
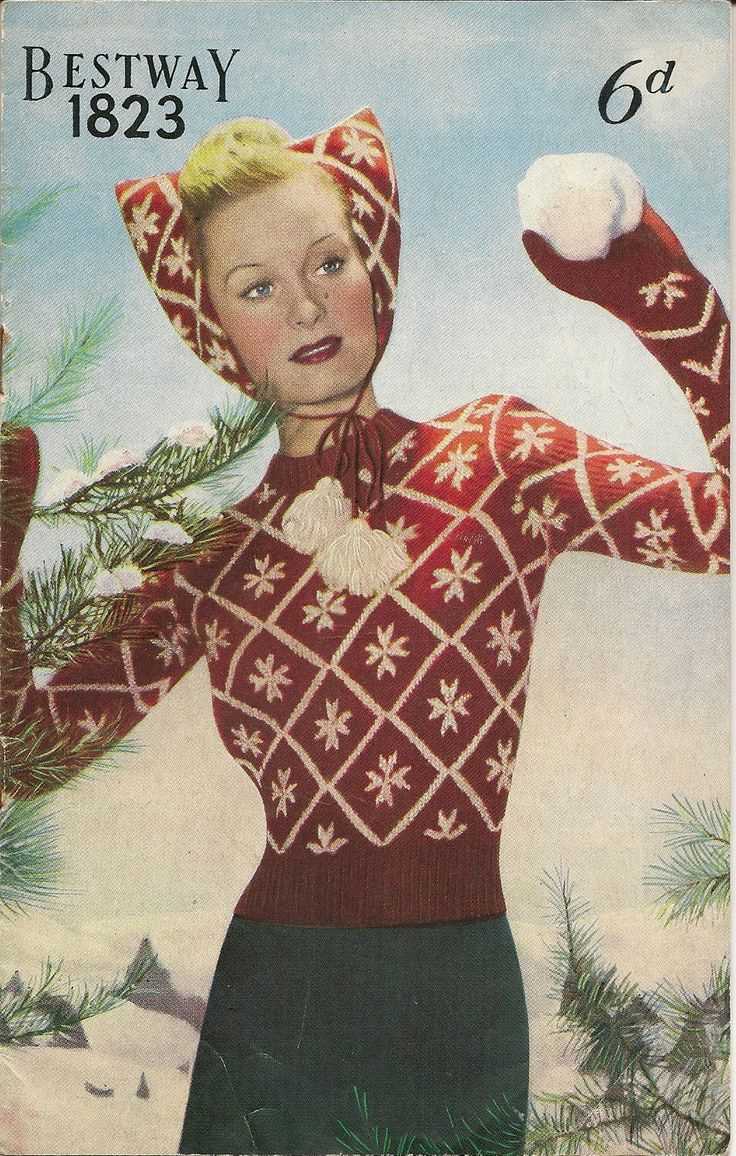
The 1940s were a time of simplicity and resourcefulness, and this was no different when it came to Christmas traditions. One popular tradition during this time was knitting Christmas stockings for loved ones. Knitting was a common hobby, and many people would spend hours creating beautiful stockings to fill with small gifts and treats.
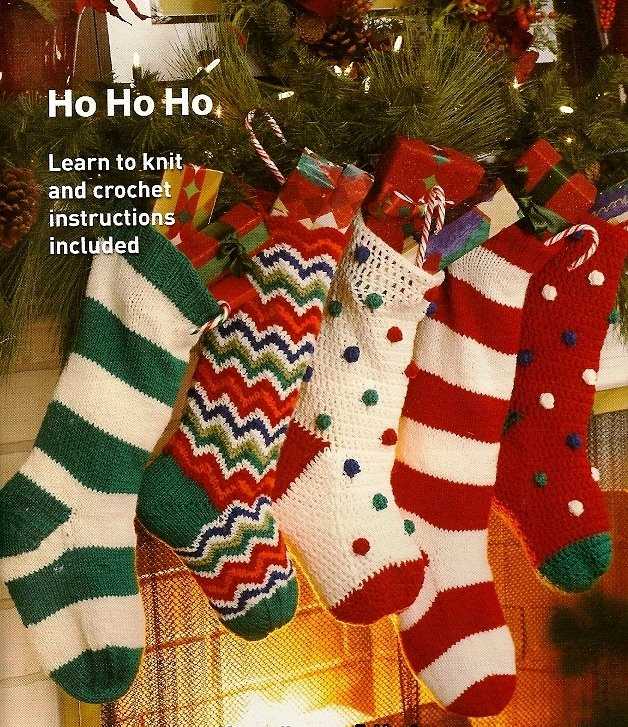
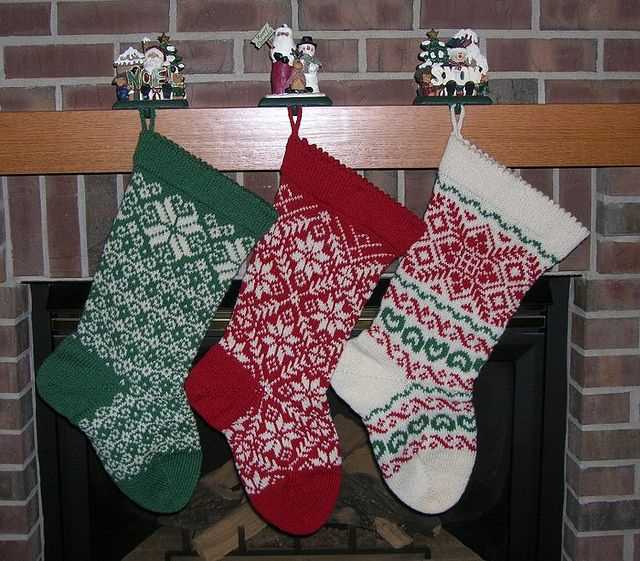
This knitting pattern from the 1940s is a classic design that is still beloved today. The pattern includes instructions for knitting a traditional stocking, complete with a ribbed cuff, textured body, and contrasting toe and heel. The stocking is the perfect size to hang by the fireplace and is sure to bring joy to anyone who receives it.
Knitting this stocking is not only a way to create a thoughtful and personal gift, but it also allows you to connect with the past and recreate a tradition that has been passed down through generations. The act of knitting can be a meditative and relaxing experience, allowing you to take a break from the hustle and bustle of the holiday season and create something beautiful with your own two hands.
Whether you are an experienced knitter or just starting out, this 1940s Christmas stocking knitting pattern is a great project to take on. So gather your needles, choose your favorite yarn colors, and get ready to create a timeless holiday decoration that will be cherished for years to come.
1940’s Christmas Stocking Knitting Pattern
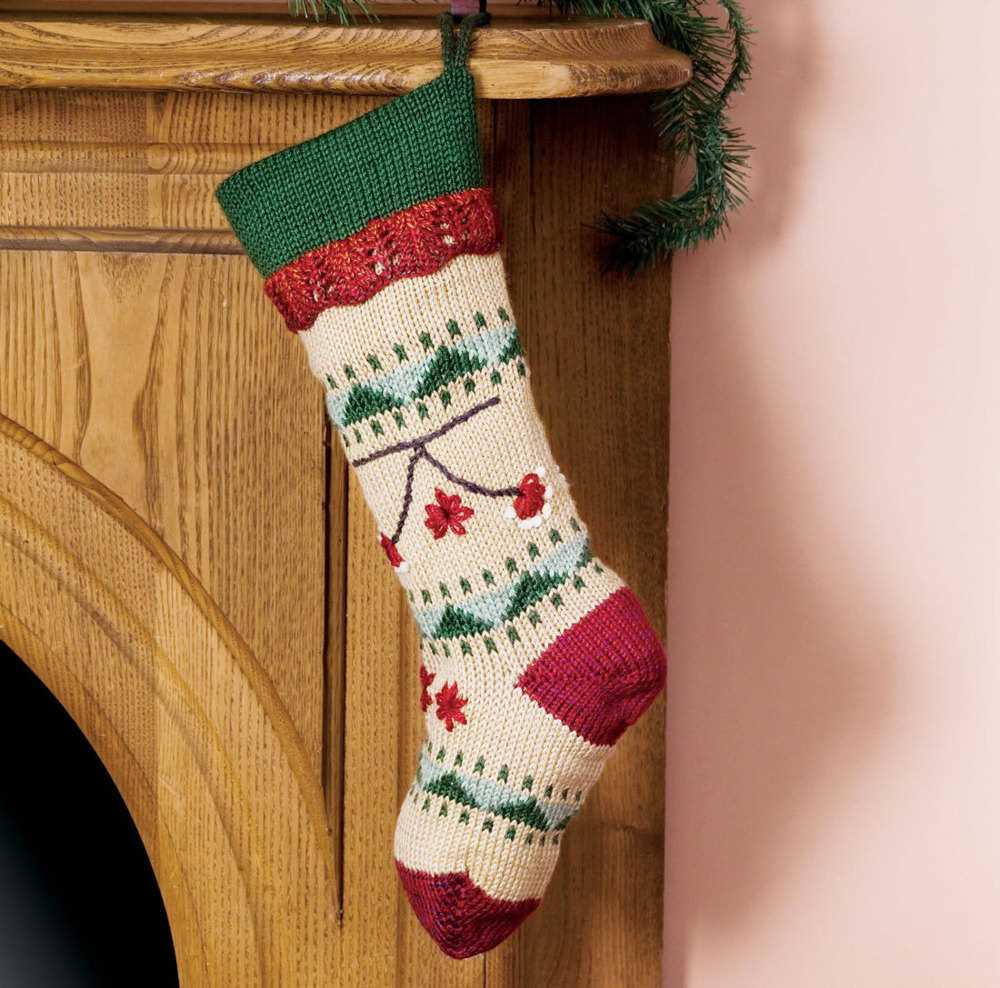
The 1940’s Christmas stocking knitting pattern is a nostalgic and classic design that captures the charm and warmth of the holiday season. This pattern is perfect for those looking to add a touch of vintage elegance to their Christmas decorations.
To knit the 1940’s Christmas stocking, you will need basic knitting skills and a few supplies. The pattern calls for worsted weight yarn in various colors, knitting needles in size 7 or 8, and a set of double-pointed needles. You will also need a tapestry needle and a pair of scissors.
Materials:
- Worsted weight yarn in various colors
- Knitting needles in size 7 or 8
- Set of double-pointed needles
- Tapestry needle
- Scissors
Once you have gathered all your supplies, you can begin knitting the 1940’s Christmas stocking. The pattern starts with the cuff and works its way down to the toe. It includes instructions for a decorative colorwork design, as well as a classic heel and toe shaping.
The finished stocking measures approximately 18 inches in height, making it the perfect size to hang on a fireplace mantel or decorate a Christmas tree. Its traditional design and nostalgic feel will bring a touch of vintage charm to your holiday celebrations and make it a cherished heirloom for years to come.
Retro Christmas: 1940’s Style
Step back in time this Christmas and embrace the vintage charm of the 1940s with a retro-inspired holiday celebration. From festive decorations to classic recipes, you can recreate the magic of a bygone era and add a touch of nostalgia to your celebrations. One way to capture the essence of the 1940s is by incorporating traditional knitting patterns into your holiday décor. Knitted Christmas stockings were a popular DIY project in the 1940s, and they still hold a special place in many hearts today.
Knitting Your Own Christmas Stockings
Knitting your own Christmas stockings not only adds a personal touch to your holiday decorations, but it also allows you to bring the style and coziness of the 1940s into your home. The 1940s were known for their simple yet elegant designs, often featuring stripes and intricate stitch patterns. By following a vintage knitting pattern, you can recreate this look and feel in your own stockings.
- Choose a vintage pattern: Look for knitting patterns from the 1940s that match your skill level and desired design. Many vintage patterns are available online or in knitting books.
- Select your yarn: To achieve an authentic 1940s look, consider using natural fibers like wool or cotton. These materials were commonly used during that time period and will give your stockings a vintage feel.
- Get the right knitting needles: The knitting needles used in the 1940s were often made of aluminum or plastic. If you want to stay true to the era, opt for these materials.
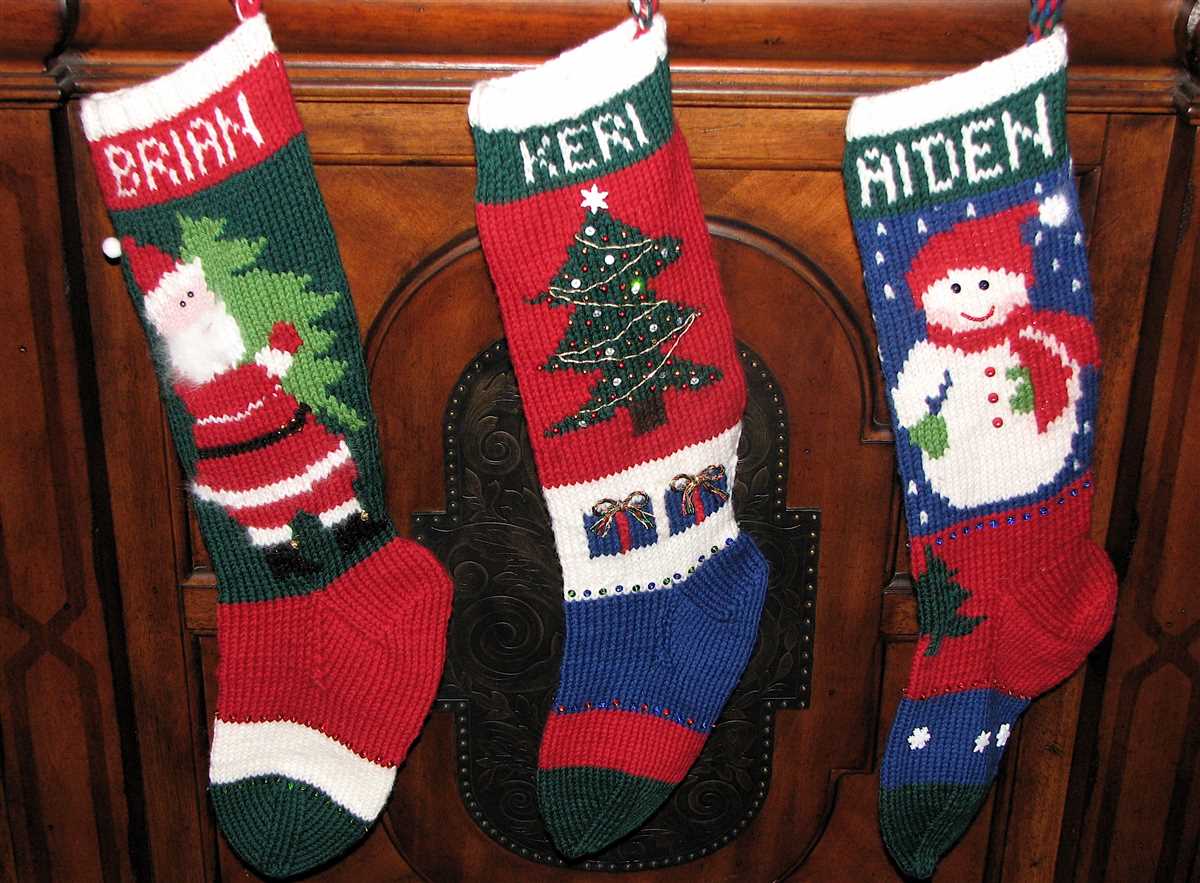
- Add personal touches: Customize your stockings with personal touches such as embroidered initials or small decorative buttons. These details will make your stockings even more special.
Embracing the 1940s Aesthetic
Christmas in the 1940s was all about simplicity and making the most of what you had. Embrace this frugal and patriotic spirit by incorporating other elements of the 1940s into your holiday celebrations.
- Decorate with vintage ornaments: Instead of buying new ornaments, search for vintage glass or handcrafted ones. These ornaments will add an authentic touch to your tree.
- Play classic Christmas music: Fill your home with the sounds of Bing Crosby, Nat King Cole, and other popular artists from the 1940s. Their timeless songs will transport you to a different era.
- Serve traditional recipes: Cook up classic dishes like roasted turkey, mashed potatoes, and cranberry sauce. The 1940s were all about comfort food and hearty meals.
- Host a retro-inspired party: Invite your friends and family to a vintage-themed Christmas party. Encourage them to dress up in 1940s attire and have fun with the nostalgic spirit of the era.
By incorporating knitting patterns and embracing the 1940s aesthetic, you can create a truly unique and memorable Christmas celebration. Whether it’s the warmth of a hand-knit stocking or the joy of a retro-inspired party, these elements will bring a touch of timelessness and charm to your holiday season.
Choosing the Right Yarn and Needles
When it comes to knitting a Christmas stocking from the 1940s, choosing the right yarn and needles is essential to achieve the desired vintage look and feel. The yarns available during that time were typically made from natural fibers such as wool, cotton, or a blend of the two. To maintain authenticity, it is recommended to select a yarn that closely resembles the options available during the 1940s.
Yarn weight: The yarn weight used in the 1940s varied, but it mainly fell within the worsted weight category. This weight is versatile and works well for a variety of projects, including stockings. It provides a good balance between warmth and durability.
Needle size: To achieve the tight gauge often seen in vintage knitting, using smaller needle sizes is key. Depending on the desired outcome, needles ranging from US size 4 to 7 (3.5mm to 4.5mm) can be used. These smaller needles will create a tighter fabric, similar to the one used in stockings from that era.
In addition to the yarn weight and needle size, it is also important to consider the color palette. Traditional Christmas colors such as deep reds, greens, and whites were commonly used in 1940s stockings. To recreate this vintage look, opt for yarns in these classic Christmas shades.
Texture: Lastly, for a truly authentic 1940s feel, consider using a yarn with a textured or tweed effect. This will add depth and dimension to your stocking, giving it that nostalgic charm that was prevalent during that time.
By carefully selecting the right yarn weight, needle size, color palette, and texture, you can create a beautiful Christmas stocking that captures the essence of the 1940s. Whether you are recreating a family heirloom or simply embracing the vintage style, these choices will help ensure your knitting project achieves the desired authenticity.
Getting Started: Cast On and Rib Stitch

When starting your knitting project for a 1940’s-inspired Christmas stocking, it is important to begin with the essential steps of casting on and working the rib stitch. These initial stages set the foundation for your stocking and ensure a professional finish.
1. Casting On: To start, you will need to cast on the required number of stitches for your pattern. This will vary depending on the size of the stocking and the desired width of the ribbing. One popular casting on method for ribbing is the long-tail cast on. This technique provides a neat edge and elasticity, perfect for the rib stitch. If you are unfamiliar with the long-tail cast on, there are numerous resources available online with detailed instructions and helpful visuals.
2. Rib Stitch: Once you have cast on the appropriate number of stitches, it’s time to start working the rib stitch. The rib stitch creates a textured, stretchy fabric that is perfect for cuffs and bands on the stocking. The most common rib stitch used is the knit 1, purl 1 (K1, P1) rib. This means that you will knit one stitch, then purl one stitch, repeating this pattern across the row. The next row will be worked in the same pattern, knitting the knit stitches and purling the purl stitches. This creates the characteristic ribs.
It is important to maintain tension while working the rib stitch to ensure an even fabric. Be mindful of your tension and avoid pulling too tightly, as this can result in a tight, rigid ribbing. Conversely, if your tension is too loose, the ribbing may appear floppy and uneven. Practice finding the right tension before proceeding further into your project.
To add variety and interest to your ribbing, you can experiment with different rib stitch combinations. For example, you could try a knit 2, purl 2 (K2, P2) rib or even a knit 3, purl 1 (K3, P1) rib. These variations can create unique and visually appealing textures.
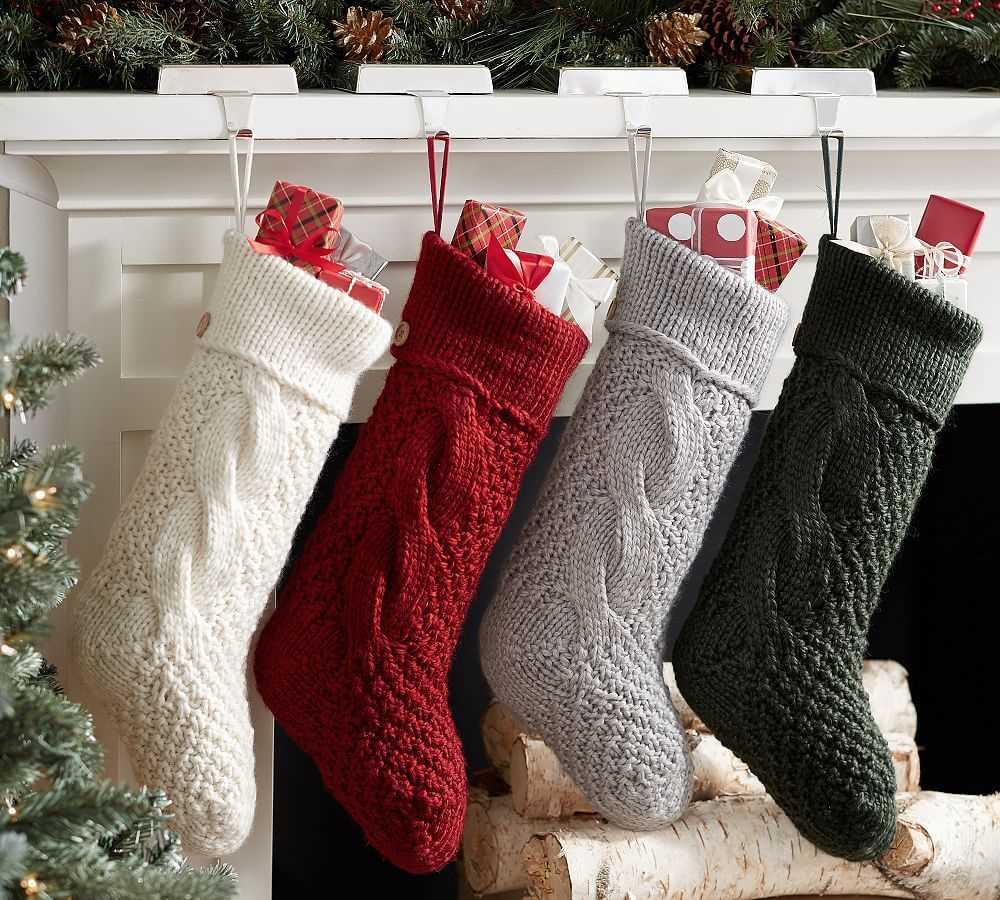
The Classic Cable Pattern
One of the most iconic and beloved knitting patterns from the 1940s is the classic cable pattern. This intricate design features twisting and crossing stitches that create a beautiful interlocking pattern reminiscent of braids or cables. The cable pattern adds an elegant and timeless touch to any knitted project, making it perfect for creating Christmas stockings that exude vintage charm.
Knitting with the cable pattern requires intermediate to advanced skills, as it involves working with multiple stitches and cables that cross over each other. The pattern typically consists of a central column of stitches, flanked by smaller cables on either side. The cables are created by moving stitches to a cable needle, holding them to the front or back of the work, then knitting the stitches from the cable needle back onto the main needles. This process creates the distinctive twisted appearance of the cables.
To create the classic cable pattern for a Christmas stocking, start by casting on the desired number of stitches and establishing the ribbing at the top of the stocking. Once the ribbing is complete, begin working the cable pattern, following a chart or written instructions. As you knit, take care to keep track of the cable twists and crossings to maintain the integrity of the pattern.
To add extra visual interest to the stocking, consider incorporating other decorative elements alongside the cable pattern. For example, you could alternate rows of cables with rows of simple stockinette stitch to create a contrasting texture. Additionally, you could include colorwork motifs, such as snowflakes or holly, within the cable pattern to further enhance the festive feel of the stocking.
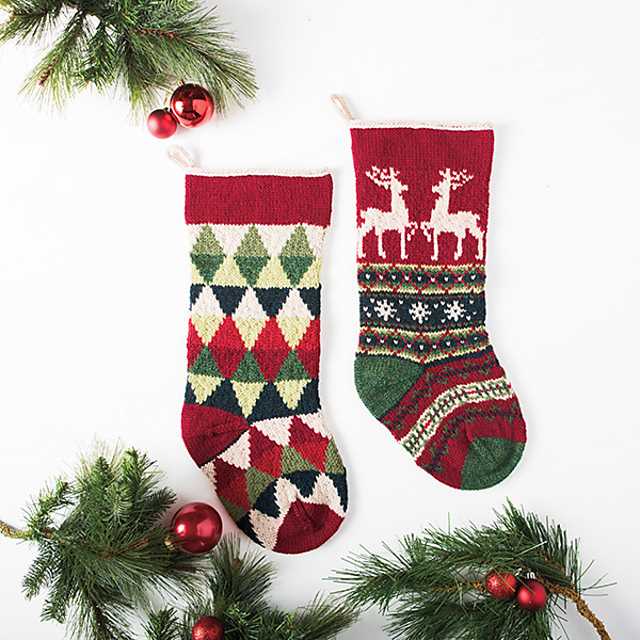
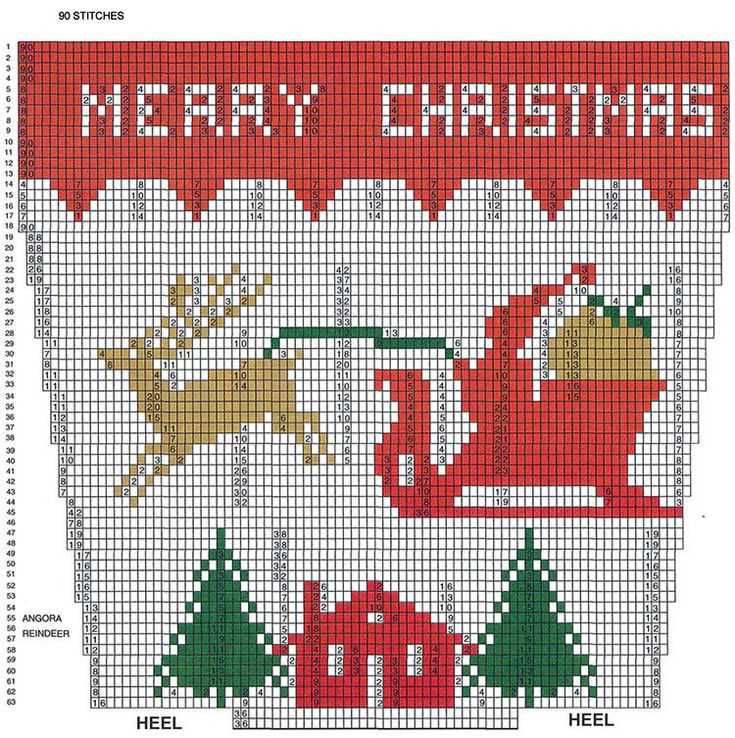
Adding Festive Colors with Fair Isle
When it comes to creating a Christmas stocking that truly captures the spirit of the 1940s, one technique that cannot be ignored is Fair Isle knitting. Fair Isle, named after a tiny island in the Shetland archipelago of Scotland, is a traditional knitting technique that involves creating patterns using multiple colors.
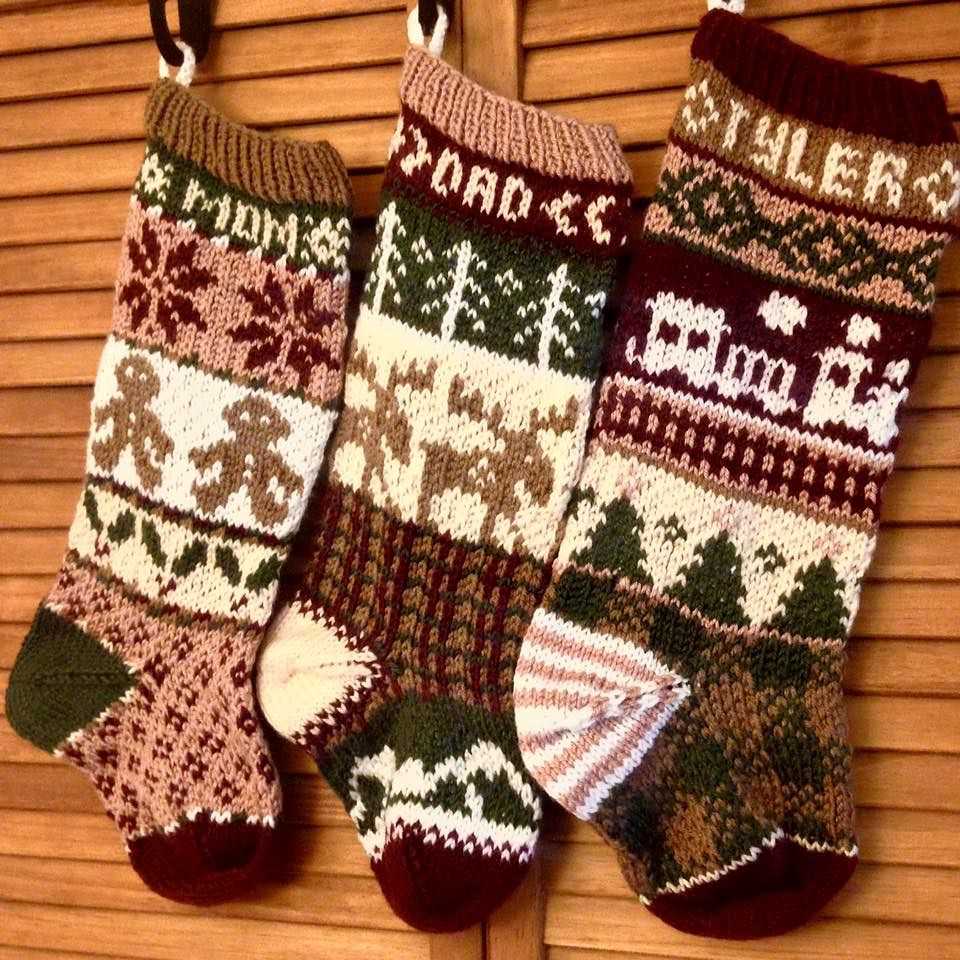
The use of vibrant and contrasting colors is a hallmark of Fair Isle knitting, making it the perfect technique to add festive flair to your Christmas stockings. While traditional 1940s stockings often featured bold reds, greens, and whites, you can get creative with your color choices to match your personal style and decor. The key is to select colors that complement each other and create an eye-catching pattern.
A popular color combination for Christmas stockings is red and white, with green as an accent color. You can use the Fair Isle technique to create intricate motifs like snowflakes, reindeer, or Christmas trees using these colors. Another option is to incorporate metallic yarns into your Fair Isle pattern for a touch of shimmer and elegance.
When knitting with multiple colors, it’s important to keep your yarn tension consistent to ensure an even and professional-looking finished product. Practice your tension control by swatching before starting on the stocking itself. You may also find it helpful to use a knitting chart or pattern to guide you through each row, especially if you’re new to Fair Isle knitting.
By incorporating Fair Isle knitting into your 1940s-style Christmas stockings, you can create unique and festive pieces that capture the nostalgia and charm of the era. Whether you choose traditional color combinations or put a modern twist on the technique, the result will be stockings that are sure to be treasured for years to come.
Knitting the Heel and Gusset
Once you have completed the foot of your 1940’s Christmas stocking, it’s time to move on to knitting the heel and gusset. This is an important step in the knitting process as it shapes the back of the stocking and provides a comfortable fit.
1. Turning the Heel: To begin, you will need to divide your stitches. This is typically done by knitting a certain number of stitches, then knitting two stitches together, and finally knitting the remaining stitches. This creates a triangular shape, known as a heel flap.
For example:
K20, K2tog, K1, turn
Sl1, P5, P2tog, P1, turn
Sl1, K6, K2tog, K1, turn
2. Picking Up Stitches: Once you’ve turned the heel, you will need to pick up stitches along the side of the heel flap. This is done by inserting your needle into the edges of the slipped stitches and knitting them onto the needle.
For example:
Pick up and knit 14 stitches along the side of the heel flap
3. Creating the Gusset: The gusset is created by knitting across the instep stitches and then picking up stitches along the other side of the heel flap. This helps to shape the stocking and provide room for the foot.
For example:
K across 20 instep stitches
Pick up and knit 14 stitches along the other side of the heel flap
Repeat these steps until you have the desired number of stitches, typically the same number as you started with for the foot. This will create a snug and comfortable fit for your 1940’s Christmas stocking.
Shaping the Toe
The shaping of the toe is an important step in knitting a 1940’s Christmas stocking. It is a technique used to narrow the knitting and create a tapered point at the end of the stocking. This shaping is achieved by decreasing stitches in a specific pattern.
To begin shaping the toe, several decrease rounds are worked. These rounds typically involve knitting two stitches together (K2tog) or slipping one stitch knitwise, knitting the next stitch, and then passing the slipped stitch over the knit stitch (S1, K1, PSSO). These decreases are usually worked at the beginning and end of the round, as well as at specific intervals throughout the toe section.
The decreases are spaced out to create a gently curved shape, gradually reducing the number of stitches and forming the pointed toe. It is important to follow the specific pattern instructions for the decreases, as they will vary depending on the knitting pattern being used. By carefully working these decrease rounds, the knitter can achieve an aesthetically pleasing and well-shaped toe for the Christmas stocking.
Below is an example of a typical decrease pattern for shaping the toe:
| Round | Decrease |
|---|---|
| Round 1 | K2tog, knit to last 2 stitches, K2tog |
| Round 2 | K2tog, knit to last 2 stitches, K2tog |
| Round 3 | K2tog, knit to last 2 stitches, K2tog |
| Round 4 | K2tog, knit to last 2 stitches, K2tog |
By repeating these decrease rounds, the number of stitches will gradually decrease until only a few stitches remain. This creates a neatly shaped toe that complements the overall design of the Christmas stocking.
Knitting the Cuff
When knitting the cuff of a 1940’s Christmas stocking, it is important to follow the pattern closely to ensure an authentic and accurate result. The cuff is typically a wide band of ribbing that adds both aesthetic appeal and practicality to the stocking.
Step 1: To begin, cast on the required number of stitches as indicated in the pattern. This will typically be a multiple of two or four, depending on the desired width of the cuff. Use the specified size of knitting needles to achieve the correct gauge.
Step 2: Once the stitches are cast on, begin working the ribbing pattern. This can be either a knit 1, purl 1 (K1, P1) rib or a knit 2, purl 2 (K2, P2) rib, again following the pattern instructions. Remember to keep your tension consistent throughout to ensure an even and professional finish.
Step 3: Continue working in the ribbing pattern for the specified number of rows or until the cuff reaches the desired length. This is typically around 2-4 inches, but can vary depending on personal preference and the length indicated in the pattern.
Step 4: Once the cuff is complete, you can then move on to knitting the body of the stocking. This may involve changing needle sizes or stitch patterns, so be sure to carefully read the pattern instructions to ensure accuracy.
By following these steps and paying attention to the pattern details, you can create a beautiful and authentic 1940’s Christmas stocking cuff. The ribbing adds a touch of nostalgia and charm to the stocking, making it a treasured heirloom for years to come.
Finishing Touches: Sewing in Ends and Blocking
Once you have completed your 1940’s Christmas stocking knitting pattern, there are a few finishing touches to complete before your stocking is ready to be hung with care. The first step is sewing in all the loose ends of yarn that were left from changing colors or joining new skeins. This ensures that the stocking will have a neat and professional appearance.
To sew in the ends, use a tapestry needle and thread the loose end through the stitches on the wrong side of the stocking. Weave the yarn in and out of the stitches for a few inches to secure it in place. Trim any excess yarn, being careful not to cut the stitches. Repeat this process for all the loose ends on the stocking.
Blocking
After sewing in the ends, it’s time to block the stocking to give it a polished and uniform shape. Blocking helps to smooth out any uneven stitches and allows the stocking to hold its shape better. To block the stocking, you will need a blocking board or a clean surface that can be pinned into.
Begin by wetting the stocking gently with lukewarm water. Avoid using hot water or rubbing the stocking vigorously as this may cause the colors to bleed or the yarn to felt. Once the stocking is damp, lay it out on the blocking board and gently manipulate it into the desired shape.
You can use pins to hold the stocking in place, stretching it slightly to even out any irregularities. Allow the stocking to dry completely before removing the pins. This may take several hours or even overnight, depending on the humidity level in your area. Once the stocking is dry, it will be ready to be filled with gifts and proudly displayed as part of your Christmas decor.
Personalizing Your Stockings with Embroidery
Adding embroidery to your Christmas stockings is a wonderful way to personalize them and make them truly special. With just a needle, thread, and a little creativity, you can create beautiful designs that reflect the personality and interests of the recipient.
Choosing the right design: When it comes to embroidery, the possibilities are endless. You can choose to embroider the recipient’s name, initials, or even a meaningful symbol or image. Consider their hobbies, favorite colors, or any special themes that reflect their personality. For example, if they love snowflakes, you could create a delicate embroidered snowflake pattern on the stocking.
Picking the perfect thread: The thread color you choose can greatly enhance the overall look of the embroidered design. Metallic threads can add a touch of glamour and sparkle, while pastel threads can create a soft and delicate effect. Take into account the colors of the stocking and the recipient’s personal preferences when selecting the thread.
Embroidery techniques: There are various embroidery techniques you can use to personalize your stockings. These include satin stitch for filling in solid areas, backstitch for outlining shapes or writing names, and French knots for adding texture. Experiment with different stitches and techniques to find the ones that best suit your design.
- Adding embellishments: To further enhance your embroidered stockings, consider adding small embellishments such as beads, sequins, or bows. These little details can add a touch of whimsy and make the stockings even more unique.
- Getting started: Before you start embroidering, it’s a good idea to practice your stitches on a scrap piece of fabric. This will help you get a feel for the thread tension and ensure that your stitches look even and neat.
Caring for embroidered stockings: To preserve the beauty of your embroidered stockings, it’s important to handle them with care. Avoid pulling on loose threads or washing them in hot water, as this can cause the embroidery to unravel. Instead, gently hand wash the stockings in cool water and lay them flat to air dry.
By adding embroidery to your Christmas stockings, you can create a keepsake that will be treasured for years to come. Whether you choose a simple monogram or an intricate design, your personalized stockings are sure to bring joy and festive cheer to your holiday celebrations.
Tips for Customizing Your Pattern
When knitting a Christmas stocking, it’s always fun to add your own personal touch to the pattern. Here are some tips to help you customize your knitting project:
Choose your desired size
Before you start knitting, consider what size you want your Christmas stocking to be. You can adjust the pattern accordingly by adding or subtracting stitches and rows. Keep in mind that a larger stocking will require more yarn, so make sure you have enough on hand.
Select your favorite colors

One of the easiest ways to customize your pattern is by choosing colors that you love. Whether you prefer traditional red and green or want to experiment with a more modern color scheme, the choice is yours. Consider using different colors for the cuff, body, and toe of the stocking to create a unique look.
Add personalized decorations
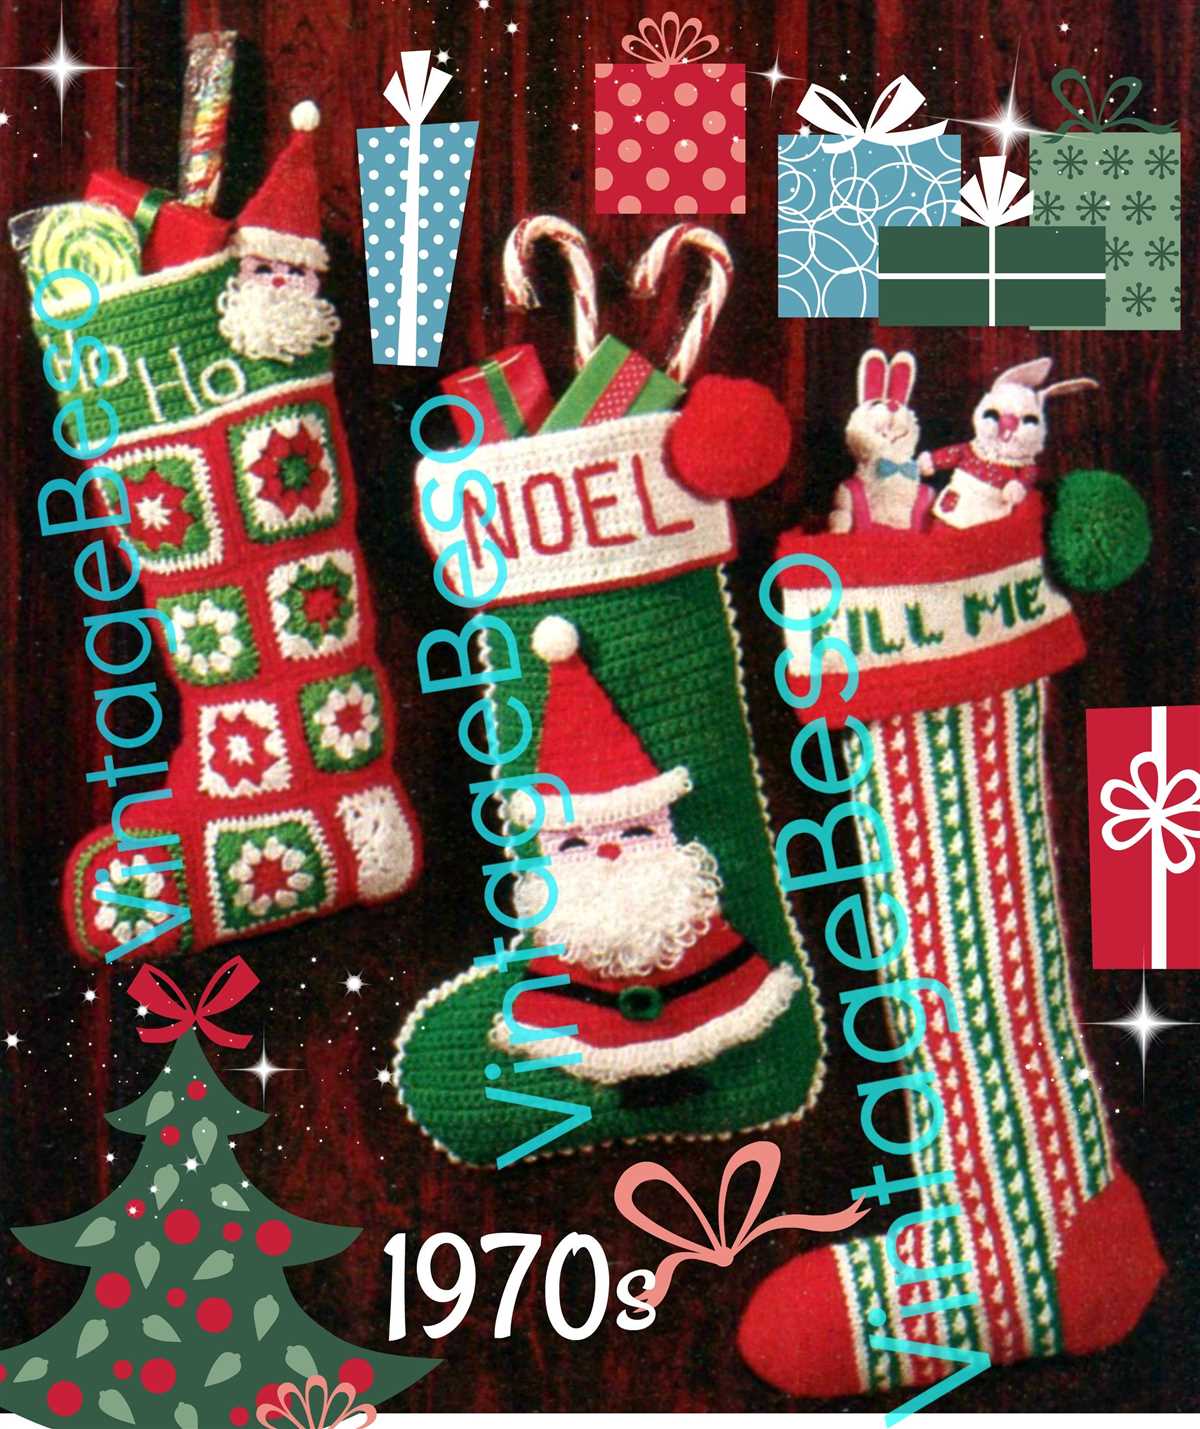
To make your Christmas stocking truly unique, consider adding personalized decorations. You can embroider the recipient’s name, add sequins or beads, or even knit small motifs such as snowflakes or reindeer. Get creative and make the stocking extra special.
Experiment with different stitch patterns
If you’re an experienced knitter, why not try incorporating different stitch patterns into your Christmas stocking? You can add cables, lace, or even colorwork to make your project more interesting. Just make sure to adjust your stitch count accordingly to maintain the desired size.
Consider the recipient’s tastes
Lastly, when customizing your pattern, always keep in mind the tastes and preferences of the person who will be receiving the stocking. If they have a favorite color or pattern, try to incorporate it into your design. It’s the little details that can make the stocking truly special and meaningful.
Displaying Your Handmade Stockings with Pride
After putting in all the time and effort to knit your beautiful 1940’s Christmas stockings, it’s only natural that you would want to display them with pride during the holiday season. Here are some ideas for showing off your handiwork:
- Hanging on the Mantel: The classic way to display Christmas stockings is by hanging them on the mantel. If you have a fireplace, this is the perfect spot to show off your stockings. Arrange them in a row, with the largest stocking in the middle, and hang them using decorative hooks or ribbon. And don’t forget to stuff them with small gifts and treats!
- From the Banister: If you don’t have a mantel, don’t worry! You can still create a beautiful display by hanging your stockings from the banister of your staircase. Use coordinating ribbon or twine to attach the stockings, and make sure to hang them at different heights for visual interest.
- On a Festive Garland: For a more unique and whimsical display, consider hanging your stockings on a festive garland. You can find or make a garland with Christmas lights, greenery, and other decorations, and then attach your stockings to it using clothespins or decorative clips.
- In a Decorative Basket: Another option for displaying your stockings is to place them in a decorative basket or container. This works especially well if you have a collection of stockings or if you want to showcase other holiday decor along with the stockings. Fill the basket with some fluffy tissue paper or ornaments to add a festive touch.
However you choose to display your handmade stockings, remember to take a step back and appreciate all the hard work and love that went into creating them. Your stockings are not just decorations, but a symbol of your creativity and craftsmanship. Enjoy the holiday season and the joy your stockings will bring to your home!