
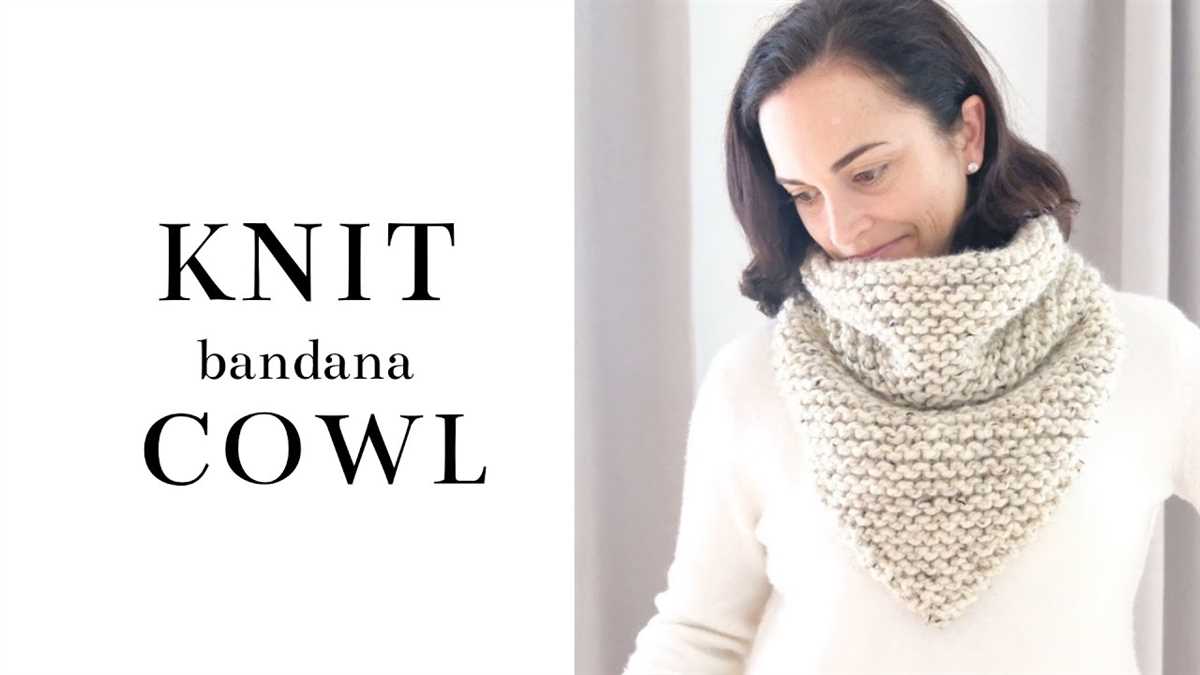
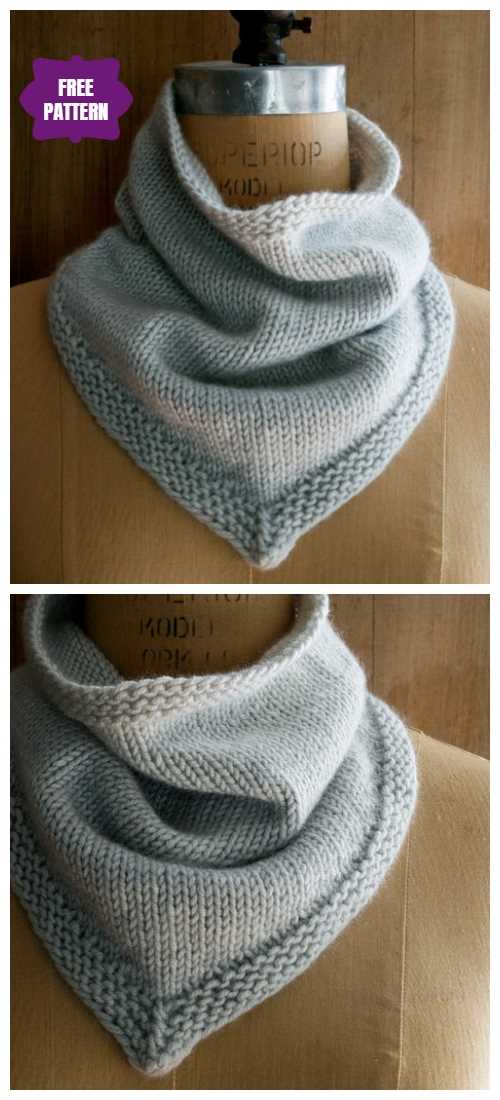
Knitting enthusiasts looking for a stylish and versatile accessory need to look no further than our free bandana knitting pattern. With its trendy design and easy-to-follow instructions, this pattern is perfect for knitters of all skill levels.
Bandanas are a timeless fashion accessory that can be worn in various ways, making them a must-have in every wardrobe. Whether you want to add a pop of color to your outfit or protect your hair from the wind, this bandana is the perfect solution. Plus, knitting your own bandana allows you to customize it to your liking, choosing your favorite colors and textures.
Our free bandana knitting pattern features a simple yet chic design that is sure to become a staple in your wardrobe. The pattern includes step-by-step instructions, along with detailed explanations of common knitting techniques, making it suitable for both beginners and experienced knitters. So, whether you’re new to knitting or looking for your next project, this bandana is a great choice.
Free Bandana Knitting Pattern
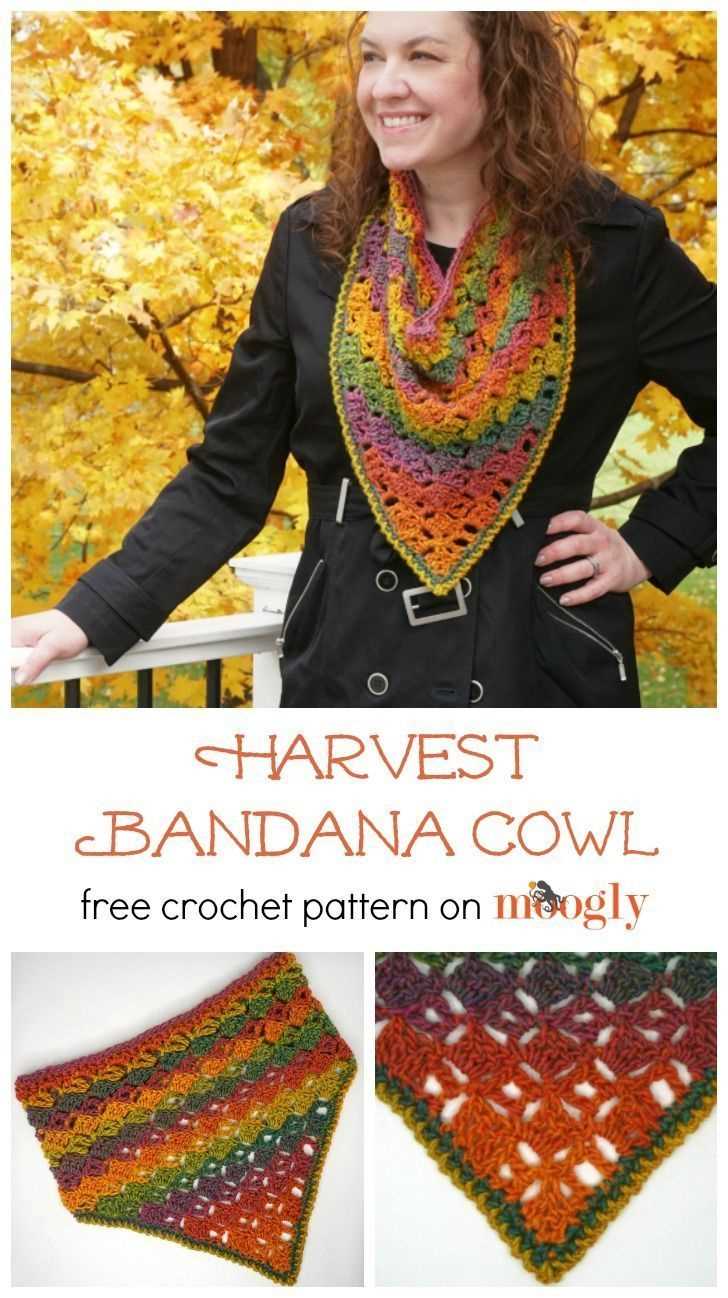
A bandana is a versatile accessory that can be worn in multiple ways to add a stylish touch to any outfit. Whether you want to keep your hair out of your face or add a pop of color to your look, a knitted bandana can do the job. With this free bandana knitting pattern, you can create your own unique bandana in no time.
To get started, you will need the following materials:
- A pair of knitting needles
- Yarn in your chosen color
- Tapestry needle
- Scissors
Once you have gathered all the materials, follow these simple steps to knit your own bandana:
- Cast on the desired number of stitches, depending on the width you want for your bandana.
- Start knitting in your chosen stitch pattern. You can go for a simple garter stitch or experiment with different stitch patterns like ribbing or lace.
- Continue knitting until your bandana reaches the desired length. Keep in mind that it should be long enough to tie comfortably around your head.
- Bind off the stitches to finish your knitting.
- Weave in any loose ends using a tapestry needle.
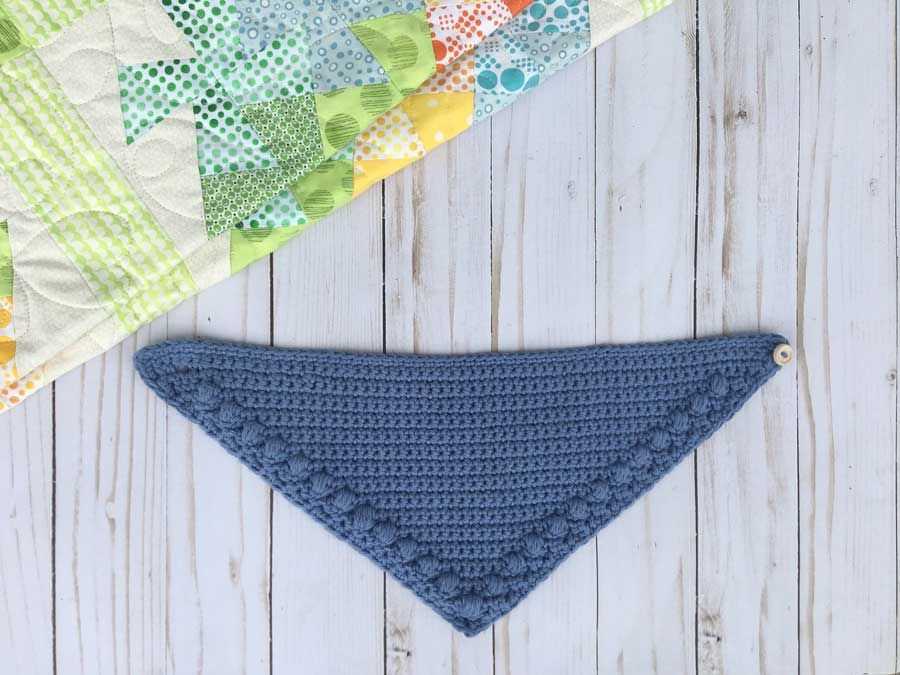
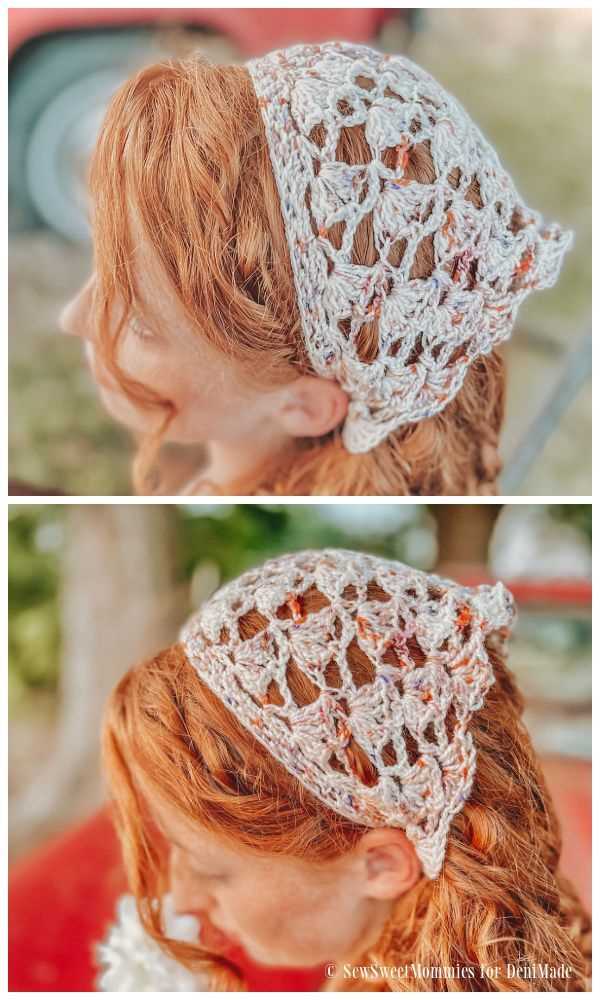
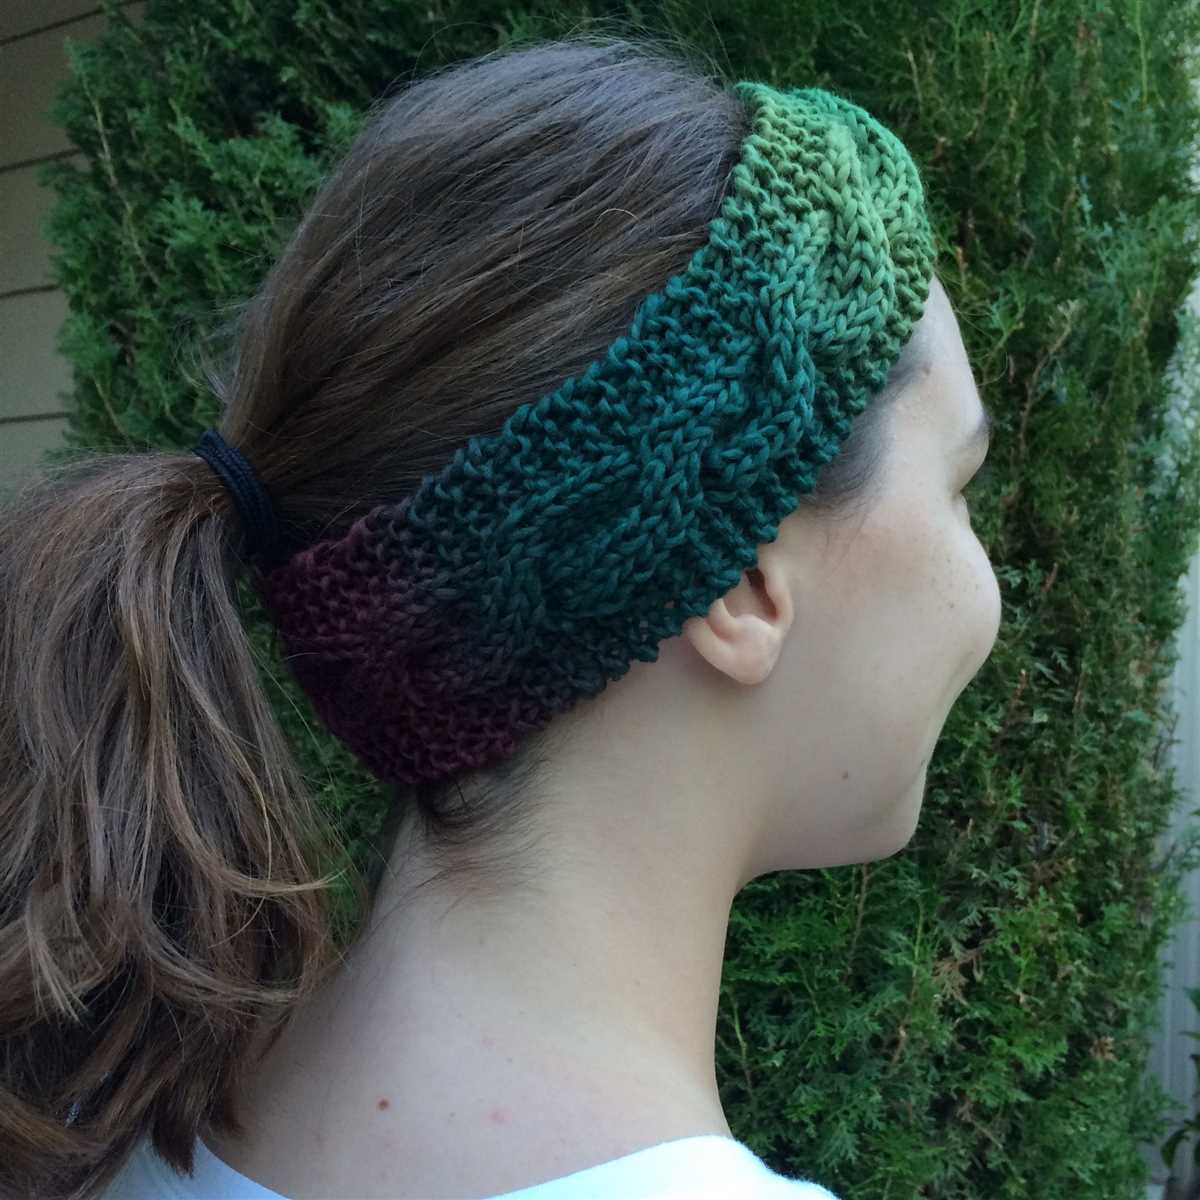
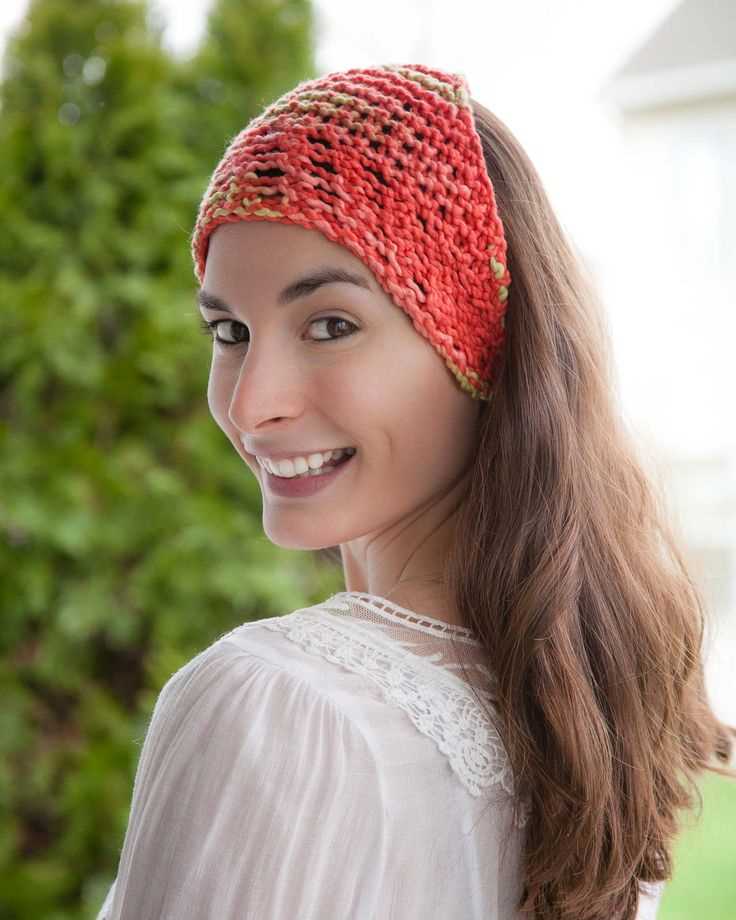
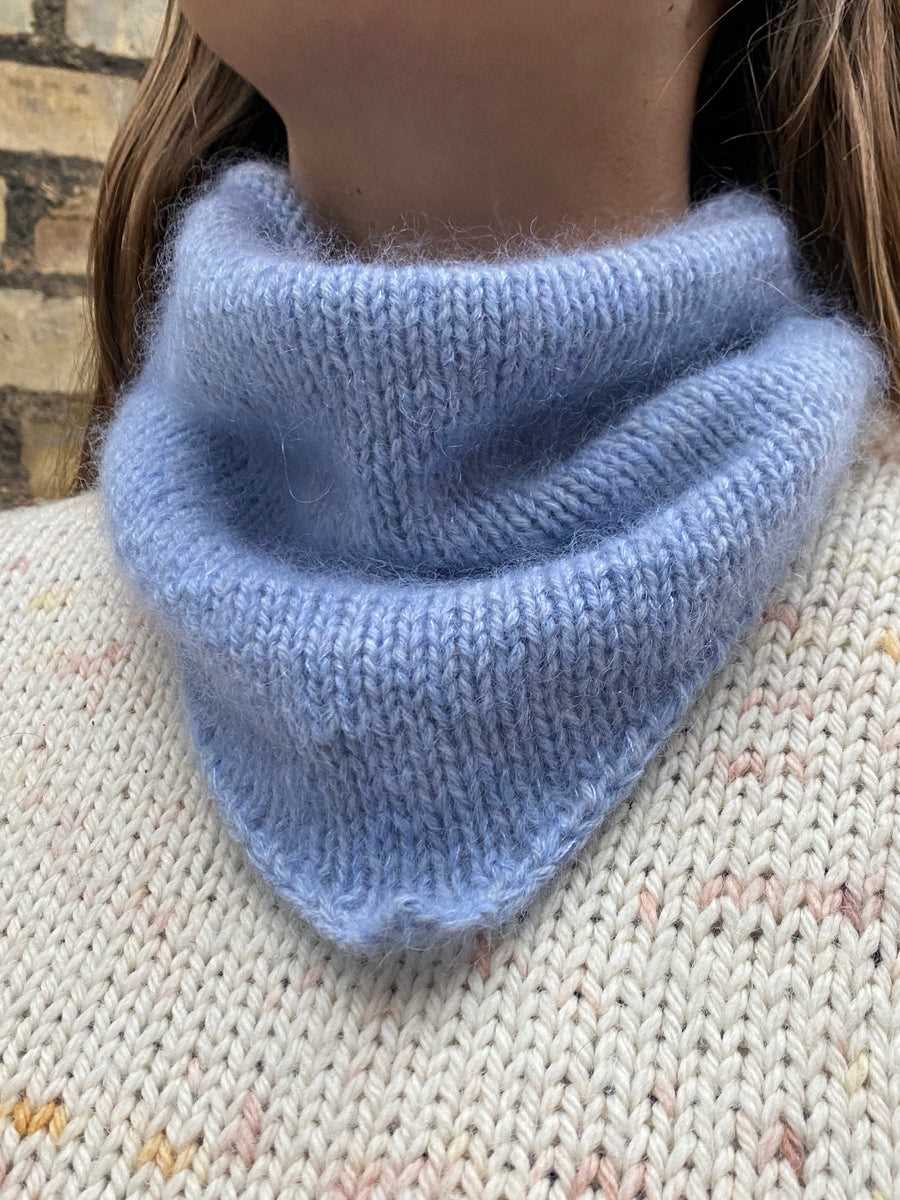
Once your bandana is complete, you can wear it in various ways. Twist it and tie it at the back for a classic headband look, or fold it in half and tie it around your neck for a stylish choker. You can also wear it as a statement accessory by tying it around your wrist or attaching it to your favorite handbag.
With this free bandana knitting pattern, the possibilities are endless. Experiment with different yarn colors and stitch patterns to create a bandana that perfectly reflects your style. Whether you’re a beginner or an experienced knitter, this project is a fun and quick way to add a touch of handmade charm to your wardrobe.
Knitting Basics
When it comes to knitting, understanding the basics is key to creating beautiful and functional pieces. Whether you’re a beginner or an experienced knitter, it’s important to familiarize yourself with the essential techniques and terms used in knitting. This will enable you to follow patterns, troubleshoot any issues, and unleash your creativity.
Casting On: The first step in any knitting project is casting on. This is the process of creating the foundation row of stitches on your needle. There are various methods for casting on, such as the long-tail cast-on or the knit cast-on. It’s important to choose a method that suits your project and provides the desired edge.
Knit Stitch: The knit stitch is the most basic and commonly used stitch in knitting. It creates a smooth and interlocking fabric. To knit, insert the right-hand needle into the stitch on the left-hand needle, wrap the working yarn around the needle, pull it through the stitch, and slide the stitch off the left-hand needle. Repeat this process for each stitch in the row.
Purl Stitch: The purl stitch is the reverse of the knit stitch. It creates a bumpy surface on the fabric. To purl, insert the right-hand needle from right to left into the stitch on the left-hand needle, wrap the working yarn around the needle, pull it through the stitch, and slide the stitch off the left-hand needle. Repeat for each stitch in the row.
Increase: Increasing is the process of adding stitches to your work. This can be done by knitting or purling into the front and back of a stitch, or by using other specific increase techniques, such as yarn overs. Increasing is often used to shape garments or create decorative elements in knitting.
Decrease: Decreasing is the process of removing stitches from your work. This can be done by knitting or purling stitches together, or by using other specific decrease techniques, such as slip-slip-knit or knit two together. Decreasing is commonly used to shape garments, create decorative elements, or achieve a specific stitch pattern.
Finishing: After completing the main body of your knitting project, it’s time to finish it off. This involves weaving in any loose ends, blocking the finished piece to shape it and enhance its drape, and adding any desired embellishments, such as buttons or embroidery. Proper finishing techniques are essential for giving your project a polished and professional look.
Pattern Reading: Learning to read knitting patterns is a crucial skill for any knitter. Knitting patterns provide instructions on the order of stitches and techniques to create a specific design. They often include abbreviations, symbols, and charts, which can be intimidating at first. However, with practice and familiarity, you’ll become more comfortable interpreting patterns and bringing them to life.
By understanding and mastering these knitting basics, you’ll be well equipped to take on any knitting project with confidence. Whether you’re knitting a simple scarf or a complex sweater, these foundational techniques and skills will guide you towards creating beautiful and unique pieces.
Choosing the Right Yarn
When it comes to knitting a bandana, choosing the right yarn is essential. The yarn you select will determine the drape, texture, and overall look of your finished project. Here are some factors to consider when choosing yarn for your bandana:
Fiber Content
The fiber content of the yarn will greatly affect the feel and durability of your bandana. Natural fibers like wool, cotton, silk, and alpaca offer different characteristics. Wool provides warmth and elasticity, while cotton is lightweight and breathable. Silk adds sheen and drape, and alpaca offers softness and warmth. Consider the properties you are looking for in your bandana and choose a fiber accordingly.
Weight
The weight of the yarn is another important factor to consider. It determines the thickness of your bandana and how warm or cool it will be. Yarns are classified into different weights, ranging from lace weight to super bulky. Lace weight yarn is thin and delicate, while super bulky is thick and warm. Choose a yarn weight that suits the desired look and function of your bandana.
Color
The color of the yarn will dictate the appearance of your bandana. Solid colors are classic and can easily match any outfit, while variegated or self-striping yarns add visual interest and unique patterns. Consider the color palette that complements your style and wardrobe when selecting yarn.
Care Instructions
Lastly, consider the care instructions of the yarn. Some yarns require delicate hand washing, while others can be machine washed and dried. Think about how much time and effort you are willing to dedicate to maintaining your bandana and choose a yarn with care instructions that align with your preferences.
By considering these factors, you can choose the perfect yarn for your bandana project. Happy knitting!
Selecting the Proper Needles
When it comes to knitting bandanas, selecting the proper needles is important to ensure that your project turns out just right. There are a few factors to consider when choosing your needles, including the type of yarn you are using and the desired size and drape of your finished bandana.
Size: The size of your needles will depend on the gauge you want to achieve and the thickness of your yarn. For a lightweight bandana, you may want to use smaller needles, such as size US 3 or 4. For a thicker, warmer bandana, larger needles like size US 7 or 8 can be used. Be sure to check the yarn label for recommended needle sizes or swatch with different size needles to achieve your desired fabric.
Type: Needles come in various types, including straight, circular, and double-pointed. Straight needles are suitable for smaller projects or those worked flat, while circular needles are more versatile and can be used for both flat and circular knitting. Double-pointed needles are typically used for small projects knit in the round, such as hats or socks. Consider the construction and shape of your bandana when choosing the needle type.
- Materials: Needles are made from a variety of materials, such as metal, plastic, wood, or bamboo. Each material has its own characteristics, such as weight, flexibility, and smoothness, which can affect your knitting experience. Metal needles are known for their durability and slickness, making them great for faster knitting. Wood and bamboo needles are lighter and offer more grip, making them a good choice for beginners or for working with slippery yarns. Plastic needles are affordable and easy to find, but they may not be as sturdy as other materials.
- Tips: Consider using circular needles with a longer cable length, such as 32 or 40 inches, instead of straight needles for bandanas. This allows you to easily accommodate the growing number of stitches as you increase your bandana’s width. It also gives you the option to use the magic loop technique for smaller projects. Additionally, using needles with sharp tips can be helpful for picking up stitches or working intricate stitch patterns.
Ultimately, the right needles for your bandana project will depend on your personal preferences and the characteristics of the yarn you are using. Experiment with different sizes, types, and materials to find the needles that feel comfortable and produce the desired results. Happy knitting!
Getting Started: Casting On
Before you can start knitting your free bandana, you will need to cast on. Casting on is the first step in creating any knitted project and it sets the foundation for your work. There are several different methods for casting on, but we will focus on the long-tail cast on method for this bandana pattern.
To begin the long-tail cast on, you will need to measure out a long tail of yarn. This tail should be about three times the width of your finished bandana. For example, if your bandana will be 20 inches wide, you will want a tail of yarn that is about 60 inches long.
To cast on, hold the tail of yarn in your left hand and the working yarn in your right hand. Make a slipknot with the yarn by creating a small loop and pulling the tail through. Place this slipknot on the left needle and tighten it. This slipknot does not count as a stitch.
Next, insert the right needle into the slipknot from left to right, going under the left needle. With your right hand, bring the working yarn over the right needle, creating a loop. Insert the right needle through this loop and bring it under the left needle, creating another loop. Repeat this process until you have cast on the required number of stitches for your bandana.
Once you have finished casting on, you are ready to begin your knitting pattern. The long-tail cast on method creates a neat and elastic edge, making it perfect for projects like the bandana. Practice this cast on method until you feel comfortable with it, and then you can move on to the next step in your bandana knitting journey.
Knitting the Body of the Bandana
Once you have cast on and completed the initial rows of your bandana, it’s time to start knitting the body of the bandana. This is where you will create the main fabric of the bandana that will drape around your neck.
Row 1: Begin by knitting across all stitches on your needle. This will create a row of knit stitches that will form the foundation of the bandana body.
Once you have completed row 1, you will continue working in the same pattern for the following rows. This can vary depending on the specific bandana pattern you are following. Some patterns may instruct you to alternate between knit and purl stitches to create a textured fabric, while others may use different stitch patterns to create a more intricate design.
Tip: It’s important to pay attention to the specific instructions provided in your bandana knitting pattern to ensure that you are creating the desired fabric. If you are unsure about any part of the pattern, consult the pattern instructions or reach out to a more experienced knitter for guidance.
As you continue knitting the body of the bandana, it’s important to keep track of your row count to ensure that you are following the pattern correctly. You can use stitch markers or a row counter to help you keep track of your progress.
Once you have reached the desired length for your bandana, you will move on to the next step of the pattern, which may involve shaping the bandana or adding embellishments. Again, consult your specific pattern instructions for guidance on how to proceed.
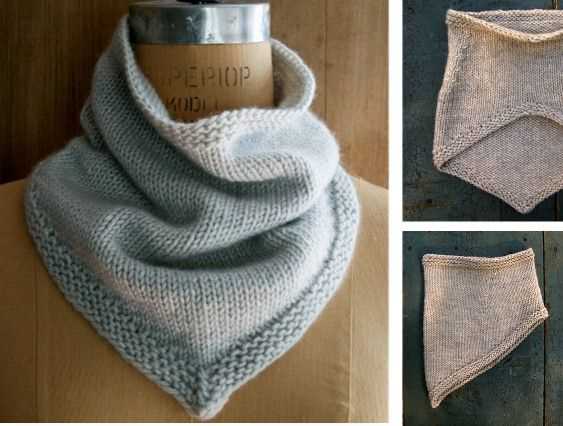
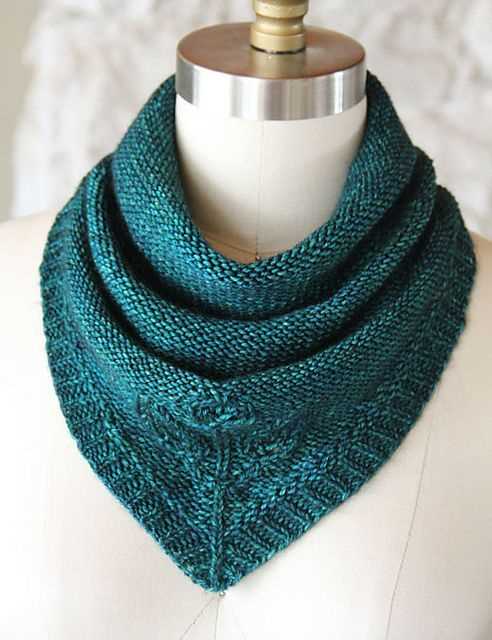
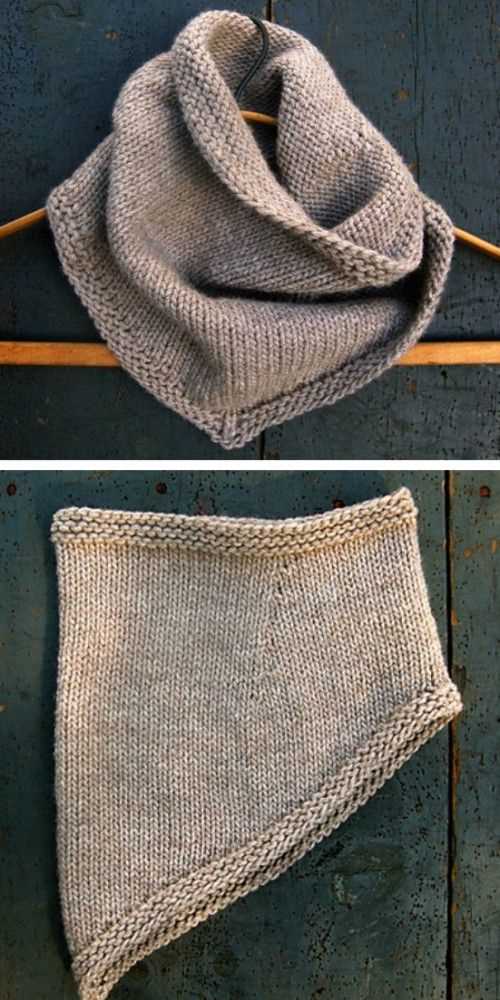
Shaping the Bandana
When knitting a bandana, shaping is an essential part to achieve the desired triangular shape. There are a few key techniques that can be used to create the shaping.
Decreases: Decreases are used to decrease the number of stitches on the needles, gradually shaping the bandana. The most common decrease stitch used is the knit two together (k2tog) stitch. This stitch is worked by inserting the right needle through the next two stitches on the left needle and knitting them together as one stitch.
Short Rows: Short rows are another technique that can be used to shape the bandana. Short rows allow for partial knitting of rows, creating a curved shape. When working short rows, the knitter turns the work before reaching the end of the row and works back in the opposite direction. This creates extra stitches in the middle of the row, which form the shape.
- Pattern Example: In a free bandana knitting pattern, the shaping may be specified in the instructions. For example, the pattern may instruct the knitter to work a certain number of decreases on every right-side row to create a pointed end.
- Custom Shaping: Alternatively, knitters can experiment with their own shaping techniques to achieve the desired shape. This may involve increasing or decreasing the number of stitches at specific points or using short rows to create curves.
Adding Decorative Stitching

Adding decorative stitching to your bandana can elevate its style and add a personal touch. There are several techniques you can use to achieve this, such as embroidery, appliqué, and crochet. By incorporating these decorative elements, you can create a one-of-a-kind bandana that reflects your own unique taste and style.
Embroidery: Embroidery is a popular technique for adding decorative stitching to fabric. You can use various embroidery stitches, such as satin stitch, chain stitch, or French knots, to create intricate patterns or designs on your bandana. You can incorporate flowers, animals, or geometric shapes to give your bandana a personalized touch.
Appliqué: Appliqué is another technique you can use to embellish your bandana. With appliqué, you can cut out shapes or designs from different fabrics and then sew them onto the bandana using a sewing machine or hand stitching. You can create contrasting colors or use patterned fabrics to make your bandana stand out.
Crochet: If you have crochet skills, you can also add decorative stitching to your bandana using crochet techniques. You can create crocheted motifs, edgings, or borders to give your bandana an intricate and textured look. Crochet can be a fun way to add a pop of color and create unique patterns on your bandana.
Whichever technique you choose, adding decorative stitching to your bandana allows you to create a truly personalized and stylish accessory. Whether you’re knitting your bandana from scratch or upcycling an old one, these decorative elements will help you make it truly your own. So go ahead and get creative with your bandana and enjoy the process of adding decorative stitching!
Finishing Touches: Binding Off
Once you have completed knitting your bandana, it’s time to bind off to give it a finished look. Binding off, also known as casting off, is the process of securing the live stitches at the end of your knitting so that they don’t unravel.
To bind off your bandana, follow these simple steps:
- Knit two stitches. Start by knitting the first two stitches of your last row.
- Pass the first stitch over the second stitch. Insert your left needle into the first stitch on your right needle and lift it over the second stitch. Drop the first stitch off the needle.
- Knit another stitch. Continue knitting one more stitch on your right needle.
- Pass the first stitch over the second stitch again. Repeat the process of passing the first stitch over the second stitch, just as you did in step 2.
- Repeat steps 3 and 4. Knit one stitch, pass the first stitch over the second stitch, and continue this process until you have only one stitch left on your right needle.
- Trim the yarn and pull it through the last stitch. Cut the yarn, leaving a tail of about 6 inches. Thread the tail through the last stitch, pull tight to secure, and weave in the loose end.
Once you have bound off all the stitches, your bandana is ready to be worn or gifted! The binding off process ensures that your knitting stays intact and prevents any unraveled stitches. Remember to use a stretchy bind off if you want the edge of your bandana to have some elasticity. Now you can enjoy your finished bandana and show off your knitting skills!
Blocking and Shaping the Bandana
Once you have finished knitting your bandana, it is important to block and shape it to achieve the desired look and fit. Blocking involves wetting the knitted fabric and then stretching it into shape to set the stitches and even out any irregularities. Shaping, on the other hand, refers to the process of molding the bandana into the desired shape by using various techniques.
Blocking: To block your bandana, start by soaking it in lukewarm water with a gentle detergent for about 10 minutes. Gently squeeze out the excess water, being careful not to wring or twist the fabric. Lay a clean towel on a flat surface and place the bandana on top of it. Use your hands to gently stretch and shape the bandana to your desired dimensions, making sure to maintain the desired shape of the pattern. Secure the edges of the bandana with pins to hold it in place. Leave the bandana to dry completely before unpinning it.
Shaping Techniques:
- Pointed Ends: To create a bandana with pointed ends, fold the knitted fabric in half diagonally and sew along the edge, leaving a small opening. Turn the bandana inside out through the opening and stitch it closed.
- Rounded Ends: For a bandana with rounded ends, fold the knitted fabric in half diagonally and trim the corners to create a curved shape. Sew along the edges, leaving a small opening. Turn the bandana inside out through the opening and stitch it closed.
Remember to refer to the pattern instructions for specific blocking and shaping recommendations, as different patterns may require slightly different techniques. Blocking and shaping your bandana will help to enhance the overall appearance and ensure a comfortable fit when wearing it.
Care Instructions for Your Knitted Bandana
Proper care and maintenance are essential for keeping your knitted bandana looking great and lasting for a long time. Here are some care instructions to follow:
1. Washing
To clean your knitted bandana, it is recommended to hand wash it using a mild detergent or wool wash. Gently agitate the bandana in the soapy water, then rinse it thoroughly with clean water. Avoid wringing or twisting the bandana as it may cause damage to the fibers. Instead, gently squeeze out the excess water.
2. Drying
Lay the bandana flat on a clean towel and roll it up to absorb any remaining water. After that, reshape the bandana and lay it flat on a drying rack or a clean, dry towel. Avoid hanging the bandana as it may stretch out of shape. Allow it to air dry completely before wearing or storing.
3. Storing
When not in use, store your knitted bandana in a clean, dry place. It is best to fold the bandana neatly and place it in a drawer or a fabric bag to protect it from dust and potential snags. Avoid storing it in direct sunlight or in areas with high humidity.
Remember, knitted items are delicate and can snag easily, so it’s important to handle your bandana with care. By following these care instructions, you can keep your knitted bandana looking beautiful and in great condition for years to come.