
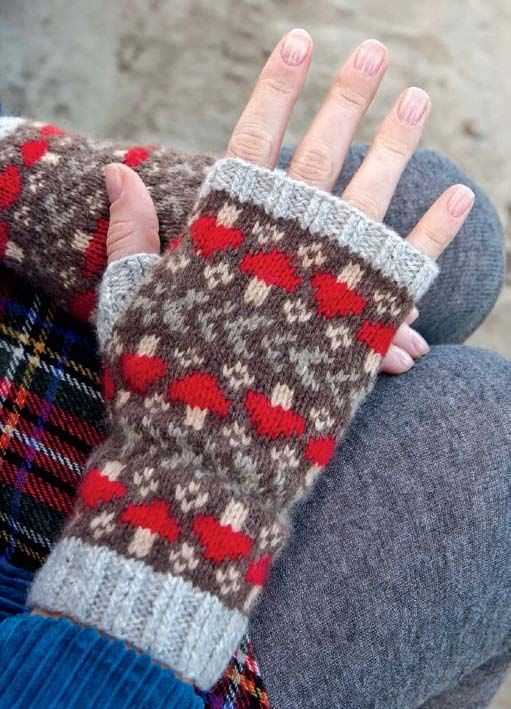
Knitting gloves is a wonderful way to keep your hands warm during the colder months, and with the Fair Isle technique, you can create beautifully patterned gloves that are both functional and stylish. Fair Isle knitting, also known as stranded knitting, involves using two or more colors in a row to create intricate designs. This technique is perfect for adding a pop of color and visual interest to your gloves.
Creating Fair Isle gloves may seem daunting at first, but with a little practice and patience, you’ll be able to master this technique and create your own unique designs. In this article, we’ll provide a step-by-step guide on how to knit Fair Isle gloves, including tips on choosing colors, reading a color chart, and working the Fair Isle technique.
Before you get started, you’ll need a few supplies: DK weight yarn in your chosen colors, circular knitting needles in the appropriate size, double-pointed needles, and a stitch marker. It’s also helpful to have a color chart or pattern to follow. Once you have gathered your supplies, you’ll be ready to begin the exciting process of knitting your own Fair Isle gloves.
Fair Isle Gloves Knitting Pattern
If you’re looking for a new knitting project, why not try making a pair of Fair Isle gloves? The Fair Isle knitting technique originated in the Fair Isle, a small island in the Shetland Islands of Scotland. It is known for its vibrant and intricate colorwork patterns that are created by using two or more colors in each round.
To create the Fair Isle gloves, you will need a few basic knitting skills, including how to knit in the round, how to change colors, and how to read a colorwork chart. The gloves are typically knitted using double-pointed needles, but you can also use a circular needle if you prefer.
When choosing your yarn for the gloves, make sure to select a yarn that is suitable for colorwork and that has good stitch definition. Traditional Fair Isle gloves are often knitted using Shetland wool, which is known for its softness and warmth.
The Fair Isle gloves knitting pattern typically includes instructions for different sizes, so you can make a pair that fits perfectly. The pattern will guide you through the process of casting on, creating the ribbed cuff, working the colorwork pattern, shaping the fingers, and finishing the gloves. It may also include tips and tricks for achieving even tension and creating a neat finish.
Knitting Fair Isle gloves can be a time-consuming project, but the end result is a beautiful and unique pair of gloves that you can wear or gift to someone special. So gather your knitting supplies, choose your favorite color combination, and get started on your own Fair Isle gloves today!
What is Fair Isle knitting?

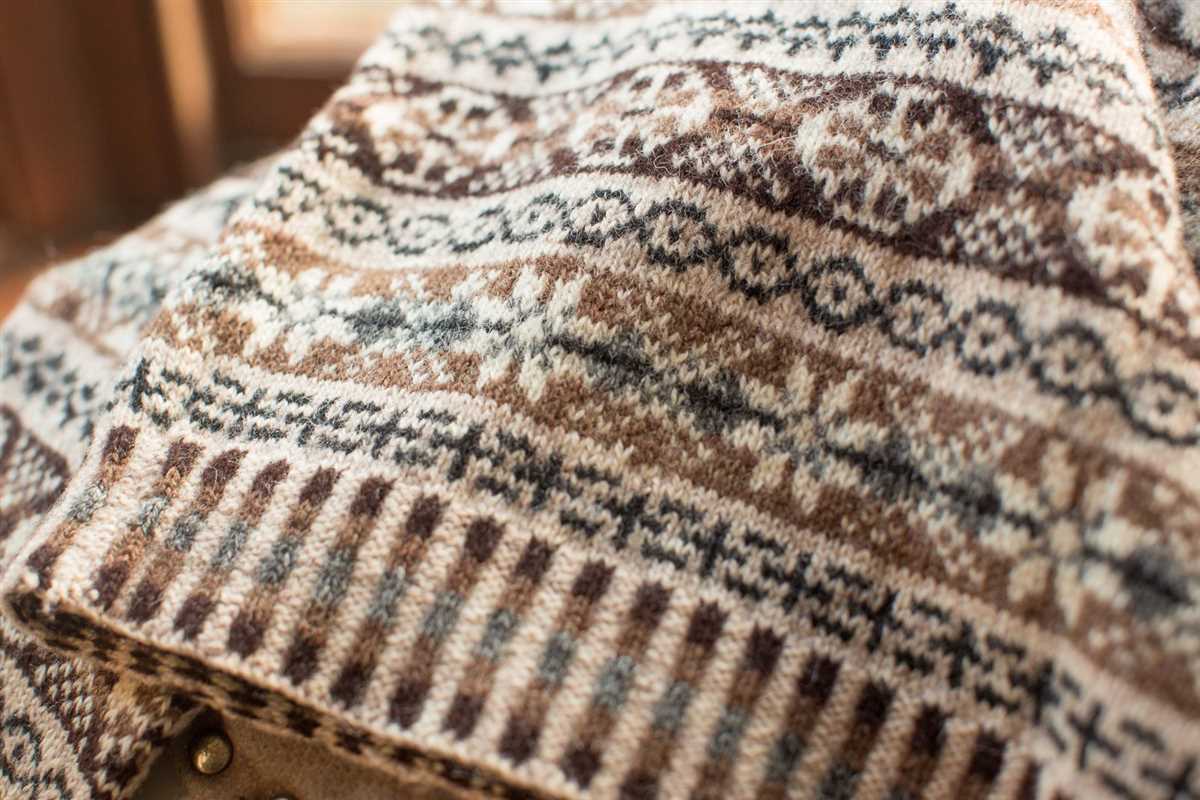
Fair Isle knitting is a traditional knitting technique that originated in the Fair Isle, a small island in Scotland. It is characterized by the use of multiple colors in each row to create intricate patterns and designs. The technique involves alternating between two or more colors in a single row, with the unused colors being carried along the back of the work. This creates a beautiful, textured appearance and adds warmth to the fabric.
The name “Fair Isle” comes from the knitting style’s association with the Fair Isle, where the technique was used to create warm and durable garments for the islanders. The patterns often feature geometric motifs, such as stars, diamonds, or waves, and are typically knit using a small circular needle or double-pointed needles.
Key Elements of Fair Isle Knitting
1. Colorwork: Fair Isle knitting is known for its intricate colorwork, with multiple colors used in each row to create patterns and designs. The colors are typically limited to two or three per row, with the unused colors carried along the back of the work.
2. Stranded Knitting: Stranded knitting is the technique used in Fair Isle knitting, where two or more colors are worked across each row. The unused colors are carried along the back of the work, creating floats that can be up to five or six stitches long.
3. Small Circular Needles: Fair Isle knitting is commonly done using small circular needles or double-pointed needles. The small circumference of the needles helps to maintain tension and ensures that the stitches are evenly distributed.
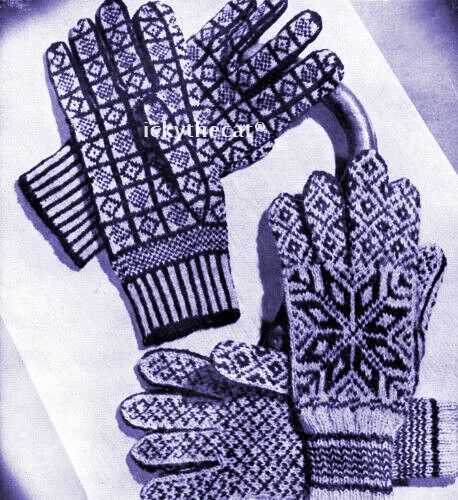
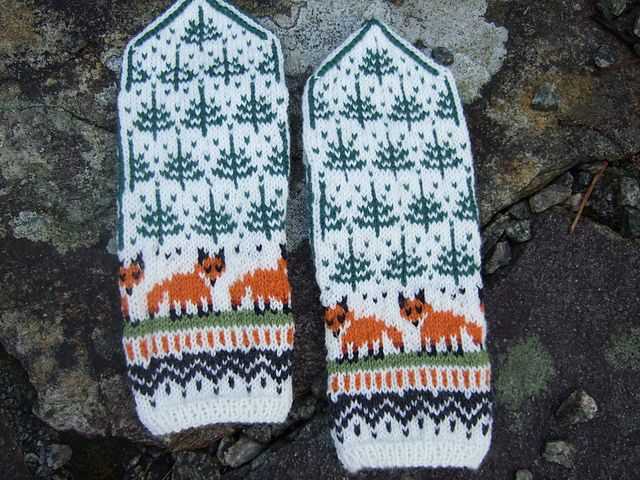
4. Geometric Motifs: Fair Isle patterns often feature geometric motifs, such as stars, diamonds, or waves. These motifs are created by combining different colors in various ways, resulting in visually appealing patterns.
5. Warmth and Durability: Fair Isle knitting creates a warm and durable fabric due to the multiple layers of stranded knitting. The floats that are carried along the back of the work help to insulate the fabric, making it suitable for cold weather garments such as sweaters, hats, and gloves.
Choosing the right yarn for Fair Isle gloves
When it comes to knitting Fair Isle gloves, choosing the right yarn is crucial for achieving the desired results. Fair Isle knitting is known for its intricate colorwork, and the yarn you choose can greatly impact the final look and feel of your gloves.
Weight: One of the first considerations when selecting yarn for Fair Isle gloves is the weight or thickness of the yarn. Thicker yarns will result in bulkier gloves, while lighter yarns will create a more delicate and lightweight glove. It’s important to consider the desired warmth and dexterity of your gloves when choosing the weight of the yarn.
Fiber content: The fiber content of the yarn will also affect the overall look and feel of your Fair Isle gloves. Traditional Fair Isle knitting often utilizes wool yarn, as it is warm, breathable, and easy to work with. However, if you prefer a softer or more luxurious feel, you may opt for yarns that include other fibers such as alpaca or cashmere.
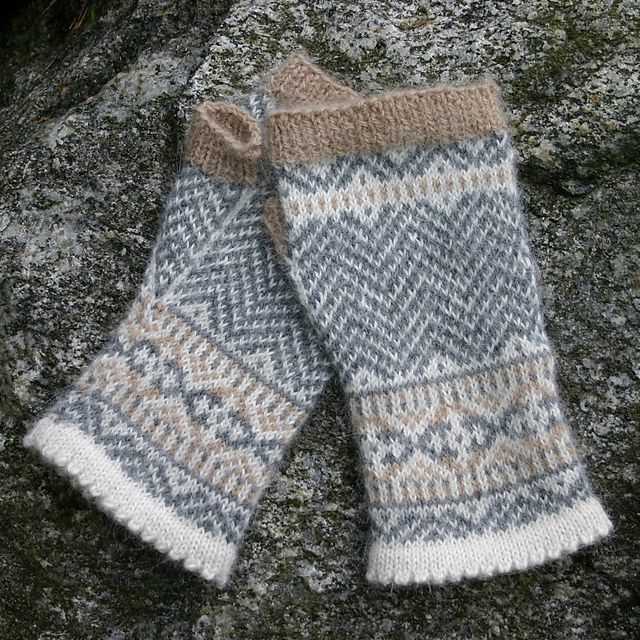
Color selection: Fair Isle knitting is all about color, and choosing a yarn with a wide range of complimentary shades is key. Look for yarns that offer a variety of colors that work well together and can create a harmonious colorwork pattern. Many yarn manufacturers produce specific ranges of yarn suitable for Fair Isle knitting, making it easier to find the right colors.
Tension and gauge: Lastly, it’s important to consider the tension and gauge of the yarn when knitting Fair Isle gloves. The yarn should be suitable for the recommended needle size and gauge specified in your chosen pattern. This will ensure that your gloves have the right fit and that the colorwork pattern is properly displayed.
By considering these factors when choosing your yarn, you can ensure that your Fair Isle gloves turn out as beautifully as you envision. Remember to experiment, have fun, and let your creativity shine through in your color choices!
Essential knitting techniques for Fair Isle gloves
If you want to create Fair Isle gloves, there are several essential knitting techniques you should be familiar with. Fair Isle knitting is characterized by its intricate colorwork patterns, and mastering these techniques will help you achieve the beautiful, traditional designs that are typical of Fair Isle gloves.
1. Stranded knitting: Stranded knitting is at the heart of Fair Isle techniques. It involves using two or more colors in a row and carrying the unused strands along the back of the work. This technique creates the distinct color patterns of Fair Isle gloves. Practice tension control and keeping the floats neat and even to achieve even stitches and prevent the unused strands from tangling.
2. Intarsia knitting:
Intarsia knitting is a technique that allows you to create blocks of color within a larger design. It is commonly used in Fair Isle gloves to create small motifs or patterns. When working with intarsia, you’ll need to use bobbins or separate balls of yarn for each different color block, ensuring that the floats are not too long and tangled.
- 3. Pattern reading and chart interpretation:
In order to follow the intricate Fair Isle patterns, it is important to practice reading knitting charts. Fair Isle patterns are often represented in chart form, with each square on the chart representing a stitch and each color represented by a symbol. Understanding how to read these charts will help you navigate the pattern and create the desired design.
4. Knitting in the round: Fair Isle gloves are typically knit in the round, which means you’ll need to master circular knitting techniques. This involves using double-pointed needles or circular needles and working in a continuous spiral. Learning how to join and work in the round will allow you to seamlessly create the tube-shaped glove.
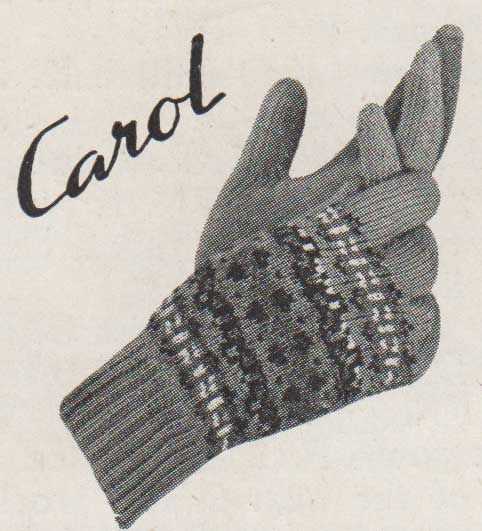
5. Thumb construction: Fair Isle gloves often feature a thumb gusset, which requires a specific construction technique. Practice picking up stitches and creating a thumb gusset to ensure a comfortable and well-fitting glove. Follow a pattern that includes instructions for thumb construction, or explore various techniques to find the one that works best for you.
By mastering these essential knitting techniques for Fair Isle gloves, you’ll be able to create beautiful and intricate designs. Remember to practice and experiment with different patterns and color combinations to truly make your Fair Isle gloves unique.
Getting started with the Fair Isle gloves pattern
Knitting a pair of Fair Isle gloves can be a fun and rewarding project for knitters of all skill levels. The Fair Isle technique, also known as stranded knitting, involves using two or more colors of yarn in each row to create beautiful patterns and designs. With this pattern, you can create a pair of gloves that are not only warm and functional but also stylish and unique.
To get started with the Fair Isle gloves pattern, you will need to gather your materials. You will need two different colors of yarn, one for the main color and one for the contrasting color. Make sure to choose yarns that are compatible in weight and texture to ensure an even and consistent stitch. You will also need a set of double-pointed knitting needles in the appropriate size for your yarn, as well as a stitch marker, yarn needle, and scissors.
Once you have all your materials ready, you can begin by casting on the required number of stitches for the gloves. The pattern will typically specify the size and gauge, so make sure to follow these instructions carefully. You may need to adjust your needle size or tension to achieve the correct gauge. After casting on, place a stitch marker to mark the beginning of the round.
The Fair Isle pattern will involve working with two colors of yarn in each row. You will need to carry the unused color along the back of your work, catching it every few stitches to prevent long floats on the wrong side. Make sure to keep your tension even and not pull too tightly on the carried yarn to avoid distorting the fabric. Follow the pattern chart or written instructions to create the desired Fair Isle pattern on the gloves.
Once you have completed the Fair Isle portion of the gloves, you can proceed to work the rest of the pattern, including the thumb gusset and the fingers. Pay close attention to any shaping or decreasing instructions to ensure a proper fit. After finishing all the sections, you will need to weave in any loose ends and block the gloves to shape them. Finally, you can enjoy your beautifully knitted Fair Isle gloves!
Tips for knitting the Fair Isle pattern
The Fair Isle knitting pattern is known for its colorful and intricate designs. If you’re looking to take on this technique and create beautiful Fair Isle gloves, here are some tips to help you get started:
Choose the right yarn
When knitting Fair Isle gloves, it’s important to select yarns that have a similar weight and gauge. This will ensure that your stitches are consistent and that the pattern lays flat. Using yarns with different weights can lead to uneven tension and a distorted design. Additionally, opt for yarns with good color contrast, as this will help highlight the different motifs in the pattern.
Practice tension management
Tension management is crucial when knitting Fair Isle gloves. Since you’ll be working with multiple strands of yarn at the same time, it’s important to keep your tension even throughout the project. Practice knitting with two colors at once and pay attention to the tightness of your stitches. The goal is to maintain an even tension to ensure that the final product looks seamless and professional.
Use a colorwork chart
A colorwork chart is an essential tool for knitting Fair Isle gloves. It provides a visual representation of the pattern, showing you which colors to use and when to switch. By following the chart row by row, you can easily keep track of your progress and ensure accuracy in your color placement. Make sure to read the chart from right to left for each row, as Fair Isle patterns are typically worked in the round.
Carry the yarns correctly
When knitting Fair Isle gloves, you’ll be carrying multiple strands of yarn along the back of your work. To prevent long floats and potential snagging, it’s important to carry the yarns correctly. Typically, the dominant color is carried on top, while the non-dominant color is carried underneath. This can help keep your floats shorter and create a neater appearance on the right side of the fabric.
Block your finished gloves
Blocking is an important step in the knitting process, especially for Fair Isle gloves. Once you’ve completed your gloves, soak them in water and shape them to your desired dimensions. This will help even out any irregularities in your stitches and enhance the overall appearance. Blocking also allows the yarn to relax and settle into its final form, resulting in gloves that fit and drape beautifully.
By following these tips, you’ll be well on your way to creating stunning Fair Isle gloves that showcase the beauty of this traditional knitting technique.
Creating the cuffs for your gloves
When knitting fair isle gloves, one of the first steps is to create the cuffs. The cuffs provide a snug fit around the wrists, helping to keep the gloves in place and prevent them from sliding off. To create the cuffs, you will need to cast on the required number of stitches using the main color of yarn.
Once you have cast on the stitches, you can begin working the cuffs in a rib stitch pattern. The rib stitch pattern is a popular choice for cuffs as it adds elasticity and stretchiness to the fabric, allowing the gloves to fit comfortably around the wrists. You can choose to work the cuffs in a 1×1 rib, where you alternate between knitting one stitch and purling one stitch, or a 2×2 rib, where you alternate between knitting two stitches and purling two stitches.
It is important to ensure that the cuffs are not too tight or too loose. If they are too tight, they may be difficult to pull over your hands, while if they are too loose, they may not provide enough support. To check the fit of the cuffs, you can try them on as you go or measure the circumference of your wrists and compare it to the width of the knitted fabric.
Once you have completed the cuffs, you can continue knitting the rest of the glove, following the fair isle pattern for the main body of the glove. The cuffs serve as the foundation for the rest of the glove and provide a smooth transition between the wrist and the hand. With the cuffs in place, you can now move on to the exciting part of knitting the fair isle pattern and creating a beautiful design on your gloves.
Knitting the hand section of your Fair Isle gloves
After completing the cuff and thumb sections of your Fair Isle gloves, it’s time to move on to the hand section. This is where the intricate Fair Isle pattern will truly come to life.
To begin, follow the chart or written pattern provided for the hand section. The hand section is typically worked in the round, so you will continue using double-pointed needles or a circular needle, depending on your preference.
Start by knitting the first round in your main color, and then begin incorporating the contrasting colors according to the pattern. The Fair Isle technique involves carrying multiple colors along the back of your work, so make sure to keep your floats loose enough to avoid pulling the fabric too tightly.
As you work through the hand section, pay attention to the pattern’s color changes and stitch counts. This section might include shaping for the fingers, so carefully follow the instructions to create the proper fit.
Once you’ve completed the final round of the hand section, you can cut the contrasting yarn and continue knitting the rest of the glove in the main color. This will typically include shaping for the fingertips and finishing off the top of the glove.
Remember to take your time and enjoy the process of knitting the hand section of your Fair Isle gloves. The intricate colorwork and pattern will create a beautiful and unique accessory that you can be proud of.
Adding the Fair Isle pattern to your gloves
Knitting Fair Isle gloves can be a fun and challenging project for knitters of all skill levels. The Fair Isle technique involves using multiple colors in a pattern to create beautiful and intricate designs. Adding this technique to your gloves can result in a unique and eye-catching accessory.
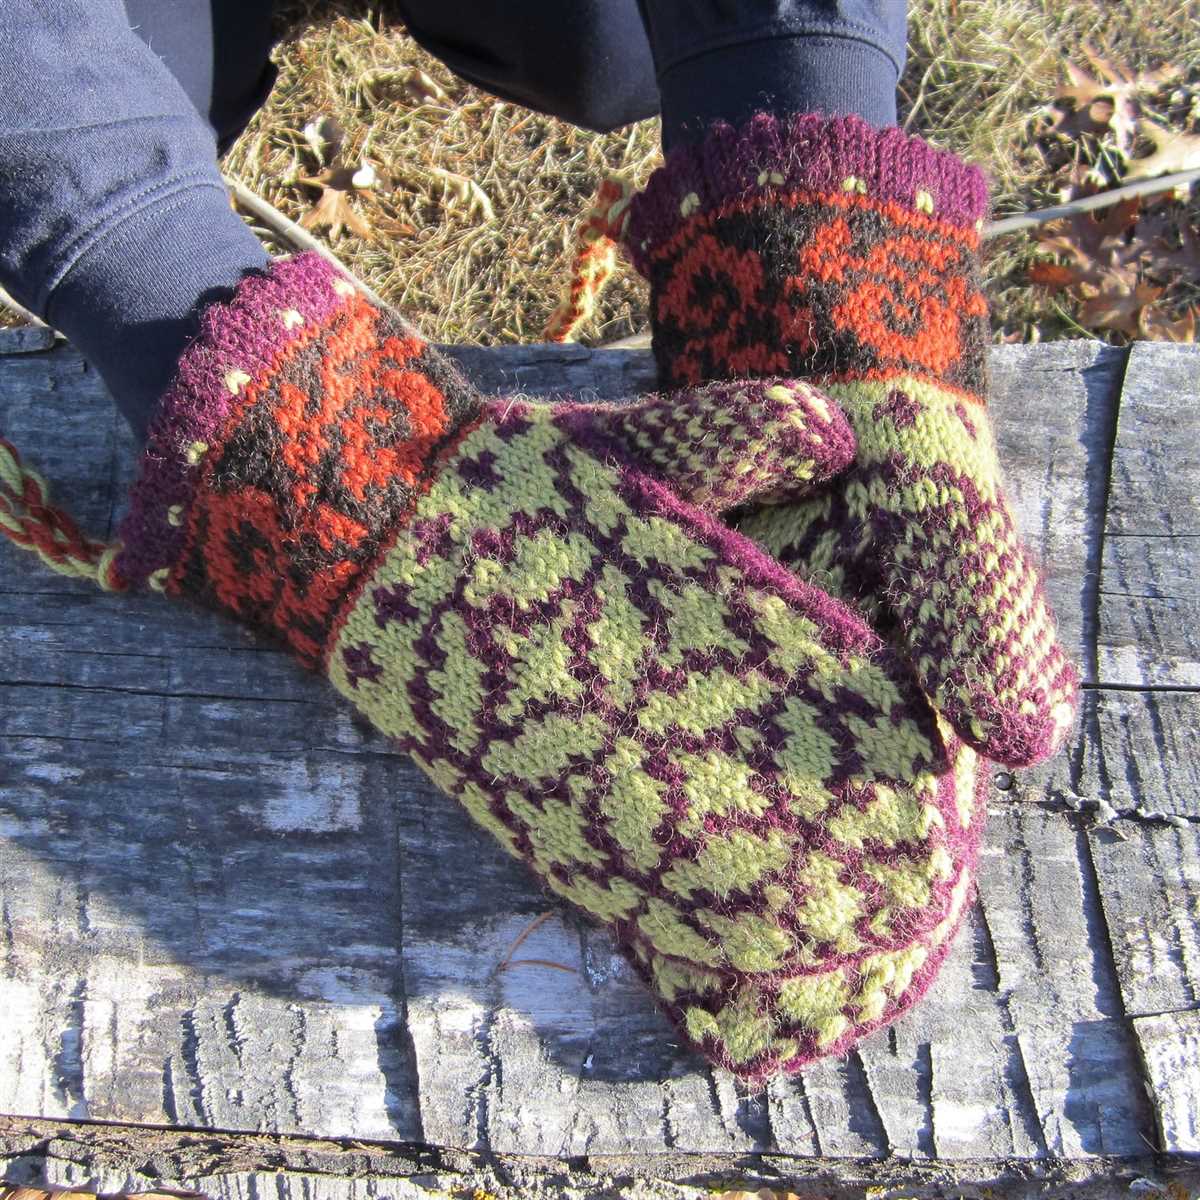
To start incorporating the Fair Isle pattern into your gloves, you will need to choose your colors. Traditionally, Fair Isle designs use a limited color palette, typically no more than four or five colors. These colors should contrast well with each other to make the pattern stand out. You can use a color wheel or online resources to help you choose complementary colors.
Once you have your colors selected, you can begin knitting your gloves. The Fair Isle pattern is typically worked in the round, so you will need to use double-pointed needles or circular needles to accommodate the small circumference. Begin by casting on the required number of stitches for your glove, and then distribute them evenly across your needles.
Now you can start incorporating the Fair Isle pattern into your glove. You will need to follow a chart or pattern that specifies when to switch colors and where to place each stitch. The pattern will typically indicate how many stitches to work in each color before switching, as well as any shaping or increases/decreases that need to be done.
To create the Fair Isle pattern, you will hold two colors of yarn at a time. When knitting with one color, the other color will be carried along the back of the work. Be sure to keep your floats loose enough so the fabric doesn’t pucker, but not too loose that they create long loops or snag on your hands.
Continue knitting your gloves following the Fair Isle pattern until you reach the desired length or when the pattern specifies. Once you have completed the main body of the gloves, you can also incorporate the Fair Isle pattern into the cuffs or any other desired areas.
Finally, finish off your gloves by binding off and weaving in any loose ends. Block your gloves to help even out the stitches and enhance the Fair Isle pattern. The final result will be a beautiful pair of gloves that showcase your knitting skills and the artistry of the Fair Isle pattern.
Shaping the fingers of your gloves
When knitting fair isle gloves, shaping the fingers is an important step to ensure a proper fit. There are several techniques you can use to shape the fingers, depending on the pattern you are following or your personal preference. Here are some common ways to shape the fingers:
- Decreasing stitches: This is the most common method used to shape the fingers. You can decrease stitches by knitting two stitches together or by slipping a stitch, knitting the next stitch, and then passing the slipped stitch over the knitted stitch. Decreasing stitches evenly on each side of the finger will create a tapered shape.
- Gussets: Another way to shape the fingers is by using gussets. A gusset is a triangular or diamond-shaped piece of fabric that is inserted into the glove to create extra room for the fingers. This method provides a more roomy and comfortable fit.
- Short rows: Short rows are used to create curves or slopes in the knitting. They can be used to shape the fingers of gloves by adding extra rows in specific areas to create a rounded shape. Short rows are often combined with decreasing stitches to shape the fingers more precisely.
When shaping the fingers, it is important to follow the instructions provided in the pattern or to plan out your shaping method in advance. Take into consideration the size of your fingers and the desired fit of the gloves. Remember to keep track of your stitches and rows to ensure symmetry and uniformity in your glove fingers. With the right shaping techniques, you can create a pair of fair isle gloves that fit perfectly and look beautiful.
Finishing touches and final steps for your Fair Isle gloves
Once you have completed the knitting portion of your Fair Isle gloves, it’s time to add the finishing touches to make them truly professional and ready to wear. Here are some final steps to consider:
1. Blocking
Before you start assembling your gloves, it’s a good idea to block them. This process involves soaking your gloves in lukewarm water and gently squeezing out the excess moisture. Then, reshape them by gently stretching and pinning them into the desired shape. Allow the gloves to air dry completely before proceeding.
2. Seaming and weaving in ends
Next, you’ll need to seam your gloves together. Use a tapestry needle and matching yarn color to stitch the side seams, leaving an opening for the thumb. Be sure to securely sew the ends together, as this will ensure the longevity of your gloves. Additionally, weave in any loose ends from color changes or joins to create a seamless finish.
3. Adding a thumb
Now it’s time to add the thumb to your gloves. Pick up stitches along the opening you left while seaming and knit the thumb to the desired length. Use the same Fair Isle pattern as the rest of the glove for a cohesive look. When you’re finished knitting the thumb, bind off the stitches and weave in any loose ends.
4. Finishing details
To add a polished touch to your Fair Isle gloves, consider adding some decorative elements. This could include a ribbed cuff for added stretch and comfort, or even some embroidery or beading for extra flair. Get creative and personalize your gloves to make them truly one-of-a-kind.
With these finishing touches complete, your Fair Isle gloves are now ready to be worn and enjoyed. Embrace the warmth, style, and timeless charm of your handmade creation, and showcase your knitting skills with pride.
Q&A:
What is Fair Isle knitting?
Fair Isle knitting is a technique that originated in the Fair Isle, a small island in Scotland. It involves using multiple colors of yarn in each row to create intricate patterns.
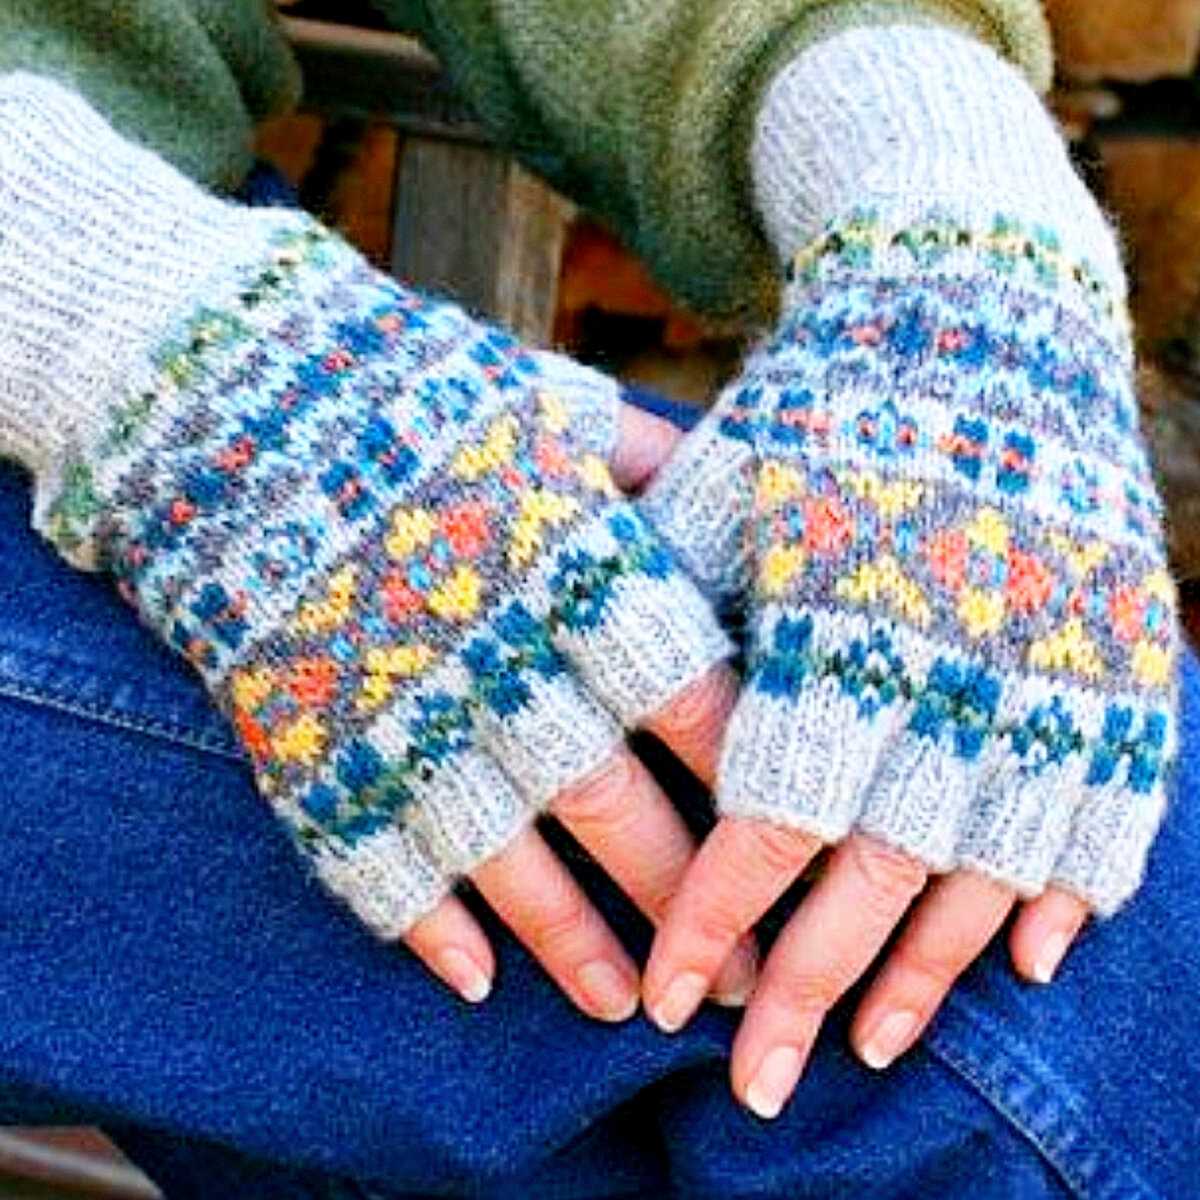
What are Fair Isle gloves?
Fair Isle gloves are gloves that are knitted using the Fair Isle knitting technique. They typically feature a colorful pattern made by using multiple colors of yarn.
Are Fair Isle gloves difficult to knit?
Fair Isle gloves can be a bit challenging for beginner knitters due to the colorwork involved. However, with practice and patience, anyone can learn to knit Fair Isle gloves.
What materials do I need to knit Fair Isle gloves?
To knit Fair Isle gloves, you will need multiple colors of yarn, typically in a wool or wool-blend. You will also need knitting needles in the appropriate size and a tapestry needle for weaving in ends.
Where can I find Fair Isle glove knitting patterns?
You can find Fair Isle glove knitting patterns in knitting books, magazines, and online websites. There are many resources available with a wide variety of patterns to choose from.
What is Fair Isle knitting?
Fair Isle knitting is a traditional knitting technique that originated in Fair Isle, a small island in Scotland. It involves using multiple colors of yarn in a row to create patterns. For Fair Isle gloves, this means creating intricate colorwork designs on the gloves.
Where can I find a Fair Isle gloves knitting pattern?
You can find Fair Isle gloves knitting patterns in various places. Some popular options include knitting books, knitting magazines, knitting websites, and online knitting communities. You can also find patterns on websites that specialize in knitting patterns, such as Ravelry.