
Are you just starting out with knitting and looking to expand your skills? Cable knitting is a great technique to learn that will take your projects to the next level. Despite its intricate appearance, cable knitting is actually quite simple. With just a few basic stitches and some practice, you can create beautiful, textured designs that will impress everyone.
In this article, we will explore some easy cable knitting patterns that are perfect for beginners. These patterns use simple cable techniques and are accompanied by detailed instructions and helpful tips, making them accessible even for those new to knitting. Whether you want to create a cozy scarf, a stylish hat, or a warm blanket, these patterns will help you improve your knitting skills while also creating gorgeous and functional items.
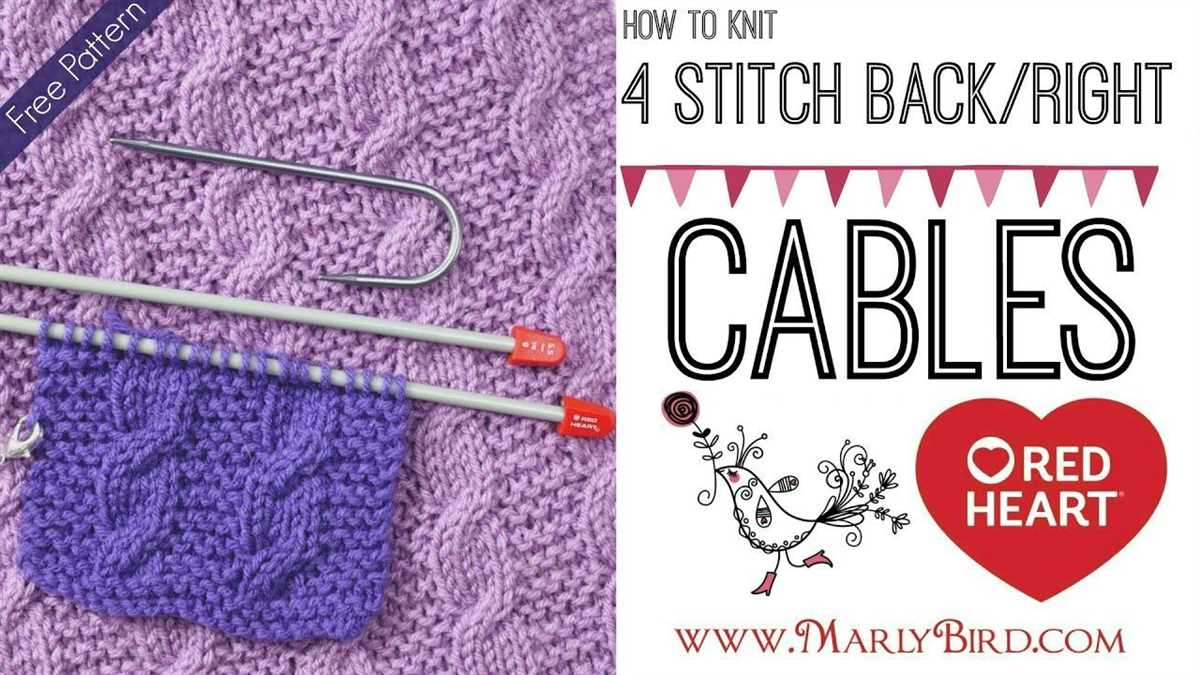
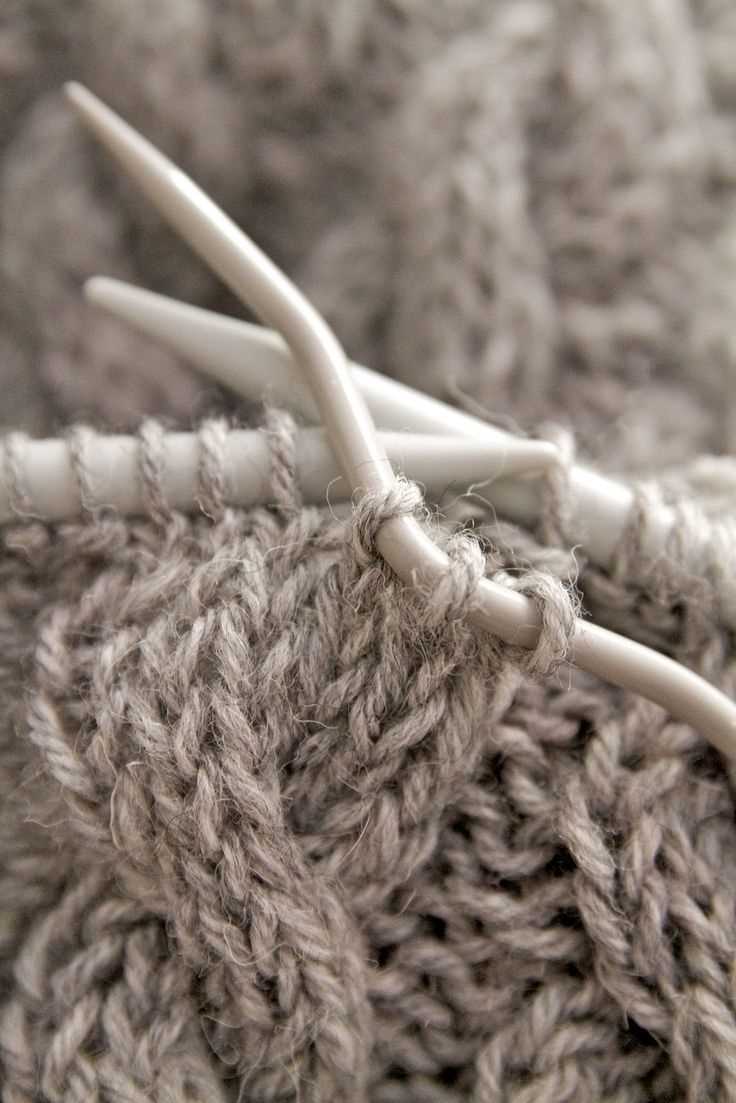
Before diving into the patterns, it’s important to understand the basics of cable knitting. Cables are created by crossing stitches over each other, usually with the help of a cable needle. The stitches are held to the front or back of the work while other stitches are knit or purled, creating the twisted effect. With practice, you will become comfortable with the technique and be able to tackle more complex cable patterns.
Easy Cable Knitting Patterns for Beginners
If you’re new to cable knitting, it can be intimidating to tackle more complex patterns. However, there are plenty of easy cable knitting patterns out there that are perfect for beginners. These patterns typically feature simple and repetitive cable designs that are easy to follow and execute. Plus, cable knitting is a great way to add texture and interest to your knitting projects.
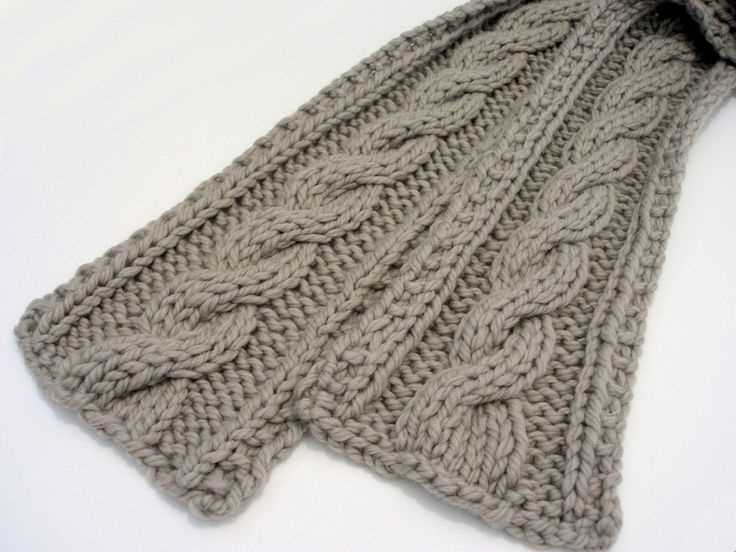
One easy cable knitting pattern for beginners is a basic cable scarf. This pattern typically involves a simple cable twist design, with cables crossing over each other to create a textured pattern. Using chunky yarn and large needles can make this pattern even easier and quicker to knit up. It’s a great project to practice your cable knitting skills and create a cozy accessory for the colder months.
Another easy cable knitting pattern for beginners is a cable headband. This pattern usually involves a smaller cable design, making it more manageable for beginners. It’s a quick and easy project that you can complete in just a few hours. Plus, it’s a practical and stylish accessory to keep your ears warm during chilly days.
If you’re feeling more adventurous, you can try knitting a cable hat. This pattern typically involves a combination of basic cables and ribbing, creating a beautiful texture and fit. With step-by-step instructions and a little patience, you can create a cozy and fashionable hat to wear or gift to a loved one.
When it comes to learning cable knitting, starting with easy patterns is the key. Once you become more comfortable with the techniques and stitches involved, you can tackle more complex cable patterns. With practice and perseverance, you’ll soon be able to create intricate and stunning cable designs for your knitting projects.
Choosing the Right Yarn and Needles
When it comes to choosing yarn for your cable knitting project, it’s important to consider the fiber content, thickness, and texture of the yarn. A smooth, medium-weight yarn made of natural fibers such as wool or cotton is a good choice for beginners. These yarns are easier to work with and provide good stitch definition, making it easier to see and fix any mistakes.
It’s also important to choose the right needles for your project. The size of the needles will depend on the thickness of the yarn you are using. Most yarn labels will recommend a needle size range for that particular yarn. You may need to experiment with different needle sizes to achieve the desired gauge, especially if you tend to knit tightly or loosely. Using the recommended needle size will ensure that your stitches are even and consistent.
Fiber Content
When choosing the fiber content of your yarn, consider the properties of different fibers. Wool is a popular choice for cable knitting as it has good elasticity and memory, which means that it can easily stretch and bounce back into shape. Cotton, on the other hand, is a less elastic fiber and may not hold the cable pattern as well. Acrylic yarns can be a good alternative for beginners, as they are affordable and easy to care for. It’s important to choose a yarn that you find comfortable to work with and that suits your needs and preferences.
Yarn Thickness
The thickness of the yarn, also known as its weight or gauge, will determine the size of the stitches and the overall look of your knitting project. For cable knitting, a medium-weight yarn, also known as worsted weight or aran weight, is often recommended. This yarn is versatile and works well for a wide range of projects. However, you can choose a lighter or heavier weight yarn depending on the size and complexity of the cable pattern you are working on. Thicker yarns will create larger, more dramatic cables, while thinner yarns will result in smaller, more delicate cables.
Texture and Color
The texture of the yarn can also play a role in the final appearance of your cable knitting project. Smooth yarns with good stitch definition will show off your cables beautifully, while yarns with a halo or fuzzy texture may obscure the cable pattern. Additionally, consider the color of the yarn and how it will highlight or camouflage the cables. Yarns with a variegated or self-striping color pattern can add visual interest to your cables, while solid colors can showcase the intricate twists and turns of the cables.
By taking into account the fiber content, thickness, texture, and color of your yarn, as well as choosing the right needles, you’ll set yourself up for success in your cable knitting journey. Remember to always swatch and check your gauge before starting a project to ensure that your cables come out looking their best.
Understanding Basic Cable Knitting Terms
When starting out with cable knitting, it’s important to become familiar with the basic terms used in this type of knitting technique. This will help you understand instructions and patterns more easily, allowing you to create beautiful cable-knit projects.
Cable: A cable in knitting refers to a technique where a group of stitches are crossed over each other to create a twist or braid-like pattern in the fabric. Cables can be simple, consisting of just a few stitches, or more complex with multiple stitch crossings.
Cable Needle: A cable needle is a short, usually U-shaped needle used to hold stitches when creating cables. It keeps the stitches secure while they are being crossed over other stitches. Cable needles can range in size and material, but are typically made of wood, metal, or plastic.
Front Cable (Cable-Over-Cable): A front cable is created by crossing one set of stitches over another set in front of the work, creating a cable that appears to be elevated. The stitches that are crossed over will usually be denoted as “C6F” (cable 6 stitches to the front) or similar in patterns.
Back Cable: A back cable is created by crossing one set of stitches behind another set, creating a cable that appears to be recessed. The stitches that are crossed over will usually be denoted as “C6B” (cable 6 stitches to the back) or similar in patterns.
It’s essential to understand these basic cable knitting terms to successfully follow cable-knit patterns. With practice, you’ll gain confidence in creating cables and be able to tackle more advanced cable designs.
How to Read a Cable Knitting Pattern
Cable knitting patterns can look quite intimidating to beginners, but with a little practice and understanding, they can be easily deciphered. Here are some tips on how to read a cable knitting pattern:
1. Familiarize Yourself with Knitting Abbreviations

Knitting patterns often use abbreviations to indicate specific stitches or techniques. Before you start working on a cable knitting pattern, make sure you understand the abbreviations used. Common abbreviations in cable patterns include C4F (slip 2 stitches onto cable needle and hold in front, knit 2 stitches, then knit 2 stitches from the cable needle) and C4B (slip 2 stitches onto cable needle and hold in back, knit 2 stitches, then knit 2 stitches from the cable needle).
2. Study the Chart or Written Instructions
Many cable knitting patterns provide both a chart and written instructions. Take the time to study both and determine which format you find easier to follow. The chart provides a visual representation of the cable pattern, with each symbol representing a specific stitch or action. Written instructions describe each step in detail. It’s important to understand how the chart or written instructions correspond to the cable pattern.
3. Start with Simple Cable Patterns
If you’re new to cable knitting, it’s a good idea to start with simple cable patterns. Look for patterns that involve only a few stitches and straightforward twists. This will help you build your confidence and understanding of cable knitting techniques before tackling more complex patterns.
4. Use Stitch Markers

Stitch markers can be incredibly useful when working on cable knitting patterns. They can help you keep track of the different sections of the pattern and ensure you don’t lose your place. Place a stitch marker before and after each cable twist to make it easier to spot where the cables should be worked.
5. Take It Slow and Practice

Reading and working on cable knitting patterns requires patience and practice. Don’t be discouraged if it takes a few tries to understand the pattern or if your first attempts don’t turn out perfectly. Keep practicing and challenging yourself with different cable patterns, and soon you’ll become more comfortable and confident in your cable knitting skills.
By following these tips and taking the time to understand cable knitting patterns, you’ll be able to create beautiful and intricate cable designs. Remember to be patient with yourself and enjoy the process of learning and mastering this fun knitting technique.
Simple Braided Cable Pattern
Knitting cables can seem intimidating to beginners, but the Simple Braided Cable Pattern is a great way to introduce yourself to the world of cable knitting. This pattern is perfect for those who are new to cables and want to create a beautiful textured design.
To create the Simple Braided Cable Pattern, you will need basic knitting skills and knowledge of knit and purl stitches. The pattern consists of a series of crossed stitches that create a braided effect on the fabric. It is worked over a multiple of stitches, typically in sets of six or eight.
To start the pattern, you will need to cast on the required number of stitches. Once the stitches are cast on, you will begin working the rows of the pattern, following the instructions for each row. The pattern will typically include instructions for knitting or purling the stitches, as well as instructions for crossing the stitches to create the braided effect.
As you work the pattern, you will repeat the series of rows until the desired length is reached. The Simple Braided Cable Pattern is versatile and can be used to create various items, such as scarves, hats, or even blankets. It adds a beautiful and textured element to your knitting projects and is sure to impress.
With a little practice and patience, you will master the Simple Braided Cable Pattern and be able to create stunning cable-knit projects. So, grab your needles and yarn, and give this pattern a try – you may just discover a new favorite knitting technique!
Classic Twist Cable Pattern
The Classic Twist Cable pattern is a popular cable knitting pattern that is perfect for beginners. With its simple, yet elegant design, it adds a beautiful twist to any project. This pattern is great for creating scarves, hats, and even blankets. Whether you’re new to cable knitting or an experienced knitter looking for a quick and easy project, the Classic Twist Cable pattern is a great choice.
To create the Classic Twist Cable pattern, you’ll need basic cable knitting skills and some basic knitting supplies. You’ll need a pair of knitting needles, a cable needle, and some yarn in the desired color. The pattern consists of a series of simple twists and crossings, creating the classic cable design.
To start the Classic Twist Cable pattern, you’ll cast on the desired number of stitches and work a few rows in a basic knit or purl stitch. Then, you’ll begin the cable section by following a specific set of instructions. These instructions will guide you through each individual cable twist and crossing, ensuring that your pattern is consistent and symmetrical.
- Row 1: Purl all stitches
- Row 2: Knit all stitches
- Row 3: Purl all stitches
- Row 4: Knit all stitches
- Row 5: Purl all stitches
- Row 6: Cable twist – slip next 2 stitches onto cable needle and hold in back, knit next 2 stitches, then knit the 2 stitches from the cable needle
- Repeat rows 1-6 until desired length is reached
The Classic Twist Cable pattern is versatile and can be customized to fit any project. You can adjust the size of the cable twist by adding or subtracting stitches, and you can also experiment with different yarn weights and textures to create unique variations of the pattern. Whether you choose to knit a cozy scarf or a stylish hat, the Classic Twist Cable pattern is sure to impress.
Beginner’s Rope Cable Pattern
Cable knitting is a popular technique that adds texture and visual interest to your knitting projects. While it may seem intimidating at first, cable knitting is actually quite easy to learn, especially with a beginner-friendly pattern like the Rope Cable pattern.
The Rope Cable pattern is a simple and versatile cable design that is perfect for beginners. It consists of a series of twists and crossings that create the appearance of a rope. This pattern is worked over a multiple of 8 stitches, making it easy to adjust the size to fit your project.
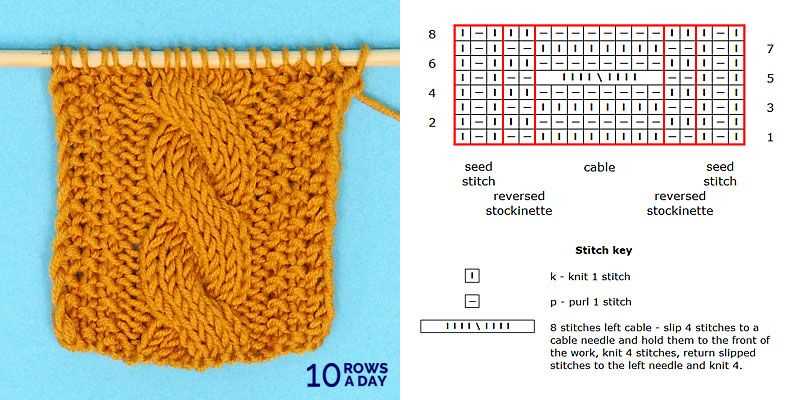
To knit the Rope Cable pattern, you will need to know how to knit and purl stitches, as well as how to use a cable needle. The pattern is worked over 4 rows and each row is repeated until you reach the desired length. Here is a breakdown of the pattern:
- Row 1: Knit all stitches
- Row 2: Purl all stitches
- Row 3: Slip the first 4 stitches onto a cable needle and hold in front of your work, knit the next 4 stitches, then knit the 4 stitches from the cable needle
- Row 4: Purl all stitches
Repeat these 4 rows until your project reaches the desired length. The Rope Cable pattern creates a beautiful texture that is ideal for scarves, hats, and even blankets. Once you have mastered this beginner’s cable pattern, you can experiment with more complex designs and create stunning knitted pieces.
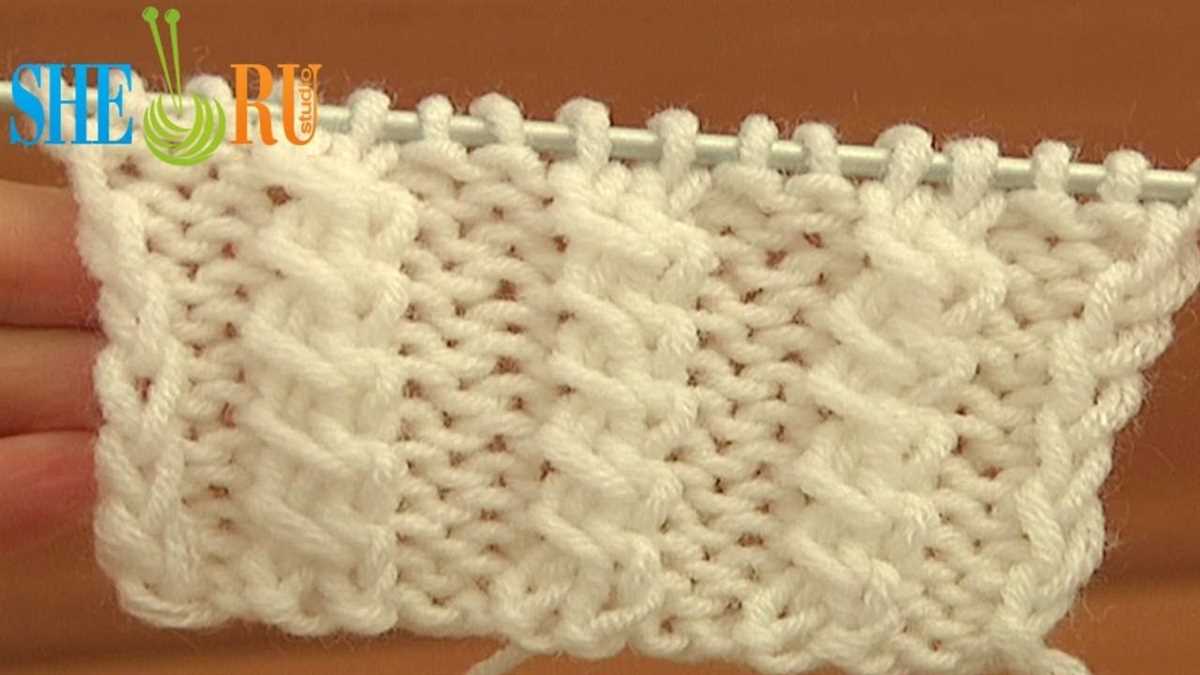
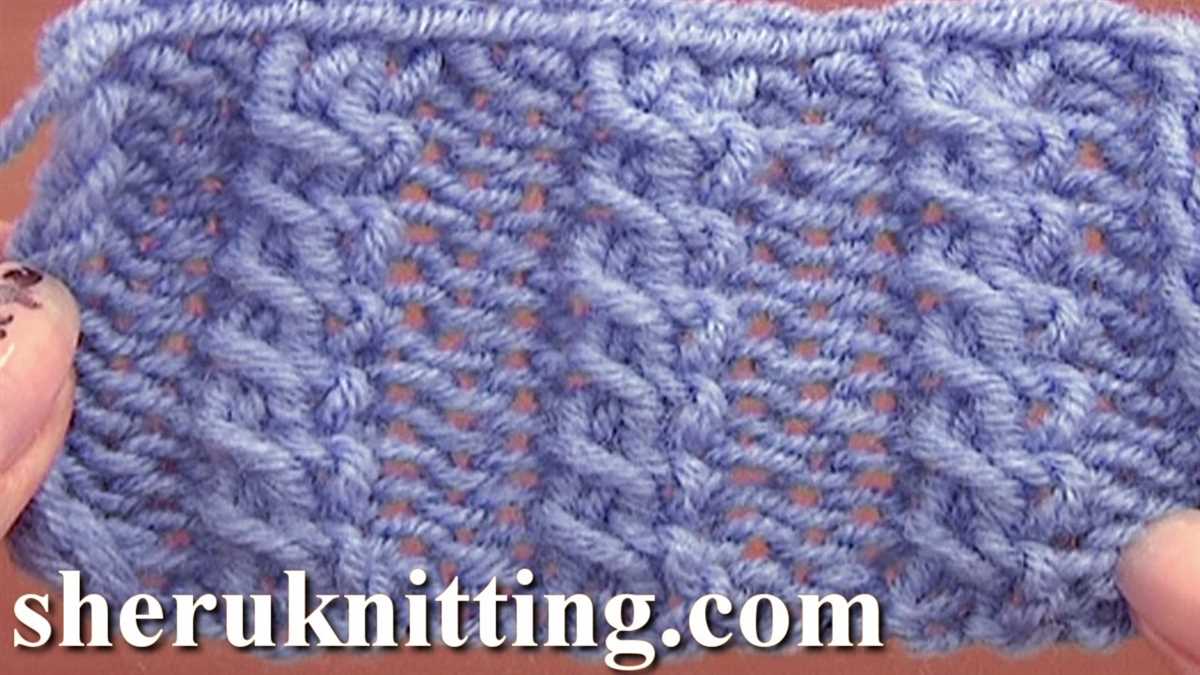
Ribbed Cable Pattern
The ribbed cable pattern is a classic knitting pattern that creates a beautiful texture and adds interest to any knitted project. It is an ideal pattern for beginners who want to try their hand at cable knitting. The combination of ribbing and cables creates a stretchy and flexible fabric that is perfect for scarves, hats, and even sweaters.
To create the ribbed cable pattern, you will need basic knitting skills such as casting on, knitting, purling, and casting off. The pattern consists of alternating rows of ribbing and cable twists. Ribbing is created by knitting and purling stitches in a specific pattern, usually alternating between knit and purl stitches. This creates the characteristic vertical ridges in the fabric.
Materials:
- Chunky weight yarn
- Knitting needles in the appropriate size for your yarn
- Cable needle
- Yarn needle for weaving in ends
Instructions:
- Cast on an even number of stitches.
- Row 1: *Knit 2, purl 2* – repeat from * to * until the end of the row.
- Row 2: *Purl 2, knit 2* – repeat from * to * until the end of the row.
- Repeat rows 1 and 2 to create the ribbing.
- Begin the cable twists:
- Row 1: *Knit 2, slip 2 stitches onto the cable needle and hold it at the back of the work, knit the next 2 stitches, then knit the 2 stitches from the cable needle* – repeat from * to * until the end of the row.
- Row 2: *Purl 2, knit 2* – repeat from * to * until the end of the row.
- Repeat rows 1 and 2 to continue the cable twists.
- Continue alternating between the ribbing and cable twists until the desired length is reached.
- End with a few rows of ribbing and cast off.
The ribbed cable pattern is a versatile and timeless choice for knitters of all skill levels. Once you have mastered the basic pattern, you can experiment with different yarn weights, needle sizes, and cable designs to create unique and personalized projects. Happy knitting!
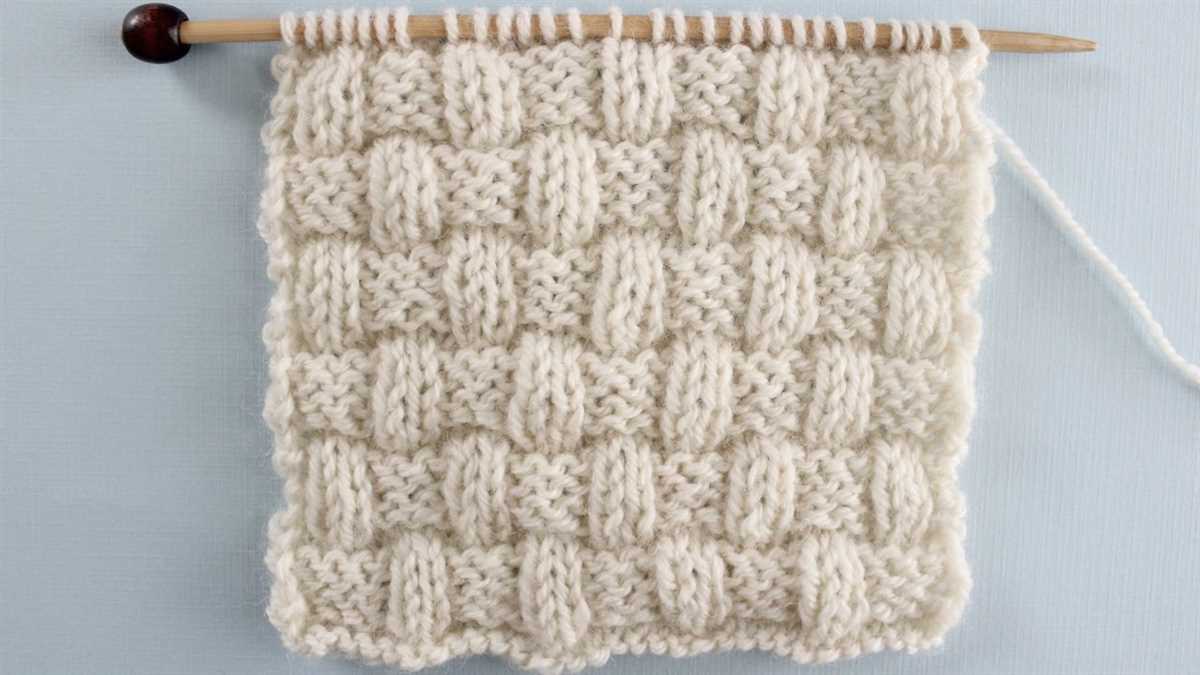
Basketweave Cable Pattern
The basketweave cable pattern is a classic cable pattern that is perfect for beginners. It creates a lovely texture that resembles a woven basket, hence the name. This pattern is great for adding interest and dimension to your knitting projects, and it’s surprisingly easy to knit.
To create the basketweave cable pattern, you’ll need to know how to knit and purl, as well as how to do basic cable stitches. The pattern consists of a series of knit and purl stitches arranged in a specific order to create the woven basket effect.
To knit the basketweave cable pattern, start by casting on an even number of stitches. The pattern typically calls for a multiple of 8 stitches, but you can adjust this depending on the size of your project. Once you have cast on, work the following rows:
- Row 1: Knit all stitches
- Row 2: Purl all stitches
- Row 3: Knit 4 stitches, *purl 4 stitches, knit 4 stitches*. Repeat from * to * until the end of the row.
- Row 4: Purl 4 stitches, *knit 4 stitches, purl 4 stitches*. Repeat from * to * until the end of the row.
- Repeat rows 1-4 until your desired length is reached.
As you work the pattern, you’ll notice that the knit and purl stitches alternate to create the woven basket effect. The basketweave cable pattern is a versatile pattern that can be used for a variety of knitting projects, such as scarves, hats, and even blankets.
With its simple yet captivating design, the basketweave cable pattern is a great choice for beginners who want to try their hand at knitting cables. Give it a try and see how this pattern can elevate your knitting projects to the next level!
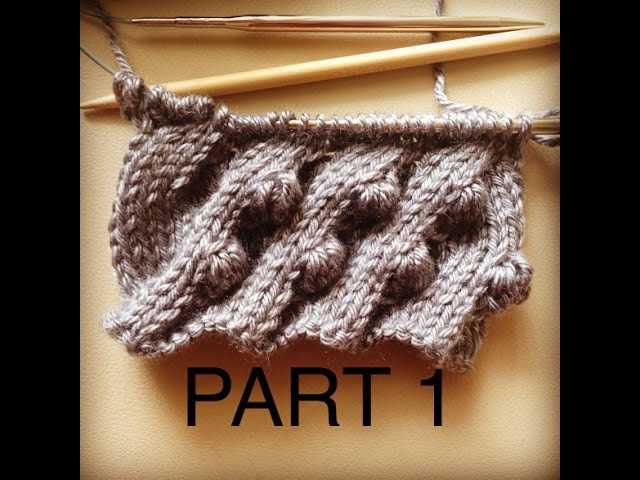
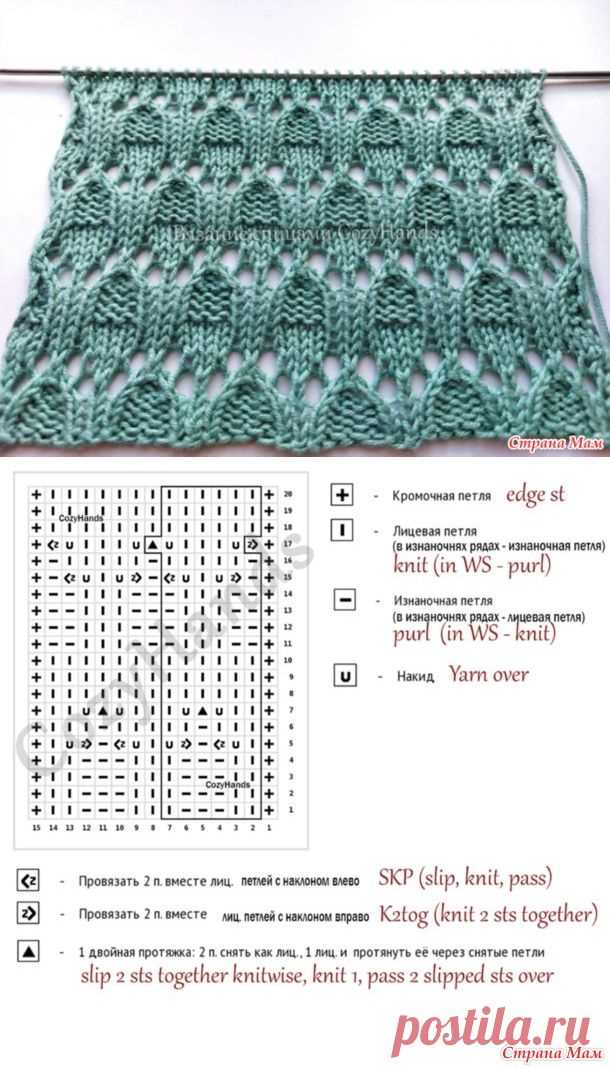
Zigzag Cable Pattern
The Zigzag Cable pattern is a simple yet eye-catching cable knitting pattern that adds texture and visual interest to your knitwear. It is a great pattern for beginners who are looking to experiment with cables for the first time.
To create the Zigzag Cable pattern, you will need a set of cable needles and a basic knowledge of how to knit cables. The pattern consists of a repeating zigzag pattern that is created by crossing the stitches over each other.
To knit the Zigzag Cable pattern, start by casting on the desired number of stitches. Then, follow these steps:
- Knit a few rows in the main stitch pattern to establish the base.
- Begin the cable pattern by slipping the first few stitches onto a cable needle and holding it in front of the work.
- Knit the next few stitches from the left-hand needle.
- Knit the stitches from the cable needle, crossing them over the stitches on the left-hand needle.
- Continue to repeat steps 2-4, following the chart or written instructions for the pattern, until you have reached the desired length.
- Finish your project by knitting a few more rows in the main stitch pattern and binding off.
The Zigzag Cable pattern is a versatile pattern that can be used in a variety of projects, such as scarves, hats, and even sweaters. It creates a visually appealing texture that is sure to impress. So grab your knitting needles and give this cable pattern a try!
Cable Block Blanket Pattern

If you are a beginner knitter looking for a fun and challenging project, the Cable Block Blanket pattern is perfect for you. This pattern combines simple cable stitches to create a beautiful and cozy blanket that will impress everyone. The pattern is designed to be easy to follow, with detailed instructions and clear diagrams.
Materials:
- 8 skeins of bulky weight yarn (approximately 800 yards)
- Size 10 (6mm) knitting needles
- Cable needle
- Tapestry needle
Instructions:
- Cast on 120 stitches using the long-tail cast-on method.
- Row 1: Knit all stitches.
- Row 2: Knit all stitches.
- Row 3: Purl all stitches.
- Row 4: Knit all stitches.
- Repeat rows 3 and 4 for a total of 6 more times.
- Row 13: Purl all stitches.
- Row 14: Knit all stitches.
- Row 15: Slip 6 stitches onto cable needle and hold in front, knit 6 stitches, then knit the 6 stitches from the cable needle. Repeat this cable twist pattern across the row.
- Row 16: Knit all stitches.
- Repeat rows 13-16 for a total of 6 more times.
- Continue repeating rows 3-16 until the blanket measures approximately 50 inches long.
- Knit rows 1-6 one more time.
- Bind off all stitches.
This Cable Block Blanket pattern is a great way to practice cable knitting and create a beautiful and functional piece. Whether you use it as a cozy throw for your living room or as a warm blanket for your bed, this pattern is sure to become a favorite. So grab your knitting needles and get started on this fun and rewarding project!
Tips for Successful Cable Knitting
Cable knitting can be a bit intimidating for beginners, but with practice and the right techniques, it can become an enjoyable and rewarding skill. Here are some tips to help you succeed in your cable knitting projects:
- Start with a simple pattern: If you’re new to cable knitting, it’s best to start with a simple pattern that only includes a few cables. This will help you become familiar with the technique and build your confidence before moving on to more complex designs.
- Use the right needles: Using the right needles is essential for cable knitting. Choose needles that are the appropriate size for your yarn and comfortable for you to work with. Circular needles or double-pointed needles may be easier to use when knitting cables, as they provide more space for the stitches.
- Use stitch markers: Stitch markers can be helpful for keeping track of your cable pattern. Place a stitch marker before and after each cable section to mark where the cable stitches should go. This will make it easier to follow the pattern and avoid mistakes.
- Pull the stitches tight: When working the cable stitches, be sure to pull the stitches tight. This will help define the cable and prevent any gaps or loose stitches. However, be careful not to pull too tight, as this can distort the shape of the fabric.
- Read the pattern carefully: Before starting a cable knitting project, read the pattern carefully and familiarize yourself with the cable symbols and instructions. Make sure you understand how to read and interpret the charts or written instructions for the cables.
- Practice patience: Cable knitting requires patience and concentration. Don’t rush the process, and take your time to ensure that each cable stitch is worked correctly. If you make a mistake, don’t be afraid to rip out and start again. The more you practice, the better you will become.
By following these tips and practicing regularly, you’ll soon be able to master cable knitting and create beautiful and intricate designs. Remember to start with simple patterns and gradually work your way up to more complex ones. With time and experience, you’ll become a confident cable knitter!