
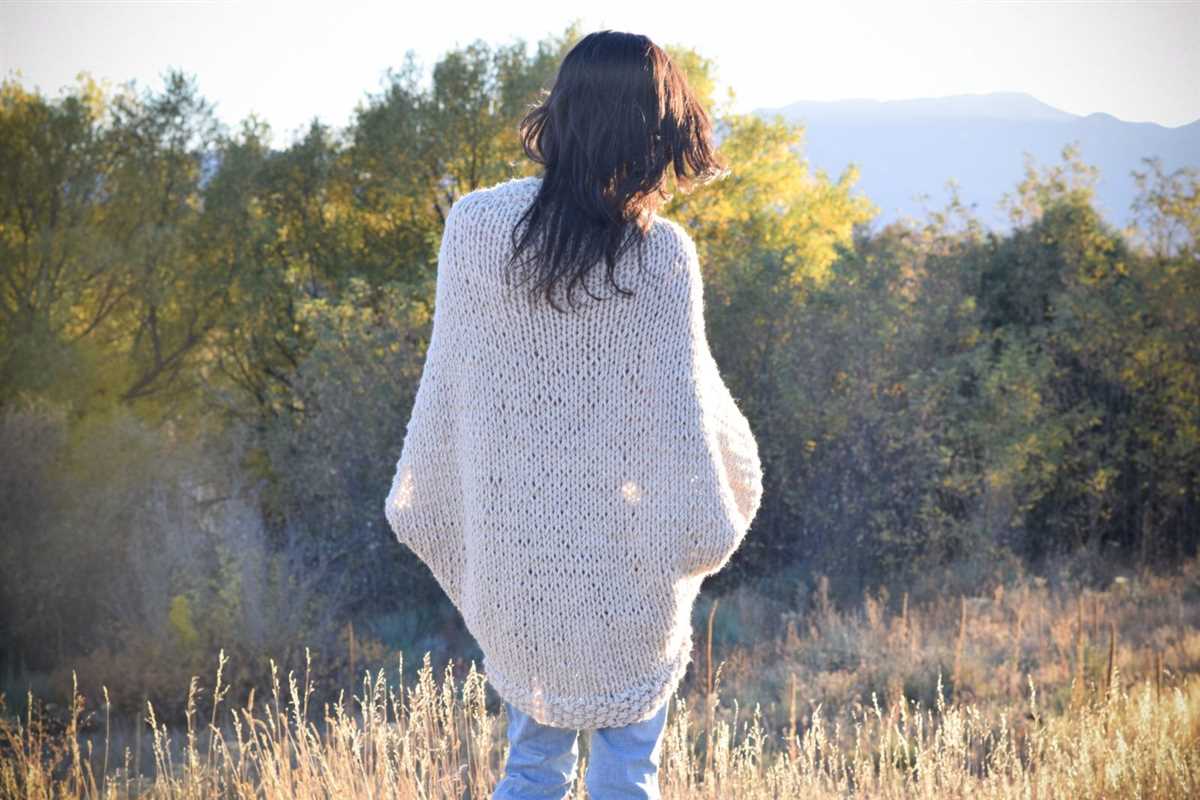
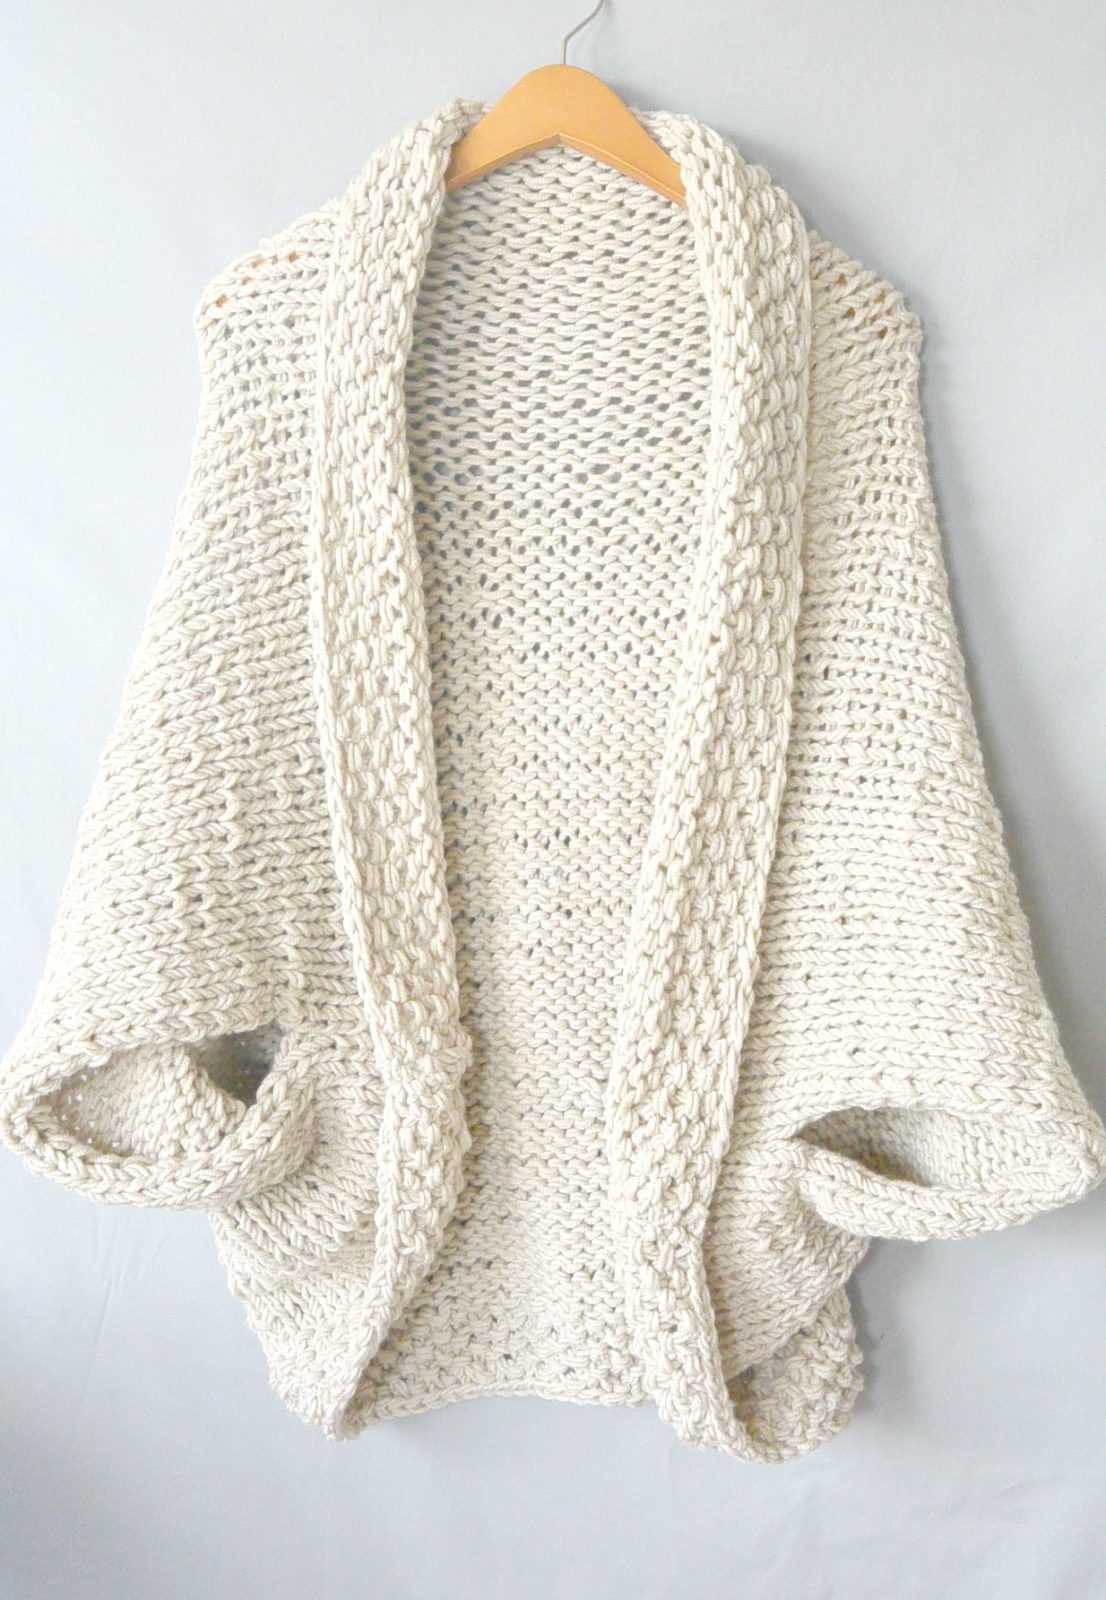
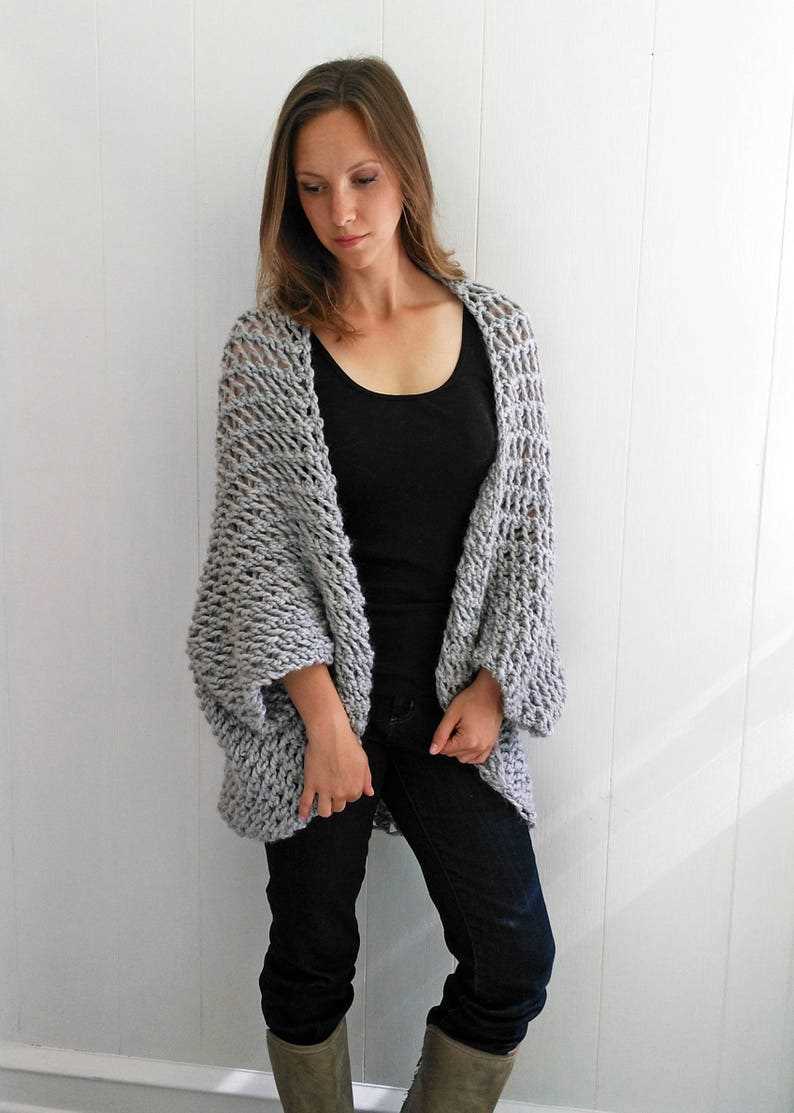
If you’re looking for a quick and easy knitting project that will keep you cozy all winter long, then look no further than the easy blanket sweater knitting pattern. This versatile project is perfect for beginners and experienced knitters alike, and is sure to become a wardrobe staple.
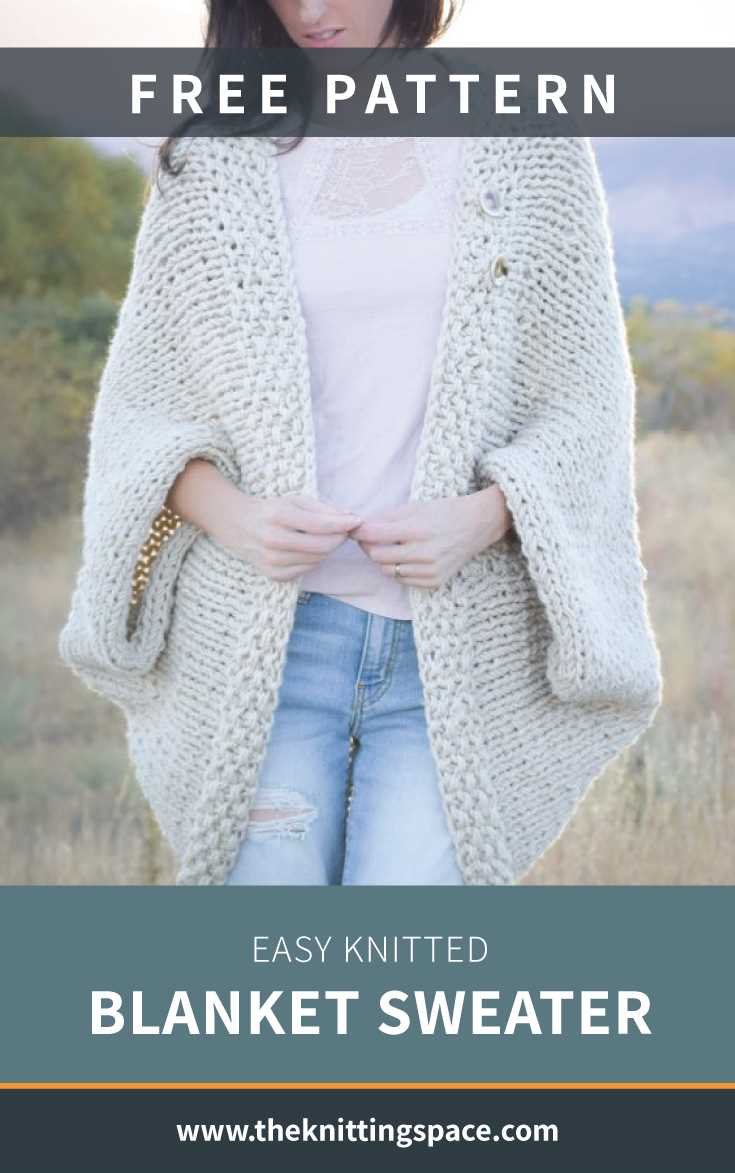
Knitted with bulky yarn and large needles, this blanket sweater is a quick knit that will keep you warm and stylish. The pattern includes sizes from small to extra large, so you can create a custom fit. The oversized design is not only comfortable, but also on-trend, making it a perfect addition to any outfit.
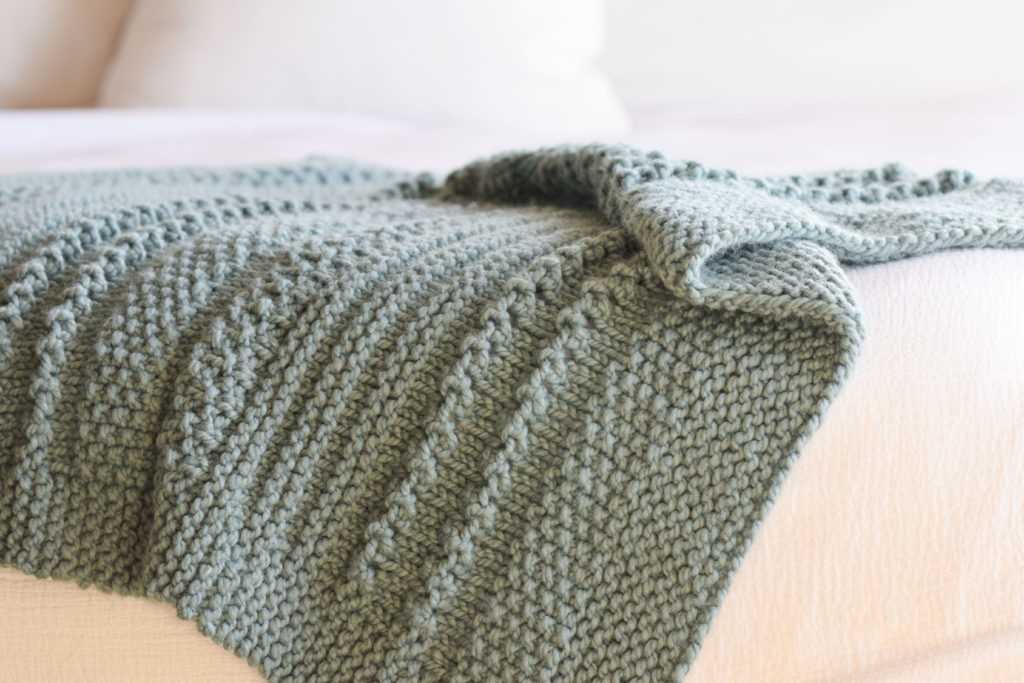
With its simple construction and minimal shaping, this pattern is perfect for novice knitters who want to take their skills to the next level. The sweater is knit in one piece, starting with the back and ending with the front, so you won’t need to worry about sewing or seams. Plus, the garter stitch pattern is easy to master and creates a beautiful, textured fabric.
So grab your knitting needles and get ready to create your new favorite sweater. With the easy blanket sweater knitting pattern, you’ll have a cozy and stylish addition to your winter wardrobe in no time.
How to Knit an Easy Blanket Sweater
If you enjoy knitting and want to create a cozy and stylish sweater, then an easy blanket sweater is the perfect project for you. This knitting pattern allows you to create a versatile and comfortable sweater that can be worn in any season and is suitable for all skill levels.
To get started, gather your materials. You will need a set of knitting needles, yarn in your desired color, and a tape measure. It’s important to choose a soft and warm yarn that will provide you with the comfort and coziness you desire.
Step 1: Take Measurements
The first step in knitting an easy blanket sweater is to take your measurements. Use a tape measure to measure your bust, waist, and hips. Write down these measurements as they will determine the size of your sweater.
Step 2: Cast On
Once you have your measurements, it’s time to cast on. Take your knitting needles and cast on the required number of stitches for the size of sweater you are making. Make sure to refer to the knitting pattern for the exact number of stitches to cast on.
Step 3: Knit the Body
After casting on, you will then begin knitting the body of the sweater. Follow the pattern instructions for this part. You may need to work in a particular stitch pattern or increase or decrease stitches to achieve the desired shape and fit.
Step 4: Knit the Sleeves
Once the body of the sweater is complete, it’s time to knit the sleeves. Follow the pattern instructions for the sleeves, making sure to knit to the desired length. You may need to increase or decrease stitches at the beginning or end of rows to shape the sleeves.
Step 5: Finishing Touches

After completing the body and sleeves, it’s time to add any desired finishing touches to your sweater. This may include adding ribbing to the neckline, cuffs, and hem, or adding buttons or other embellishments. Follow the pattern instructions for these finishing touches.
Once you have finished knitting your easy blanket sweater, make sure to give it a good blocking to even out the stitches and make it look its best. Then, try it on and enjoy your cozy and stylish new sweater!
Choosing the Right Yarn and Tools
Choosing the right yarn and tools is essential when knitting an easy blanket sweater. It can make all the difference in the final look and feel of the garment. Here are some tips to help you make the best choices.
Yarn
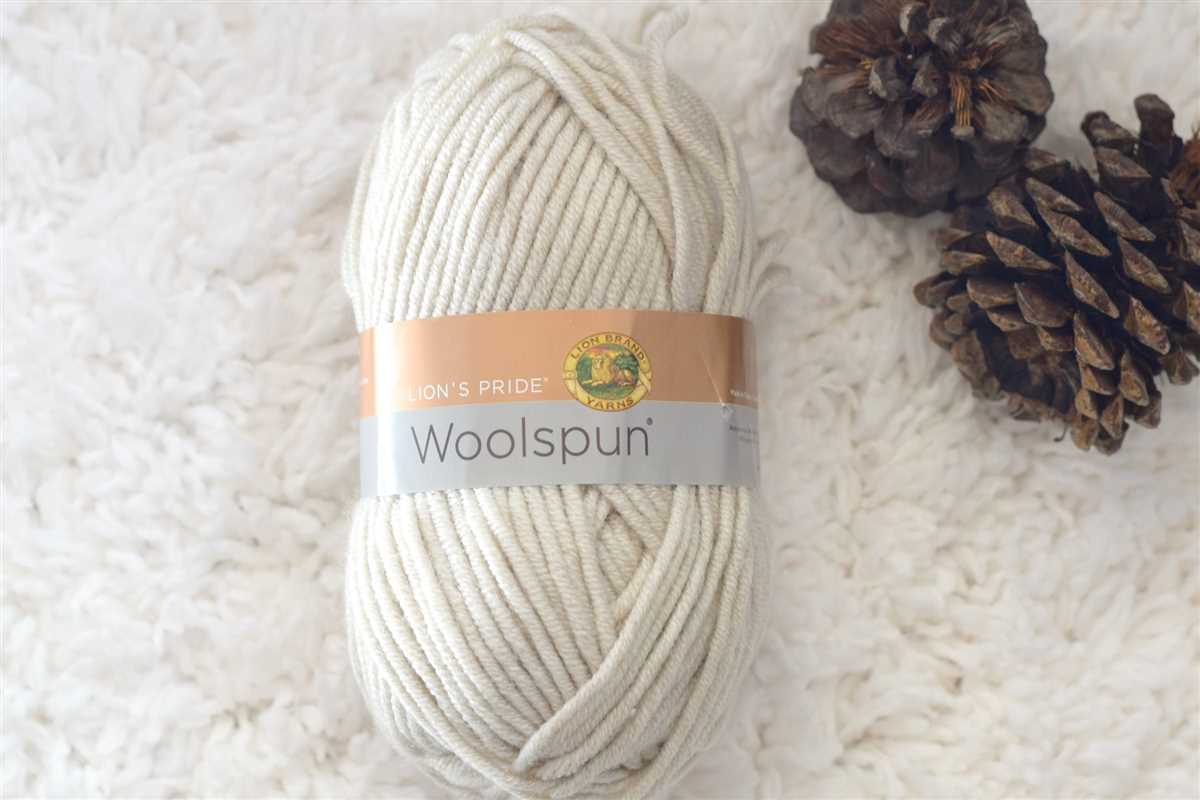
Type: When selecting yarn for your blanket sweater, consider the desired weight and texture. Chunky or bulky weight yarns are often preferred for a cozy and warm sweater, while lighter weight yarns can result in a more breathable garment. Also, think about the fiber content of the yarn. Wool, alpaca, and acrylic blends are popular choices for their softness and durability.
Color: The color of the yarn can have a significant impact on the overall look of the sweater. Choose a color that complements your style and skin tone. Neutral colors like gray, beige, or black can be versatile and timeless, while bold or vibrant colors can add a pop of personality to your outfit.
Tools
Knitting Needles: The type and size of knitting needles you use depend on the yarn and the desired gauge of your sweater. Circular needles are commonly used for knitting sweater projects as they allow for more flexibility and ease of use. Make sure to check the recommended needle size on your yarn label and adjust accordingly.
Tape Measure: A tape measure is an essential tool for checking your gauge and measuring your progress as you knit. It ensures that your sweater will fit properly and helps you keep track of the dimensions as you work through the pattern.
Stitch Markers: Stitch markers are used to mark specific stitches or sections of your knitting. They can be particularly helpful when working on large projects like a blanket sweater. They help you keep track of stitch patterns and ensure that you’re following the pattern correctly.
Darning Needle: A darning needle is used for weaving in loose ends and finishing touches. It allows you to seamlessly hide any yarn tails or secure seams, giving your sweater a polished and professional look.
By taking the time to choose the right yarn and tools for your easy blanket sweater project, you’ll be setting yourself up for success. With the right materials in hand, you’ll be able to create a beautiful and cozy sweater that you’ll love to wear.
Understanding the Pattern
When it comes to knitting an easy blanket sweater, it is important to understand the pattern before getting started. The pattern will provide you with the necessary instructions and measurements to create the sweater. Make sure to read the entire pattern thoroughly so that you have a clear understanding of each step before beginning your project.
The first thing to look for in the pattern is the materials needed. This will include the type of yarn and the size of knitting needles required. It is important to use the recommended materials to ensure that your sweater turns out the way it is intended. The pattern may also include suggestions for alternative materials if you prefer to use something different.
Next, take a look at the gauge provided in the pattern. Gauge refers to the number of stitches and rows per inch that you should aim for in order to achieve the correct size of the sweater. To determine your gauge, knit a swatch using the recommended needles and yarn, and measure the number of stitches and rows in a 4-inch square. Adjust your needle size if needed to match the gauge specified in the pattern.
Once you have gathered your materials and determined the correct gauge, it’s time to dive into the pattern itself. The pattern will typically provide a list of abbreviations used throughout the instructions, so make sure to familiarize yourself with these before starting. It may also include a diagram or schematic to help visualize the construction of the sweater.
As you read through the pattern, pay attention to any special stitches or techniques that may be involved. It is helpful to have a basic understanding of knitting techniques, such as casting on, knitting, purling, increasing, and decreasing. If there are any unfamiliar stitches or techniques mentioned in the pattern, consider looking them up or practicing them before attempting the sweater.
The pattern will then guide you step by step through the process of knitting the sweater. It will provide instructions for the different sections, such as the body, sleeves, and collar. Follow the instructions carefully, and don’t be afraid to ask for help if you are unsure about any part of the pattern.
Remember, knitting is a process, and it may take some time and practice to get the hang of it. Be patient with yourself and enjoy the process of creating your own cozy and comfortable blanket sweater.
Casting On and Starting the Sweater
Before you can begin knitting your easy blanket sweater, you will need to cast on the required number of stitches. The cast on method you choose will depend on your personal preference and the desired result. You can use a long-tail cast on, a knit cast on, or any other method you are comfortable with. Be sure to leave a long tail of yarn, as you will use it later to join the sweater and create a neat edge.
Once you have cast on the necessary stitches, you are ready to start knitting the body of the sweater. Begin by working the first row in the stitch pattern specified in the pattern instructions. This may involve a combination of knits, purls, and other stitches, depending on the design. Pay close attention to the pattern and follow the instructions carefully to ensure that you achieve the desired texture and look.
Continue working the rows according to the pattern until you reach the desired length for your sweater. To check the length, you can use a measuring tape or try on the sweater as you go. It’s important to note that the length may vary depending on the size of the sweater and the fit you prefer. Make sure to adjust the length accordingly to ensure a comfortable fit.
As you knit each row, take care to keep your tension even and consistent. This will ensure that your stitches are uniform and that the sweater has a professional finish. If you’re new to knitting, it may take some practice to achieve the desired tension, but with time and experience, it will become easier.
- Choose your cast on method and leave a long tail of yarn for joining
- Follow the stitch pattern specified in the pattern instructions
- Continue working the rows until you reach the desired length
- Check the length using a measuring tape or by trying on the sweater
- Maintain even tension as you knit each row for a professional finish
By following these steps and taking care with your knitting, you will be well on your way to creating a cozy and stylish blanket sweater. Happy knitting!
Knitting the Body
Once you have completed the ribbing for the collar and casted on the required number of stitches, you can begin knitting the body of the blanket sweater. Using a basic knit stitch, you will continue working in the round to create a seamless and cozy piece.
Body Stitch Pattern
The body stitch pattern is simple and repetitive, making it perfect for beginners. You will knit all stitches for every round until you reach the desired length for your sweater. This creates a smooth and uniform fabric that is both warm and comfortable to wear.
As you progress with knitting the body, it is important to periodically check your gauge to ensure that you are maintaining the correct tension. This will help ensure that your sweater fits properly and matches the measurements indicated in the pattern. Adjust your needle size if necessary to achieve the correct gauge.
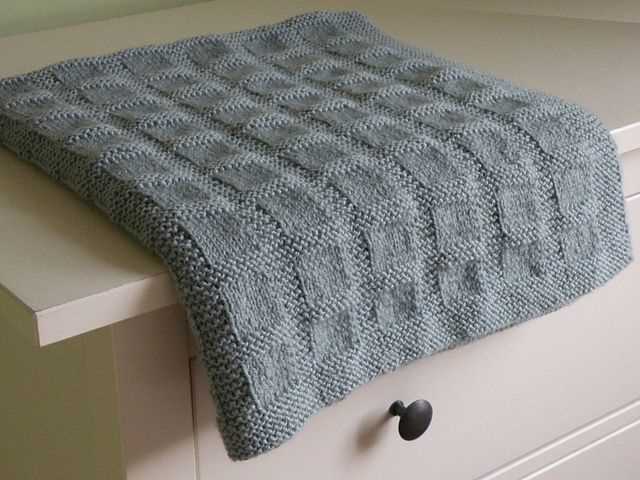
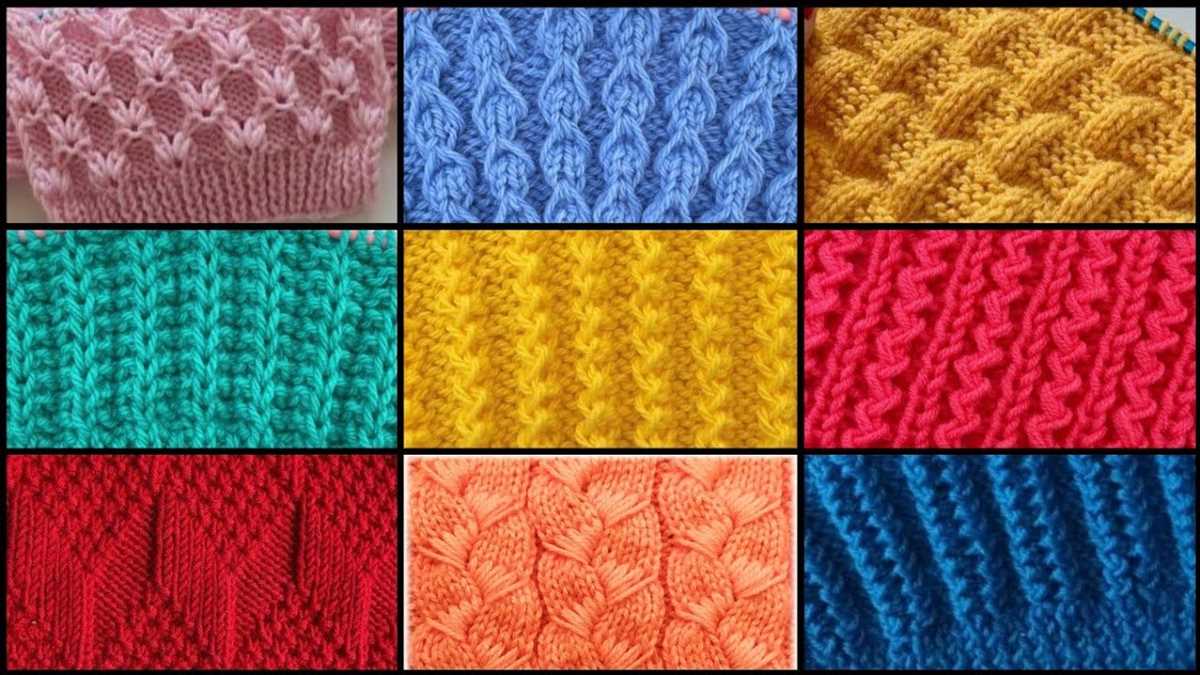
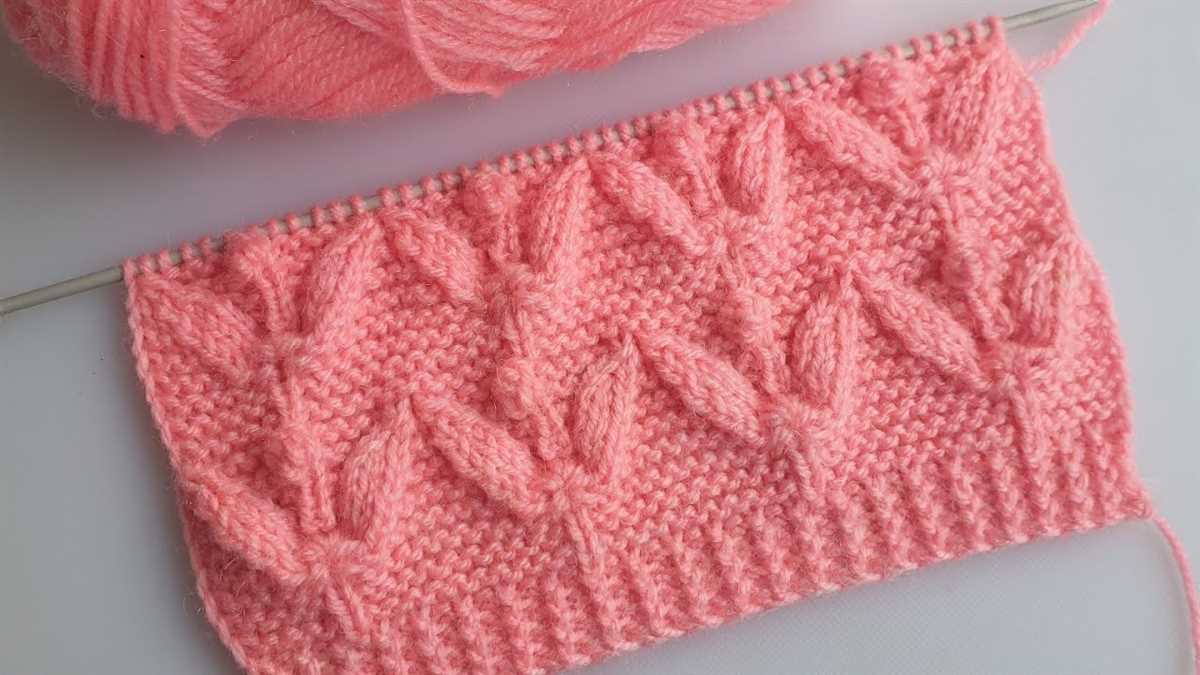
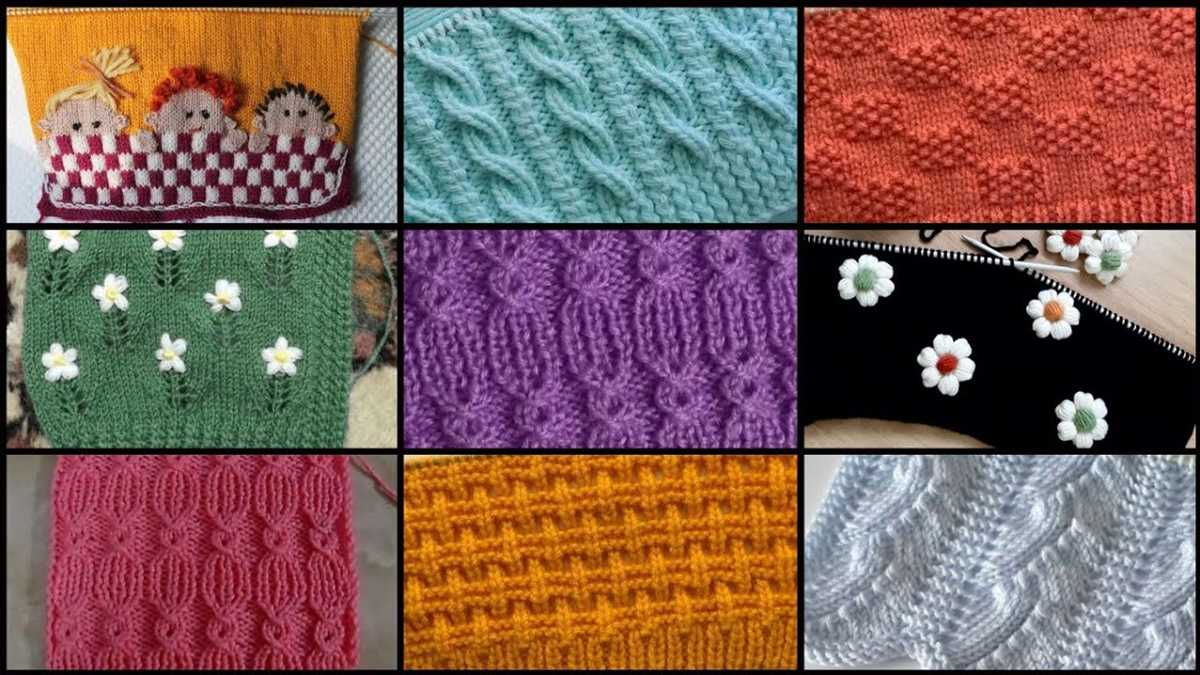
To add a touch of visual interest to your sweater, you can incorporate different stitch patterns or textured designs into the body. For example, you could alternate between sections of stockinette stitch and garter stitch, or even experiment with lace patterns or cables. These details can elevate the overall look of your blanket sweater and make it truly unique.
Continue knitting the body of your sweater until you have reached the specified length or until you are satisfied with the fit. Once you have completed this section, you will be ready to move on to knitting the sleeves and finishing touches of your easy blanket sweater.
Creating the Sleeves
Once you have completed the body of the blanket sweater, it’s time to move on to creating the sleeves. The sleeves will add warmth and coziness to the sweater, making it perfect for those chilly days.
Casting on
To begin, you’ll need to cast on the required number of stitches for your sleeve. This will vary depending on the size of the sweater and the desired fit. Refer to the pattern instructions for the exact number of stitches to cast on.
Knitting the sleeves

Once you have cast on the stitches, you can start knitting the sleeves in the desired stitch pattern. This could be a simple stockinette stitch or a more intricate pattern, depending on your preference. Follow the pattern instructions for the required stitch pattern.
While knitting the sleeves, make sure to check your gauge to ensure the sweater is the correct size. You may need to adjust your needle size or tension to achieve the desired gauge. It’s important to knit a gauge swatch before starting the sleeves to ensure an accurate fit.
Shaping the sleeves
To shape the sleeves, you’ll need to follow the pattern instructions for any increases or decreases. This will create the tapered shape of the sleeve, allowing it to fit snugly around the arm. Take your time and carefully follow the pattern to ensure the sleeves turn out just right.
Once you have completed the shaping, continue knitting the sleeves until you reach the desired length. This will vary depending on personal preference and the style of the sweater. It’s a good idea to try on the sweater as you go to ensure the sleeves are the perfect length for you.
Once both sleeves are complete, you can finish off any remaining stitches and weave in any loose ends. Now your blanket sweater is complete and ready to be enjoyed!
Shaping the Neckline
When knitting a sweater, one of the key elements to pay attention to is the neckline. The neckline can greatly affect the overall look and fit of the sweater, so it’s important to shape it properly. There are different ways to shape the neckline, depending on the style you want to achieve.
One common method is to use decreases to shape the neckline. This is often done by working decreases on either side of a center stitch or stitches. The number and frequency of the decreases will vary depending on the desired shape and size of the neckline. This method creates a V-neck or a boat neck, depending on how many stitches are decreased.
Another method is to add short rows to shape the neckline. Short rows are rows that are partially worked, either by knitting or purling only a certain number of stitches and then turning the work. By adding short rows to the neckline, you can create a scoop neck or a more rounded shape. This method is often used for sweaters with a more relaxed or casual look.
It’s important to follow the pattern instructions carefully when shaping the neckline, as the exact number of decreases or short rows will be specified. Additionally, it’s a good idea to try on the sweater as you work, or at least measure it against a similar fitting garment, to ensure that the neckline is shaping correctly and fits comfortably. With a well-shaped neckline, your easy blanket sweater will not only be cozy and warm, but also stylish and flattering.
Adding Finishing Touches
Once you have finished knitting your easy blanket sweater, it’s time to add the finishing touches to make it truly complete. Whether you are knitting this sweater for yourself or as a gift, these final steps will ensure a polished and professional look.
Blocking: Before adding any embellishments or finishing details, it is important to block your sweater. This process involves gently wetting your knitted piece and then reshaping it to the correct dimensions. Blocking helps to even out any inconsistencies in tension and allows the stitches to relax and settle into place. It will give your sweater a neater appearance and make it easier to work with when adding the finishing touches.
Embellishments:
There are many ways to add embellishments to your blanket sweater, depending on your personal style and preferences. One option is to add buttons to the front, either as a decorative detail or as a functional closure. You can choose buttons in a contrasting color or a complementary shade to enhance the overall look of the sweater.
Another option for adding embellishments is to embroider or appliqué designs onto the sweater. This can be done using yarn, thread, or fabric scraps to create unique patterns or images. You can also experiment with different embroidery stitches to add texture and dimension to the sweater.
Final Details:
After adding any desired embellishments, take the time to check for any loose ends or stray yarn. Weave in any loose ends using a tapestry needle to ensure they are secure and won’t unravel over time. You can also lightly steam or press the sweater to give it a smooth and polished appearance.
Finally, don’t forget to try on your finished sweater and make any necessary adjustments. Check for the proper fit and comfort, and make sure all the finishing touches are to your liking before enjoying your cozy and stylish blanket sweater.
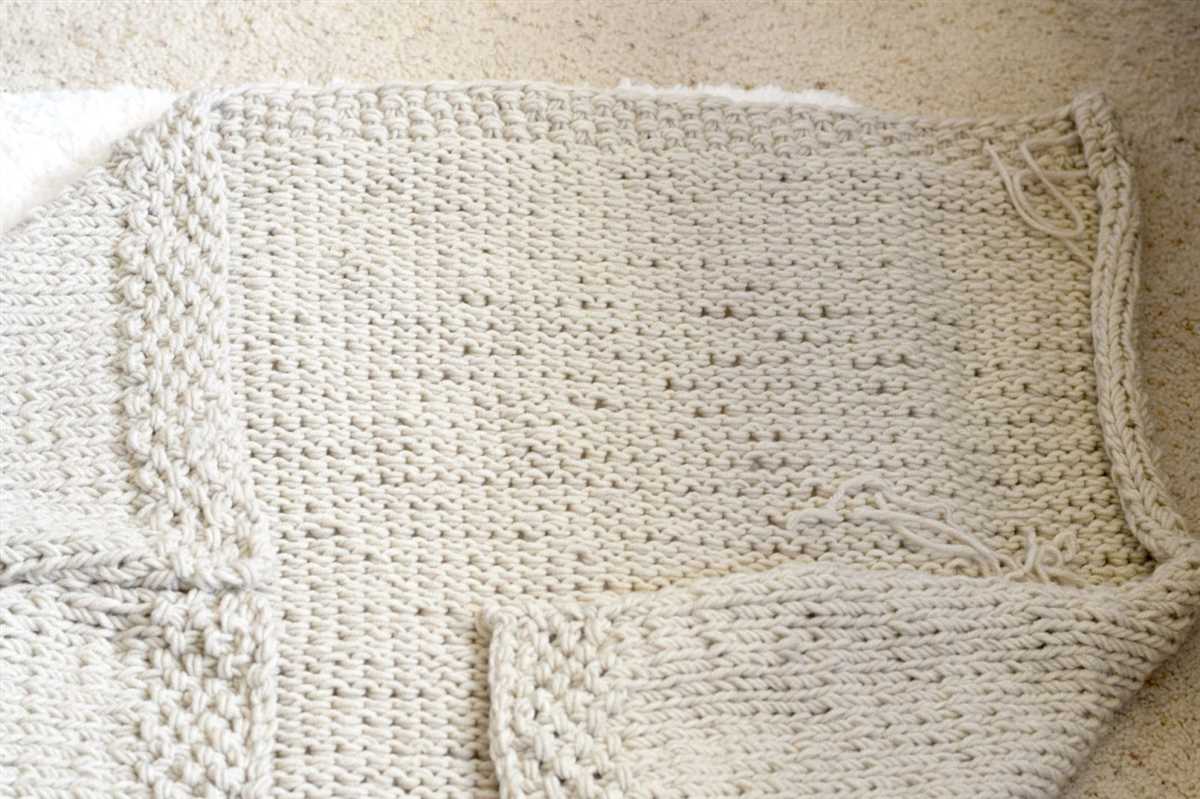
Blocking and Seaming the Sweater
Once you have finished knitting the easy blanket sweater pattern, the next step is to block the pieces. Blocking is an important process that helps to shape the fabric and give it a more professional finish. To block the sweater, you will need to wet the pieces and then gently stretch and shape them to the desired dimensions.
First, fill a sink or large basin with cool water and a mild detergent. Place the knitted pieces in the water and gently push them down so that they are fully submerged. Let the pieces soak for about 10-15 minutes, or until they are fully saturated. Then, carefully lift the pieces out of the water and gently squeeze out any excess water.
Next, lay the pieces flat on a clean towel or blocking mat, making sure to smooth out any wrinkles or lumps. Use pins or blocking wires to secure the edges and shape the pieces to the desired size. If you need to stretch the fabric, gently pull on it until it reaches the desired dimensions. Let the pieces dry completely before moving on to the seaming step.
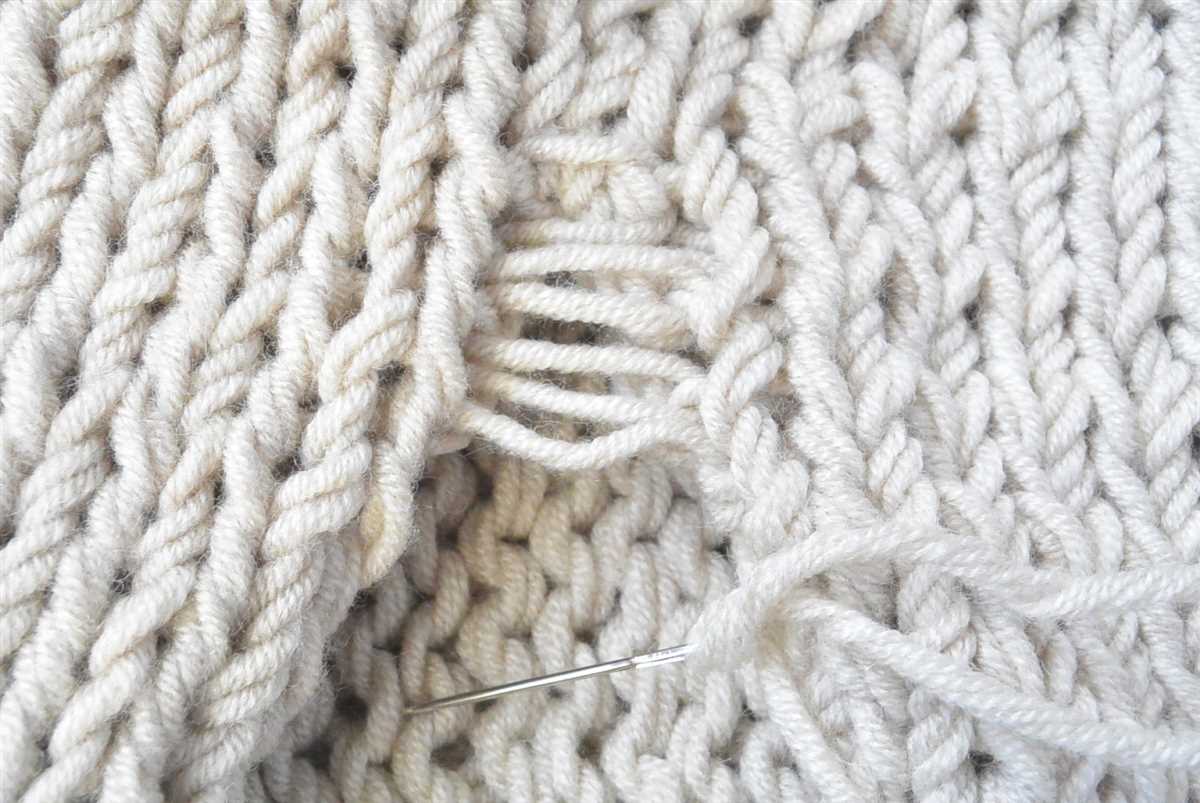
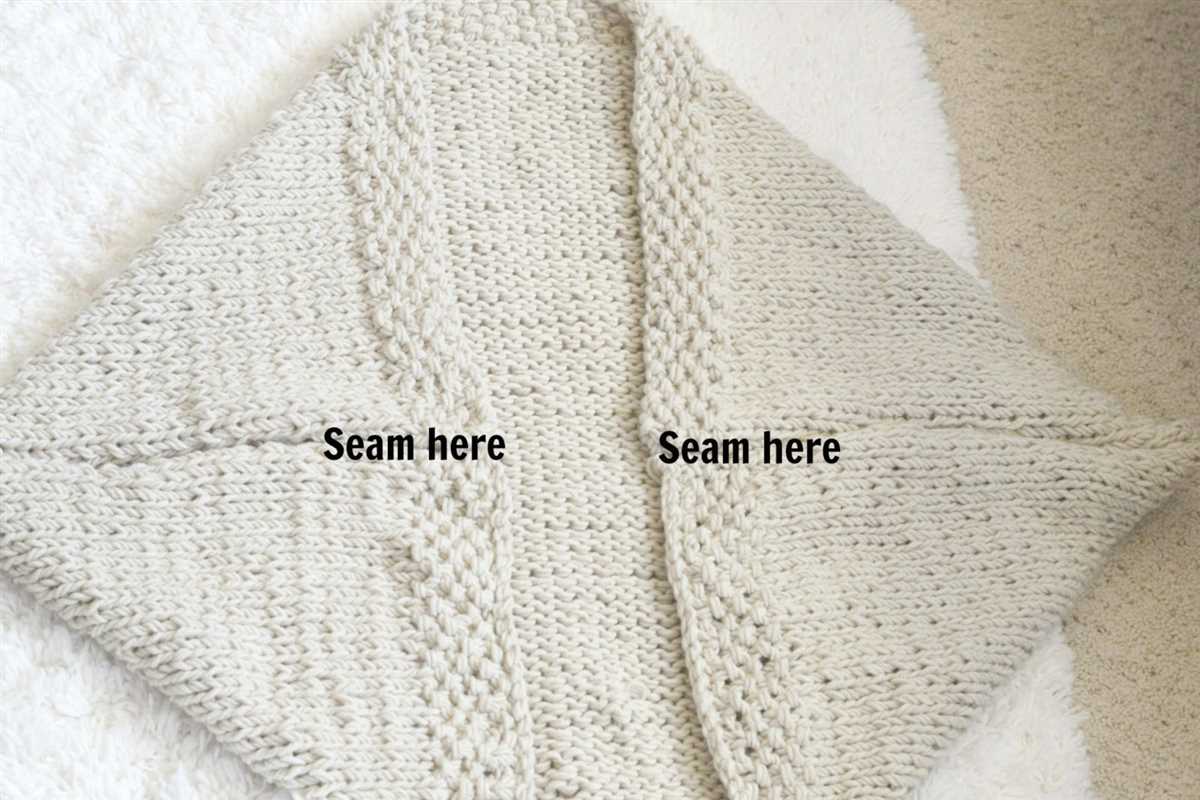
Seaming the sweater involves stitching the different pieces together to assemble the final garment. Start by aligning the front and back pieces with right sides facing each other and use a tapestry needle and yarn to sew the shoulder seams. Repeat this process to sew the side seams, leaving openings for the sleeves.
To attach the sleeves, align them with the openings left in the side seams and use a whipstitch or mattress stitch to sew them in place. Make sure to match the stitch pattern and tension to create a seamless look. Finally, sew the sleeve seams and any other finishing touches, such as the collar or hem, as specified in the pattern instructions.
- Fill a sink or basin with cool water and mild detergent
- Soak the knitted pieces for 10-15 minutes
- Gently squeeze out excess water and lay the pieces flat
- Use pins or blocking wires to secure the edges and shape the pieces
- Let the pieces dry completely
- Align and sew the shoulder seams
- Sew the side seams, leaving openings for the sleeves
- Attach the sleeves using a whipstitch or mattress stitch
- Sew the sleeve seams and any other finishing touches
Customizing the Pattern
One of the great things about knitting is that you can easily customize patterns to make them your own. The same goes for the easy blanket sweater pattern. Here are a few ways you can make this pattern unique:
Choose Your Yarn
Start by selecting the yarn you want to use for your sweater. You can choose a soft, bulky yarn for a cozy feel, or opt for a lighter, thinner yarn for a more delicate look. The choice of yarn will not only impact the weight and drape of the sweater but also the overall appearance.
Add Some Texture
If you want to add some extra interest to your blanket sweater, consider incorporating different stitch patterns or textures. You can experiment with cables, lace, or even colorwork. Adding texture can make your sweater stand out and showcase your knitting skills.
Adjust the Size
The easy blanket sweater pattern is designed to be one-size-fits-most, but you can easily adjust the size to fit your preferences. If you want a more oversized look, you can simply knit the pattern with larger needles to create a larger gauge. Conversely, if you prefer a more fitted sweater, you can use smaller needles for a tighter gauge.
Embellishments
Another way to customize your blanket sweater is to add embellishments. You can sew on buttons, attach pom poms, or even add a belt for a cinched waist. These small details can completely transform the look of your sweater and make it truly unique.
Remember, this easy blanket sweater pattern is just a starting point. Don’t be afraid to get creative and make it your own. Happy knitting!
Troubleshooting Common Issues
Knitting a blanket sweater may seem easy, but even experienced knitters can run into some common issues along the way. Here are a few troubleshooting tips to help you overcome any problems you may encounter:
1. Gauge Problems
One of the most common issues with any knitting project is getting the correct gauge. If your sweater turns out too big or too small, the problem is likely with your gauge. Make sure to swatch before starting your project and adjust your needle size accordingly. Remember that different yarns and stitch patterns can affect your gauge, so it’s important to check and adjust as needed.
2. Uneven Tension
An uneven tension can create an unattractive finished sweater. To avoid this issue, try to maintain a consistent tension throughout your knitting. Practice knitting at a comfortable speed and pay attention to your tension. If you find that your tension is still uneven, you can try using a different knitting style or adjusting the way you hold your yarn to achieve a more uniform tension.
3. Dropped Stitches
Dropped stitches can be frustrating, especially in a large project like a blanket sweater. To fix a dropped stitch, use a crochet hook or a tapestry needle to carefully pick up the stitch and return it to the needle. If the stitch has unraveled several rows, you may need to undo some knitting and then pick up the stitches in the correct order. Remember to secure the stitch properly to avoid further unraveling.
4. Twisted Stitches
If you notice that your stitches are twisted, it can affect the overall look and fit of your sweater. Twisted stitches are usually caused by twisting the needle when knitting. To avoid this, make sure that your needle is inserted correctly into the stitch before knitting. If you do come across twisted stitches, you may need to unravel some rows and re-knit them to correct the issue.
By keeping these troubleshooting tips in mind, you’ll be able to overcome common issues that may arise when knitting a blanket sweater. Remember to stay patient and practice, and soon you’ll be enjoying the cozy comfort of your handmade creation.
Recommending Additional Knitting Resources
Looking to expand your knitting skills and find more patterns to try? Here are some highly recommended resources that can help you further enhance your knitting journey:
1. Knitting Magazines and Books
There are numerous magazines and books dedicated to knitting that offer a wide range of patterns, tutorials, and tips. Some popular knitting magazines include “Vogue Knitting,” “Interweave Knits,” and “Knitscene.” These publications feature beautiful designs from renowned knitters and provide in-depth instructions to help you recreate them.
2. Online Knitting Communities and Forums
Joining online knitting communities and forums is an excellent way to connect with other knitting enthusiasts and seek advice. Websites like Ravelry, LoveKnitting, and KnittingHelp have active communities where you can ask questions, share your projects, and find inspiration for your next knitting project. These platforms also offer pattern databases, allowing you to discover a wide range of designs.
3. YouTube Tutorials
When it comes to learning new knitting techniques or understanding complicated patterns, YouTube can be a valuable resource. Many experienced knitters share instructional videos on their YouTube channels, breaking down complex techniques into easy-to-follow steps. From basic knitting stitches to advanced techniques like lacework or colorwork, you can find a tutorial for almost anything on YouTube.
4. Knitting Workshops and Retreats
If you prefer hands-on learning and enjoy immersing yourself in the knitting community, attending knitting workshops or retreats can be a great option. These events often feature expert instructors who teach various knitting techniques and provide personalized guidance. Additionally, you’ll have the opportunity to connect with fellow knitters, share ideas, and immerse yourself in a creative and supportive environment.
5. Local Yarn Stores
Don’t underestimate the resources available at your local yarn store. Many stores offer classes for all skill levels and can provide personal assistance when you’re stuck on a pattern. They often carry a wide selection of knitting books, magazines, and patterns, allowing you to browse through different options and find inspiration for your next project.
Remember, the knitting world is vast, and there are always new techniques and patterns to discover. By exploring these additional knitting resources, you can continue to grow as a knitter and embark on exciting new projects.
Wrapping Up

In this article, we have explored an easy blanket sweater knitting pattern that is perfect for beginners. We have provided step-by-step instructions and helpful tips to guide you through the process. This pattern allows you to create a cozy and stylish sweater that can be worn during the colder months.
By following this pattern, you can create a beautiful sweater that is not only functional but also fashionable. The blanket sweater is an excellent choice for those looking to experiment with knitting techniques and create a unique piece of clothing.
Remember to choose the right yarn and needle size for your project. Take your time and practice the stitches before starting your sweater. Don’t be afraid to make mistakes – knitting is a learning process, and each project is an opportunity to improve.
Here are some key points to remember:
- Choose a soft and warm yarn for your sweater.
- Use the recommended needle size to achieve the correct tension.
- Follow the instructions carefully, paying attention to stitch counts and measurements.
- Take your time and enjoy the process of knitting.
- Don’t be afraid to ask for help or consult knitting resources for guidance.
Once you have completed your blanket sweater, you can proudly wear your handmade creation or give it as a thoughtful gift to someone special. Knitting is a beautiful and rewarding hobby that allows you to create unique and personalized items.
Happy knitting and enjoy the cozy warmth of your new blanket sweater!