
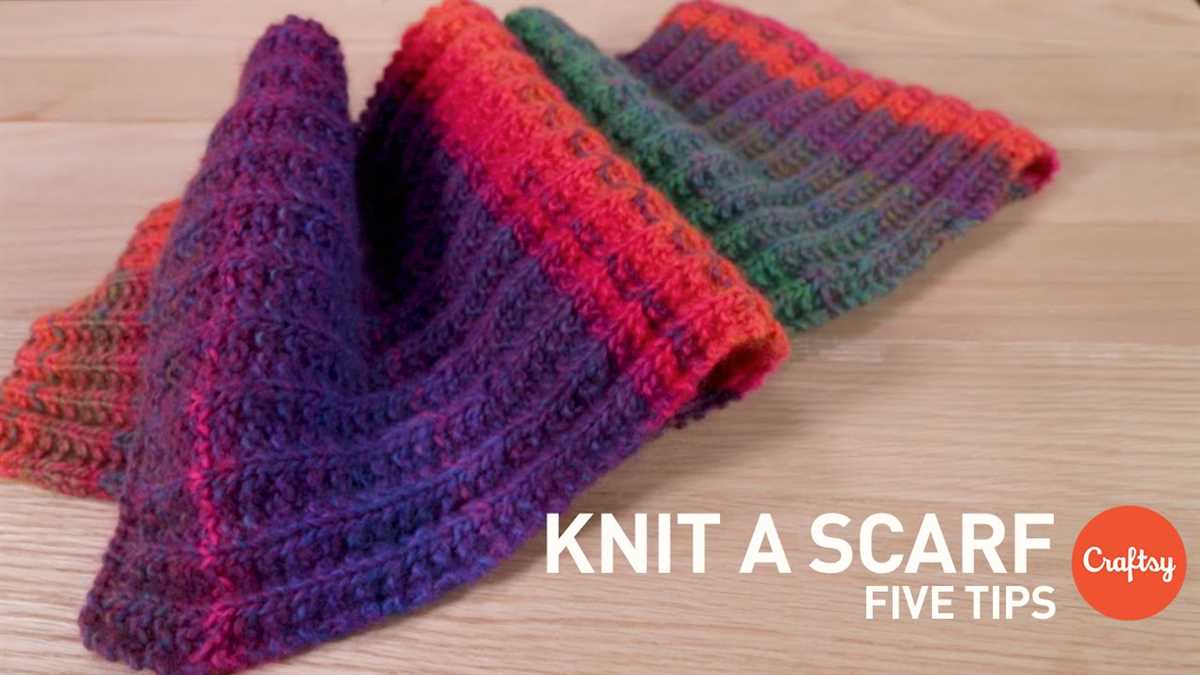
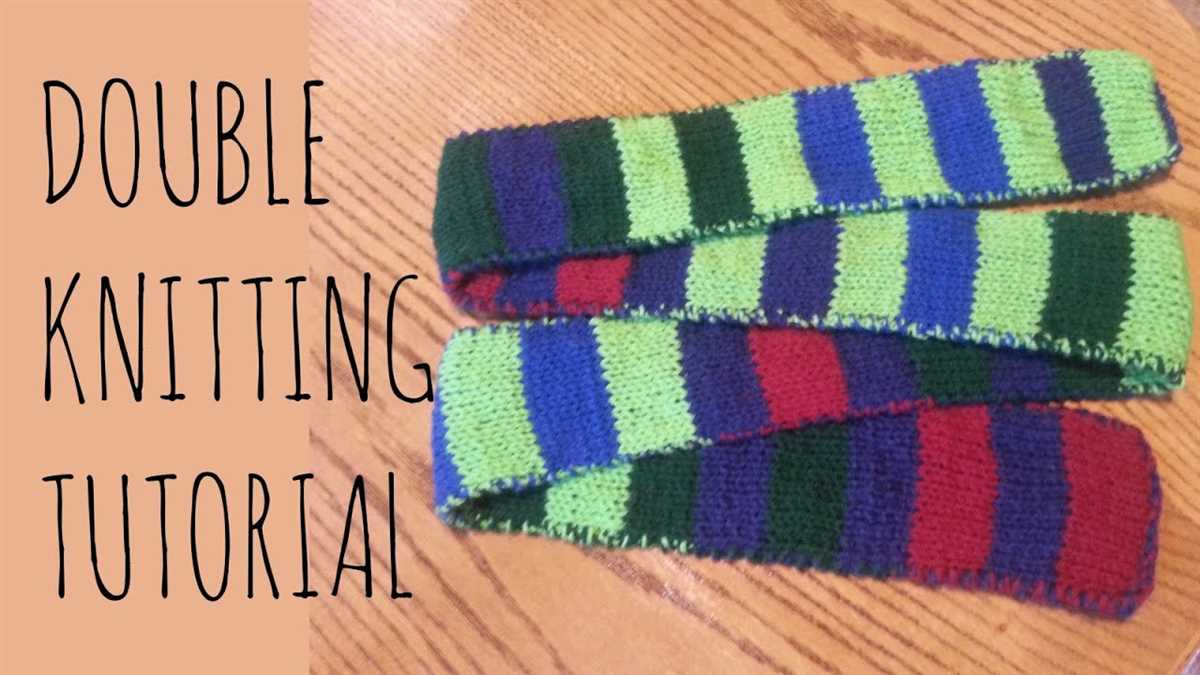
Double knitting is a unique technique in knitting that creates a reversible fabric, making it perfect for scarves. With double knitting, you can create two layers of knitting simultaneously, resulting in a warm and cozy scarf that looks just as beautiful on the wrong side as it does on the right side.
Are you looking for a new project to showcase your double knitting skills? Look no further! In this article, we will share a double knitting scarf pattern that is perfect for both beginners and experienced knitters.
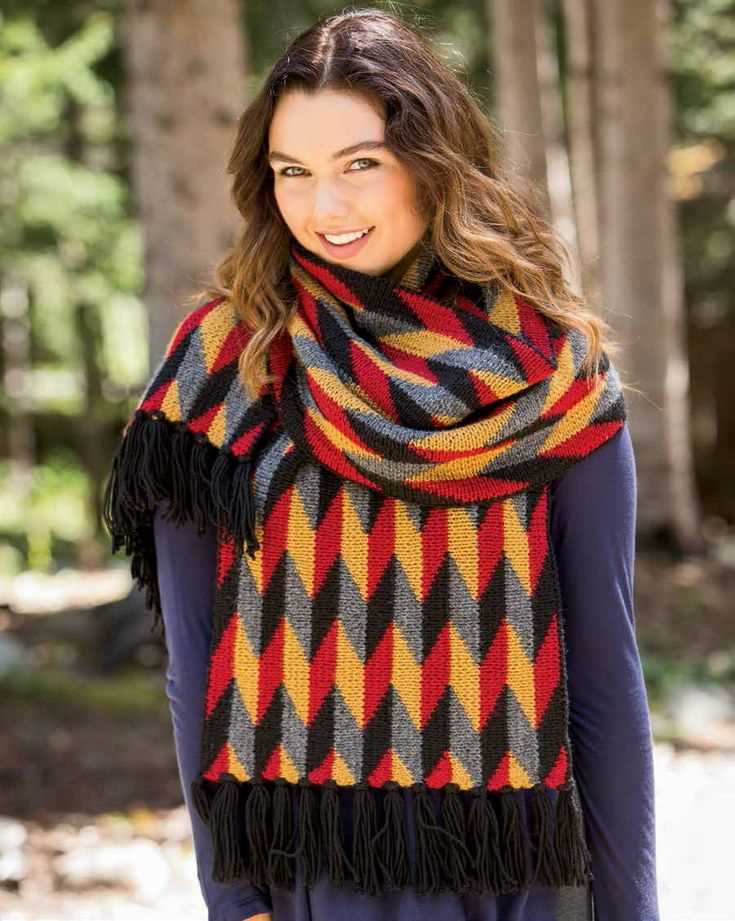
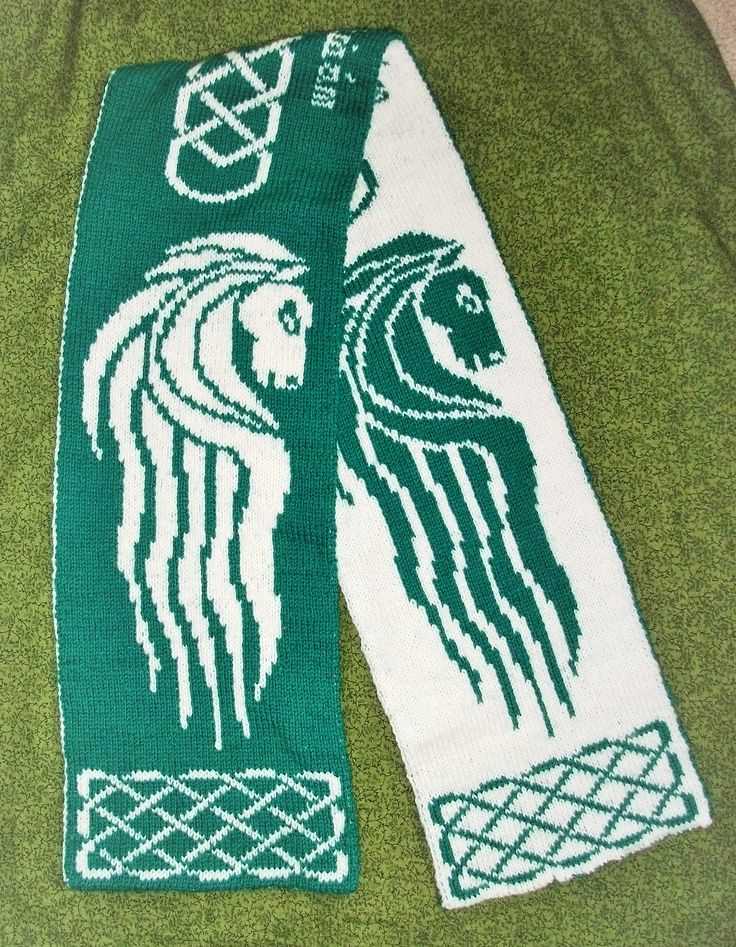
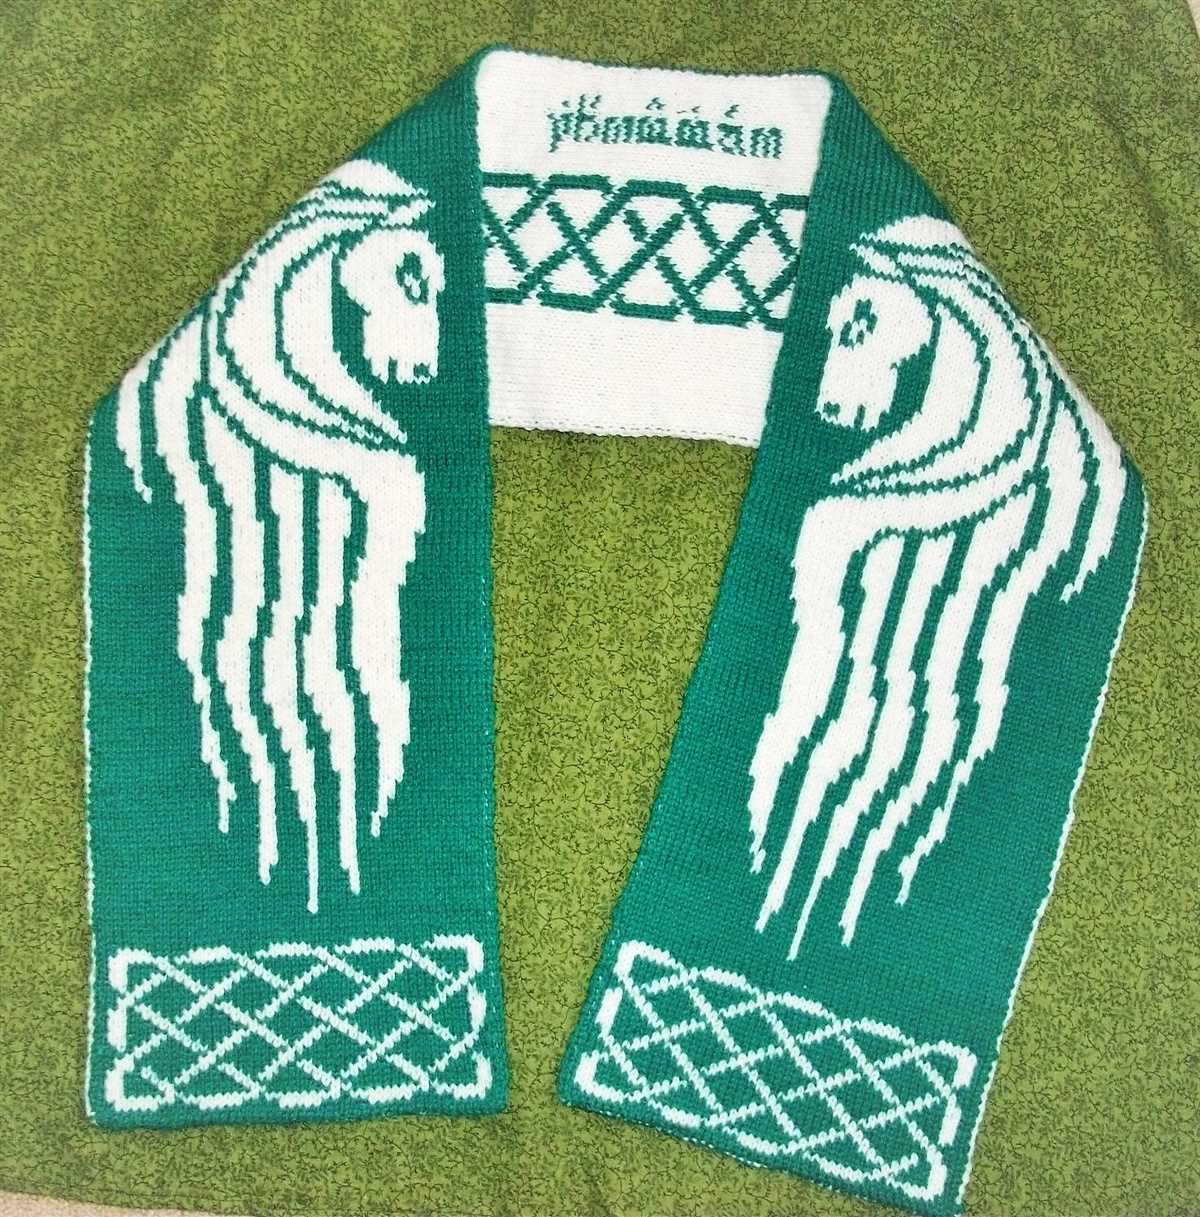
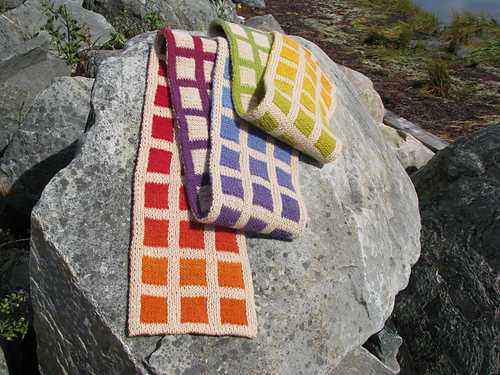
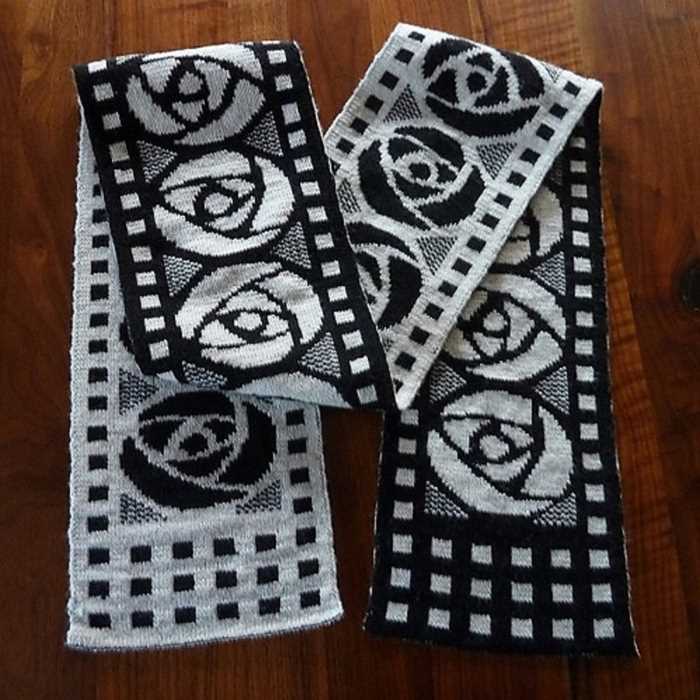
Our pattern combines simple stitches and colorwork to create a stunning design. The reversible nature of double knitting allows you to create intricate patterns and motifs that will be visible on both sides of the scarf. Whether you choose a geometric pattern, stripes, or even a picture, the possibilities are endless!
How to Knit a Double Knitting Scarf
Knitting a double knitting scarf is a great way to create a warm and cozy accessory for the colder months. Double knitting is a technique that creates a reversible fabric, with two layers that are joined together as you knit. This makes it perfect for scarves, as both sides will look identical and give the scarf a nice weight and thickness.
To start knitting a double knitting scarf, you will need two contrasting colors of yarn and a pair of knitting needles. The size of the needles will depend on the type of yarn you are using, so check the label for the recommended needle size. It’s also a good idea to have a stitch marker handy to help you keep track of your stitches.
Step 1: Cast on
Start by casting on an even number of stitches, making sure to alternate between the two yarn colors as you cast on. This will create the double knitting effect. If you are new to double knitting, it may be helpful to use a stitch marker to mark the right side of your work.
Step 2: Knit the first row
On the first row, knit the first stitch with the first color of yarn, and then bring the second color of yarn to the front of your work. Slip the next stitch purlwise and bring the first color of yarn to the front. Repeat this pattern across the row, alternating between knitting and slipping stitches. This will create the double knitting fabric.
Step 3: Continue knitting
Continue knitting in this pattern, alternating between knitting and slipping stitches, until your scarf reaches the desired length. Make sure to keep alternating between the two yarn colors to maintain the double knitting effect.
Step 4: Bind off
Once you have reached the desired length, bind off your stitches in the same double knitting pattern. This will give your scarf a nice finished edge. Cut the yarn, leaving a long tail for weaving in the ends.
Once you have finished knitting and weaving in the ends, you will have a beautiful double knitting scarf that is reversible and cozy. It’s a great accessory to keep you warm during the colder months, and the double knitting technique adds a unique touch to your knitting projects.
Choosing the Right Yarn and Needles
When it comes to knitting a double knitting scarf, choosing the right yarn and needles is crucial. The yarn you choose will affect the overall look and feel of your finished project, while the needles determine the size and tension of your stitches. Here are some factors to consider when selecting your yarn and needles:
Yarn Weight:
The weight of the yarn will determine the thickness and warmth of your scarf. For a cozy winter scarf, you may want to choose a bulky or super bulky weight yarn. If you prefer a lighter scarf for transitional seasons, a DK or worsted weight yarn would be a good choice. Consider the climate and intended use of your scarf when selecting the yarn weight.
Fiber Content:
The fiber content of the yarn will affect the drape, durability, and care instructions of your finished scarf. Common yarn fibers include wool, acrylic, cotton, and blends. Wool yarns provide warmth and elasticity, while acrylic yarns are easy to care for and often more affordable. Consider your personal preferences, any allergies or sensitivities, and the maintenance requirements of the yarn when choosing the fiber content.
Needle Size:
The needle size you choose will determine the gauge of your knitting and the overall size of your stitches. Smaller needles will create tighter, denser stitches, while larger needles will create looser, more open stitches. The pattern you are using for your double knitting scarf may recommend a specific needle size, so be sure to check the pattern instructions. You may need to adjust your needle size to achieve the desired tension and stitch definition.
Specialty Needles:
Depending on the pattern and desired outcome, you may want to consider using specialty needles such as circular needles or double-pointed needles. Circular needles are a great option for larger projects or those that require knitting in the round, while double-pointed needles are commonly used for small circumference knitting, such as making hat crowns or socks. These specialty needles can add versatility to your knitting and make the process more enjoyable.
By taking the time to carefully consider your yarn and needle choices, you can ensure that your double knitting scarf turns out beautifully and meets your expectations in terms of look, feel, and functionality.
Understanding Double Knitting Technique
Double knitting is a technique in knitting where two layers of fabric are created simultaneously on the same needles. This technique allows for intricate and reversible patterns to be created, as both sides of the fabric look identical. Double knitting is often used to create scarves, garments, and accessories with unique designs.
To understand double knitting, it is important to have a solid grasp of basic knitting skills. The technique involves working with two colors of yarn, one for each layer of fabric. Each stitch is worked twice, once with each color, creating a double layer of fabric that is connected by the stitches.
The basic structure of a double knitting pattern consists of pairs of stitches, where one stitch is worked in one color and its paired stitch is worked in the other color. This creates a reversible pattern that is visually striking and offers endless design possibilities.
In double knitting, the tension of the stitches is crucial to creating an even and sturdy fabric. It is important to keep the tension consistent throughout the project to ensure both layers are identical in size and appearance. Using yarns of similar thickness and a set of needles suitable for the yarn weight is recommended to achieve the desired tension.
The double knitting technique can be challenging for beginners, but with practice and patience, it can be mastered. There are many resources available, including tutorials and patterns, that can help knitters learn and improve their double knitting skills. With this versatile technique, knitters can create beautiful and unique designs that are sure to impress.
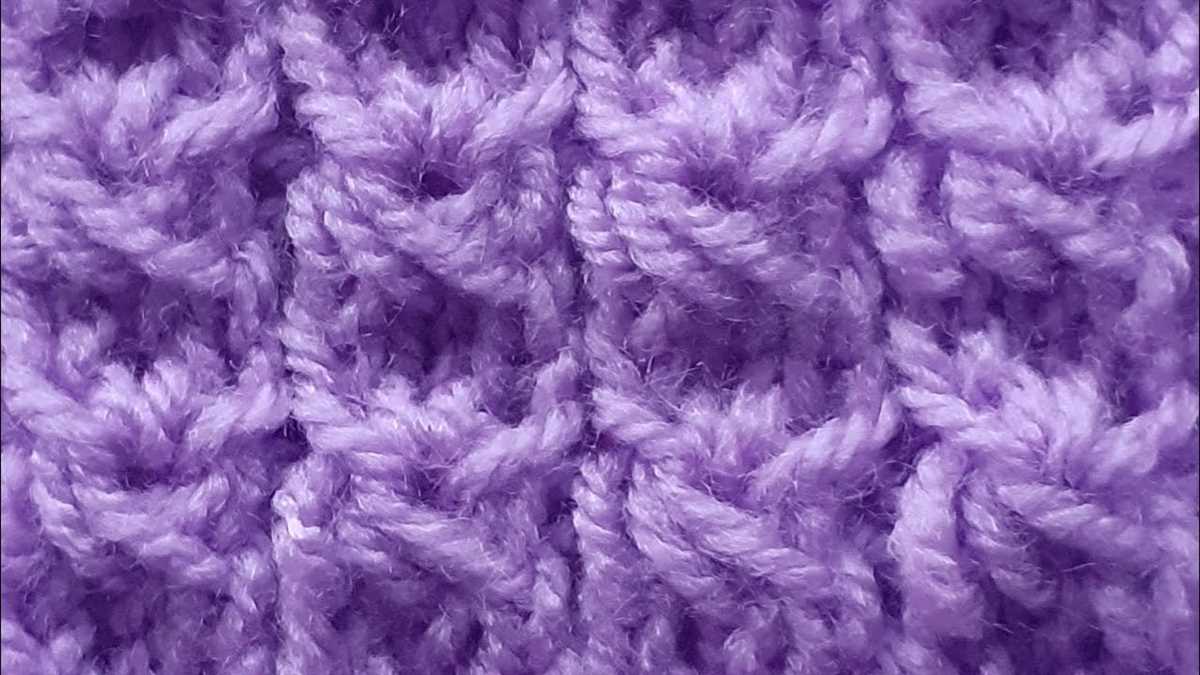
Basic Double Knitting Stitch
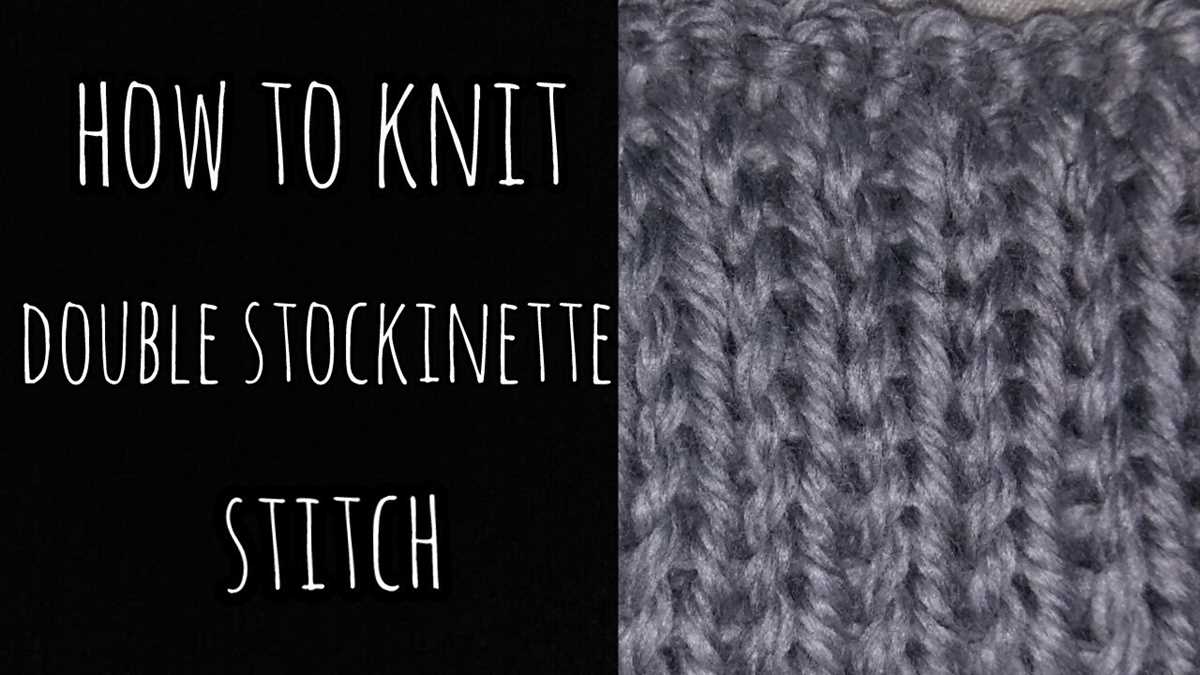
The double knitting stitch is a versatile knitting technique that creates a reversible fabric with two separate layers. It is often used to create scarves, blankets, and other items where both sides of the fabric are visible. In this stitch, you use two different colored yarns and knit both layers simultaneously, resulting in a piece that is thick, warm, and beautiful.
To start the double knitting stitch, you will need two balls of yarn in contrasting colors. Choose colors that complement each other and create an interesting contrast. You will also need a pair of knitting needles that are appropriate for the thickness of your yarn.
Begin by casting on an even number of stitches, as this stitch pattern requires an even number of stitches to work properly. Hold one strand of yarn in your left hand and the other in your right hand. Insert your right-hand needle into the first stitch on your left-hand needle, but instead of knitting it as you normally would, you will be knitting both strands of yarn together.
Here is a step-by-step guide to the basic double knitting stitch:
- Insert your right-hand needle into the first stitch on your left-hand needle, holding both strands of yarn.
- Wrap the yarn around the right-hand needle as if you were knitting, and pull it through the stitch.
- Slip the stitch off the left-hand needle.
- Repeat steps 1-3 for each stitch across the row.
- When you reach the end of the row, turn your work and repeat the process on the other side. This time, you will use the opposite color of yarn and knit into the opposite leg of each stitch.
- Continue knitting back and forth, working one row with one color and the next row with the other color, until your piece reaches the desired length.
- Remember to always knit the two strands of yarn together when knitting each stitch.
The double knitting stitch can be a bit challenging at first, but with practice, you will quickly get the hang of it. Experiment with different color combinations and patterns to create unique and eye-catching designs. Happy knitting!
Casting On for Double Knitting
When starting a double knitting project, it is important to cast on the appropriate number of stitches to ensure an even and balanced piece. Double knitting is a technique in which two layers of fabric are created simultaneously, resulting in a reversible fabric with contrasting colors on each side. To cast on for double knitting, follow these steps:
1. Determine the desired width of your scarf: Before casting on, decide how wide you want your scarf to be. This will depend on your personal preference and the pattern you are following. Once you have determined the width, you can move on to the next step.
2. Calculate the number of stitches: To calculate the number of stitches you need to cast on, you will need to consider the gauge of your knitting, which is the number of stitches and rows per inch. Once you have the gauge, multiply the desired width of your scarf by the gauge to get the total number of stitches needed for one side of the scarf.
For example, if your desired width is 8 inches and your gauge is 5 stitches per inch, you will need to cast on 40 stitches for each side of the scarf.
3. Start casting on: To cast on for double knitting, you can use any method that you are comfortable with. Some commonly used methods include the long tail cast on or the cable cast on. Make sure to cast on the calculated number of stitches for each side of the scarf.
4. Begin the double knitting: Once you have cast on the required number of stitches, you can begin the double knitting technique. This involves working with two strands of yarn, one for each side of the fabric, and knitting or purling the stitches in a specific pattern to create the reversible design. Follow the pattern instructions to continue knitting your double knit scarf.
Casting on for double knitting may take some practice, but once you get the hang of it, you will be able to create beautiful and unique reversible pieces. Enjoy the process and have fun exploring different color combinations and patterns!
Working the Main Body of the Scarf
The main body of the double knitting scarf pattern is where you will really start to see the design come to life. Using two contrasting colors of yarn, you will create a reversible fabric with a design that is visible on both sides.
To begin, you will cast on the required number of stitches for the width of your scarf. Make sure to use a long tail cast on method to ensure an even and stretchy edge. Once your stitches are on the needle, prepare to work with both colors of yarn simultaneously.
For the first row of the main body, you will knit with the first color while purling with the second color. This creates a double fabric where the knit stitches are one color and the purl stitches are the other. Make sure to keep your tension even as you switch between the two colors.
As you continue working the main body, you will follow the pattern chart or instructions to create the desired design. The pattern will specify which color to use for each stitch and may include color changes and different stitch combinations to achieve the desired effect.
Remember to always carry the unused color along the back of your work, twisting the yarns together every few stitches to prevent long floats on the wrong side. This will ensure that both sides of your scarf are neat and tidy.
Continue working in this manner until you reach the desired length for your scarf. Make sure to keep track of your rows and stitches to ensure consistency throughout the project. Once you have completed the main body, you will be ready to move on to the finishing steps of the double knitting scarf pattern.
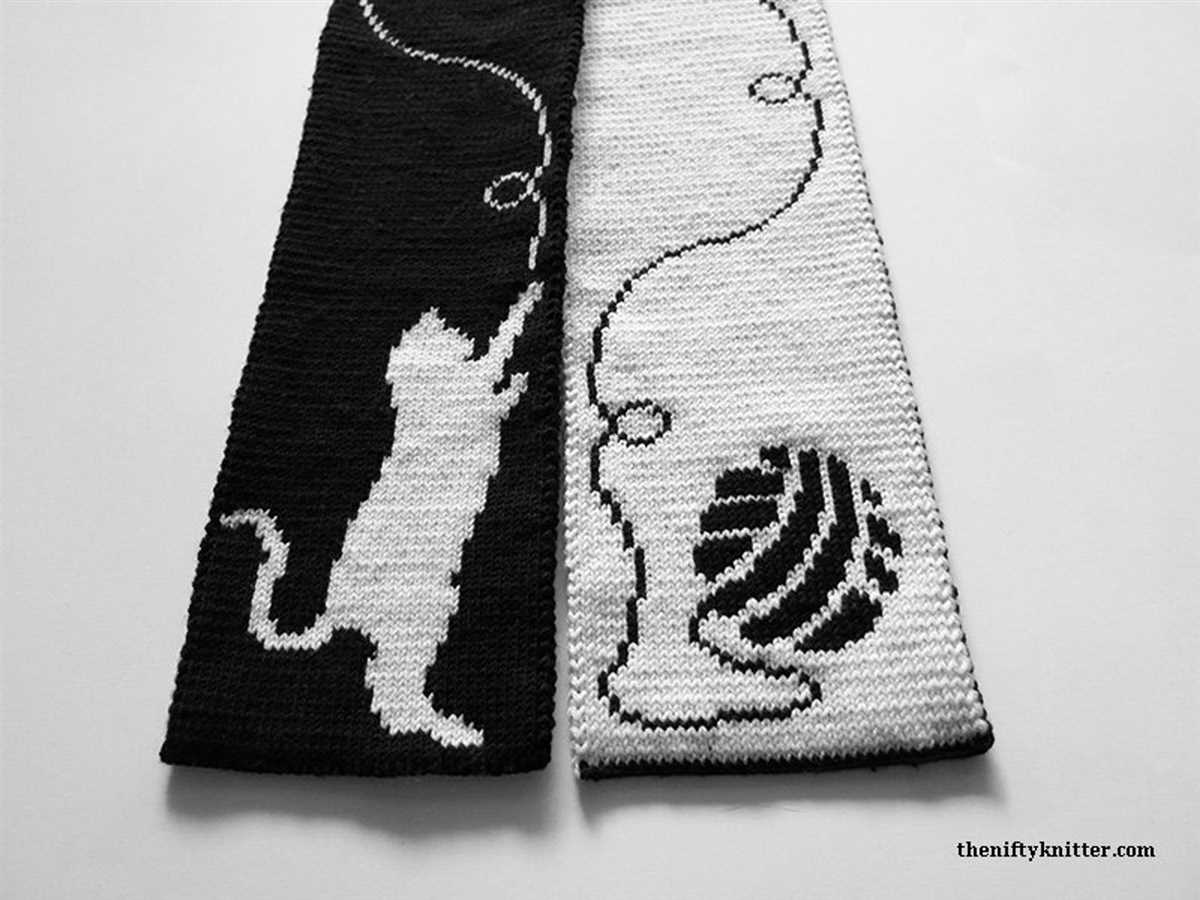
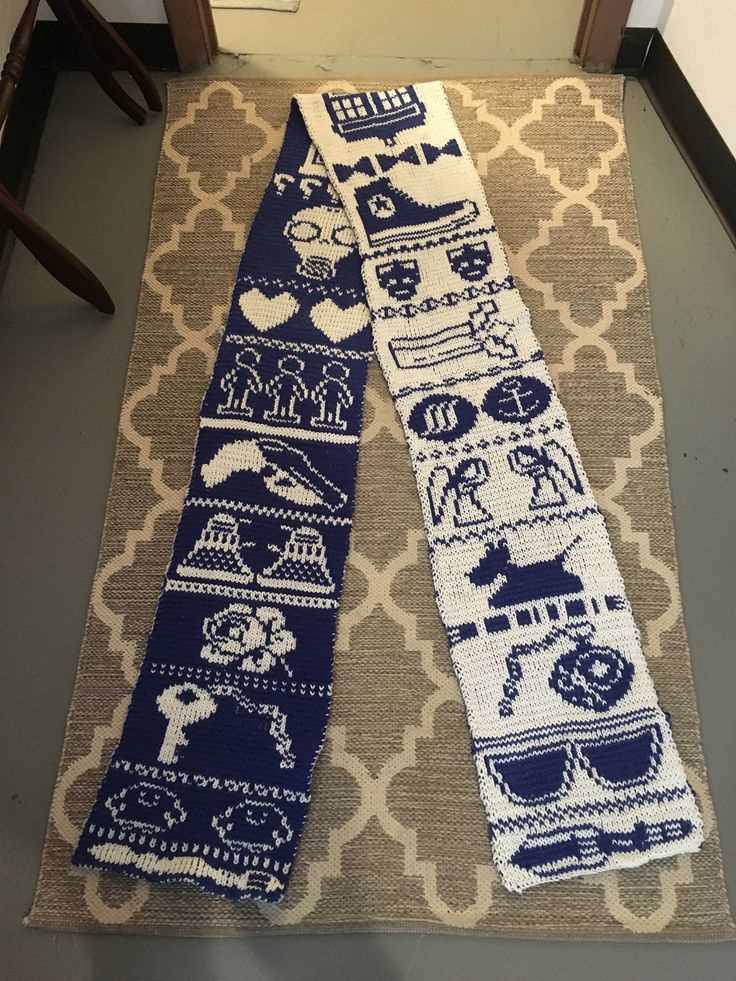
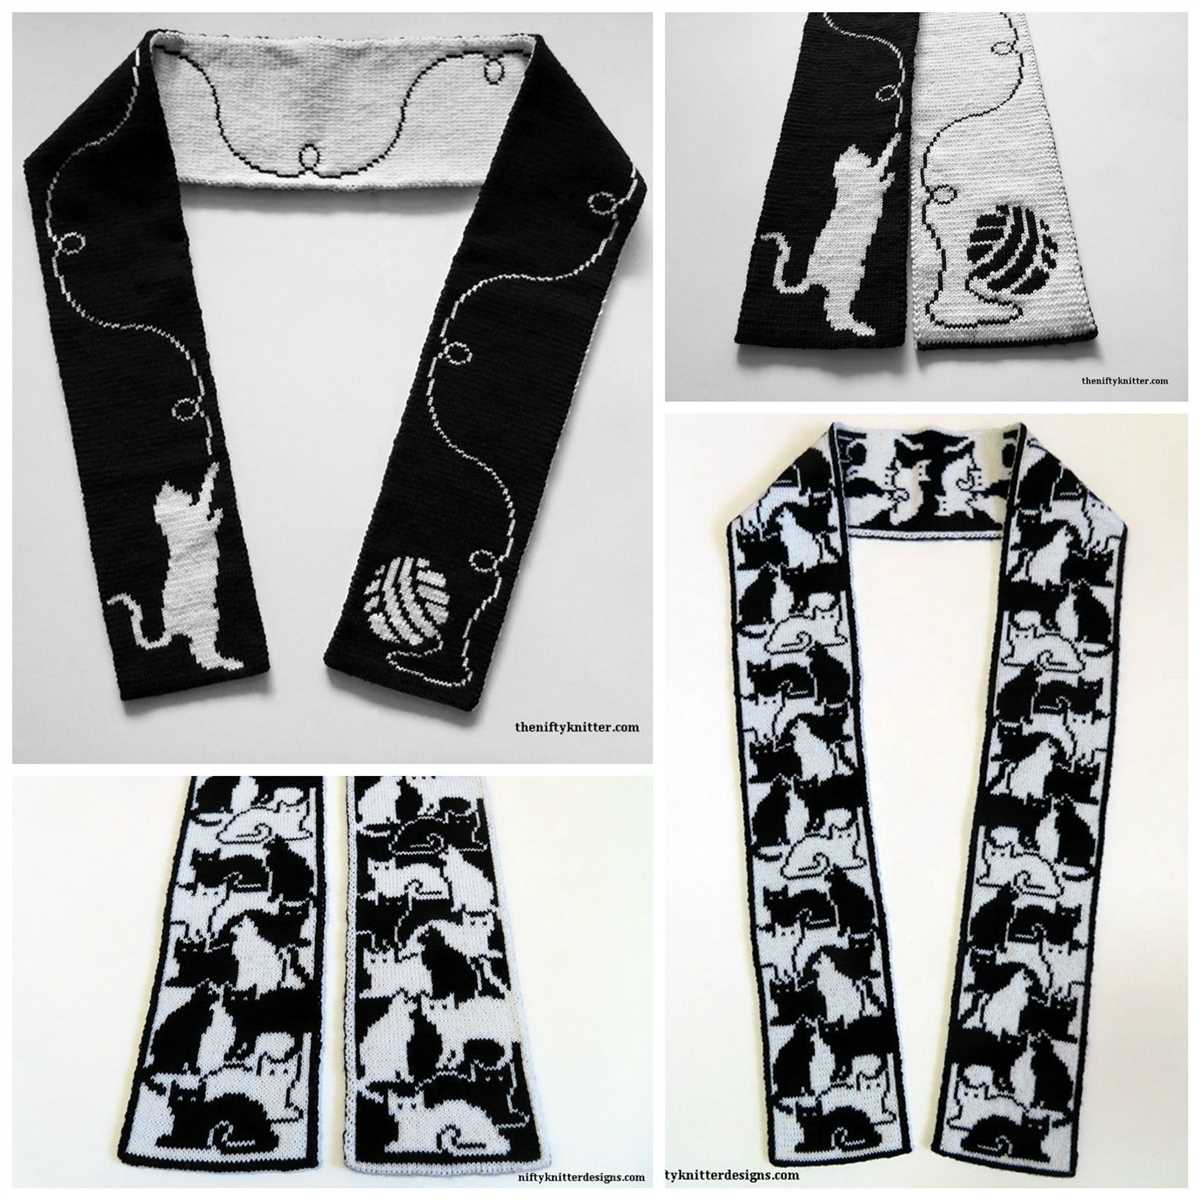
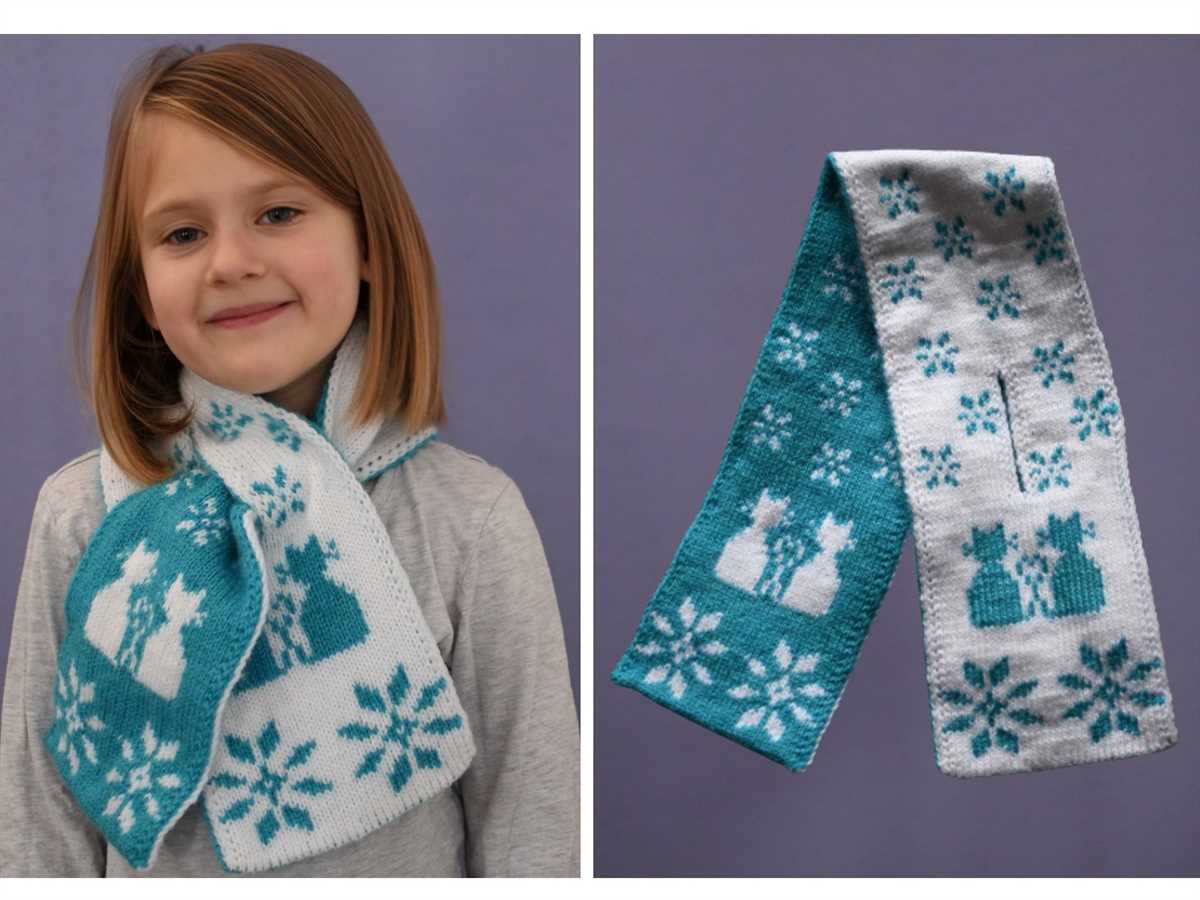
Creating Colorwork in Double Knitting
Double knitting is a versatile knitting technique that allows you to create colorwork patterns on both sides of your fabric. Unlike traditional Fair Isle or stranded knitting, double knitting produces a reversible fabric with two layers. The front and back sides of the fabric have different color patterns, making it perfect for scarves, blankets, and other accessories.
To create colorwork in double knitting, you will need two contrasting colors of yarn. Choose colors that complement each other and create a harmonious design. It’s important to select yarns with similar weights and fiber content to ensure an even tension throughout your project.
1. Set Up Your Double Knitting Project
Begin by casting on an even number of stitches using both colors of yarn. Each stitch will be worked as a pair, with one stitch from each color. Make sure to keep the yarns separate and untangled as you work.
When working in double knitting, you will knit one color and slip the corresponding stitch in the other color. For example, if you are knitting in color A, you will slip the stitch in color B without knitting it.
2. Create the Colorwork Pattern
To create a colorwork pattern in double knitting, you will alternate between knitting and slipping stitches in each color. The pattern can be as simple or complex as you like, ranging from stripes and checks to intricate motifs.
One common technique in double knitting colorwork is to create a checkerboard pattern. To do this, you would knit two stitches in color A, then slip two stitches in color B, repeating this pattern across the row. On the next row, you would knit the slipped stitches in color A and slip the knit stitches in color B to create the checkerboard effect.
Experiment with different color patterns and motifs to create your own unique double knitting colorwork designs. Keep in mind that color dominance may affect the appearance of your pattern. The color used more frequently will appear more prominent on the fabric.
With practice and creativity, you can master the art of creating colorwork in double knitting and bring stunning designs to life on your knitting projects.
Adding a Border to the Scarf
Adding a border to your double knitting scarf can be a great way to add an extra touch of style and enhance the overall design. There are several different methods you can use to add a border, depending on your knitting skills and preferences.
If you’re an experienced knitter and want to create a seamless border, you can pick up stitches along the edges of the scarf and knit the border directly onto the existing fabric. This method requires careful attention to detail and precision, but the result is a beautiful, finished look.
If you’re a beginner or prefer a simpler approach, you can also add a border by knitting separate strips and sewing them onto the edges of the scarf. This method allows for more flexibility in terms of design and color, as you can choose a contrasting yarn for the border. It’s also a great way to practice different stitch patterns and techniques.
Whether you choose to knit the border directly onto the scarf or sew on separate strips, it’s important to consider the width and style of the border. A narrow border can create a subtle accent, while a wider border can make a bold statement. You can also experiment with different stitch patterns, such as ribbing or cables, to create a unique texture.
Once you’ve finished knitting or sewing on the border, be sure to block the scarf to ensure that the border lies flat and matches the rest of the fabric. Blocking will also help to even out any tension differences between the border and the main body of the scarf.
Shaping and Decreasing
When working on a double knitting scarf pattern, shaping and decreasing techniques can be used to create various design elements and achieve the desired shape. Shaping refers to the process of increasing or decreasing stitches to create curves, angles, or other design elements in the fabric. Decreasing, on the other hand, is a technique used to reduce the number of stitches in a row or round, resulting in a narrower or tapered section of the fabric.
There are several ways to shape and decrease in double knitting. One common method is the use of paired increases and decreases. This involves simultaneously increasing one stitch and decreasing the corresponding stitch on the opposite face of the fabric. By working these paired stitches, it is possible to create symmetrical design elements such as chevrons or waves.
This technique can be achieved by working two stitches together as a decrease on one side of the fabric, and simultaneously working a yarn-over increase on the other side. This creates a balanced effect and maintains the same number of stitches on each face of the fabric. By strategically placing these increases and decreases, intricate patterns and motifs can be created.
Another method of shaping and decreasing in double knitting is through the use of short rows. Short rows involve working only part of a row or round, leaving some stitches unworked. This technique can be used to create curves or angles in the fabric. By working short rows on one face of the fabric and leaving the stitches unworked on the other face, it creates a difference in length between the two sides, resulting in shaping.
Overall, shaping and decreasing techniques add depth and dimension to double knitting projects. Whether it’s through paired increases and decreases or the use of short rows, these techniques allow for endless possibilities in creating unique and intricate designs.
Changing Colors in Double Knitting
In double knitting, changing colors can add depth and interest to your project. Whether you’re creating a vibrant color palette or incorporating a subtle gradient, understanding how to change colors in double knitting is essential.
1. Planning your color changes: Before starting your project, it’s important to plan out how and when you want to change colors. Consider the overall design and decide where you want each color to appear. This will help ensure a cohesive and visually appealing result.
2. Carrying the yarn: In double knitting, you’ll typically have two strands of yarn, one for each color. When changing colors, simply drop the old color and pick up the new color, leaving a tail of yarn on the back of your work. Carry the unused color along the back of your work, catching it in the stitches to keep it secure.
3. Joining a new color: When starting a new color, join it by knitting the first stitch with both strands of yarn. This will securely anchor the new color and prevent any gaps or loose stitches. Continue knitting with the new color, carrying the old color along the back as before.
4. Creating color changes: To create a color change, simply switch from knitting with one color to knitting with the other. This can be done in various ways, such as knitting two stitches with one color, then two stitches with the other color. Experiment with different patterns and techniques to achieve the desired effect.
5. Weaving in ends: Once you’ve finished your project, weave in the ends of each color change to secure them. This can be done by using a tapestry needle to thread the yarn tails through the back of the stitches, ensuring they are hidden and secure.
By understanding the process of changing colors in double knitting, you can create stunning patterns and designs. Experiment with different color combinations and techniques to make your double knitting project truly unique.
Finishing the Scarf
Once you have completed the double knitting pattern for your scarf, you will need to finish it off to give it a polished look. Here are some steps you can follow to finish your scarf:
1. Bind off
To bind off, work the first two stitches as normal, then pass the first stitch over the second stitch and off the needle. Continue in this manner until you have bound off all stitches. Cut the yarn, leaving a long tail, and pull it through the last stitch to secure. Weave in any remaining loose ends.
2. Block the scarf
Blocking is an important step to help shape and smooth out your finished scarf. You can block your double knit scarf by wetting it with water and gently squeezing out the excess. Lay the scarf flat on a towel and use pins or blocking wires to shape it to the desired size and dimensions. Allow it to dry completely before removing the pins.
3. Add finishing touches

If desired, you can add additional finishing touches to your scarf. This can include adding fringe to the ends, sewing on buttons or other embellishments, or adding a border or edging to the scarf. Get creative and personalize your scarf to make it unique!
By following these steps, you can ensure that your double knit scarf is finished with a professional and polished look. Now you can proudly wear or gift your handmade scarf!
Blocking and Care Instructions
After completing your double knitting scarf, it’s important to block it to give it a polished and finished look. Blocking helps to even out the stitches, relax the fibers, and make the scarf drape nicely when worn. Follow these simple blocking instructions to achieve the best results:
Blocking Instructions:
- Fill a basin or sink with lukewarm water.
- Add a small amount of gentle wool wash or mild detergent to the water and mix well.
- Gently place the scarf in the water and press it down to submerge it.
- Allow the scarf to soak for about 15-30 minutes, ensuring that it is fully saturated.
- Remove the scarf from the water and gently squeeze out any excess water. Do not twist or wring.
- Lay a clean towel on a flat surface and place the scarf on top.
- Roll up the towel with the scarf inside and press down gently to remove more water.
- Unroll the towel and lay the scarf flat on a blocking board or any other flat surface, reshaping it if necessary.
- Use rust-free T-pins to secure the scarf in place, stretching it gently if needed.
- Allow the scarf to air dry completely. This may take a day or two, depending on the humidity and air circulation in the room.
Now that your double knitting scarf is blocked and dried, it’s important to take proper care of it to maintain its beauty and quality. Here are some care instructions to follow:
Care Instructions:
- Always hand wash your scarf using cold or lukewarm water.
- Use a gentle wool wash or mild detergent specifically designed for delicate fibers.
- Avoid using bleach or harsh chemicals, as they can damage the fibers and colors.
- Do not wring, twist, or scrub the scarf. Instead, gently squeeze out excess water and lay it flat to dry.
- Avoid hanging the scarf, as it can stretch and lose its shape.
- If necessary, touch up any wrinkles or creases using a cool iron with a pressing cloth on top.
- Store your scarf in a clean, dry place, away from direct sunlight and potential moth damage.
- Avoid storing the scarf with heavy items on top, as this can cause distortion of the stitches.
- If properly cared for, your double knitting scarf will continue to bring you warmth and style for years to come.
Exploring Variations and Design Ideas
Once you have mastered the double knitting technique and completed several scarves, you may want to experiment and explore different variations and design ideas. Here are a few suggestions to get you started:
1. Colorwork patterns:
Try using multiple colors to create intricate patterns and designs on your scarf. You can use different color combinations to create stripes, plaids, or even floral motifs. Experiment with different color placements and see how the patterns come to life.
2. Cable motifs:
Add a touch of sophistication to your double knitting scarf by incorporating cable motifs. Cables are created by crossing stitches over each other, creating beautiful textures. You can choose from a variety of cable patterns or even create your own.
3. Lace patterns:
If you prefer a lighter, more delicate look, try incorporating lace patterns into your double knitting scarf. Lace patterns are created by using yarn overs and decreases to create holes and intricate designs. They add an elegant touch and can be combined with other stitch patterns for a unique look.
4. Intarsia designs:
Intarsia is a technique that allows you to create images or motifs using different colors of yarn. You can create personalized designs, such as initials or small pictures, by working with different yarn colors in specific areas. This technique can add a personalized touch to your scarf.
5. Textured stitches:
Explore different textured stitches, such as seed stitch, ribbing, or garter stitch, to add dimension to your double knitting scarf. These stitches create interesting patterns and can be combined with other stitch patterns for a unique look.
Remember, the possibilities are endless when it comes to designing your own double knitting scarf. Don’t be afraid to experiment and try new techniques and ideas. Have fun and let your creativity shine!