
If you’re looking for a new knitting project and want to stay warm this winter, why not try making a double knit hat? This pattern is free and perfect for beginners and experienced knitters alike. Double knitting is a technique that creates a thick, warm fabric by knitting with two strands of yarn at the same time. It’s a great way to make cozy winter accessories like hats, scarves, and mittens.
This pattern is designed with the UK weather in mind, so you can be sure it will keep you warm in chilly temperatures. The double knit technique creates a dense fabric that’s perfect for trapping in heat and keeping out the cold. Plus, by knitting with two strands of yarn, your hat will be extra strong and durable.
Whether you’re a seasoned knitter or just starting out, this pattern is perfect for you. The instructions are easy to follow, with step-by-step guidance and clear explanations. And because it’s a free pattern, you can get started right away without breaking the bank.
Double Knit Hat Pattern Free UK
Are you looking for a free knitting pattern to make a double knit hat? Look no further! We have the perfect pattern for you, and the best part is that it’s completely free. This pattern is specifically designed for those in the UK, so you can be confident that it will fit perfectly and keep you warm during the colder months.
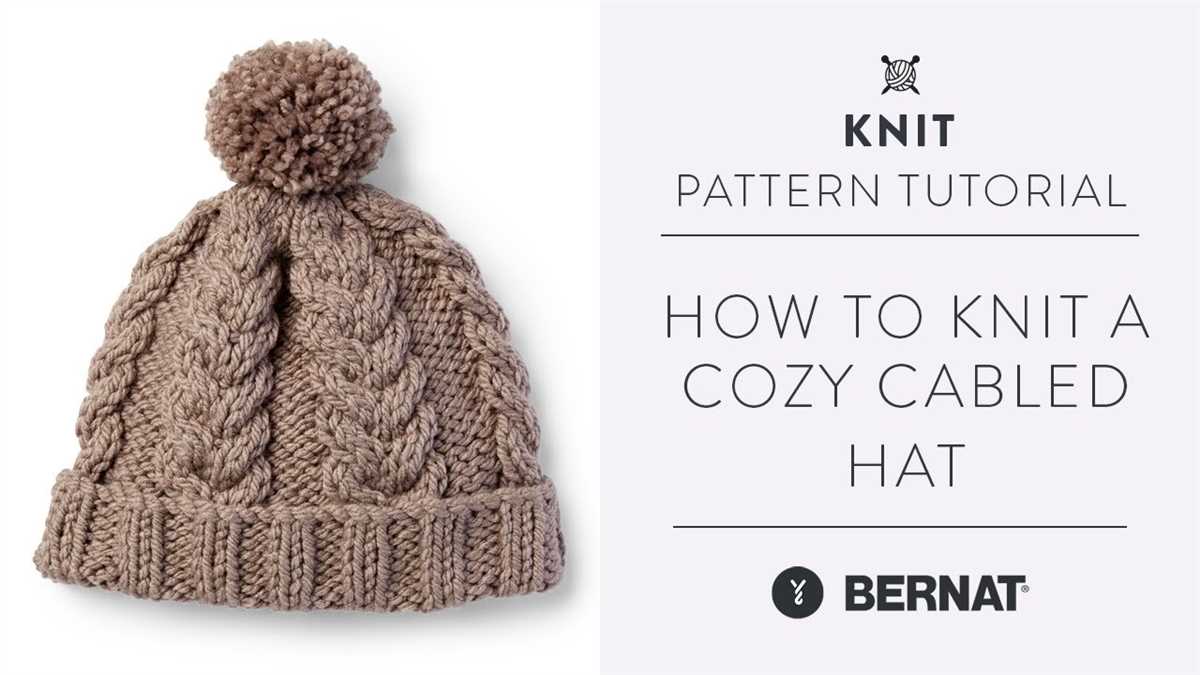
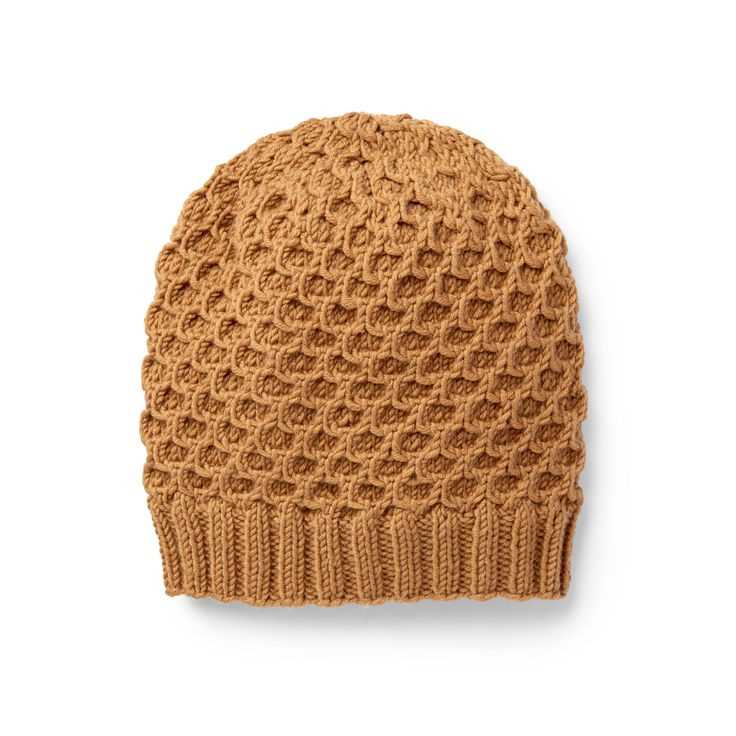
This double knit hat pattern features a classic design that is both stylish and practical. It can be customized to match your personal style by choosing different yarn colors or adding embellishments such as pom-poms or buttons. The pattern includes detailed instructions and a helpful chart to ensure that even beginner knitters can successfully complete the project.
Pattern Details:
- Difficulty level: Beginner
- Yarn weight: DK (Double Knit)
- Needle size: 4mm (US size 6)
- Size options: One size fits most adults
To get started, gather your materials including DK weight yarn and 4mm knitting needles. Then, simply follow the step-by-step instructions provided in the pattern. As you work through each row, you’ll see the hat begin to take shape and before you know it, you’ll have a finished double knit hat to wear or give as a gift.
Whether you’re an experienced knitter looking for a quick project or a beginner looking to learn a new skill, this double knit hat pattern is the perfect choice. Get started today and soon you’ll have a cozy hat to keep you warm on those chilly UK days.
Benefits of Double Knit Hat Patterns
Knitting is a popular hobby for many people, and one of the most common things to knit is a hat. There are many different hat patterns available, but one type that is particularly popular is the double knit hat pattern. This type of pattern has several benefits that make it a great choice for knitters of all skill levels.
1. Warmth and Comfort

A double knit hat is made by knitting two layers of fabric at the same time, creating a double thickness that provides extra warmth and insulation. This makes it perfect for colder climates or for anyone who wants to keep their head extra warm on chilly days. The double layer also adds extra cushioning and comfort, making the hat more comfortable to wear for longer periods of time.
2. Versatility and Style
Double knit hat patterns come in a wide variety of styles and designs, allowing knitters to create unique and personalized hats. Whether you prefer a simple and classic design or something more intricate and eye-catching, there is a double knit pattern out there for you. This versatility makes it easy to find a pattern that matches your personal style and preferences.
3. Durability

Double knit hats are known for their durability. The double layer of fabric provides extra strength and resilience, making the hat less likely to stretch out of shape or develop holes over time. This makes double knit hats a smart investment, as they are more likely to last and provide years of use compared to hats made from a single layer of fabric.
4. Learning Opportunity
If you are new to knitting or looking to expand your knitting skills, working on a double knit hat pattern can be a great learning opportunity. Double knitting involves knitting two layers of fabric simultaneously, which can help you practice your tension and coordination. It also allows you to experiment with different stitch patterns and techniques, helping you improve your knitting skills while creating a beautiful and functional item.
Overall, double knit hat patterns offer several benefits, including added warmth and comfort, versatility in style, durability, and a learning opportunity. Whether you are an experienced knitter or just starting out, trying out a double knit hat pattern can be a rewarding and enjoyable knitting project.
Choosing the Right Yarn for Your Double Knit Hat
When it comes to knitting a double knit hat, one of the most important things to consider is the type of yarn you choose. The yarn you select can greatly affect the final outcome of your hat, including its warmth, durability, and overall aesthetic. To ensure you make the right choice, here are some key factors to consider when selecting yarn for your double knit hat.
Yarn Weight
The weight of the yarn is crucial in determining the overall thickness and warmth of your double knit hat. Generally, double knit hats require a medium weight yarn, also known as DK weight yarn. This weight provides a good balance between warmth and breathability, making it suitable for various weather conditions. However, you can also experiment with other weights, such as worsted weight or bulky weight, depending on your desired outcome.
Fiber Content
The fiber content of the yarn can greatly impact the comfort, durability, and care instructions of your double knit hat. For a hat that is soft and warm, consider using yarns made from natural fibers such as wool, alpaca, or cashmere. These fibers have excellent insulation properties and can keep your head cozy in cold weather. If you prefer a hat that is more lightweight and breathable, you can opt for yarns made from synthetic fibers like acrylic or nylon.
Color and Texture
Another factor to consider when choosing yarn for your double knit hat is the color and texture. The color of the yarn can affect the overall look of your hat, so think about whether you want a vibrant and bold hat or a more subtle and neutral one. Additionally, the texture of the yarn can add depth and interest to your hat. Consider experimenting with different textures, such as variegated or tweed yarns, to create unique and eye-catching patterns.
Budget
Last but not least, consider your budget when selecting yarn for your double knit hat. Yarns come in a wide range of prices, so it’s important to choose one that fits within your budget without compromising on quality. Keep in mind that investing in a higher quality yarn may result in a hat that is more durable and long-lasting.
Overall, choosing the right yarn for your double knit hat involves considering factors such as weight, fiber content, color, texture, and budget. By carefully selecting the yarn, you can create a hat that not only meets your aesthetic preferences but also provides warmth and comfort in colder climates.
Tools and Materials Needed for Double Knit Hat Patterns
When it comes to knitting double knit hat patterns, there are a few tools and materials that you will need to have on hand. These items are essential for creating beautiful and functional hats that will keep you warm during the colder months.
Knitting Needles:
To knit a double knit hat, you will need a pair of knitting needles. The size of the needles will depend on the pattern you are using and the thickness of the yarn. Be sure to check the pattern for the recommended needle size to achieve the desired gauge. It is also important to use the correct type of needles, whether they are straight, circular, or double-pointed, as specified in the pattern.
Yarn:

Choosing the right yarn for your double knit hat pattern is crucial. Look for a yarn that is soft, warm, and durable. The weight of the yarn will also impact the finished hat, so be sure to select the appropriate weight as indicated in the pattern. Acrylic, wool, or a blend of natural fibers are popular choices for knitting hats.
Tape Measure:
A tape measure is essential for taking accurate measurements of your head circumference and length, which will help you determine the proper size for your hat. It is important to measure carefully to ensure a snug and comfortable fit.
Stitch Markers:
Stitch markers are small rings or clips that are used to mark specific stitches or sections in your knitting. They can be especially helpful when knitting patterns that require shaping or intricate stitch patterns. Using stitch markers will help you keep track of where you are in the pattern and prevent mistakes.
Tapestry Needles:
Tapestry needles, also known as yarn needles, are used for sewing in loose ends and seaming pieces together. These needles have a large eye that can easily thread yarn through, making them ideal for finishing your double knit hat.
Scissors:
Having a good pair of scissors is essential for any knitting project. You will need them to cut yarn, weave in ends, and trim any excess threads. Make sure to keep your scissors sharp and handy.
Other Accessories:
Depending on the specific double knit hat pattern, you may also need additional accessories such as buttons, pom poms, or ribbons. These embellishments can add a personal touch to your hat and make it truly unique.
With these tools and materials at your disposal, you will be well-equipped to tackle any double knit hat pattern and create beautiful handmade hats that are both stylish and cozy.
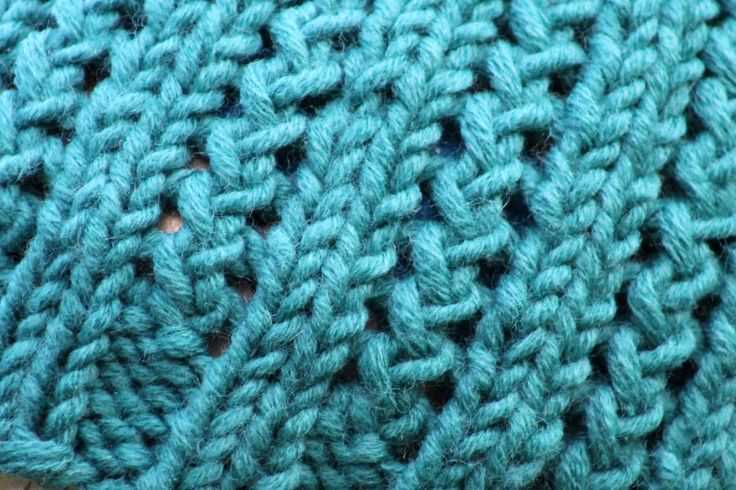
Understanding Double Knitting Techniques
Double knitting is a versatile knitting technique that allows you to create a double layer of fabric with two different color patterns on each side. It is commonly used to create reversible garments and accessories, such as hats and scarves, as both sides of the fabric are equally attractive. This technique is achieved by simultaneously knitting two layers of fabric using two different colors of yarn.
Working with two colors: When working in double knitting, you will be using two colors of yarn, one for each side of the fabric. You will typically work with one color in each hand, with one color being the main color (MC) and the other being the contrast color (CC). This allows you to create intricate color patterns and designs, such as stripes or geometric shapes, on both sides of the fabric.
Cast-on and set-up row: To start double knitting, you will cast on an even number of stitches, as each stitch will be worked twice – once for each side of the fabric. The set-up row is where you establish the stitch pattern and colorwork. This row will often involve knitting or purling stitches in both colors to create the desired color pattern.
Double knitting stitches: Double knitting stitches can be worked in a few different ways. The most common method is to knit one stitch from the main color yarn and slip one stitch from the contrast color yarn purlwise with the yarn in the back, and then repeat this pattern across the row. This creates a double layer of fabric with the main color stitches on one side and the contrast color stitches on the other side.
Increases and decreases: Double knitting allows you to create increases and decreases to shape your fabric. When increasing, you will typically work a knit stitch and a slipped stitch together as one to add a stitch on each side of the fabric. When decreasing, you will work two stitches together, either knitwise or purlwise, to decrease one stitch on each side of the fabric.
Finishing and bind-off: Once you have completed your double knitting project, you will need to finish and bind off your stitches. To do this, you can use a regular bind-off method, such as the basic bind-off or the stretchy bind-off. Make sure to weave in any loose ends and block your finished project to give it a neat and polished look.
Double knitting can be a challenging technique to master, but with practice and patience, you can create beautiful and reversible designs. Whether you are knitting a double knit hat or a cozy scarf, understanding the techniques involved will help you achieve stunning results.
Casting On for Your Double Knit Hat

Before you start knitting your double knit hat, you need to cast on to your knitting needles. Casting on is the process of creating the first row of stitches that will form the base of your hat. There are several methods you can use to cast on, but the two most common methods are the long-tail cast on and the knit cast on.
The long-tail cast on is a versatile method that creates a stretchy and neat edge. To do the long-tail cast on, you will need to estimate the amount of yarn you will need for your cast on. This can be done by wrapping the yarn around your needle the number of times equal to the number of stitches you need to cast on, and then adding a little extra for the tail. Once you have determined the length of your tail, you can begin the cast on by making a slipknot and placing it on your needle. Then, hold the tail end in your right hand and the working yarn in your left hand, and begin casting on each stitch by wrapping the yarn around the needle in a specific way.
If you prefer a simpler and quicker cast on method, you can use the knit cast on. This method is also known as the backward loop cast on. To do the knit cast on, start by making a slipknot and placing it on your needle. Then, insert your right needle into the loop of the slipknot from left to right and wrap the working yarn around the right needle in a clockwise direction. Pull the loop through the stitch and place it on your left needle. Repeat this process for each stitch you need to cast on.
Working the Ribbing for Your Double Knit Hat
The ribbing is an important part of your double knit hat, as it creates the stretch and elasticity needed for a comfortable fit. To work the ribbing, you will need to use a smaller needle size than the main body of the hat. This will help create a tighter, denser fabric that will hold its shape.
Start by casting on the required number of stitches for your hat. For a standard ribbing, you will generally cast on a multiple of 2 or 4 stitches. Once your stitches are cast on, you will begin working the ribbing pattern.
To create a classic 2×2 ribbing, alternate between knitting 2 stitches and purling 2 stitches for each row. This will create the signature ribbed effect. Repeat this pattern for the desired length of your ribbing, usually around 1-2 inches.
If you prefer a different ribbing pattern, such as a 1×1 rib or a twisted rib, you can adjust the stitch pattern accordingly. Just be sure to follow the pattern consistently for each row to maintain the ribbing effect.
Once you have completed the ribbing, you can switch to your main needle size and begin working the body of the hat. The ribbing will provide a seamless transition and a snug fit for your double knit hat.
Remember to always check your gauge and adjust your needle size if necessary to ensure your hat fits properly. Happy knitting!
Creating the Body of Your Double Knit Hat
Once you have gathered all the necessary materials and familiarized yourself with the basic techniques of double knitting, you are ready to start creating the body of your double knit hat. The body of the hat is the main part that will cover your head and keep it warm, so it is important to take your time and ensure that it is knit correctly.
To begin, cast on the required number of stitches for your hat size using the double knitting method. This method involves casting on two sets of stitches, one in the main color and one in the contrasting color. This creates a double layer of fabric that will give the hat extra warmth and durability.
Next, work the body of the hat in the desired stitch pattern. You can choose to knit the body in a simple stockinette stitch for a smooth, uniform look, or you can get creative and incorporate various stitch patterns to add texture and visual interest. Be sure to follow the pattern instructions carefully and check your gauge periodically to ensure that your hat is the correct size.
As you knit the body of the hat, it is important to keep track of your progress and regularly measure it against your head to ensure that it will fit properly. You can use a flexible measuring tape or simply try the hat on periodically to check for fit. Adjustments can be made by either adding or subtracting stitches as necessary.
Once the body of the hat has been completed to the desired length, it is time to start shaping the crown. This is typically done by decreasing stitches in a specific pattern to create a tapered effect. Follow the pattern instructions for the crown shaping carefully to ensure that the hat maintains its shape and proportions.
Once the crown shaping is complete, bind off all stitches and weave in any loose ends. Congratulations, you have now completed the body of your double knit hat! Feel free to add any additional embellishments or personal touches, such as pom-poms or ribbons, to make the hat uniquely yours.
Shaping the Crown of Your Double Knit Hat

When knitting a double knit hat, one of the most important steps is shaping the crown. This is where you create the rounded top of the hat that fits snugly on the head. There are several techniques you can use to shape the crown, depending on the pattern and your personal preferences.
Decreasing: One common method for shaping the crown is to decrease the number of stitches gradually as you knit upwards. This can be done by knitting two stitches together, slipping a stitch knitwise, passing a slipped stitch over, or a combination of these techniques. Decreasing evenly spaced around the entire hat creates a symmetrical crown.
Slip Stitch Decreases: Another option is to use slip stitch decreases, which create a subtle and decorative effect on the crown. With this technique, you slip the first stitch of each round purlwise, knit the next stitch, and then pass the slipped stitch over the knit stitch. This creates a smooth decrease and adds visual interest to the top of the hat.
Short Rows: For a different look, you can also shape the crown using short rows. This involves knitting part of the round, then turning the work and knitting back in the opposite direction. By wrapping and turning the yarn around the needle, you create extra fabric that adds height to the crown. Short rows can create a unique shape and texture to the top of the hat.
Choosing the Right Method: The method you choose for shaping the crown will depend on the pattern you are using and the desired final look of your double knit hat. Experimenting with different techniques can be a fun way to add your own personal touch to your hat. Regardless of the method you choose, take your time and make sure to follow the instructions carefully to ensure a well-shaped and comfortable crown.
When it comes to knitting, adding embellishments to your double knit hat can add a personal touch and make your hat truly unique. There are many options for embellishments, from simple and subtle to bold and eye-catching. Here are a few ideas to get you started.
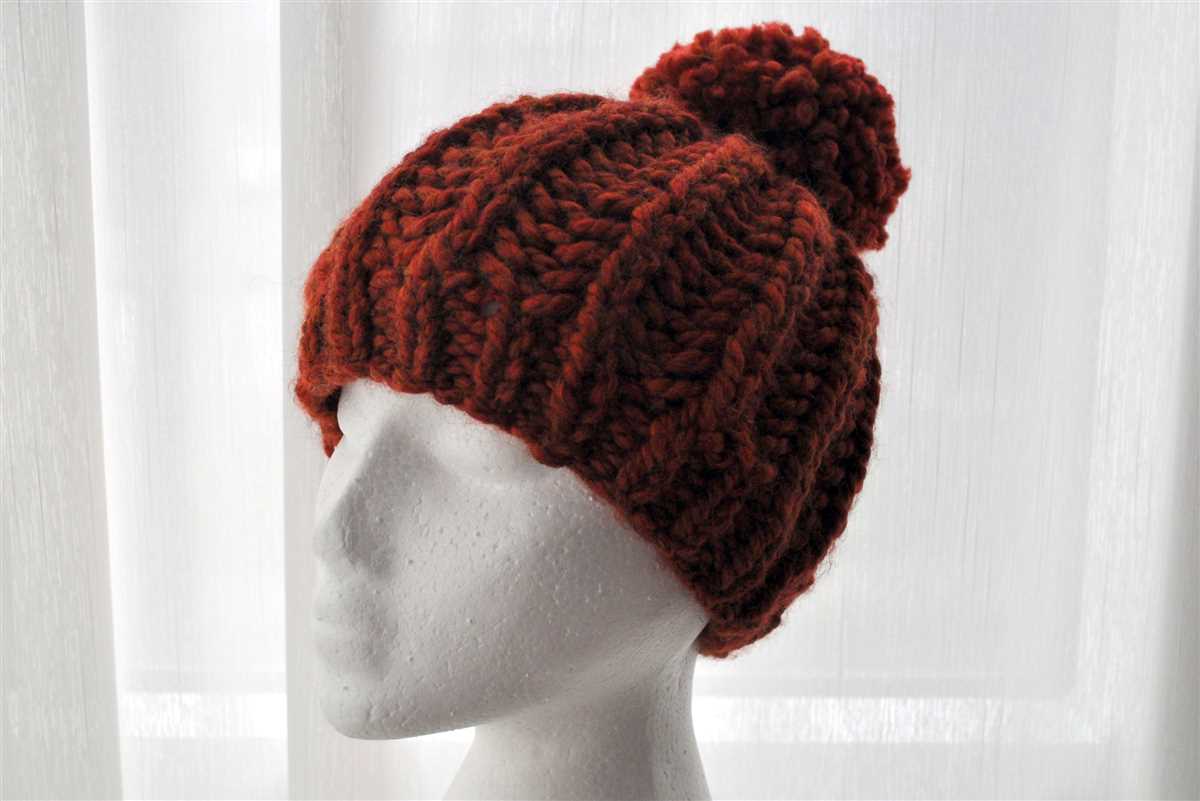
Add a Pom Pom
One of the most popular ways to embellish a hat is by adding a pom pom. Pom poms can be made from yarn in a contrasting color, or using faux fur or other materials for a different texture. Simply attach the pom pom to the top of the hat using a needle and thread, ensuring it is secure.
Embroidery
Another way to add embellishment to your double knit hat is through embroidery. You can use a contrasting color of yarn or embroidery floss to create intricate designs on the hat. Popular options include adding a name or initials, flowers, or geometric patterns. You can find plenty of embroidery patterns online or come up with your own unique design.
Buttons and Ribbons
If you want to add a touch of elegance or a vintage vibe to your double knit hat, consider adding buttons or ribbons. Sew a row of buttons along the brim of the hat or attach a ribbon bow to the side. This can add a pop of color and texture to your hat and make it stand out.
Charms and Brooches
For a more whimsical or statement look, you can attach charms or brooches to your double knit hat. Choose charms that reflect your personality or interests, such as animals, flowers, or symbols. You can also find decorative brooches that can be attached to your hat, adding an elegant touch.
These are just a few ideas for adding embellishments to your double knit hat. The possibilities are endless, so let your creativity guide you and have fun experimenting with different ways to make your hat truly one-of-a-kind.
Finishing and Blocking Your Double Knit Hat
Once you’ve finished knitting your double knit hat, it’s important to properly finish and block it to ensure that it retains its shape and looks its best. Follow these steps to finish and block your hat:
1. Weave in loose ends:
Before blocking your hat, make sure to weave in any loose ends of yarn. This will give your hat a clean and finished look. Use a tapestry needle to carefully weave the ends into the fabric, ensuring that they are secure and invisible.
2. Soak your hat:
Fill a basin or sink with lukewarm water and add a small amount of gentle wool wash or mild detergent. Submerge your hat in the water, making sure it is fully soaked. Gently squeeze the water through the fabric to ensure thorough coverage.
3. Rinse and squeeze out excess water:
After soaking your hat, drain the water and refill the basin or sink with clean lukewarm water. Gently squeeze the hat to remove excess water, being careful not to wring or twist the fabric. Repeat this rinsing process until the water runs clear.
4. Block your hat:
Place a clean towel on a flat surface and lay the wet hat on top of it. Gently reshape the hat to your desired size and shape, smoothing out any wrinkles or creases. Use pins to secure the hat in place, making sure to maintain the shape and dimensions you desire.
5. Allow the hat to dry:
Leave the pinned hat to air dry. Depending on the thickness of the yarn and the humidity level in the room, this may take a day or two. Resist the temptation to rush the process by using a hairdryer or other heat sources, as this can damage the fibers.
6. Remove the pins and enjoy your finished hat:
Once the hat is completely dry, carefully remove the pins. Your hat should now be perfectly shaped and ready to wear. Put it on and enjoy the cozy warmth and style of your handmade double knit hat!
Conclusion
Free double knit hat patterns in the UK offer a wide variety of options for knitters of all skill levels. Whether you prefer a simple beanie or a more intricate design, there is a pattern available to suit your style and taste. These patterns provide an excellent opportunity to showcase your knitting skills while creating a cozy and stylish accessory.
By exploring the various websites and resources mentioned, you can easily find the perfect free double knit hat pattern that meets your needs. Be sure to check the skill level and gauge requirements before starting a project, and don’t be afraid to experiment with different yarns and colors to make the hat truly unique. With a free pattern and some yarn, you’ll be able to create a lovely double knit hat in no time!
So why wait? Start your knitting journey today and enjoy the process of creating a beautiful and practical accessory that will keep you warm in style.