
Distressed knitting patterns have become a popular trend in the world of fashion and crafts. This unique technique involves intentionally distressing knitted items to give them a worn and vintage appearance. Whether you’re a beginner knitter or an experienced one looking to add a new dimension to your projects, distressed knitting patterns offer a creative and stylish twist to traditional knitting techniques.
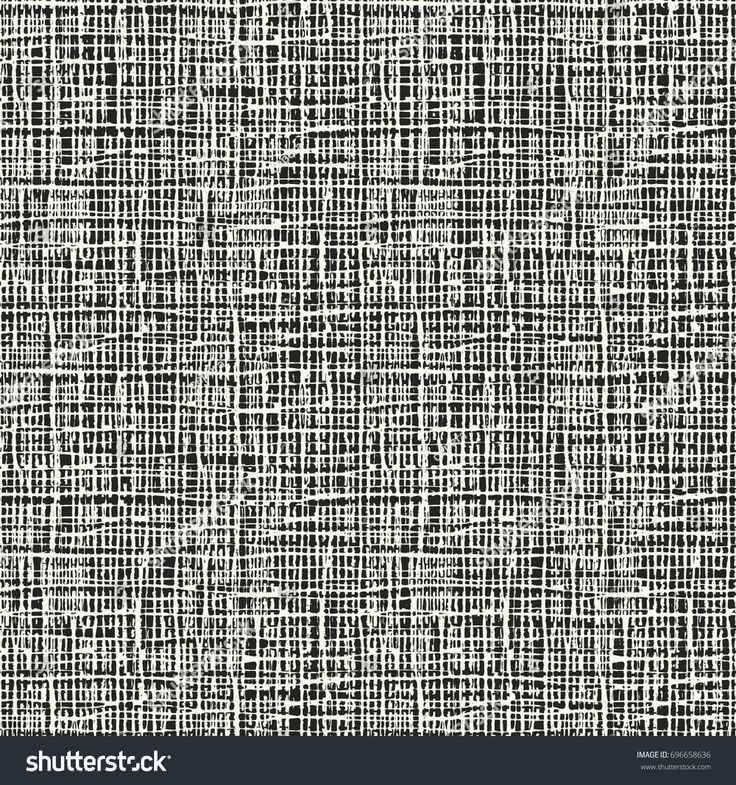
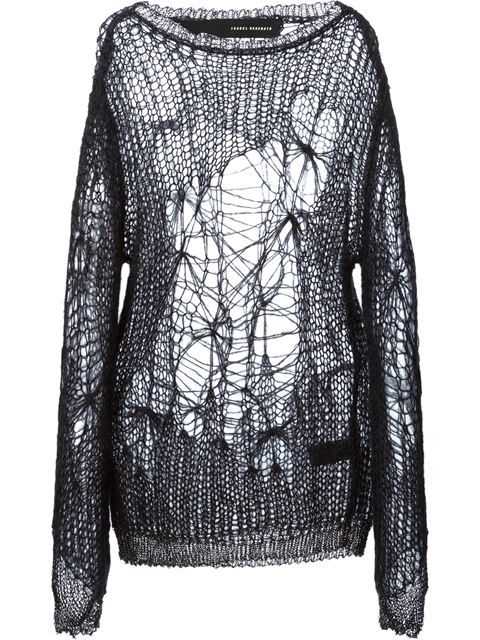
One of the key features of distressed knitting patterns is the combination of deliberately holes, pulls, and frayed edges. This creates a look that is reminiscent of well-loved and well-worn vintage pieces. By strategically distressing certain areas of your knitted work, you can instantly add character and uniqueness to your creations. It’s a great way to repurpose old garments or create new ones with a touch of nostalgia.
Distressed knitting patterns also allow for endless creativity and experimentation. You can choose to distress your knits subtly for a more understated look or go all out with bold and dramatic distressing techniques. From oversized sweaters with large intentional holes to delicate scarves with strategically placed frayed edges, there are countless possibilities to explore.
If you’re new to distressed knitting, there are many resources available online to help you get started. You can find patterns, tutorials, and inspiration from fellow knitters who have mastered the art of distressing their knits. With a little practice and experimentation, you’ll soon be able to create one-of-a-kind pieces that are both fashionable and unique.
What Is Distressed Knitting Pattern and How to Create It
Distressed knitting pattern is a popular technique that gives knitted items a worn and aged look. It involves intentionally distressing the fabric using various techniques to create a vintage or weathered appearance. This style of knitting has gained popularity in recent years, as it adds a unique and rustic charm to garments and accessories.
To create a distressed knitting pattern, there are several techniques you can use. One common method is called “over-dyeing,” where you dye the finished knitted piece using a darker color. This process creates subtle variations in shade and adds depth to the overall look. Another technique is “felting,” where you intentionally shrink the knitted fabric to create a more textured and worn appearance.
Another way to achieve the distressed look is by adding intentional holes or “distressing” the fabric. This can be done by using larger needles or intentionally dropping stitches to create gaps in the fabric. You can also use a technique called “stripping,” where you distress the fabric by removing or unraveling sections of it, giving it a more worn and imperfect look.
When creating a distressed knitting pattern, it’s important to consider the overall aesthetic you want to achieve. Experiment with different techniques, such as distressing only certain sections of the fabric or using different colors and textures. Remember, the goal is to create a worn and weathered appearance, so embrace imperfections and embrace the beauty of the distressed look.
- Experiment with distressing techniques like over-dyeing and felting
- Add intentional holes or distress the fabric by dropping stitches
- Consider using larger needles to create a more textured look
- Try stripping or unraveling sections of the fabric for a more worn appearance
- Embrace imperfections and embrace the beauty of the distressed look
Understanding Distressed Knitting Pattern
In the world of knitting, distressed patterns have gained popularity for their unique and edgy aesthetic. These patterns mimic the appearance of worn and aged fabrics, creating a distressed and worn-in look for your knitted garments. Whether you want to add a touch of vintage charm to your wardrobe or create a trendy statement piece, understanding distressed knitting patterns is essential.
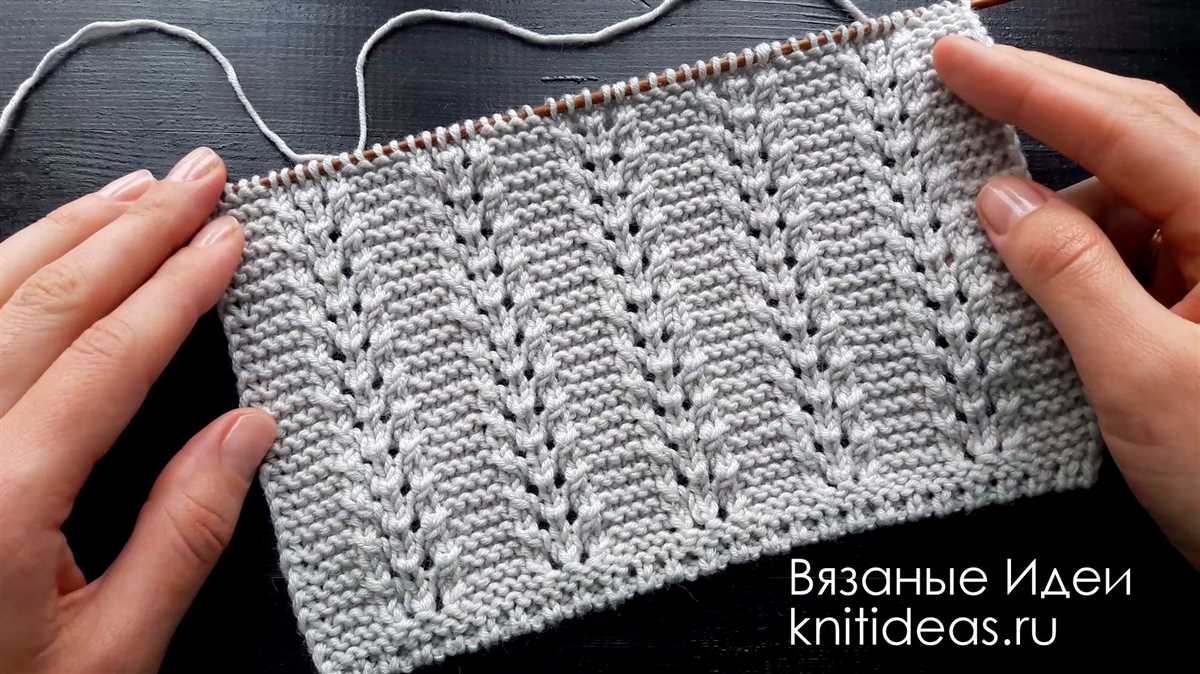
Distressed knitting patterns incorporate various techniques and stitches to achieve their distinctive look. These techniques include intentional holes, dropped stitches, and frayed edges. Dropped stitches can be created by simply skipping a stitch or intentionally unraveling a stitch to create an elongated loop.
Another key element of distressed knitting patterns is the use of unconventional and textured yarns. These yarns often have a slubby or irregular texture, adding to the distressed appearance. You can also experiment with combining different types of yarns to create unique textures and visual interest in your projects.
Creating a distressed knitting pattern requires a combination of skill and creativity. It’s important to pay attention to the details and be intentional about the placement of holes, frayed edges, and dropped stitches. Additionally, understanding how to control tension and gauge is crucial to achieving the desired distressed look. Whether you’re working on a sweater, scarf, or hat, take the time to practice and experiment with different techniques to perfect your distressed knitting skills.
- Experimenting with different stitch patterns like lace or cable stitches can also add to the distressed aesthetic.
- Keep in mind that distressed knitting patterns are meant to have an intentionally worn and imperfect look. Embrace imperfections and let your creativity shine through.
- When it comes to color choices, earth tones and muted shades often work well to enhance the distressed appearance. However, don’t be afraid to experiment with bold and vibrant colors to create a unique and eye-catching distressed garment.
With a good understanding of distressed knitting patterns and a bit of experimentation, you can create one-of-a-kind knitted pieces that stand out from the crowd. Whether you’re a beginner or an experienced knitter, give distressed knitting a try and embrace the art of imperfection in your projects.
History of Distressed Knitting Pattern
Distressed knitting pattern, also known as “deconstructed knitting” or “punk knitting,” is a style of knitting that emerged in the late 1970s as a rebellious response to traditional knitting techniques. Inspired by the punk movement and the do-it-yourself ethos of the time, distressed knitting pattern took the concept of creating intentionally worn and destroyed garments to a new level.
The origins of distressed knitting pattern can be traced back to the punk subculture, which emerged in the late 1970s in the United Kingdom. Punk fashion, characterized by its DIY attitude and anti-establishment stance, rejected the traditional elegance and refinement of mainstream fashion. Instead, it embraced a raw and edgy aesthetic that incorporated elements of distress, destruction, and rebellion. In this context, distressed knitting pattern became a way for knitters to subvert the norms of traditional knitting and create garments that were intentionally rough, torn, or unraveling.
Distressed knitting pattern often involves techniques like reverse stitching, intentional unraveling, and incorporating unconventional materials into the knitting process. Rather than striving for a polished and flawless finished product, distressed knitters deliberately introduce imperfections and irregularities into their work. This can be achieved through techniques such as dropping stitches, intentionally leaving holes or gaps in the fabric, or even distressing the yarn itself prior to knitting.
Today, distressed knitting pattern continues to be embraced by knitters around the world who appreciate its unique aesthetic and creative possibilities. It has evolved beyond its punk origins and has been embraced by designers and knitters in a range of different styles and contexts. From high fashion runways to streetwear brands, distressed knitting pattern offers a way to create garments that are both visually striking and expressive of a rebellious spirit.
Popular Techniques in Distressed Knitting Pattern
In the world of knitting, distressed patterns have gained popularity in recent years for their unique and edgy aesthetic. These patterns mimic the look of worn-out and weathered fabrics, giving the knitted garment a vintage and lived-in appeal. To achieve this distressed look, there are several techniques that knitters can employ.
1. Intentional dropped stitches
One of the key techniques in creating a distressed knitting pattern is intentionally dropping stitches. This involves intentionally letting stitches slip off the needles to create holes or ladders in the fabric. By strategically dropping stitches in specific areas, knitters can create a distressed and worn appearance.
2. Raveling and fraying
Another popular technique is raveling and fraying of the knitted fabric. This involves pulling on the stitches or gently unraveling parts of the fabric to create a frayed and worn-out effect. By partially unraveling the fabric, knitters can achieve a distressed look that resembles the natural wear and tear of time.
3. Distressing with color
Color plays a crucial role in distressed knitting patterns. By using variegated yarns or strategically incorporating different colored strands, knitters can create an aged and faded appearance. By choosing colors that mimic the look of rust, faded denim, or sun-bleached fabrics, the knitted garment can evoke a sense of nostalgic charm.
4. Rough textures and uneven stitches
To add to the distressed look, knitters can create rough and uneven textures in their patterns. This can be achieved through techniques such as moss stitch, garter stitch, or by intentionally working certain stitches looser or tighter than others. By incorporating these rough textures and uneven stitches, the knitted fabric takes on a more worn and aged appearance.
5. Patchwork and visible repairs
In distressed knitting patterns, visible repairs and patchwork can add to the overall worn and distressed look. This can be achieved by incorporating patches of different-colored yarns or by adding intentional visible repairs to the fabric. These visible repairs give the knitted garment a sense of history and add to its unique and distressed aesthetic.
Overall, distressed knitting patterns offer knitters a creative and unique way to achieve a vintage and edgy look in their garments. By employing techniques such as intentional dropped stitches, raveling and fraying, distressing with color, rough textures and uneven stitches, and patchwork and visible repairs, knitters can create knitwear that stands out with its distressed charm.
Choosing the Right Yarn and Needles
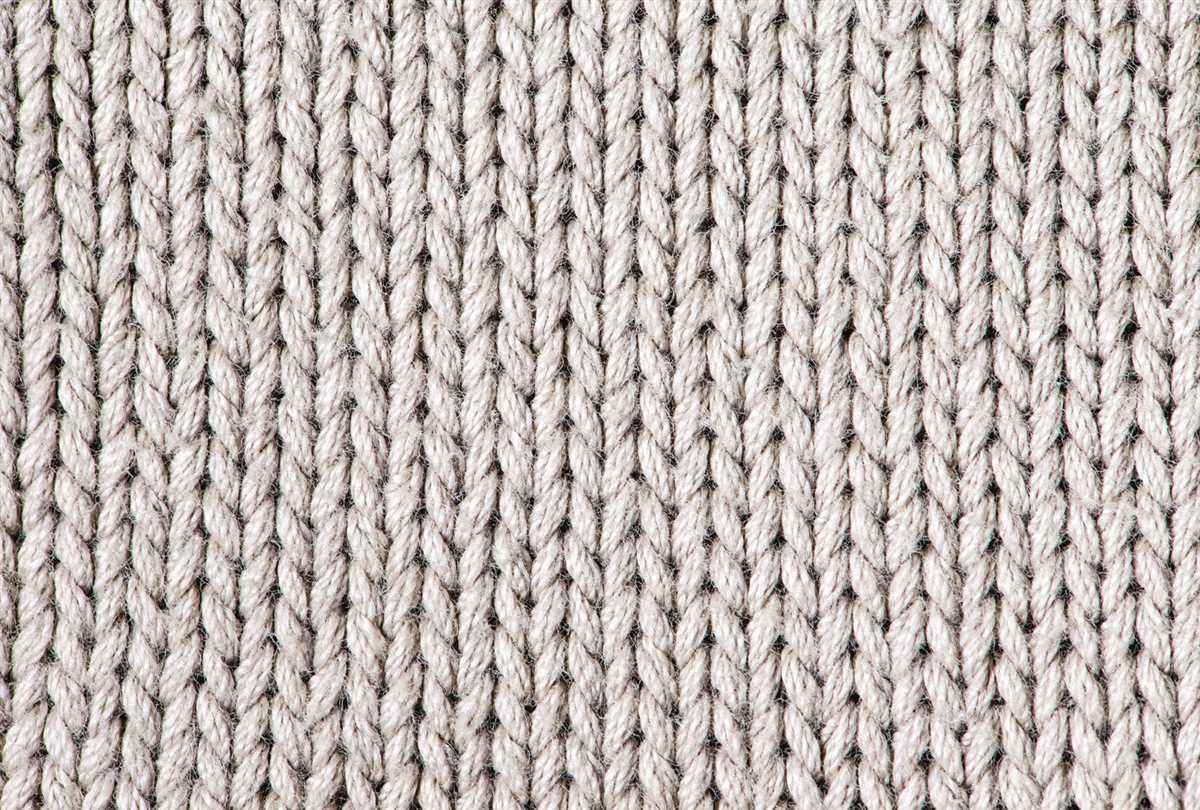
When it comes to knitting a distressed pattern, choosing the right yarn and needles is crucial. The yarn you select will greatly impact the final look and feel of your project. For a distressed effect, it’s best to opt for natural fibers like wool or cotton. These materials have a rustic and worn-in appearance that will enhance the distressed look of your knit.
Yarn weight: The weight of the yarn will also play a role in achieving the desired distressed effect. Choosing a bulky or chunky weight yarn will create a more textured and rugged knit. It will also knit up faster, allowing you to complete your project with a distressed finish in less time.
Color and texture: When selecting the yarn, consider the color and texture of the fibers. Earth tones and muted shades are ideal for achieving a distressed look. You can also look for yarns with a tweed or marled effect, as these add depth and interest to your knit.
Along with the yarn, choosing the right needles is important for distressed knitting. For a distressed effect, it’s recommended to use larger-sized needles. This will create larger stitches, adding to the overall texture and distressed appearance of the knit.
Needle material: The material of the needles can also impact the outcome of your project. Wooden or bamboo needles provide more grip and can help create that rustic look. Metal needles, on the other hand, can give a sleeker and more polished appearance, which may not be ideal for distressed knitting.
Remember to always swatch before starting your project to ensure you’re happy with the yarn, needle size, and overall effect. Swatching will help you determine if you’re achieving the desired distressed look and make any necessary adjustments before diving into your project.
Tips for a Successful Distressed Knitting Project
Distressed knitting is a popular trend in the world of knitting that involves intentionally creating a worn or distressed look in the finished project. Whether you’re working on a sweater, scarf, or hat, here are some tips to help you achieve a successful distressed knitting project.
1. Choose the Right Yarn
When it comes to distressed knitting, the type of yarn you choose can make a big difference in achieving the desired effect. Opt for yarns that have a rustic or textured appearance, such as tweed or boucle. These yarns will add depth and character to your distressed knitting project.
2. Experiment with Stitch Patterns
Distressed knitting is all about creating an intentionally worn look, so don’t be afraid to experiment with different stitch patterns. Try using simple textural stitches like seed stitch or garter stitch, or even incorporate some intentional dropped stitches for added distress. The key is to create an uneven and worn effect throughout the fabric.
3. Use Natural Fiber Blends
Using natural fiber blends, such as wool or cotton, can enhance the distressed look of your knitting project. These fibers have a natural ability to felt or shrink, which can create a more worn appearance. Be sure to check the care instructions of your chosen yarn to see if felting or shrinking is possible, and keep this in mind when washing the finished project.
4. Add Embellishments
Embellishments can enhance the distressed look of your knitting project and add unique details. Consider adding buttons, patches, or even embroidery to give your project a worn and well-loved appearance. Just make sure to choose embellishments that complement the overall distressed look you’re trying to achieve.
5. Finish the Project with Blocking
Blocking is an important step in any knitting project, and it can also help enhance the distressed look of your finished piece. After completing your project, wet block it by gently soaking it in lukewarm water and then shaping it to the desired dimensions. This will help relax the stitches and give it a more worn and vintage appearance.
By following these tips, you’ll be well on your way to creating a successful distressed knitting project that showcases the unique character and charm of this popular trend.
Getting Started: Casting On
In the world of distressed knitting, casting on is the first step to creating a beautifully textured and worn look. There are several methods you can use to cast on, but the most commonly recommended for distressed knitting is the long tail cast on. This method creates a sturdy foundation for your project while also giving it a slightly uneven and rustic appearance.
To begin the long tail cast on, you’ll need a long tail of yarn – approximately three times the width of your finished piece. Start by making a slip knot at the end of the yarn, leaving a tail that is long enough for later weaving in. Then, insert the needle into the slip knot and tighten it around the needle, making sure to leave enough space for the stitches to move freely.
Next, Hold the needle in your right hand and the tail of the yarn in your left hand. With your right thumb, place it over both strands of yarn, creating a tight loop. Insert the needle under the loop, from top to bottom, and then slip your thumb out of the loop. Gently pull the loop tight against the needle, creating your first stitch.
After creating the first stitch, you’ll repeat the process for the desired number of stitches. Remember to keep the tension of your yarn consistent, neither too tight nor too loose. As you progress, you’ll see the distinctive long tail cast on edge forming, with each stitch having a slightly different size and appearance.
To make sure you have enough stitches, you can use a stitch counter or simply count them as you go along. Once you have the desired number of stitches, you can start working on your distressed knitting pattern, following the instructions for each row.
Tips:
- Experiment with different needle sizes and yarn weights to achieve different levels of distress in your knitting.
- If you’re not familiar with the long tail cast on, it may be helpful to practice with scrap yarn before starting your project.
- When weaving in the tail of your cast on, be mindful of keeping the distressed look by avoiding neat and tidy edges.
Basic Stitches for Distressed Knitting Pattern
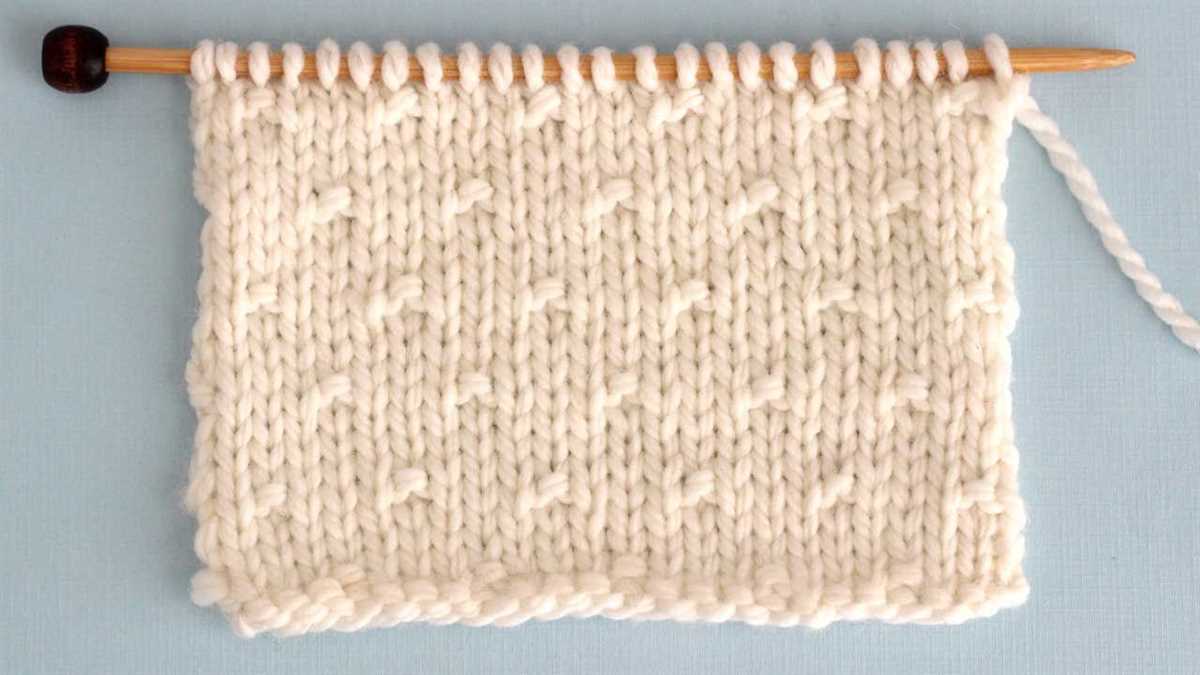
Distressed knitting pattern is a unique and popular style that creates a worn, textured look in knitted projects. This style is achieved through the use of specific stitches and techniques that intentionally create a distressed or weathered appearance. By combining different stitches, such as dropped stitches, slipped stitches, and intentionally uneven tension, knitters can create a variety of distressed effects.
1. Dropped stitches: One of the main elements in distressed knitting is the use of dropped stitches. To create this effect, simply knit a stitch as normal and then, before moving on to the next stitch, slide the just-knitted stitch off the needle. This creates a hole or ladder in the fabric, giving it a distressed appearance.
2. Slipped stitches: Slipped stitches are another important stitch in distressed knitting. To create this effect, simply skip a stitch and slide it from the left-hand needle to the right-hand needle without knitting or purling it. This creates a elongated stitch that adds texture to the fabric.
3. Uneven tension: In distressed knitting, intentionally varying the tension of your knitting adds to the overall distressed look. By knitting certain sections of the fabric with a looser tension and other sections with a tighter tension, you can create a textured, uneven appearance.
4. Garter stitch: Garter stitch is a simple stitch pattern that is commonly used in distressed knitting. To create garter stitch, knit every row, creating a fabric with horizontal ridges. This stitch pattern adds texture and interest to distressed knitted projects.
5. Yarn choice: The type of yarn you choose can also contribute to the distressed look of your knitted project. Opt for yarns with a slightly rough or uneven texture, such as tweed or slub yarns. These yarns add to the overall distressed appearance of the finished project.
By using these basic stitches and techniques, you can create a variety of distressed knitting patterns. Experiment with different combinations and techniques to achieve the desired distressed effect in your knitted projects.
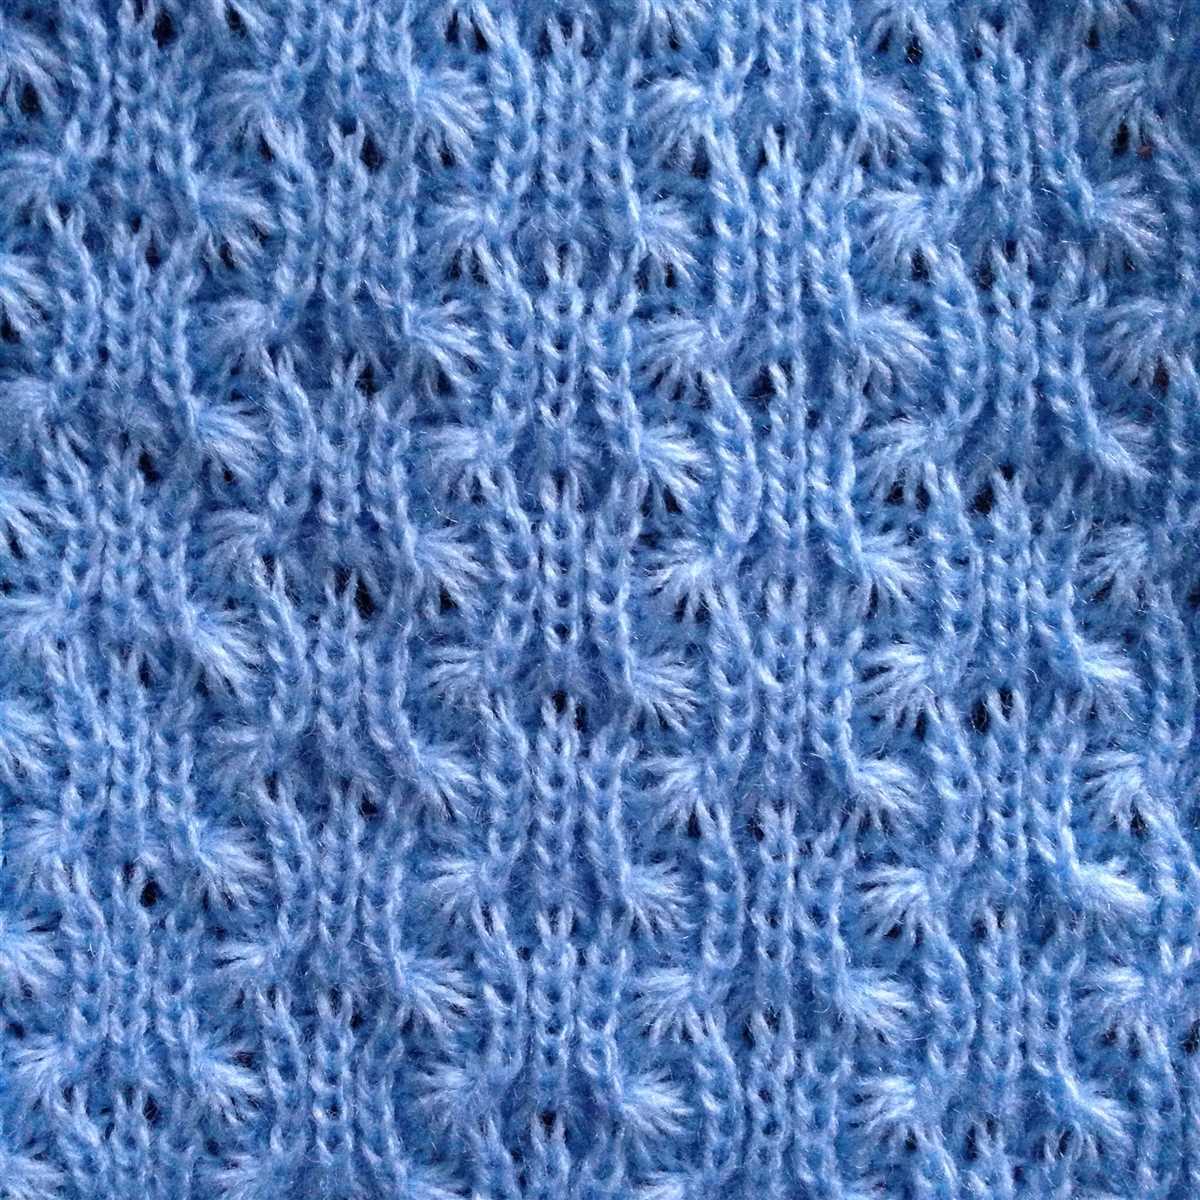
Creating Distressed Texture with Various Stitch Patterns
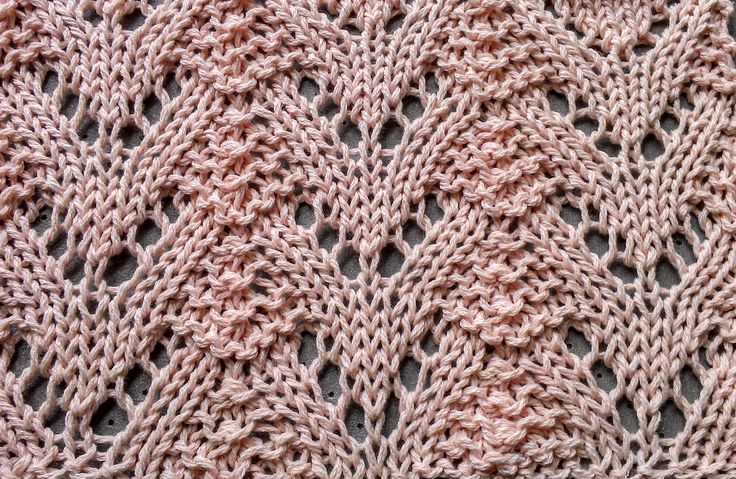
If you’re looking to add a touch of ruggedness and character to your knitting projects, incorporating distressed stitch patterns can be a great way to achieve the desired effect. Distressed textures can evoke a sense of history and worn-out charm, making your knitted items stand out. In this article, we’ll explore various stitch patterns that can help you create the distressed texture you’re looking for.
Garter Stitch: One of the simplest yet effective ways to achieve a distressed texture is by using garter stitch. This stitch pattern produces a bumpy texture that adds depth to your knitting project. By alternating knit rows with purl rows, your fabric will have a rustic and textured appearance.
Moss Stitch: Moss stitch, also known as seed stitch, is another versatile stitch pattern that can add a distressed texture to your knitting. By alternating between knit and purl stitches within the same row, moss stitch creates a pattern that resembles the texture of moss or seeds. This textured stitch can add visual interest and depth to your knitted items.
Reverse Stockinette Stitch: Reverse stockinette stitch is a stitch pattern where the purl side of the fabric is the right side. This creates a bumpy texture on the surface of the fabric, similar to the texture achieved in garter stitch. By using reverse stockinette stitch, you can give your knitting projects a distressed and worn-out appearance.
Slip Stitch Patterns: Slip stitch patterns involve slipping stitches from one row to another without knitting them. This creates a textured fabric with raised stitches and elongated stitches. By incorporating slip stitch patterns into your knitting projects, you can achieve a distressed texture that resembles weaving or hand-sewn details.
These are just a few examples of stitch patterns that can help you create a distressed texture in your knitting projects. By experimenting with different stitch patterns, you can personalize your projects and add a unique touch of character to your knitted items. Whether you’re knitting a cozy sweater or a textured scarf, incorporating distressed stitch patterns can elevate your finished piece and make it truly one-of-a-kind.
Adding Rips and Tears to Knitted Garments
Distressed knitting patterns have become increasingly popular in recent years, as they add a unique and edgy touch to traditional knitted garments. One way to achieve this distressed look is by incorporating rips and tears into the design. By strategically placing intentional holes throughout the garment, you can create a worn and lived-in aesthetic that is both fashionable and stylish.
Choosing the Right Yarn: When planning to add rips and tears to your knitted garment, it is important to choose a yarn that is sturdy and can withstand the pulling and stretching associated with creating intentional holes. Stronger yarns, such as wool or cotton blends, are ideal for this purpose, as they are less likely to break or unravel when manipulated.
Placing the Rips and Tears: The placement of the rips and tears in your knitted garment is crucial to achieving the desired distressed look. Consider the natural wear and tear patterns on clothing and focus on areas that are more prone to damage, such as the elbows, cuffs, or shoulders. Use stitch markers or safety pins to mark the desired locations before you start creating the holes.
Creating the Holes: There are several techniques you can use to create the rips and tears in your knitted garment. One common method is to intentionally drop stitches, allowing them to unravel and create a hole. Alternatively, you can use a small crochet hook to create intentional holes by pulling loops through the fabric or cutting small slits using a sharp pair of scissors. Be sure to practice on a swatch first to ensure that you achieve the desired effect without causing any irreversible damage.
Finishing Touches: Once you have created the rips and tears in your knitted garment, it is important to secure the surrounding stitches to prevent further unraveling. You can do this by reinforcing the area with additional stitches or using a crochet hook to weave the loose stitches back into the fabric. Be mindful of the tension and try to match it with the surrounding stitches to maintain a cohesive look.
Embracing Imperfections: The beauty of distressed knitting lies in its imperfections. Don’t be afraid to experiment and embrace the unique and worn appearance that rips and tears can bring to your knitted garments. Each hole tells a story and adds character to your creation, making it truly one-of-a-kind.
- Choose a sturdy yarn
- Place rips and tears strategically
- Create holes using various techniques
- Secure surrounding stitches to prevent further unraveling
- Embrace the imperfections and unique character of distressed knitting
Finishing Techniques for Distressed Knitting Pattern
When it comes to distressed knitting patterns, the finishing techniques you choose can have a big impact on the final look of your project. These techniques can help enhance the distressed effect and give your knitted piece a unique and worn-in appearance.
One popular finishing technique for distressed knitting patterns is fraying. To achieve this look, you can intentionally fray the edges of your knitting by gently pulling apart the yarn fibers. This can be done with a needle or your fingers. The frayed edges add a touch of texture and give your knitting a more rustic and aged look.
Another technique that can be used to enhance the distressed effect is distressing the stitches themselves. This can be done by intentionally dropping stitches or adding intentional mistakes to the knitting. By doing so, you can create holes or gaps in the fabric, giving it a worn and tattered appearance. This technique requires careful planning and execution, but can result in a truly unique and distressed finished piece.
Adding embellishments can also be a great way to enhance the distressed look of your knitting. You can incorporate elements such as beads, buttons, or patches into your project to give it a more vintage or grungy feel. These embellishments can be added during the knitting process or sewn on afterwards. They can help create a focal point or add extra texture to your project.
Lastly, blocking and finishing your distressed knitting project are important steps to consider. Blocking can help even out the stitches and give your project a more polished look. This is especially important if you have intentionally distressed the stitches or added embellishments. Finishing techniques, such as weaving in ends and sewing seams, should also be done with care to ensure your project holds up well over time.
Overall, when working with distressed knitting patterns, the finishing techniques you choose can greatly impact the final result. By incorporating techniques such as fraying, distressing stitches, adding embellishments, and carefully blocking and finishing your project, you can create a unique and visually interesting piece of knitted art.
Inspiration for Distressed Knitting Projects and Patterns
Distressed knitting is a unique way to create beautiful and unconventional pieces that showcase a distressed or worn aesthetic. This knitting technique is perfect for those who want to experiment with different textures and styles in their knitting practice. If you’re looking for inspiration for your next distressed knitting project, look no further! Here are a few ideas to get you started.
1. Distressed Scarf
A distressed scarf is a versatile and fashionable accessory for any outfit. Incorporate holes, dropped stitches, and unconventional color combinations to create a distressed look. Knit with a chunky yarn and large needles to enhance the worn effect. This is a great project for beginners who want to explore distressed knitting.
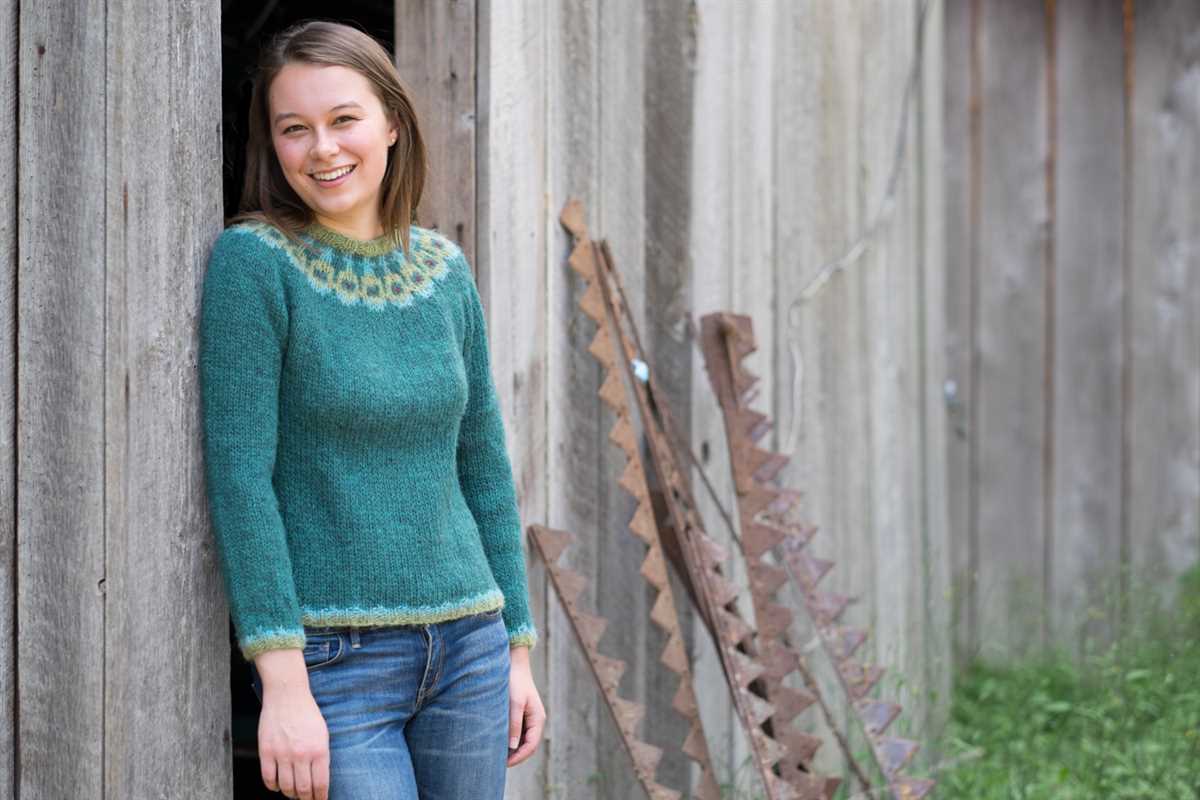
2. Distressed Sweater
If you’re feeling adventurous, take your distressed knitting to the next level by creating a distressed sweater. Experiment with different distressing techniques such as intentional fraying, unraveling stitches, or incorporating distressed fabric patches. Combine different yarn textures and colors to create a unique and edgy sweater that will be a standout piece in your wardrobe.
3. Distressed Hat

A distressed hat is a fun and functional project that can be easily personalized. Use distressed techniques to create a worn look on the brim or incorporate distressed fabric patches for added texture. Experiment with different stitch patterns and yarn combinations to create a one-of-a-kind hat that will keep you warm and stylish during the colder months.
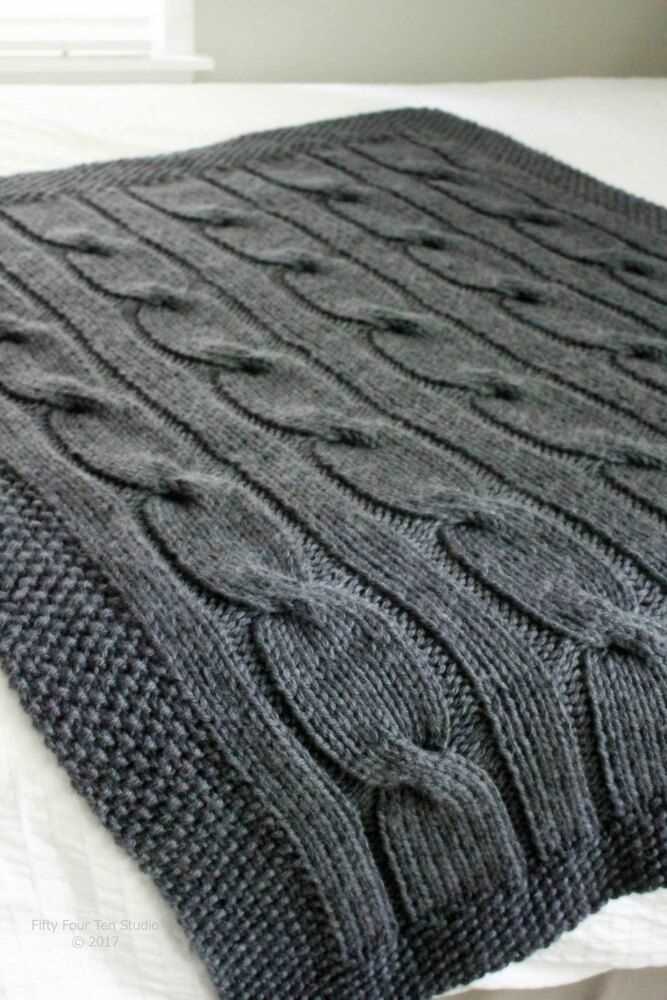
4. Distressed Pillow
Add a touch of distressed charm to your home decor with a distressed pillow. Create a distressed pattern using dropped stitches or intentionally unraveled sections. Experiment with different yarn textures and colors to complement your existing decor. A distressed pillow adds a unique and cozy touch to any living space.
Distressed knitting is all about embracing imperfections and creating unconventional and visually interesting pieces. Whether you’re a beginner knitter or an experienced pro, there’s no limit to the creativity you can bring to your distressed knitting projects. Let your imagination run wild and have fun experimenting with different techniques, textures, and colors. Happy knitting!