
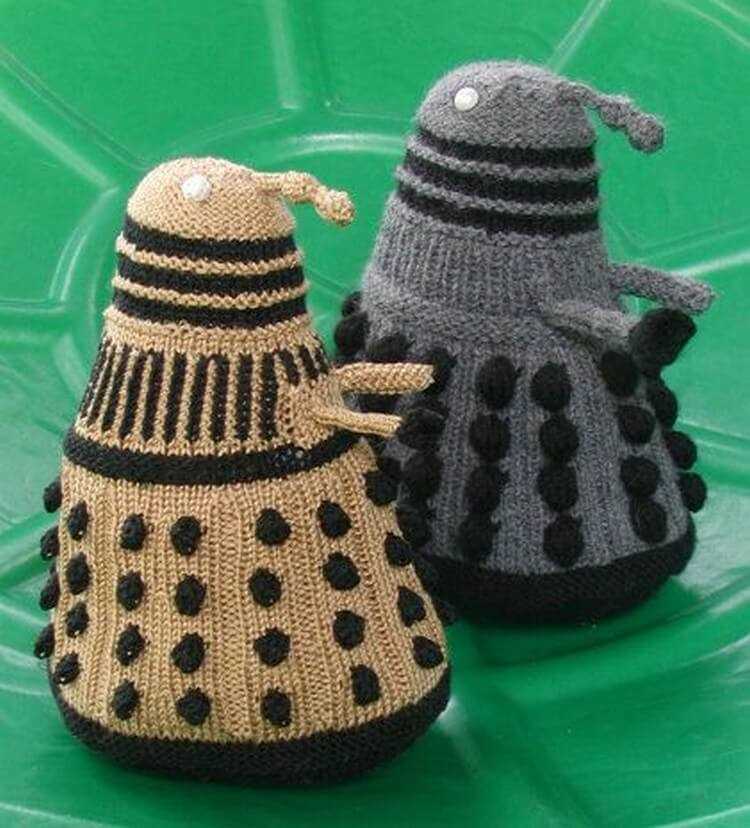
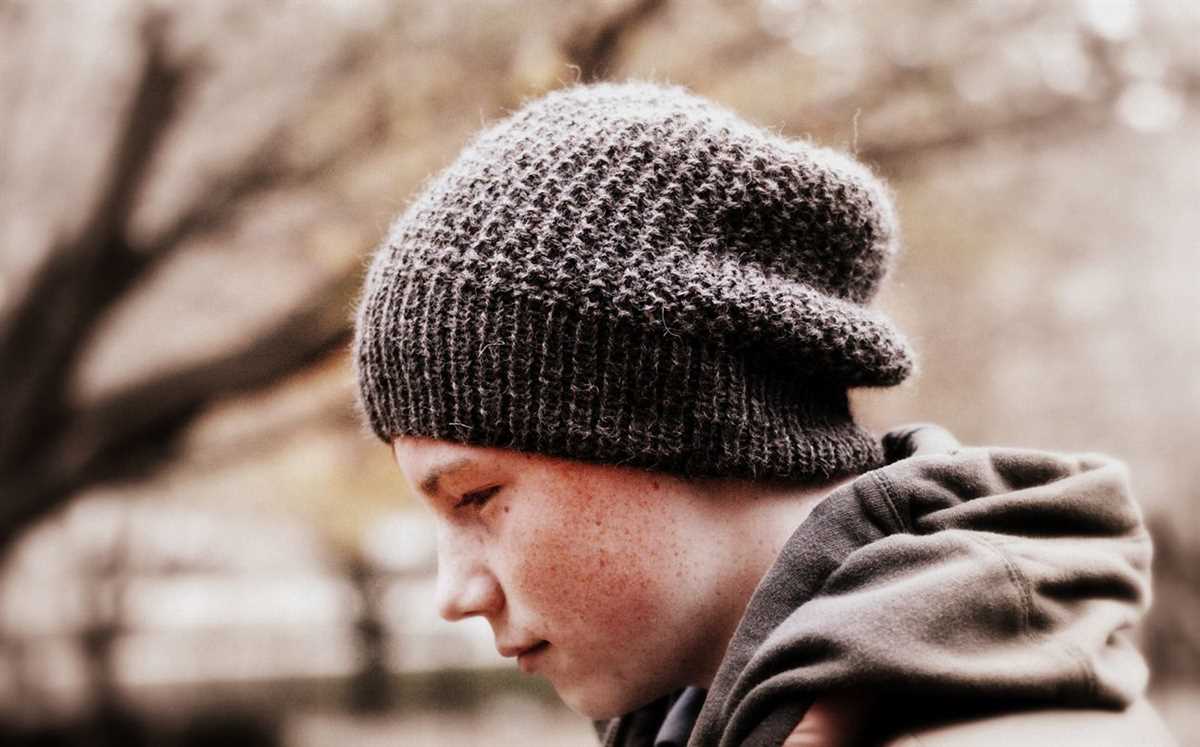
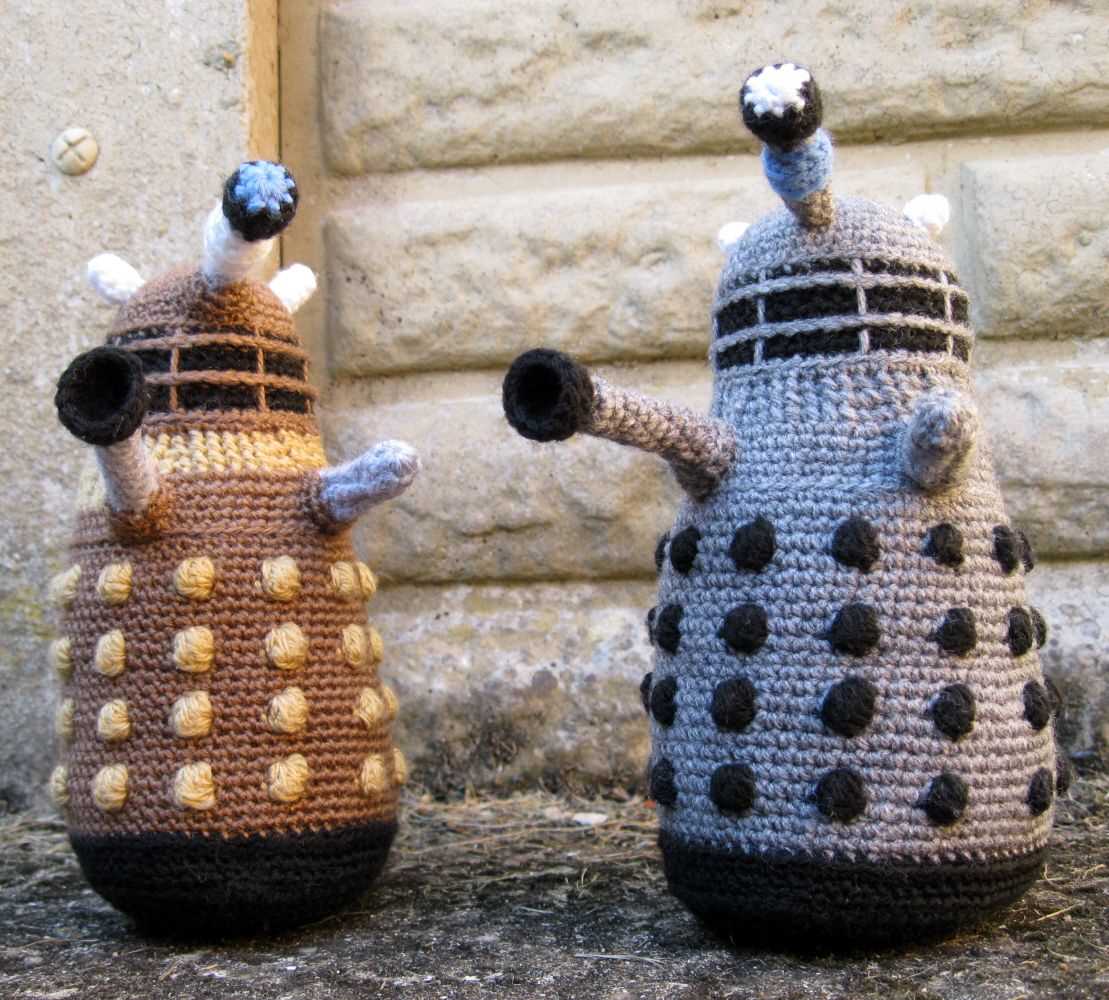
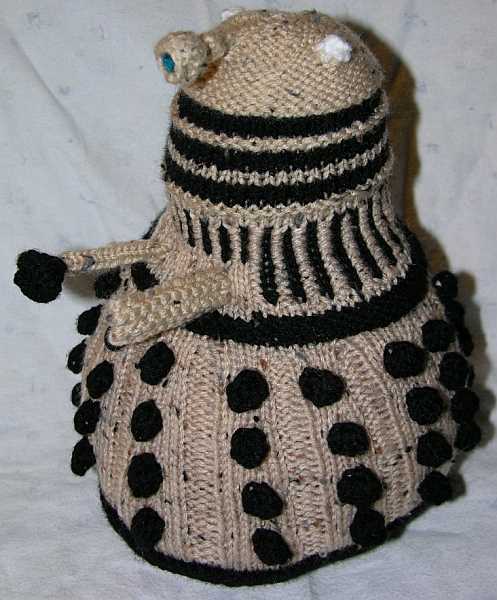
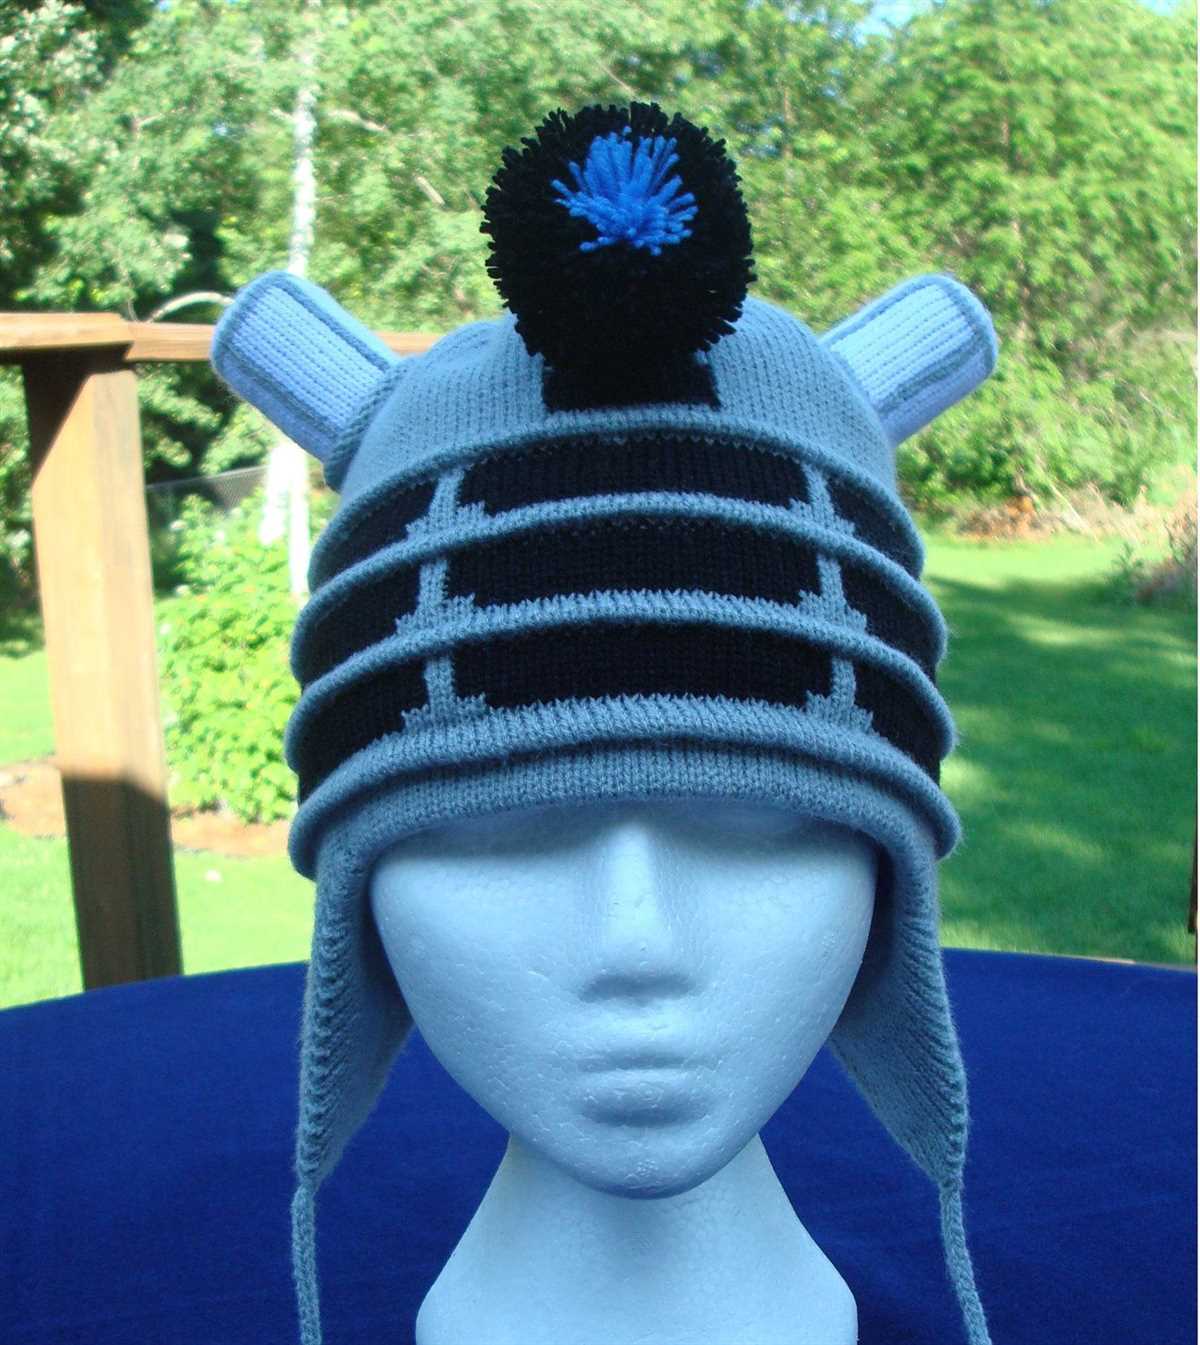
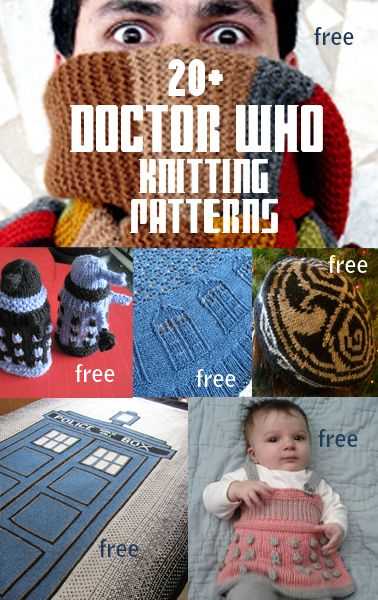
Are you a big fan of the iconic British sci-fi series Doctor Who? Do you love the menacing Daleks that the Doctor has to constantly outsmart? If so, then this Dalek hat knitting pattern is perfect for you!
Knitting has long been a popular hobby for those looking to create their own unique clothing and accessories. And what better way to show off your geeky side than with a hat inspired by one of the most recognizable villains in science fiction?
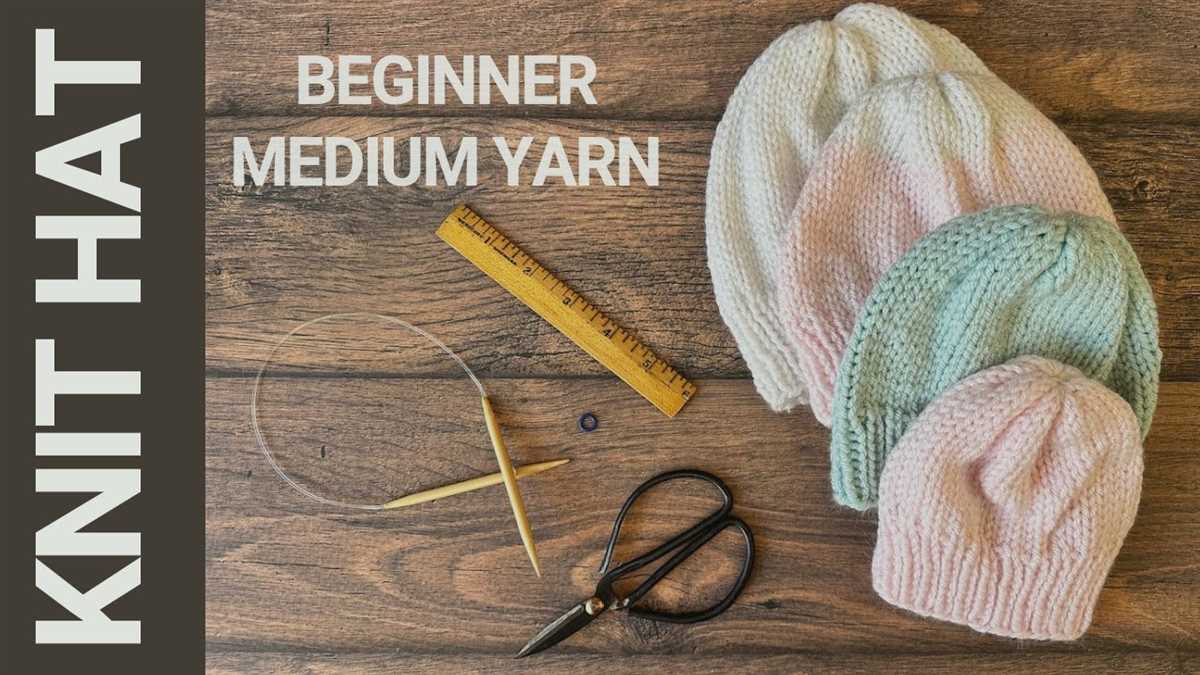
This Dalek hat knitting pattern is suitable for knitters of all skill levels. Whether you’re a beginner or an experienced knitter, you’ll be able to create a hat that looks like a miniature Dalek. The pattern includes detailed instructions and diagrams, making it easy to follow along and achieve great results.
Once you’ve completed this hat, you can proudly wear it to conventions, parties, or even just for everyday wear. It’s the perfect accessory for any Doctor Who fan, and it’s sure to be a conversation starter wherever you go. So grab your knitting needles and get ready to create a hat that will make you feel like you’re ready to exterminate!
Dalek Hat Knitting Pattern: How to Crochet Your Own Sci-Fi-Inspired Hat
Are you a fan of Doctor Who and looking for a fun and unique project to keep you busy? Why not try crocheting your very own Dalek hat? This sci-fi-inspired hat is not only a great way to showcase your love for the show, but it’s also a practical and cozy accessory for the colder months.
To get started, you’ll need some basic crochet skills and a few simple supplies. Here’s a breakdown of what you’ll need:
- Yarn in the colors of your choice (we recommend using metallic yarn for an extra futuristic touch)
- A crochet hook in a size appropriate for your chosen yarn
- Scissors
- A yarn needle for weaving in ends
- A stitch marker
Once you have your supplies ready, it’s time to begin crocheting your Dalek hat. Here’s a step-by-step guide:
- Start by crocheting a foundation chain that fits comfortably around your head. Make sure it’s not too tight or too loose, as you want the hat to fit snugly.
- Join the last stitch of the foundation chain with the first stitch to form a loop.
- Work in rounds, using a combination of single crochet and double crochet stitches to create the body of the hat. Feel free to experiment with different stitch patterns to add texture and visual interest.
- As you crochet, be sure to use your stitch marker to keep track of your rounds. This will help ensure that your hat has a consistent shape and size.
- Once you’ve reached your desired height for the hat, it’s time to add the Dalek-inspired details. This can include crocheting circles or squares in contrasting colors to represent the Dalek’s “panels,” and using embroidery or appliqué techniques to add the Dalek’s “eye stalk” and “plunger.”
- Finish off your hat by weaving in any loose ends and blocking it to give it a polished look. You can use a foam head or a bowl of the appropriate size to help maintain the shape of the hat while it dries.
With a little time and patience, you’ll have your very own Dalek hat to wear proudly as you binge-watch your favorite Doctor Who episodes. Don’t forget to share your creation with other fans online and spread the sci-fi love!
Materials and Tools You’ll Need
Before you start knitting your Dalek hat, make sure you have all the necessary materials and tools. Here is a list of what you’ll need:
- Yarn: Choose a soft, chunky yarn in the colors of your choice. You’ll need at least two different colors for the Dalek design.
- Knitting Needles: Use a pair of appropriately sized knitting needles that match the yarn you’ve chosen.
- Tapestry Needle: This needle will be used to weave in loose ends and sew any necessary stitches.
- Stitch Markers: These small plastic rings will help you keep track of your stitches and pattern repeats.
- Scissors: A good pair of scissors is essential for cutting yarn and trimming any excess.
- Measuring Tape: Use a measuring tape to check your gauge and ensure that the hat will fit properly.
- Pattern: Make sure you have the Dalek hat knitting pattern, either in print or digital format, before you begin.
With these materials and tools ready, you’ll be well-equipped to start creating your very own Dalek hat. Happy knitting!
Choosing the Right Yarn and Needle Size
When knitting a Dalek hat, it’s important to choose the right yarn and needle size to ensure that you achieve the desired result. The yarn and needle size you choose will affect the size, fit, and overall look of the hat.
Yarn: The type of yarn you choose will determine the warmth, texture, and appearance of the hat. For a Dalek hat, it’s recommended to use a medium-weight yarn that is soft and cozy. Acrylic or wool blends are popular choices for this project as they provide warmth and are easy to care for. Consider using yarn in colors that match the iconic Dalek design, such as shades of gray, black, and metallic accents.
Needle Size: The needle size you use can also affect the final outcome of the hat. It’s important to choose a needle size that will result in a fabric with a tight enough gauge to keep the wearer warm and provide structure to the hat. The recommended needle size for a Dalek hat is usually around US 7-9 (4.5-5.5mm). However, it’s always a good idea to check the gauge of the pattern you’re using and adjust the needle size if necessary to achieve the desired gauge. Keep in mind that using a larger needle size will result in a looser fabric, while using a smaller needle size will create a tighter fabric.
When choosing the yarn and needle size for your Dalek hat, consider the wearer’s preferences and the look you want to achieve. Experiment with different yarns and needle sizes to find the perfect combination that will result in a hat that is cozy, stylish, and reminiscent of the iconic Dalek.
Getting Started: Making a Gauge Swatch
If you’re planning to knit a Dalek hat using a specific knitting pattern, it’s important to create a gauge swatch before starting the project. A gauge swatch is a small sample of knitting that helps you determine the number of stitches and rows per inch in a specific yarn and needle combination.
Why is making a gauge swatch important?
Making a gauge swatch is essential because it ensures that your finished project will be the correct size and fit. By knitting a small sample of the pattern using the recommended needle size and yarn, you can measure the number of stitches and rows in a given measurement, such as one inch. This information is crucial for adjusting your knitting tension and ensuring that your finished project matches the measurements specified in the knitting pattern.
How to make a gauge swatch:
- Choose the right yarn and needle size: Before starting your gauge swatch, select the yarn and needle size recommended in the knitting pattern. Using a different yarn or needle size may result in a different gauge.
- Cast on stitches: Cast on a number of stitches recommended in the knitting pattern. It’s usually specified in the instructions for making the gauge swatch. Make sure to leave a few extra stitches on each side for a border.
- Knit your swatch: Follow the knitting pattern to create a small sample. Make sure to maintain a relaxed knitting tension, similar to how you would knit the rest of the project.
- Measure your swatch: Once you’ve completed your swatch, lay it flat on a surface. Use a ruler or a tape measure to measure the number of stitches and rows in a specified measurement, such as one inch. Count the stitches and rows within that measurement to determine your gauge.
- Adjust if necessary: Compare your gauge with the gauge specified in the knitting pattern. If your gauge doesn’t match, you may need to adjust your knitting tension by using a different needle size. A looser tension will result in fewer stitches and rows per inch, while a tighter tension will result in more stitches and rows per inch.
By taking the time to make a gauge swatch, you can ensure that your Dalek hat will fit correctly and look as intended. It may seem like an extra step, but it will save you from potential disappointment and the need for any adjustments later in the knitting process. Happy knitting!
Casting On: Creating the Brim of the Hat
Before you can start knitting the Dalek hat, you’ll need to cast on and create the brim of the hat. The brim is an important part of the hat as it helps to provide structure and stability. To begin, you’ll need to gather your materials and choose your yarn and needle size. For this pattern, it is recommended to use a medium weight yarn and size 8 needles.
To cast on, start by making a slipknot. To do this, create a loop with the yarn, passing the end through the loop and pulling tight. Next, insert your needle into the slipknot and pull the yarn through, creating a new stitch. Repeat this process until you have the desired number of stitches, which will depend on the size of the hat you are making.
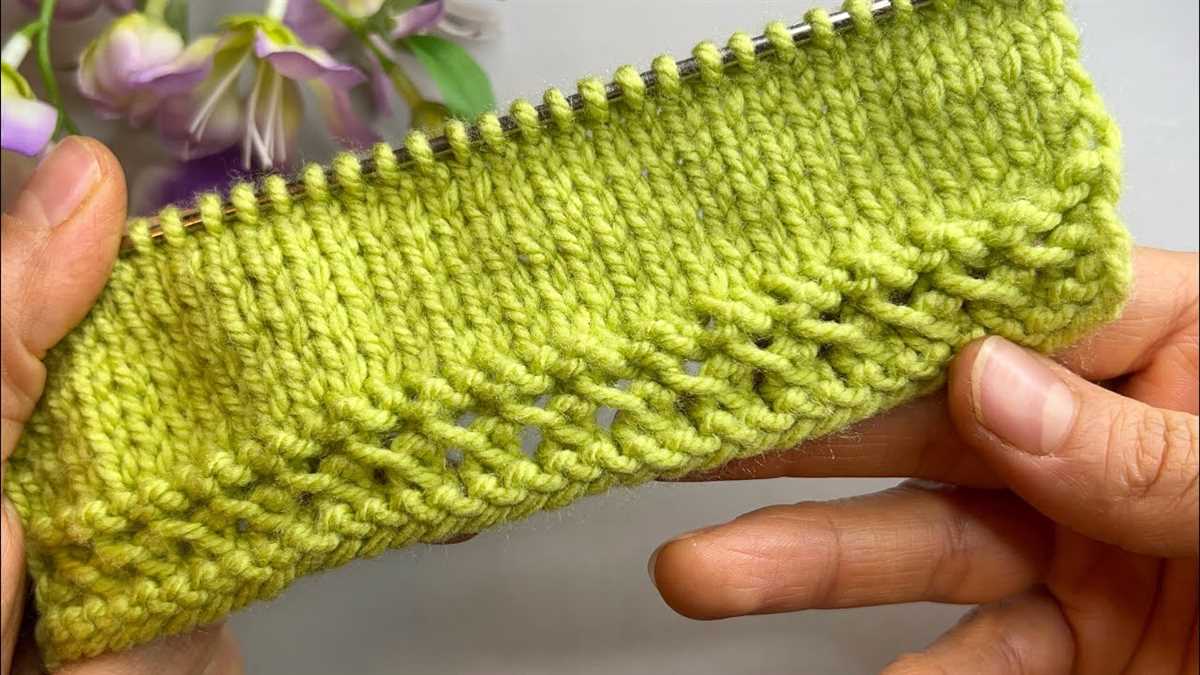
Once you have cast on your stitches, you can begin knitting the brim of the hat. The brim is typically worked in a rib stitch pattern, which creates a stretchy and flexible fabric. To create a rib stitch pattern, alternate between knitting and purling stitches. This can be as simple as knitting two stitches, then purling two stitches, and repeating this pattern until the end of the row.
Continue knitting in the rib stitch pattern for the desired length of the brim, typically around 1.5 to 2 inches. Make sure to keep track of your stitches and count as you go to ensure you maintain the correct stitch pattern. Once you have reached the desired length, you can move on to the next section of the hat pattern, which will guide you through shaping the crown.
Knitting the Ribbing: Adding Texture to the Brim
When it comes to knitting the brim of your Dalek hat, one way to add texture and visual interest is by incorporating ribbing. Ribbing is a knitting technique that creates a stretchy, elastic fabric by alternating knit and purl stitches. It not only adds a decorative element to your hat but also ensures a snug fit around the wearer’s head.
To begin knitting the ribbing, cast on the required number of stitches for the brim using your chosen yarn and needle size. The ribbing pattern typically consists of a set number of knit stitches followed by a set number of purl stitches, repeated until you reach the desired length for the brim.
For example:
- Cast on 80 stitches for a medium-sized hat.
- Row 1: *Knit 2 stitches, purl 2 stitches*; repeat from * to * across the row.
- Row 2: Repeat Row 1.
- Continue repeating Rows 1 and 2 until the ribbing measures approximately 2 inches in length.
By using this simple ribbing pattern, you’ll create a textured brim that not only adds visual interest but also helps to ensure a comfortable and secure fit. The alternating knit and purl stitches create a fabric that can stretch and adapt to different head sizes, making the hat versatile and suitable for various wearers. Additionally, ribbing adds a touch of sophistication and professionalism to your knitting project, elevating it from a simple beanie to a stylish accessory.
Shaping the Hat: Increasing Stitches for the Crown
The Dalek hat knitting pattern is a fun and unique project that allows you to recreate the iconic shape of the Doctor Who villain. To shape the crown of the hat, you will need to increase stitches in a specific pattern to create the raised dome effect. This section of the pattern is crucial to achieving the distinctive look of the Dalek hat.
To start shaping the crown of the hat, you will need to increase stitches evenly across each round. This can be done by knitting into the front and back of a stitch, or by using other common increase techniques such as yarn overs or make one stitches. The number of stitches you increase will depend on the size of your hat and the desired width of the crown.
When increasing stitches for the crown, it’s important to maintain the pattern and stitch count to ensure a well-fitting hat. Following the instructions provided in the knitting pattern will help you achieve the correct shape. It’s recommended to keep track of your stitch count as you work through each round to ensure accuracy.
As you knit the crown of the hat, you will notice the shape of the Dalek dome beginning to form. The increased stitches create a gradual slope, mimicking the shape of the villain’s head. Depending on the size and length of the hat, you may need to continue increasing for several rounds until you reach the desired height.
Shaping the crown of the Dalek hat is an important step in creating an accurate and recognizable finished product. By carefully increasing stitches in a pattern, you can achieve the iconic dome shape that makes the Dalek hat instantly recognizable to Doctor Who fans.
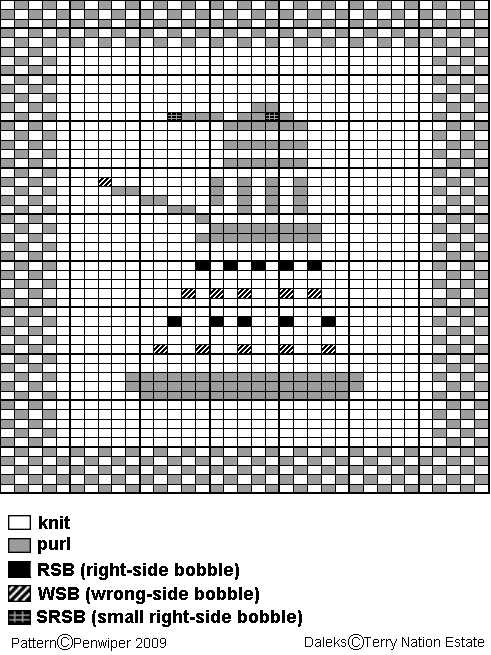
Creating the Dalek Design: Intarsia Knitting Technique
The Dalek hat is one of the most iconic designs in the world of knitting. With its unique shape and intricate details, this hat is a must-have for any Doctor Who fan. To create the perfect Dalek design, it is essential to master the intarsia knitting technique.
The intarsia knitting technique involves using different colors of yarn to create a pattern or design within a knitted piece. In the case of the Dalek hat, the different colors of yarn are used to create the distinctive shape and features of the Dalek. The intarsia technique allows for more precise color changes and gives the design a seamless appearance.
To begin knitting the Dalek hat using the intarsia technique, you will first need to gather the necessary materials. This includes different colors of yarn, knitting needles, a tapestry needle, and the Dalek hat knitting pattern. Once you have everything ready, you can start casting on and following the pattern to create the basic shape of the hat.
As you progress with the knitting, you will reach a point where the Dalek design comes into play. This is where the intarsia technique is utilized to add the different colors and details to the hat. Each color change requires a new strand of yarn to be started and woven in as you go along. The important thing is to keep the tension even and avoid pulling the yarn too tightly, as this can distort the design.
- Make sure to follow the chart or pattern carefully, as it will indicate when to change colors and where to place each color within the design.
- Remember to twist the yarns at the color change points to prevent holes from forming.
- Use a tapestry needle to weave in the loose ends of yarn as you go along to keep your knitting looking neat and tidy.
By mastering the intarsia knitting technique, you can create a stunning Dalek hat that is sure to impress any Doctor Who fan. With the precise color changes and seamless design, this hat will be a standout piece in your knitting collection.
Adding Details: Embroidering the Dalek Eye Stalk and Panels
Once you have completed the main structure of your Dalek hat, it’s time to add the details that will bring it to life. One of the most iconic features of a Dalek is its eye stalk, which can easily be embroidered onto the hat using a dark colored yarn and a tapestry needle. Start by deciding where you want the eye stalk to be positioned on your hat, and mark the spot with a removable stitch marker or piece of contrasting yarn.
Thread your tapestry needle with the dark colored yarn, and begin stitching in a vertical line from the marked spot upwards. Make sure to stitch securely through all layers of the hat to ensure the eye stalk stays in place. As you reach the top, create a small loop or circle to represent the actual eye at the end of the stalk. This can be achieved by stitching a few small stitches in a circular pattern.
Next, let’s move on to the Dalek’s panels. These are the colored squares or rectangles that decorate the front of the Dalek’s body. You can add these panels by embroidering them onto the hat using a different colored yarn. Start by deciding on the size and placement of the panels, and mark each spot with a removable stitch marker.
Thread your tapestry needle with the colored yarn, and begin stitching around the marked spots to create square or rectangular shapes. You can use a running stitch or a backstitch, depending on your preference. Make sure to stitch securely through all layers of the hat, and leave a small space between each panel to mimic the appearance of the original Dalek design.
Continue embroidering the panels until you have completed all of the desired details. Once finished, take a step back and admire your work – you now have a Dalek hat that is ready to conquer the universe!
Finish the Body of the Hat: Continuing in Stockinette Stitch
Once you have completed the ribbing section of the hat, it’s time to continue knitting in stockinette stitch for the body of the hat. Remember to keep track of your stitch count and markers as you go along.
Continue knitting in stockinette stitch for the desired length of the hat. You can measure the length by trying it on or referring to the pattern instructions. Stockinette stitch is created by knitting one row and then purling the next row. Repeat this pattern until you have reached the desired length.
As you continue knitting in stockinette stitch, make sure to maintain an even tension throughout your work. This will help ensure that your hat has a smooth and professional finish. You can use a stitch marker at the beginning of each row to help you keep track of your progress.
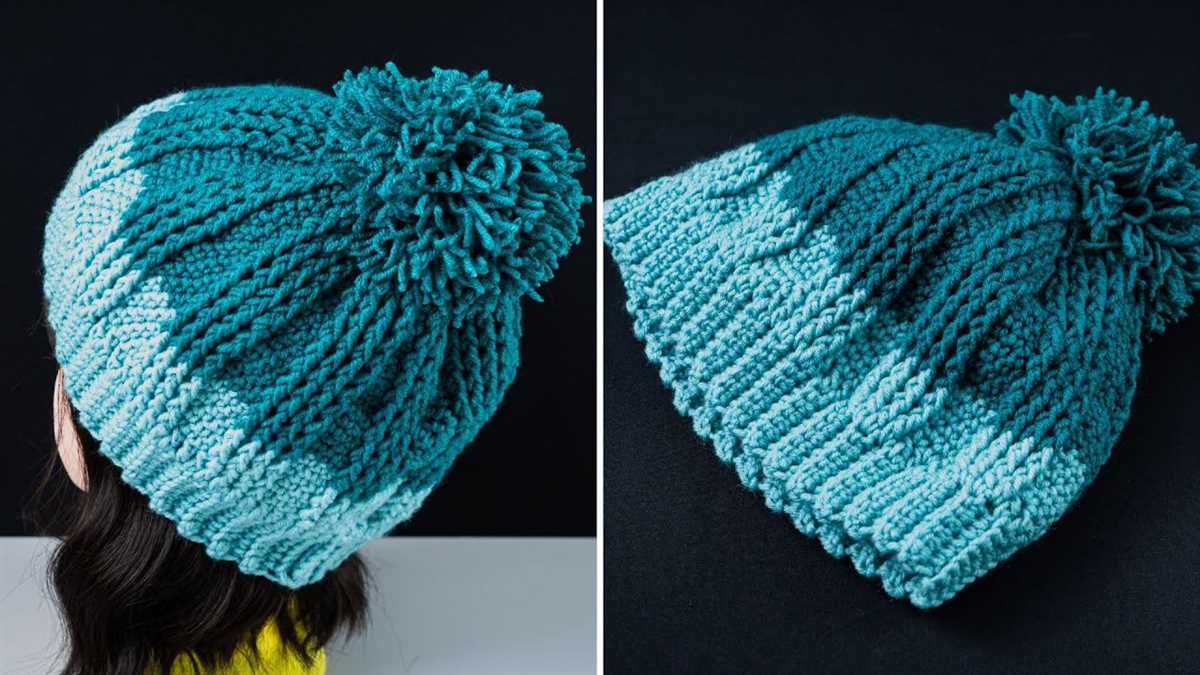
At this point, you can also choose to add any desired design elements or embellishments to your hat. This could include stripes, colorwork, or even a decorative pattern. Get creative and make your hat truly unique!
Once you have finished knitting the body of the hat, you can then move on to shaping the crown. This involves decreasing stitches to create a tapered effect at the top of the hat. Follow the pattern instructions for shaping the crown and continue knitting until you have completed the hat.
Decreasing Stitches: Shaping the Top of the Hat
Once you have reached the desired length of your Dalek hat, it is time to shape the top by decreasing stitches. Decreasing stitches helps create a tapered crown, giving the hat its iconic shape. There are various methods you can use to decrease stitches, but the most commonly used methods are the knit-two-together (k2tog) and slip-slip-knit (ssk) techniques.
To decrease stitches using the k2tog method, you simply knit two stitches together as if they were one stitch. This creates a single stitch out of two. Repeat this decrease every few stitches evenly across the row until the desired number of stitches is reached.
The ssk method is another commonly used technique to decrease stitches. To perform this decrease, you slip the next two stitches knitwise, insert the left needle into the front part of those two stitches, and then knit them together through the back loops. This creates a left-leaning decrease. Again, repeat the ssk decrease evenly across the row until the desired number of stitches is reached.
When decreasing stitches, it is important to maintain the pattern and symmetry of your hat. You may need to adjust the frequency of the decreases depending on the stitch pattern you are using. Always refer to the pattern instructions for guidance on the number of stitches to decrease and the spacing between decreases.
By decreasing stitches at the top of your Dalek hat, you will create a snug and tapered crown that mirrors the shape of the famous Doctor Who villain. Take your time and carefully follow the decrease instructions to achieve the desired shape and fit of your hat. With the top shaping complete, you can now finish off your Dalek hat by binding off the remaining stitches and weaving in any loose ends.
Finishing Touches: Sewing up the Seam and Weaving in Ends
After completing your Dalek hat knitting project, it’s time to add the finishing touches to make it look polished and professional. One of the final steps is sewing up the seam to close the top of the hat. This ensures that the hat fits snugly and keeps the cold air out. Use a yarn needle and matching yarn to sew up the seam, making sure to align the stitches and maintain the overall pattern of the hat. It’s important to sew up the seam neatly and securely, so take your time and double-check your work before finishing.
Once the seam is sewn up, the next step is to weave in the loose ends of yarn. These loose ends are the result of starting and ending each section of the hat, as well as any color changes that were made. Weaving in ends is essential to prevent the hat from unraveling and to give it a clean and seamless appearance. Start by threading the yarn needle with one of the loose ends and carefully weave the yarn through the stitches on the wrong side of the hat, following the same path as the surrounding stitches. Repeat this process for each loose end, making sure to securely fasten the yarn before trimming off any excess.
By sewing up the seam and weaving in the ends, you can give your Dalek hat the finishing touches it needs to look professional and complete. These final steps may require some patience and attention to detail, but the end result will be a beautifully crafted hat that you can proudly wear or give as a thoughtful gift. So take your time, follow the instructions, and enjoy the process of bringing your knitting project to its final stage!
Wear Your Dalek Hat with Pride: Styling and Care Tips
Now that you have your Dalek hat, it’s time to show it off! Whether you’re a Doctor Who fan or just love unique and quirky fashion accessories, the Dalek hat is sure to make a statement. Here are some styling tips to help you rock your Dalek hat with pride:
- Casual with an edge: Pair your Dalek hat with a simple t-shirt or sweater and jeans for a casual yet stylish look. The hat will add a touch of geeky coolness to your outfit.
- Dressed up chic: Don’t be afraid to dress up your Dalek hat! Pair it with a dress or a skirt and blouse for a fun and unexpected twist on a more formal outfit.
- Festival fashion: If you’re heading to a music festival or any other outdoor event, the Dalek hat is the perfect accessory to stand out in the crowd. Pair it with boho-inspired pieces and embrace your inner Whovian.
- Gift it with love: The Dalek hat also makes a great gift for fellow Doctor Who fans or anyone who appreciates geeky fashion. Spread the love and share the joy of wearing a Dalek hat!
Now that you know how to style your Dalek hat, let’s talk about how to take care of it. While the hat is hand-knit with care, it’s important to keep it in good condition to ensure its longevity:
- Hand wash only: Avoid machine washing or drying your Dalek hat. Instead, gently hand wash it in cool water with mild detergent. Pat it dry with a towel and reshape it while it’s still damp.
- Store it properly: When you’re not wearing your Dalek hat, make sure to store it in a dry and clean place. Avoid storing it in direct sunlight or in a damp area to prevent any damage.
- Handle with care: The Dalek hat may be sturdy, but it’s still a delicate hand-knit item. Avoid pulling or stretching it too much to maintain its shape and structure.
With these styling and care tips in mind, you’re ready to wear your Dalek hat with pride! Whether you’re attending a Doctor Who convention, geeking out at a comic book store, or simply adding a touch of nerdiness to your everyday life, your Dalek hat is sure to be a conversation starter and a cherished accessory.
Q&A:
What is a Dalek hat knitting pattern?
A Dalek hat knitting pattern is a set of instructions for knitting a hat that resembles a Dalek, a fictional alien race from the British sci-fi series “Doctor Who”. The pattern usually includes detailed instructions on how to create the hat’s shape, colorwork, and any additional embellishments.
Where can I find a Dalek hat knitting pattern?
You can find Dalek hat knitting patterns on various knitting websites, online marketplaces, and sometimes even in knitting books or magazines. A simple internet search for “Dalek hat knitting pattern” should provide you with several options to choose from.
Are Dalek hat knitting patterns suitable for beginners?
It depends on the specific pattern. Some Dalek hat knitting patterns are designed with beginners in mind and may include detailed step-by-step instructions. However, others may assume some prior knitting knowledge and experience. It’s always a good idea to read through the pattern before starting to assess if it matches your skill level.
What materials do I need for knitting a Dalek hat?
The materials needed for knitting a Dalek hat will depend on the specific pattern, but generally, you will need yarn in the required colors, knitting needles (often in two sizes – one for the ribbing and one for the main body), a tapestry needle for weaving in ends, and any additional embellishments mentioned in the pattern.
Can I modify a Dalek hat knitting pattern?
Yes, you can modify a Dalek hat knitting pattern to suit your preferences. You can change the colors, add or remove embellishments, or adjust the size to fit your head or the head of the intended recipient. Just keep in mind that modifying a pattern may require some knowledge of knitting techniques and how they affect the final result.
Where can I find a Dalek hat knitting pattern?
You can find a Dalek hat knitting pattern on various knitting websites, such as Ravelry or Etsy. You can also try searching for it on knitting forums or by using search engines like Google.
Are there different variations of Dalek hat knitting patterns?
Yes, there are many different variations of Dalek hat knitting patterns available. Some patterns might feature a more simple design, while others may be more intricate and detailed. When looking for a Dalek hat pattern, you can choose from a variety of options that suit your skill level and preferences.