
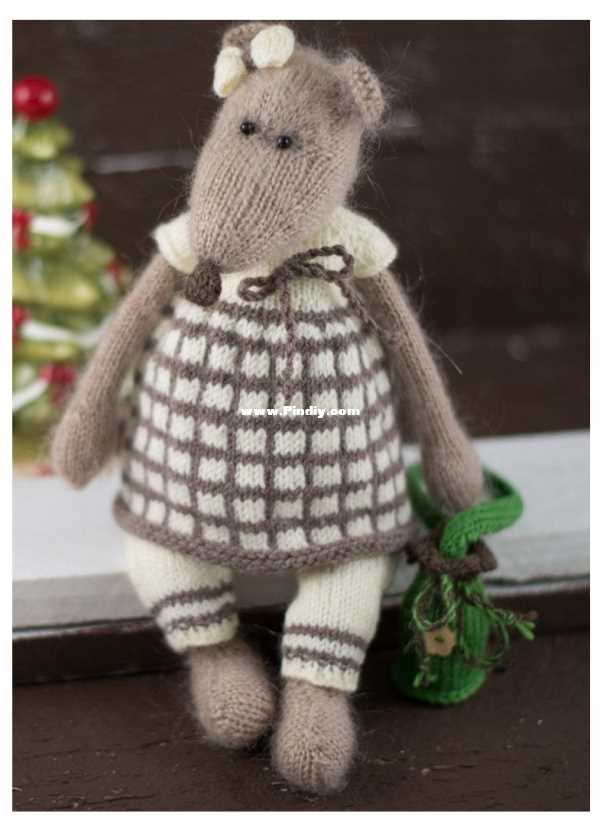
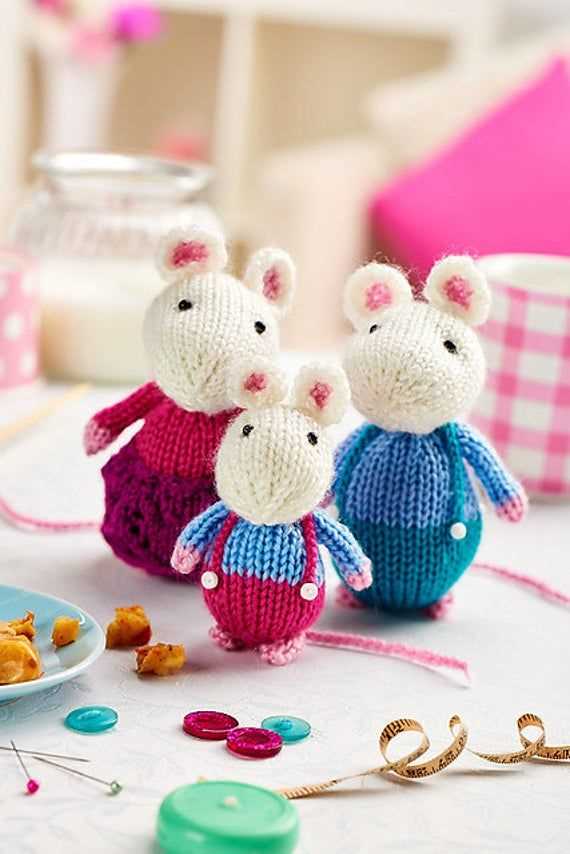
Christmas is a time for joy, warmth, and getting creative with crafts. If you’re a knitting enthusiast looking to add some festive cheer to your home or give a unique handmade gift, why not try knitting your own Christmas mouse? With this free knitting pattern, you can create an adorable mouse ornament that will add a touch of charm to your Christmas tree or make a delightful stocking filler.
This easy-to-follow knitting pattern is perfect for both beginners and experienced knitters. The pattern includes step-by-step instructions, along with clear photos and diagrams to help you along the way. Whether you’re knitting for yourself or a loved one, this Christmas mouse is sure to bring a smile to anyone’s face.
The best part about this pattern is that it’s completely free! All you need is some basic knitting supplies and a few hours of your time. Knitting your own Christmas decorations allows you to personalize your home and create a one-of-a-kind festive atmosphere. So, why not grab your knitting needles, choose some vibrant Christmas colors, and start knitting your very own Christmas mouse today?
How to Knit a Free Christmas Mouse Pattern
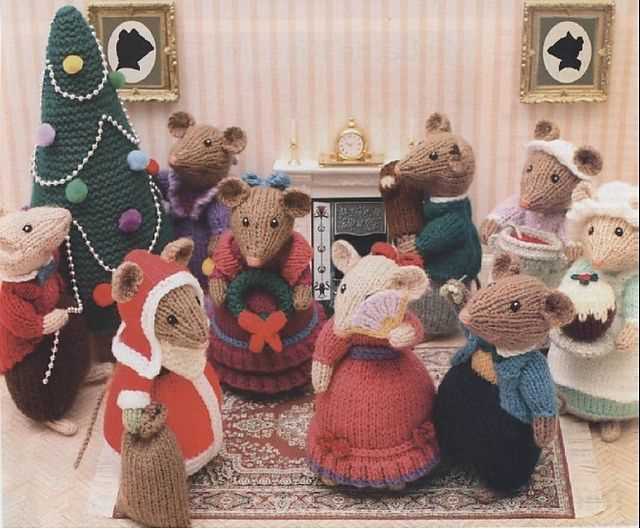
Knitting your own Christmas decorations can be a fun and rewarding activity during the holiday season. If you’re looking for a free pattern to try, why not consider knitting a cute Christmas mouse? These adorable little creatures can be used as ornaments, stocking stuffers, or even as part of a festive display on your mantel or table.
First, you will need to gather your materials. For this project, you will need knitting needles, yarn in various colors (such as brown, white, red, and green), stuffing, a darning needle, and a pair of scissors. Once you have everything you need, you can begin knitting your mouse.
To start, you will need to cast on your stitches. The pattern you choose should specify how many stitches to cast on. Typically, a mouse pattern will require you to cast on a certain number of stitches for the body, the head, and the limbs. Follow the pattern instructions carefully to ensure you cast on the correct number of stitches.
Once your stitches are cast on, you can begin knitting the different parts of the mouse. The body and head are often knitted in one piece, while the limbs are knitted separately and then sewn onto the body. You may also need to knit additional pieces, such as the ears and tail. Again, refer to the pattern for specific instructions on how to knit each part.
After all of the pieces are knitted and assembled, you can stuff the mouse with stuffing to give it a soft and plushy feel. Be sure to stuff the body and head firmly, but not so much that it distorts the shape. Use a darning needle to sew any openings closed, and trim any excess yarn with a pair of scissors.
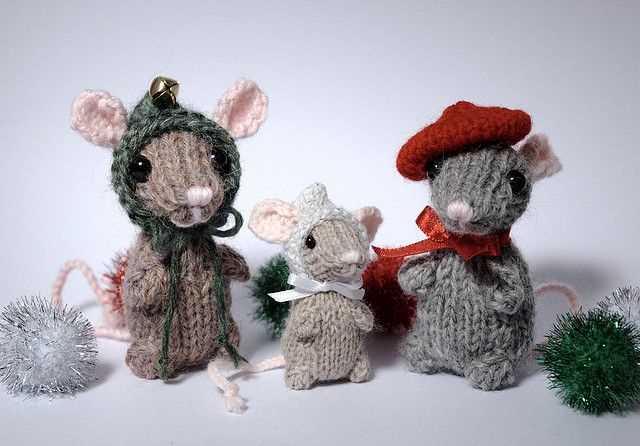
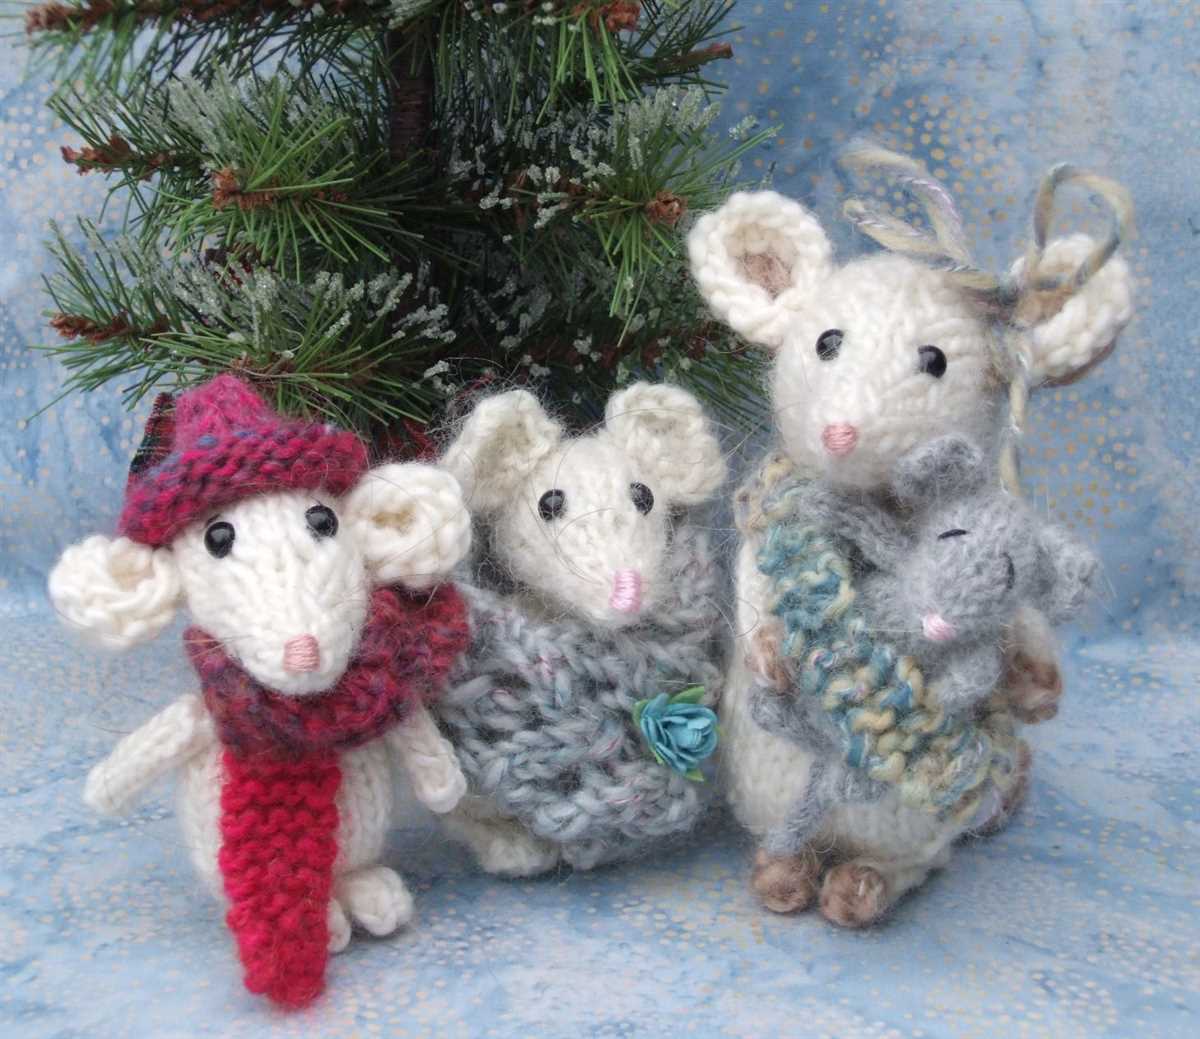
Finally, you can add the finishing touches to your Christmas mouse. This may include embroidering the face using contrasting yarn, adding a ribbon or scarf around its neck, or attaching tiny beads for eyes. Get creative and have fun personalizing your mouse to make it truly unique.
Once your Christmas mouse is complete, you can proudly display it as part of your holiday decor. Whether you place it on your tree, hang it from a garland, or give it as a gift, your handmade creation is sure to bring joy and charm to the festive season.
Step-by-Step Instructions for Knitting a Christmas Mouse
Knitting a Christmas mouse is a fun and festive project that can add a touch of holiday charm to your home decor or make a delightful gift for loved ones. Follow these step-by-step instructions to create your very own knitted Christmas mouse.
Materials:
- Yarn in red, green, white, and black
- Knitting needles in the appropriate size for your chosen yarn
- Stuffing
- Tapestry needle
- Scissors
- Optional: small bell or ribbon for embellishment
Instructions:
- Body: Start by casting on stitches in your chosen color for the mouse’s body. Knit a rectangular shape that is wide enough to fold in half and sew up the sides. Once the desired length is reached, bind off the stitches.
- Ears: Knit two small triangles using the desired color for the mouse’s ears. These can be attached to the top of the body after it is sewn together.
- Tail: Knit a thin, elongated strip in the desired tail color. Leave a long yarn tail to attach the tail to the body later on.
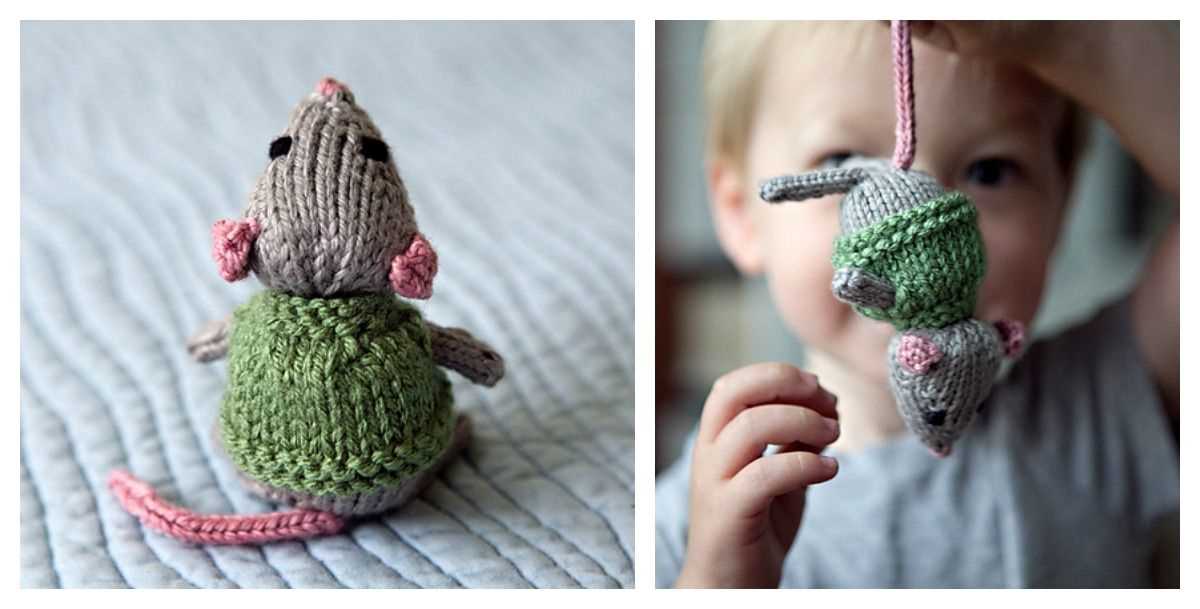
- Head: Knit a small circular shape for the mouse’s head. This can be done using the same color as the body or a contrasting color for added visual interest.
- Nose and Eyes: Use black yarn to embroider or stitch on a small nose and two eyes on the mouse’s face. This will give the mouse its characteristic features.
- Assembly: Once all the separate pieces are completed, it’s time to assemble the mouse. Start by folding the body piece in half and sewing up the sides, leaving a small opening at the bottom for stuffing. Fill the body with stuffing until it reaches the desired firmness, and then close up the opening. Attach the ears and tail to the body using the long yarn tails left for each piece.
- Finishing touches: To add a final festive touch to your Christmas mouse, you can sew on a small bell or tie a colorful ribbon around its neck. This will give the mouse a whimsical and playful look.
Now that you have completed all the steps, you can proudly display your knitted Christmas mouse as a delightful holiday decoration or give it as a thoughtful handmade gift to spread the joy of the season.
Materials Needed for Knitting a Christmas Mouse
When it comes to knitting a Christmas mouse, you’ll need a few essential materials to bring this adorable holiday character to life. Here’s a list of what you’ll need:
- Yarn: Choose a soft, medium-weight yarn in festive colors like red, white, and green. Acrylic or cotton yarn works well for this project.
- Knitting Needles: You’ll need a pair of knitting needles in a size appropriate for your chosen yarn. Circular or straight needles can both be used, depending on your preference.
- Stitch Markers: These small rings or clips help you keep track of your progress and mark important points in your pattern.
- Stuffing: To give your Christmas mouse a plush and cuddly feel, you’ll need stuffing material like polyester fiberfill or cotton batting.
- Tapestry Needle: This large, blunt needle with a wide eye is used for sewing up your knitted pieces and weaving in loose ends.
- Embroidery Floss: Use embroidery floss in various colors to add facial details like eyes, nose, and mouth to your Christmas mouse.
- Buttons and Ribbons: Decorative buttons and ribbons can be used to add an extra festive touch to your Christmas mouse, such as attaching a bowtie or placing buttons for eyes.
With these materials at hand, you’ll have everything you need to start knitting your own delightful Christmas mouse. Gather your supplies and let the holiday crafting begin!
Choosing the Right Yarn for Your Christmas Mouse
When it comes to knitting a Christmas mouse, choosing the right yarn is essential to achieve the desired look and feel. Here are some factors to consider when selecting yarn for your festive project.
Type of Yarn:
For a Christmas mouse, it’s best to opt for a soft and fluffy yarn to mimic the cozy texture of a mouse’s fur. Mohair yarn, which is derived from the hair of the Angora goat, is an excellent choice as it provides a fluffy and realistic appearance. Alternatively, you can also use a high-quality acrylic or blend yarn specifically designed for toy knitting. These yarns are often soft and durable, making them perfect for creating a festive mouse.
Color Selection:

Choosing the right colors for your Christmas mouse can add a touch of whimsy and festive cheer to your project. Traditional colors such as red, green, and white are popular choices for the body of the mouse, while metallic yarns in gold or silver can be used for the mouse’s accessories like a bow or scarf. Consider using variegated yarns with holiday-inspired colorways for a more playful and unique look.
Yarn Weight:
The yarn weight you choose will determine the size and overall appearance of your Christmas mouse. A lightweight yarn like fingering or sport weight will create a smaller and more delicate mouse, while a bulkier yarn like worsted or chunky weight will result in a larger and more substantial mouse. Consider the finished size you desire and the level of detail you want to achieve when selecting the yarn weight.
Washable and Hypoallergenic:
If you plan to give your Christmas mouse as a gift or display it in a high-traffic area, it’s important to choose a yarn that is easy to clean and hypoallergenic. Look for yarns that are machine washable and have minimal shedding to ensure your mouse stays fresh and free from allergens. This is especially important if the mouse will be handled by children or individuals with sensitive skin.
By taking these factors into consideration, you can choose the perfect yarn for your Christmas mouse project. Whether you prefer a fluffy and realistic mouse or a whimsical and colorful creation, the right yarn can bring your festive knit to life.
Basic Knitting Stitches for the Christmas Mouse Pattern
When knitting the Christmas mouse pattern, it’s important to be familiar with the basic knitting stitches that will be used. These stitches will create the adorable details and shape of the mouse. Here are the main stitches you’ll need to know:
1. Knit Stitch
The knit stitch is the most basic and commonly used stitch in knitting. It creates a smooth and textured fabric. To knit, insert the right-hand needle into the first stitch on the left-hand needle from left to right, bringing the yarn over the right-hand needle. Pull the yarn through the stitch, slipping the stitch off the left-hand needle. Repeat across the row.
2. Purl Stitch
The purl stitch is another basic stitch used in knitting. It creates a bumpy texture on the fabric, perfect for adding depth to the Christmas mouse pattern. To purl, hold the yarn in front of the work, insert the right-hand needle into the first stitch on the left-hand needle from right to left, bring the yarn under the right-hand needle and over it, and pull the yarn through the stitch. Slip the stitch off the left-hand needle. Repeat across the row.
3. Increase Stitches
In the Christmas mouse pattern, you’ll need to increase stitches to create the shaping for the mouse’s body and features. There are several ways to increase stitches, including knit front and back (kfb), make one (m1), and yarn over (yo). Pay attention to the pattern instructions to determine which increase method to use in each specific case.
4. Decrease Stitches
Decreasing stitches is essential for shaping the Christmas mouse’s body and head. The most common decrease stitches used in the pattern are knit two stitches together (k2tog) and slip, slip, knit (ssk). These stitches create a smooth decrease that slants to the right or left, depending on the method used.
By mastering these basic knitting stitches, you’ll be able to create the adorable Christmas mouse pattern with ease. Have fun and enjoy the process of knitting this festive craft!
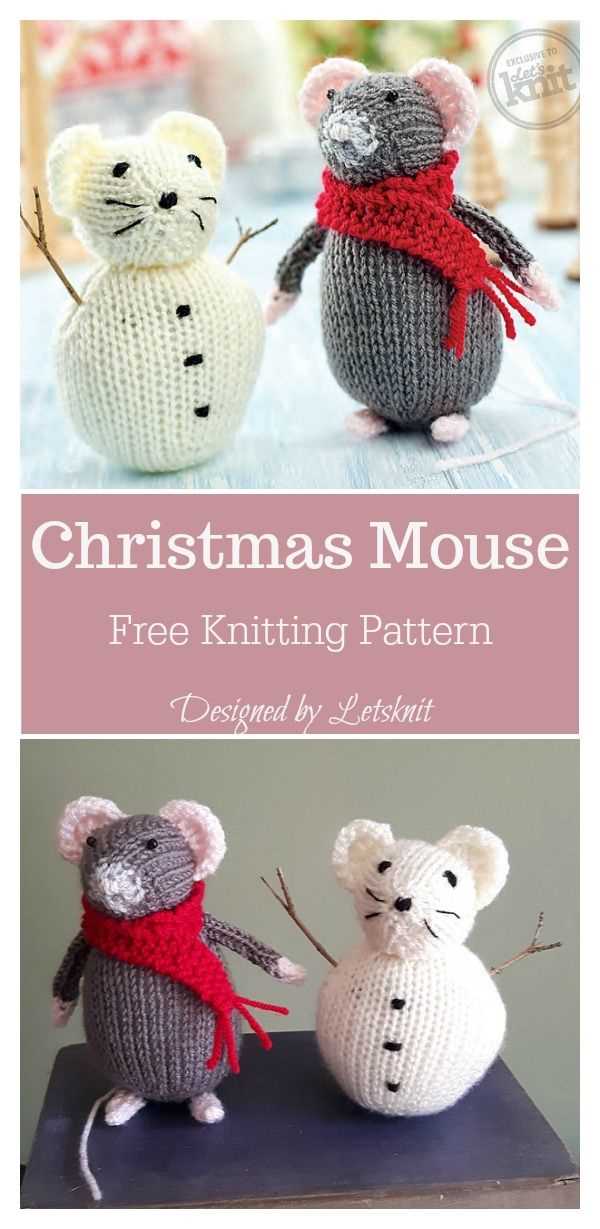
Free Christmas Mouse Knitting Pattern
Looking for a cute and festive addition to your holiday decorations? Why not try knitting your own Christmas mouse! With this free knitting pattern, you can create a charming and whimsical mouse that will add a touch of holiday cheer to your home.
To get started, gather your materials. You’ll need some yarn in your desired colors, knitting needles, stuffing, and a few other basic knitting supplies. Once you have everything you need, you can begin knitting the mouse using the provided pattern.
The pattern includes detailed instructions and a list of abbreviations to help you along the way. It’s designed for knitters of all skill levels, so even if you’re a beginner, you can still give this project a try. The finished mouse measures around 6 inches tall, making it the perfect size to display on a mantel, shelf, or as a centerpiece for your holiday table.
Materials:
- Yarn in main color (MC) and contrast color (CC)
- Knitting needles
- Stuffing
- Tapestry needle
- Scissors
Instructions:
- Using MC, cast on 10 stitches.
- Knit 1 row.
- Purl 1 row.
- Continue knitting in stockinette stitch until the piece measures 4 inches in length.
- Next row: k2tog, knit to last 2 stitches, k2tog (8 stitches).
- Continue decreasing 2 stitches at the beginning and end of every row until 2 stitches remain.
- Bind off and weave in ends.
- Using CC, embroider eyes and nose onto the mouse.
- Stuff mouse firmly with stuffing.
- Using CC, sew up the bottom seam of the mouse.
Once you’ve finished knitting and assembling the mouse, you can add some festive touches, such as a tiny Santa hat or a miniature string of lights. Get creative and make each mouse unique!
This free Christmas mouse knitting pattern is a fun and creative way to add some holiday spirit to your home. Whether you’re an experienced knitter or a beginner, give it a try and see how adorable these little mice can be!
Knitting the Body of the Christmas Mouse
When knitting the body of the Christmas mouse, it’s important to start with the right yarn and needles. Choose a soft, fine yarn in a color that matches the desired appearance of the mouse. Using a small set of double-pointed needles will make it easier to create the small and intricate details of the toy.
Begin by casting on the required number of stitches for the mouse body. The pattern may specify the exact number of stitches to cast on, or you can estimate based on the desired size of the mouse. It’s important to keep track of your stitches, so use stitch markers or a scrap piece of yarn to mark the beginning of each round.
Once the stitches are cast on, you can begin knitting in the round. Follow the pattern instructions for the specific stitch pattern or design elements. If there are no design elements, simply continue knitting every round until the body reaches the desired length.
To shape the body, you may need to decrease stitches at certain points. This can be done by knitting two stitches together, or following a specific decrease pattern as indicated in the pattern instructions. Make sure to evenly distribute the decreases so that the body maintains its shape.
Once the body is complete, finish off by binding off all stitches. Cut the yarn, leaving a long tail for sewing the body closed. Weave in any loose ends to ensure a clean finished look. The body of the Christmas mouse is now ready to be stuffed and sewn onto the head and limbs of the toy.
Knitting the Arms and Legs of the Christmas Mouse
When knitting the arms and legs of the Christmas mouse, it’s important to pay attention to the pattern instructions and gauge to ensure the correct size and shape. Using a pair of double-pointed needles, cast on the required number of stitches for the desired limb. For example, the pattern may instruct to cast on 6 stitches for each arm.
Knit in the round: To give the arms and legs a seamless appearance, it is recommended to knit them in the round. This can be done using double-pointed needles or using the magic loop method. Knitting in the round also reduces the need for seaming later on.
Working the pattern: Follow the pattern instructions for each limb, keeping track of any increases or decreases as required. This may involve knitting a specific number of rounds, changing colors, or adding decorative stitches. Pay close attention to the pattern’s instructions and refer to any accompanying charts if necessary.
- Shaping the limbs: To shape the arms and legs, the pattern may instruct to decrease or increase stitches at specific points. This creates the tapered effect needed for the mouse’s limbs. Make sure to follow the instructions carefully and count the stitches to ensure accuracy.
Finishing touches: Once the limbs are complete, secure the thread and cut it, leaving a tail for sewing. Carefully stuff the arms and legs with toy stuffing to give them a firm yet soft feel. Make sure to evenly distribute the stuffing to create a consistent shape.
- Attaching the limbs: Using a tapestry needle, sew the arms and legs onto the body of the mouse according to the pattern’s instructions. Take care to position them correctly and securely, ensuring they are evenly spaced and aligned.
With these steps, you’ll be able to knit the charming arms and legs of the Christmas mouse, adding a delightful touch to your festive decorations.
Assembling the Christmas Mouse
Once you have finished knitting all the pieces of the Christmas mouse, it’s time to assemble them together to create the final adorable decoration. Take a moment to admire your handiwork before proceeding with the assembly process.
Gather Your Materials
Before you begin assembling the mouse, make sure you have all the necessary materials at hand. You will need a tapestry needle, scissors, stuffing, and any additional embellishments you want to add to your mouse, such as a tiny Santa hat or a mini wreath. Having everything ready will help streamline the process and prevent any interruptions.
Start with the Body
Begin by sewing the legs to either side of the body, making sure they are evenly spaced. Use a whipstitch or a similar stitching technique to securely attach the legs to the body. Next, sew the arms onto the body, positioning them just below the head. Again, use a whipstitch to secure the arms in place.
Attach the Head and Tail
With the limbs in place, it’s time to attach the head to the body. Align the head piece with the neck opening, making sure it is centered and level. Use a whipstitch to secure the head to the body, taking care to stitch through both layers of fabric for a sturdy attachment. Finally, attach the tail to the back of the mouse using the same stitching technique.
Stuff and Finish
Once all the pieces are securely attached, it’s time to stuff the mouse. Carefully fill the body and head with a generous amount of stuffing, making sure to evenly distribute it for a plump appearance. Keep adding stuffing until the desired firmness is achieved. Once stuffed, close the opening using a whipstitch or a similar technique.
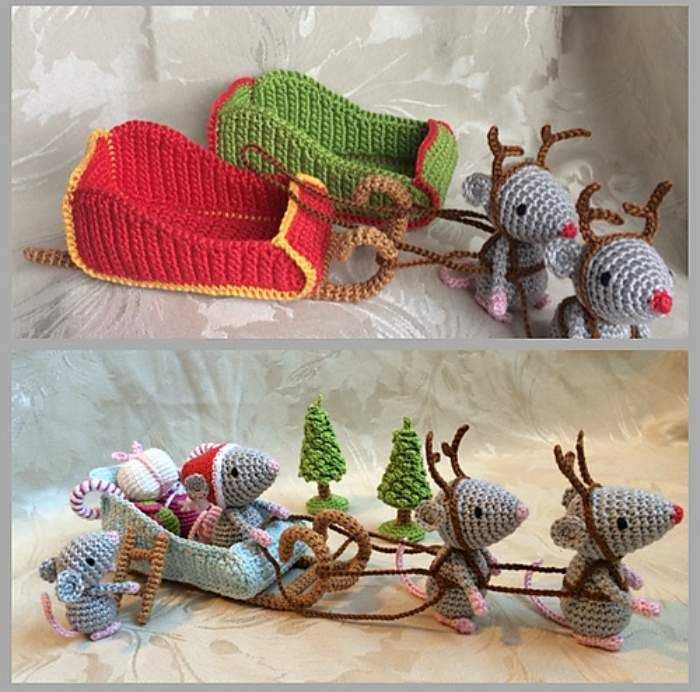
Now that the main assembly is complete, you can add any additional embellishments to personalize your Christmas mouse. Attach a small Santa hat to the head or tie a mini wreath around its arm to give it a festive touch. Get creative and have fun decorating your adorable knitted Christmas mouse!
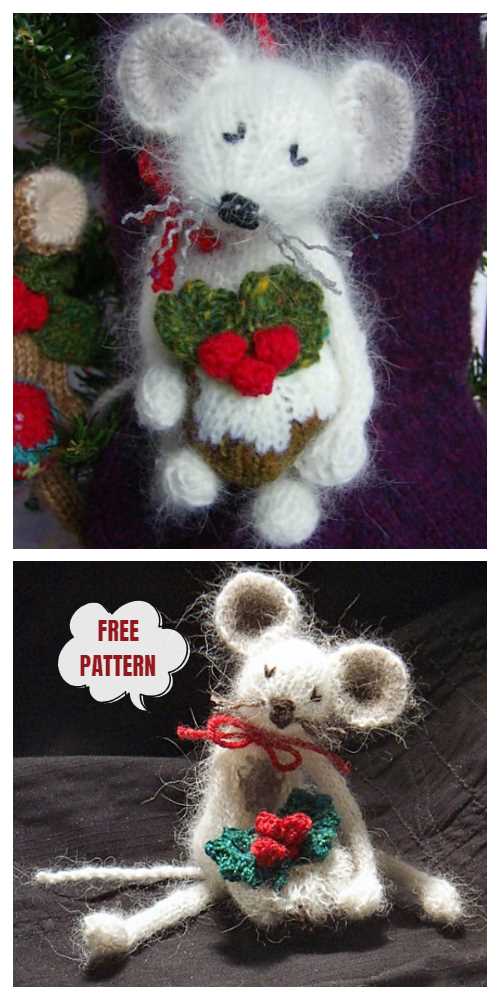
Adding Finishing Touches to Your Christmas Mouse

After successfully knitting your Christmas mouse, it’s time to add the finishing touches to make it even more festive and adorable. These little details will truly bring your creation to life and make it a standout decoration for the holiday season.
1. Embroidering the face: The face of your Christmas mouse is where its personality shines through. Take a small amount of black or brown embroidery floss and carefully stitch the eyes and nose onto the mouse’s face. Use a satin stitch or French knots to create the desired effect. Remember to leave a small space between the eyes and position the nose slightly below them for a cute, symmetrical look.
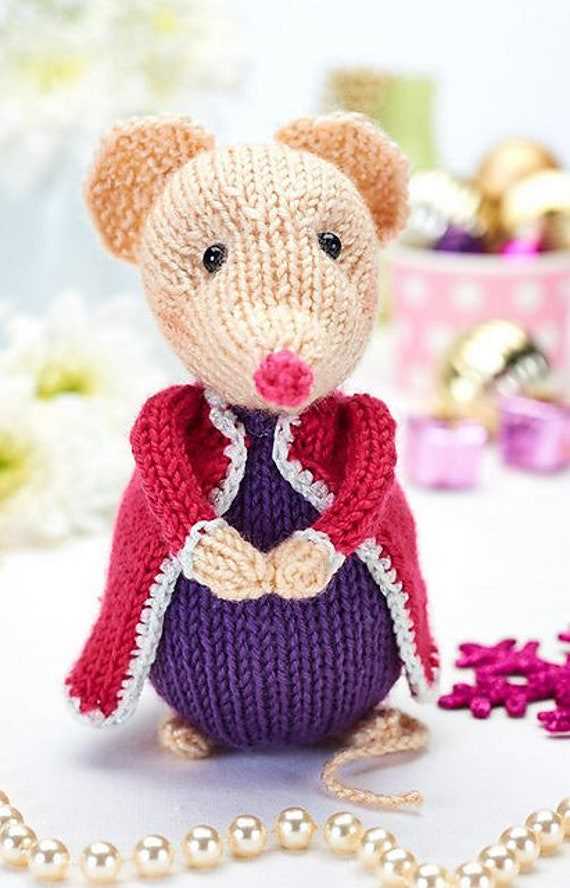
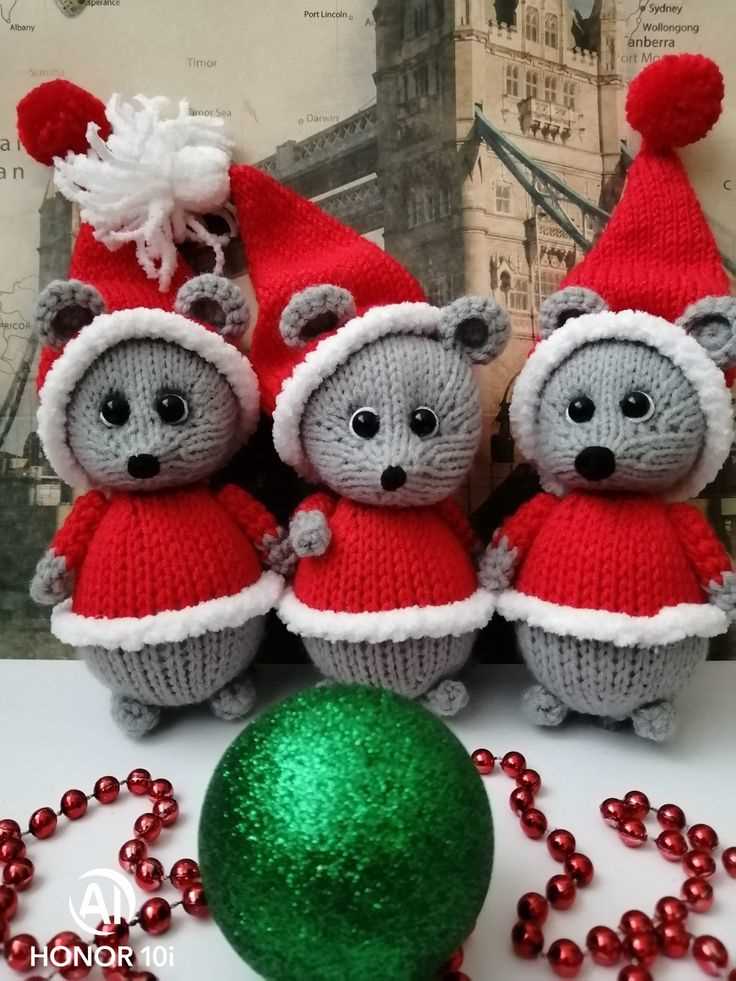
2. Adding a tiny Santa hat: To give your Christmas mouse an even more festive look, consider knitting a tiny Santa hat to place on its head. Use red yarn and follow a simple pattern to create a miniature hat that fits snugly. You can attach the hat to the mouse’s head using a small amount of glue or by sewing it in place.
3. Attaching a tiny candy cane: Nothing says Christmas like a candy cane! To add a touch of whimsy to your mouse, attach a small candy cane to its paw using thread or string. You can either sew the candy cane directly onto the paw or tie it securely using a small piece of ribbon. Be sure to position the candy cane in a way that looks natural and creates a sense of movement.
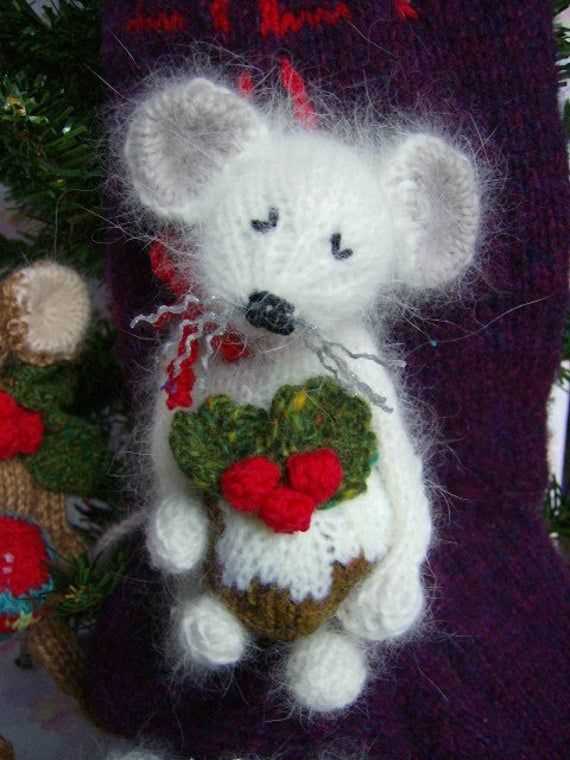
4. Decorating with miniature ornaments: To really make your Christmas mouse stand out, consider adding miniature ornaments to its body. You can thread small beads or bells onto a piece of string and use a needle to carefully attach them to the mouse’s back. This will give the appearance of the mouse wearing festive decorations and add a festive touch to your overall display.
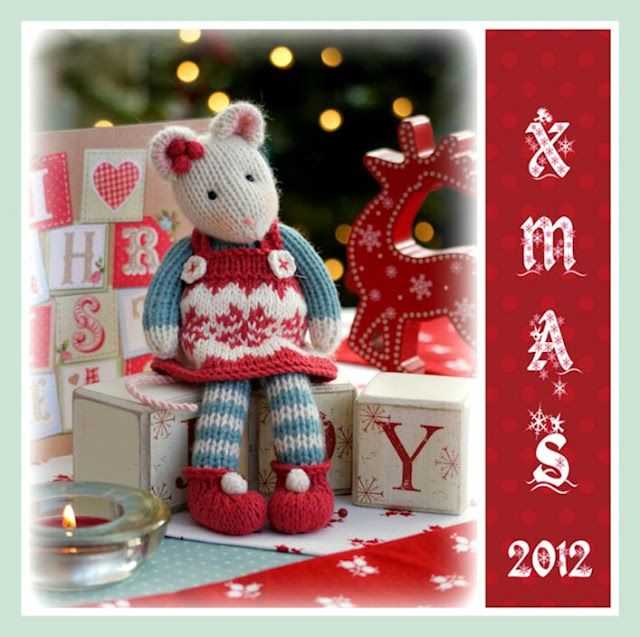
5. Creating a cozy scarf: Finally, consider knitting a tiny scarf for your Christmas mouse to keep it warm during the winter season. Choose a festive color, such as red or green, and follow a simple pattern to create a miniature scarf that wraps around the mouse’s neck. This small accessory will add an extra dose of charm and make your mouse look even more cuddly and ready for the holiday season.
By following these simple steps and adding these finishing touches, you can take your Christmas mouse from cute to absolutely adorable. Feel free to get creative with the details and personalize your mouse to match your own unique style and holiday decor. Whether you place it on your tree, mantel, or give it as a gift, this knitted Christmas mouse is sure to be a cherished decoration for years to come.
Conclusion
In conclusion, the free Christmas mouse knitting pattern is a perfect project for knitters of all skill levels who want to add a touch of festive charm to their holiday decorations. With its adorable design and easy-to-follow instructions, this pattern allows you to create a cute and cuddly mouse that will bring joy to your Christmas season.
Whether you are a beginner or an experienced knitter, this pattern offers the opportunity to practice various knitting techniques and create a unique ornament or gift for your loved ones. The materials required for this project are affordable and easily accessible, making it a budget-friendly option for your holiday crafting.
By following the step-by-step instructions and using your imagination, you can personalize your Christmas mouse by choosing different colors and patterns for its clothing and accessories. You can also experiment with different yarn types to create a soft and snuggly mouse or a more textured one.
Once you have completed your Christmas mouse, you can use it to decorate your home, hang it on your Christmas tree, or give it as a thoughtful handmade gift. No matter how you choose to use it, this adorable little creature is sure to bring smiles and holiday cheer to all who see it.
So, grab your knitting needles and get ready to spread some festive joy with your very own Christmas mouse. Happy knitting and Merry Christmas!