
Knitting is a beloved craft that allows you to create beautiful and functional items by interlocking loops of yarn with needles. While following knitting patterns is a great way to learn and create, many knitters dream of designing their own unique patterns.
Writing your own knitting patterns can be a rewarding and creative experience, but it can also be quite challenging, especially for beginners. It requires a deep understanding of knitting techniques, an eye for detail, and the ability to clearly communicate your ideas to others.
In this beginner’s guide, we will walk you through the process of writing knitting patterns from start to finish. We will discuss the essential elements of a knitting pattern, such as gauge, abbreviations, and stitch instructions. We will also delve into the importance of clear and concise instructions, as well as how to properly format and organize your pattern.
Whether you dream of designing intricate lace shawls, cozy sweaters, or adorable baby booties, this guide will provide you with the tools and knowledge you need to start writing your own knitting patterns. So grab your needles, gather your inspiration, and let’s dive into the wonderful world of pattern designing!
Beginners Guide to Writing Knitting Patterns
Writing knitting patterns can be an exciting and rewarding process. Whether you’re an experienced knitter or just starting out, creating your own patterns allows you to express your creativity and share your unique designs with others. However, writing a knitting pattern can also be a complex task that requires attention to detail and clear communication. In this beginners guide, we’ll explore the key steps to writing knitting patterns that are easy to follow and produce beautiful results.
Gather Your Materials and Tools
Before you begin writing your knitting pattern, it’s important to gather all the necessary materials and tools. This includes the yarn you’ll be using, the needles or hooks, and any additional supplies such as stitch markers or tapestry needles. Having everything prepared and within reach will make the pattern writing process much smoother.
Start with a Swatch
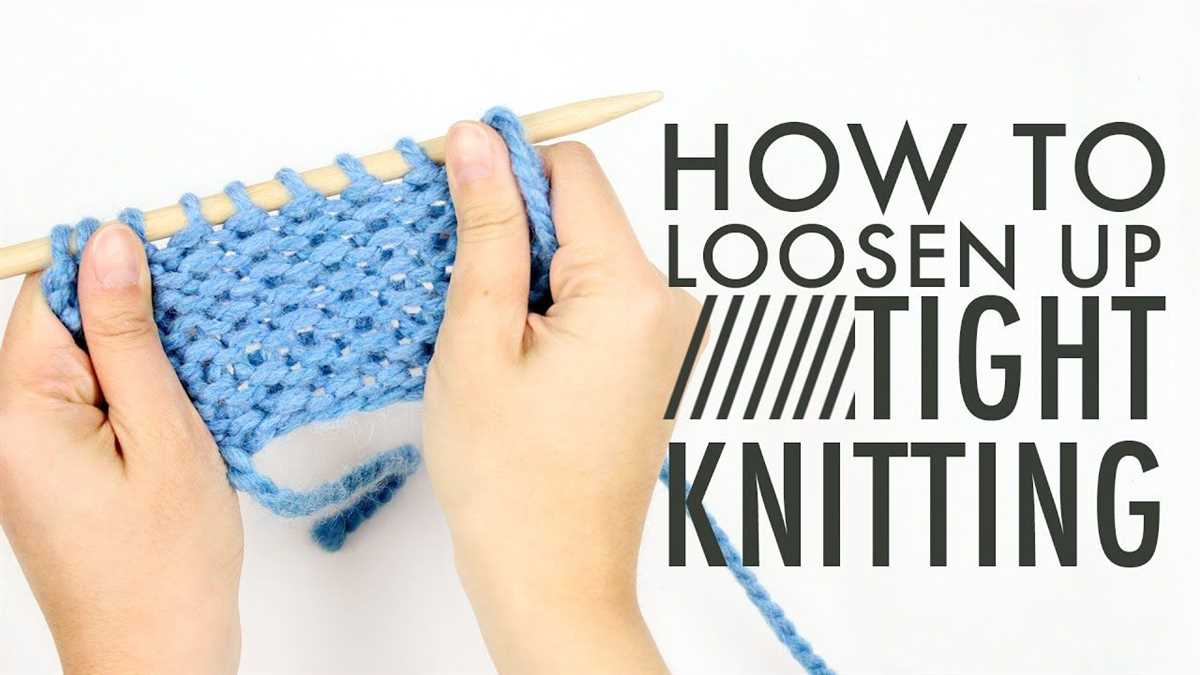
Before diving into writing the pattern for your project, it’s essential to create a swatch. This small sample of your chosen stitch pattern and yarn will help you determine the gauge, or the number of stitches and rows per inch. Gauge is crucial for ensuring that the finished project will have the correct measurements. Measure your swatch using a ruler and record the number of stitches and rows per inch.
Take Clear and Detailed Notes
As you work on your knitting project, be sure to take clear and detailed notes. This includes writing down each step of the pattern, the number of stitches and rows required, and any special techniques or stitches used. Using abbreviations can make the pattern more concise, but be sure to include a key explaining each abbreviation. Organize your notes in a logical order, starting from the cast-on and ending with the bind-off.
Use Standardized Language and Formatting
When writing your knitting pattern, it’s important to use standardized language and formatting. This ensures that other knitters will be able to understand and follow your instructions easily. Use clear and concise language, avoiding jargon or overly technical terms. Be consistent in your use of abbreviations and make sure to include any necessary stitch diagrams or charts. Proofread your pattern carefully to catch any errors or inconsistencies.
Test and Revise Your Pattern
Once you’ve written your knitting pattern, it’s crucial to test it thoroughly. Knit the project according to the instructions, following each step exactly as written. Note any issues or confusion that arise during the knitting process. Revise your pattern accordingly, making any necessary changes or clarifications. Repeat the testing process until you are confident that your pattern is clear and error-free.
Share Your Pattern with Others
After completing and refining your knitting pattern, it’s time to share it with others. Consider publishing it on a knitting website, submitting it to a knitting magazine, or self-publishing on platforms like Ravelry. Be sure to provide high-quality photos of the finished project and any additional information that knitters may find helpful. Engage with the knitting community and welcome feedback from other knitters to continue improving your pattern writing skills.
What are knitting patterns?
Knitting patterns are instructions written for creating a knitted item. They provide the necessary details and steps to construct a specific design, such as a sweater, scarf, or hat. Knitting patterns are essential for both beginners and experienced knitters, as they guide the knitting process and help achieve the desired outcome.
Knitting patterns typically include information such as the materials required, recommended gauge or tension, stitch and row counts, and the required knitting techniques. They often incorporate charts or written instructions for different stitch patterns or motifs. The specific measurements and sizing instructions are also crucial components of a knitting pattern, ensuring a proper fit for the finished piece.
A well-written knitting pattern should be clear, concise, and easy to understand. It should provide all the necessary information for a knitter to successfully complete the project, even for those who may be less experienced. Additionally, knitting patterns can be a source of inspiration for knitters, offering an opportunity to explore various designs and techniques.
In addition to written instructions, knitting patterns may also include helpful illustrations, photographs, or diagrams to visually aid in understanding the construction techniques or stitch patterns. Some knitting patterns may have multiple sizes available, allowing knitters to adapt the design to their preferred measurements.
Knitting patterns can be found in books, magazines, and online platforms. There are also many independent designers who create and sell their knitting patterns, offering unique and innovative designs for knitters to enjoy. Whether you are a beginner or an experienced knitter, knitting patterns are an essential tool for bringing your knitting projects to life!
Understanding knitting abbreviations
When you first start reading knitting patterns, you may come across a variety of abbreviations that can be confusing. However, understanding these abbreviations is essential for following and executing knitting patterns accurately. In this guide, we will break down some common knitting abbreviations and explain what they mean.
1. K – This stands for “knit.” When you see this abbreviation in a knitting pattern, it means that you should insert the right-hand needle into the stitch on the left-hand needle from left to right and draw the yarn through to create a new stitch.
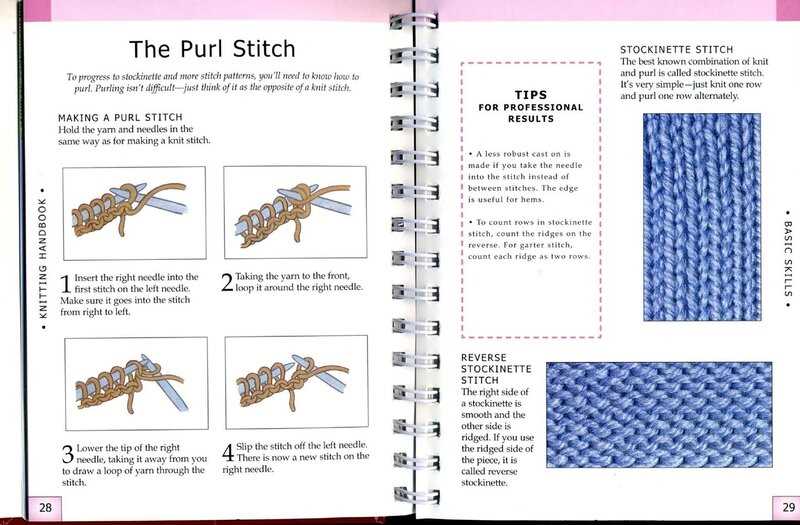
2. P – This abbreviates “purl.” When you see this abbreviation, it means that you should insert the right-hand needle into the stitch on the left-hand needle from right to left and draw the yarn through to create a purl stitch.
3. RS – This stands for “right side.” It indicates which side of the knitting project is considered the front or public-facing side. In some patterns, specific stitches or techniques are meant to be worked only on the right side.
4. WS – This abbreviates “wrong side.” It indicates the side of the knitting project that is considered the back or private-facing side. Similar to RS, certain stitches or techniques may be worked only on the wrong side in some patterns.
5. YO – This stands for “yarn over.” It instructs you to create an extra stitch by wrapping the yarn around the needle from front to back. Yarn overs are used to create eyelets or decorative openings in the knitting.
6. SSK – This abbreviation refers to “slip, slip, knit.” It is a decrease technique in which you slip two stitches individually as if you were to knit them, then insert the left-hand needle into the front loops of these slipped stitches and knit them together.
7. K2tog – This stands for “knit two together.” It is another decrease technique where you knit two stitches together as if they were one stitch, reducing the total stitch count by one.
8. PM – This abbreviates “place marker.” It is used to indicate the placement of a stitch marker on your needle. Stitch markers are often used to mark specific sections or important points in a knitting pattern.
By familiarizing yourself with these common knitting abbreviations, you will be able to decipher knitting patterns more easily and confidently undertake your knitting projects!
Choosing yarn and needles for your pattern
When it comes to knitting patterns, choosing the right yarn and needles can make a world of difference in the final result. The yarn you select will determine the texture, drape, and overall feel of the finished project, while the needles will affect the gauge and stitch definition.
Yarn: When choosing yarn for your pattern, it’s important to consider the fiber content, weight, and color. The fiber content can greatly impact the feel and care requirements of the project. For example, wool yarns are known for their warmth and elasticity, while cotton yarns are cooler and less stretchy. The weight of the yarn should be compatible with the pattern and desired finished look. Thinner yarns are generally used for delicate projects, while thicker yarns are better suited for chunky, cozy designs. Additionally, the color of the yarn should complement the pattern and highlight its features.
Needles: The choice of needles will impact the gauge, or the number of stitches and rows per inch. Different patterns require different gauges to achieve the desired size and fit. It’s important to select needles that will help you meet the gauge specified in the pattern. Additionally, the type of needle can affect the stitch definition and overall appearance of the project. For example, metal needles may produce sharper stitches, while wooden needles can provide more grip for slippery yarns.
- Consider the fiber content, weight, and color of the yarn when choosing for your pattern.
- Select needles that will help you achieve the specified gauge in the pattern.
- Take into account the stitch definition and overall appearance when choosing the type of needle.
Designing your knitting pattern
Designing your own knitting pattern can be a satisfying and rewarding experience. Whether you are a beginner or an experienced knitter, creating your own unique designs allows you to unleash your creativity and showcase your personal style.
1. Inspiration: The first step in designing your knitting pattern is finding inspiration. Look for ideas in nature, art, fashion, or even everyday objects. Keep a sketchbook or a digital folder to collect your ideas and references. This will serve as your starting point for creating your own design.
2. Sketching: Once you have gathered your inspiration, it’s time to bring your ideas to life through sketches. Use your sketchbook or a design software to draw out your design. Consider the shape, stitch patterns, and sizing. Create multiple sketches and variations to explore different possibilities.
3. Swatching: Swatching is an essential step in designing your knitting pattern. It allows you to test different stitch patterns, yarns, and needle sizes to achieve the desired gauge and fabric texture. Swatching also helps you visualize how your design will look and feel.
4. Pattern Writing: Translating your design into a comprehensive knitting pattern requires clear and concise instructions. Start by writing an outline of the different sections of your pattern, including materials, gauge, sizes, and abbreviations. Then, break down each section into step-by-step instructions, making sure to be specific and include any necessary charts or diagrams.
5. Testing and Editing: Before releasing your pattern, it’s crucial to have it tested by other knitters. This will help identify any errors or confusing instructions. Make any necessary edits and revisions to ensure that your pattern is easy to follow and produces the desired result.
6. Formatting and Presentation: Finally, format your knitting pattern in a clear and visually appealing way. Use headings, bullet points, and numbering to organize the information. Include high-quality photographs of your finished project and swatches to give knitters a better understanding of the design.
Remember, designing knitting patterns takes practice and patience. Don’t be afraid to experiment and take risks with your designs. Embrace the process and enjoy the journey of creating something truly unique!
Writing clear and concise instructions
When writing knitting patterns, it is important to provide clear and concise instructions to ensure that the knitter can easily follow along and complete the project without confusion. Clear instructions help to eliminate any potential misunderstandings or mistakes that may arise.
1. Use simple and straightforward language: It is important to use simple and straightforward language when writing knitting instructions. Avoid using complex jargon or technical terms that may confuse the reader. Use plain, everyday language that anyone can understand. Explain the steps in a logical manner, breaking down complex techniques into smaller, easy-to-understand instructions.
2. Organize the instructions: Organize the instructions in a logical sequence. Start with an overview of the project and any necessary materials. Then, break down the pattern instructions into sections, such as cast-on, body, sleeves, and finishing. Within each section, provide clear step-by-step instructions with bullet points or numbered lists. Use headings, subheadings, and spacing to make the instructions easier to read and navigate.
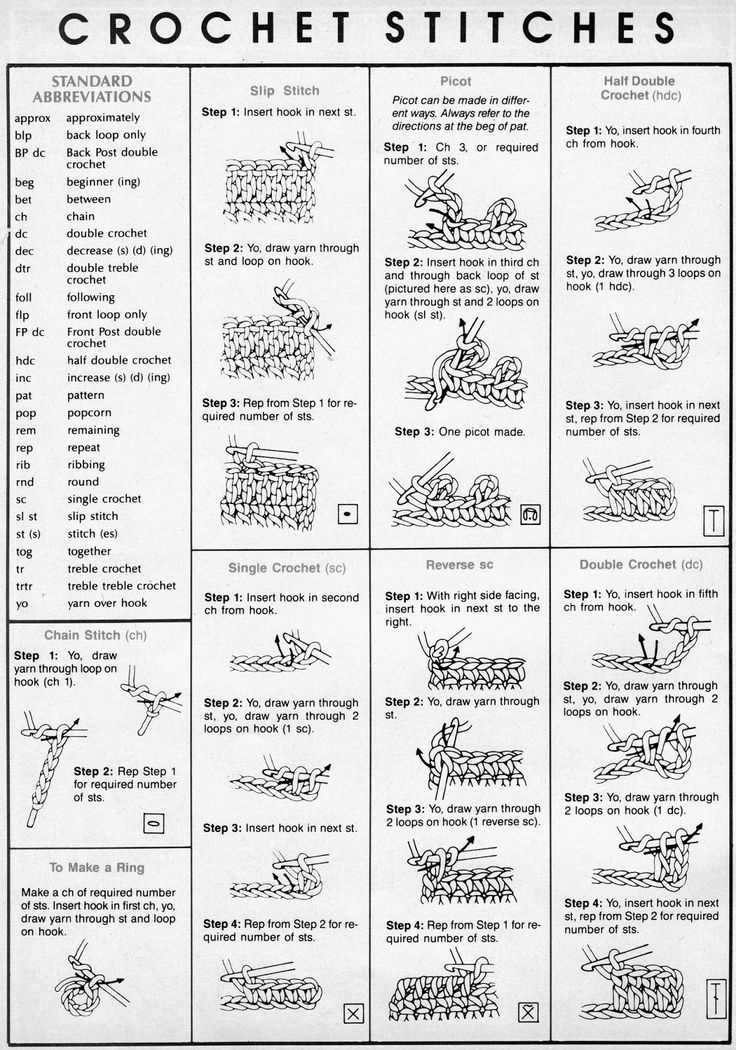
3. Include visual aids: Visual aids, such as charts or diagrams, can greatly enhance the clarity of knitting instructions. Use simple symbols or color-coding to represent different stitches or techniques. Include clear labels and legends to help the reader understand the symbols or colors used. Visual aids provide a visual representation of the pattern, making it easier for the knitter to follow along and visualize the final outcome.
4. Test the instructions: Before finalizing the knitting pattern, it is important to test the instructions by having someone else follow them. This can help identify any areas that may be unclear or confusing. Ask the tester to provide feedback on any difficulties they encountered or any questions that arose during the knitting process. Take note of any suggestions or improvements that can be made to the instructions to make them clearer.
By following these tips, you can ensure that your knitting patterns have clear and concise instructions that are easy for knitters of all skill levels to understand and follow.
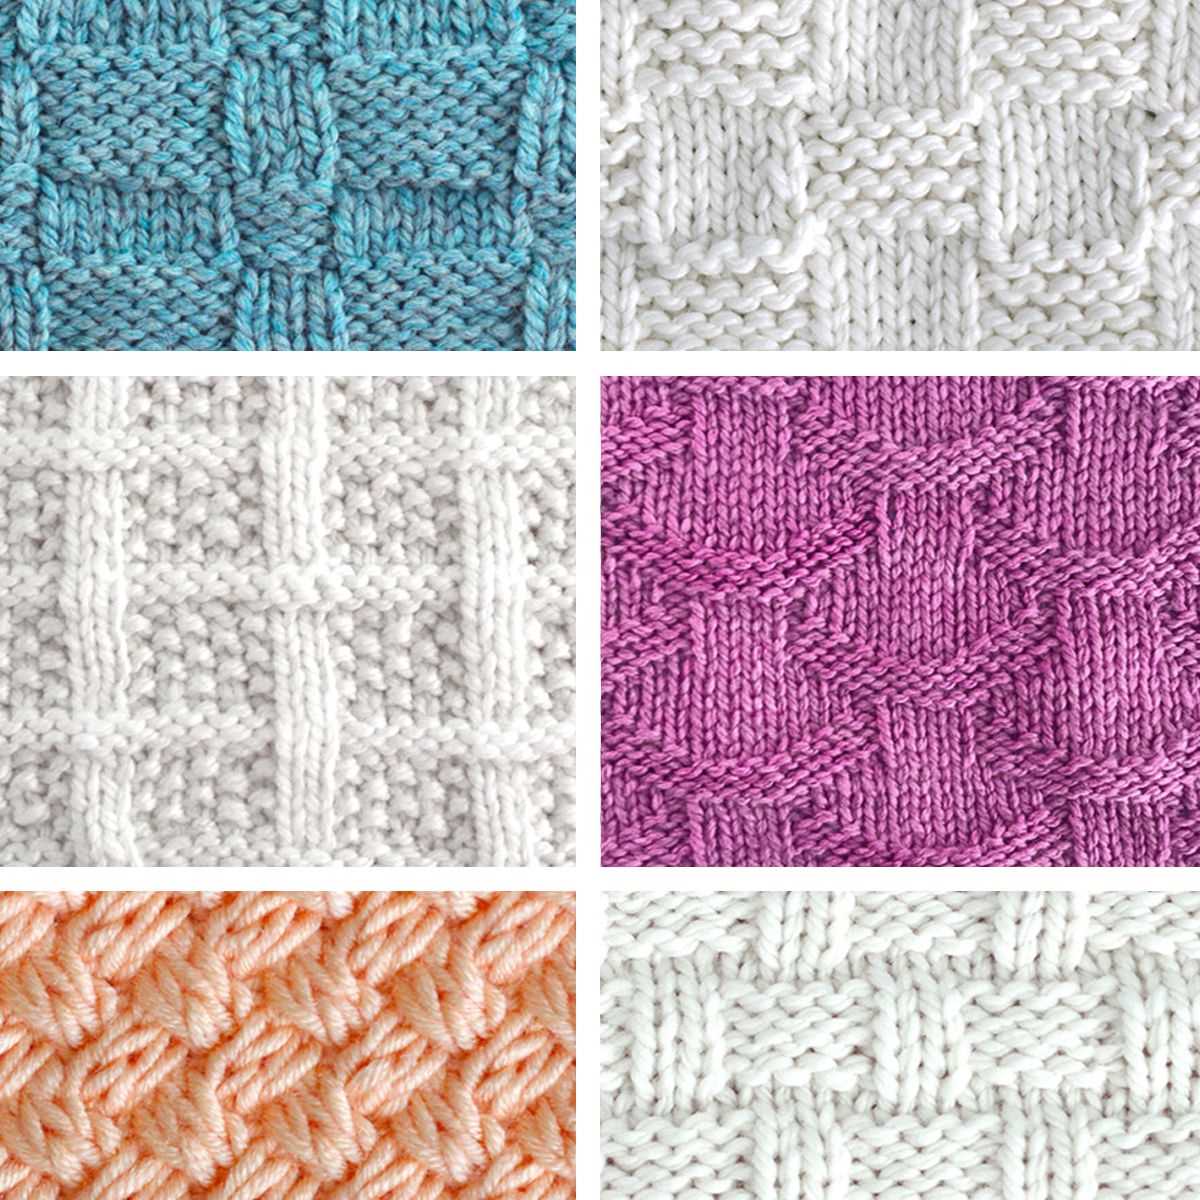
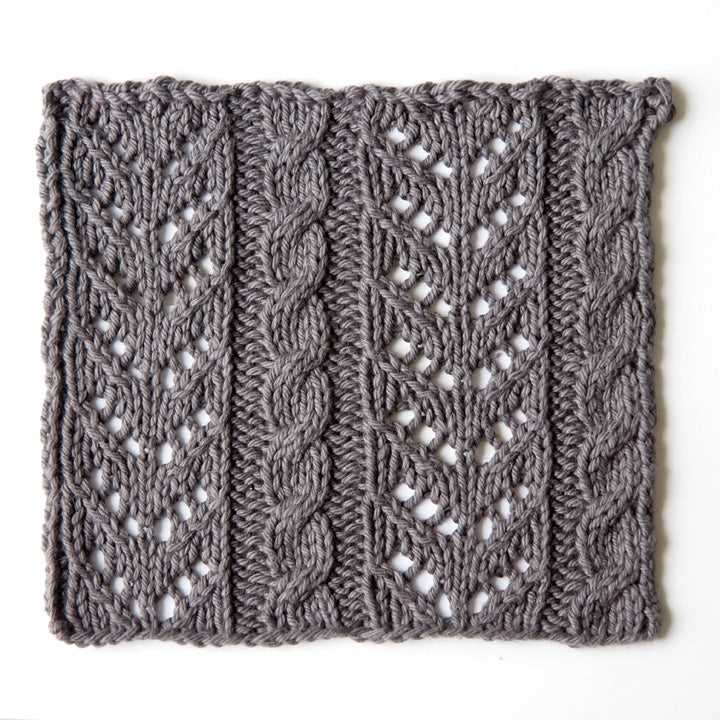
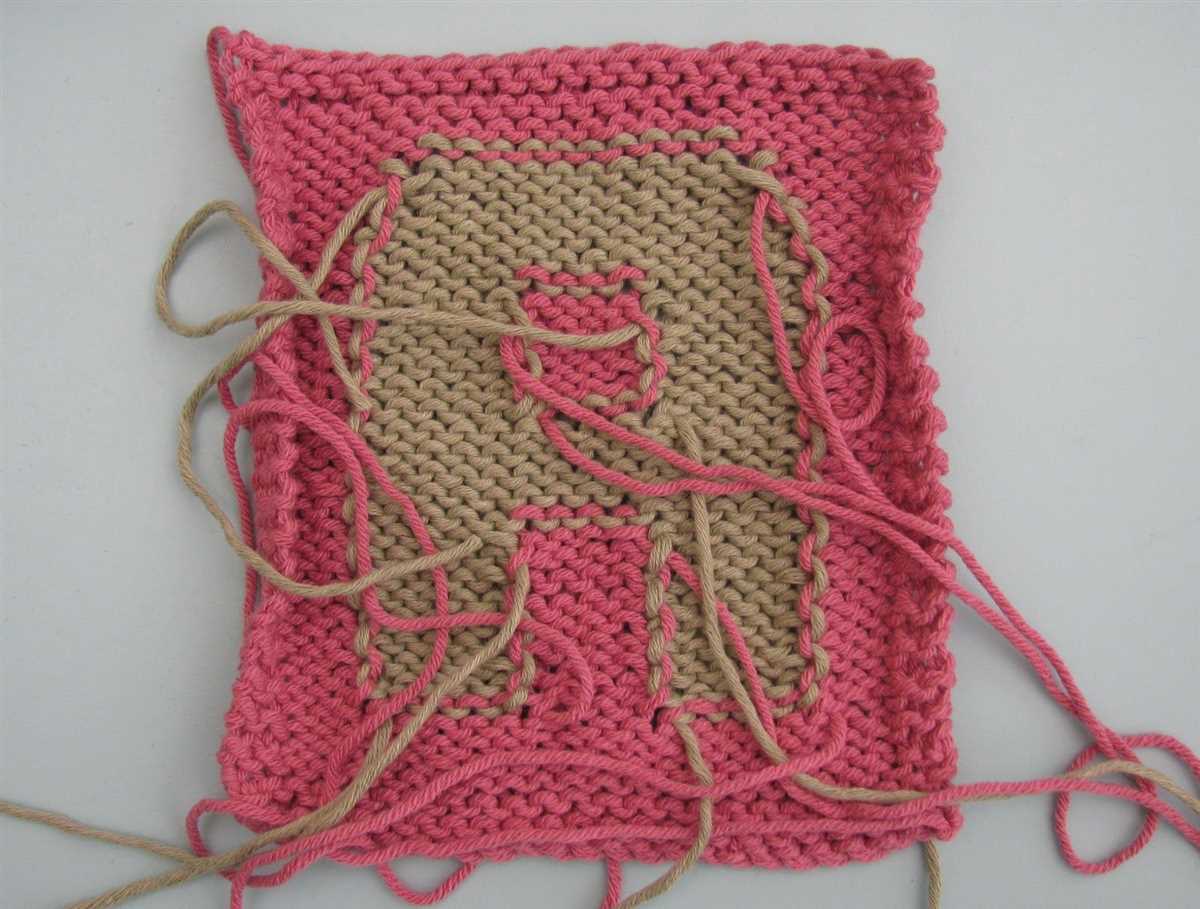
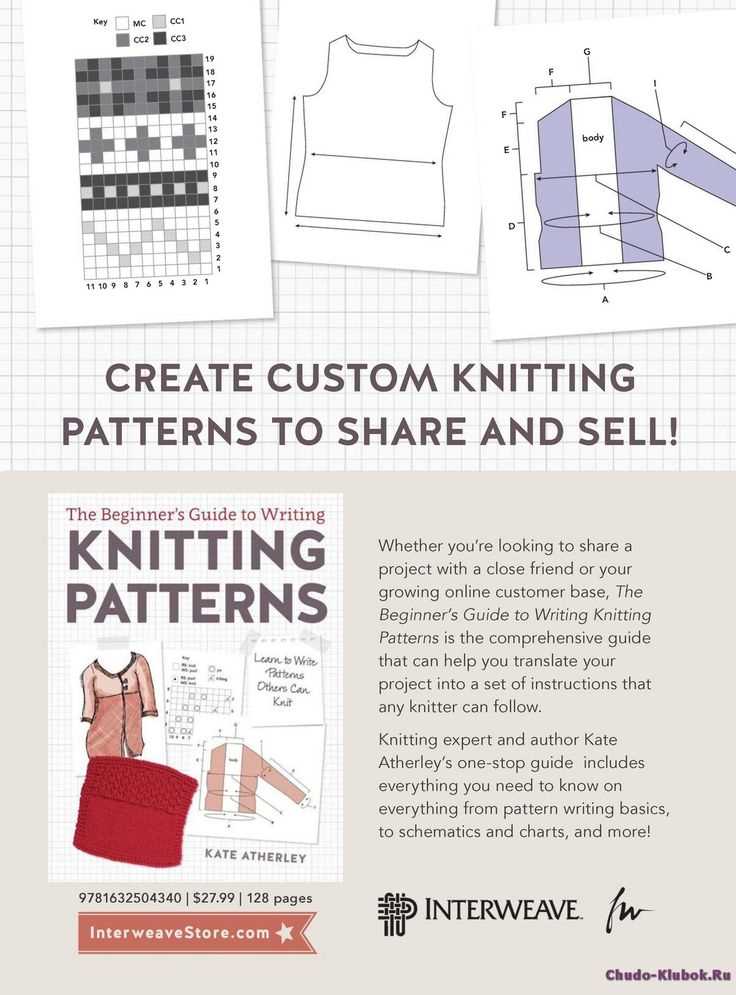
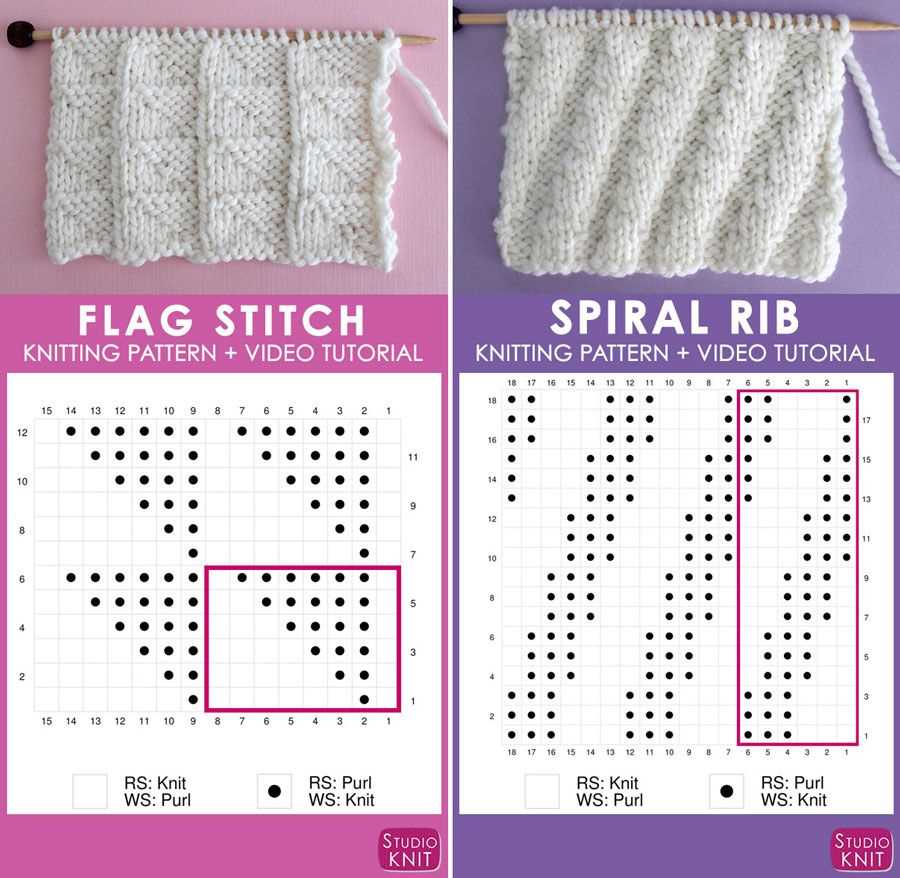
Adding charts and diagrams to your pattern
When creating knitting patterns, including charts and diagrams can be incredibly helpful for both the designer and the knitter. These visual aids provide a clear and concise representation of the stitch patterns, making it easier to follow and understand the instructions.
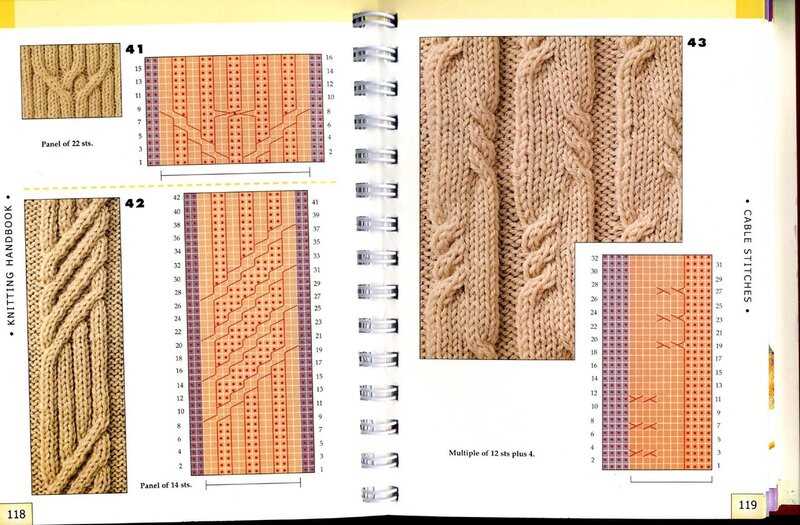
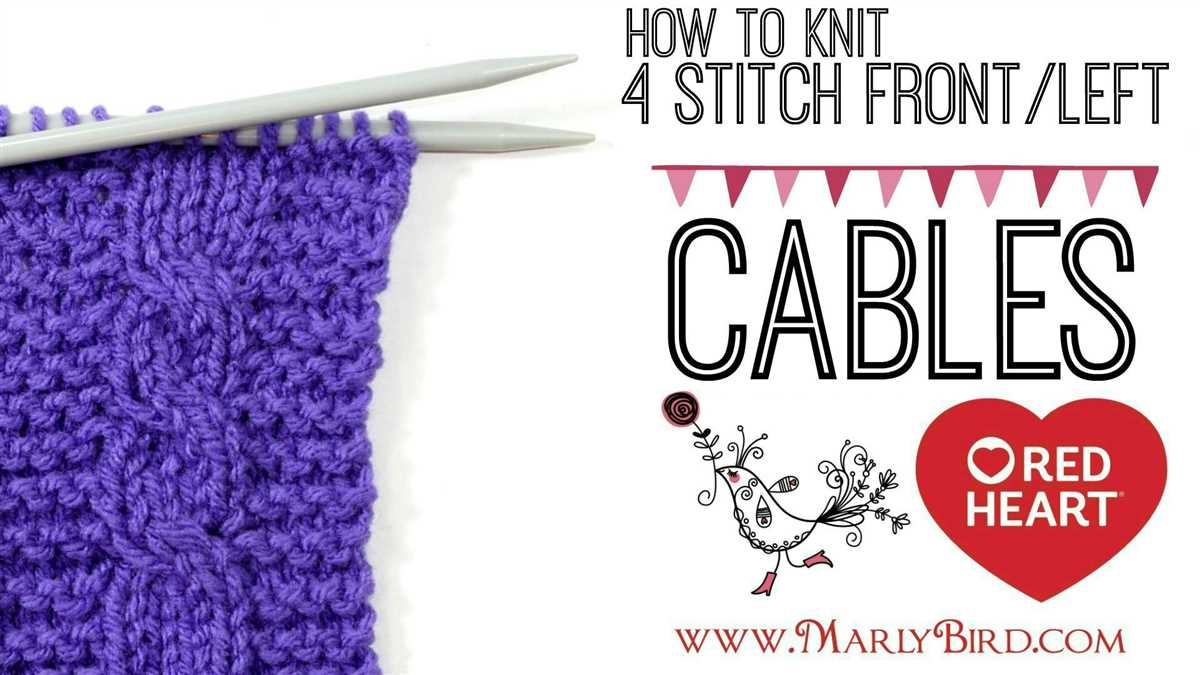
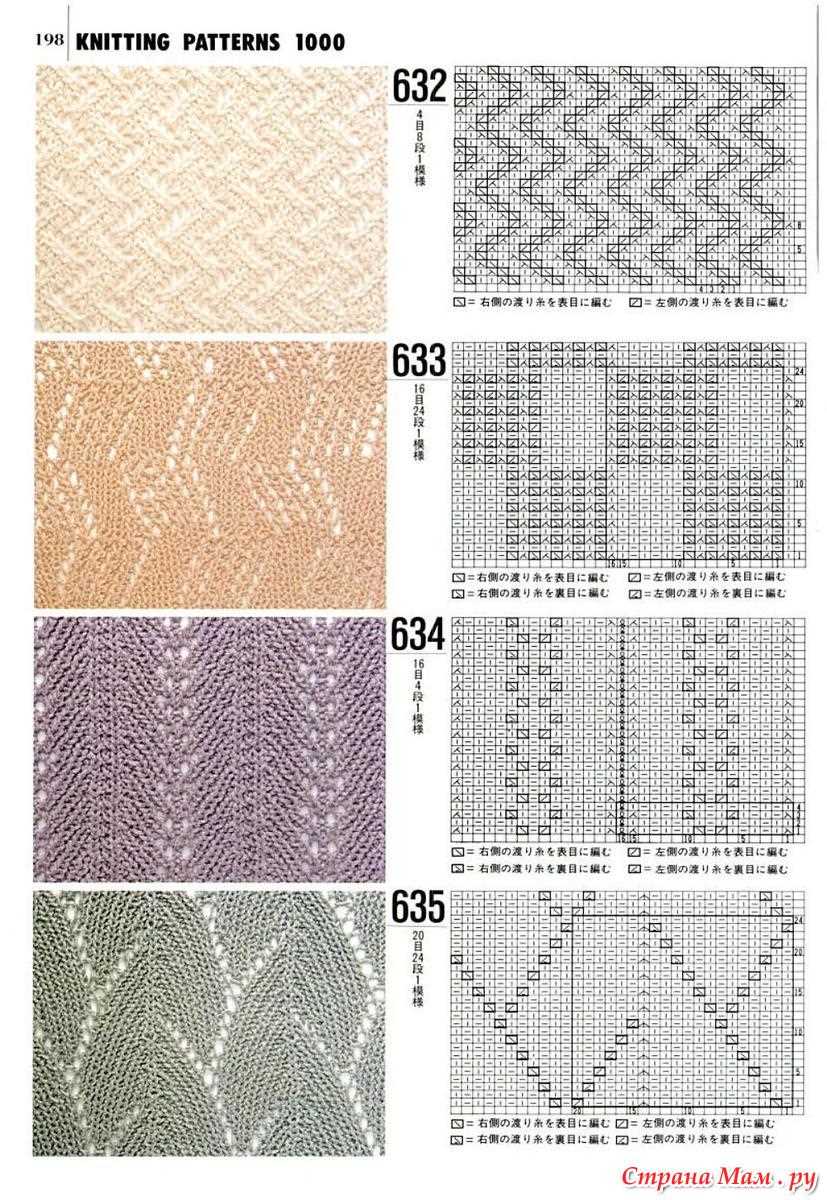
Charts: Charts are visual representations of the stitch patterns used in the knitting pattern. They consist of symbols or icons that represent each stitch and are placed on a grid that corresponds to the rows and stitches in the pattern. Charts can be used for various stitch patterns such as cables, lace, colorwork, and more. They can be especially useful for complex stitch patterns that are difficult to explain with written instructions alone.
Diagrams: Diagrams are visual representations of the construction of a knitted item. They illustrate the different sections, seams, shaping, and measurements of the garment or accessory. Diagrams can help the knitter visualize how the different parts of the pattern come together and give them a clear understanding of how to assemble the finished product.
Usage: To include charts and diagrams in your knitting pattern, it is important to provide clear and concise instructions on how to read and interpret them. This can include a key that explains the meaning of the symbols or icons used in the chart, as well as any other relevant information. It is also useful to include written instructions alongside the charts and diagrams to accommodate different learning styles and preferences.
- Tip: When creating charts and diagrams, consider the readability and legibility of the design. Use clear and distinguishable symbols or icons, and ensure that the grid or layout is easy to follow.
- Example: Below is an example of how to include a chart in your knitting pattern:
| Row | Stitches |
|---|---|
| 1 | Knit 2, purl 2, knit 2 |
| 2 | Purl 2, knit 2, purl 2 |
| 3 | Knit 2, purl 2, knit 2 |
Incorporating charts and diagrams into your knitting pattern can greatly enhance the knitting experience for both the designer and the knitter. They provide visual clarity, promote better understanding of the stitch patterns, and contribute to a successful and enjoyable knitting journey.
Sizing and measuring your knitted piece
When creating a knitting pattern, it is essential to ensure that the finished piece fits the intended recipient properly. This requires accurate sizing and measuring. By following a few simple steps, you can ensure that your knitting pattern produces the desired size.
Determine the measurements: Start by deciding which measurements are necessary for your pattern. Common measurements include chest/bust circumference, sleeve length, and body length. Consider the fit you want to achieve, whether it’s a loose or fitted garment, and adjust your measurements accordingly.
Use a reliable measuring tape: It is important to use a measuring tape specifically designed for taking body measurements, as it will provide more accurate results. Avoid using a ruler or a flexible tape meant for sewing, as they may provide inconsistent measurements.
Measure with care: When measuring, ensure that the recipient is wearing thin or no clothing that could interfere with the measurements. Take the measurements at the fullest part of each area (such as the bust or hip) and avoid pulling the tape too tight or leaving it too loose.
Document the measurements: Once you have taken all the necessary measurements, document them in a clear and organized manner. This will help you refer back to them as you create your knitting pattern and ensure that you accurately size the different parts of the garment.
Consider ease: When sizing your knitted piece, it’s important to consider ease. Ease refers to the difference between the actual body measurements and the finished measurements of the knitted garment. Consider whether you want a snug fit, a relaxed fit, or any other specific fit, and add or subtract ease accordingly.
Make a swatch: Before starting your knitting project, make a swatch using the recommended yarn and needle size. This will allow you to check your gauge and ensure that your knitting matches the desired measurements in your pattern. Adjust your needle size if necessary.
By following these steps and incorporating accurate sizing and measuring techniques into your knitting pattern, you can create pieces that fit perfectly and are loved by your recipients.
Checking for errors and making corrections
When writing knitting patterns, it is extremely important to carefully check for errors and make any necessary corrections before publishing or sharing the pattern with others. A single mistake or typo can completely change the outcome of a project and frustrate the knitter.
One of the first steps in checking for errors is to carefully read through the pattern instructions, line by line, to ensure that they make sense and are accurately written. It is helpful to visualize each step in your mind as you read, so you can catch any inconsistencies or omissions.
Key points to consider while checking for errors and making corrections in knitting patterns:
- Consistency: Check for consistency in abbreviations, terminology, and formatting throughout the pattern. Make sure that you are using the same abbreviations for the same stitches or techniques, and that measurements and calculations are consistent throughout.
- Missing or repeated instructions: Look for any missing or repeated instructions and make the necessary corrections. Ensure that all steps, from cast on to bind off, are included and in the correct order.
- Clarity: Check for clarity in your instructions. Are they clear and easy to understand? Does each step flow logically from the previous one? Consider having someone else read through the pattern to get their feedback on clarity.
- Gauge and sizing: Check that the recommended gauge and sizing information are accurate. Knitters rely on these measurements to ensure the project will fit as intended.
- Stitch counts: Double-check all stitch counts and ensure they are accurate. Even a small discrepancy can cause problems.
Once you have thoroughly checked for errors and made any necessary corrections, it is also a good practice to have others test knit the pattern to ensure its accuracy and clarity. Their feedback can be invaluable in catching any remaining errors or confusing instructions. By taking the time to carefully check for errors and make corrections, you can provide a high-quality knitting pattern that knitters will enjoy working from.
Formatting and Layout for a Professional-Looking Pattern
When it comes to writing knitting patterns, it’s important to pay attention to the formatting and layout to ensure a professional-looking final product. A well-organized and visually appealing pattern will not only be easier for knitters to follow, but it will also help establish your credibility as a pattern designer.
1. Clear and Consistent Headers: Start each section of your pattern with a clear header. This helps break down the pattern into manageable chunks and makes it easier for knitters to navigate. Use a larger font size or bold styling to make the headers stand out.
2. Bulleted or Numbered Lists: When listing instructions or steps, use bulleted or numbered lists instead of long paragraphs. This makes the information easier to scan and follow. Make sure to use indentation for lists to visually differentiate them from the main text.
3. Abbreviation List: Include an abbreviation list at the beginning or end of your pattern to define any knitting abbreviations used. This helps prevent confusion and ensures that even beginner knitters can understand the instructions. Use a simple table format to list the abbreviations and their meanings.
4. Consistent Font and Formatting: Stick to a consistent font and formatting style throughout your pattern. This helps create a cohesive and professional look. Avoid using too many different font styles or sizes, as it can make the pattern appear cluttered and confusing.
5. Visual Aids: Include clear and well-lit photographs or illustrations to accompany your pattern. This helps knitters visualize the finished product and understand any complex techniques or stitch patterns. Place the images strategically throughout the pattern, corresponding to the relevant instructions.
6. White Space and Margins: Leave ample white space between paragraphs, sections, and instructions to make the pattern more visually appealing and easier to read. Use margins to create a neat and organized layout. Avoid cluttering the pattern with unnecessary information or excessive design elements.
By following these formatting and layout tips, you can create a professional-looking knitting pattern that is easy for knitters to follow and enjoy. Remember, a well-presented pattern not only enhances the user experience but also reflects positively on your skills as a pattern designer.
Publishing and sharing your knitting pattern
Once you have completed your knitting pattern and are satisfied with the final result, it’s time to share it with the knitting community. Publishing and sharing your knitting pattern allows others to enjoy your design and create their own beautiful creations.
There are several ways you can publish and share your knitting pattern. One option is to self-publish your pattern on a platform such as Ravelry. Ravelry is a popular online community for knitters and crocheters, and it allows you to upload your pattern, add photos, and provide detailed instructions for others to follow. By self-publishing, you have full control over your pattern and can make changes or updates as needed.
If you prefer a more traditional route, you can also submit your knitting pattern to knitting magazines or websites. Many publications accept submissions from independent designers and will work with you to edit and format your pattern for their audience. This can be a great way to reach a wider audience and gain recognition for your work.
When sharing your knitting pattern, it’s important to provide clear and concise instructions that are easy to follow. Use charts, diagrams, and written instructions to cater to different learning styles. Include any special techniques or stitches used in the pattern, along with the recommended yarn and needle sizes. It’s also helpful to provide photos of the finished project to give knitters an idea of what the final result should look like.
Remember to always credit yourself as the designer when sharing your knitting pattern. This not only gives you recognition for your work but also allows others to easily find more of your patterns if they enjoy your design. Additionally, be open to feedback and suggestions from other knitters who may have tried your pattern. This can help you improve and refine your design skills.
- Self-publishing on Ravelry
- Submit to knitting magazines or websites
- Provide clear and concise instructions
- Include photos of the finished project
- Credit yourself as the designer
- Be open to feedback and suggestions
Tips for promoting and selling your patterns
Once you have created and finalized your knitting patterns, it’s time to promote and sell them. Here are some tips to help you get started:
1. Build an online presence
Creating a website or blog dedicated to your knitting patterns is an excellent way to showcase your work. You can also use social media platforms like Instagram and Pinterest to share photos of your finished projects and engage with your audience.
2. Collaborate with other knitters and designers

Collaborating with other knitters and designers can help you expand your reach and gain exposure for your patterns. Consider partnering with other creators to create joint projects or hosting giveaways and sharing each other’s work.
3. Offer free patterns and tutorials
Providing free patterns and tutorials can be a great way to attract knitters to your work and establish yourself as an expert in the field. Make sure to include a link to your paid patterns whenever you share a free one, so interested knitters can easily find and purchase your other designs.
4. Participate in knitting communities and forums
Engage with the knitting community by participating in online forums and communities. Offer valuable advice, answer questions, and share your patterns when relevant. This can help you build a reputation as a knowledgeable and helpful designer and increase your visibility.
5. Create eye-catching visuals
When promoting your patterns, take high-quality photos of your finished projects that showcase the details and textures. Also, consider creating visually appealing graphics or videos to attract attention on social media platforms.
6. Offer discounts and promotions
Periodically offering discounts or promotions can help drive sales and encourage knitters to try your patterns. Consider running special promotions during holidays or events, or offering bundle discounts for customers who purchase multiple patterns at once.
7. Get feedback and reviews
Encourage knitters who have purchased your patterns to leave reviews and feedback. Positive reviews can help build trust and credibility, while constructive feedback can help you improve your designs and instructions.
Conclusion
Promoting and selling your knitting patterns requires building an online presence, collaborating with others, offering free patterns and tutorials, actively participating in knitting communities, creating eye-catching visuals, offering discounts and promotions, and seeking feedback. By implementing these strategies, you can increase your visibility, attract customers, and establish yourself as a successful knitting pattern designer.