
Knitting is a timeless craft that allows you to create cozy and stylish accessories for yourself or your loved ones. If you’re just starting out with knitting, a beginner-friendly project like a hat is a great place to begin. And the best part? You can create a beautiful knitted hat using straight needles, making it accessible for beginners who may not have circular needles on hand.
This beginner knit hat pattern is perfect for those who are new to knitting or are looking for a simple and enjoyable project. With just a few basic knit and purl stitches, you can create a warm and fashionable hat that you’ll be proud to wear or gift.
By using straight needles instead of circular ones, you can avoid the need for additional knitting equipment and focus on mastering the basic stitches. This pattern is straightforward and easy to follow, making it ideal for anyone who wants to dip their toes into the world of knitting.
So, if you’re ready to take on a new knitting project and create a lovely hat using straight needles, grab your favorite yarn and get started with this beginner knit hat pattern. With a little patience and practice, you’ll have a cozy hat to keep you warm in no time!
Beginner Knit Hat Pattern Straight Needles
Are you a beginner knitter looking for a simple hat pattern? Look no further! This beginner knit hat pattern is perfect for those who are just starting out with their knitting journey. And the best part? It can be made using straight needles!
With this pattern, you will learn the basic techniques of knitting, such as casting on, knit stitch, purl stitch, and decreasing. It’s a great project to practice your skills and create a cozy and stylish hat for yourself or as a gift.
To get started, you will need a pair of straight knitting needles, a skein of yarn in your preferred color, and a tapestry needle for weaving in ends. The pattern is worked in the round, so you won’t need to worry about seaming or joining stitches.
Materials:
- Straight knitting needles (size US 8 or as recommended on the yarn label)
- 1 skein of yarn (worsted weight)
- Tapestry needle
Pattern:
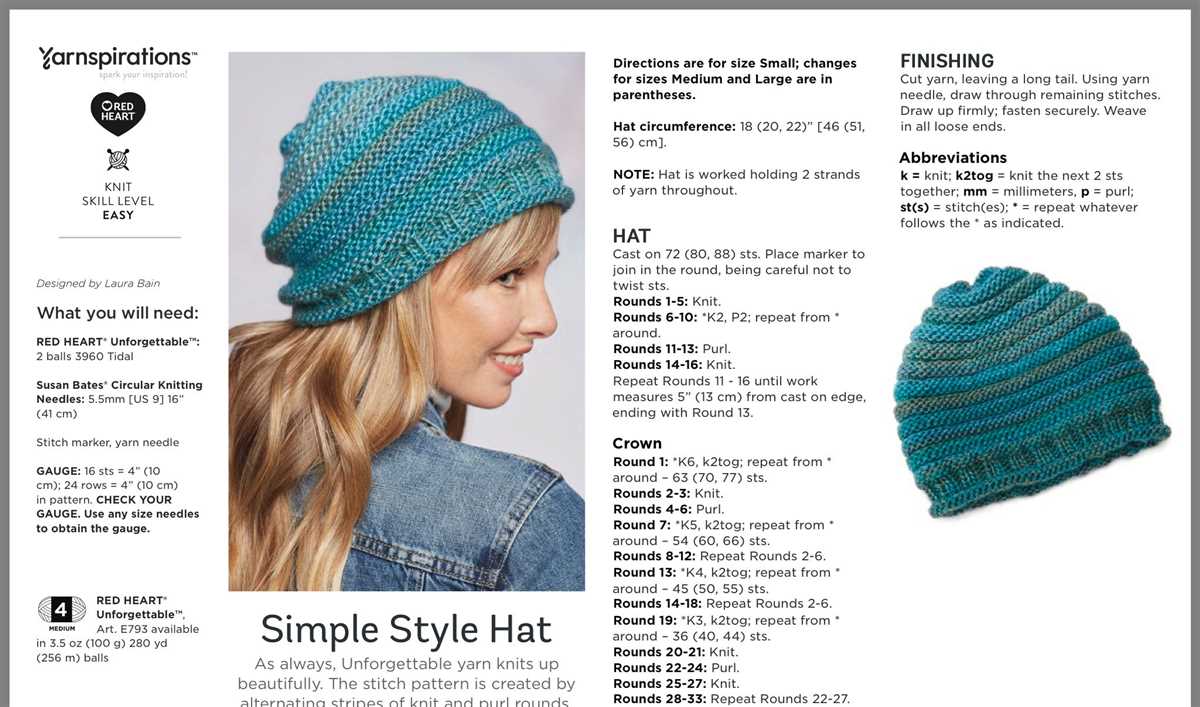
- Cast on 80 stitches.
- Begin working in a 2×2 rib pattern, knitting 2 stitches, then purling 2 stitches, for approximately 2 inches.
- Switch to stockinette stitch by knitting all stitches for the next 6 inches.
- Start decreasing: Knit 6 stitches, knit 2 together (repeat until end of round).
- Knit all stitches for the next round.
- Knit 5 stitches, knit 2 together (repeat until end of round).
- Continue decreasing in this manner, knitting one less stitch before each decrease, until only a few stitches remain.
- Cut the yarn, leaving a long tail. Thread the tail through the tapestry needle and slide it through the remaining stitches, removing them from the knitting needle. Pull tight to close the top of the hat.
- Weave in any loose ends.
That’s it! You’ve completed your first knit hat using straight needles. Feel free to customize your hat with a pom-pom, a folded brim, or any other embellishments you desire. Happy knitting!
How to Choose Yarn for Your Knit Hat
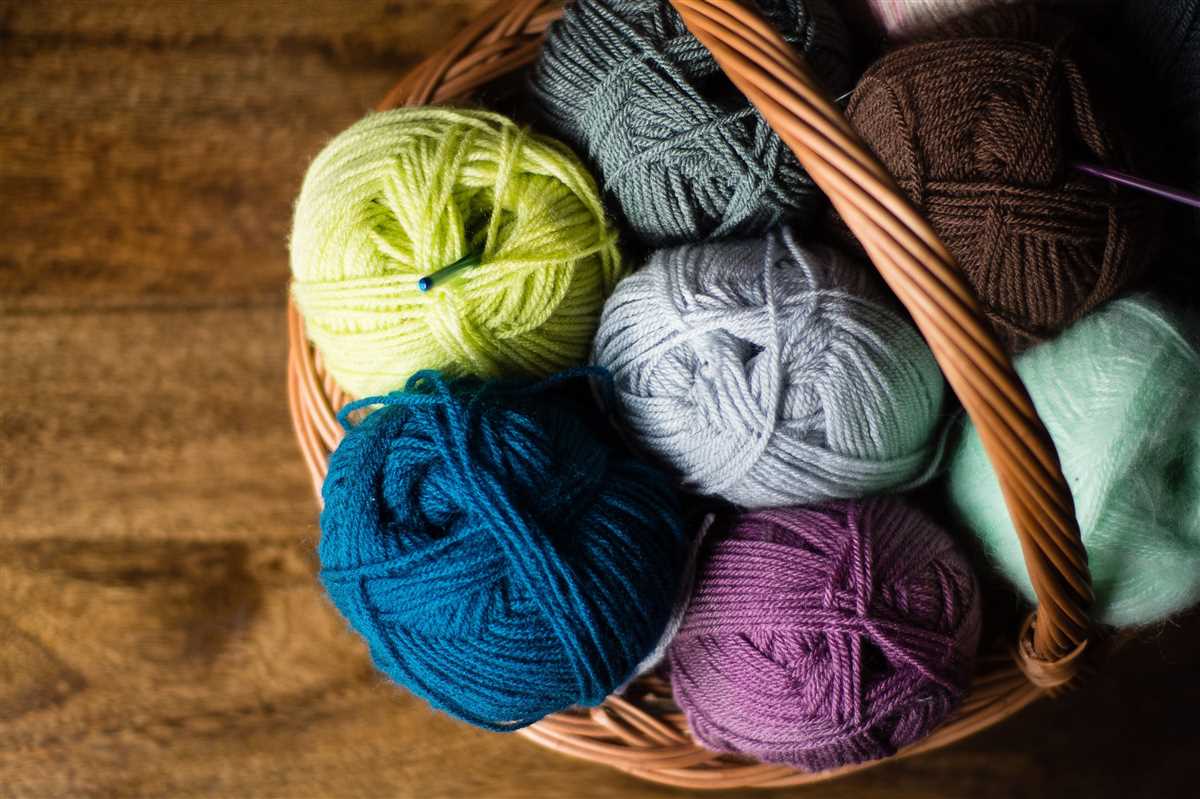
When it comes to knitting a hat, choosing the right yarn is essential for the success of your project. The type of yarn you choose will not only determine the look and feel of your finished hat, but it will also affect how warm and durable it is. Here are some factors to consider when selecting yarn for your knit hat.
- Fiber content: The fiber content of the yarn will determine its characteristics and properties. Some common yarn fibers include wool, acrylic, cotton, and alpaca. Wool is known for its warmth and elasticity, while acrylic is often chosen for its affordability and easy care. Cotton is lightweight and breathable, making it a great choice for hats in warmer climates. Alpaca is known for its softness and warmth.
- Weight: The weight of the yarn refers to its thickness and heaviness. Different weights are suitable for different hat patterns, so it’s important to choose the right weight for your project. Bulky or chunky weight yarns are thicker and will result in a heavier and warmer hat, while fingering or lace weight yarns are more lightweight and will create a lighter hat.
- Color and pattern: The color and pattern of the yarn can have a big impact on the final look of your hat. Bright and bold colors can make a statement, while neutral colors can create a more classic and versatile hat. Variegated or self-striping yarns can add visual interest and complexity to your hat.
- Texture: The texture of the yarn can also add depth and character to your hat. Some yarns have a smooth and even texture, while others have a more textured or slubbed appearance. Consider the texture you want for your hat and choose a yarn that matches your desired look.
By considering these factors and choosing the right yarn for your knit hat, you can create a beautiful and functional accessory that will keep you warm and stylish during the colder months.
Tools You’ll Need to Knit Your Hat
Knitting a hat can be a fun and rewarding project, and it doesn’t require a lot of fancy equipment. Here are the essential tools you’ll need to complete your beginner knit hat pattern using straight needles:
- Straight Needles: Choose a pair of knitting needles that are the appropriate size for your chosen yarn and gauge. Straight needles are typically made of wood, bamboo, or metal and come in various lengths, ranging from 9 to 14 inches. Make sure to use needles that feel comfortable in your hands and allow you to knit smoothly.
- Yarn: Select a soft and cozy yarn that is suitable for hats. Acrylic, wool, and blended yarns are popular choices for beginner knitters. Make sure to choose a yarn in a color or pattern that you love, as it will add personality to your finished hat.
- Tape Measure or Ruler: It’s important to have a measuring tool on hand to ensure that your hat comes out the correct size. You’ll need to measure your head circumference and use that measurement to determine the number of stitches to cast on, as well as the length of the hat.
- Yarn Needle: A yarn needle, also known as a darning needle, is used to weave in loose ends and finish off your hat. Look for a blunt-tipped needle with a large eye that will easily accommodate your yarn thickness.
- Stitch Markers: Stitch markers are helpful for keeping track of your progress and marking specific sections in your pattern. They can be simple plastic or metal rings that slide onto your needles, or you can use safety pins or scraps of yarn in a contrasting color.
- Scissors: A small pair of scissors or yarn snips will come in handy for cutting your yarn as you work. Choose a pair that is sharp enough to easily cut through yarn but compact enough to fit in your knitting bag.
- Row Counter: Optional but useful, a row counter can help you keep track of the number of rows you’ve knitted. It can be a physical tool that attaches to your needles or a digital app on your phone or tablet.
With these essential tools at your disposal, you’ll be well-equipped to knit your own cozy hat using straight needles. Remember to take your time, follow the pattern instructions, and enjoy the process of creating something special with your own two hands.
Step-by-Step Instructions for Casting On
When starting your knitting project, the first step is to cast on. Casting on is the process of creating the first row of stitches on your knitting needle. This sets the foundation for your project and determines the number of stitches you will have.
To begin casting on, hold your knitting needle in your right hand and the end of your yarn in your left hand. Make a slipknot by creating a loop with the yarn and pulling the end through. Place the slipknot onto the knitting needle.
Next, hold the knitting needle with the slipknot in your right hand and the yarn in your left hand. Insert the right knitting needle into the loop of the slipknot and wrap the yarn around the needle from left to right.
With the right needle, pull the loop of the slipknot through the wrapped yarn, creating a new loop on the right needle. This is your first cast-on stitch. Place the new stitch onto the left needle.
Repeat this process, inserting the right needle into the new stitch on the left needle, wrapping the yarn around the right needle, and pulling the new loop of yarn through to create a new stitch. Continue casting on until you have the desired number of stitches for your project.
Once you have finished casting on, you are ready to begin knitting the first row of your project. The cast-on stitches will form the foundation for your knitting and ensure that your project stays secure and doesn’t unravel.
Basic Knit Stitch Tutorial
In this basic knit stitch tutorial, we will learn the fundamental stitch used in knitting. The knit stitch is a technique that creates a smooth, v-shaped pattern on the right side of the work. It is the foundation for many knitting projects and is essential for beginners to master.
To start, you will need a pair of straight knitting needles and a ball of yarn. Choose a yarn that is suitable for your project and a needle size that matches the yarn’s recommended gauge. Once you have gathered your materials, you are ready to begin.
Step 1: Casting On
Before you can start knitting, you need to cast on stitches onto your needle. There are different methods for casting on, but the most common one for beginners is the long-tail cast on. This method creates a neat, flexible edge.
- Begin by making a slip knot with the yarn. Leave a long tail, approximately three times the width of your finished project.
- Insert the needle into the slip knot, holding it in your right hand.
- With your left thumb and index finger, hold the yarn coming from the ball against the needle.
- Using your right hand, bring the needle under the yarn and then over, creating a loop on the needle.
- Repeat steps 3 and 4 until you have cast on the desired number of stitches.
Step 2: Knitting the Stitch
Once you have cast on your stitches, it’s time to start knitting. The knit stitch is worked from right to left, with the right needle passing through the loop of the left needle.
- Hold the needle with the cast-on stitches in your left hand, and the empty needle in your right hand.
- Insert the right needle into the first stitch on the left needle, from left to right.
- With your right hand, wrap the yarn around the right needle, going from back to front.
- Using the right needle, pull the yarn through the stitch, sliding the stitch off the left needle.
- Repeat steps 2-4 until you reach the end of the row.
The knit stitch creates a row of smooth, v-shaped stitches on the right side of the work. On the wrong side, or purl side, the stitches will appear as bumps. By repeating these steps, you can create a knitted fabric that can be used for various projects.
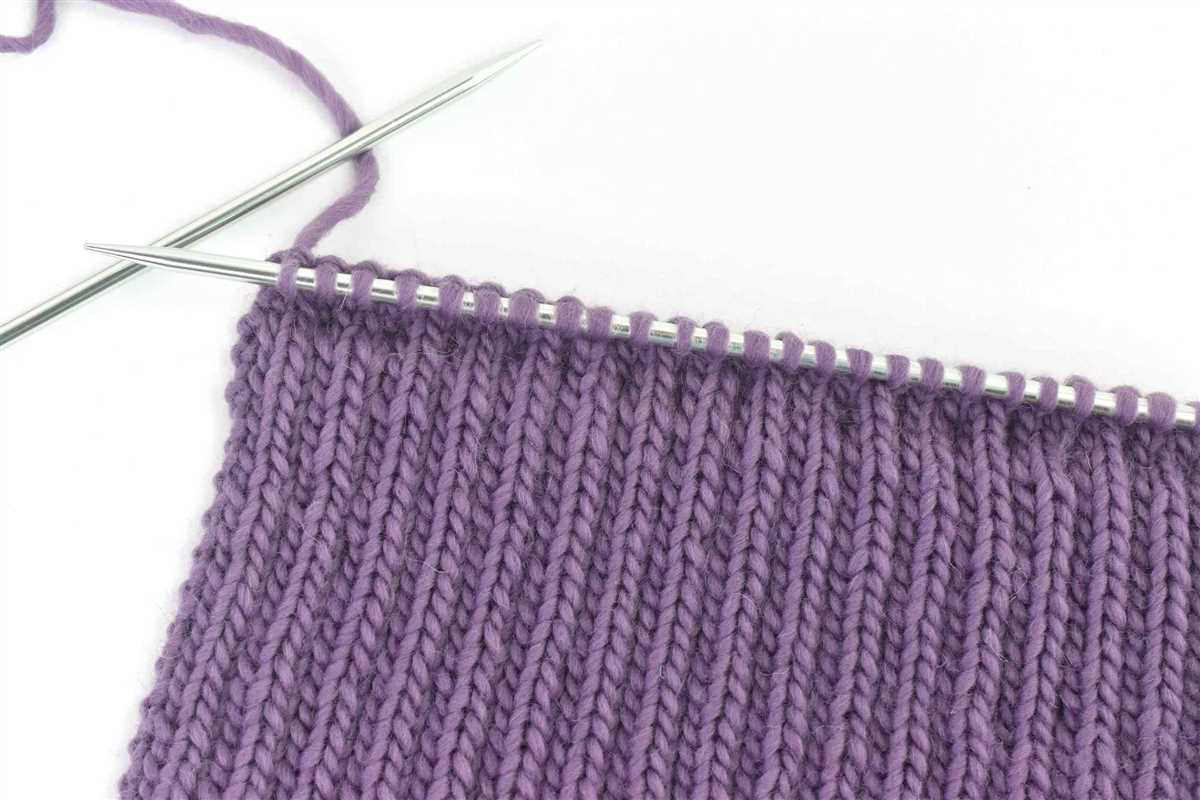
Working the Stockinette Stitch
The stockinette stitch is one of the most basic and commonly used stitch patterns in knitting. It creates a smooth, flat fabric that is perfect for many projects, including hats. To work the stockinette stitch, you will need to alternate between knitting and purling stitches.
To begin, cast on the desired number of stitches onto your straight needles. The stockinette stitch is typically worked in multiples of two stitches, but you can adjust the pattern to fit your specific needs. Once you have cast on your stitches, you are ready to start.
First, knit the first row. Insert your right needle into the first stitch on the left needle, from left to right. Wrap the yarn around the right needle counterclockwise and pull it through the stitch, creating a new stitch on the right needle. Slide the old stitch off the left needle. Continue knitting across the entire row.
Next, you will need to work the purl row. Turn your work around so that the needle with the stitches is now in your left hand. Insert your right needle from right to left into the first stitch on the left needle. Wrap the yarn counterclockwise around the right needle and pull it through the stitch, creating a new stitch on the right needle. Slide the old stitch off the left needle. Continue purling across the entire row.
Continue alternating between knitting and purling rows until your piece reaches the desired length. The stockinette stitch will create a fabric with a smooth and even texture on one side (the knit side) and a bumpy texture on the other side (the purl side).
Remember to always knit the knit stitches and purl the purl stitches. If you accidentally knit a purl stitch or purl a knit stitch, it will create a different texture and may affect the overall look of your project. So be sure to pay attention to your stitches as you work the stockinette stitch.
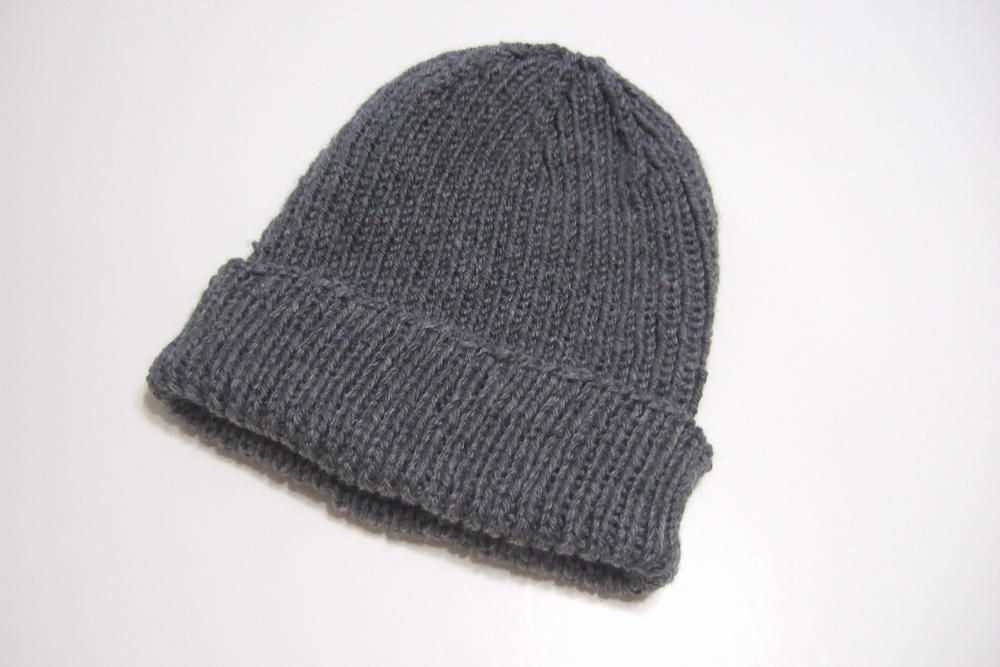
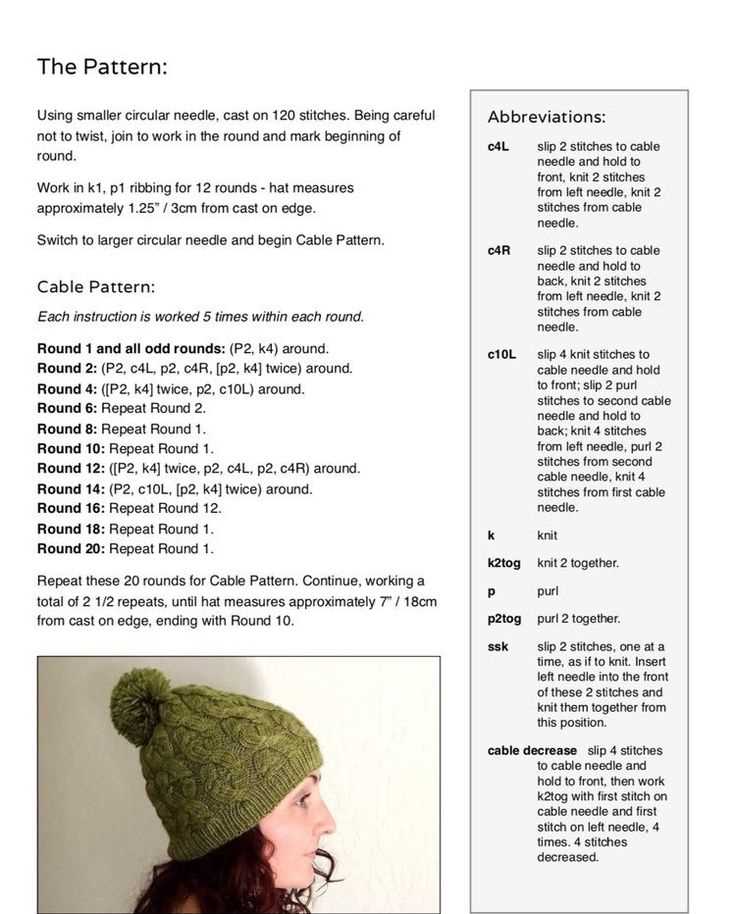
Adding Ribbed Edging to Your Hat
When knitting a beginner hat pattern with straight needles, adding a ribbed edging can provide a polished and finished look to your project. Ribbing is a technique that creates a stretchy and flexible fabric, making it ideal for hat cuffs.
To add a ribbed edging to your hat, you will need to switch to smaller needles and a different stitch pattern. The most common ribbing patterns are 1×1 rib and 2×2 rib. In a 1×1 rib, you alternate between knitting one stitch and purling one stitch. In a 2×2 rib, you knit two stitches and purl two stitches in a repeating pattern.
Here is how you can add a ribbed edging to your hat:
- At the desired length of your hat, switch to smaller needles. This will create a tighter ribbed edging.
- Choose a ribbing pattern that you like (1×1 or 2×2) and start working in that pattern. Make sure to maintain the pattern throughout the edging.
- Continue working in the ribbing pattern for the desired number of rows or until you reach your desired edging length. You can customize the length according to your preference.
- Once the ribbed edging is complete, you can bind off your stitches using a stretchy bind-off method like the tubular bind-off or the sewn bind-off. These bind-off methods will help maintain the flexibility of the ribbing.
- Weave in any loose ends and block your hat if necessary.
Adding a ribbed edging to your beginner hat pattern can elevate the overall look of your project and provide a professional finish. Whether you choose a 1×1 or 2×2 rib, the ribbed edging will add both style and functionality to your hat. Give it a try and see the difference it makes!
Decreasing Stitches for the Crown

Once you have reached the desired length for your knit hat, it’s time to start decreasing stitches to shape the crown. Decreasing stitches gradually reduce the number of stitches in each round, creating a tapered effect at the top of the hat.
There are several ways to decrease stitches, but the most common methods are knit two stitches together (K2tog) and slip, slip, knit (SSK). Both of these techniques involve combining two stitches into one, effectively reducing the total stitch count.
K2tog: To knit two stitches together, insert the right-hand needle into the next two stitches on the left-hand needle as if to knit. Then, wrap the yarn around the right-hand needle and pull it through both stitches, sliding them off the left-hand needle. This decreases one stitch.
SSK: Slip, slip, knit is another commonly used decrease method. To perform an SSK, slip the next two stitches onto the right-hand needle, one at a time, as if to knit. Then, insert the left-hand needle through the front of both slipped stitches and knit them together. This decreases one stitch.
When decreasing stitches for the crown of a knit hat, you’ll typically alternate between K2tog and SSK every few rounds to create a symmetrical decrease pattern. The exact number of decrease rounds and the frequency of decrease stitches will depend on your pattern and desired fit of the hat.
Remember to continue following your pattern’s instructions for decreasing stitches until you have the desired number of stitches remaining. Once you have finished decreasing, you can then close the top of the hat by threading the yarn through the remaining stitches, pulling it tight, and securing it with a knot or weave it in.
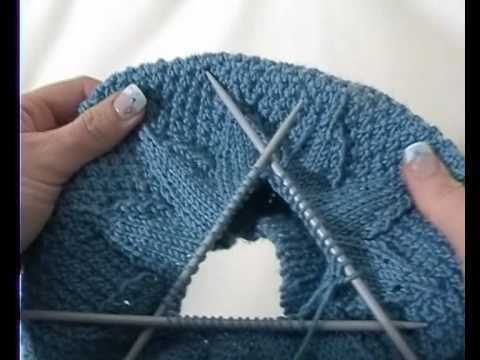
Switching to Double Pointed Needles for the Crown
Once you have completed knitting the body of your hat using straight needles, it’s time to switch to double pointed needles for the crown. This switch allows you to shape the top of the hat more easily and create a seamless transition.
To switch to double pointed needles, you will need to divide your stitches evenly onto three or four needles, depending on the size of your hat. This can be done by slipping the stitches onto the new needles or by transferring them using a spare needle as a temporary holder.
1. Divide the Stitches: Start by slipping half of the stitches onto one needle, then divide the remaining stitches evenly between the other needles. Make sure to keep track of your stitch pattern as you do this.
2. Working in the Round: Once you have divided the stitches, hold the needles with the wrong side of the hat facing you. Begin working in the round, making sure that the first stitch of each needle corresponds to the beginning of a round.
3. Decreasing: As you continue knitting in the round, you will begin to decrease the number of stitches to shape the crown of the hat. This is typically done by knitting two stitches together (k2tog) or using other decreasing techniques, depending on the pattern.
4. Finishing off: Once you have decreased the number of stitches to a few, you can use a yarn needle to thread the remaining stitches and tighten them to create a gathered crown. Secure the yarn, weave in any loose ends, and your hat is complete!
Switching to double pointed needles for the crown allows for more flexibility in shaping the top of your hat, giving it a professional finish. Once you have mastered this technique, you can easily adapt it to other patterns and knit various styles of hats with ease.
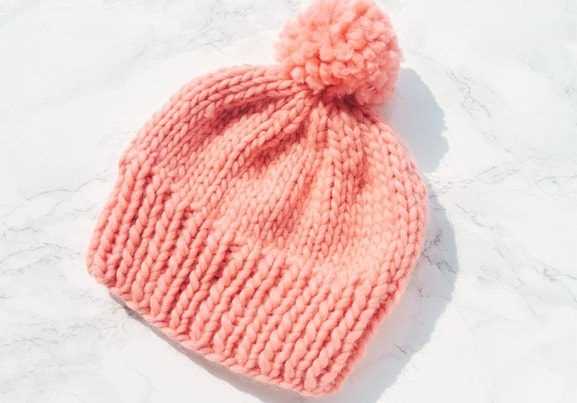
Adding Pom-Pom or Tassel to Your Hat
Adding a pom-pom or tassel to your knitted hat is a fun and easy way to personalize your creation and make it stand out. These fluffy accessories can add a touch of whimsy or elegance to your hat, depending on your preferences and the materials you choose.
When choosing a pom-pom or tassel, you can opt for a matching color to blend in with your hat or go for a contrasting color to make a bold statement. You can also experiment with different textures, such as faux fur or yarn, to add even more visual interest to your hat.
To attach a pom-pom to your hat, you will need a yarn needle and a small piece of the same yarn that you used to knit the hat. Thread the yarn through the needle and carefully insert the needle through the top of the hat, making sure to catch a few stitches to secure the pom-pom in place. Tie a knot on the inside of the hat to further secure the pom-pom and trim any excess yarn.
If you prefer tassels, you can create them by cutting several strands of yarn and folding them in half. Insert the folded end through a stitch on the top of the hat, then pass the loose ends through the folded loop and pull tight. Trim the ends to your desired length to create a neat tassel.
Remember to have fun and get creative with your pom-pom or tassel choices. They are an easy way to add a personal touch to your knitted hat and make it truly yours.
Finishing Touches: Weaving in Ends
Once you have completed knitting your beginner hat pattern using straight needles, you will need to weave in the ends to give your project a polished finish. Weaving in ends is the process of securing and hiding the loose yarn ends from your knitting project to prevent them from unraveling and to create a neat appearance.
To weave in ends, you will need a tapestry needle, which has a large eye and a blunt or dull point. This type of needle is ideal for threading the yarn through the stitches without damaging or snagging the fabric. Start by cutting the loose yarn ends, leaving a tail of about 6-8 inches.
Using the tapestry needle, thread one end of the yarn through the eye of the needle. Insert the needle under several stitches on the wrong side of the fabric, making sure to catch the yarn securely. Try to weave the yarn in a diagonal or zigzag pattern to distribute the tension evenly and prevent it from coming undone.
Continue weaving the yarn under the stitches for a few inches, then thread the yarn back through the fabric in the opposite direction. Trim any excess yarn, leaving a tail of about 1-2 inches. Repeat this process for the other loose yarn end.
Once you have woven in all the ends, flip your hat inside out and give it a gentle tug to ensure that the woven-in ends are secure. This will also help to hide the ends within the fabric. Finally, give your hat a good blocking by gently washing, shaping, and allowing it to dry flat.
Blocking Your Knit Hat

Blocking is the final step to give your knit hat a professional finish. It helps to shape your hat to the desired size and allows the stitches to relax and even out. Here are a few simple steps to follow when blocking your knit hat.
1. Prepare your hat: Fill a basin or sink with lukewarm water and add a mild wool wash. Gently immerse your knit hat in the water and let it soak for about 10 minutes. Avoid agitating or stretching the hat.
2. Remove excess water: After soaking, gently press the hat against the side of the sink or basin to squeeze out excess water. Do not wring or twist the hat, as this can cause the fibers to stretch or lose their shape.
3. Shape your hat: Place a towel on a flat surface and lay your hat on top. Use your hands to gently shape the hat to the desired size and form. Pay attention to the brim and any decorative elements you want to emphasize.
4. Pin the hat: To help the hat hold its shape, use rust-proof T-pins to secure the hat to the towel. Start with the brim and work your way up, making sure to evenly distribute the pins. Pinning the hat will also help to prevent it from shrinking or stretching during the drying process.
5. Let it dry: Allow your hat to air dry naturally. Avoid direct sunlight or heat sources, as they can damage the fibers. Depending on the thickness of your hat, it may take a day or two for it to completely dry.
6. Remove the pins: Once your hat is dry, carefully remove the T-pins and gently reshape it if necessary. Your knit hat is now ready to be worn or gifted!
Customizing Your Hat: Adding Colorwork or Embellishments
Once you have mastered the basic pattern for a knit hat using straight needles, you can start to customize your hat and make it truly unique. One way to add interest and personality to your hat is by incorporating colorwork or embellishments.
Colorwork:
If you want to add color to your hat, you can use a technique called colorwork. This involves knitting with multiple colors in the same row or round to create a pattern or design. Some popular colorwork techniques include stranded knitting, intarsia, and fair isle. You can experiment with different color combinations and patterns to create a hat that reflects your individual style.
Embellishments:
Another way to customize your hat is by adding embellishments. This could include adding buttons, pom poms, ribbons, or bows. You can sew these embellishments onto your hat once it is finished, or you can incorporate them into your knitting as you go. Be creative and have fun with it!
Summary:
- Customizing your knit hat allows you to create a unique and personalized accessory.
- Colorwork techniques such as stranded knitting, intarsia, and fair isle can be used to incorporate multiple colors into your hat.
- Embellishments like buttons, pom poms, ribbons, or bows can add a fun and decorative touch to your hat.
Remember, the sky’s the limit when it comes to customizing your knit hat. Don’t be afraid to get creative and experiment with different techniques and materials to make a hat that is truly one-of-a-kind!