
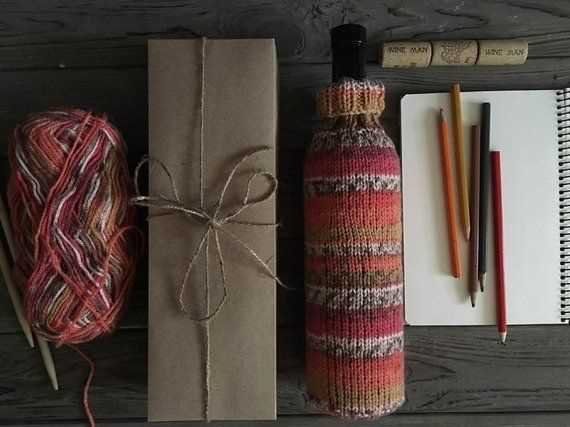
Looking for a fun and creative way to dress up your wine bottles? Why not try knitting a wine bottle cover? With just a few simple stitches, you can create a unique and personalized cover that will add a touch of elegance to any bottle. Whether you’re hosting a party, giving a bottle as a gift, or just want to make your own wine collection look more stylish, this knitting pattern is a great way to showcase your skills and add a little flair to your bottles.
This wine bottle cover knitting pattern is perfect for beginners and experienced knitters alike. With basic knitting skills, you can easily create a beautiful cover that will fit any standard wine bottle. The pattern includes detailed instructions and a materials list, making it easy to get started. Whether you prefer a simple and classic design or want to experiment with different patterns and colors, this pattern is versatile and allows for customization.
Knitting a wine bottle cover is not only a fun and rewarding project, but it also has practical benefits. The cover helps to protect the bottle from scratches and bumps, keeping it safe during transport or storage. It also adds a layer of insulation, helping to maintain the temperature of the wine. Plus, the cover adds a decorative touch, making the bottle an eye-catching centerpiece or an impressive gift. So grab your needles and yarn, and start knitting your own wine bottle cover today!
How to Knit a Wine Bottle Cover: Beginners Guide
Knitting a wine bottle cover is a great way to add a personal touch to a gift or to protect a bottle from scratches and breaks. Whether you’re a beginner or an experienced knitter, this guide will show you the basic steps to create your own wine bottle cover.
Materials Needed
Before getting started, gather the following materials:
- Knitting needles – size 8 or 9
- Yarn – choose a soft and durable yarn in your desired color
- Tape measure
- Darning needle for sewing in the ends
Step 1: Casting On
To begin, cast on 40 stitches on your knitting needles. Make sure to leave a long enough tail for sewing the ends together later.
Step 2: Knitting the Body
Using the basic knit stitch, continue knitting each row until the piece measures about 10 inches long. This will create the body of your wine bottle cover.
Step 3: Creating the Neck
After finishing the body, it’s time to create the neck of the wine bottle cover. Starting from one edge, knit 10 stitches and then bind off the next 20 stitches. Knit the remaining 10 stitches and continue knitting these 10 stitches for about 4 inches. This will make the neck opening.
Step 4: Finishing the Cover
Once the neck is complete, knit each row until the piece measures around 14 inches in total. Then, bind off all the stitches. Cut the yarn, leaving a long tail for sewing.
Finally, fold the piece in half and sew the sides together using the darning needle and the long tail. Make sure to sew neatly and securely to ensure the wine bottle cover doesn’t come apart.
And there you have it – your very own hand-knit wine bottle cover! Experiment with different yarn colors and stitch patterns to create unique designs for any occasion.
Essential Tools and Materials for Knitting Wine Bottle Covers
When it comes to knitting wine bottle covers, having the right tools and materials is essential to create a beautiful and functional piece. Whether you’re knitting as a gift or for your own enjoyment, here are some key items you’ll need to get started.
1. Knitting Needles
A good set of knitting needles is crucial for any knitting project, and wine bottle covers are no exception. Depending on the pattern and yarn you choose, you may need different sizes of needles. Circular needles are also a popular choice for knitting bottle covers, as they allow for easy knitting in the round.
2. Yarn
The yarn you choose for your wine bottle cover will greatly affect the final result. Opt for a yarn that is soft, washable, and durable. Acrylic yarns are a popular choice for their affordability and ease of care. You can also consider using cotton or wool blends for a more luxurious feel.
3. Stitch Markers
Stitch markers are essential for keeping track of your stitches and pattern repeats. They can be used to mark the beginning of your round or to indicate specific points in your pattern. They are especially useful when knitting in the round to ensure your stitches are properly aligned.
4. Cable Needle
If you’re knitting a pattern that involves cables, you’ll need a cable needle. Cable needles come in various sizes and shapes, allowing you to hold the stitches securely while you work the cable pattern. They are a must-have tool for adding texture and visual interest to your wine bottle covers.
5. Tapestry Needle
A tapestry needle is essential for finishing touches and weaving in loose ends. It allows you to seamlessly sew up any seams or hide yarn tails so that your wine bottle cover looks polished and professional. Look for a tapestry needle with a large eye for easy threading.
6. Pattern and Instructions
Lastly, you’ll need a pattern and instructions to guide you through the knitting process. There are many wine bottle cover knitting patterns available online or in knitting books. Make sure to choose a pattern that matches your skill level and personal style.
By gathering these essential tools and materials, you’ll be well-equipped to knit beautiful wine bottle covers that will impress your friends and loved ones. Enjoy the process of knitting and let your creativity shine through as you create unique and functional pieces.
Choosing the Right Yarn for Your Wine Bottle Cover
When it comes to knitting a wine bottle cover, choosing the right yarn is crucial. Not only does the yarn determine the look and feel of the cover, but it also affects its functionality and durability. Here are some factors to consider when selecting the perfect yarn for your wine bottle cover:
Type of Yarn
There are various types of yarn that can be used for knitting a wine bottle cover. The most common options include cotton, wool, acrylic, and blends of different fibers. Cotton yarn is a popular choice as it is lightweight, easy to care for, and available in a wide range of colors. Wool yarn provides excellent insulation and is perfect for keeping your wine at the desired temperature. Acrylic yarn is a budget-friendly option that offers durability and easy care. Blends of different fibers offer a combination of properties and can be a great choice if you are looking for specific characteristics.
Weight and Thickness
The weight and thickness of the yarn will determine the overall look and feel of your wine bottle cover. Lighter weight yarns create a more delicate and lacy appearance, while heavier weight yarns result in a more substantial and cozy cover. Consider the style and purpose of your wine bottle cover when deciding on the weight and thickness of the yarn. Thicker yarns may be more suitable for a winter-themed cover, while thinner yarns can be perfect for a summery or elegant design.
Color and Texture
The color and texture of the yarn can significantly impact the final look of your wine bottle cover. Choose a color that complements the occasion or matches your personal taste. Consider the texture and pattern of your knitting project as well. Some yarns have a smooth and uniform texture, while others have a more textured or nubby feel. Think about the overall design and aesthetic you want to achieve with your wine bottle cover and select the yarn accordingly.
Yarn Quantity
Depending on the size of your wine bottle cover, you will need a certain amount of yarn. Consult the knitting pattern or calculate the amount of yarn based on the specifications provided. It’s always a good idea to have some extra yarn on hand in case you need to make adjustments or add personal touches to your project. Consider purchasing yarn from the same dye lot to ensure consistent color throughout the cover.
By considering these factors and taking your personal preferences into account, you can choose the perfect yarn for your wine bottle cover. Whether you opt for a soft and cozy wool or a vibrant and lightweight cotton, the right yarn will enhance the beauty and functionality of your knitted creation.
Understanding Knitting Abbreviations and Terms
When it comes to knitting, there are a variety of abbreviations and terms that are commonly used in patterns and instructions. Understanding these abbreviations and terms is essential for successfully following knitting patterns and creating beautiful projects.
Knitting Abbreviations:
Knitting abbreviations are shorthand codes used in patterns to represent specific knitting stitches or techniques. Some common knitting abbreviations include:
- K: Knit
- P: Purl
- YO: Yarn Over
- SSK: Slip, Slip, Knit
- K2tog: Knit Two Together
Knitting Terms:
In addition to abbreviations, there are also common knitting terms that describe various aspects of the knitting process. Some important knitting terms to know include:
- Gauge: The number of stitches and rows per inch, which determines the size of the finished project
- Cast On: The process of creating the initial stitches on the knitting needle
- Bind Off: The process of finishing the edge of the knitted piece by securing the stitches and removing them from the needles
- Row: A horizontal line of stitches
- Repeat: To perform a set of instructions multiple times
By familiarizing yourself with these knitting abbreviations and terms, you will be able to read and understand knitting patterns more easily. This will empower you to take on a wider range of knitting projects and create beautiful, handmade items with confidence.
Step-by-Step Guide: Knitting a Basic Wine Bottle Cover
Knitting a wine bottle cover can be a fun and creative project that adds a personal touch to a gift or an elegant touch to your own dinner table. With just a few basic knitting techniques, you can create a beautiful cover that will keep your wine bottle protected and looking stylish. Follow this step-by-step guide to knitting a basic wine bottle cover.
Materials:
- Worsted weight yarn in the color of your choice
- Size 8 knitting needles
- Circular or double pointed needles
- Tapestry needle
- Scissors
Step 1: Cast On
Start by casting on 48 stitches using the long tail cast on method. This will create the base of your wine bottle cover.
Step 2: Knit Ribbing
Next, you will knit the ribbing for the top of the wine bottle cover. *K2, P2* across the row. Repeat this row for a total of 6 rows. The ribbing will create a stretchy and snug fit for the cover.
Step 3: Stockinette Stitch
After completing the ribbing, switch to stockinette stitch for the body of the wine bottle cover. Knit all stitches in each row until the desired length is reached. This will create a smooth and even texture.
Step 4: Decrease Stitches
To shape the top of the wine bottle cover, you will need to decrease the number of stitches. Knit 6, k2tog across the row. This will reduce the total number of stitches to 42.
Step 5: Knit Garter Stitch
After decreasing, switch to knitting garter stitch for the top portion of the cover. Knit every stitch in each row for a total of 6 rows. This will create a textured pattern that adds interest to the cover.
Step 6: Bind Off
Finally, bind off the stitches to finish the wine bottle cover. Cut the yarn, leaving a long tail. Use a tapestry needle to thread the tail through the remaining stitches and pull tight to secure. Weave in any loose ends.
There you have it! With just a few simple steps, you can create a basic wine bottle cover that is both functional and stylish. Experiment with different yarn colors and stitch patterns to create your own unique designs. Happy knitting!
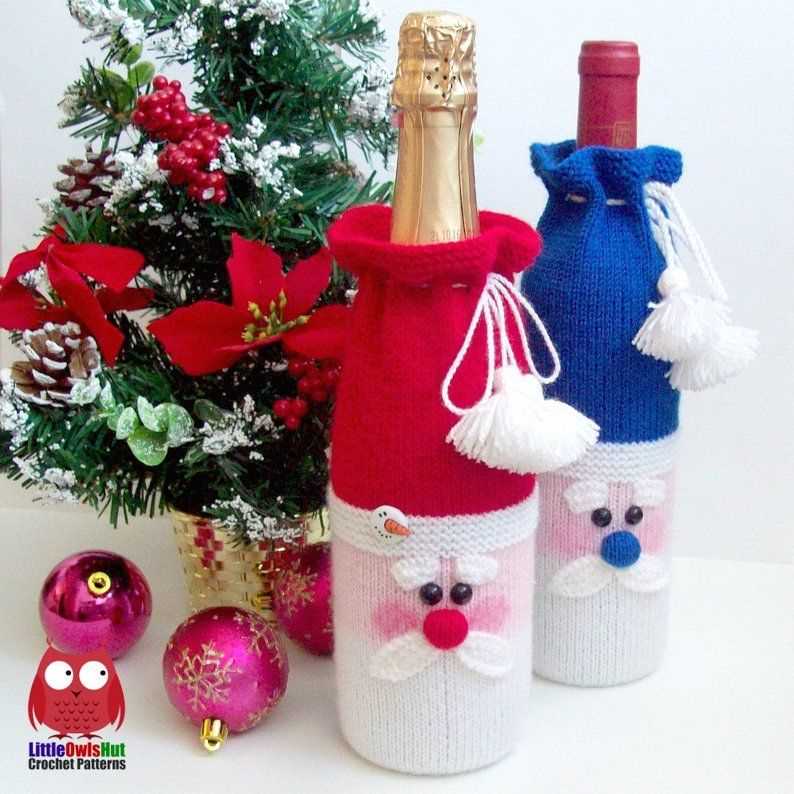
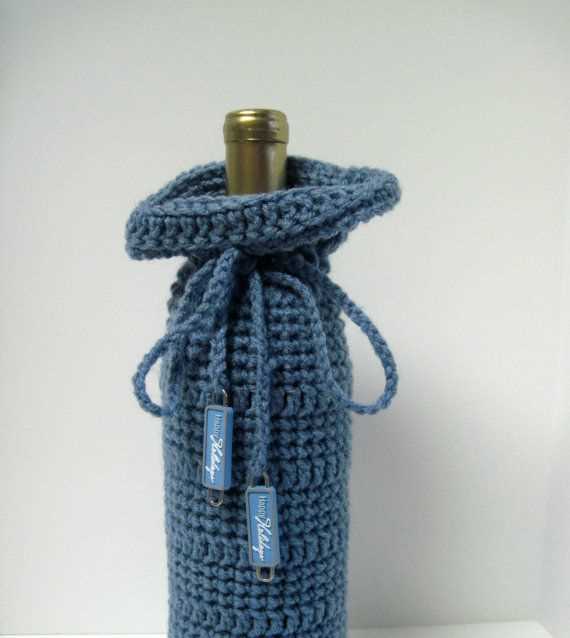
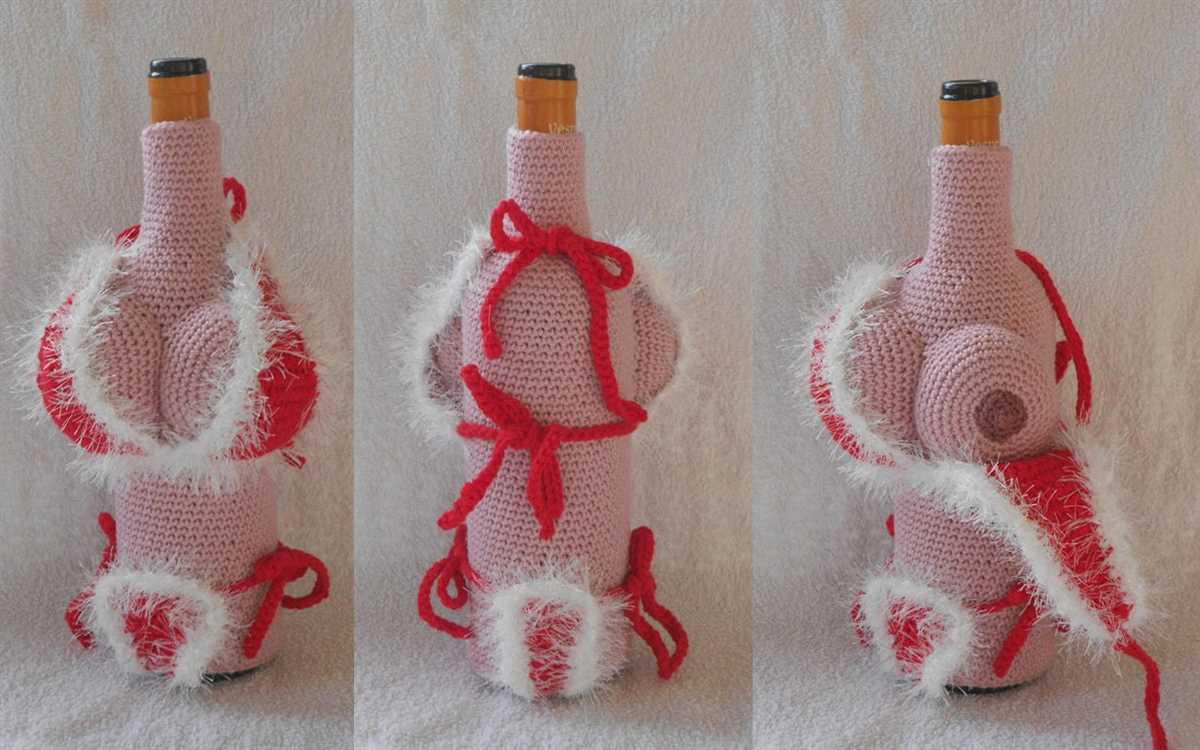
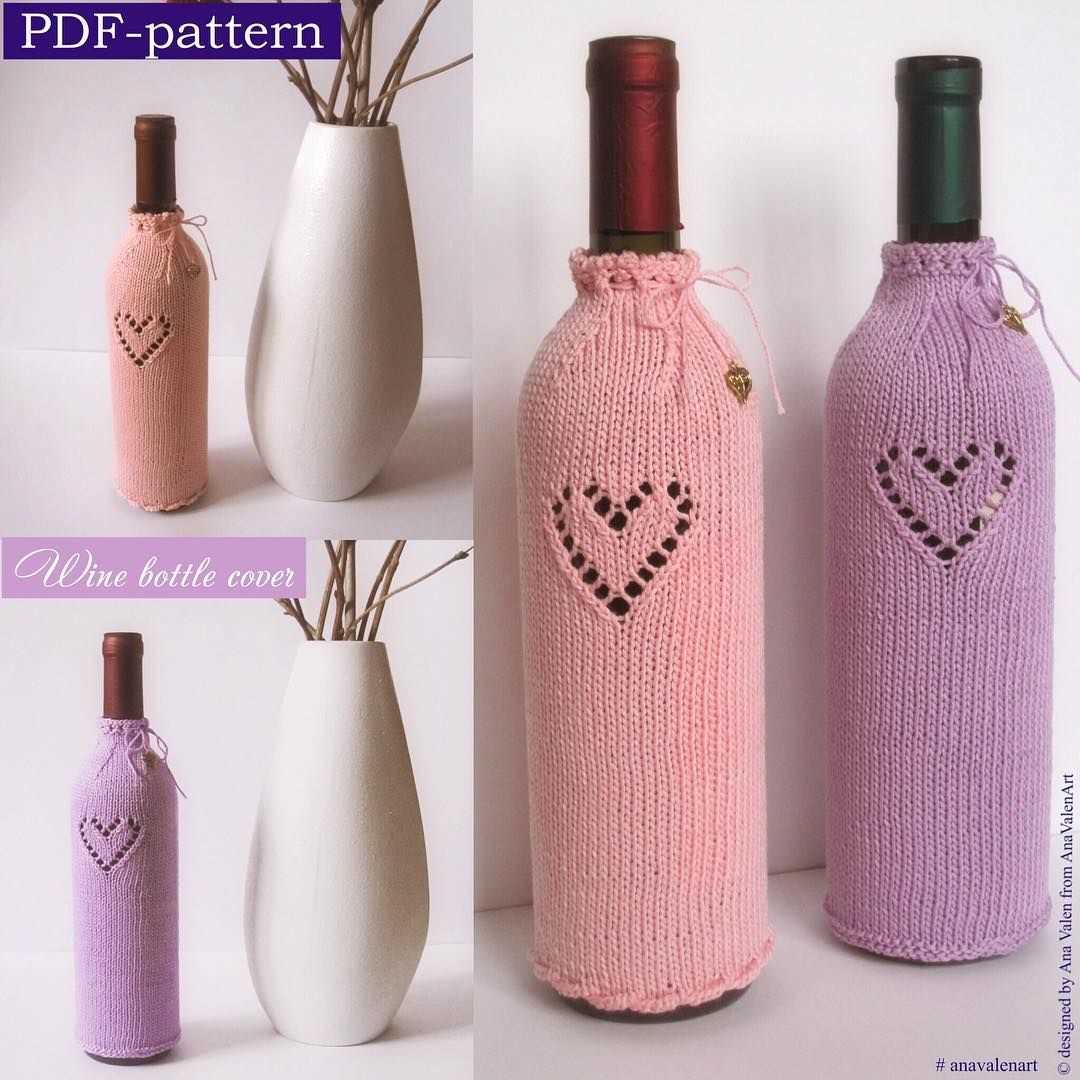
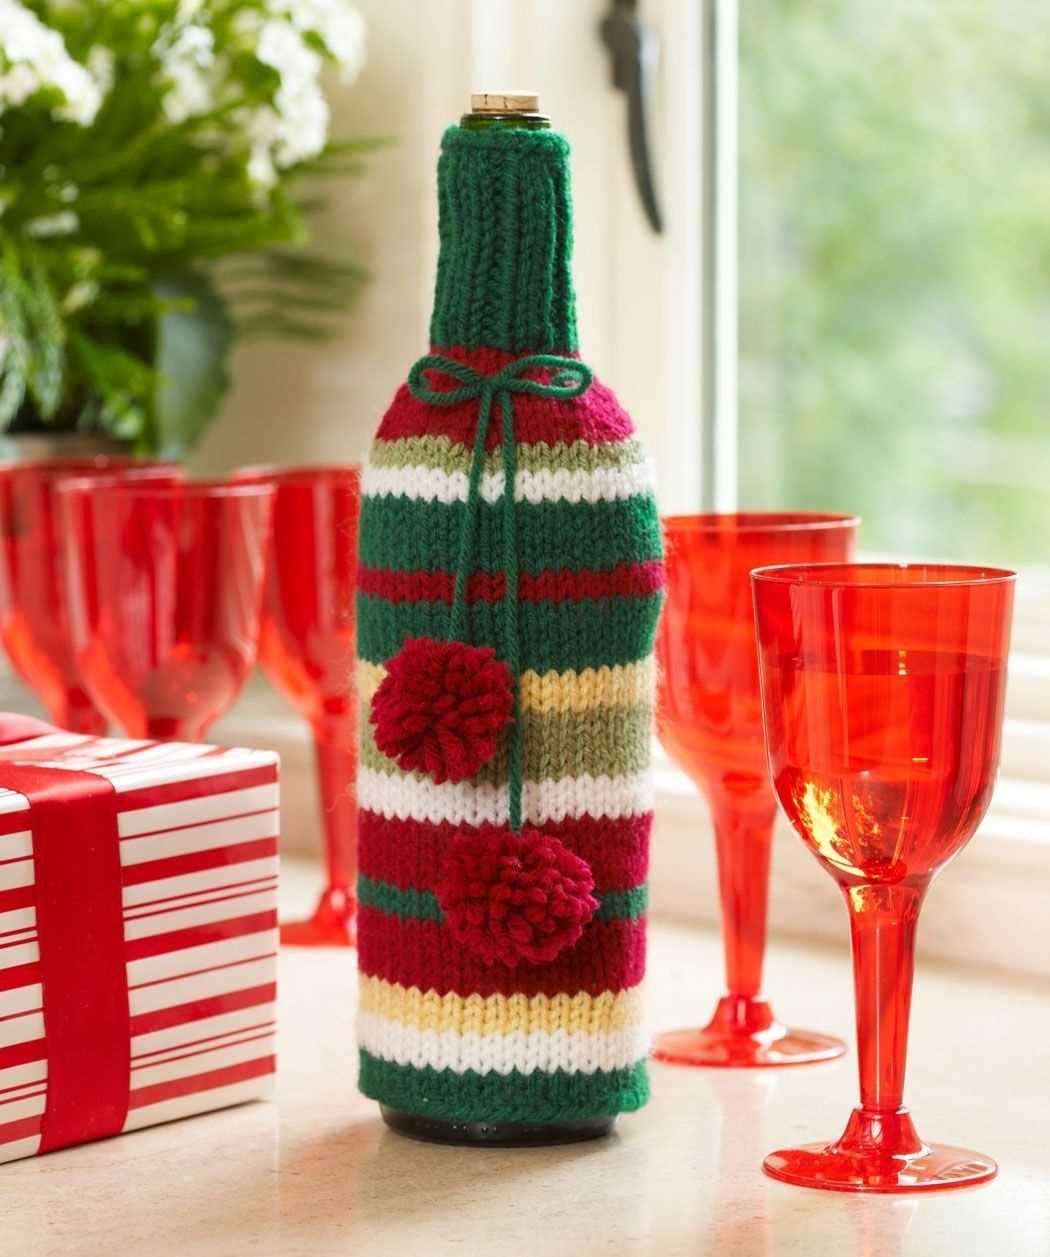
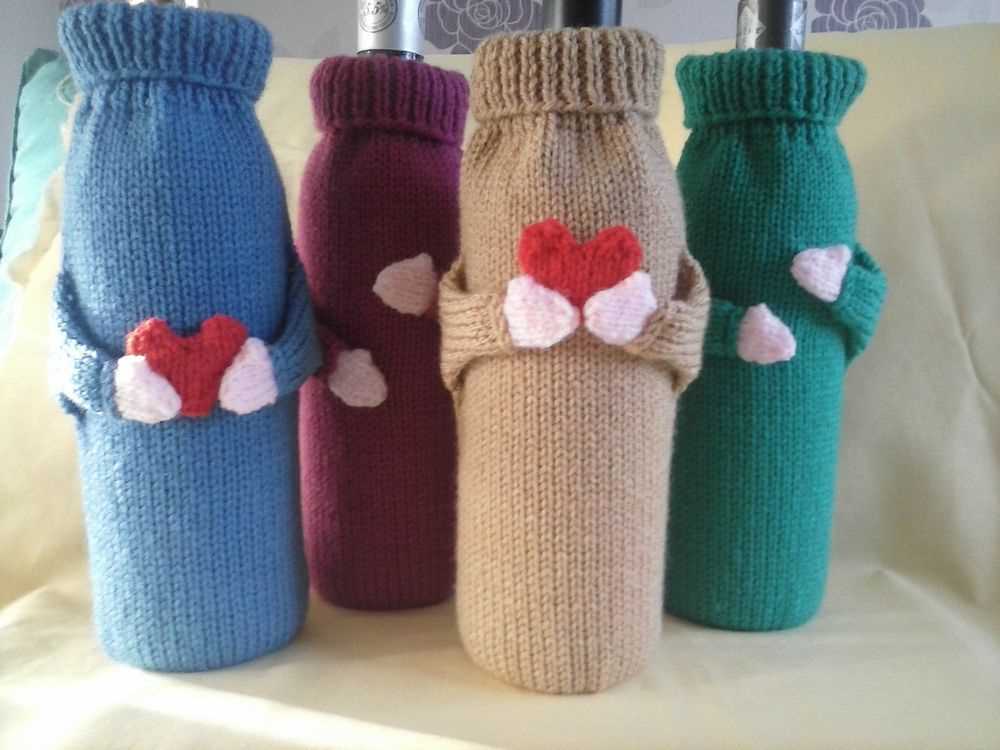
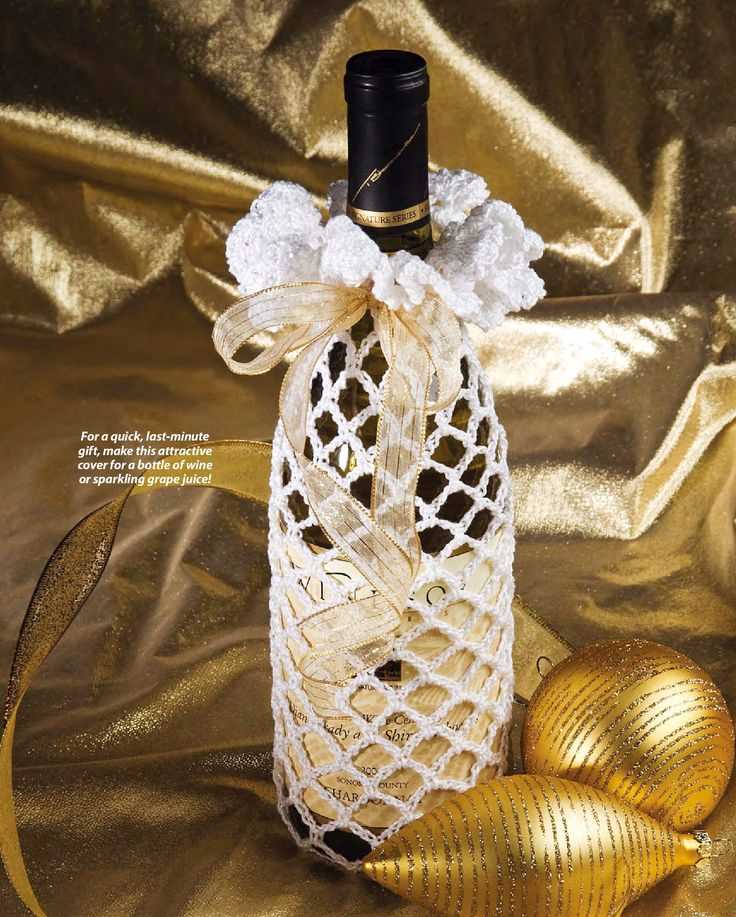
Adding Personalized Designs to Your Wine Bottle Cover
When it comes to knitting a wine bottle cover, the possibilities for creating personalized designs are truly endless. By incorporating your own unique patterns and motifs, you can add a special touch to your wine bottle cover that reflects your personal style or the occasion for which it is intended.
1. Custom Embroidery: One way to personalize your wine bottle cover is by adding custom embroidery. This can be done by stitching initials, names, or even special symbols onto the cover. You can choose thread colors that match the color scheme of the event or use metallic embroidery thread for a touch of elegance.
2. Appliqué Designs: Another option for adding personalized designs is by using fabric appliqués. These can be pre-made or hand-cut from fabric scraps. You can create appliqué designs in various shapes and sizes, such as flowers, wine bottles, or wine glasses, and then sew them onto the cover using a simple running stitch.
3. Knitted Motifs: If you prefer to incorporate designs directly into the knitting pattern, you can try adding knitted motifs. This can be done by following a chart or pattern that includes different stitches and colors to create a specific design. For example, you could knit a wine bottle cover with a Christmas tree motif for a holiday gathering or a heart motif for a romantic occasion.
4. Personalized Labels: In addition to adding designs to the cover itself, you can also create personalized labels to attach to the wine bottle cover. These labels can be printed or hand-written and can include special messages, the name of the event, or even the name of the recipient. Simply attach the label to the cover using a decorative ribbon or adhesive.
Remember, the key to adding personalized designs is to be creative and have fun with the process. Whether you choose to embroider, appliqué, knit, or add labels, your personalized wine bottle cover will surely make a memorable impression.
Tips for Properly Blocking and Finishing Your Wine Bottle Cover
Blocking and finishing your wine bottle cover is an important step to ensure that it fits properly and looks its best. By following these tips, you can achieve a polished and professional finish for your knitting project.
1. Choose the Right Blocking Method
There are several methods you can use to block your wine bottle cover, including wet blocking, steam blocking, and spray blocking. Wet blocking involves soaking your knitted piece in water and then shaping it to the desired dimensions. Steam blocking uses steam to reshape and relax the fibers, while spray blocking involves misting the piece with water and then shaping it. Choose the method that is most suitable for the yarn you used and the desired finished look of your wine bottle cover.
2. Use Blocking Tools
Blocking tools can greatly assist you in achieving an even and professional finish. Invest in blocking mats or a blocking board to provide a sturdy and flat surface for blocking. T-pins or blocking wires can be used to secure your wine bottle cover in place while blocking. These tools help to ensure that the piece stays in shape and dries evenly.
3. Pay Attention to Measurements
Before blocking your wine bottle cover, measure it to determine the desired dimensions. Take into account the size and shape of the wine bottle you will be covering. Use a measuring tape or ruler to ensure that your wine bottle cover will fit snugly and securely. Adjust the blocking process accordingly to achieve the desired measurements.
4. Allow Ample Drying Time
After blocking, give your wine bottle cover ample time to dry completely. Depending on the yarn used and the blocking method, this may take several hours or even overnight. Avoid removing the piece from the blocking surface prematurely, as this can cause the shape to warp or distort.
5. Finishing Touches
Once your wine bottle cover is dry and removed from the blocking surface, take the time to finish any remaining details. This may include weaving in loose ends, sewing on buttons or other embellishments, or adding decorative elements. These finishing touches will give your wine bottle cover a polished and professional look.
By following these tips, you can ensure that your wine bottle cover is properly blocked and finished. This will result in a beautiful and functional accessory that will add a touch of style to any wine bottle.
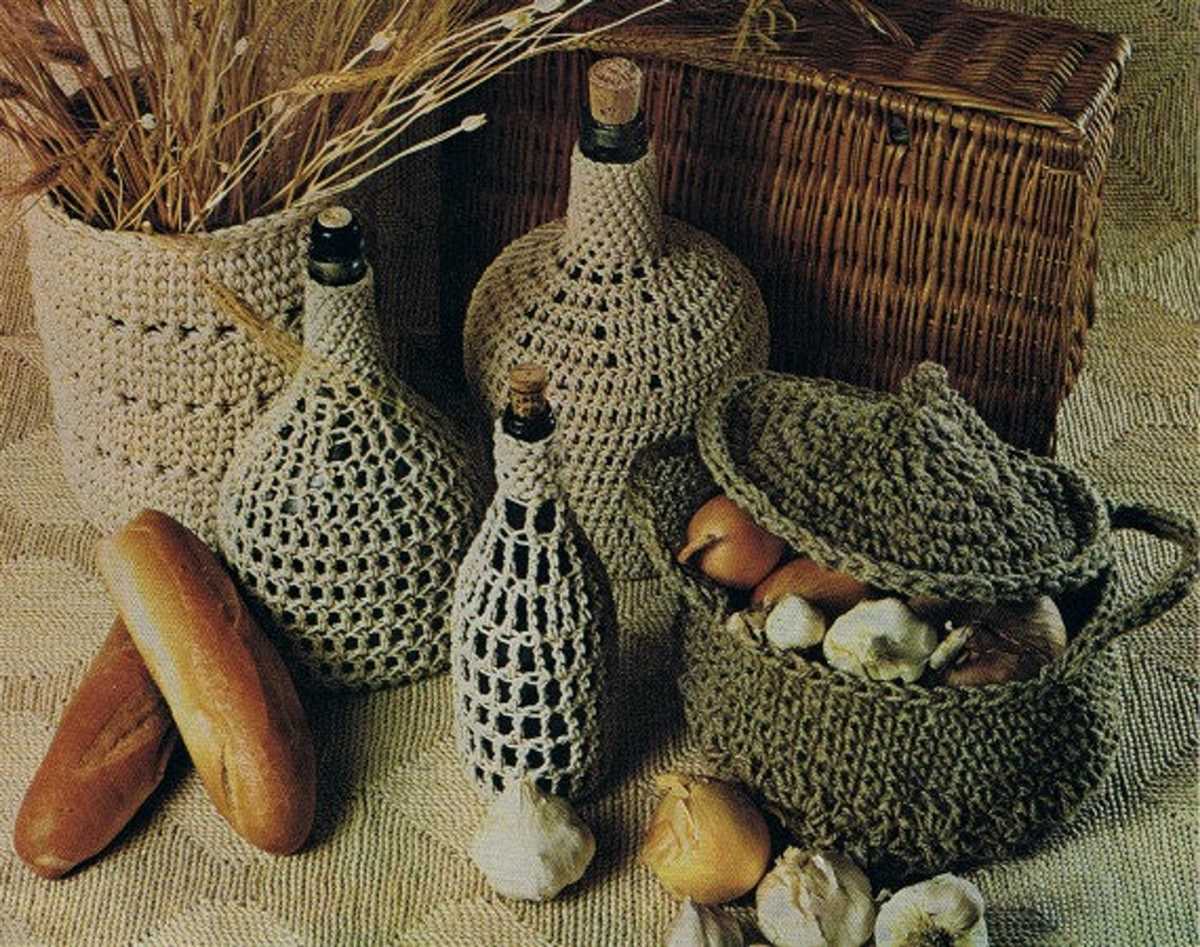
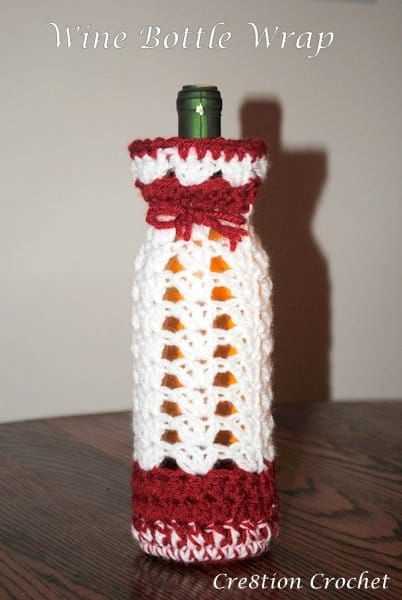
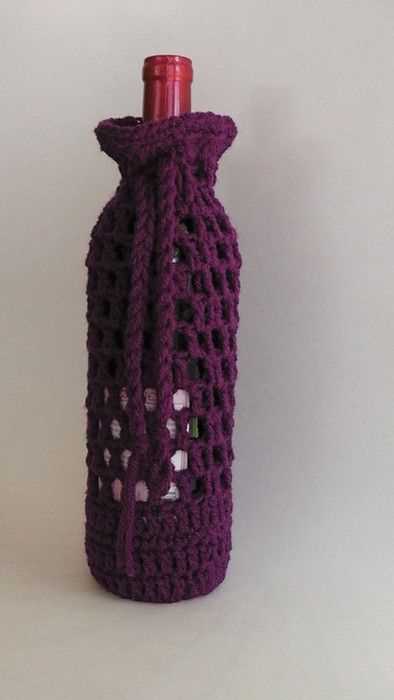
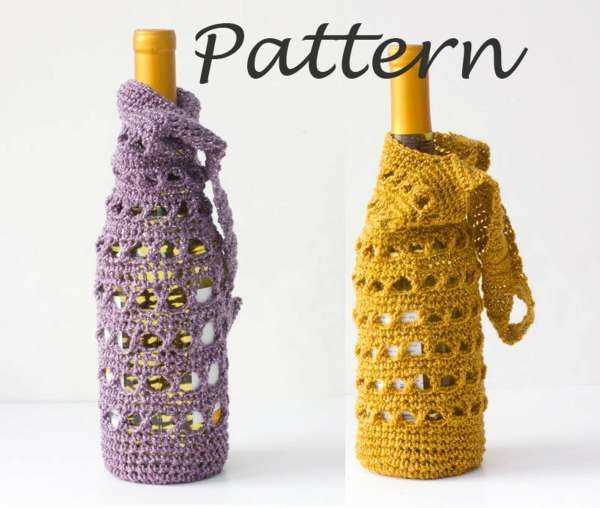
Variations on the Basic Wine Bottle Cover Pattern
Knitting wine bottle covers can add a touch of elegance and style to any wine gift or table setting. With the basic wine bottle cover pattern, you can easily create a simple and functional cover. However, if you want to add some variety and creativity to your covers, there are several variations you can try.
1. Lace Pattern
Add a delicate and beautiful touch to your wine bottle cover by incorporating a lace pattern. You can choose from a variety of lace stitch patterns such as the feather and fan, leaf lace, or eyelet lace. Lace patterns can give your covers a more feminine and refined look, perfect for special occasions or gifts.
2. Colorwork
Add some color and personality to your wine bottle covers by incorporating colorwork techniques such as fair isle or intarsia. With colorwork, you can create beautiful and intricate designs on your covers, whether it’s a simple pattern or a more complex motif. Experiment with different color combinations to create unique and eye-catching covers.
3. Cable Pattern
Add some texture and depth to your wine bottle covers by incorporating cable patterns. Cable patterns can create a classic and sophisticated look, reminiscent of traditional Aran knitting. Whether you choose a simple cable or a more intricate design, cable patterns can add a touch of elegance and charm to your covers.
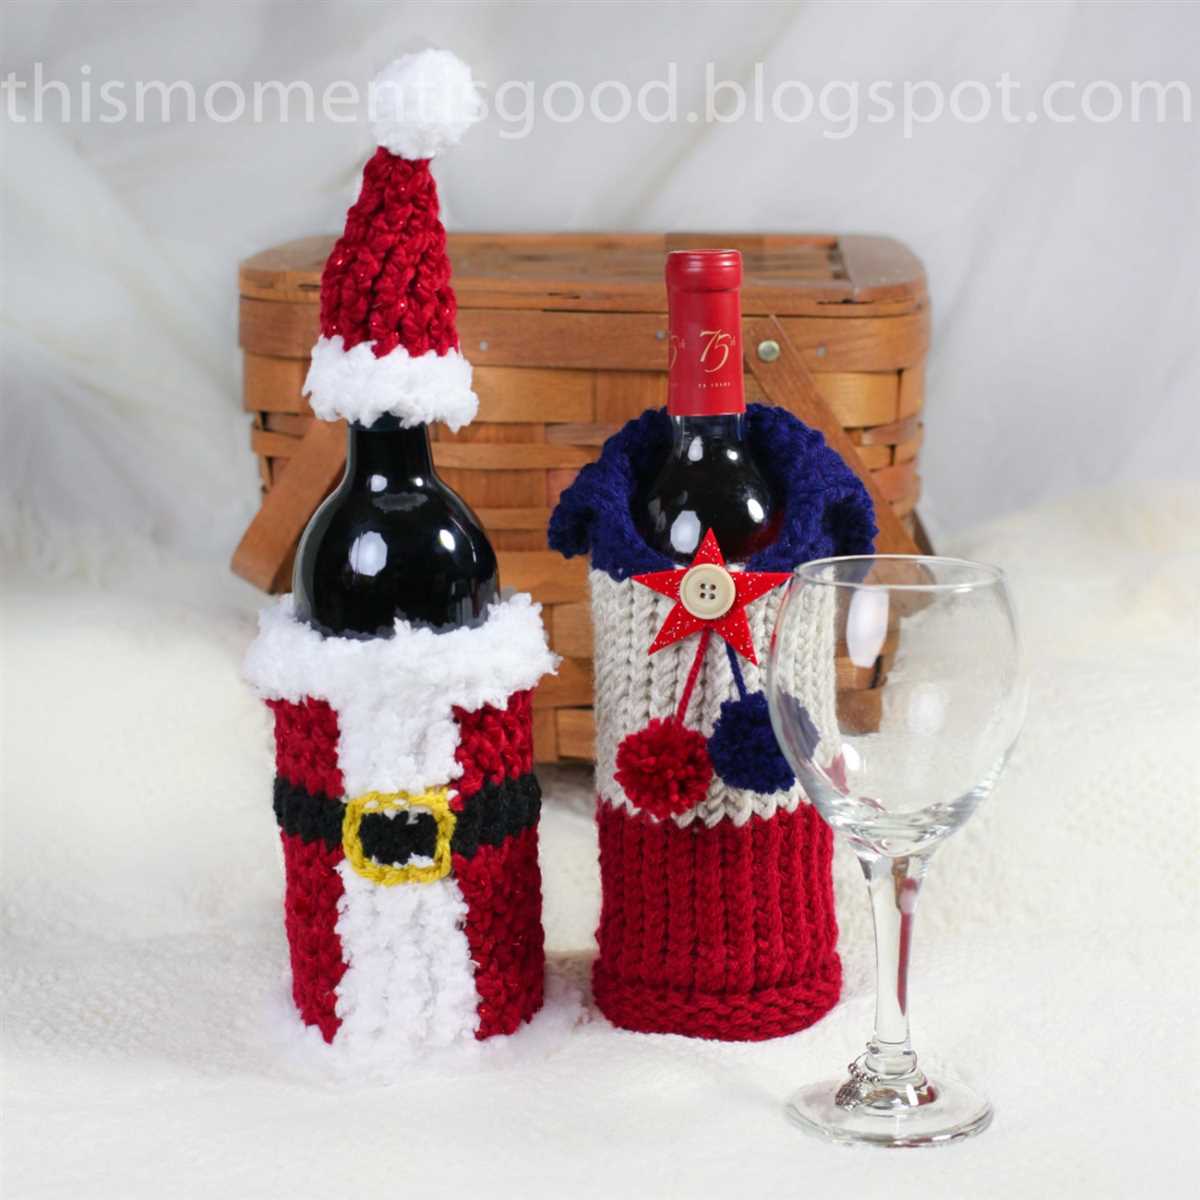
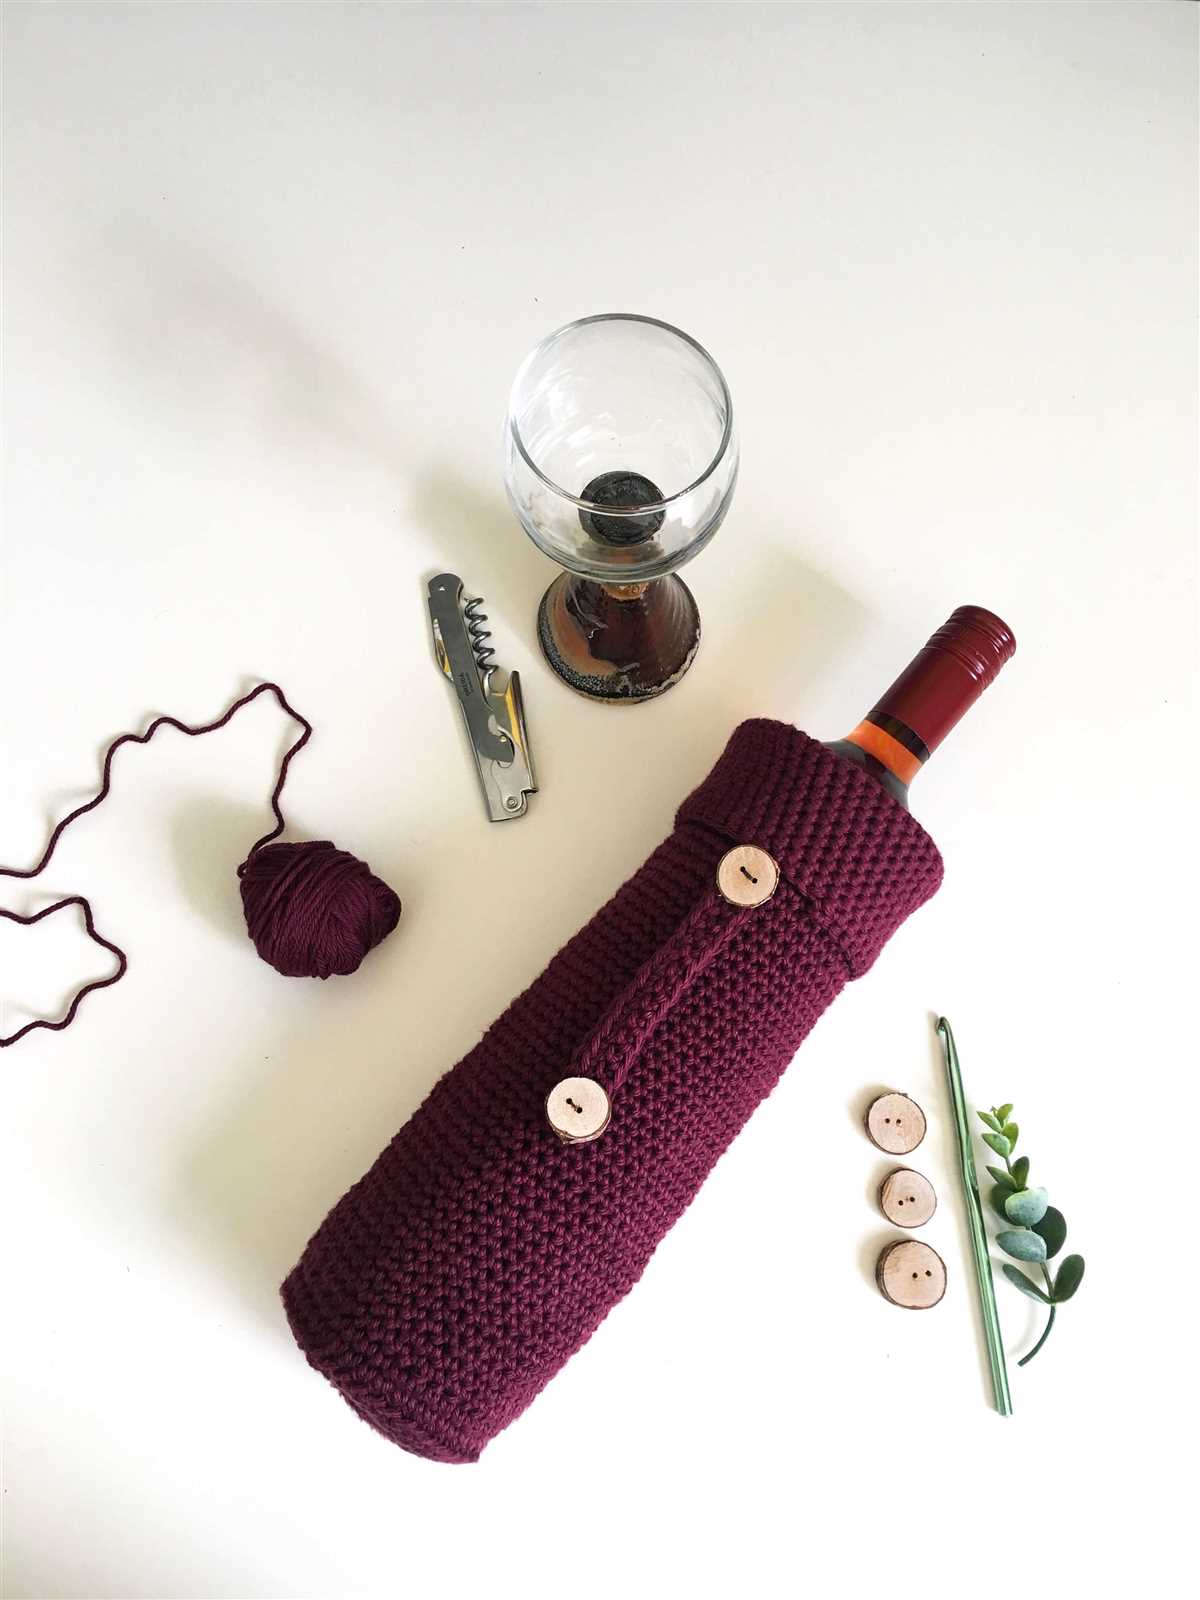
4. Embellishments
Take your wine bottle covers to the next level by adding embellishments such as buttons, beads, or ribbons. You can attach them to the cover itself or use them as closures. Embellishments can add a decorative and festive touch to your covers, making them stand out and adding a personal touch.
With these variations on the basic wine bottle cover pattern, you can create unique and personalized covers that suit any occasion or recipient. Explore different techniques and designs to bring your knitting projects to life and impress your friends and family with your creativity and craftmanship.
Advanced Techniques for Experienced Knitters
For experienced knitters looking to take their skills to the next level, there are several advanced techniques that can add depth and intricacy to their projects. These techniques require a good understanding of basic knitting stitches and the ability to read and follow more complex patterns.
Cable Knitting
One of the most popular advanced techniques is cable knitting. This technique involves crossing stitches over each other to create intricate cable patterns. Cable knitting can be used to create beautiful textured designs on sweaters, scarves, and even wine bottle covers. By working with a cable needle, knitters can manipulate stitches and create stunning patterns that add visual interest to their projects.
Lace Knitting
Another advanced technique is lace knitting. This technique involves creating delicate, openwork patterns by strategically placing increases and decreases in the knitting. Lace knitting can be used to create intricate designs on shawls, socks, and garments. It requires careful attention to detail and counting stitches, but the end result is a lightweight and elegant piece.
Colorwork

Colorwork is a technique that involves knitting with multiple colors to create patterns and designs. Fair Isle and intarsia are two common colorwork techniques. Fair Isle knitting involves stranding two or more colors along the row, creating a float or “stranded” behind the work. Intarsia knitting involves using separate bobbins or balls of yarn to create blocks of color within a design. Both techniques can be used to create stunning patterns and motifs on sweaters, hats, and accessories.
Double-Knitting
Double-knitting is a technique that creates a reversible fabric with two layers of knitting. This technique is achieved by knitting each stitch with two strands of yarn, one for each side of the fabric. Double-knitting allows for intricate colorwork and patterns on both sides of the fabric and is often used to create reversible scarves, blankets, and hats.
- Advanced techniques like cable knitting, lace knitting, colorwork, and double-knitting can add depth and intricacy to knitting projects.
- These techniques require a good understanding of basic knitting stitches and the ability to read and follow more complex patterns.
- Knitters can use cable knitting to create beautiful textured designs on sweaters, scarves, and wine bottle covers.
- Lace knitting involves creating delicate, openwork patterns by strategically placing increases and decreases in the knitting.
- Colorwork techniques like Fair Isle and intarsia allow knitters to create stunning patterns and motifs using multiple colors.
- Double-knitting creates a reversible fabric with two layers of knitting, allowing for intricate colorwork on both sides.
Creating Wine Bottle Gift Sets: Coasters and Wine Charms
When it comes to gifting a bottle of wine, why not take it up a notch and give a complete wine bottle gift set? One way to do this is by knitting a wine bottle cover and complementing it with matching coasters and wine charms. These handmade items not only add a personal touch to the gift, but also provide practical accessories that can be used time and time again.
Coasters: Coasters are an essential part of any wine bottle gift set as they protect surfaces from condensation and drips. Knitting coasters allows for endless creativity and customization. Whether you prefer simple and elegant designs or vibrant and colorful patterns, the options are limitless. Knitted coasters can be made using various stitches and techniques, such as lace, cables, or colorwork, to create unique and eye-catching designs. Pairing the coasters with the wine bottle cover creates a cohesive and visually appealing set.
Wine Charms: Wine charms are another fantastic addition to a wine bottle gift set. These small, decorative accessories are typically placed around the stem of a wine glass to help guests identify their drink during gatherings. Knitting wine charms allows for the incorporation of different colors, patterns, and motifs, making each charm unique. Whether you choose to knit charms in the shape of wine bottles, grapes, or other wine-inspired designs, they are sure to add a touch of elegance and fun to any wine lover’s collection.
Creating a wine bottle gift set with knitted coasters and wine charms is not only a thoughtful and personalized gesture, but it also allows you to showcase your knitting skills and creativity. Whether you’re gifting it for a special occasion or simply as a gesture of appreciation, this handmade set is sure to be a hit.
Exploring Different Stitch Patterns for Wine Bottle Covers
If you enjoy knitting and have a knack for creating unique and personalized gifts, then wine bottle covers can be a great project for you. Not only are they practical for keeping wine bottles insulated, but they also add a touch of style and elegance to any gift or table setting. One way to make your wine bottle covers stand out is by using different stitch patterns.
Rib Stitch: The rib stitch is a classic and versatile knitting pattern that works well for wine bottle covers. It creates a stretchy fabric that fits snugly around the bottle and helps to keep it secure. The rib stitch can be done in various combinations, such as 1×1 or 2×2, to create different textures and visual interest.
Seed Stitch:
The seed stitch is another popular stitch pattern that adds a lovely texture to wine bottle covers. It is created by alternating knit and purl stitches in a specific pattern. This stitch pattern is great for adding visual interest to your wine bottle covers and can be used alone or in combination with other stitches.
Cable Stitch:
If you want to create a more intricate and decorative wine bottle cover, the cable stitch is a great option. This stitch pattern involves crossing stitches over each other to create a cable-like effect. It requires a bit more skill and attention to detail but can result in a stunning finished product.
When choosing a stitch pattern for your wine bottle cover, consider the occasion and the recipient’s preferences. You could also experiment with combining different stitch patterns to create unique designs. Remember to use a suitable yarn and knitting needles for your chosen stitch pattern to ensure the best results. Happy knitting!
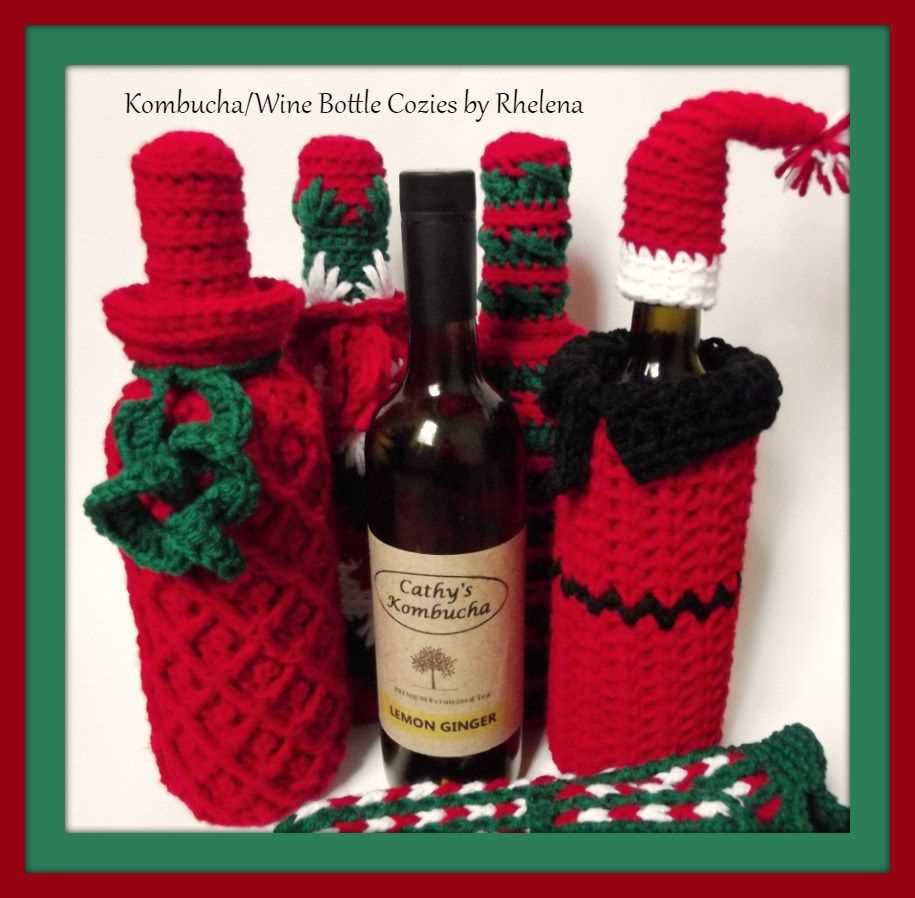
Customizing Wine Bottle Covers for Special Occasions
When it comes to special occasions, such as weddings, birthdays, or holiday celebrations, it’s the little details that can make all the difference. Customizing wine bottle covers is a creative and thoughtful way to add a personal touch to any event. Whether you’re hosting a party or attending as a guest, these handmade covers are sure to impress.
Unique Designs
One of the great things about knitting your wine bottle covers is the endless opportunities to create unique designs. From intricate lace patterns to bold and colorful stripes, you can tailor each cover to match the theme or color scheme of the occasion. Consider incorporating the host’s favorite colors, a monogram, or even a special motif that holds significance for the event. The possibilities are truly endless!
Practical and Stylish
Not only do wine bottle covers add a touch of style and personality to any occasion, but they also serve a practical purpose. These covers can help insulate the wine, keeping it cool or warming it up if necessary. Additionally, they can protect the bottle from scratches or bumps, ensuring it arrives at its destination in perfect condition. So, not only will your custom covers look fabulous, but they’ll also be functional.
Memorable Gifts
Customized wine bottle covers also make for memorable gifts. Whether you’re attending a bridal shower, housewarming party, or a holiday gathering, presenting a bottle of wine with a handmade cover shows that you’ve put thought and effort into your gift. This thoughtful gesture is sure to be appreciated and remembered long after the occasion has passed.
A Fun DIY Project
If you enjoy knitting or are looking for a new craft project, creating wine bottle covers is a fun and rewarding endeavor. Knitting allows you to express your creativity and create something beautiful with your own hands. With countless patterns and techniques available online or in craft stores, you can continuously challenge yourself and expand your knitting skills.
Conclusion
Customizing wine bottle covers for special occasions is a creative way to add a personal touch and make an event truly memorable. With unique designs, practicality, and the opportunity for unforgettable gifts, knitting these covers can be a fun and rewarding project. So, pick up your knitting needles and start crafting beautiful covers for your next special occasion!
Inspiration and Free Patterns for Wine Bottle Covers
Knitting wine bottle covers can be a fun and creative way to add a personal touch to your gifts or home decor. If you’re looking for inspiration and free patterns to get started, there are several resources available online. Whether you’re a beginner or an experienced knitter, these sources can provide you with a wide range of designs and ideas for your next project.
1. Knitting Blogs and Websites
Many knitting enthusiasts share their patterns and projects on their personal blogs or websites. These platforms often offer free patterns for wine bottle covers, along with step-by-step instructions and helpful tips. Some popular knitting blogs and websites to explore include:
- Ravelry: Ravelry is a popular online community for knitters and crocheters. It has a vast collection of free patterns, including wine bottle covers. You can search for patterns based on difficulty level, yarn type, and more.
- Knitty: Knitty is an online knitting magazine that publishes free patterns on a regular basis. It features a variety of designs, including wine bottle covers.
- LoveKnitting: LoveKnitting offers a wide range of patterns for all skill levels. Their website allows you to filter your search specifically for wine bottle covers.
2. Social Media Platforms
Social media platforms like Instagram, Pinterest, and Facebook can also be great sources of inspiration for wine bottle cover patterns. Many knitters and knitting communities share their work on these platforms, allowing you to discover different design ideas and patterns. You can use hashtags like #winebottlecover or #knittingpatterns to find relevant posts and profiles to follow.
3. Online Knitting Communities
Joining online knitting communities and forums can connect you with fellow knitters who may be willing to share their patterns or offer advice. Places like Knitting Help, Knitting Paradise, or the knitting subreddit on Reddit are great places to start. You can ask for recommendations or browse through existing threads to find patterns and inspiration for wine bottle covers.
In conclusion, there are various online resources available to inspire and provide free patterns for wine bottle covers. With a little bit of research and exploration, you can find a design that matches your skill level and personal style. So grab your knitting needles and get creative with your wine bottle covers!