
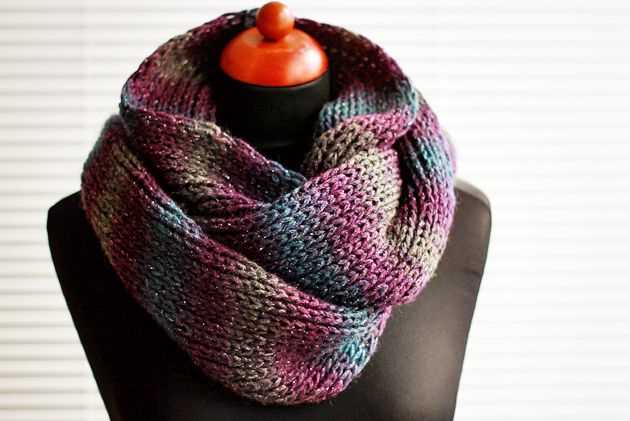
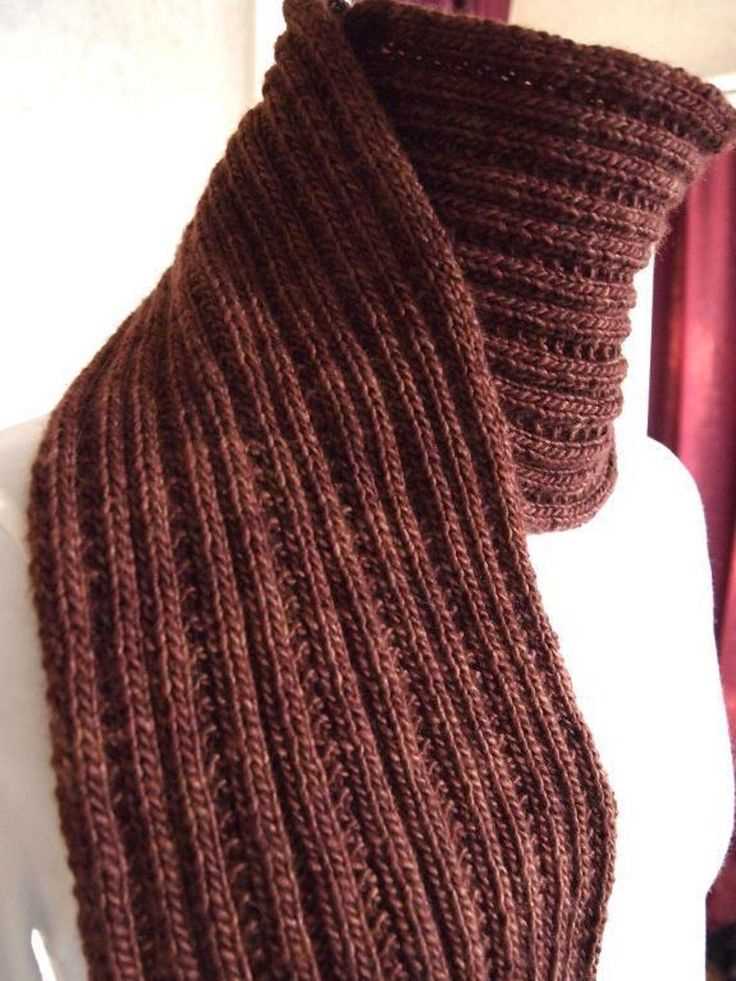
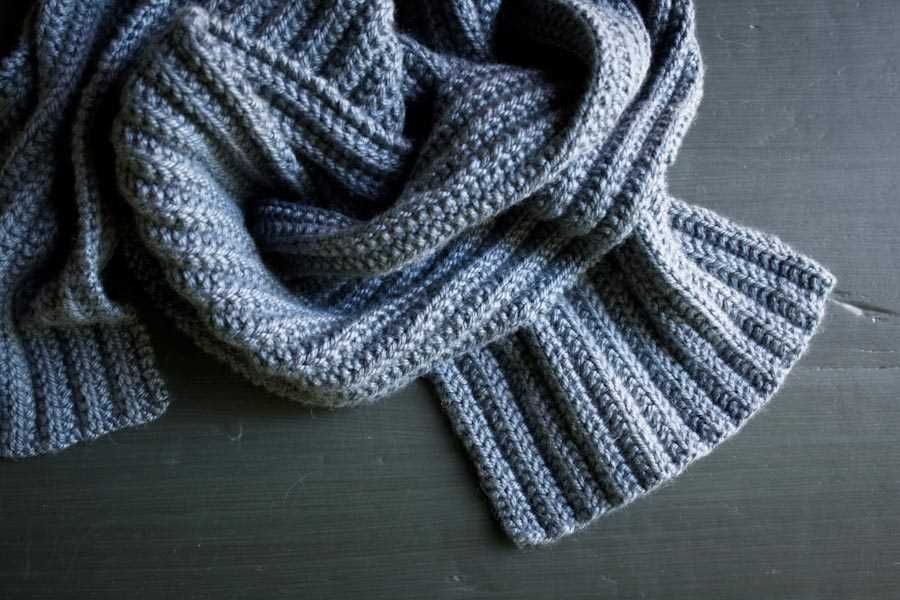
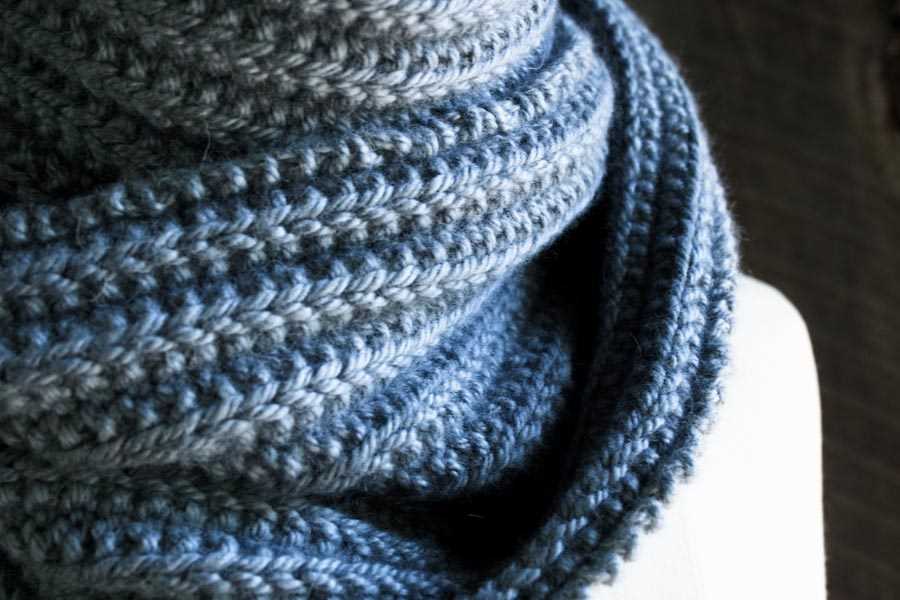
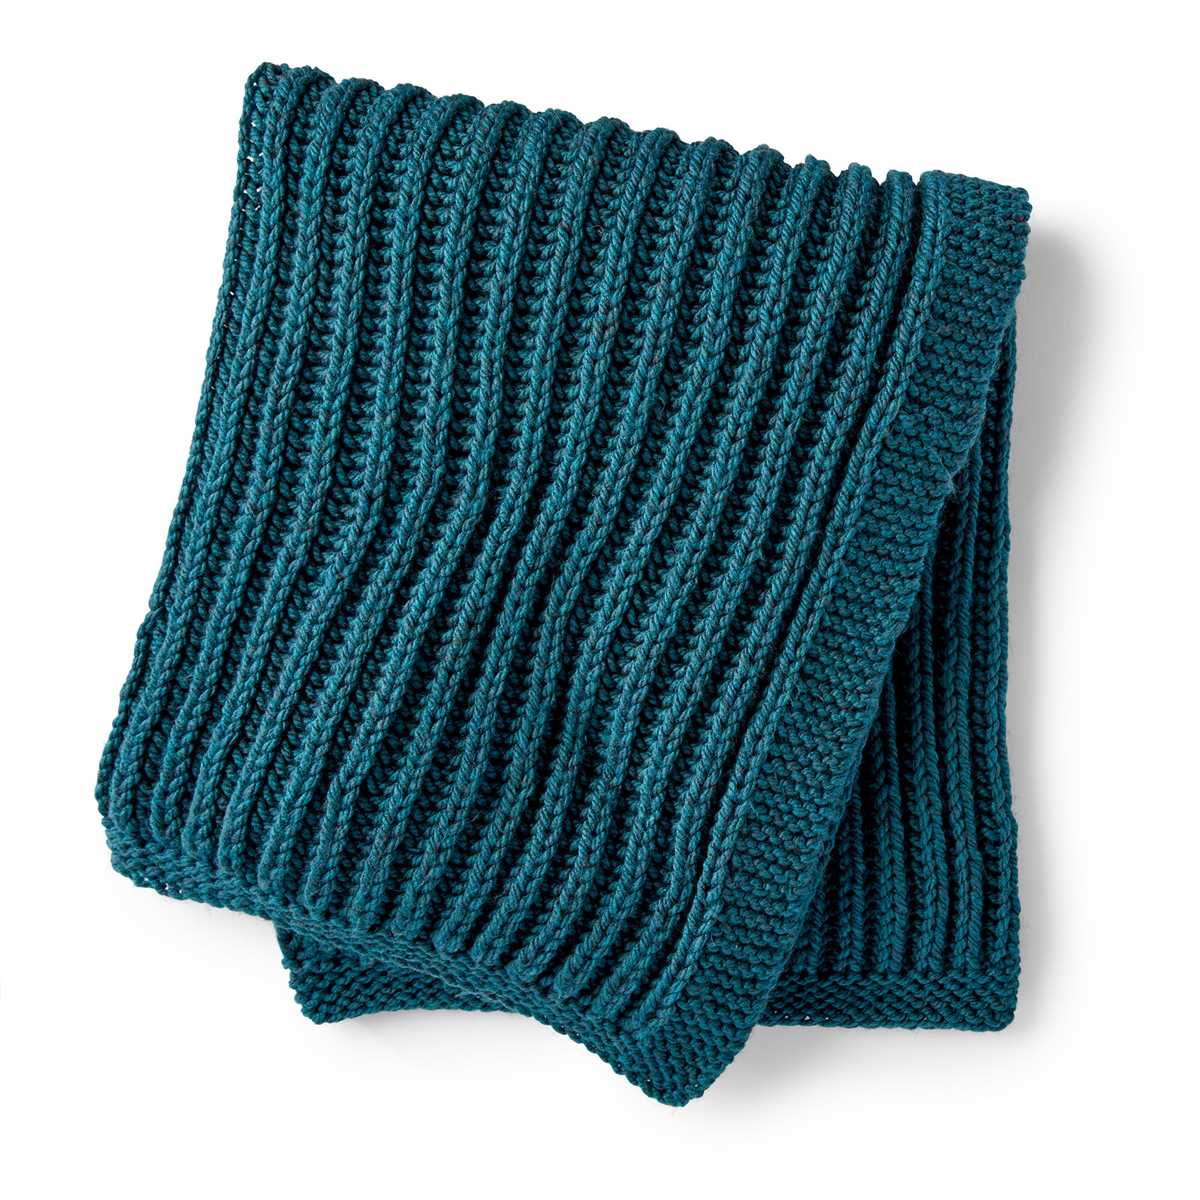
If you are looking for a fun and cozy knitting project, a ribbed knitted scarf is the perfect choice. Ribbed scarves are not only stylish, but they also provide extra warmth and comfort during the chilly winter months. With this pattern, you can create your own ribbed scarf for free, making it a budget-friendly and fashionable accessory.
The ribbed pattern is created by alternating knit and purl stitches, which gives the scarf its unique texture. This pattern is perfect for beginners who are just starting their knitting journey, as it is easy to follow and creates a beautiful result. Whether you are a seasoned knitter or a beginner, this ribbed knitted scarf pattern is suitable for everyone.
Not only is this pattern easy to follow, but it is also customizable. You can choose any color of yarn that you like and create a scarf that matches your personal style. You can also adjust the size of the scarf by simply adding or reducing the number of stitches. This versatility makes the ribbed knitted scarf a great project for knitters of all skill levels.
Ribbed Knitted Scarf Pattern Free
If you’re looking for a cozy and stylish accessory for the winter season, look no further than a ribbed knitted scarf. Ribbed patterns add texture and depth to a knitted item, making it stand out and adding an extra layer of warmth. The best part is, you can find many free patterns online to create your own ribbed knitted scarf. Whether you’re a beginner or an experienced knitter, there’s a pattern out there that’s perfect for you.
One popular ribbed knitted scarf pattern is the classic 1×1 rib. This pattern alternates between knitting one stitch and purling one stitch, creating a stretchy and reversible fabric. It’s great for beginners as it only requires basic knitting skills. You can make the scarf as long or as short as you’d like, depending on your personal style and the amount of yarn you have available.
- Materials needed: Size 8 knitting needles, worsted weight yarn
- Instructions:
- Cast on an even number of stitches, depending on the desired width of your scarf.
- Row 1: *Knit 1, purl 1*. Repeat from * to end of row.
- Repeat row 1 until the scarf reaches your desired length.
- Bind off and weave in any loose ends.
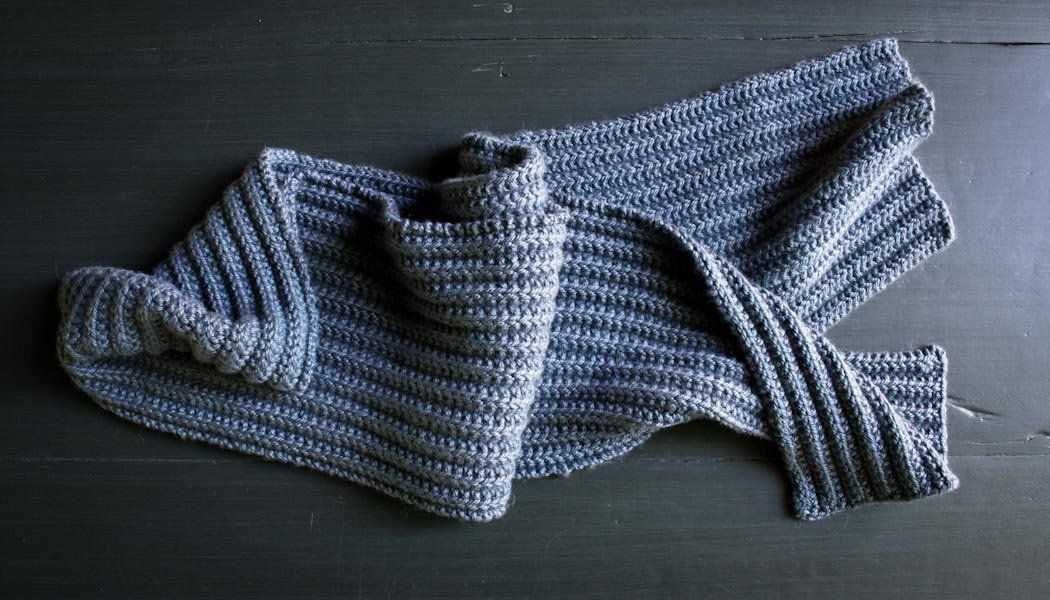
This simple and versatile ribbed knitted scarf pattern is just one example of the many options available to you. You can experiment with different stitch patterns, such as the 2×2 rib or the fisherman’s rib, to create unique and eye-catching scarves. Additionally, you can play around with different yarn colors and textures to personalize your scarf even further.
So why not give ribbed knitted scarves a try? With plenty of free patterns to choose from, you can easily create a cozy and stylish accessory to keep you warm all winter long.
Materials
The ribbed knitted scarf pattern requires the following materials:
- Yarn: Choose a bulky weight yarn in your preferred color. For a cozy and warm scarf, opt for a wool or wool-blend yarn. The amount of yarn needed will depend on the desired length of the scarf.
- Knitting Needles: Use size US 10 (6 mm) knitting needles. These needles are suitable for working with bulky weight yarn and will help create a nicely textured ribbed pattern.
- Tapestry Needle: You will need a tapestry needle with a large eye for weaving in the loose ends of yarn and finishing the project.
- Scissors: Keep a pair of scissors handy for cutting the yarn at the beginning and end of each row, as well as for any necessary yarn trimming.
- Measuring Tape: To ensure the scarf’s length and width are to your liking, keep a measuring tape nearby for taking accurate measurements as you knit.
Once you have gathered all of these materials, you will be ready to start knitting the ribbed scarf pattern. Make sure to choose yarn and needles that work well together and create the desired texture. The materials mentioned above are commonly used for this type of project and should be easily available at your local craft store or online.
Gauge
Gauge is an important concept in knitting and crochet. It refers to the number of stitches and rows in a given measurement of fabric. By following the recommended gauge, you can ensure that your finished project will be the correct size.
When working on a ribbed knitted scarf pattern, it’s essential to check your gauge before starting. Ribbing involves alternating knit and purl stitches, which can affect the tension and stretch of your fabric.
How to check gauge
To check your gauge, you should start by using the recommended yarn and knitting needles or crochet hook. Measure out a swatch of fabric using the specified stitch pattern and work a small sample.
Once you have completed the swatch, use a ruler or measuring tape to measure the number of stitches and rows in a given measurement. Compare these measurements to the recommended gauge in the pattern.
Why is gauge important?
Working with the correct gauge is crucial for achieving the desired finished size of your ribbed knitted scarf. If your gauge is too tight, your scarf may turn out smaller than intended. On the other hand, if your gauge is too loose, your scarf may end up larger than expected.
By taking the time to check your gauge and make any necessary adjustments, you can ensure that your finished ribbed knitted scarf will fit properly and look as intended. It’s worth the extra effort to achieve the best results!
Abbreviations
When knitting a ribbed knitted scarf pattern, you will come across various abbreviations. These abbreviations are commonly used in knitting patterns to represent certain knitting techniques or stitches. It is important to understand these abbreviations in order to follow the pattern accurately and create the desired outcome.
Here are some common abbreviations you may encounter while knitting a ribbed knitted scarf pattern:
K
The abbreviation “K” stands for knit stitch. This is one of the basic and most commonly used stitches in knitting. To knit a stitch, you insert the right-hand needle from left to right into the next stitch on the left-hand needle, wrap the yarn around the right-hand needle, and pull it through the stitch, slipping the old stitch off the left-hand needle.
P

The abbreviation “P” stands for purl stitch. This stitch is the reverse of the knit stitch and creates a bump on the fabric. To purl a stitch, you insert the right-hand needle from right to left into the next stitch on the left-hand needle, wrap the yarn around the right-hand needle, and pull it through the stitch, slipping the old stitch off the left-hand needle.
Rep
The abbreviation “Rep” stands for repeat. This means that you need to repeat the instructions or the stitches that come after this abbreviation a certain number of times.
St(s)
The abbreviation “St(s)” stands for stitch(es). This indicates the number of stitches you need to work or have on your needles.
CO
The abbreviation “CO” stands for cast on. This is the technique used to start a knitting project by creating an initial row of stitches on the needle.
BO
The abbreviation “BO” stands for bind off. This is the technique used to finish a knitting project by securing the stitches and creating a neat edge.
These are just a few of the many abbreviations you may encounter while knitting a ribbed knitted scarf pattern. It is always helpful to refer to a knitting abbreviation guide or a glossary if you come across any unfamiliar abbreviations.
Cast On
The cast on is the first step in starting any knitting project. It is the process of creating the initial stitches on the knitting needle. There are several different methods to cast on, but for this ribbed knitted scarf pattern, we will be using the long tail cast on method.
To begin, you will need a long tail of yarn that is approximately three times the width of the finished scarf. This extra length of yarn is necessary because it will be used to create the initial stitches. Make a slip knot at the end of the yarn, leaving a tail that is long enough to complete the cast on. Place the slip knot onto the knitting needle and hold the needle in your right hand, with the slip knot at the bottom and the tail of the yarn coming from the back.
Take the working yarn, which is attached to the ball of yarn, and hold it in your left hand. Using your left thumb and index finger, reach between the two strands of yarn (the slip knot and the working yarn) and grab a loop of the working yarn. Pull this loop through the slip knot, creating a new stitch on the knitting needle. Tighten the loop onto the needle by pulling gently on both strands of yarn. Repeat this process until you have cast on the desired number of stitches for your ribbed knitted scarf.
Once you have completed the cast on, you are ready to begin knitting the first row of your ribbed knitted scarf pattern. From here, you will follow the instructions for the rib stitch pattern, alternating between knit and purl stitches to create the ribbed texture. The cast on edge will form the bottom edge of the scarf, so it’s important to have an even and neat cast on to ensure a professional finish to your knitting project.
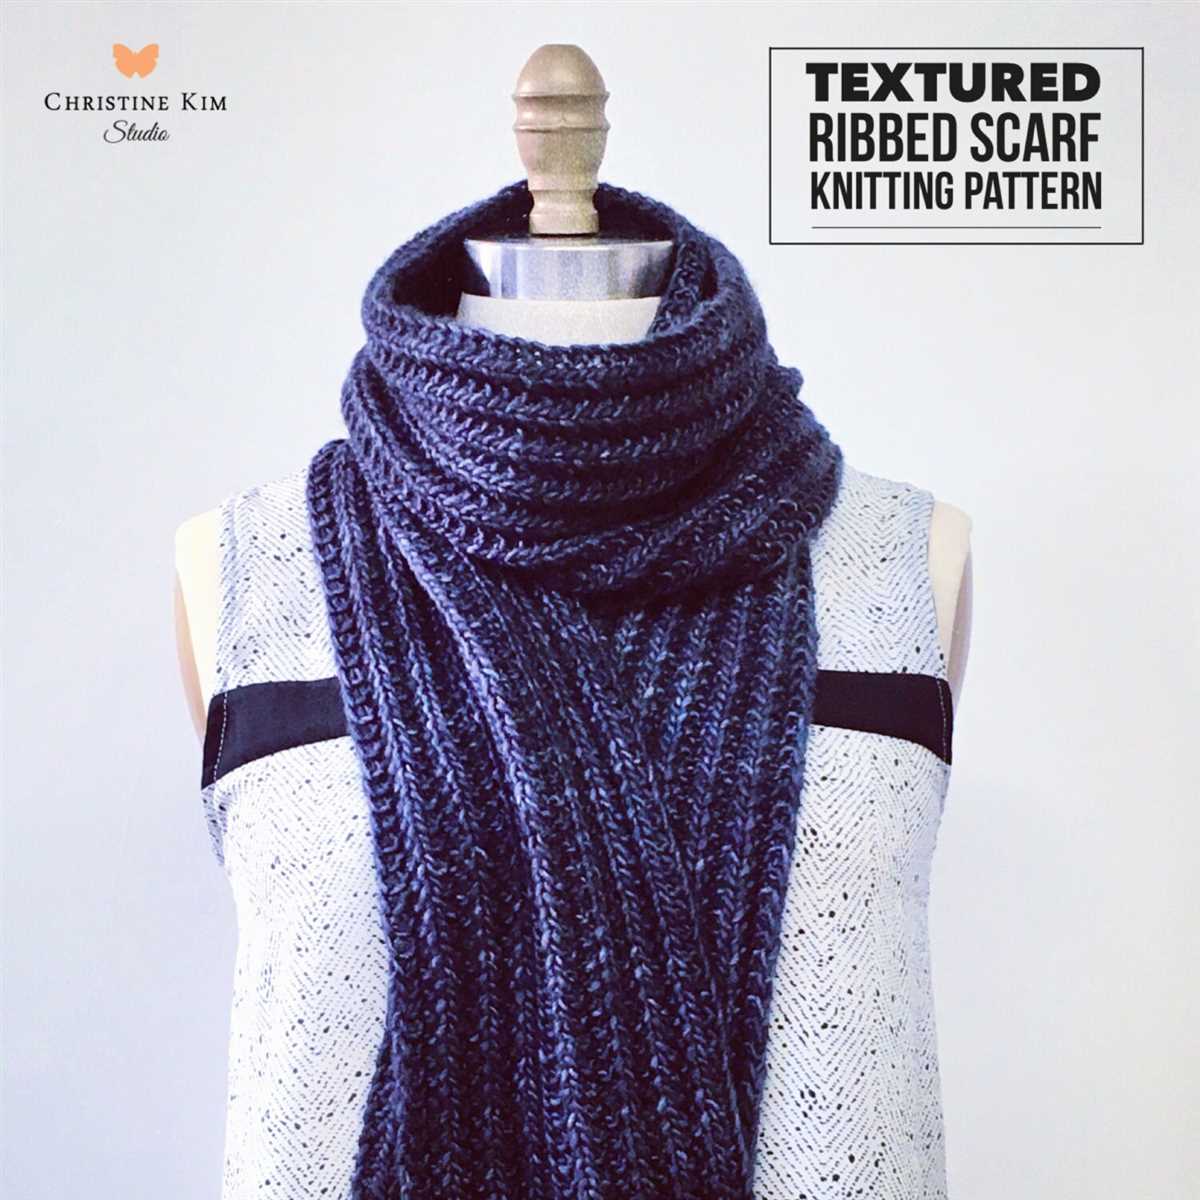
Rib Stitch Pattern
The rib stitch pattern is a classic knitting technique that creates a stretchy, textured fabric by alternating knit and purl stitches. It is commonly used in scarves, sweaters, and other garments to create ribbing at the edges or throughout the entire piece. The rib stitch pattern is versatile and easy to learn, making it a popular choice for both beginner and experienced knitters.
To create the rib stitch pattern, you will need to work with an even number of stitches. The basic pattern is simple: work one knit stitch, followed by one purl stitch, and repeat these two stitches across the row. On the next row, you will simply work each stitch as it presents itself, knitting the knit stitches and purling the purl stitches.
To make the rib stitch pattern even more interesting, you can vary the number of knit and purl stitches in the pattern. For example, you can create a 2×2 rib, where you work two knit stitches followed by two purl stitches, and repeat this pattern across the row. Or, you can try a 1×1 rib, where you alternate one knit stitch with one purl stitch, creating a tighter, more compact rib.
The rib stitch pattern is not only aesthetically pleasing, but it also has functional benefits. The stretchiness of the ribbing allows the fabric to expand and contract, making it ideal for garments that need to fit closely to the body, such as hats, gloves, and socks. Additionally, the rib stitch pattern creates a reversible fabric, with the same texture on both sides, making it perfect for scarves that can be worn in multiple ways.
Overall, the rib stitch pattern is a versatile and popular knitting technique that can be used to create a variety of textured, stretchy fabrics. Whether you’re knitting a cozy scarf or a fitted sweater, the rib stitch pattern is sure to add interest and style to your project.
Knitting the Body
Once you have cast on your stitches and completed the ribbing for your knitted scarf, it is time to move on to knitting the body. The body is the main part of the scarf where you will create the pattern or design.
Row 1: To start, knit across the first row using your chosen stitch pattern. This could be a simple knit stitch, a purl stitch, or a combination of different stitches to create a unique texture. Make sure to follow the pattern carefully to achieve the desired effect.
- Row 2 and all following even rows: Continue knitting across each row, following the established stitch pattern from the previous row. If there are any increases or decreases specified in the pattern, make sure to execute them accordingly.
- Row 3 and all following odd rows: Depending on the pattern, you may need to switch to a different stitch pattern or continue with the same one. Pay close attention to the pattern instructions and make any necessary stitch changes.
- Repeat rows: Continue repeating rows 2 and 3 until the body of the scarf reaches your desired length. Keep in mind that the length will vary depending on personal preference and the intended use of the scarf.
During this stage, it is important to maintain an even tension and check your work regularly to ensure that you are following the pattern correctly. Pay attention to your stitch count and make any necessary adjustments to maintain consistency throughout the body of the scarf.
Once you have completed the desired length of the body, you can move on to the next step in the pattern, which may involve shaping the ends or adding a border. Follow the pattern instructions carefully to ensure a successful completion of your knitted scarf.
Shaping the Scarf
When knitting a ribbed knitted scarf, the shaping of the scarf is an important aspect to consider. The way you shape the scarf can dramatically change its appearance and functionality, so it’s worth taking some time to plan it out.
1. Length: The length of the scarf is one of the first things to consider when shaping it. Do you want a short scarf that sits snugly around the neck, or a longer scarf that can be wrapped multiple times for added warmth? Think about how you want to wear the scarf and determine the desired length accordingly.
2. Width: The width of the scarf is another important factor to consider. A wider scarf will provide more coverage and warmth, while a narrower scarf can be more versatile and easier to style. Consider the desired functionality and the overall look you want to achieve when deciding on the width.
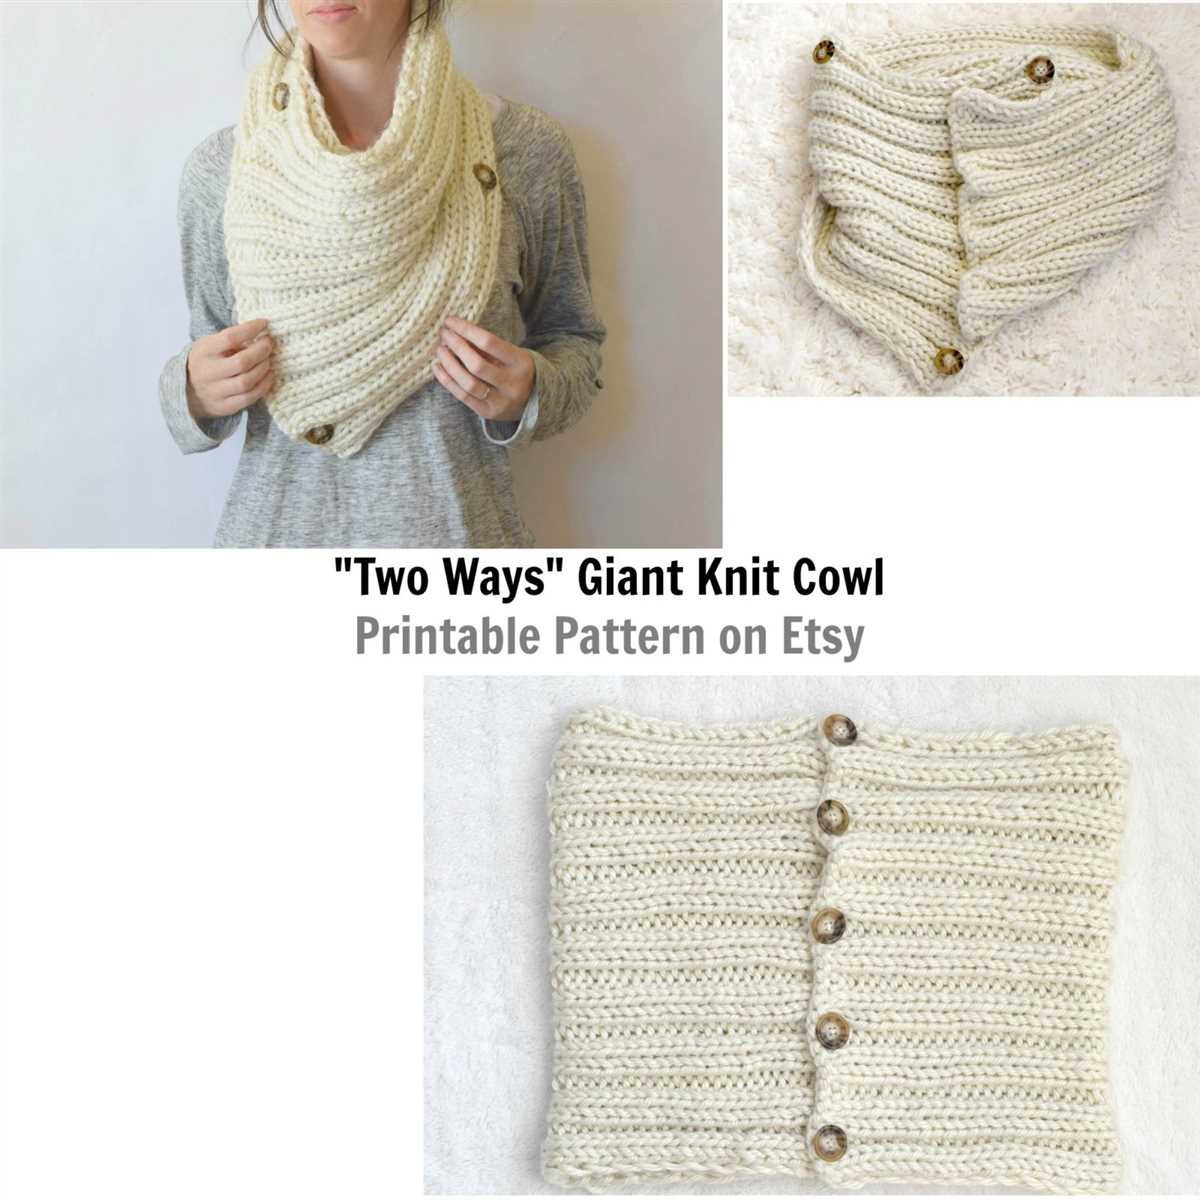
3. Tapered Ends: If you want to add some visual interest to your ribbed knitted scarf, you can shape the ends. One option is to taper the ends of the scarf by decreasing the number of stitches gradually. This creates a more delicate and elegant look. Alternatively, you can leave the ends straight for a more classic and simple design.
4. Pointed Ends: Another option for shaping the ends of your scarf is to create pointed ends. This can be done by knitting or decreasing stitches in a triangular shape. Pointed ends can add a unique touch to your scarf and make it stand out.
5. Fringed Ends: If you want to add some texture and playful flair to your ribbed knitted scarf, you can consider adding fringe to the ends. This can be achieved by cutting strands of yarn and attaching them to the end stitches. Fringed ends can give your scarf a bohemian or vintage vibe.
Overall, shaping the scarf allows you to customize its length, width, and ends to suit your preferences and style. Whether you prefer a classic and simple design or want to experiment with different shapes and accents, incorporating shaping techniques can elevate your ribbed knitted scarf and make it truly unique.
Bind Off
After completing the ribbed knitted scarf pattern, the final step is to bind off. Binding off is the process of finishing the edge of the knitted fabric, creating a neat and secure edge. This is an important step to ensure that the scarf stays in shape and does not unravel.
To bind off, start by knitting the first two stitches as usual. Then, insert the left needle into the first stitch on the right needle and lift it over the second stitch and off the right needle. This creates one bind off stitch. Knit the next stitch and repeat the process of lifting the previous stitch over the newly knitted stitch. Continue this way until you have bound off all the stitches on the right needle.
Once you have bound off all the stitches, cut the yarn leaving a tail of about 6 inches. Thread the tail through the last loop on the right needle and pull it tight to secure the bind off. This will prevent any unraveling of the stitches. Finally, weave in the loose ends of yarn into the fabric using a yarn needle, hiding them within the stitches to create a clean finish.
Binding off is a simple and essential skill in knitting. It is important to take your time and ensure that each stitch is properly bound off to achieve the desired result. With practice, you will become more comfortable with this technique and be able to bind off with ease.
Finishing and Blocking
Once you have completed knitting your ribbed scarf, it is important to properly finish and block it to enhance its appearance and ensure it retains its shape.
To finish your scarf, weave in any loose ends using a darning needle. Take care to sew through the back of the stitches to secure the yarn and prevent it from unraveling. Trim any excess yarn with scissors, being careful not to cut into the scarf itself.
Next, you’ll want to block your scarf to help even out the stitches and improve its drape. You can do this by wetting the scarf and gently squeezing out the excess water. Lay the scarf flat on a clean towel and shape it into the desired dimensions. Use blocking pins or weights to hold the edges in place and let it dry completely.
Blocking can help to relax the ribbed stitches and make them more visible. It can also help to smooth out any uneven tension in the fabric. However, be mindful that some yarns may react differently to blocking, so it’s important to read the yarn label or do a swatch beforehand to test the results.
Once your scarf is dry and blocked, it’s ready to be worn or gifted. Remember to store it in a cool, dry place to keep it in its best condition. With proper finishing and blocking, your ribbed knitted scarf will be a beautiful accessory to keep you warm and stylish during the chilly months.
Tips and Troubleshooting for Ribbed Knitted Scarf Pattern
If you are new to knitting or just want some pointers for working on the ribbed knitted scarf pattern, here are some tips and troubleshooting suggestions to help you along the way:
Tips:
- Choose the right yarn: Select a yarn that is suitable for the pattern and will give you the desired result. A medium weight yarn is typically recommended for scarves.
- Use the right needles: Make sure to use the correct size of knitting needles for the yarn you have chosen. This will ensure that your stitches are neither too tight nor too loose.
- Check your gauge: Before starting the pattern, it is always a good idea to knit a swatch to check your gauge or tension. This will help you determine if you need to adjust your needle size to achieve the desired measurements.
- Keep track of your stitches: The ribbed knitted scarf pattern typically involves alternating knit and purl stitches. It is helpful to use stitch markers or a row counter to keep track of your stitches, especially if the pattern has a specific stitch repeat.
Troubleshooting:
If you encounter any issues while working on the ribbed knitted scarf pattern, here are some troubleshooting suggestions:
- Uneven tension: If you notice that some sections of your knitting are tighter or looser than others, try to adjust your tension by consciously knitting or purling more loosely or tightly. Practice can help you achieve more consistent tension.
- Mistakes in the pattern: If you find errors in the pattern instructions or if something doesn’t seem right, double-check the pattern or consult with other knitters who have worked on the same pattern. Online forums or knitting communities can be a great resource for getting help and clarification.
- Twisted stitches: Occasionally, you may inadvertently twist a stitch, resulting in an irregular or twisted appearance. Make sure to insert your needle correctly into the stitch and be mindful of the direction of your knitting.
- Fixing mistakes: If you make a mistake and need to fix it, consider using a crochet hook or a knitting needle to carefully undo the stitches and correct the error. It’s also a good idea to regularly check your work and fix any mistakes as you go rather than leaving them for later.
Remember, knitting is a skill that improves with practice, so don’t be discouraged if you encounter challenges along the way. With patience and persistence, you’ll be able to create a beautiful ribbed knitted scarf that you can be proud of!
Variations and Customizations
If you’re feeling adventurous and want to put your own spin on the ribbed knitted scarf pattern, there are several variations and customizations you can try. Here are some ideas:
- Change the stitch pattern: Instead of using a basic rib stitch, you can experiment with different stitch patterns to create unique textures. For example, you could try a cable stitch, seed stitch, or even a lace stitch pattern.
- Adjust the width and length: The pattern provided gives you a standard width and length for the scarf, but you can easily customize it to fit your preferences. If you prefer a wider or narrower scarf, simply cast on more or fewer stitches. To make the scarf longer or shorter, adjust the number of rows you knit.
- Use different yarn: The pattern suggests using a medium-weight yarn, but you can experiment with different yarn weights and textures to achieve different effects. A chunky yarn will result in a thicker, warmer scarf, while a lightweight yarn will create a more delicate look.
- Add embellishments: If you want to add some extra flair to your scarf, consider adding embellishments such as fringe, tassels, or buttons. These small details can make your scarf truly unique and personalized.
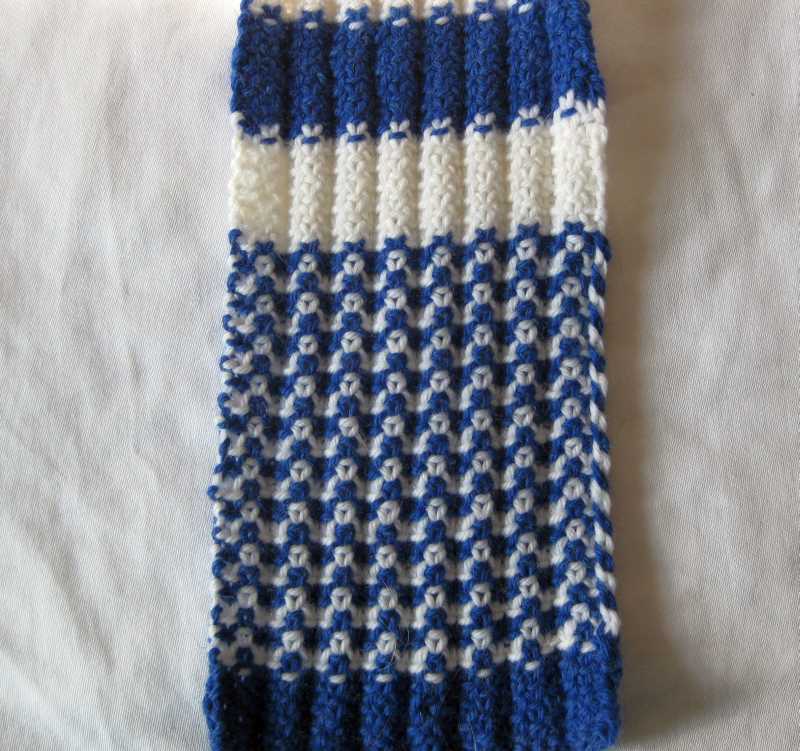
- Combine colors: Instead of using a single color for your scarf, try combining multiple colors to create a striped or gradient effect. You can alternate colors every few rows or create a pattern with specific color changes.
Remember, knitting is a creative and personal craft, so don’t be afraid to experiment and make the pattern your own. Have fun and enjoy the process of creating a beautiful ribbed knitted scarf!
Q&A:
Where can I find a free ribbed knitted scarf pattern?
You can find a free ribbed knitted scarf pattern on various websites, such as Ravelry, AllFreeKnitting, and LoveCrafts. These websites offer a wide range of free knitting patterns, including ribbed scarf patterns.
What materials do I need to knit a ribbed scarf?
To knit a ribbed scarf, you will need yarn (preferably a bulky or chunky weight yarn), knitting needles (size 10 or larger), and a tapestry needle for weaving in ends. You may also need stitch markers if the pattern requires them.
What are the basic techniques used in knitting a ribbed scarf?
The basic techniques used in knitting a ribbed scarf include the knit stitch and the purl stitch. These two stitches are alternated to create the ribbed texture. Additionally, you may need to know how to cast on stitches, bind off stitches, and weave in ends.
Can I modify the ribbed knitted scarf pattern?
Yes, you can modify the ribbed knitted scarf pattern to suit your preferences. You can adjust the width and length of the scarf, change the number of stitches required, or even incorporate different stitch patterns into the design. Just make sure to keep track of any modifications you make and adjust the pattern accordingly.