
If you enjoy knitting and want to make a pair of gloves for yourself or someone you love, you’ve come to the right place! In this article, we’ll explore a collection of free glove knitting patterns that can be made using just two needles. Whether you’re a beginner or an experienced knitter, there’s a pattern here for you.
Why use two needles instead of the traditional four or five? Two-needle patterns are great for knitters who prefer simplicity and efficiency. With just two needles, you can make gloves that are just as beautiful and functional as those made with more needles. Plus, it’s easier to keep track of your stitches and progress when you have fewer needles to manage.
We’ve gathered a variety of patterns for gloves of all styles and skill levels. Whether you prefer fingerless gloves or ones with full fingers, there’s a pattern here that will suit your needs. From basic ribbed gloves to intricate lace designs, these patterns will inspire you to create unique and stylish gloves. So grab your knitting needles, choose a pattern, and get ready to make a cozy pair of gloves!
Free Glove Knitting Patterns Two Needles

If you love knitting and want to make a pair of gloves, look no further! We have compiled a list of free glove knitting patterns that can be made using two needles. These patterns are perfect for both beginners and experienced knitters, and they are a great way to create unique and cozy gloves for yourself or as gifts for friends and family.
One of the patterns you can try is the simple ribbed glove pattern. This pattern creates a classic and timeless design that is perfect for everyday wear. The ribbing provides a snug and comfortable fit, and you can easily adjust the size to fit your hands. The best part is that you only need two needles to make these gloves, making it a great option for knitters who prefer not to use double-pointed needles.
Another pattern you might want to try is the cable knit glove pattern. Cable knitting creates beautiful and intricate designs that will make your gloves stand out. These gloves are not only stylish but also warm and cozy, making them perfect for cold winter days. With this pattern, you will learn how to knit cables using just two needles, and you can customize the size and length to fit your preferences.
If you’re feeling adventurous, you can also try the lace glove pattern. Lace knitting is a delicate and intricate technique that results in beautiful and feminine gloves. These gloves are perfect for special occasions or when you want to add a touch of elegance to your outfit. With this pattern, you will learn how to knit lace using two needles, and you can personalize the size and design to your liking.
So, if you’re ready to start knitting some gloves, grab your needles and choose one of these free patterns. Whether you prefer a simple ribbed design, a cable knit pattern, or a lacey look, there is a pattern that suits your style. Happy knitting!
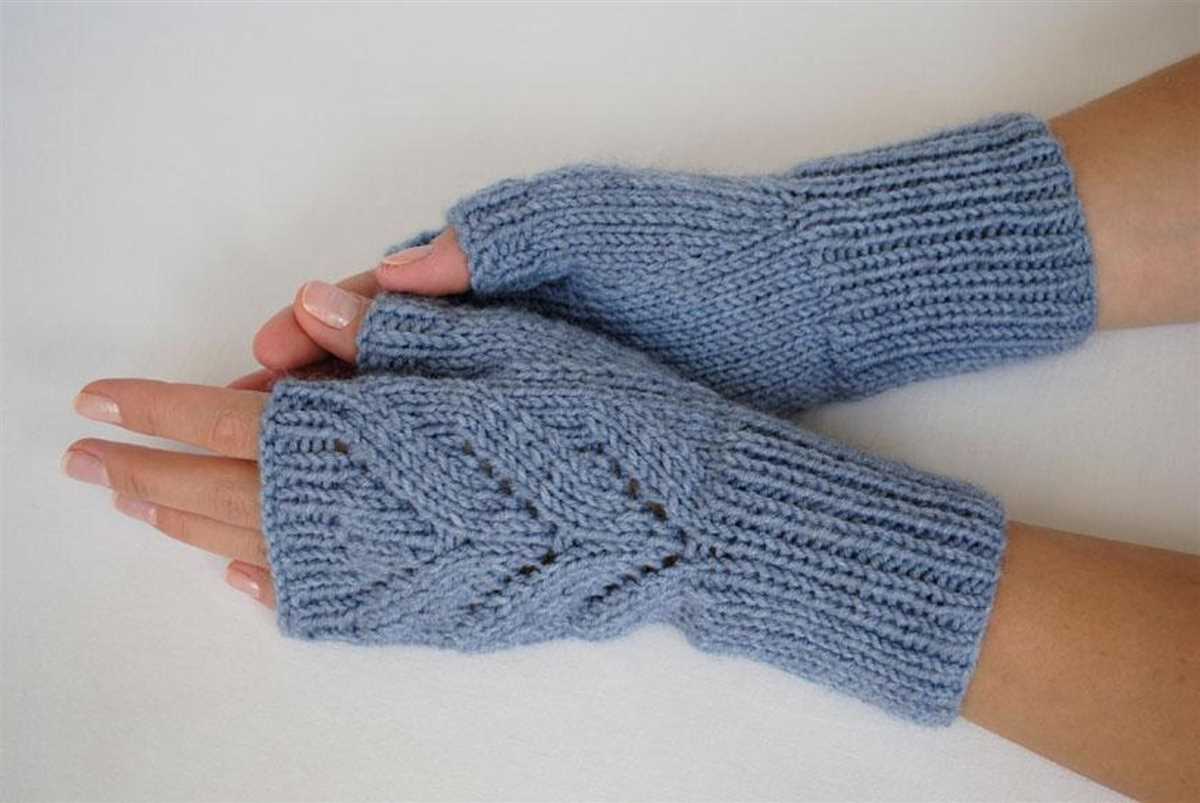
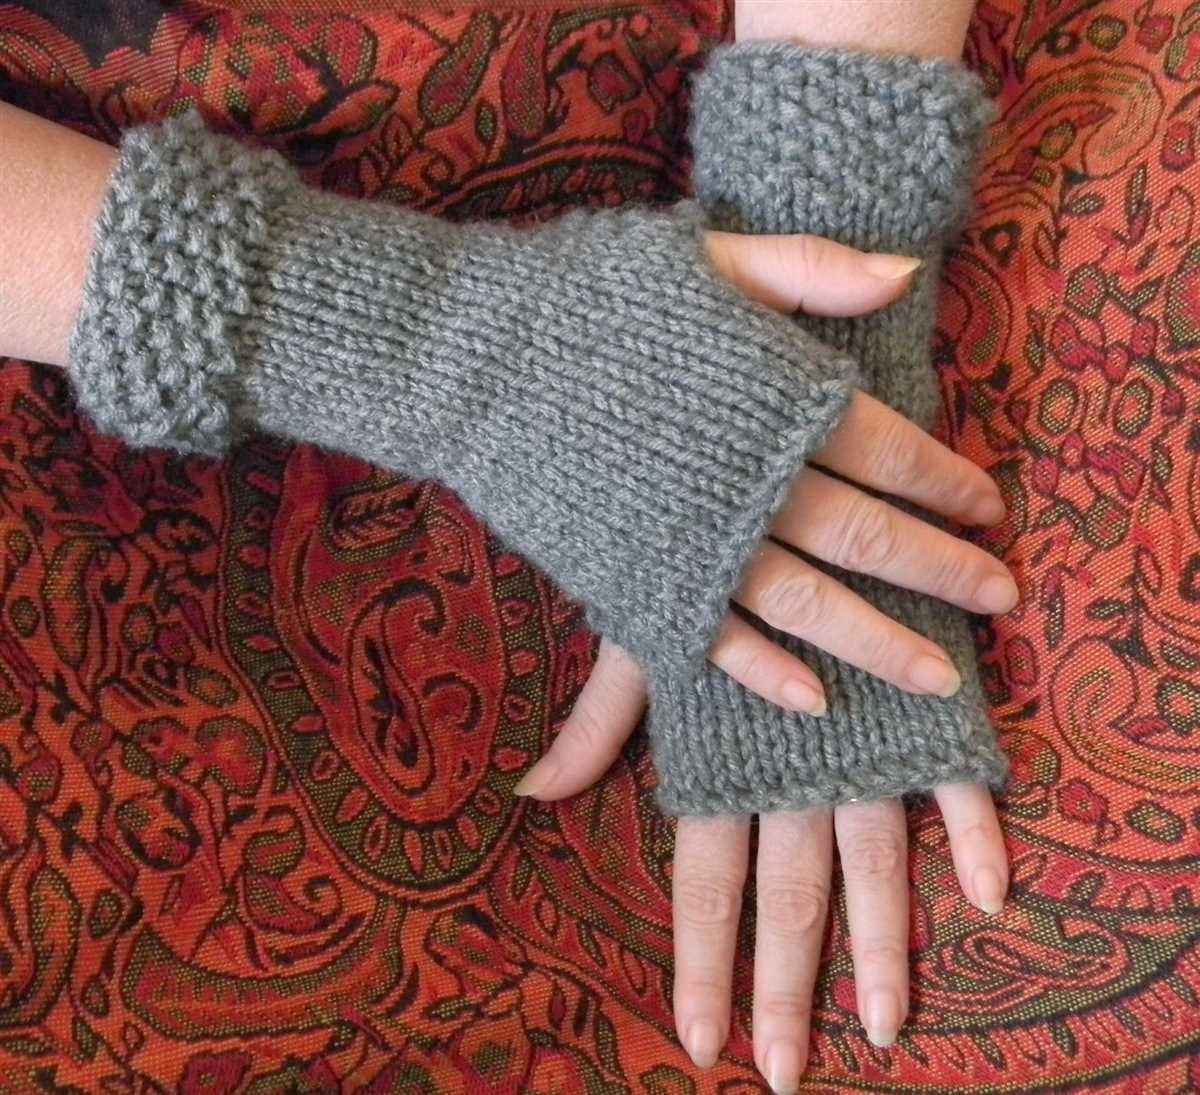
Basic Fingerless Gloves Pattern

Fingerless gloves are a popular accessory that can keep your hands warm while still allowing you to use your fingers freely. This basic fingerless gloves pattern is perfect for beginners, as it requires only two needles and basic knitting techniques. With this pattern, you can easily create a pair of fingerless gloves that are cozy and stylish.
To begin this pattern, you will need to gather the necessary materials: a pair of knitting needles, yarn in your desired color, and a pair of scissors. The gauge for this pattern is not crucial, but it is recommended to use a medium weight yarn and matching needle size to ensure a comfortable fit.
Instructions:
-
Cast on 34 stitches onto one needle. This will be the number of stitches for the cuff of the glove.
-
Divide the stitches evenly between the two needles, with 17 stitches on each needle.
-
Knit every row until the cuff, or desired length, is achieved. This will create a ribbed pattern.
-
Once the cuff is complete, begin shaping the hand. Knit 17 stitches from the first needle, then place a stitch marker. Knit the remaining 17 stitches from the second needle.
-
Continue knitting every row until the hand section measures the desired length from the cuff to the base of the fingers.
-
To shape the thumb opening, knit the first 15 stitches, bind off the next 4 stitches, and then knit the remaining stitches. On the next row, cast on 4 stitches over the bound off stitches.
-
Knit every row until the glove reaches the base of the fingers. Bind off all stitches.
-
Repeat steps 1-7 to create the second glove.
With this basic fingerless gloves pattern, you can easily create a cozy and stylish accessory that is perfect for chilly days. Feel free to customize the pattern by adding ribbing, lace, or other embellishments to make it unique to your style. Happy knitting!
Chunky Mittens Pattern
If you’re looking for a cozy and warm pair of mittens to keep your hands toasty during the winter months, then this chunky mittens pattern is perfect for you. With just two needles, you can easily create these stylish and functional mittens. Whether you’re a beginner or an experienced knitter, this pattern is suitable for all skill levels.
To begin, you’ll need chunky weight yarn and a pair of size 10 knitting needles. Start by casting on 28 stitches, then divide them evenly onto two needles. This will create the width of the mitten. Knit in a rib stitch pattern for about 2 inches to create a snug cuff that will keep the mitten in place.
Once the cuff is complete, switch to stockinette stitch for the remainder of the mitten. Continue knitting until the piece measures approximately 8 inches from the cuff. This will create the length of the mitten. Next, it’s time to shape the top of the mitten.
Decrease the stitches gradually by knitting two stitches together at the beginning and end of each needle. Repeat this decrease row every other row until you have 8 stitches remaining. Cut the yarn, leaving a long tail, and thread it through the remaining stitches to secure and close the top of the mitten.
Repeat these steps to make the second mitten, and your chunky mittens are complete! Feel free to add any additional embellishments, such as buttons or pom poms, to personalize your mittens. These chunky mittens will keep your hands warm and stylish all winter long.
Striped Gloves Pattern
Looking for a fun and stylish knitting project? Look no further! This striped gloves pattern is sure to be a hit. With just two needles and some basic knitting skills, you can create a pair of cozy and fashionable gloves that are perfect for chilly days.
Start by gathering your supplies. You’ll need two colors of yarn – one for the main color and one for the stripes. Choose colors that complement each other for a striking effect. You’ll also need a pair of knitting needles in the appropriate size for your chosen yarn, as well as a yarn needle for finishing.
To begin, cast on the desired number of stitches for your glove size using the main color yarn. Knit several rows in a rib stitch pattern to create a stretchy cuff. Then, switch to the stripe color and knit several rows in stockinette stitch.
Continue alternating between the main color and stripe color, following your desired stripe pattern, until the glove reaches the desired length. Make sure to end with the main color yarn so that you can easily continue on to the hand section of the glove.
Once the desired length is reached, it’s time to shape the hand section of the glove. Follow a glove pattern or create your own by decreasing stitches at the base of the fingers and thumb. Continue knitting until the glove reaches the desired length for the fingers, then bind off.
Repeat the same process to create the second glove, making sure to mirror the stripe pattern if desired. Once both gloves are complete, use the yarn needle to weave in any loose ends and secure the edges. Your striped gloves are now ready to be worn!
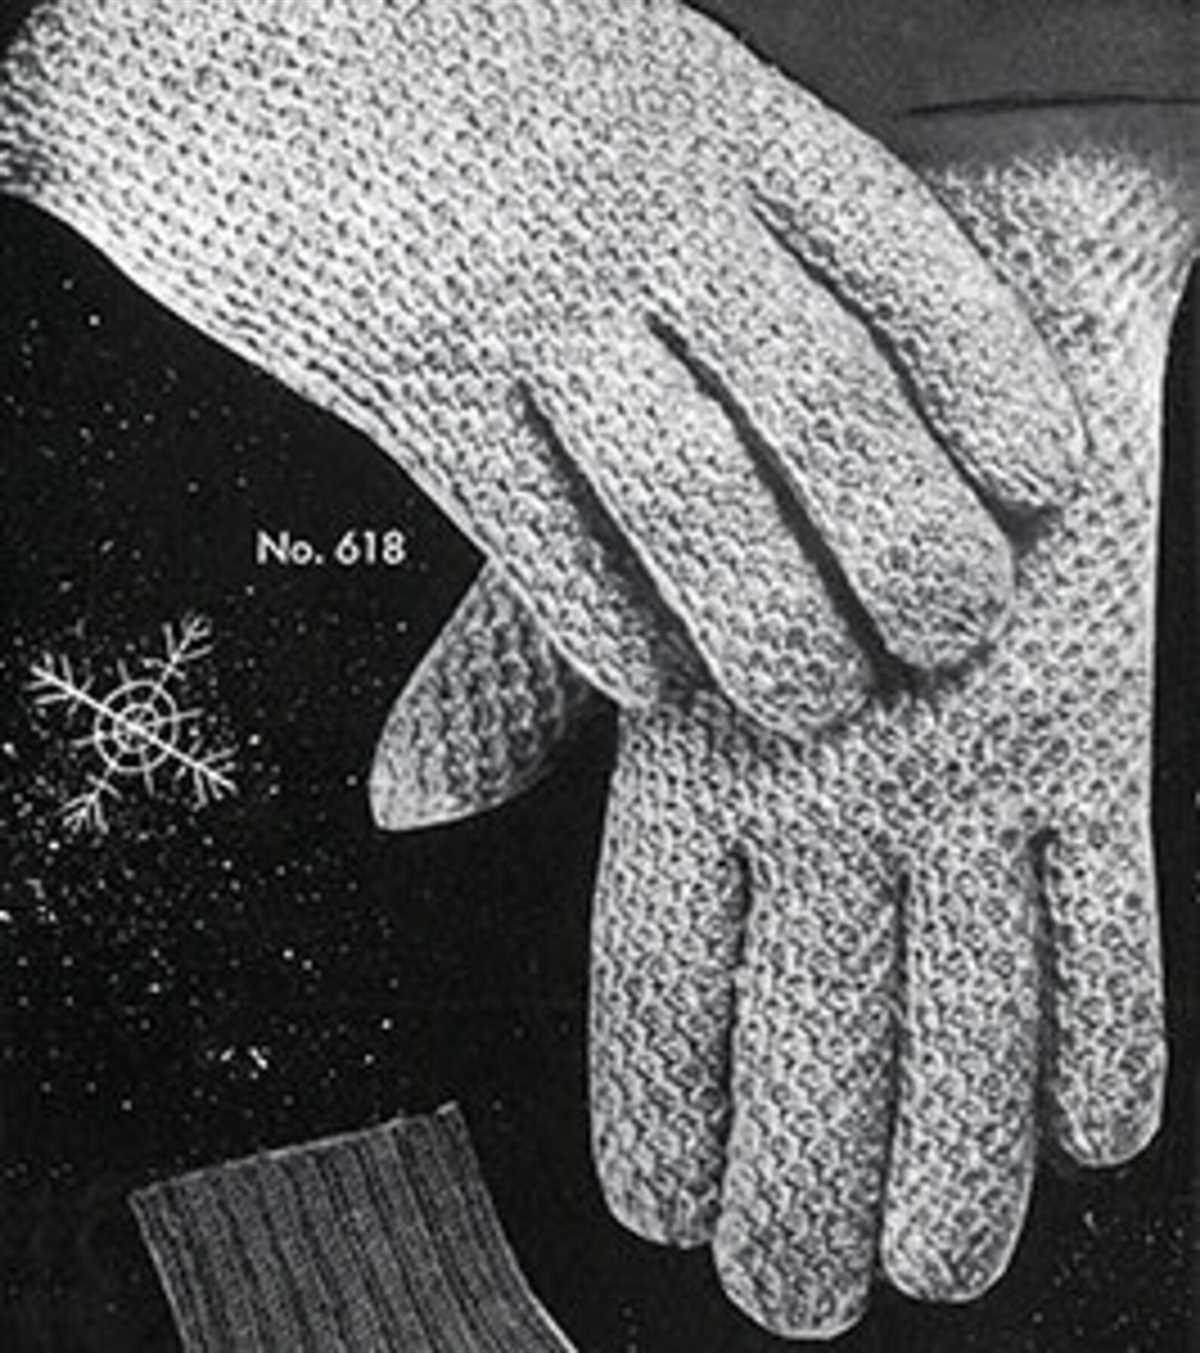
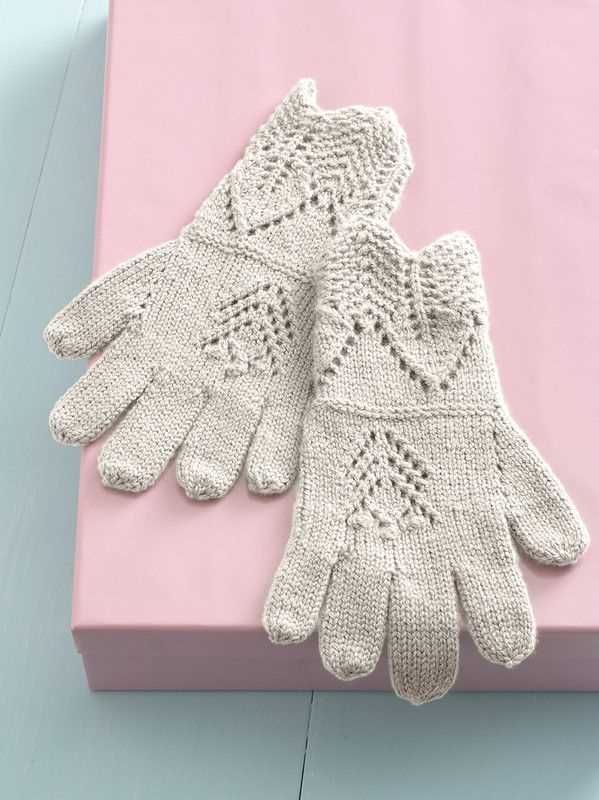
Lace Gloves Pattern
Lace gloves are a beautiful accessory that can add a touch of elegance to any outfit. Whether you are attending a formal event or simply want to add a touch of sophistication to your everyday look, lace gloves are a great choice. Knitting your own lace gloves can be a rewarding project that allows you to create a one-of-a-kind accessory that perfectly fits your hands.
There are many free glove knitting patterns available that require only two needles, making them accessible to knitters of all skill levels. Lace gloves patterns typically feature intricate lacework and delicate details such as ribbing, picot edges, or cabled designs. These patterns often utilize a fine yarn, such as lace weight or fingering weight, to achieve a delicate and airy look.
The lace gloves pattern usually starts with casting on the desired number of stitches and knitting a ribbed cuff. From there, the pattern may incorporate lace stitches, cables, or other decorative elements. Some patterns include instructions for knitting separate finger sections, while others create a seamless glove with openings for the fingers. It’s important to pay attention to the pattern and follow the instructions carefully to achieve the desired result.
When knitting lace gloves, it’s important to keep in mind that gauge and tension can greatly affect the final size and fit of the gloves. It’s a good idea to knit a swatch using the same yarn and needles you plan to use for the gloves to ensure that your gauge matches the pattern. Additionally, blocking the finished gloves can help to open up the lacework and create a more polished and finished look.
Overall, knitting lace gloves can be a fun and rewarding project that allows you to create a unique accessory to complement your style. With the wide variety of free glove knitting patterns available, you can find a pattern that suits your skill level and preferences. So grab your needles, choose a beautiful lace pattern, and start knitting your own pair of stunning lace gloves!
Ribbed Gloves Pattern
Are you looking for a beginner-friendly glove knitting pattern that can be knit with just two needles? Look no further! The ribbed gloves pattern is perfect for those who are new to knitting gloves or prefer to knit with straight needles. With its classic ribbed design, these gloves are not only stylish but also provide a snug fit.
Materials:
- Worsted weight yarn
- US size 8 (5mm) knitting needles
- Tapestry needle
Instructions:
- Cast on 40 stitches.
- Work in a k1, p1 ribbing pattern for 2 inches.
- Switch to stockinette stitch and knit every row until the glove measures 6 inches from the cast-on edge.
- Begin shaping the thumb gusset by knitting 2 stitches, placing a marker, increasing 1 stitch, knitting to the end of the row.
- Continue increasing 1 stitch before and after the marker on every other row until you have 14 stitches between the markers.
- Next row: Knit to the marker, slip the 14 thumb stitches onto a stitch holder, cast on 2 stitches, knit to the end of the row.
- Continue knitting in stockinette stitch for the desired length of the glove, usually about 4-5 inches.
- Switch back to the k1, p1 ribbing pattern and knit for 2 inches.
- Bind off all stitches in pattern.
- Use the tapestry needle to sew the thumb seam and weave in any loose ends.
This ribbed gloves pattern is a great project for knitters of all skill levels. The ribbing provides stretch and a comfortable fit, while the stockinette stitch adds a touch of elegance. Knit a pair for yourself or as a thoughtful gift for a loved one. Happy knitting!
Cable Knit Gloves Pattern
When it comes to knitting gloves, cable patterns add a touch of elegance and sophistication to your project. The intricate twists and turns of the cables create a beautiful texture that is sure to impress. Whether you’re a beginner or an experienced knitter, this cable knit gloves pattern is a great way to showcase your skills and create a pair of warm and stylish gloves.
To begin, you will need two needles and a cable needle. Start by casting on the desired number of stitches for your size. The pattern usually includes instructions for multiple sizes, so you can choose the one that best fits your hand. Once you have cast on, join the round and begin knitting in the round.
Row 1: Knit all stitches.
Row 2: Purl all stitches.
Row 3: Begin the cable pattern by crossing stitches. This is done by slipping a certain number of stitches onto the cable needle and holding them in front or back of your work, depending on the cable stitch you want to create. Then knit the next set of stitches, and finally knit the stitches from the cable needle. Repeat this pattern across the row.
Continue knitting in the cable pattern until the glove measures the desired length. Then, you will start shaping the fingers. This is done by decreasing stitches in certain rows to create the shape of each finger. The pattern will usually include detailed instructions on how to do this.
Once you have finished knitting the glove, you can bind off your stitches and sew any seams if necessary. Remember to leave an opening for your thumb!
- Choose a cable knit gloves pattern that matches your skill level.
- Use the appropriate yarn and needle size recommended in the pattern.
- Take your time and pay attention to the cable pattern instructions.
- Make sure to check your gauge before starting to ensure the correct fit.
- Experiment with different cable patterns to create unique gloves.
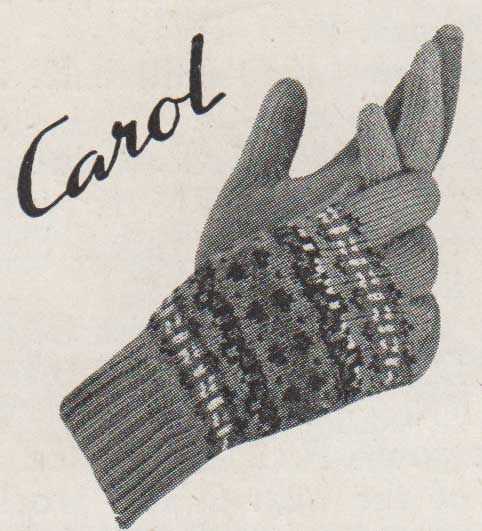
Fair Isle Gloves Pattern
Fair Isle knitting is a traditional technique that originated in the Fair Isle, a tiny island in Scotland. The technique involves using multiple colors in the same row to create intricate patterns. Fair Isle gloves are a popular project among knitters, as they can showcase different color combinations and patterns.
To make Fair Isle gloves, you will need two needles, preferably in a size that gives you the desired gauge. The pattern will typically include instructions for the cuff, thumb gusset, hand, and fingers. You can also customize the length of the gloves to suit your preferences.
Here is a step-by-step guide to knitting Fair Isle gloves:
- Start by casting on the required number of stitches for the cuff. The number will vary depending on the size of the gloves.
- Work the cuff using a ribbing or any other desired stitch pattern. This will provide elasticity and help the gloves stay in place.
- Begin the Fair Isle section by introducing the second color. You can follow a chart or create your own pattern by alternating colors.
- As you work through the hand section, make sure to maintain the tension and keep the floats of the unused color neatly carried along the back.
- When you reach the thumb gusset, follow the instructions to increase stitches to accommodate the thumb. This will provide a better fit.
- Once the thumb gusset is complete, continue working in the Fair Isle pattern until you reach the desired length for the fingers.
- Finally, finish off the glove by decreasing stitches to close the fingers and bind off the remaining stitches.
Remember to weave in any loose ends and block the gloves to give them a neat and professional finish. With practice, you can create stunning Fair Isle gloves that are not only warm and functional but also a beautiful accessory to showcase your knitting skills.
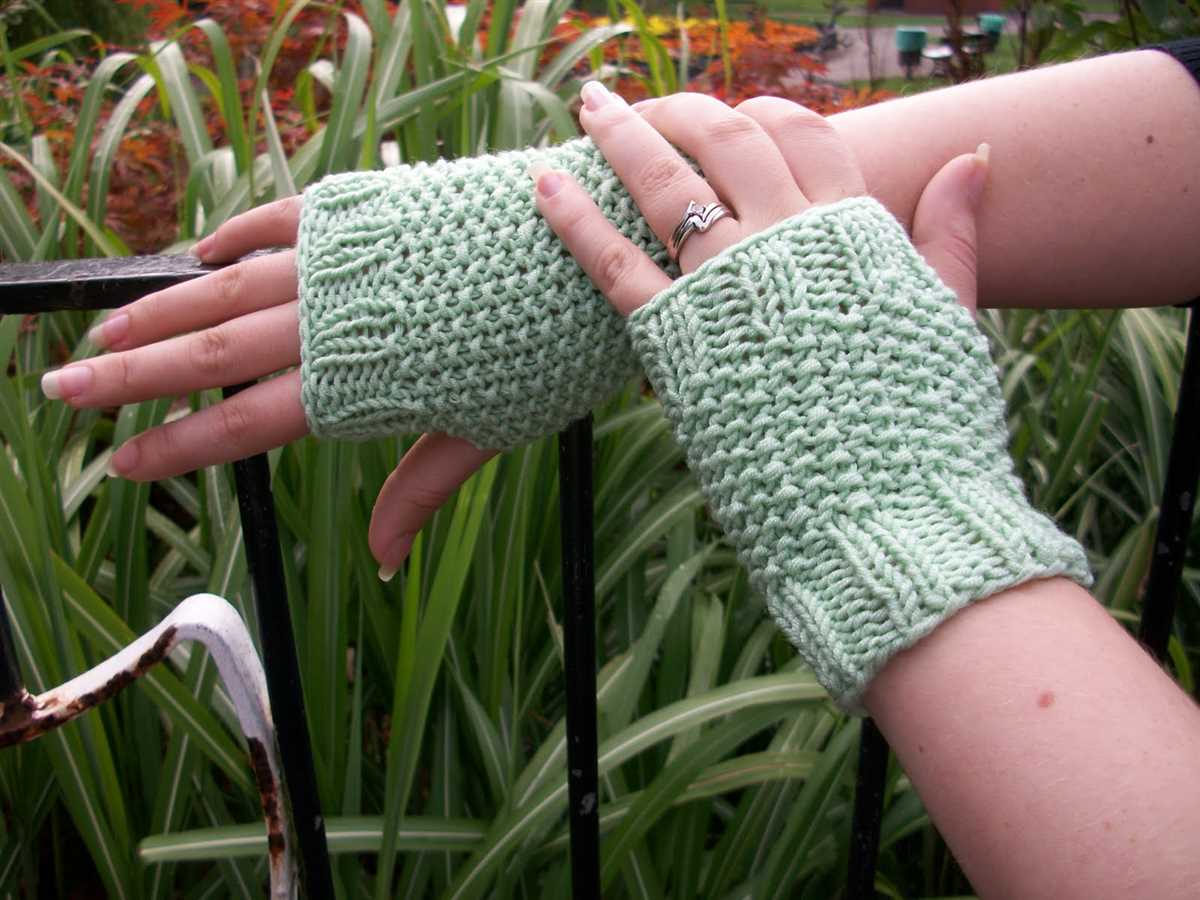
Colorful Fingerless Gloves Pattern
Fingerless gloves are not only practical, but they can also be a stylish accessory to add a pop of color to your outfit. With this colorful fingerless gloves pattern, you can create your own vibrant gloves using just two needles.
Materials:
- Needles: Size 6 (4mm) double-pointed needles
- Yarn: Worsted weight yarn in multiple colors
- Tapestry needle
- Scissors
Instructions:
- Cast on 36 stitches using the first color of yarn.
- Divide the stitches evenly onto three needles (12 stitches per needle).
- Join the round by knitting the first stitch of the first needle with the last stitch of the third needle.
- Continue knitting in a round using the stockinette stitch (knit all stitches) until the piece measures approximately 2 inches.
- Change to the second color of yarn, and continue knitting in a round for another 2 inches.
- Repeat step 5 with different colors until the glove reaches the desired length.
- To create the thumb hole, transfer the first 6 stitches from the first needle onto a stitch holder.
- Knit in a round with the remaining 30 stitches for another 2 inches.
- Bind off all stitches and weave in any loose ends.
These colorful fingerless gloves are perfect for keeping your hands warm while still allowing your fingers to be free. Don’t be afraid to mix and match different colors to create your own unique design. Whether you’re a beginner or an experienced knitter, this pattern is a great way to practice your skills and add a touch of fun to your winter wardrobe.
Textured Gloves Pattern
If you’re looking for a unique and stylish pair of gloves to knit, this textured gloves pattern is perfect for you. With just two needles, you can create a pair of gloves that feature beautiful texture and intricate design, making them a standout accessory for any outfit.
To begin knitting these gloves, you’ll need the following materials: a pair of knitting needles (size 8), a skein of worsted weight yarn (color of your choice), a stitch marker, and a yarn needle for finishing touches.
Start by casting on 32 stitches and dividing them evenly onto two needles. Then, follow the pattern below:
Pattern:
- Cuff: Knit 2, purl 2 ribbing for 2 inches to create a comfortable and stretchy cuff.
- Body: Begin the textured pattern by knitting one row, then purling one row.
- Thumb Gusset: On the next knit row, knit 3, place a stitch marker, knit to the end. On the following purl row, purl to the marker, slip the marker, make 1, purl to the end.
- Thumb: Continue knitting in the textured pattern until the gloves reach the base of your thumb. Then, place the thumb stitches onto a stitch holder.
- Fingers: Knit in the textured pattern for the remaining stitches, continuing until the gloves reach the desired length.
- Thumb: Transfer the thumb stitches back onto the needles and knit in the textured pattern until the thumb reaches the desired length.
- Finishing: Bind off all stitches, weave in any loose ends, and seam the sides of the gloves using a yarn needle.
These textured gloves are not only fashionable but also functional, providing warmth and comfort during the cold winter months. Whether you’re a beginner knitter or more experienced, this pattern is suitable for all skill levels. With its unique texture and intricate design, you’ll have a pair of gloves that will be the envy of all your friends.
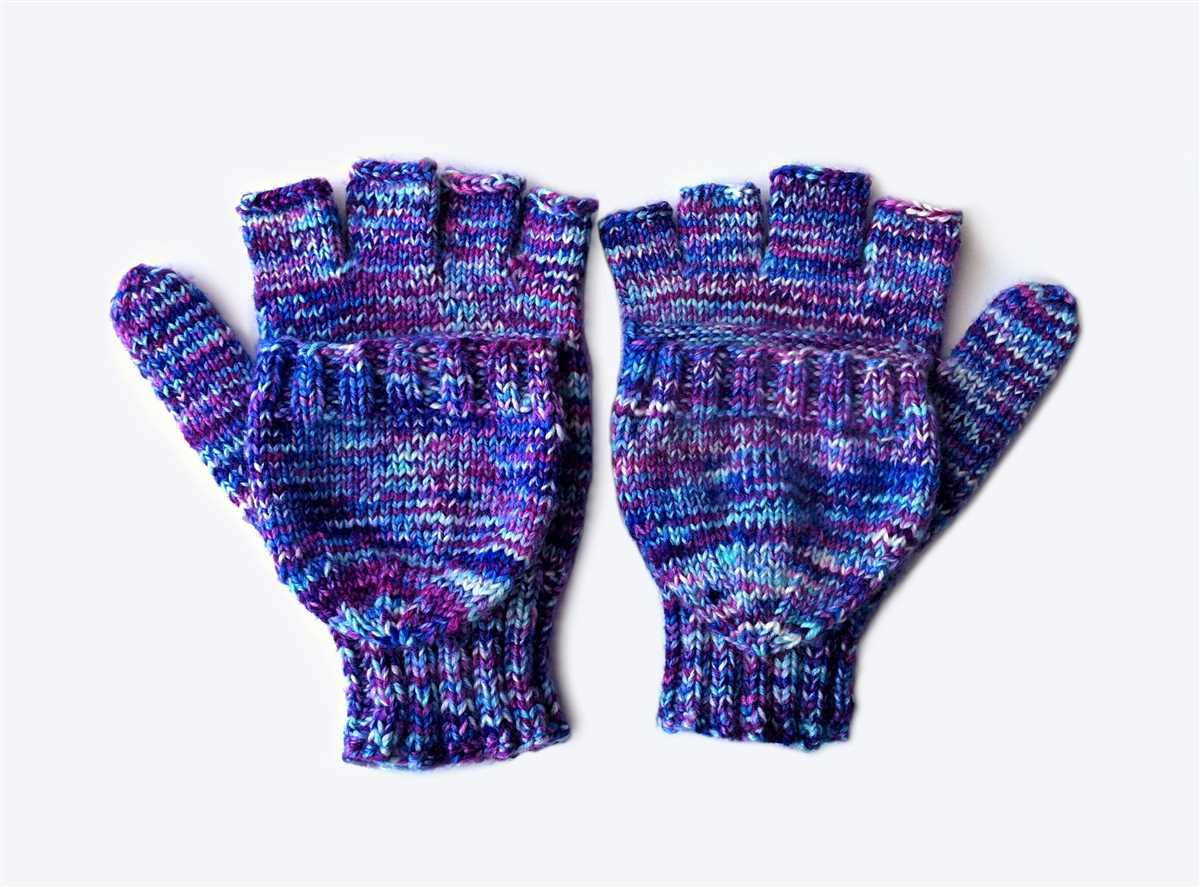
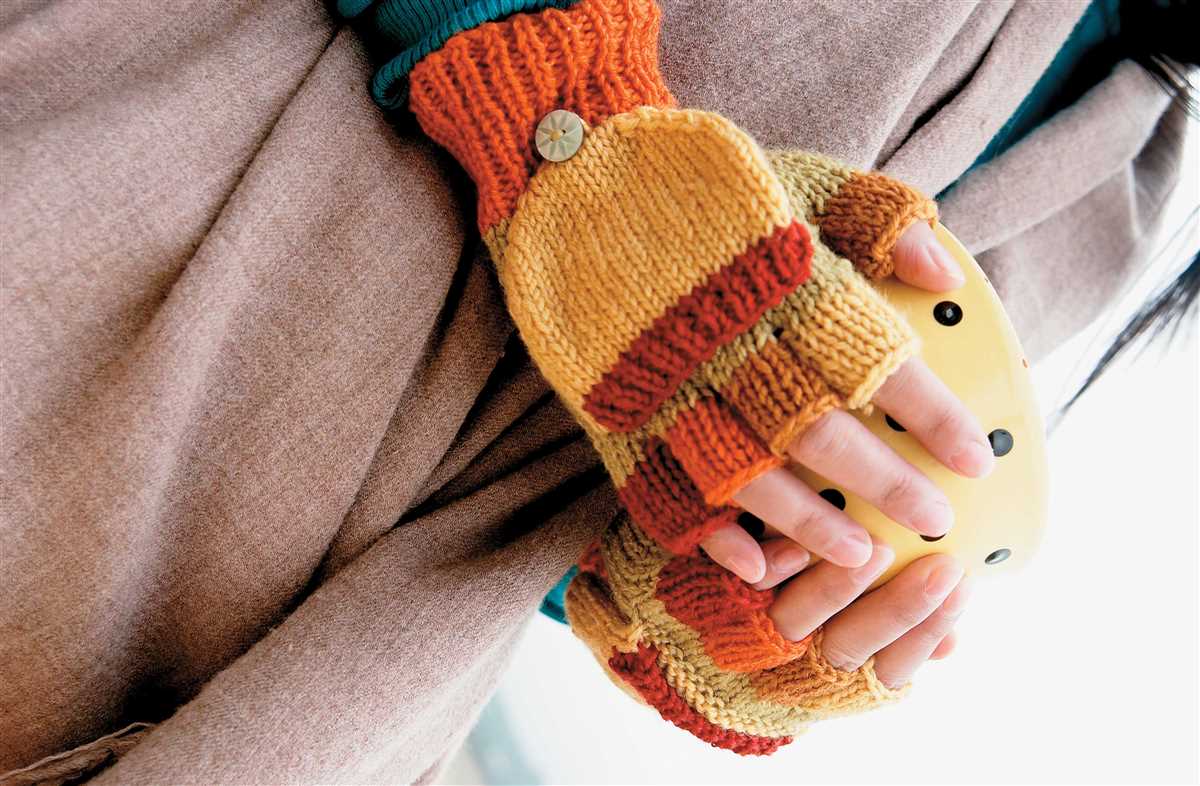
Convertible Gloves Pattern
Convertible gloves are a versatile accessory that can be used in both cold and mild weather. With this pattern, you can create your own pair of convertible gloves using just two needles.
To make these gloves, you will need:
- DK weight yarn
- Size 6 (4mm) knitting needles
- Tapestry needle
Here are the steps to knit the convertible gloves:
- Cast on 40 stitches.
- Knit 2 rows in rib stitch (k1, p1).
- Continue knitting in rib stitch for 1 inch.
- Switch to stockinette stitch (knit on right side, purl on wrong side) and continue for 3 inches.
- Next, create the thumb opening by binding off 8 stitches in the center of your work.
- Continue to knit each side separately for 2 inches.
- Join the two sides by knitting them together for 1 inch.
- Switch back to rib stitch and knit for 1 inch.
- Bind off all stitches.
- Repeat the above steps to make the second glove.
To use the convertible gloves as fingerless gloves, simply fold back the top portion and secure it with a button or a snap. To use as regular gloves, unfold the top portion and cover your fingers.
This pattern is a great introduction to glove knitting and allows for customization. You can adjust the length and width to fit your hand, and experiment with different stitch patterns or yarns to create unique gloves. Enjoy knitting your own pair of convertible gloves!
Summary:
Convertible gloves are a practical accessory that can be used in different weather conditions. With this pattern, you can easily create your own pair of convertible gloves using just two needles. Knitting them in rib and stockinette stitch gives you flexibility in using them as fingerless gloves or regular gloves. Customize the pattern to fit your hand and have fun experimenting with different stitches and yarns for a unique pair of convertible gloves.