
Knitting is an age-old craft that has captured the hearts of many, from beginners to experts. It’s a creative and relaxing activity that allows you to express your personal style while also keeping you warm during the colder months. One of the most popular projects for knitters is making hats, and what better way to start than with some knitted hat patterns using straight needles?
Using straight needles for knitting hat patterns has its advantages. They are easy to handle, especially for beginners who are still getting the hang of the craft. Additionally, straight needles provide more stability and control over your stitches, allowing you to create beautiful and intricate designs.
In this article, we will explore a variety of knitted hat patterns that can be made using straight needles. From basic designs that are perfect for beginners to more challenging patterns for advanced knitters, there is something for everyone. Whether you prefer a classic ribbed hat or a cozy cable-knit design, these patterns will surely inspire and challenge you to create your own unique pieces.
Top 10 Knitted Hat Patterns for Straight Needles
If you’re looking for knitted hat patterns that can be made using straight needles, you’re in the right place! Knitting hats is a fun and rewarding project that allows you to showcase your skills and create a cozy accessory for the colder months. With straight needles, you can easily knit hats without the need for circular or double-pointed needles. Here are the top 10 knitted hat patterns for straight needles that you can try:
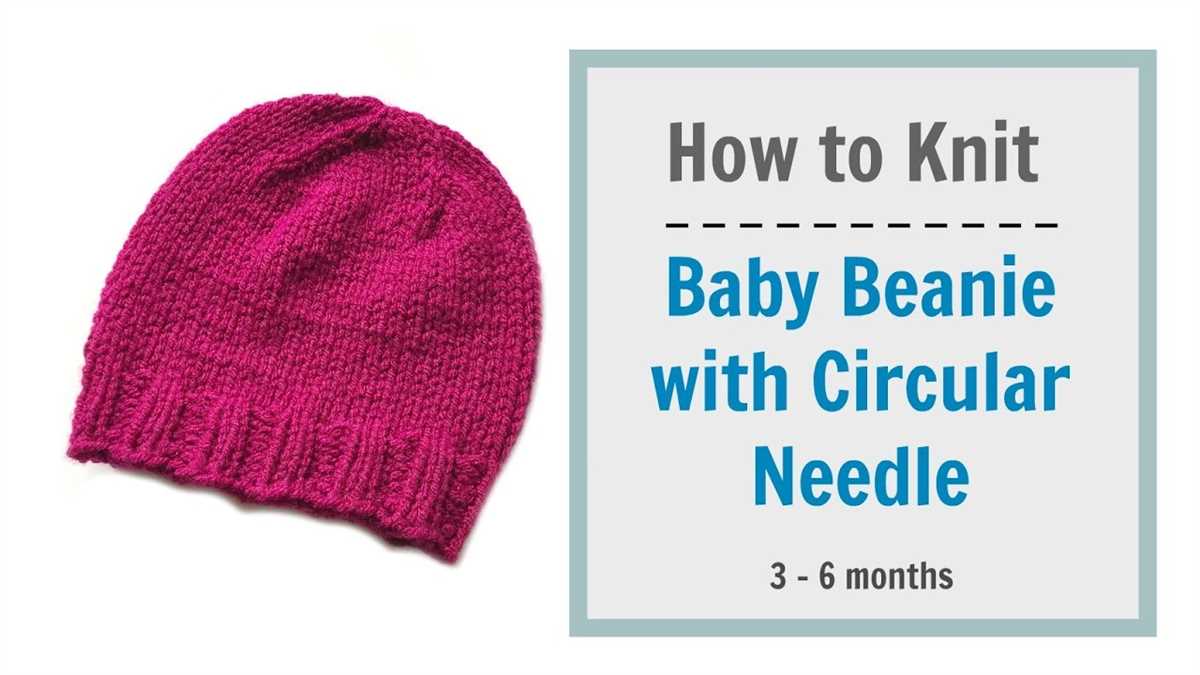
- Ribbed Beanie: This classic pattern features a ribbed design that stretches to fit snugly on your head. It’s perfect for beginners and creates a timeless look.
- Cabled Hat: Add some texture to your hat with a cabled pattern. This pattern incorporates twists and turns, creating a sophisticated and stylish hat.
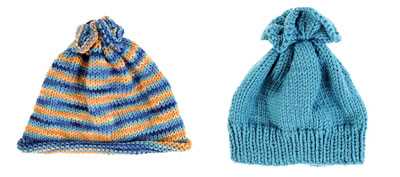
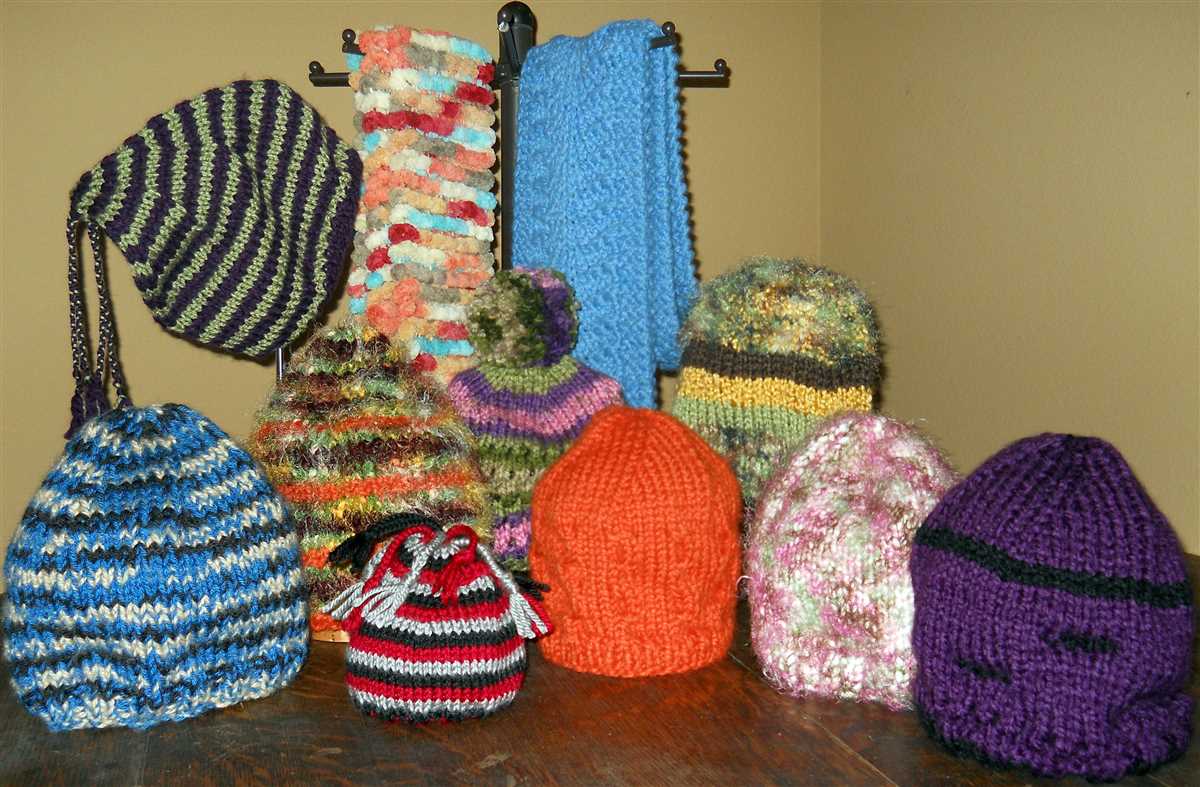
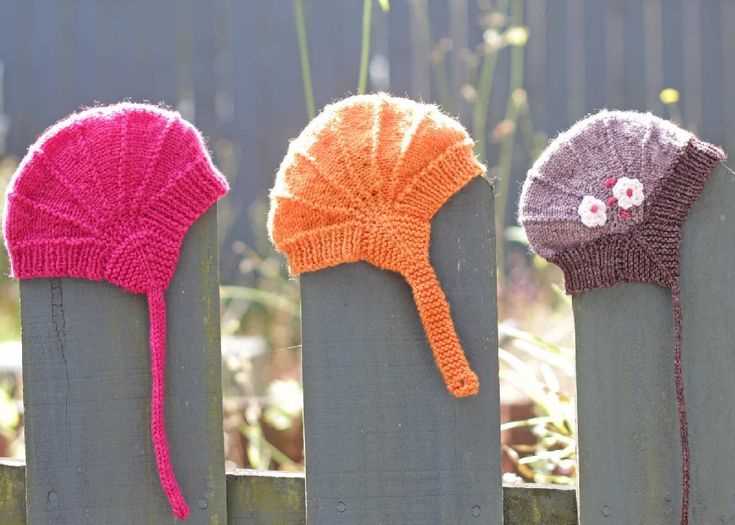
- Colorful Striped Hat: Have fun with colors by knitting a striped hat. Choose your favorite color combinations and create a vibrant accessory that will brighten up any winter outfit.
- Fair Isle Hat: If you’re up for a challenge, try knitting a Fair Isle hat. This pattern involves stranded colorwork and creates a beautiful, intricate design.
- Slouchy Beret: For a more relaxed and casual look, go for a slouchy beret. This pattern creates a loose and floppy hat that can be worn in various styles.
- Ruffled Hat: Add some feminine flair to your hat with a ruffled pattern. This design creates a delicate and elegant look that’s perfect for special occasions.
- Braided Cable Hat: Combine cables and braids for a unique and eye-catching hat. The braided cables add an extra level of detail to your knitting.
- Moss Stitch Hat: The moss stitch creates a beautiful textured pattern that works well for hats. This simple yet effective pattern is perfect for beginners.
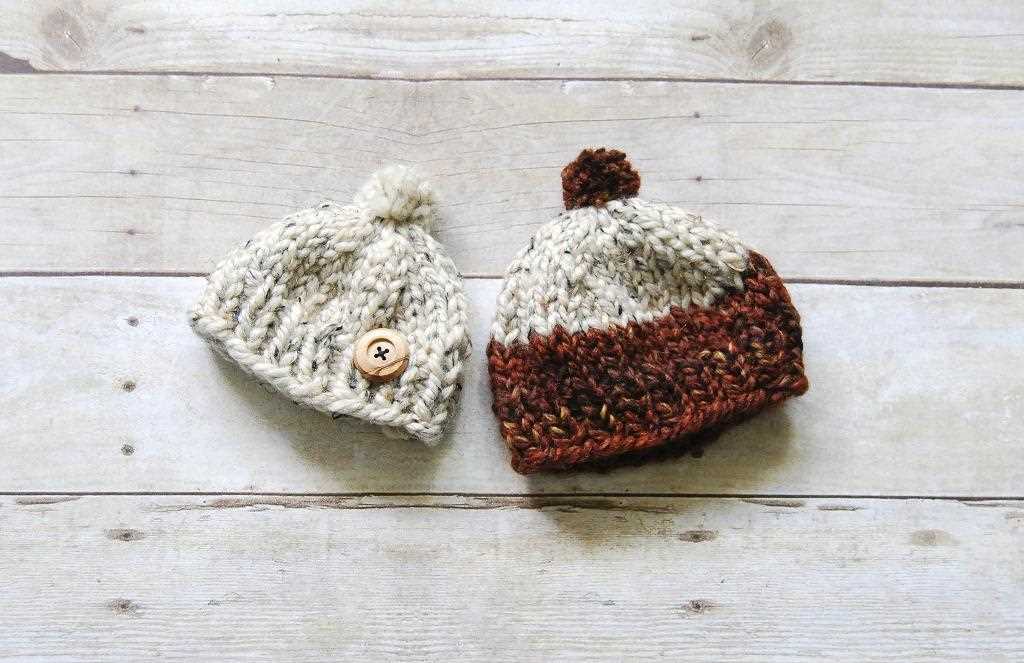
- Beanie with Pom Pom: Add a playful touch to your hat by adding a pom pom. This pattern creates a classic beanie style with a fun and fluffy pom pom on top.
- Lace Hat: For a delicate and feminine look, try knitting a lace hat. Lace patterns create an elegant and airy design that’s perfect for warmer weather or dressier occasions.
With these top 10 knitted hat patterns for straight needles, you’ll be able to create a variety of hats to suit your style and skill level. Whether you’re a beginner or an experienced knitter, there’s a pattern here for everyone. So grab your straight needles and start knitting your next hat project!
Classic Ribbed Hat Pattern
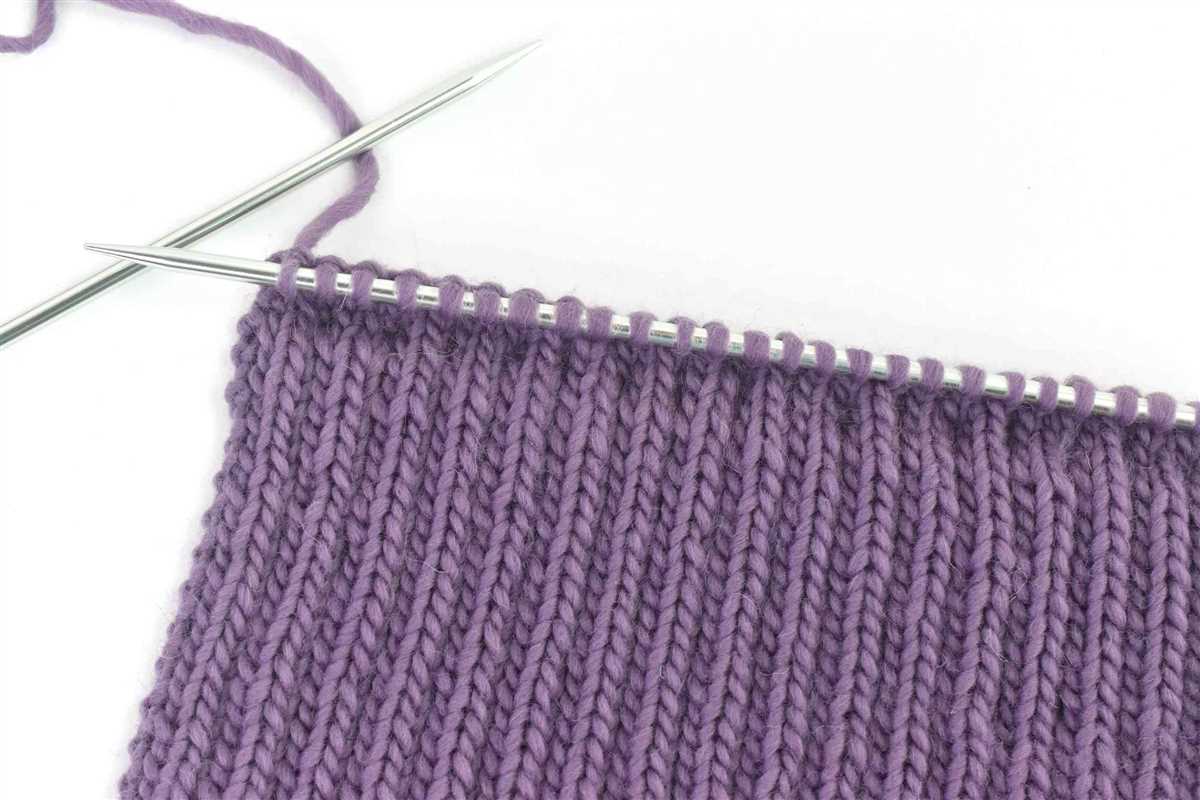
If you’re looking for a classic and timeless knitted hat pattern, then the Classic Ribbed Hat is perfect for you. This pattern is simple yet sophisticated, making it a versatile accessory for both men and women.
To knit the Classic Ribbed Hat, you will need a pair of straight needles and worsted weight yarn. The ribbed stitch pattern gives the hat an elastic and snug fit, ensuring warmth and comfort during the chilly months.
Materials:

- Size 8 (5 mm) straight knitting needles
- Worsted weight yarn (approximately 200 yards/183 meters)
- Cable needle
- Tapestry needle for weaving in ends
Instructions:
- Using the long-tail cast-on method, cast on 96 stitches.
- Work in a k2, p2 ribbing pattern for the brim of the hat for approximately 2 inches (5 cm).
- Switch to stockinette stitch (knit on the right side, purl on the wrong side) and continue knitting until the hat measures approximately 7 inches (18 cm) from the cast-on edge.
- Begin decreasing for the crown of the hat by working the following rows:
| Row | Instructions |
|---|---|
| 1 | K2, p2, k2tog, p2, k2, p2, repeat to end of row. |
| 2 and all even rows | P the purl stitches and knit the knit stitches. |
| 3 | K1, p2, k2, p2, k2, p2, repeat to end of row. |
| 5 | P2tog, k2, p2, k2, p2, repeat to end of row. |
| 7 | P1, k2, p2, k2, p2, repeat to end of row. |
| 9 | P2tog, k2, p1, k2, p2, repeat to end of row. |
| 11 | K1, p2, k1, p2, k2, repeat to end of row. |
| 13 | P2tog, k1, p1, k2, repeat to end of row. |
| 15 | K1, p1, k1, p2, repeat to end of row. |
| 17 | P2tog, k1, p1, repeat to end of row. |
| 19 | Purl all stitches. |
Continue decreasing in this pattern until you have 8 stitches remaining. Cut the yarn, leaving a long tail. Thread the tail through a tapestry needle, slip the needle through the remaining stitches, and pull tight to close. Weave in any loose ends.
The Classic Ribbed Hat is now complete! You can wear it as is or add a pom-pom or other embellishments to further personalize your hat. Enjoy the warmth and style of this timeless knitted accessory.
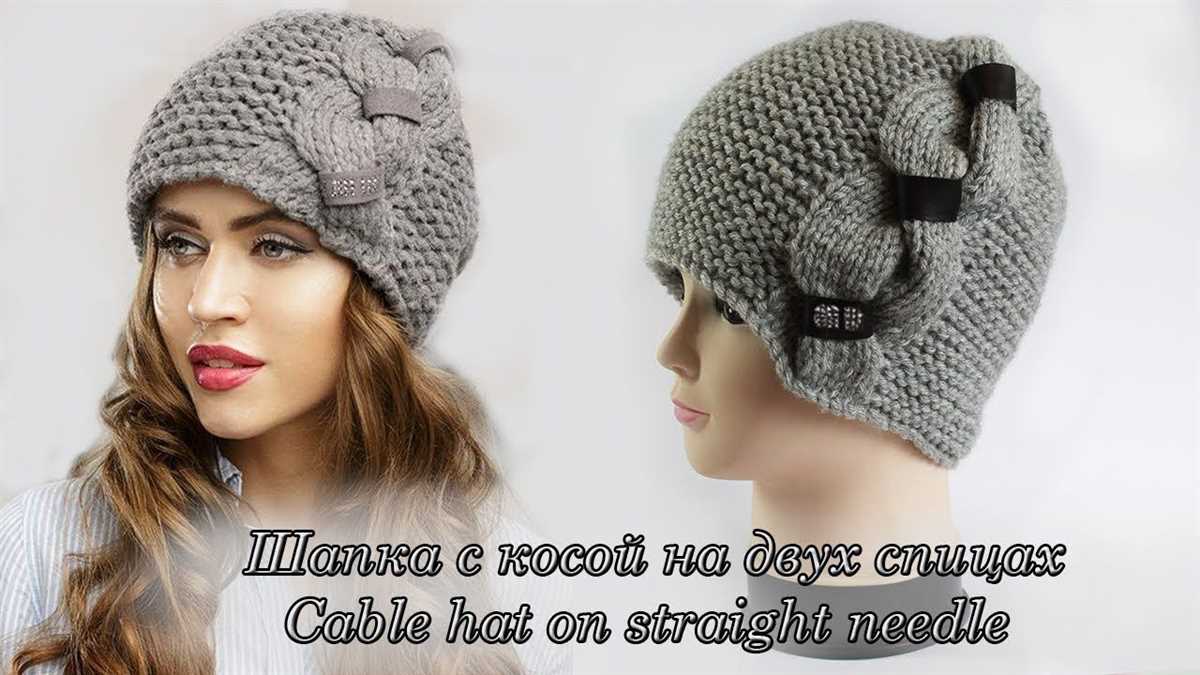
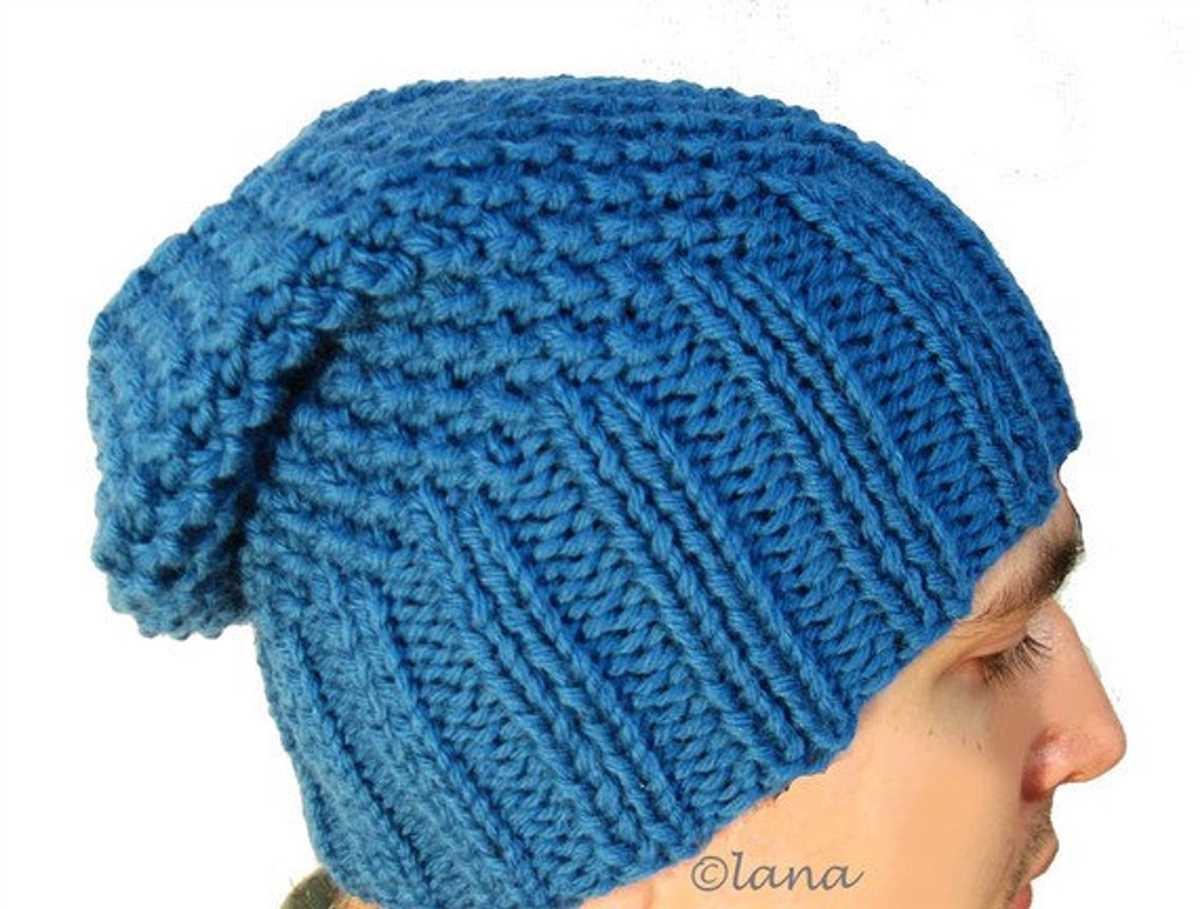
Cable Knit Hat Pattern
Knitting a cable knit hat is a great way to showcase your skills and create a beautiful accessory for the colder months. With its intricate interlocking pattern, a cable knit hat adds texture and style to any outfit.
To create a cable knit hat, you will need a set of straight needles, preferably in a size that will work well with your chosen yarn. Start by casting on the desired number of stitches, generally around 80-100 stitches for an adult-sized hat.
Once you have cast on, you can begin the cable pattern. To create the cables, you will need to use a cable needle. A cable needle is a short, double-pointed needle that is used to hold stitches while you work the cable pattern. The cable pattern consists of crossing stitches over each other to create the distinctive cable design.
There are many different cable patterns to choose from, ranging from basic cables to more intricate designs. Some popular cable patterns include the simple 2/2 cable, which crosses two stitches over two, and the horseshoe cable, which creates a beautiful horseshoe shape. Experiment with different cable patterns to find the one that suits your style.
Once you have completed the cable pattern, you can continue knitting in the round until the hat reaches the desired length. Finish off by casting off the stitches and weaving in any loose ends.
- Choose a cable knit hat pattern that you like.
- Gather the necessary materials, including straight needles and yarn.
- Cast on the desired number of stitches.
- Begin the cable pattern using a cable needle.
- Experiment with different cable patterns to find your favorite.
- Continue knitting until the hat reaches the desired length.
- Cast off the stitches and weave in any loose ends.
Fair Isle Hat Pattern
The Fair Isle hat pattern is a classic design that features intricate colorwork and beautiful geometric patterns. It is typically knitted using straight needles, making it accessible to knitters of all skill levels. The hat is worked in the round from the bottom up, starting with a ribbed brim and ending with a gathered crown.
To create the Fair Isle pattern, you will need two or more colors of yarn and a chart that shows the specific stitch pattern. The chart will guide you on which color to use for each stitch, creating the colorful design. This technique requires you to knit with two yarns at once, carrying the unused color along the back of the work.
To begin the Fair Isle hat, cast on the desired number of stitches for the brim using the smaller-sized needles. Work the ribbing pattern for the desired length, then switch to the larger-sized needles for the main body of the hat. Follow the Fair Isle chart, knitting with the different colors as indicated.
As you continue knitting in the round, be mindful of your tension to ensure an even fabric and consistent gauge. It may be helpful to use stitch markers to keep track of the pattern repeats. Once you reach the desired height of the hat, begin decreasing stitches to shape the crown. You can use a variety of decrease stitches, such as knit two together or slip, slip, knit, to create a neat and snug fit at the top.
Once you have completed the crown decreases, cut the yarn, leaving a long tail. Thread the tail through the remaining stitches, pull tight to gather the crown, and secure the yarn. Weave in any loose ends and your Fair Isle hat is ready to be worn or gifted to a lucky recipient!
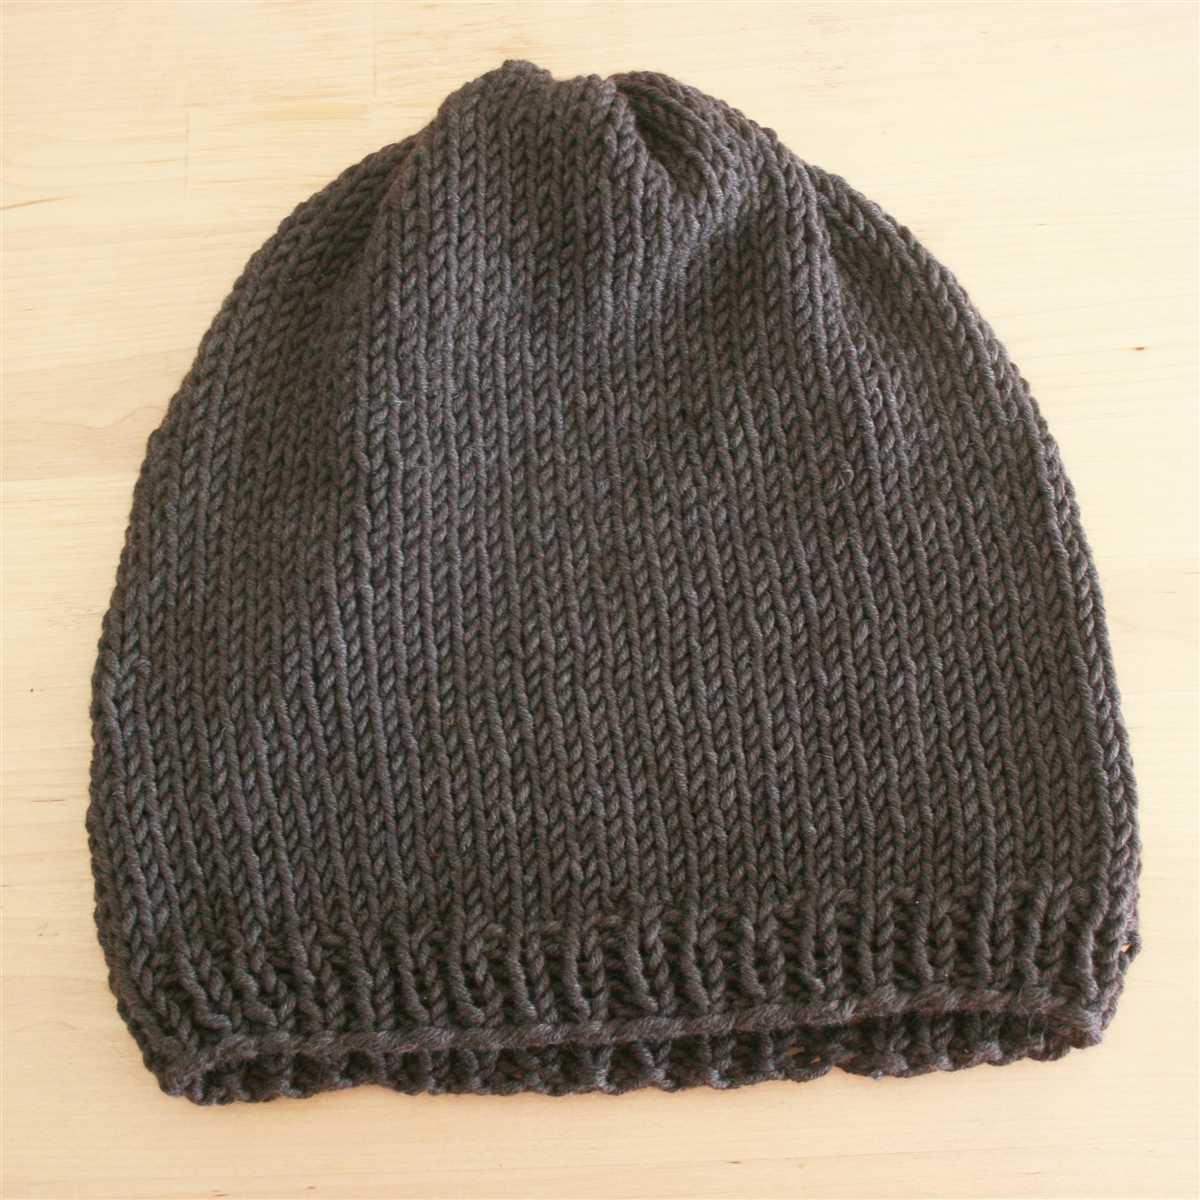
Slouchy Beanie Pattern
A slouchy beanie is a trendy and versatile hat that can add a stylish touch to any outfit. Whether you’re going for a casual or a more dressed-up look, a slouchy beanie can keep you warm and fashionable during the colder months. If you enjoy knitting and prefer using straight needles, here is a simple pattern to create your own slouchy beanie.
Materials:
- Straight knitting needles (size 8 or as desired)
- One skein of yarn (worsted weight)
- Tapestry needle
- Scissors
Instructions:
- Begin by casting on 80 stitches.
- Knit the first row.
- Purl the second row.
- Continue knitting in stockinette stitch (knit one row, purl one row) until the hat measures approximately 8 inches from the cast-on edge.
- Next, decrease stitches to shape the crown of the hat. To do this, knit two stitches together for the entire row.
- Continue decreasing in this manner until you have approximately 10-12 stitches remaining.
- Cut the yarn, leaving a long tail. Thread the tail through a tapestry needle, and slide the needle through the remaining stitches to secure them.
- Pull the yarn tight to close the top of the hat.
- Use the tapestry needle to sew the side seam of the hat together.
- Weave in any loose ends.
- Your slouchy beanie is now ready to wear!
This pattern is perfect for beginners and can be customized to your desired length and fit. Experiment with different colors and yarns to create unique slouchy beanies that reflect your personal style. Happy knitting!
Seed Stitch Hat Pattern
The seed stitch hat pattern is a classic design that is perfect for those who prefer to use straight knitting needles. The seed stitch creates a rich texture and a thick fabric, making it an ideal choice for winter hats.
To start this pattern, you will need size 8 knitting needles and a worsted weight yarn. Begin by casting on 100 stitches. The ribbing of the hat will be created using the seed stitch, which alternates between knit and purl stitches. This creates a bumpy texture that adds visual interest to the hat. Knit the first stitch, then purl the next stitch. Repeat this pattern until the end of the row.
Continue working in the seed stitch pattern for the desired length of the ribbing, typically around 2 inches. Then, switch to a stockinette stitch for the main body of the hat. Knit every stitch in each row until the hat measures the desired length from the brim to the crown. You can customize the length to fit your preference.
Finally, finish off the hat by decreasing the number of stitches in each row. This creates a tapered shape that fits snugly on the head. You can use the k2tog (knit two together) decrease method or any other decrease method of your choice. Continue decreasing until only a few stitches remain, then cut the yarn and pull it through the remaining stitches to secure.
This seed stitch hat pattern is a versatile and classic design that can be easily customized to fit your style. Experiment with different yarn colors and variations of the seed stitch to create unique and personalized hats for yourself or as gifts.
Bobble Stitch Hat Pattern
Are you looking to knit a cozy and stylish hat? The bobble stitch hat pattern is a perfect option! This pattern is great for beginners and advanced knitters alike, as it only requires basic knitting techniques and straight needles. The bobble stitch adds a fun and playful texture to the hat, making it a unique and eye-catching accessory.
To start, you will need the following materials:
- Straight knitting needles (size US 8)
- Worsted weight yarn (approximately 200 yards)
- Tapestry needle
- Scissors
Begin by casting on 88 stitches using a long tail cast on method. This will create the base for your hat. Then, continue knitting in a rib stitch pattern (knit one, purl one) for about 2 inches. This will give your hat a stretchy and comfortable brim.
Next, it’s time to start the bobble stitch pattern. Knit 3 stitches, then make a bobble stitch by knitting into the front, back, and front of the same stitch. This will create a raised, textured bobble. Repeat this pattern across the row, knitting 3 stitches and making a bobble stitch, until you reach the end of the row.
Continue knitting in the bobble stitch pattern until your hat reaches your desired length, typically around 7 to 8 inches from the ribbed brim. Then, it’s time to decrease for the crown of the hat. Start by knitting 2 stitches together, then knit 6 stitches. Repeat this pattern across the row.
Continue decreasing in this pattern, knitting 2 stitches together and then knitting the specified number of stitches, until you have 8 stitches remaining on your knitting needles. Cut the yarn, leaving a long tail, and thread it through a tapestry needle. Slip the needle through the remaining stitches, pull tight, and secure the end of the yarn.
Your bobble stitch hat is now complete! This pattern allows for customization, so feel free to mix up the colors of yarn or add decorative elements like a pom-pom on top. Enjoy wearing your cozy and stylish hat, or create more for friends and family!
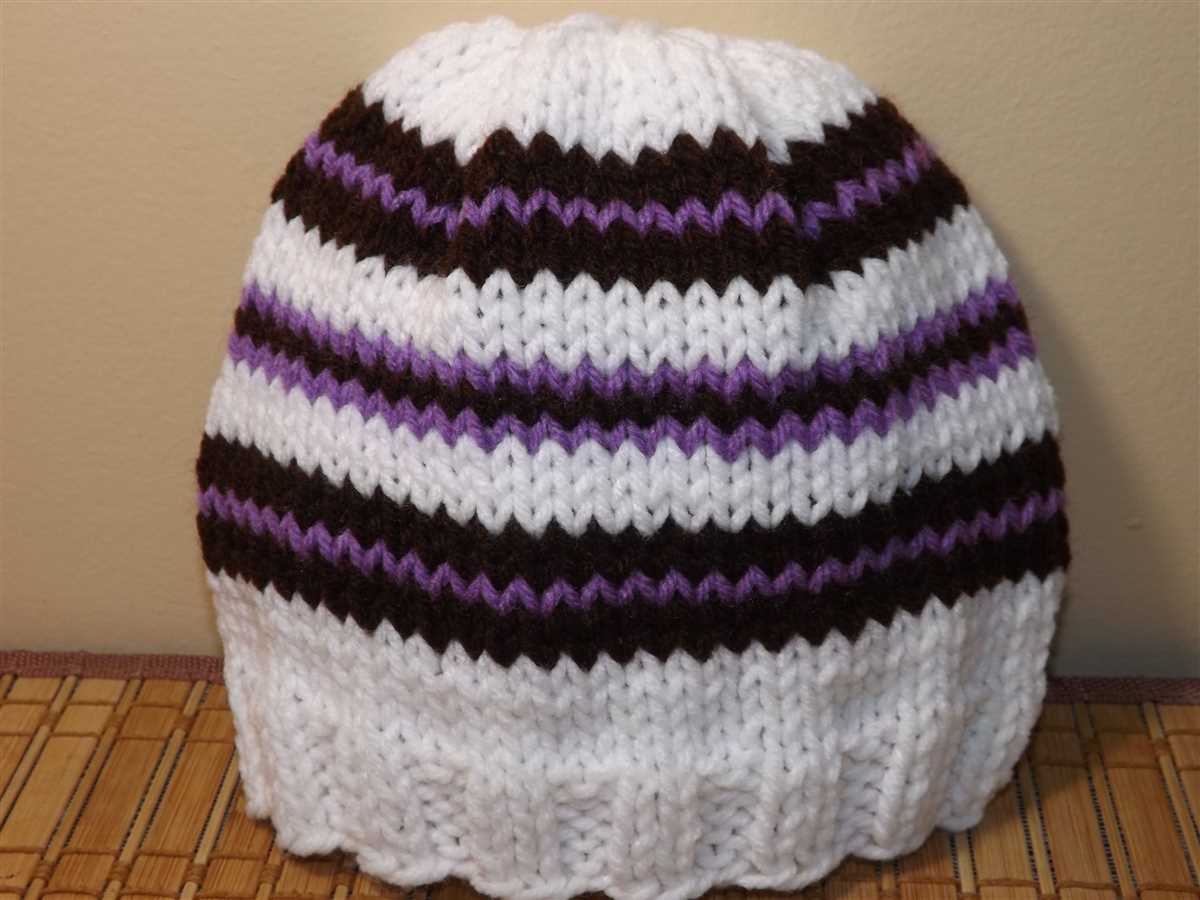
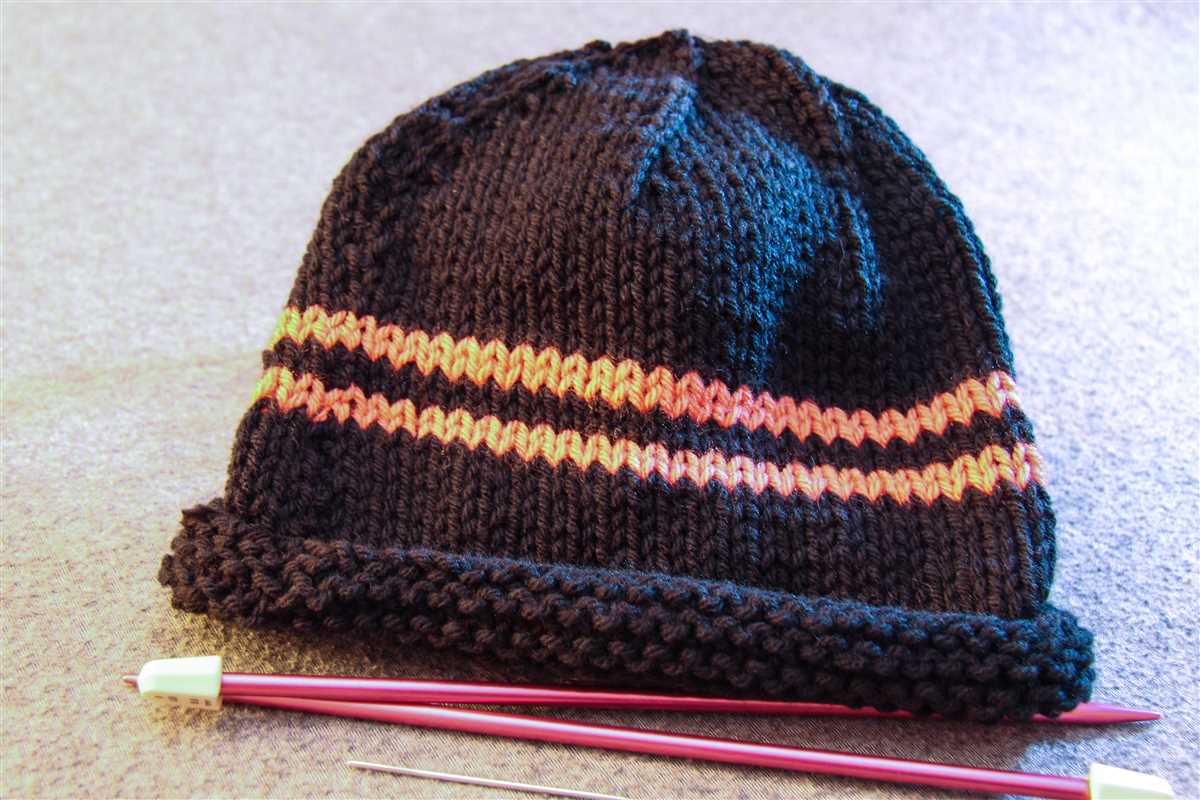
Striped Hat Pattern
Knitting a striped hat is a fun and stylish project that can be easily done with straight needles. With this striped hat pattern, you can create a cozy and fashionable accessory for the colder months. Whether you’re a beginner or an experienced knitter, this pattern is perfect for you.
To start, gather your materials: two contrasting colors of yarn, straight knitting needles, a yarn needle, and scissors. Choose colors that complement each other and reflect your personal style. Once you have everything you need, you’re ready to begin.
Step 1: Cast on
Using one of the yarn colors, cast on the desired number of stitches for your hat size. This will depend on the thickness of your yarn and the circumference of the wearer’s head. A common number to start with is 80 stitches, but you can adjust this to fit your needs.
Step 2: Knit the brim
Once you have cast on, you will start knitting the brim of the hat. Using the same color as your cast-on, work in a rib stitch pattern for about two inches. This will give the hat a stretchy and comfortable fit.
Step 3: Begin the stripes
After you have finished the brim, it’s time to introduce the second color and create the stripes. Switch to the second color and continue knitting in stockinette stitch until desired length, alternating colors for each row. You can make thick or thin stripes, depending on your preference.
Step 4: Decrease for the crown
Once you have reached the desired length for your hat, it’s time to decrease for the crown. This will give the hat its tapered shape. Follow a decreasing pattern, such as knitting two stitches together, evenly throughout the row until you have a small number of stitches left.
Continue decreasing until you have just a few stitches remaining, then cut the yarn, leaving a long tail. Thread the tail through the yarn needle and weave it through the remaining stitches, pulling tight to close the top of the hat. Secure the yarn and weave in any loose ends.
With this striped hat pattern, you can create a stylish and cozy accessory that will keep you warm during the colder months. Experiment with different color combinations and stripe patterns to make each hat unique. Whether you’re knitting for yourself or as a gift, this pattern is sure to impress.
Textured Hat Pattern
A textured hat pattern is a great way to create a unique and stylish accessory using just straight needles. With a variety of stitch patterns and techniques, you can add depth and interest to your knitting projects. Whether you’re a beginner or an experienced knitter, this pattern is sure to challenge and inspire you.
Materials
- Straight knitting needles, size 8
- Worsted weight yarn, approximately 200 yards
- Tapestry needle
- Scissors
Instructions
- Cast on 80 stitches using the long tail cast on method.
- Knit 2 rows in a basic knit stitch for the brim of the hat.
- Begin the textured stitch pattern:
- Row 1: *Knit 1, purl 1; repeat from * to end of row.
- Row 2: *Purl 1, knit 1; repeat from * to end of row.
- Repeat these two rows for the desired length of the hat body.
- Switch back to a basic knit stitch for the last few rows of the hat.
- Bind off all stitches.
- Seam up the sides of the hat using a tapestry needle.
- Weave in any loose ends.
This textured hat pattern is not only stylish, but it also provides warmth and comfort. The combination of knit and purl stitches creates a visually appealing fabric that is perfect for the colder months. The pattern is versatile and can be customized with different yarn colors and stitch variations to suit your personal style. Whether you’re knitting this hat for yourself or as a gift, it’s sure to be a hit!
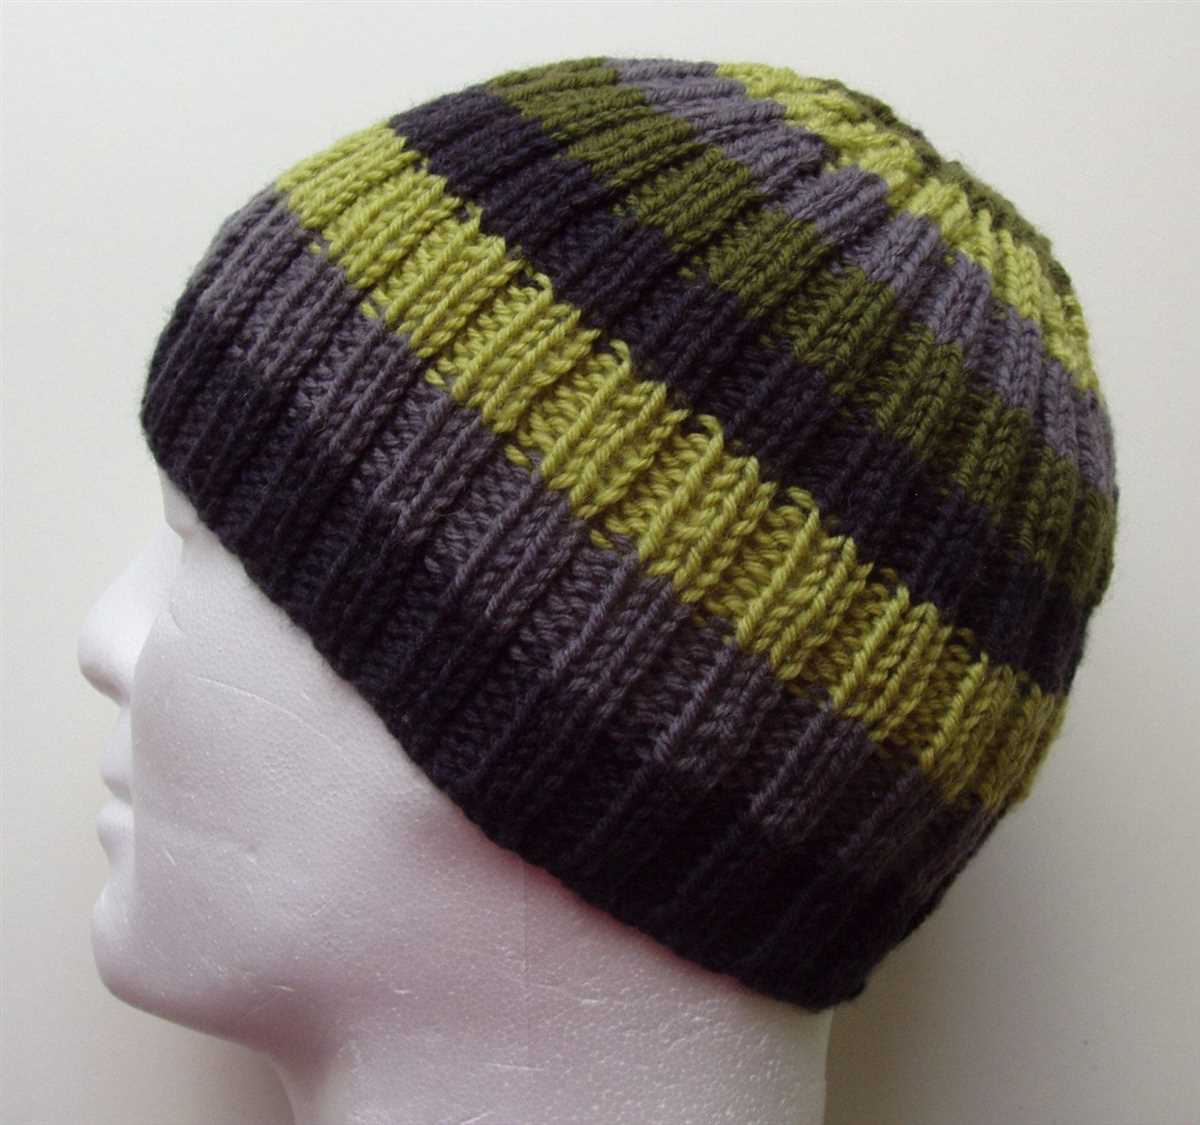
Colorblock Hat Pattern
If you’re looking for a stylish and modern hat to knit, the Colorblock Hat Pattern is the perfect choice. This pattern features a simple yet eye-catching design, with bold blocks of color that make a statement. Whether you’re a beginner or an experienced knitter, this pattern is easy to follow and can be knit using straight needles.
To start knitting the Colorblock Hat, you’ll need two contrasting colors of yarn and a pair of straight needles. The pattern begins with a ribbed brim that gives the hat a snug and comfortable fit. Then, you’ll work in the main body of the hat using the colorblock pattern. The colorblock design can be customized to your preference – you can choose how many rows of each color to knit.
One of the advantages of knitting with straight needles is that you don’t need to worry about using circular needles or double-pointed needles. This makes the Colorblock Hat Pattern accessible to knitters of all skill levels. The straight needle construction also allows for easy color changes, as you can simply switch yarns at the beginning of a row.
The Colorblock Hat Pattern is a versatile design that can be knit in any color combination you desire. It’s a great project for using up leftover yarn from other projects or for creating a coordinated set with a matching scarf or mittens. Knit this hat for yourself or as a thoughtful gift for a friend or family member – it’s sure to be a hit!
Lace Hat Pattern
Knitting a lace hat can add elegance and sophistication to your winter wardrobe. Lace patterns are beautiful and delicate, adding intricate details to your hat. This lace hat pattern is perfect for those who want to challenge their knitting skills and create a stunning accessory.
To create this lace hat, you will need a pair of straight knitting needles and a light-weight yarn of your choice. This pattern is suitable for intermediate knitters who are comfortable with knitting lace stitches.
Materials:
- Straight knitting needles (size 8 or as preferred)
- Light-weight yarn (approximately 200 yards)
- Yarn needle
- Scissors
Instructions:
- Cast on 96 stitches.
- Row 1: *K2, P2* to end of row.
- Row 2: *P2, K2* to end of row.
- Repeat rows 1 and 2 until the ribbing measures approximately 2 inches.
- Begin lace pattern:
- Row 1: *K2, P2, yarn over (YO), knit 2 together (K2tog)* to end of row.
- Row 2: *P2, K2* to end of row.
- Row 3: *K1, YO, K2tog, P2* to end of row.
- Row 4: *P2, K2* to end of row.
- Repeat rows 1-4 until the lace pattern measures approximately 5 inches.
- Continue knitting in stockinette stitch (knit every row) until the hat measures approximately 9 inches from the cast-on edge.
- Decrease rounds:
- Round 1: *K2, K2tog* to end of round.
- Round 2: Knit all stitches.
- Repeat rounds 1 and 2 until 12 stitches remain.
- Cut the yarn, leaving a long tail. Thread the yarn through the yarn needle, slip the remaining stitches onto the yarn needle, and remove them from the knitting needles. Pull the yarn tight to close the top of the hat.
- Weave in all loose ends.
With this lace hat pattern, you can create a stunning accessory that showcases your knitting skills and adds a touch of elegance to your winter attire. Whether you wear it for warmth or as a fashion statement, this lace hat is sure to impress.