
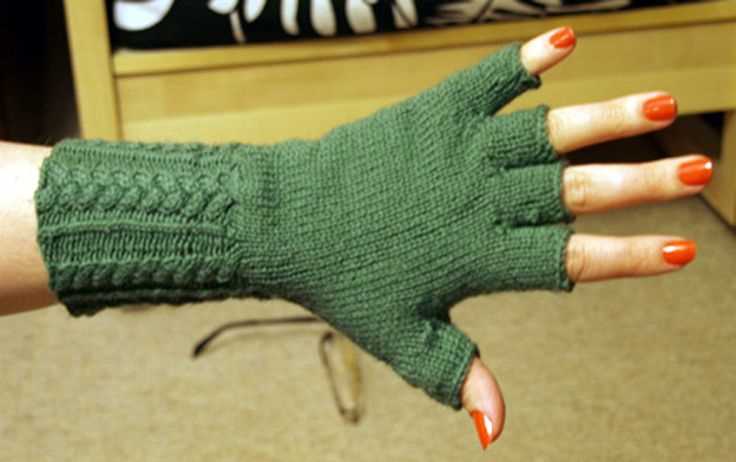
Knitting fingerless gloves can be a fun and rewarding project for any knitting enthusiast. Fingerless gloves are not only stylish but also quite practical, allowing you to keep your hands warm while still having the dexterity to use your fingers freely. If you are looking for a fingerless gloves pattern that can be knitted with just two needles, you are in the right place!
This knitting pattern is perfect for those who prefer to work with two needles instead of using double-pointed needles or a circular needle. With just a basic knowledge of knitting techniques and stitches, you can create a beautiful pair of fingerless gloves with ease.
Whether you are a beginner or an experienced knitter, this pattern is suitable for all skill levels. You will need a pair of straight knitting needles, a ball of yarn in your chosen color, and a tapestry needle for finishing touches. The pattern includes step-by-step instructions and helpful tips to guide you through the process.
Materials needed for fingerless gloves knitting
Knitting fingerless gloves requires a few specific materials to ensure a successful and comfortable end product. Here are the key materials you will need:
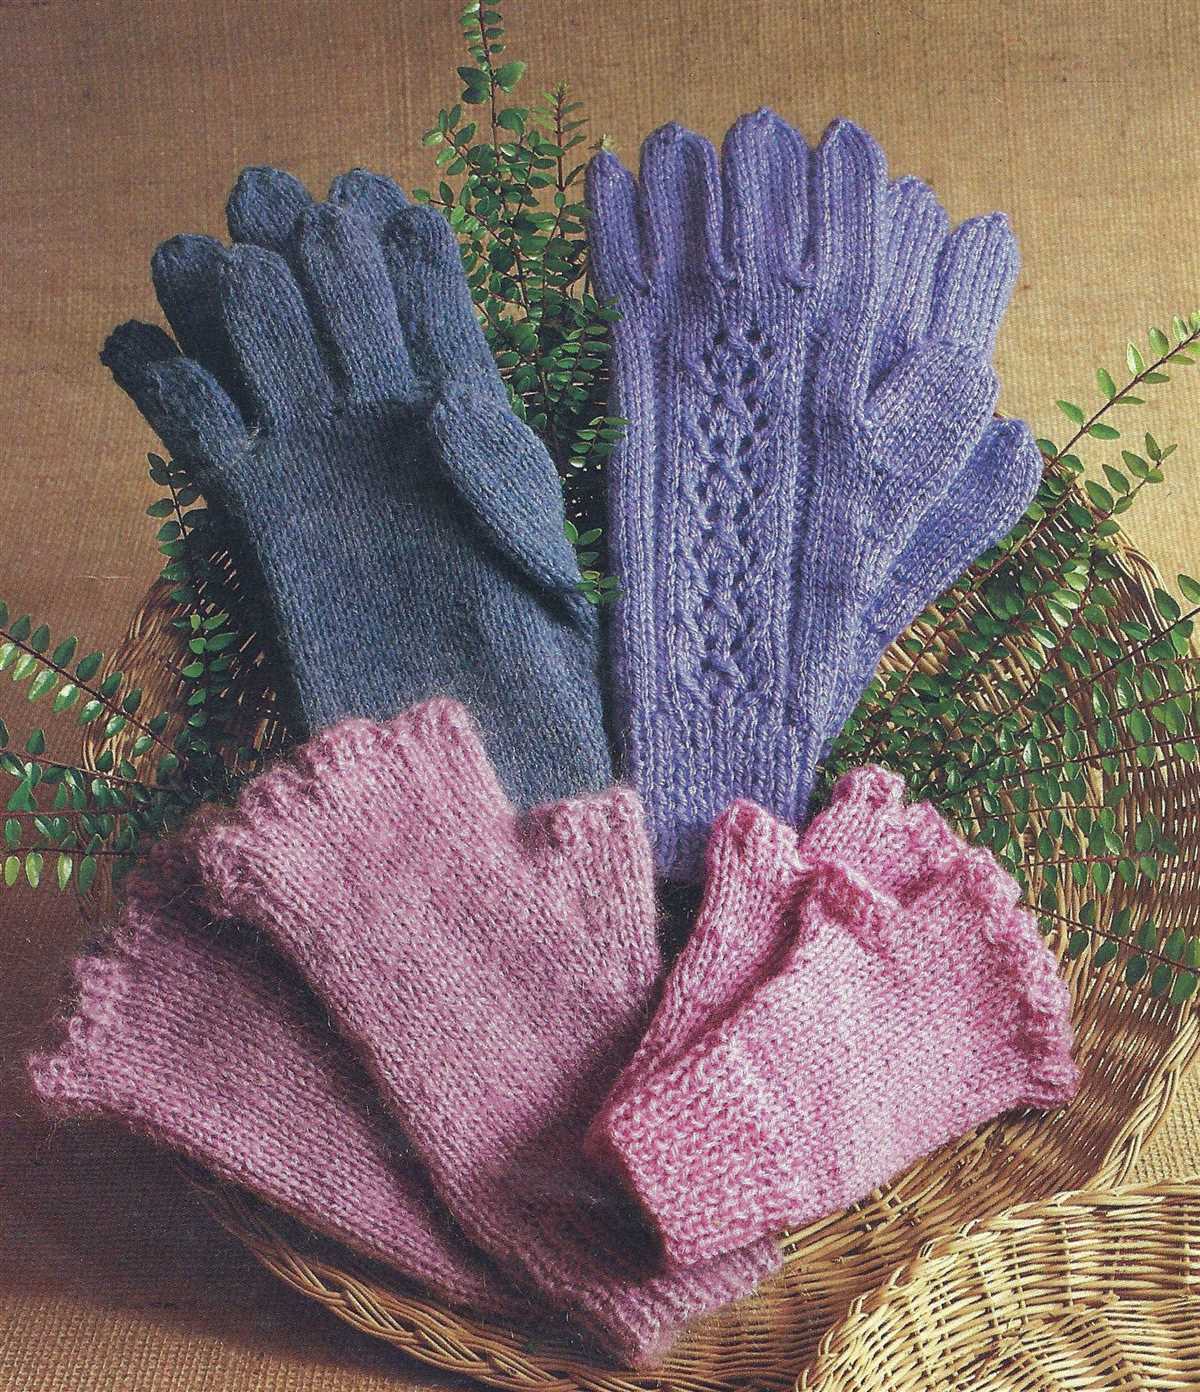
- Yarn: Choose a yarn that is suitable for the desired level of warmth and softness for the gloves. Options can range from lightweight cotton yarn for springtime wear to thicker wool yarn for winter weather. Pick a color that complements your style and outfits.
- Knitting Needles: For fingerless gloves knitting, you will need a pair of straight knitting needles. The recommended size will depend on the pattern you are following, but most gloves can be knit with size 4 or 5 needles.
- Tape Measure: Having a tape measure on hand is essential for ensuring accurate sizing while knitting the gloves. It will help you measure your hand circumference and length to ensure the gloves fit comfortably.
- Scissors: Sharp scissors are necessary for cutting the yarn once you finish knitting or need to make any adjustments.
- Stitch Markers: Stitch markers are useful tools for keeping track of different sections or stitches in the glove pattern. They can be placed on the needles to mark significant points, such as the beginning of the round.
- Yarn Needle: A yarn needle with a large eye is used for weaving in loose ends and sewing up any seams on the glove. This will give your gloves a polished and finished look.
By gathering these materials before starting your fingerless gloves knitting project, you will be well-prepared and ready to create cozy and stylish gloves to keep your hands warm while still allowing your fingers to remain free.
Choosing the right yarn for fingerless gloves
When it comes to knitting fingerless gloves, choosing the right yarn is essential to ensure both comfort and functionality. Fingerless gloves are often worn for various activities, including typing, driving, and outdoor sports, so the yarn needs to be durable, flexible, and warm.
1. Fiber Content: One of the most important factors to consider when selecting yarn for fingerless gloves is the fiber content. Natural fibers such as wool, alpaca, or cashmere offer excellent insulation and breathability, which is crucial for keeping hands warm and comfortable. Acrylic blends can also be a good option as they provide warmth and are easy to care for.
2. Weight: The weight of the yarn is another crucial consideration. Fingerless gloves require yarn that is not too thick or too thin. Medium-weight yarn, also known as worsted weight, is generally a safe choice as it allows for a good balance between warmth and dexterity. However, sport weight or DK weight yarn can also be used for lighter gloves or finer details.
3. Durability: Since fingerless gloves are often subjected to frequent use and friction, using a durable yarn is important to ensure the gloves can withstand the test of time. Yarns with added nylon or other reinforcing fibers can provide extra strength and resistance to wear and tear.
4. Stretch and Flexibility: Fingerless gloves should fit snugly without restricting movement. Therefore, choosing a yarn with some natural stretch or blended with elastic fibers can help the gloves to stretch and retain their shape. This ensures a comfortable fit and allows for easy movement of the hands and fingers.
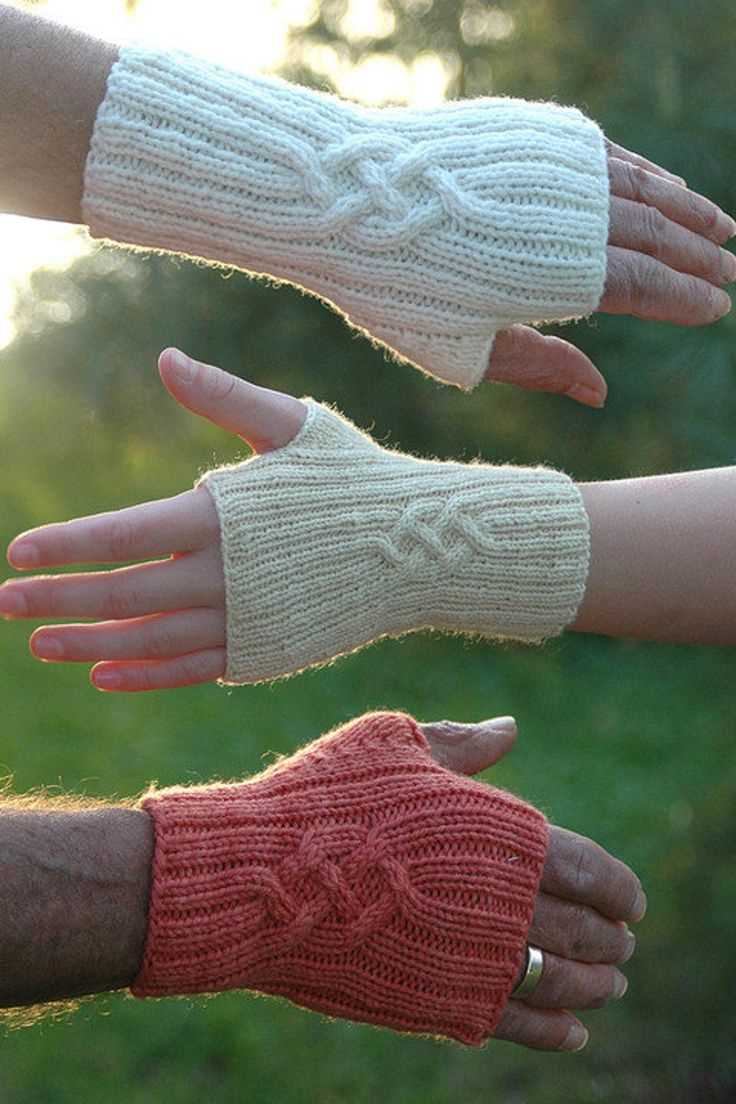
5. Color and Texture: While not directly related to functionality, the color and texture of the yarn can also be important considerations. Bright and vibrant colors can add a pop of style to the gloves, while textured yarns can create interesting patterns or designs. However, it’s important to ensure that the chosen yarn’s color and texture won’t interfere with the gloves’ practical use.
In conclusion, when choosing yarn for fingerless gloves, considering factors such as fiber content, weight, durability, stretch, and color can help ensure that the gloves are not only stylish but also comfortable and functional. By selecting the right yarn, you can create fingerless gloves that are perfect for keeping hands warm and protected during various activities.
Selecting the appropriate needle size for fingerless gloves
When it comes to knitting fingerless gloves, selecting the appropriate needle size is crucial to achieving the desired size, fit, and gauge for your project. The needle size you choose will determine the overall size of your gloves and how tight or loose the stitches will be.
1. Consider the yarn thickness: Different yarns have different recommended needle sizes, so it’s important to check the yarn label for guidance. Thicker yarns usually require larger needles to create a looser fabric, while thinner yarns require smaller needles for a tighter stitch.
2. Gauge swatch: Before starting your fingerless gloves, it’s always a good idea to make a gauge swatch using the selected yarn and needle size. This allows you to measure the number of stitches and rows per inch and adjust your needle size if necessary. If your gauge doesn’t match the pattern, try changing your needle size to achieve the correct gauge.
3. Desired fit: Consider how you want your fingerless gloves to fit. If you prefer a tighter fit, choose a smaller needle size, and if you want a looser fit, opt for a larger needle size. Keep in mind that the needle size will also affect the drape and stretchiness of your gloves.
4. Pattern recommendations: Some fingerless glove patterns may specify a particular needle size, so it’s important to follow the pattern instructions to achieve the desired outcome. However, don’t be afraid to experiment with different needle sizes to create a unique look or adjust the fit according to your preferences.
By carefully considering the yarn thickness, making a gauge swatch, considering the desired fit, and following any pattern recommendations, you can ensure that you select the appropriate needle size for your fingerless gloves knitting project.
Gauge swatch for fingerless gloves knitting pattern
Before starting your fingerless gloves knitting project, it is important to create a gauge swatch to ensure that your finished gloves will have the correct fit and size. The gauge swatch will help you determine the number of stitches and rows needed to achieve the desired measurements.
To make a gauge swatch, you will need the same type of yarn and the same knitting needles that you plan to use for your fingerless gloves. Cast on a few more stitches than suggested in the pattern, usually around 20 stitches, to allow for accurate measurement.
Step 1: Begin by knitting a few rows of the swatch in stockinette stitch. This stitch involves alternating rows of knit and purl stitches. Knit the first row, then purl the second row. Repeat these two rows until you have a square or rectangle of fabric.
Step 2: Once your swatch is complete, remove it from the needles and gently wash and block it. This will help relax the stitches and give you a more accurate measurement. Lay the swatch flat and use measuring tape or a ruler to measure the number of stitches and rows within a 1-inch square.
Step 3: Compare the measurements of your swatch to the gauge specified in the fingerless gloves knitting pattern. If your gauge matches the pattern’s gauge, you’re ready to start knitting your gloves. If your gauge is larger or smaller, you may need to adjust your needle size to achieve the correct gauge.
Remember, creating a gauge swatch is an essential step in knitting projects as it helps ensure that your final piece will have the right size and fit. Taking the time to knit a swatch can save you a lot of frustration and disappointment later on.
Cast on stitches for fingerless gloves
When starting to knit fingerless gloves, the first step is to cast on the required number of stitches. The number of stitches will depend on the size of the gloves and the desired fit. It is important to cast on the stitches evenly to ensure the gloves have a neat and symmetrical appearance.
To begin, take a pair of knitting needles and the chosen yarn. Make a slipknot at the end of the yarn and insert one of the knitting needles through the loop. Pull the yarn to tighten the loop around the needle. Holding the needle with the slipknot in your right hand, use your left thumb and index finger to hold the yarn.
Now, using your right hand, insert the other knitting needle into the first loop on the left-hand needle, positioning it from left to right and underneath the left-hand needle. With the yarn held in the left hand, bring it over the right-hand needle, from back to front. This creates a new loop on the right-hand needle.
Repeat this process until the desired number of stitches is cast on. It is important to count the stitches as you go to ensure you have the correct number. Once all the stitches are cast on, you can continue with the next steps of the fingerless gloves knitting pattern.
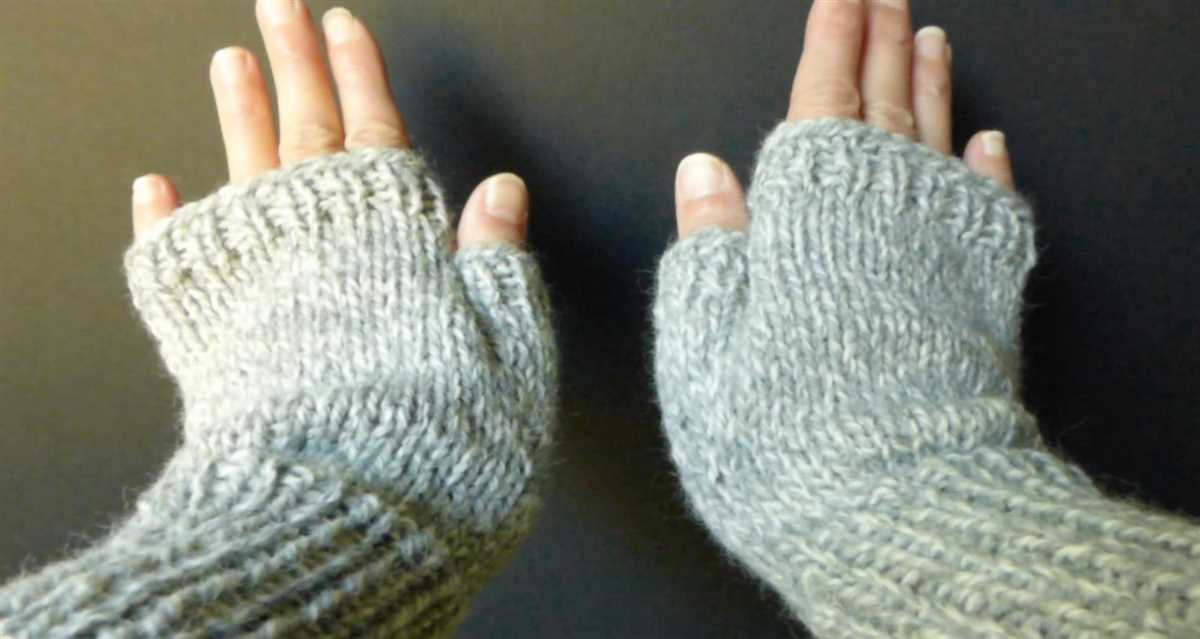
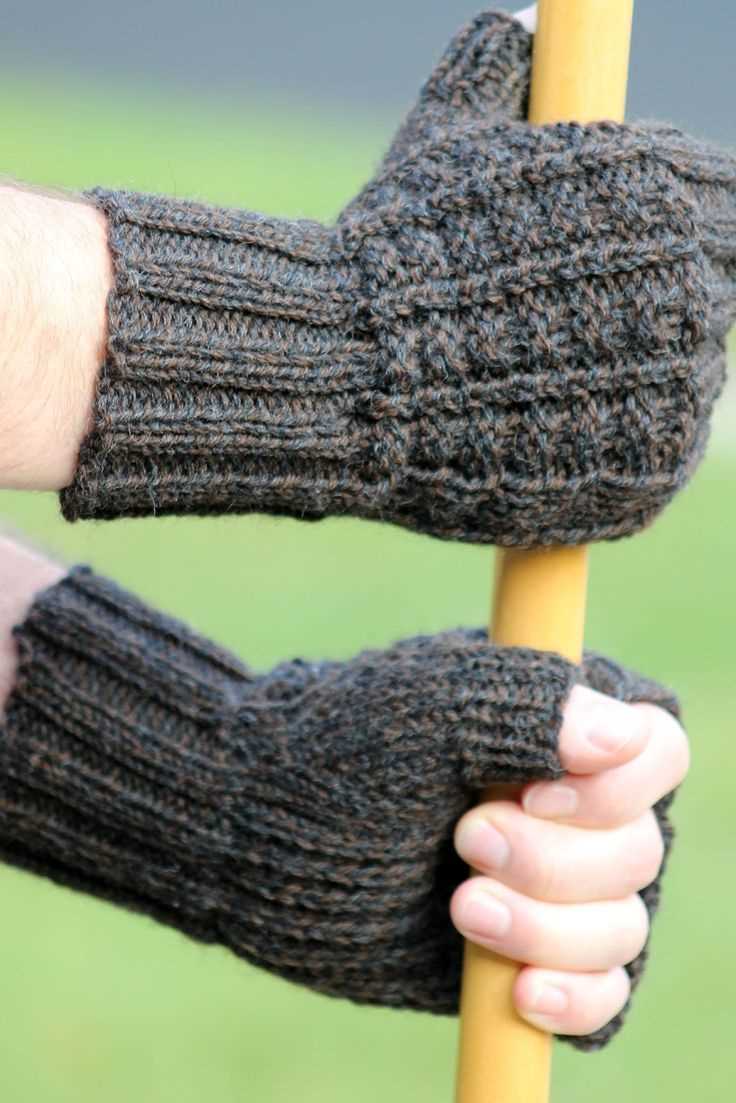
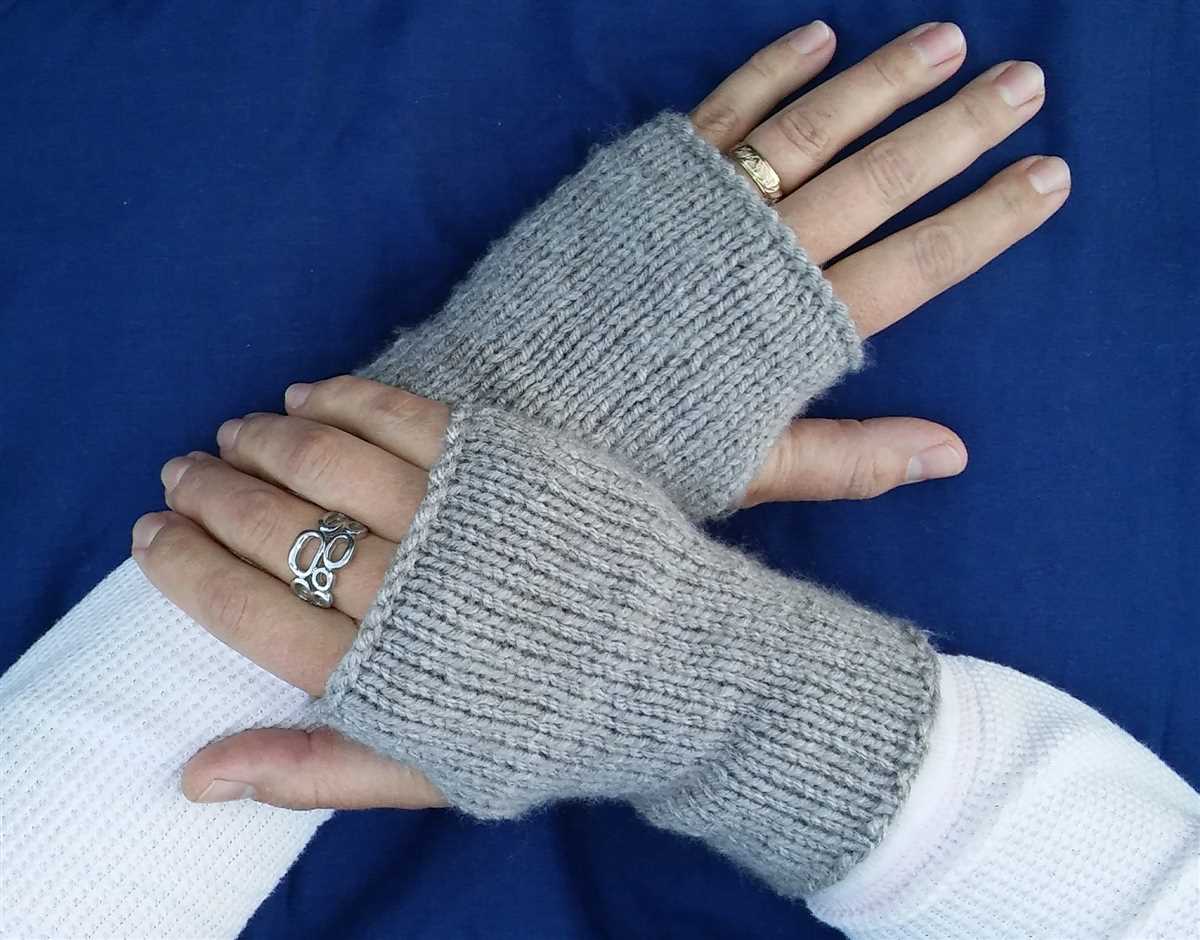
Knitting the ribbed cuff for fingerless gloves
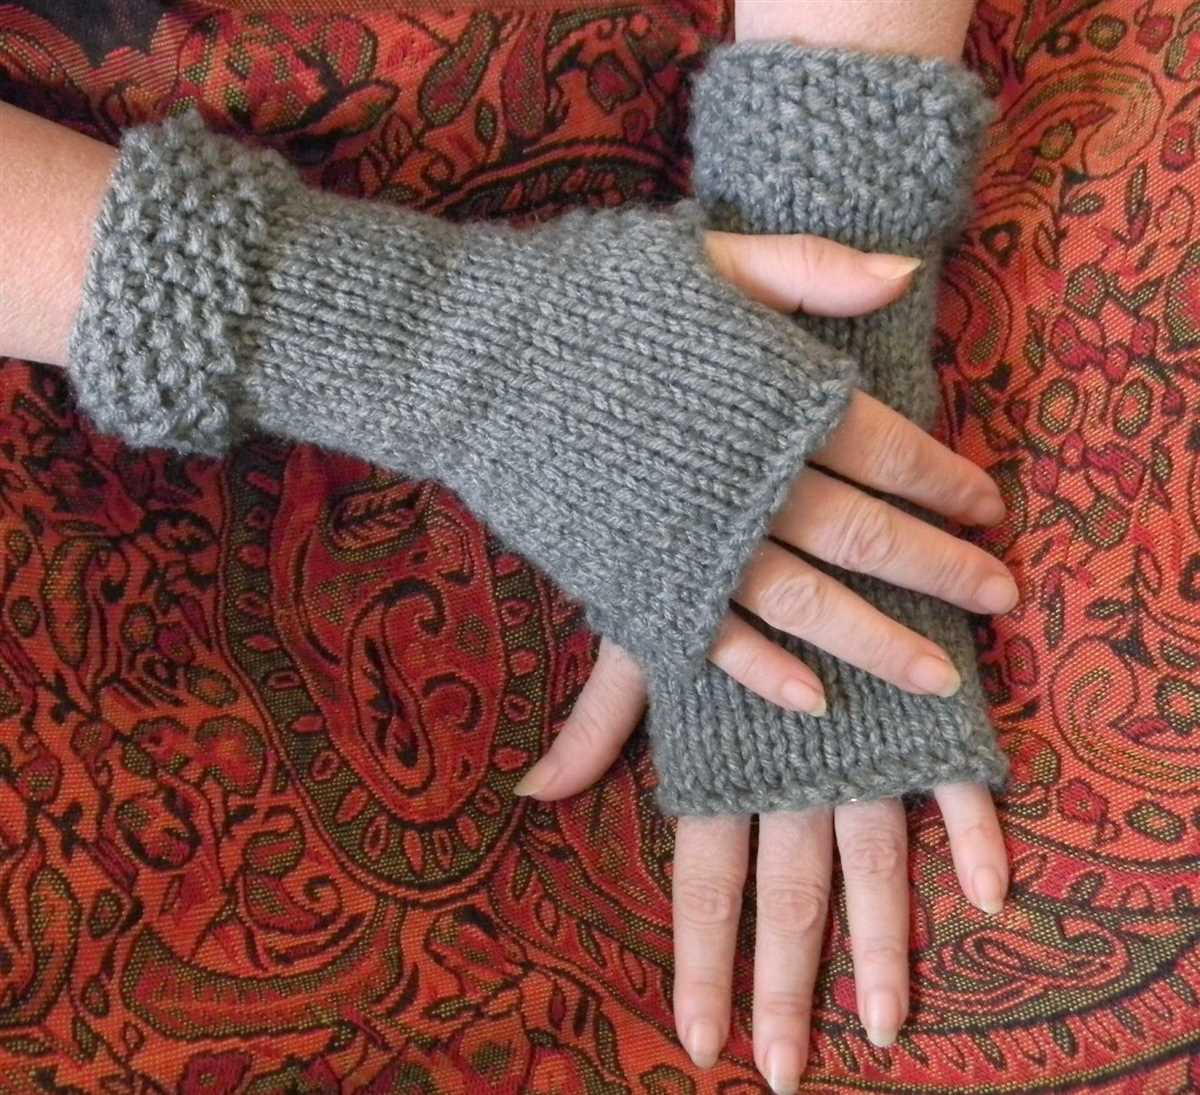
When knitting fingerless gloves, one of the first steps is to create the ribbed cuff. The cuff not only adds a decorative element to the gloves, but it also helps to give them a snug fit around the wrist. To knit the ribbed cuff, you will need two needles and a basic knowledge of knitting stitches.
Materials needed:
- Yarn of choice
- Knitting needles appropriate for the yarn weight
- Tape measure
- Yarn needle
Instructions:
- Cast on: To begin, you will need to cast on the desired number of stitches. This will vary depending on the size of the gloves and the stitch pattern you choose. For a ribbed cuff, it is common to use a multiple of 2 or 4 stitches to create a stretchy fabric.
- Ribbing stitch: Once you have cast on your stitches, you will begin working in the ribbing stitch pattern. This typically involves alternating between knitting and purling stitches to create a textured ribbed effect. The most common ribbing patterns are 1×1 (alternating between one knit stitch and one purl stitch) or 2×2 (alternating between two knit stitches and two purl stitches).
- Repeat: Continue working in the ribbing stitch pattern for the desired length of the cuff. Measure the circumference of your wrist or the recipient’s wrist to ensure a snug fit. It is recommended to knit the cuff slightly smaller than the desired wrist size, as the ribbing will stretch when worn.
- Bind off: Once you have reached the desired length, it is time to bind off your stitches. This will create a finished edge for the cuff. Use a basic knitting bind off method, such as the knit two together (k2tog) or the slip, slip, knit (ssk) stitch, to bind off your stitches.
- Finishing: To finish the cuff, weave in any loose ends with a yarn needle. Make sure to secure the ends tightly to prevent unraveling. If desired, you can also add any additional embellishments or decorations to the cuff, such as buttons or small knit motifs.
By following these instructions, you can easily knit the ribbed cuff for fingerless gloves using two needles. Once the cuff is complete, you can then move on to knitting the remainder of the gloves, such as the hand portion and the thumb hole. Fingerless gloves are a fun and practical project, and the ribbed cuff adds a stylish touch to the finished product.
Shaping the thumb hole

To shape the thumb hole in your fingerless gloves, follow these instructions:
1. Begin shaping the thumb hole

To start shaping the thumb hole, you will need to divide the stitches for the thumb from the rest of the hand. You can do this by placing a stitch marker on the desired stitch. This stitch will serve as the center stitch for the thumb hole.
2. Decrease stitches
Next, you will need to decrease stitches to create an opening for the thumb. To do this, you can use a simple decrease technique such as knit or purl two stitches together. The number of stitches you decrease will depend on the size of the thumb hole you want to create. Continue decreasing stitches evenly on both sides of the center stitch until you reach the desired width for the thumb hole.
3. Dividing the thumb stitches
Once you have finished decreasing stitches, you will have a separate set of thumb stitches. You can move these stitches onto a separate set of double-pointed needles or a stitch holder to keep them separate from the rest of the hand stitches.
4. Continuing with the hand stitches
After dividing the thumb stitches, you can continue knitting the remaining hand stitches in the pattern. Make sure to keep track of any changes to the stitch count and pattern due to the thumb hole. You may need to adjust the number of stitches or rows to maintain the desired fit and pattern.
By following these steps, you can shape the thumb hole in your fingerless gloves and create a comfortable and functional garment. Enjoy knitting!
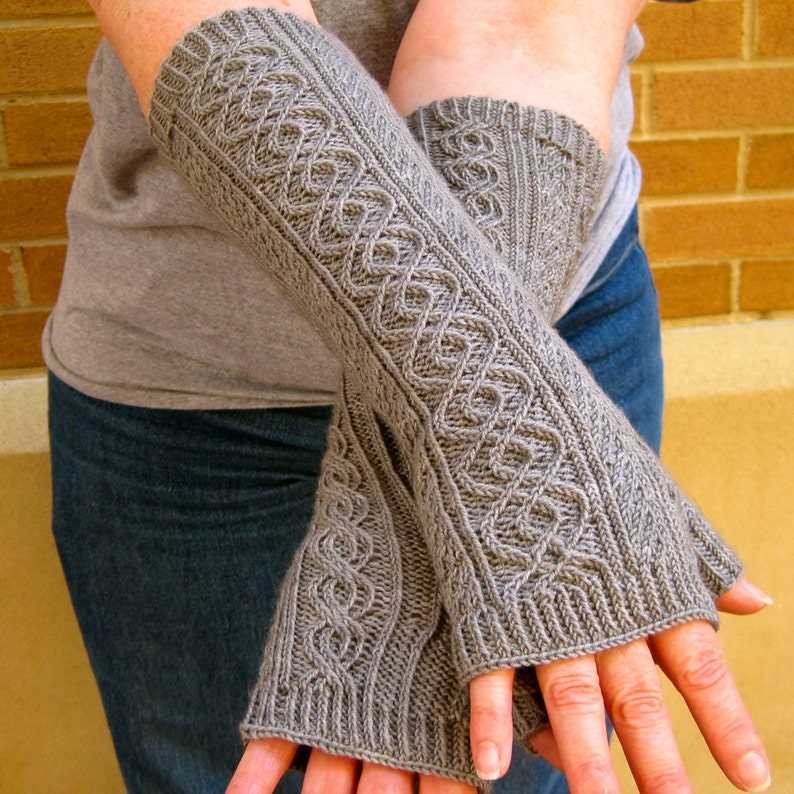
Knitting the Body of the Fingerless Gloves
Once you have casted on the required number of stitches for your fingerless gloves, you can start knitting the body of the gloves. This is the main section of the gloves that will cover your hand and wrist.
To knit the body of the fingerless gloves, you will continue working in the stitch pattern that you have chosen. Whether it’s a basic ribbing pattern or a more complex lace pattern, make sure to follow the instructions carefully to achieve the desired look.
If you are using a ribbing pattern: Alternate between knitting and purling stitches according to the pattern. This will create a stretchy and snug fabric that will fit comfortably on your hand.
If you are using a lace pattern: Follow the chart or written instructions for the lace pattern. You may need to use both knit and purl stitches, as well as yarn overs and decreases, to create the desired lace design. Pay close attention to the pattern repeats and any special stitches or techniques that may be required.
As you knit the body of the fingerless gloves, make sure to periodically try it on to check the fit. This will ensure that the gloves are the right size and that they will comfortably cover your hand and wrist. If necessary, you can make adjustments by adding or removing rows or stitches.
Continue knitting until the body of the fingerless gloves reaches the desired length. Remember to keep track of your rows if necessary, especially if you are using a pattern with a specific stitch count or repeat. Once the body is complete, you can move on to knitting the thumb opening and finishing the gloves.
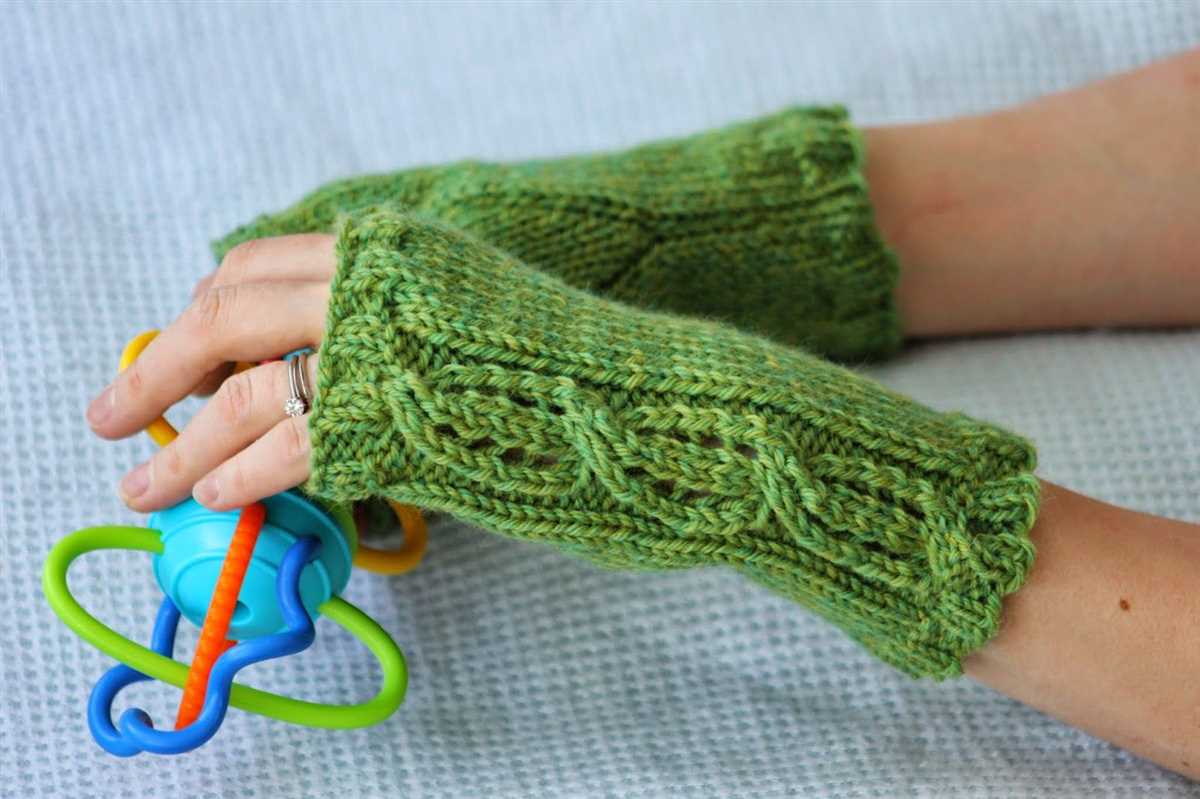
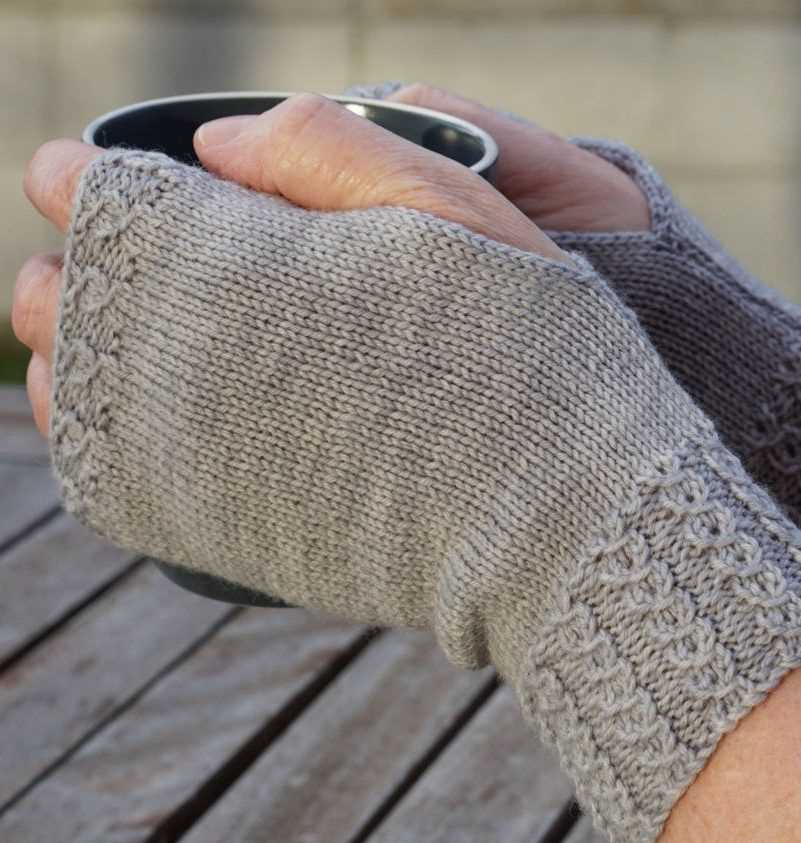
Creating the top ribbed edging for fingerless gloves
When knitting fingerless gloves, one important aspect is creating a top ribbed edging that not only adds a decorative touch but also helps keep the gloves snugly in place on the wearer’s wrists. This ribbed edging can be achieved using a simple knitting pattern that is worked with two needles.
To start, cast on the desired number of stitches using a stretchy cast-on method such as the long-tail cast-on. This will ensure that the ribbed edging has enough elasticity to comfortably fit around the wearer’s wrists. For example, a common number of stitches to cast on is around 40.
Once the stitches are cast on, join them in the round by carefully transferring the last stitch cast on to the left needle and knitting it together with the first stitch. This creates a seamless and continuous loop of stitches.
Using a pair of straight knitting needles, begin working the ribbed edging in a pattern of knit and purl stitches. Alternating between these two stitches creates the ribbed effect. For example, you can start with a row of knit stitches followed by a row of purl stitches and continue this pattern until the desired length of the ribbed edging is reached.
As you work the ribbed edging, it’s important to keep the tension consistent to ensure a neat and even result. Make sure to avoid knitting too tightly as this can cause the edging to become too tight and uncomfortable. Similarly, knitting too loosely can result in a loose and floppy edging that does not hold its shape well.
Once the ribbed edging is complete, you can continue knitting the fingerless gloves using your chosen stitch pattern and shaping techniques. The ribbed edging will provide a polished finish to your gloves and help them stay in place while being worn.
Finishing off fingerless gloves with bind off
Once you have finished knitting your fingerless gloves using the two-needle knitting pattern, the final step is to bind off the stitches to create a clean edge and secure the glove. The bind off method you choose can depend on personal preference and the desired finish of your gloves. Here are a few options to consider:
Regular bind off:
This is the most basic bind off method and creates a simple edge. To do a regular bind off, knit the first two stitches, then lift the first stitch over the second stitch and off the needle. Knit the next stitch and repeat the process of lifting the previous stitch over until you are left with one stitch. Cut the yarn, leaving a long tail, and thread it through the final stitch to secure.
Elastic bind off:
If you want a stretchy edge for your fingerless gloves, the elastic bind off is a great choice. To do this, instead of knitting the stitches as you bind off, knit them through the back loop. This gives the edge more stretch and flexibility, perfect for a snug fit on the wrist or hand.
I-cord bind off:
If you prefer a decorative edge for your fingerless gloves, consider using an I-cord bind off. This method creates a small, braided cord along the edge of the glove. To do this, cast on three extra stitches using a separate needle. Knit the first two stitches, then knit the next two stitches together. Repeat this process until you reach the end of the row, then cut the yarn and thread it through the final stitch to secure.
Whichever bind off method you choose, make sure to weave in any loose ends of yarn and block your fingerless gloves to shape them properly. With these finishing touches, your fingerless gloves will be ready to keep your hands warm and stylish throughout the colder months!
Conclusion
Knitting fingerless gloves with two needles can be a rewarding project for beginners and experienced knitters alike. With the help of this fingerless gloves knitting pattern, you can create a stylish and functional accessory for yourself or as a gift for someone special.
In this article, we have covered the basics of knitting fingerless gloves, including casting on, knitting in the round, creating a thumb opening, and binding off. We have also discussed how to customize the pattern to fit your hand size and desired length.
Blocking and finishing is an important step in the knitting process that helps to shape and enhance the appearance of your gloves. By wetting the knitted fabric, gently stretching and pinning it into place, you can achieve a more polished and professional finished product.
To summarize, knitting fingerless gloves with two needles allows you to create a cozy and practical accessory that can be worn throughout the colder months. Whether you choose to knit them for yourself or as a gift, they are sure to be a stylish and functional addition to any wardrobe.
Q&A:
What are fingerless gloves?
Fingerless gloves, also known as fingerless mitts, are gloves or mittens that do not cover the fingertips. They leave the fingers exposed, allowing for dexterity and the ability to use touchscreen devices.
What is a knitting pattern?
A knitting pattern is a set of instructions that guide the knitter on how to create a specific item using knitting techniques. It usually includes a list of materials, knitting stitches, and step-by-step instructions for creating the item.
How to knit fingerless gloves with two needles?
To knit fingerless gloves with two needles, you will need to follow a knitting pattern specifically designed for that purpose. There are various fingerless gloves knitting patterns available that can be worked with two needles. These patterns typically involve knitting the gloves in separate sections, such as the hand and thumb, and then seaming them together.
Where can I find fingerless gloves knitting patterns for two needles?
You can find fingerless gloves knitting patterns for two needles in various sources. Online knitting communities and websites such as Ravelry, Etsy, or LoveKnitting offer a wide range of fingerless gloves patterns specifically designed for knitting with two needles. Knitting books and magazines also often include patterns for fingerless gloves.
What are some popular fingerless gloves knitting patterns for two needles?
Some popular fingerless gloves knitting patterns for two needles include the “Fetching” pattern by Cheryl Niamath, the “Susie Rogers’ Reading Mitts” pattern by Susie Rogers, and the “Worsted Fingerless Gloves” pattern by Marguerite L. The patterns vary in complexity and design, so you can choose one that suits your knitting skill level and preferred style.
What is a fingerless gloves knitting pattern?
A fingerless gloves knitting pattern is a set of instructions that guides you through the process of knitting fingerless gloves using two needles.
Why would someone want to knit fingerless gloves?
Knitting fingerless gloves can be a practical and fashionable choice. They keep your hands warm while allowing your fingers to be free for tasks that require dexterity, such as typing on a keyboard or using a smartphone.