
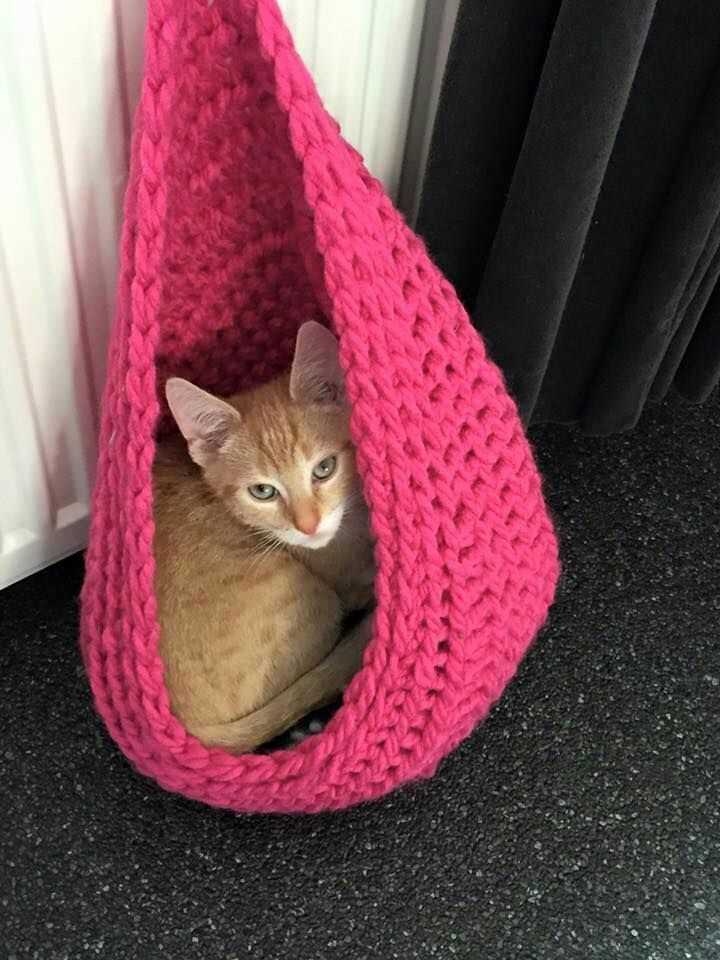
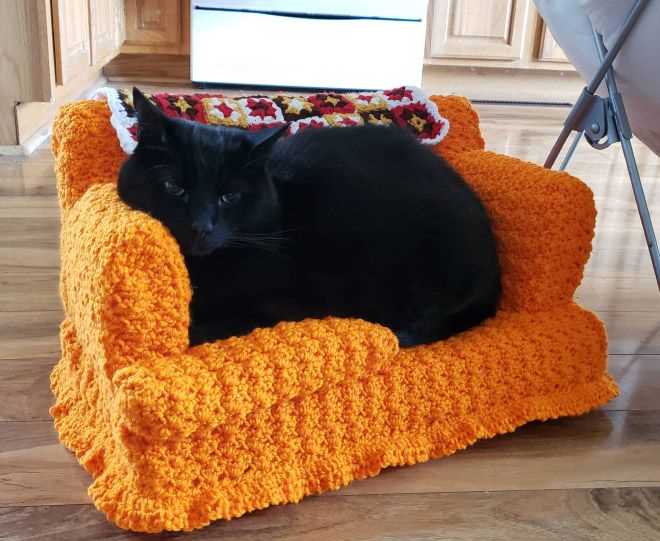
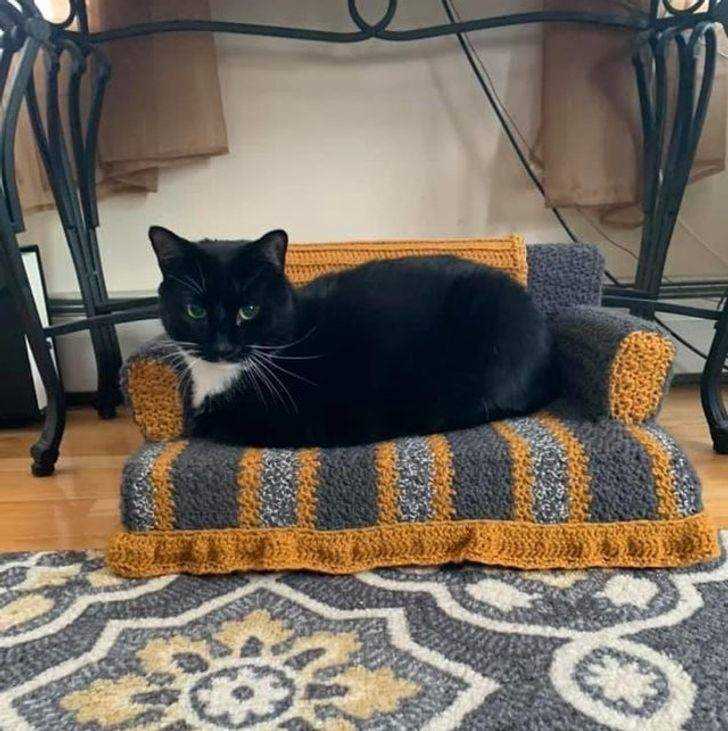
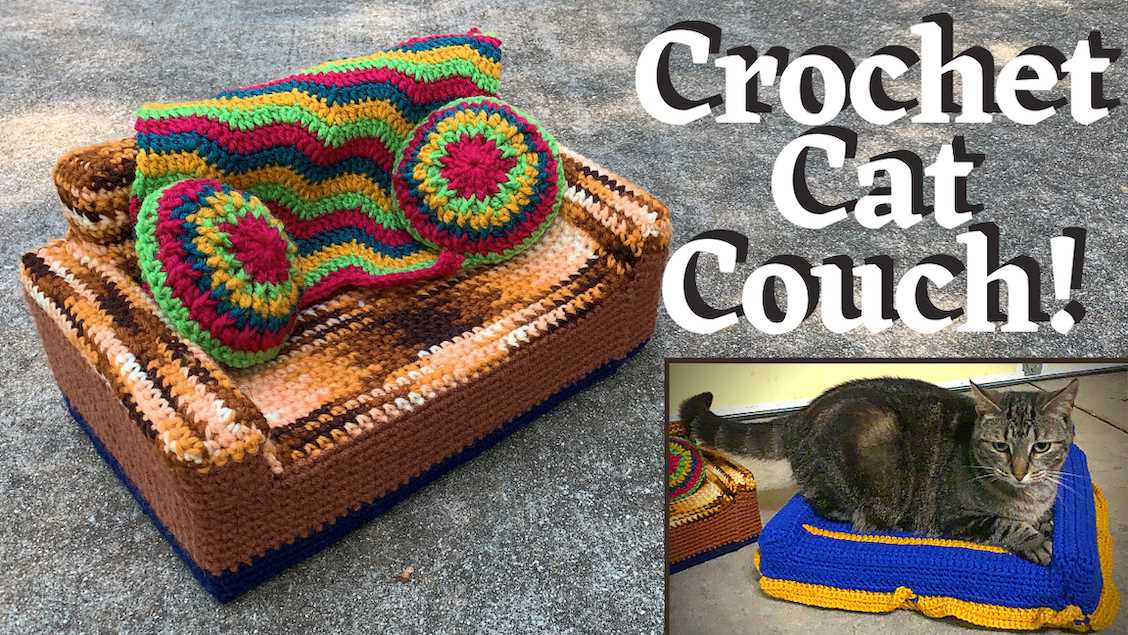
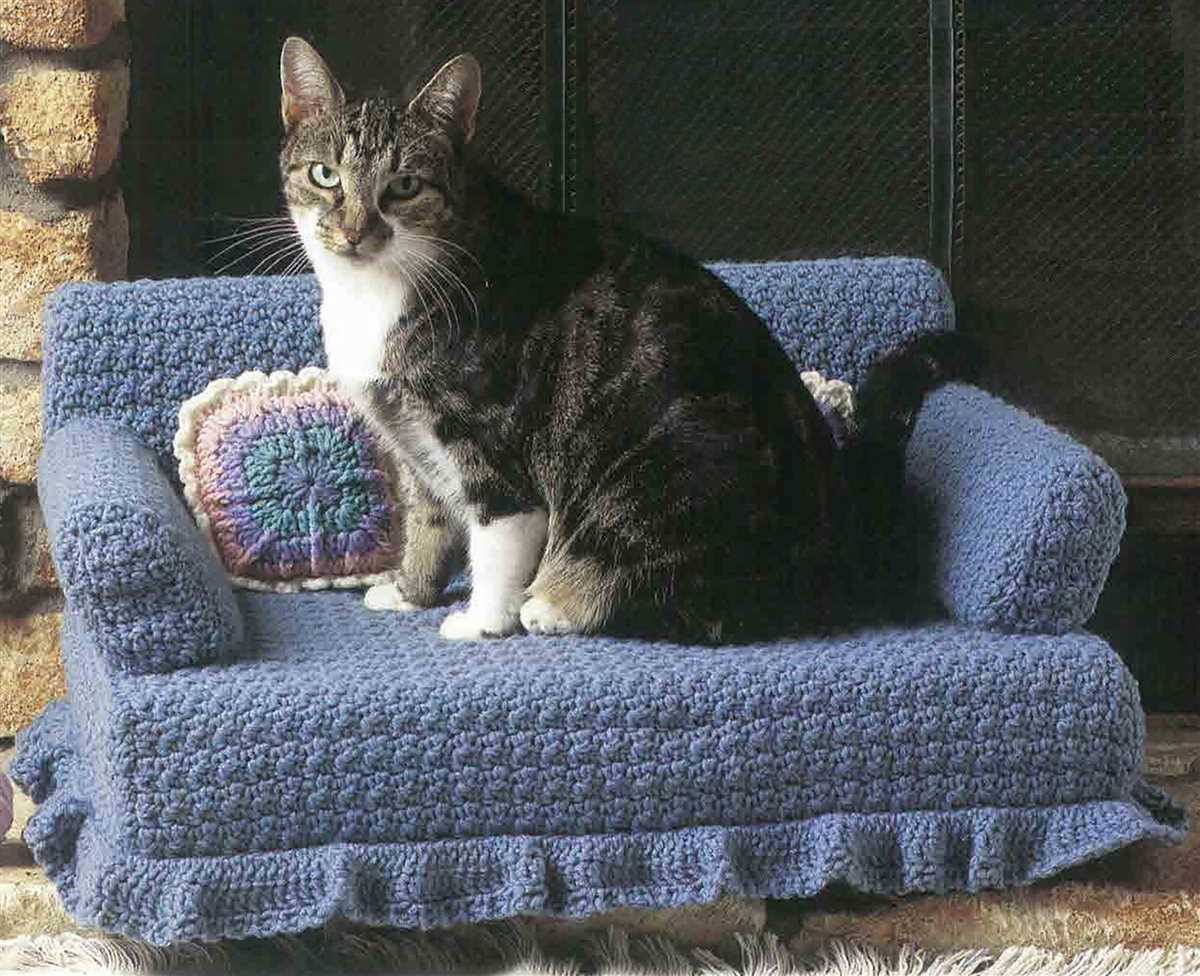
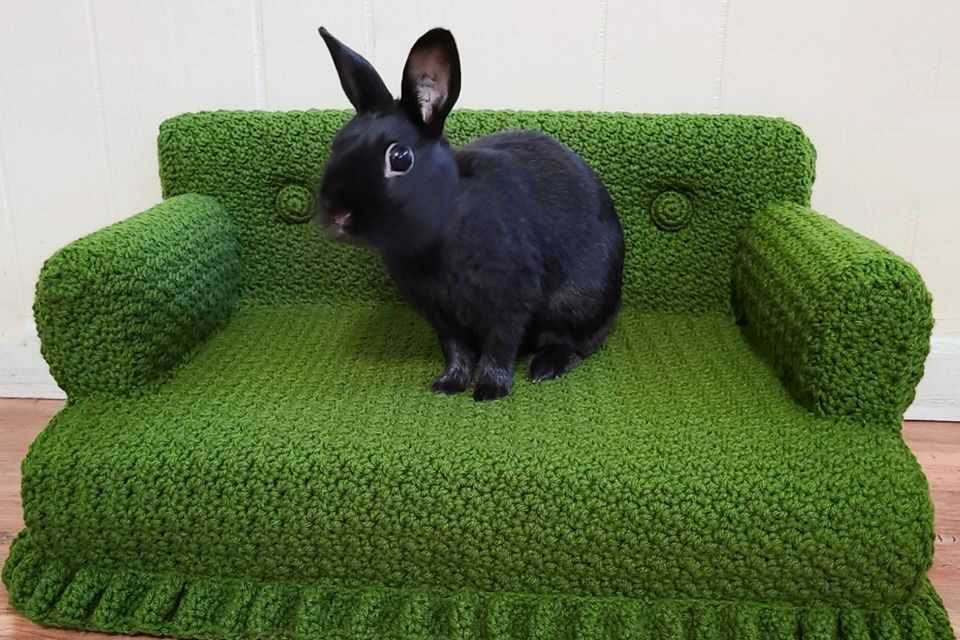
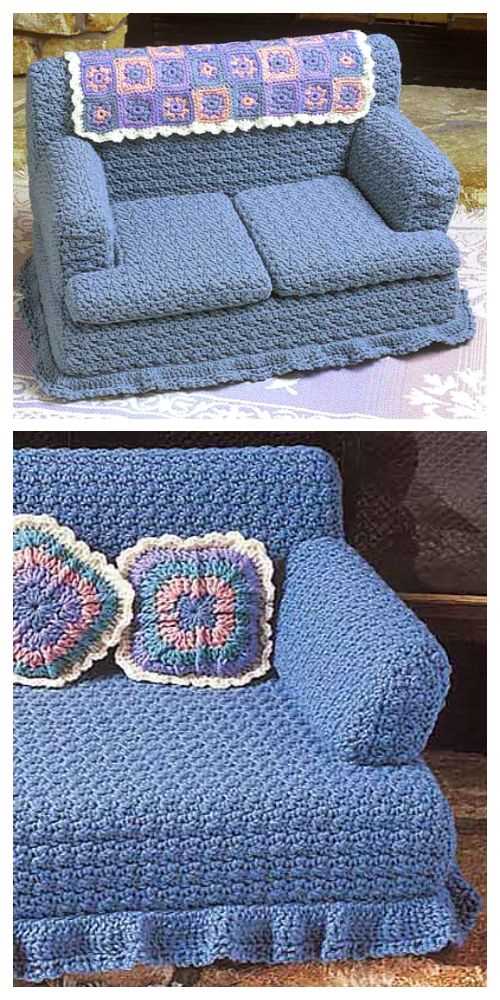
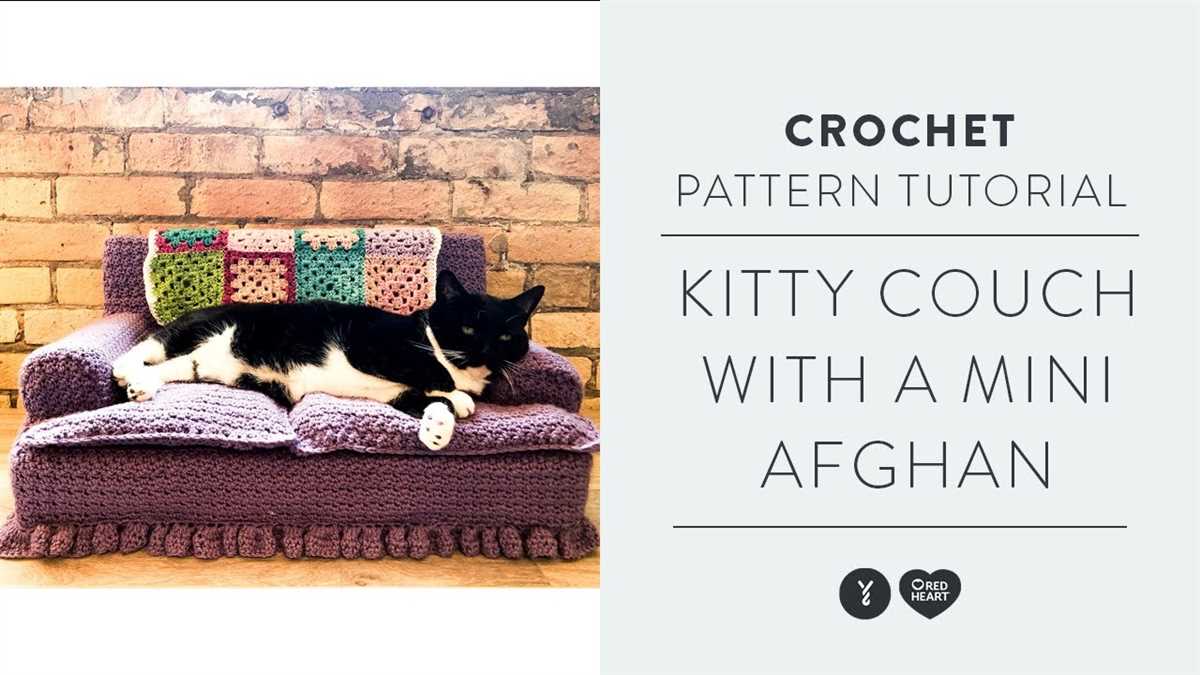
If you’re a cat lover and a knitting enthusiast, this is the perfect project for you! The kitty couch knitting pattern is a fun and creative way to create a cozy and stylish place for your furry friend to relax. Whether you have a small kitten or a larger cat, this pattern can be easily adjusted to accommodate their size. Not only will your cat love their new cozy spot, but you’ll also have the satisfaction of knowing you made it with your own two hands.
Making a kitty couch is a great opportunity to practice your knitting skills and create something unique and personalized for your pet. The pattern involves basic knitting techniques such as casting on, knitting and purling, as well as some more advanced techniques like increasing and decreasing stitches. It’s a great project for knitters of all skill levels, from beginners looking to learn new techniques to experienced knitters looking for a fun and quick project.
The kitty couch knitting pattern is also a fantastic way to use up any leftover yarn you may have lying around. You can get creative with color combinations and patterns, making each kitty couch truly one-of-a-kind. Not only will you have a practical and stylish accessory for your home, but you’ll also be reducing waste by using up any unused yarn.
So, grab your knitting needles, some yarn, and get ready to create a cozy spot for your feline friend. Your cat will thank you for it!
Kitty Couch Knitting Pattern
Knitting is a wonderful hobby that allows you to create beautiful and useful items, and what better way to show your love for your feline friend than by knitting them a cozy couch? With this kitty couch knitting pattern, you can create a comfortable and stylish place for your cat to relax.
To start, you will need a set of knitting needles and some soft and durable yarn. You can choose any color you like, but it’s always fun to match your kitty’s personality with the color of the couch. For this pattern, we recommend using a worsted weight yarn for a nice balance of comfort and durability.
Materials:
- Size 8 knitting needles
- Worsted weight yarn (about 500 yards)
- Tapestry needle
Once you have gathered your materials, you can begin knitting the couch. Start by casting on 60 stitches using the long-tail cast-on method. This will create the base of the couch. Knit in garter stitch (knit every row) for about 10 inches, or until the base reaches your desired length.
Next, you will need to create the sides of the couch. Knit 10 stitches, then purl 20 stitches, knit 20 stitches, and purl 10 stitches. Continue this pattern for the next 10 rows to create the sides. After completing the sides, continue knitting in garter stitch for another 10 inches, or until the couch is tall enough for your cat to comfortably rest on.
Finally, you can bind off all stitches and weave in any loose ends. Use a tapestry needle to sew the sides of the couch together, leaving an opening for your cat to enter. You can also add a cushion or blanket inside for extra comfort. Your kitty couch is now complete and ready for your furry friend to enjoy!
Remember to always supervise your cat while they are using the couch and make sure it is placed in a safe and comfortable location. Happy knitting!
Materials Needed
In order to complete the kitty couch knitting pattern, you will need several materials. Here is a list of the items you will need:
- Knitting needles: You will need a pair of knitting needles in the size specified in the pattern. Make sure they are the correct size to achieve the proper gauge for your project.
- Yarn: Choose a soft and cozy yarn in the color of your choice. The pattern will specify the type and amount of yarn needed. It’s always a good idea to purchase an extra ball of yarn, just in case.
- Tapestry needle: A tapestry needle with a large eye will be needed for sewing up seams and weaving in ends.
- Stitch markers: These are optional but can be helpful in marking the beginning of a round or specific stitches.
- Scissors: A pair of sharp scissors will be necessary for cutting yarn.
- Measuring tape: A measuring tape or ruler will be needed for checking your gauge and measuring the length of your project.
These are the basic materials you will need to get started on your kitty couch knitting pattern. Once you have gathered all of these items, you will be ready to begin your knitting adventure!
Choosing the Right Yarn
Selecting the right yarn for your kitty couch knitting project is essential to ensure the final piece meets your expectations. The type of yarn you choose can affect the comfort, durability, and appearance of the finished product. Here are some factors to consider when choosing the right yarn for your kitty couch:
1. Fiber Content
The fiber content of the yarn will determine characteristics such as softness, warmth, and ease of care. Common yarn fibers include wool, acrylic, cotton, and blends. Wool provides excellent insulation and warmth, making it an ideal choice for cooler climates. Acrylic, on the other hand, is often more affordable, machine washable, and hypoallergenic. Cotton is cool, breathable, and suitable for warmer weather. Consider the intended use of the kitty couch and the preferences of your feline friend when selecting the yarn’s fiber content.
2. Weight and Thickness
The weight and thickness of the yarn will influence the overall look and feel of the kitty couch. Yarns are categorized by weight, such as lace, fingering, sport, DK, worsted, and bulky. Thinner yarns will create a more delicate and lightweight couch, while thicker yarns will result in a chunkier and more substantial piece. Take into consideration the desired texture and appearance of the couch when selecting the appropriate weight and thickness of the yarn.
3. Color and Pattern
The color and pattern of the yarn will help create a visually appealing kitty couch. Consider the existing color scheme of your home and the personality of your feline friend when choosing the yarn’s color. Solid colors can provide a sleek and modern look, while variegated or self-striping yarns can add visual interest and whimsy to the couch. Additionally, consider how the chosen color or pattern will hide or show any fur or stains that may accumulate over time.
In conclusion, selecting the right yarn for your kitty couch knitting project involves considering the fiber content, weight and thickness, as well as the color and pattern. By taking these factors into account, you can ensure that your kitty couch is not only visually appealing but also comfortable and durable for your furry companion.
Selecting the Ideal Needles
When it comes to knitting, selecting the right needles is essential for a successful and enjoyable knitting experience. The type and size of needles you choose can greatly affect the outcome of your project, so it’s important to consider a few factors before making a decision.
1. Needle material: Knitting needles come in a variety of materials, including wood, bamboo, metal, and plastic. Each material has its own unique qualities and advantages. For example, wooden needles are known for their warmth and smoothness, while metal needles are durable and offer fast knitting speed. Consider your personal preferences and the type of yarn you’ll be using to determine the best material for your project.
2. Needle size: The size of your needles will depend on the thickness of your yarn and the gauge you want to achieve. Needles are typically labeled with sizes ranging from 0 to 15, with smaller numbers indicating thinner needles. It’s important to match the needle size to the recommended gauge in your knitting pattern to ensure that your finished project turns out the right size. Be sure to check your gauge before starting your project and adjust your needle size if needed.
3. Needle length: Needle length is another factor to consider when choosing knitting needles. The length of your needles will depend on the size of your project and your personal knitting style. Longer needles are great for larger projects, as they can hold more stitches and provide better control. Shorter needles, on the other hand, are more suitable for smaller projects and can be easier to handle. Consider the size and type of project you’ll be working on to determine the ideal needle length.
4. Needle tips: Needle tips come in different shapes and styles, including sharp, rounded, and pointed. The choice of needle tips depends on your personal knitting style and the type of stitches you’ll be working with. Sharp and pointed tips are ideal for intricate stitch patterns and precision work, while rounded tips are better for basic knitting and larger stitches. Consider your skill level and the complexity of your project to determine the most suitable needle tips.
By considering these factors, you can select the ideal needles for your knitting project and enjoy a smoother and more enjoyable knitting experience. Experiment with different materials, sizes, lengths, and tips to find the needles that work best for you.
Understanding Knitting Abbreviations
In the world of knitting, there are numerous abbreviations that can often seem confusing to beginners. However, once you understand and become familiar with these abbreviations, knitting patterns become much easier to read and follow. Here are some common knitting abbreviations that you should know:
- CO: This stands for “cast on,” which is the process of creating the first row of stitches on your knitting needles.
- K: This stands for “knit,” which is the basic stitch in knitting where you insert the right-hand needle into the front of the stitch on the left-hand needle, then wrap the yarn around the right-hand needle and pull the loop through.
- P: This stands for “purl,” which is another basic stitch in knitting where you insert the right-hand needle into the front of the stitch on the left-hand needle, then wrap the yarn around the right-hand needle in the opposite direction as for knitting, and pull the loop through.
- K2tog: This is an abbreviation for “knit two together,” which is a decrease stitch where you knit two stitches together as if they were one.
- P2tog: This is an abbreviation for “purl two together,” which is a decrease stitch where you purl two stitches together.
- YO: This stands for “yarn over,” which is an increase stitch where you wrap the yarn over the right-hand needle from front to back.
- RS: This stands for “right side,” which indicates which side of the fabric is intended to be the visible or front side.
- WS: This stands for “wrong side,” which indicates which side of the fabric is intended to be the hidden or back side.
These are just a few examples of the many knitting abbreviations that you may encounter in knitting patterns. It’s important to consult a knitting abbreviation reference guide or the specific pattern instructions to understand any unfamiliar abbreviations. Learning these abbreviations will greatly assist you in successfully completing knitting projects and will help you become more confident and skilled in your knitting endeavors.
Getting Started
Before you begin knitting the kitty couch, there are a few things you’ll need to gather. First and foremost, you’ll need the knitting pattern for the kitty couch. You can find various patterns available online or in knitting books. Make sure to choose a pattern that suits your skill level and preferences.
In addition to the knitting pattern, you’ll need the proper materials and tools. This includes yarn in the colors of your choice, knitting needles in the appropriate size recommended by the pattern, and a pair of scissors. It’s also helpful to have a tape measure and a yarn needle for finishing touches.
- Knitting pattern for the kitty couch
- Yarn in desired colors
- Knitting needles
- Scissors
- Tape measure
- Yarn needle
Once you have gathered all the necessary materials, it’s time to familiarize yourself with the pattern. Read through the instructions carefully, making sure you understand each step. It can be helpful to have a pencil or highlighter handy to mark any important sections or areas that you may need to refer back to.
If you’re new to knitting or if the pattern seems challenging, you might want to start with a smaller project to practice the techniques before diving into the kitty couch. This will give you an opportunity to get comfortable with the knitting process and build your skills.
Casting On Stitches
Before you can begin knitting your kitty couch, you need to cast on your stitches. This is the process of creating the foundation row of stitches that your project will be built upon. There are several methods for casting on, but we will cover the basic long-tail cast on method.
The long-tail cast on method is commonly used and creates a sturdy and flexible edge. To start, you will need a long tail of yarn, approximately four times the width of your knitting project. This extra length is needed to create the loops that will become your stitches.
Steps to cast on stitches using the long-tail method:
- Make a slipknot at the end of your yarn, leaving a tail of about 6 inches.
- Hold the slipknot in your right hand and the working yarn (the long tail) in your left hand, with your thumb and forefinger creating a “V” shape.
- Insert the knitting needle into the slipknot from front to back, making sure the needle is under the working yarn.
- Squeeze the “V” shape with your thumb and forefinger, and bring the needle under the “V” and over the top of the working yarn.
- Pull the working yarn through the loop on the needle, creating a new loop.
- Repeat steps 3-5 until you have cast on the desired number of stitches.
Once you have cast on all your stitches, you are ready to start knitting your kitty couch! Remember to keep a consistent tension with your stitches to ensure an even and neat finish. Happy knitting!
Knitting the Base
When it comes to knitting the base of your kitty couch, it’s important to choose the right yarn and needle size to achieve the desired texture and size. The yarn should be soft and durable, as it will be the foundation of the couch where your cat will spend a lot of time. Consider using a worsted weight yarn made of natural fibers such as cotton or wool for a cozy and comfortable base.
To start knitting the base, cast on the required number of stitches using the long-tail cast-on method. It’s helpful to use stitch markers to mark the corners of the couch to ensure straight edges and consistent sizing. Knit the first few rows in garter stitch or seed stitch to create a sturdy and textured base.
Tip: Pay close attention to your tension while knitting the base as it should be consistent throughout to avoid any unevenness in the finished product. It’s also a good idea to periodically measure the width and length of the base to ensure you’re on track with the pattern.
As you continue knitting, you can incorporate different stitch patterns or color changes to add visual interest to the base. You can create stripes, chevron patterns, or even try your hand at simple cable stitches. Just make sure to keep track of your stitches and rows to maintain symmetry and proper shaping.
Note: If you’re new to knitting or need a refresher on different stitch patterns, there are plenty of online resources and tutorials available to help you along the way.
Once you’ve completed knitting the base according to the pattern instructions, bind off the stitches and weave in any loose ends. Give your knitted base a gentle steam block or press to even out the stitches and ensure a polished finish. Now you’re ready to move on to the next step in your kitty couch knitting journey!
Creating the Side Panels
To start creating the side panels for your kitty couch, you will need to gather the necessary materials. These include the specific color and type of yarn you have chosen for your project. Additionally, you will need knitting needles in the appropriate size for your yarn, a tape measure, and a pair of scissors.
Once you have gathered your materials, you can begin knitting the side panels. To do this, you will cast on the required number of stitches, as indicated in the knitting pattern. Make sure to check the gauge of your knitting to ensure that the panels will be the correct size.
Step 1: Using your size-appropriate knitting needles and the desired color of yarn, cast on the required number of stitches. This will create the foundation for your side panel.
Step 2: Begin knitting the side panel by following the pattern instructions. This may include various knitting stitches such as knit, purl, and possibly some pattern repeats. Make sure to carefully read and understand the instructions before proceeding.
Step 3: Continue knitting until you have reached the specified length for the side panel. You can measure this using a tape measure to ensure accuracy. Adjust your tension as needed to maintain consistent sizing throughout the knitting process.
Step 4: Once you have completed the required length, you can finish off your knitting by binding off the stitches. This will secure the edge of the side panel and prevent any unraveling.
Repeat these steps to create the second side panel of your kitty couch. Once both side panels are complete, you can move on to the next step in the pattern, whether it is assembling the couch or adding additional details.
Assembling the Couch
Once you have finished knitting all the pieces for the kitty couch, it’s time to assemble them together. Follow these step-by-step instructions to create a cozy spot for your feline friend.
1. Sewing the Cushion
Begin by sewing the two cushion panels together. Place the panels with the right sides facing each other and use a whip stitch to sew the edges together, leaving a small opening for stuffing. Once sewn, turn the cushion right side out and stuff it firmly with polyester fiberfill. Close the opening with a whip stitch.
2. Attaching the Back Panel
Next, attach the back panel to the cushion. Line up the edges of the back panel with the top edge of the cushion and sew them together using a whip stitch. Be sure to sew through both layers of fabric to ensure a secure attachment.
3. Adding the Side Panels
Now it’s time to add the side panels. Start by attaching the first side panel to one of the cushion’s long edges. Line up the edges and sew them together using a whip stitch. Repeat this process with the second side panel on the opposite long edge of the cushion.
4. Securing the Armrests
Finally, secure the armrests to the sides of the couch. Line up the edges of the armrest with the top corners of the cushion and side panels. Sew them in place using a whip stitch, making sure to sew through all layers of fabric for extra durability.
Once all the pieces have been assembled, your kitty couch is complete! Place it in a comfortable corner of your home and watch as your furry friend snuggles up for a cozy nap.
Adding Padding and Cushions
When making a kitty couch, it’s important to ensure that it is comfortable for your furry friend. Adding padding and cushions can greatly enhance the coziness of the couch and make it the perfect spot for your kitty to relax.
To start, you will need some foam or batting to create the padding. Measure the dimensions of the couch and cut the foam or batting to fit. You can use a sewing machine or hand-sew the pieces together to create a custom-sized cushion that fits snugly into the couch.
Next, choose a fabric that matches your kitty couch and cut it to size to cover the cushion. You can use a sewing machine or hand-sew the fabric together, leaving one side open to insert the cushion. Once the fabric is sewn together, turn it inside out and insert the cushion. Use a needle and thread to hand-stitch the remaining side closed.
To add extra comfort and flair to the cushions, you can also consider adding decorative elements such as buttons or embroidery. This will not only make the cushions look more appealing, but it will also provide some extra texture and padding for your kitty.
Finally, place the cushions onto the kitty couch and arrange them in a way that is comfortable for your furry friend. You can also add additional blankets or pillows to make the couch even more inviting.
With the added padding and cushions, your kitty couch will become a cozy and luxurious spot for your feline companion to lounge and nap. Your kitty will surely appreciate the comfort and you will love seeing them enjoy their new favorite spot!
Finishing Touches
Once you have completed knitting your kitty couch, it’s time to add some finishing touches to make it extra cozy and cute for your furry friend. Here are a few ideas to consider:
- Padding: Adding a layer of padding to the couch will make it more comfortable for your cat to lounge on. You can use foam or quilt batting to create a soft cushioning for the couch.
- Buttons or Embellishments: Sewing on decorative buttons or other embellishments can add a touch of personality to the couch. You can choose buttons in different shapes and colors to match your cat’s style.
- Pillow: Consider making a small pillow or cushion to go with the couch. This will give your cat an additional soft spot to rest their head.
If you want to take your kitty couch to the next level, you could even personalize it with your cat’s name by embroidering it onto the fabric. This will make the couch feel extra special and unique to your furry friend.
Care and Maintenance
Proper care and maintenance of your kitty couch is essential to ensure its longevity and keep it looking its best. Follow these tips to keep your kitty couch in top condition:
Cleaning
To clean your kitty couch, remove any excess fur or debris with a lint roller or vacuum cleaner. For spot cleaning, use a mild detergent or upholstery cleaner and a soft cloth or sponge. Blot the stain gently and avoid rubbing, as this can damage the fabric. Allow the couch to air dry completely before using it again.
It’s important to check the care instructions provided with the yarn you used to knit the kitty couch. Some yarns may be machine washable, while others may require hand washing or dry cleaning. Follow these instructions to ensure the best results.
Preventing Damage
To prevent damage to your kitty couch, discourage your cat from scratching or biting it. Provide your cat with appropriate scratching surfaces, such as a scratching post or mat, and regularly trim their nails to minimize the risk of snagging or tearing the fabric.
It’s also a good idea to rotate the kitty couch occasionally to distribute wear and tear evenly. This will help extend its lifespan and prevent any one area from becoming excessively worn.
Storage
If you need to store your kitty couch when not in use, make sure it is clean and completely dry before packing it away. Avoid storing it in a damp or humid environment, as this can encourage mold and mildew growth. Store the couch in a cool, dry place, preferably in a breathable storage bag or container.
Remember to check on your kitty couch periodically while in storage to ensure it is not being damaged by pests or moisture. If you notice any signs of damage, take appropriate measures to address the issue before using the couch again.
Conclusion
With proper care and maintenance, your kitty couch can provide comfort and enjoyment for both you and your furry friend for years to come. Follow these guidelines to keep your kitty couch clean, prevent damage, and ensure its longevity. By taking good care of your kitty couch, you can continue to enjoy cozy knitting sessions with your cat for many knitting projects to come.