
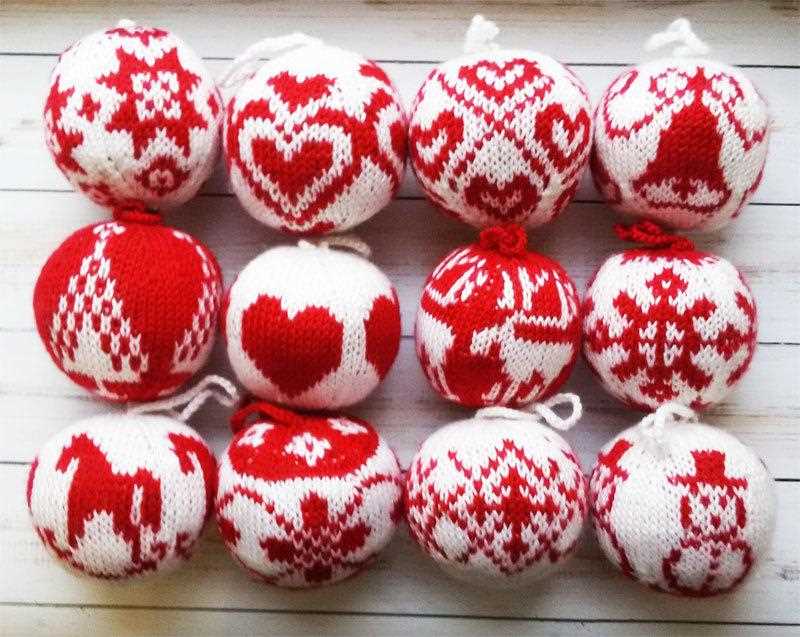
Christmas is just around the corner and what better way to decorate your home than with some festive knitted Christmas balls? Knitting is a great hobby that allows you to create beautiful, personalized items. Knitting Christmas balls is a fun and creative project that will add a cozy touch to your holiday decorations.
Whether you’re a beginner or an experienced knitter, this free pattern will guide you through the process of creating your very own knitted Christmas balls. You can choose from a variety of colors and knitting techniques to make each ball unique. The pattern includes step-by-step instructions and helpful tips to ensure your finished product is perfect.
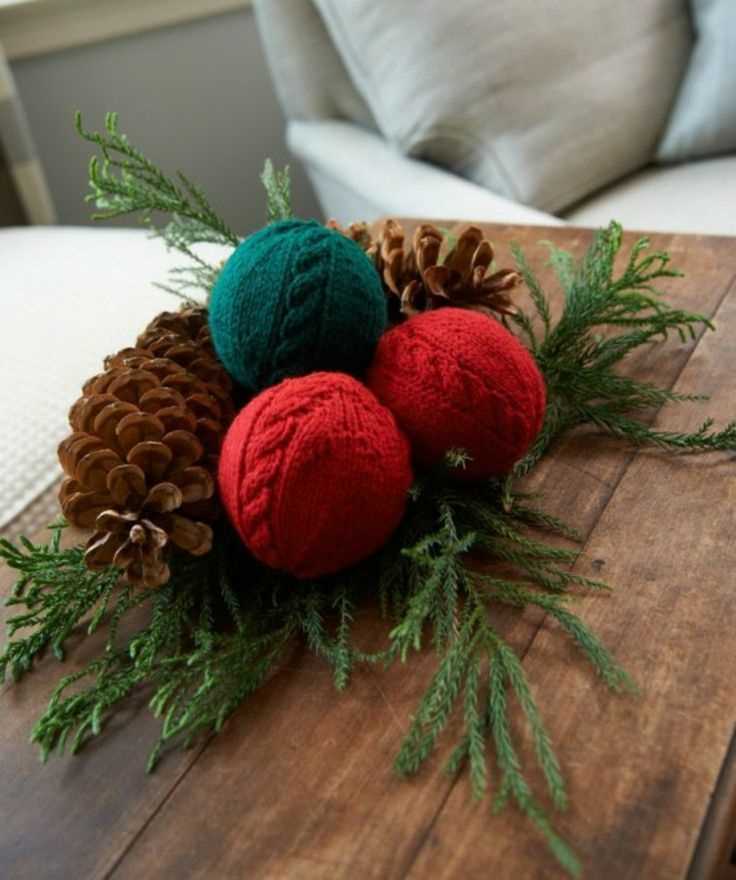
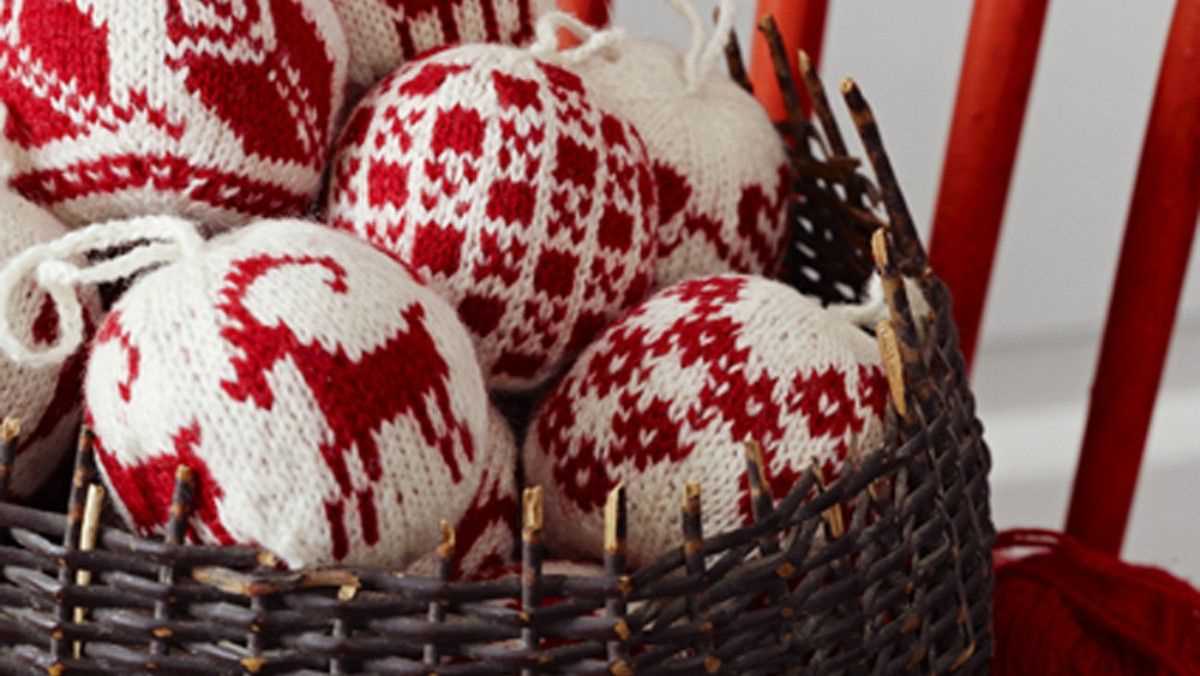
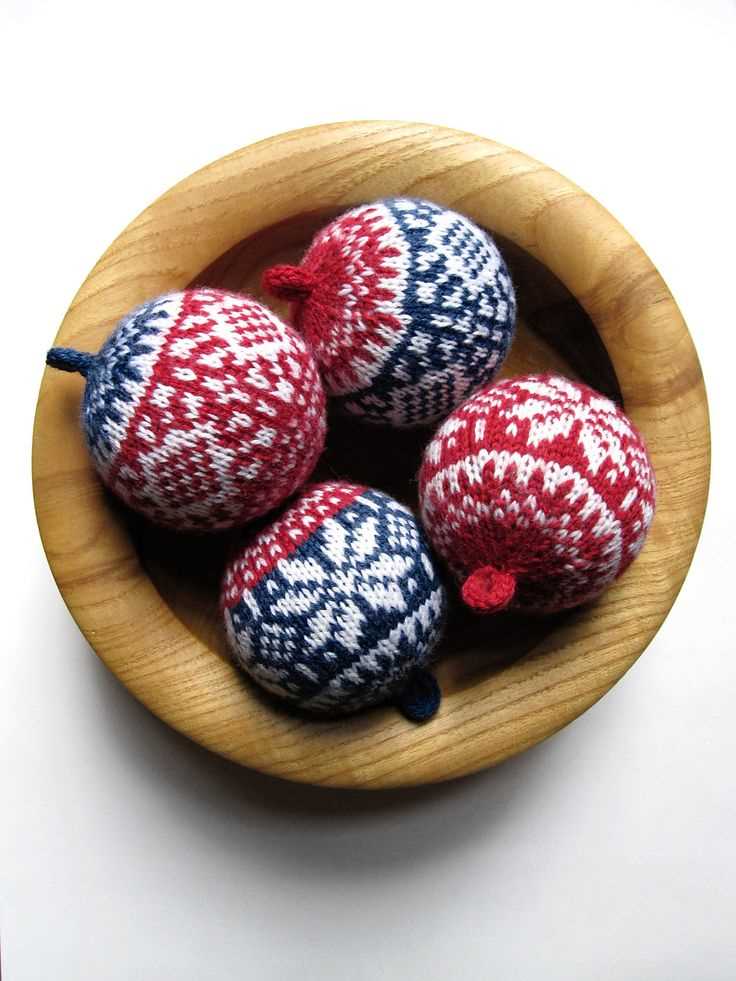
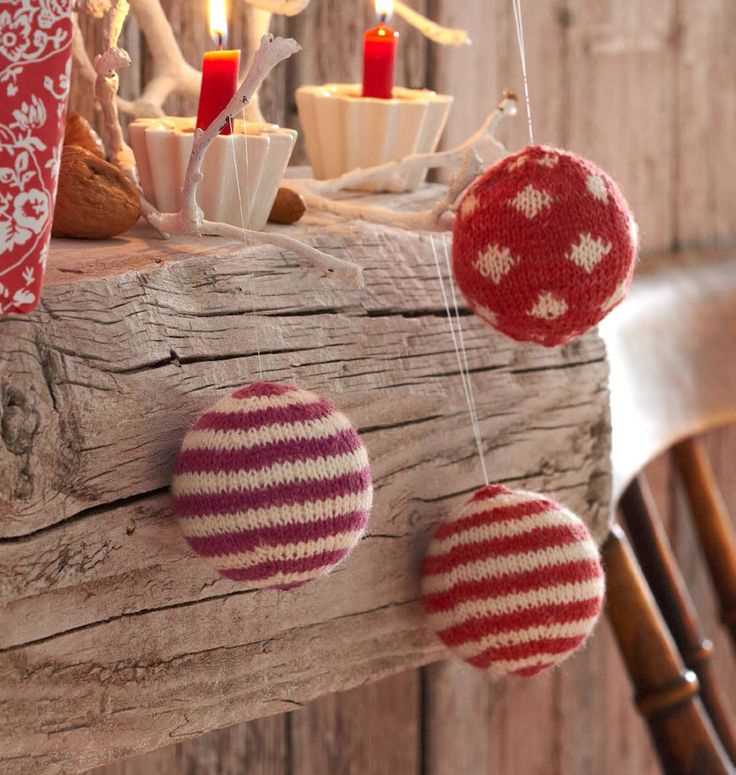
Knitted Christmas balls make wonderful ornaments for your Christmas tree, or you can display them in a bowl or basket as part of your holiday decor. They also make great gifts for friends and family. Handmade gifts are always appreciated and cherished, and the recipient will be delighted to receive a one-of-a-kind knitted Christmas ball.
So gather your knitting needles, choose some festive yarn, and get started on this fun and festive project. With this free pattern and a little bit of time and creativity, you’ll have beautiful knitted Christmas balls to enjoy for many holiday seasons to come.
Knitted Christmas Balls Free Pattern
If you’re looking for a fun and festive holiday project, then look no further than knitting your own Christmas balls! With a free pattern and a few basic knitting skills, you can create beautiful ornaments to decorate your tree or give as gifts.
Materials:
- Size 6 knitting needles
- Worsted weight yarn in various colors
- Stuffing or batting
- Tapestry needle
- Scissors
Instructions:
- Cast on 24 stitches.
- Knit 2 rows in stockinette stitch.
- Begin decreases: knit 2 together, knit 2, repeat across row.
- Knit 1 row.
- Repeat steps 3 and 4 until 6 stitches remain.
- Cut yarn, leaving a long tail. Thread tail through tapestry needle and slip stitches onto needle. Pull tight to close.
- Using a different color yarn, create a loop by sewing a small loop at the top of the ball.
- Stuff ball lightly with stuffing or batting.
- Sew the bottom of the ball closed.
- Repeat steps 1-9 to create more Christmas balls in different colors.
With this free pattern, you can create a whole collection of knitted Christmas balls to add a cozy and handmade touch to your holiday decorations. Get creative with your yarn colors and designs to personalize each ornament and make your tree truly unique. Happy knitting and happy holidays!
Why knit your own Christmas balls?
Knitting your own Christmas balls can add a personal and unique touch to your holiday decorations. By creating your own designs and choosing your own colors, you can customize your Christmas balls to match your personal style and home decor. Knitted Christmas balls can also make great gifts, as they are handmade and one-of-a-kind.
Handmade and heartfelt. Knitting your own Christmas balls allows you to put your love and care into each stitch, creating an item that is not only beautiful, but also meaningful. Whether you are knitting for your own home or for loved ones, the time and effort you put into creating these ornaments will be appreciated and cherished.
Cost-effective and eco-friendly. By knitting your own Christmas balls, you can save money compared to buying pre-made ornaments. You can also use leftover yarn or repurpose old materials, making this a great way to upcycle and reduce waste. Knitting your own Christmas balls is not only budget-friendly, but also environmentally friendly.
Relaxing and therapeutic. Knitting can be a calming and meditative activity, allowing you to unwind and destress during the busy holiday season. Creating these small projects can provide a sense of accomplishment and satisfaction, and can be a great way to relax and take a break from the hustle and bustle of the holiday preparations.
Unique and eye-catching. Knitted Christmas balls can add a touch of whimsy and charm to your holiday decorations. With endless possibilities for colors, patterns, and designs, you can create ornaments that are truly one-of-a-kind. These knitted balls are sure to catch the eye of your guests and become a conversation starter.
Fun and festive. Knitting your own Christmas balls can be a fun and enjoyable activity for the whole family. You can involve children in the process, teaching them how to knit or allowing them to choose their own colors and patterns. This can be a great way to spend quality time together and create lasting memories.
Basic materials needed for Knitted Christmas balls

In order to create beautiful knitted Christmas balls, you will need a few basic materials. These materials will ensure that you have everything you need to complete the project and create stunning decorations for the holiday season.
Yarn:
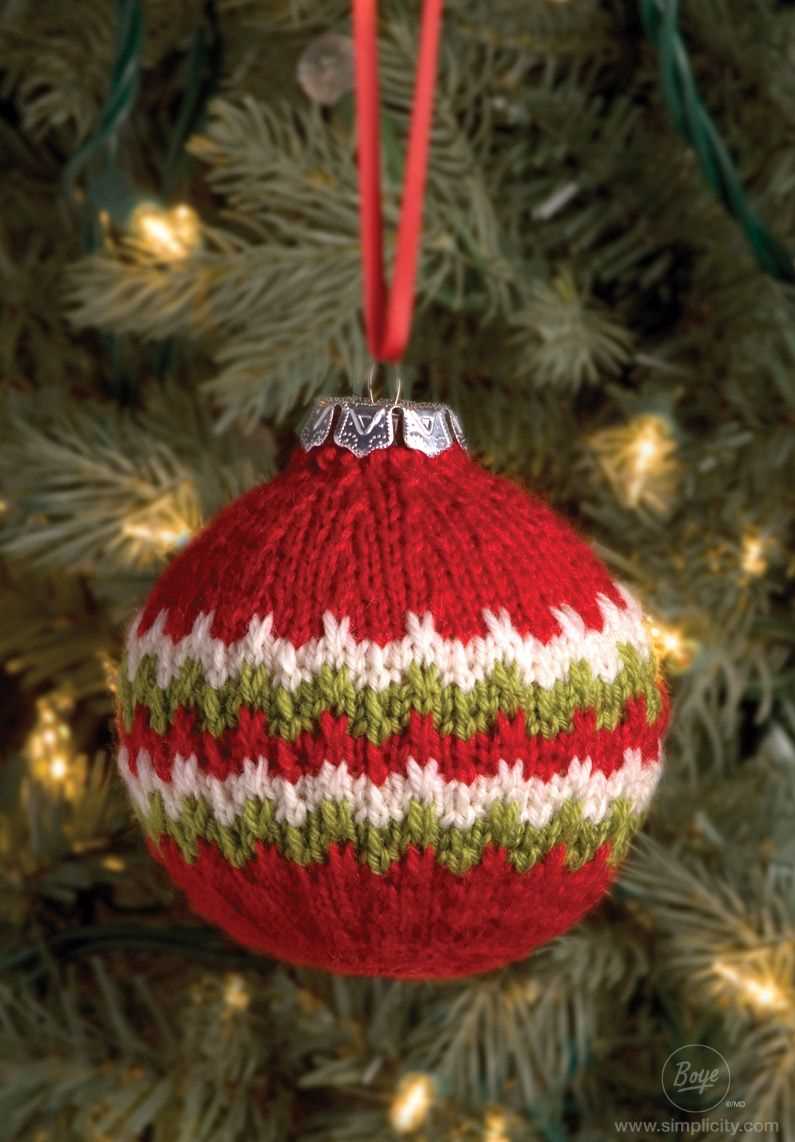
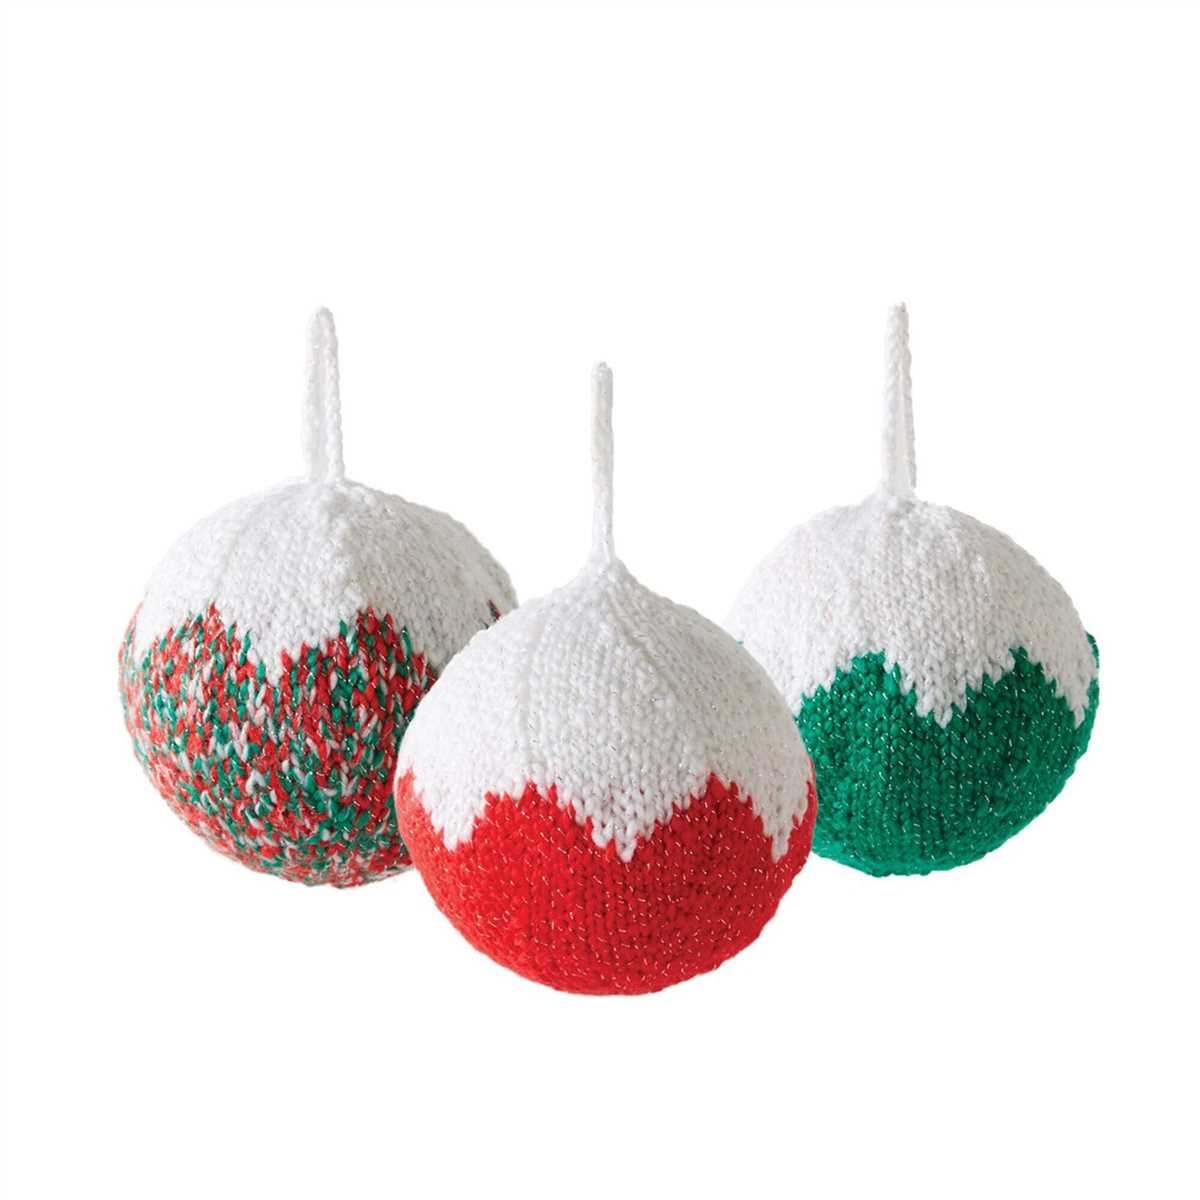
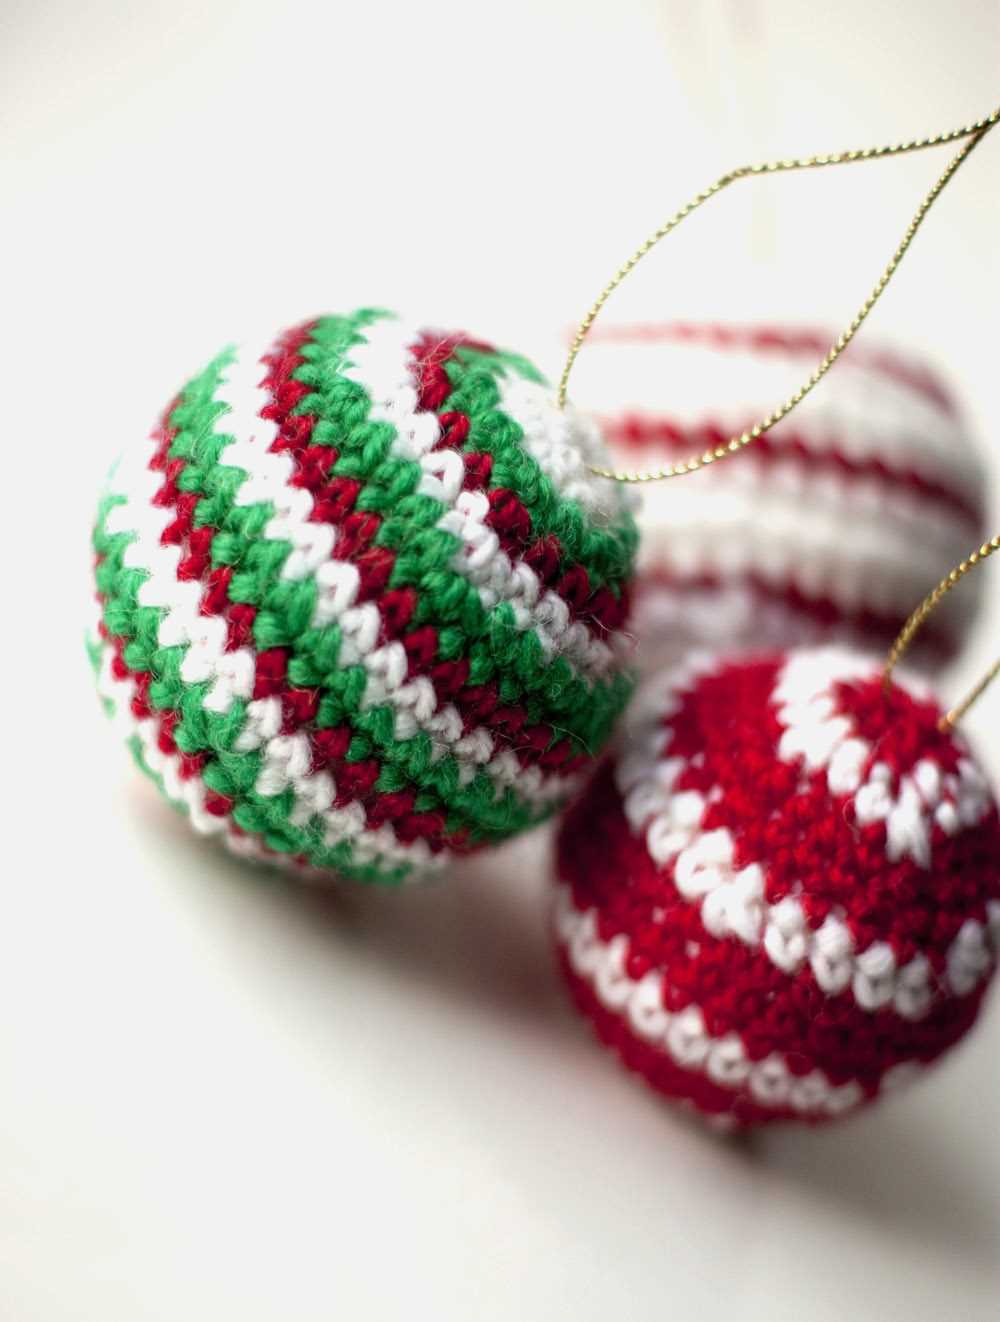
The first and most important material you will need is yarn. Choose a variety of colors to create vibrant and festive balls. You can opt for traditional Christmas colors such as red, green, and white, or get creative with different shades and textures.
Knitting Needles:

You will also need a pair of knitting needles. The size of the needles will depend on the thickness of the yarn you are using. Be sure to check the recommended needle size on the yarn label to ensure you are using the correct size for your project.
Stuffing:
To give your knitted Christmas balls shape and structure, you will need some stuffing. This can be polyester fiberfill or any other soft material that will fit inside the knitting. Make sure you have enough to fill each ball evenly.
Tapestry Needle:
A tapestry needle is essential for weaving in loose ends and sewing up the seams of your knitted Christmas balls. Choose a needle with a large eye that can accommodate the thickness of the yarn you are using.
Optional Embellishments:
If you want to add some extra flair to your knitted Christmas balls, you can consider adding embellishments such as small beads, sequins, or ribbon. These can be attached to the surface of the balls using a hot glue gun or by stitching them on with a needle and thread.
By gathering these basic materials, you will be well-prepared to start knitting your own Christmas balls and create unique and personalized decorations for your holiday celebrations.
Choosing the right yarn
When it comes to knitting Christmas balls, choosing the right yarn is crucial to achieve the desired result. The type, weight, and texture of yarn can greatly affect the overall look and feel of the knitted ornament.
Type of yarn: There are various types of yarn that can be used for knitting Christmas balls, including acrylic, wool, cotton, and blends. Each type of yarn has its own unique characteristics and advantages. For example, acrylic yarn is often favored for its affordability and durability, while wool yarn offers warmth and natural insulation. Cotton yarn, on the other hand, is lightweight and breathable, making it a good choice for ornaments that will be used in warmer climates.
Yarn weight: The weight of the yarn refers to its thickness, which can range from lace weight to super bulky. When knitting Christmas balls, it is recommended to use a medium weight yarn, such as DK or worsted weight, as it provides a good balance between stitch definition and drape. However, if you prefer a more delicate or chunky look, you can experiment with lighter or heavier weight yarns.
Texture: The texture of the yarn can also play a role in the final outcome of the knitted Christmas ball. Smooth, sleek yarns like acrylic or mercerized cotton can give a polished and shiny finish, while yarns with a fuzzy texture, such as mohair or angora, can add a soft and fluffy look. Metallic or glittery yarns can also be used to create a festive and sparkly effect.
Ultimately, the choice of yarn for knitting Christmas balls depends on personal preference and the desired aesthetic. It is recommended to swatch and experiment with different yarns before starting the project to ensure that you achieve the desired look and feel.
Selecting the perfect needle size
When it comes to knitting Christmas balls, selecting the right needle size is important for achieving the desired result. The size of the needle can determine the overall size and texture of the ball, as well as the stitch definition and tension.
Consider the yarn weight: The first factor to consider when choosing a needle size is the weight of the yarn you are using. For finer yarns, such as lace or fingering weight, smaller needle sizes like 2.25mm or 2.75mm may be appropriate. For thicker yarns, such as worsted or bulky weight, larger needle sizes like 4.5mm or 5mm may be more suitable.
Think about the desired outcome: The needle size you choose can also affect the overall look and feel of the knitted ball. If you want a more tightly knit ball with defined stitches, opt for a smaller needle size. For a looser and more textured appearance, go for a larger needle size.
Consider the pattern recommendations: Some knitting patterns may specify the recommended needle size to achieve the desired gauge and size. It’s always a good idea to follow the pattern recommendations, especially if you are a beginner, to ensure that your knitting projects turn out as intended.
Keep in mind your knitting style: Your personal knitting style can also influence the needle size you choose. If you tend to knit tightly, you may need to use a larger needle size to achieve the desired tension. On the other hand, if you knit loosely, using a smaller needle size may be necessary.
By considering these factors and experimenting with different needle sizes, you can find the perfect needle size for your knitted Christmas balls. Remember, every knitter is different, so don’t be afraid to adjust the needle size to suit your preferences and style.
Getting started: casting on
When beginning a knitting project, the first step is to cast on. Casting on is the process of creating the first row of stitches on your knitting needle. There are several methods for casting on, but the most common method is the long-tail cast on.
To cast on using the long-tail method, start by leaving a long tail of yarn, about three times the length of your desired width of knitting. Make a slipknot in the yarn and place it on the needle. Hold the needle and the tail of the yarn in your right hand, and the working yarn in your left hand.
- With your right hand, hold the needle and tail of yarn together.
- With your left hand, bring the needle under the tail of the yarn, then over the working yarn.
- Using your right hand, bring the needle over the tail of the yarn, then under the working yarn.
- Repeat steps 2 and 3 until you have cast on the desired number of stitches.
- Once you have cast on all the stitches, you are ready to begin knitting!
Knitting the body of the ball
Once you have gathered all the materials needed for knitting your Christmas ball, you can start working on the body of the ball itself. The body of the ball is typically knitted in the round, using double-pointed needles or a circular needle.
To begin, cast on the required number of stitches onto your needles. This number will vary depending on the size of the ball and the gauge of your knitting. Make sure to follow the pattern instructions for the specific number of stitches to cast on.
Once your stitches are cast on, join in the round by bringing the first stitch and the last stitch of the cast-on row together. This will create a continuous round for knitting the body of the ball.
Work the desired stitch pattern or colorwork chart as specified in the pattern, knitting each round until the body of the ball reaches the desired length. This can typically range between 2-4 inches, but again, follow the pattern instructions for the specific measurements.
Remember to change colors or stitch patterns as indicated in the pattern to create the desired design on the body of the ball. Pay attention to any shaping instructions, such as decreases or increases, that may be necessary to achieve the shape of the ball.
Once you have completed the knitting portion, you will typically need to stuff the ball with fiberfill or a similar stuffing material to give it shape. Then, you can close up the top of the ball by either using a three-needle bind-off or grafting the stitches together using the Kitchener stitch.
Knitting the body of the ball is an enjoyable process that allows you to play with different stitches and colors to create a unique and festive decoration for your Christmas tree. Enjoy the process and have fun experimenting with different patterns and designs!
Adding the decorative patterns
Once you have knitted the basic shape of the Christmas ball, you can start adding the decorative patterns. There are various ways to do this, depending on the design you want to achieve.
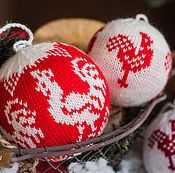
One popular technique is to use stranded colorwork, also known as Fair Isle knitting. This involves knitting with two or more colors at the same time, creating intricate patterns and designs. To do this, you will need to carry the unused yarn behind the work and catch it in the stitches when you need to switch colors. Fair Isle patterns can be traditional or more modern and can incorporate holiday motifs or geometric designs.
Another option is to use duplicate stitch or Swiss darning. This technique allows you to add a pattern or design to the surface of your knitted piece after it has been completed. You will use a tapestry needle and a contrasting color of yarn to embroider the design over the existing stitches. This is a great option if you want to add small details or accents to your Christmas ball, such as stars, snowflakes, or initials.
If you prefer a simpler approach, you can also use surface crochet to add decorative patterns. With this technique, you will use a crochet hook to work slip stitches, chain stitches, or other crochet stitches directly onto the surface of your knitted piece. This can create raised or textured designs and can be used to add borders, snowflakes, or other embellishments.
- Stranded colorwork: knitting with two or more colors at the same time.
- Duplicate stitch or Swiss darning: embroidering a pattern over the existing stitches.
- Surface crochet: using a crochet hook to add crochet stitches onto the surface of the knitted piece.
Shaping the ball: decreasing stitches
Shaping the ball: decreasing stitches
Once you have completed the desired number of rounds to reach the desired size of your Christmas ball, it’s time to start shaping the ball by decreasing stitches. Decreasing stitches will give the ball its round shape and create a more defined top.
To decrease stitches, you will need to work a series of decreases evenly spaced around the ball. This will involve knitting or purling two stitches together to decrease the stitch count. It is important to evenly distribute the decreases to maintain the shape of the ball and prevent any lumps or bumps.
One common method for decreasing stitches is the “k2tog” or “knit two together” decrease. To work this decrease, simply insert your right needle into the next two stitches on your left needle as if to knit, and then knit them together as one stitch. This will decrease your stitch count by one.
Another method for decreasing stitches is the “ssk” or “slip slip knit” decrease. To work this decrease, slip the next stitch on your left needle onto your right needle knitwise, slip the following stitch from left to right needle purlwise, and then insert your left needle back into both slipped stitches from left to right and knit them together through the back loops. This will also decrease your stitch count by one.
- To decrease stitches evenly, you can use stitch markers to mark out the sections where the decreases will be made. For example, if you have 60 stitches and want to decrease to 30 stitches, you could place a stitch marker every 2 stitches to indicate where the decreases will be made.
- Follow your knitting pattern instructions for the specific placement and frequency of decreases. This will ensure that your ball maintains the desired shape and proportions.
- If you are creating your own pattern or adjusting an existing one, consider experimenting with different decrease patterns to create unique effects on your Christmas ball.
Remember to carefully count your stitches and keep track of your decreases to ensure that your ball turns out symmetrical and well-shaped. Happy knitting!
Finishing touches: binding off
Once you have finished knitting your Christmas balls, it’s time to give them a neat and clean finish. The final step in this process is binding off. Binding off is a technique used to secure the stitches at the end of your knitting project and prevent them from unraveling.
To bind off, start by knitting two stitches. Then, using your left-hand needle, lift the first stitch over the second stitch and off the right-hand needle. You will now have one stitch remaining on your right-hand needle. Knit one more stitch and repeat the process of lifting the first stitch over the second stitch. Continue this pattern until you have bound off all the stitches.
Binding off can be done in different ways, depending on the desired effect. For a stretchy bind off, you can use a larger needle size to create looser loops. This is especially useful for projects like Christmas balls, as it allows for easier insertion of the stuffing. If you prefer a more secure bind off, you can tighten the stitches by using a smaller needle size or by working the bind off with the same size needle as the rest of the project.
Once the binding off is complete, you can cut the yarn, leaving a tail of several inches. Use a yarn needle to thread the tail through the last stitch and pull tight to secure. This will prevent the yarn from unraveling and give your Christmas balls a professional-looking finish.
In conclusion, binding off is an essential step in finishing your knitted Christmas balls. It helps to secure the stitches and give your project a clean and polished appearance. Experiment with different bind off techniques to achieve the desired effect and make sure to leave a tail of yarn for a secure finish.
Assembling and stuffing the ball
Once you have finished knitting all the pieces for your knitted Christmas ball, it’s time to assemble and stuff it. First, you will need to sew together the two halves of the ball. Line up the edges of the halves and use a tapestry needle to whip stitch them together. Make sure to leave a small opening at the bottom for stuffing.
Once the ball is sewn together, it’s time to stuff it. Use polyester fiberfill or any other stuffing material of your choice. Start by inserting small amounts of stuffing into the opening and use your fingers or a stuffing tool to evenly distribute the filling. Be careful not to overstuff the ball, as it may lose its shape.
Tip: If you want to add some extra weight to the ball, you can also use dried beans or rice as stuffing.
Once the ball is sufficiently stuffed, sew up the remaining opening using the same whip stitch technique. Make sure to secure the stitches tightly so that the stuffing doesn’t come out.
And that’s it! You have successfully assembled and stuffed your knitted Christmas ball. Now you can hang it on your Christmas tree or use it as a festive decoration for your home.
Embellishing with beads or sequins
One popular and beautiful way to embellish knitted Christmas balls is by adding beads or sequins. This adds a touch of sparkle and glamour to the balls, making them even more festive and eye-catching.
There are several techniques for adding beads or sequins to knitted Christmas balls. One option is to thread beads or sequins onto the yarn before knitting, and then incorporate them into the pattern as you go. This can create intricate designs and patterns, and you can experiment with different colors and sizes of beads or sequins to achieve the desired effect.
Another option is to sew beads or sequins onto the finished knitted Christmas balls using a needle and thread. This allows for more flexibility in terms of placement and design, as you can easily add or remove beads or sequins as needed. You can create patterns, swirls, or random arrangements, depending on your preference. It’s important to use a strong and thin needle, and to make sure that the thread matches the color of the beads or sequins for a seamless look.
Whether you choose to incorporate beads or sequins into the knitting process or sew them onto the finished balls, embellishing with these shiny accents is sure to transform a simple knitted Christmas ball into a stunning and festive decoration. It’s a fun and creative way to personalize your holiday decor and add a touch of elegance to your Christmas tree.
Tips for hanging and displaying your knitted Christmas balls
Once you’ve finished knitting your Christmas balls, it’s time to think about how you want to hang and display them. Here are some tips to help you showcase your beautiful creations:
- Choose the right type of hanger: Consider using ribbon or twine to create a loop that can hang your knitted Christmas balls. You can also use ornament hooks or small metal rings that can easily attach to the top of the balls.
- Hang them at different heights: To create an eye-catching display, hang your knitted Christmas balls at different heights. This will add visual interest and create a dynamic look.
- Consider using a tree branch: If you want to go for a more rustic and natural look, you can hang your knitted Christmas balls on a tree branch. Simply find a sturdy branch, attach hooks or loops, and hang your balls from it.
- Group them together: Instead of scattering your knitted Christmas balls throughout your space, consider grouping them together. This will create a focal point and make a bigger impact.
- Use them as table centerpieces: Place your knitted Christmas balls in a bowl or on a decorative tray to use them as a beautiful table centerpiece. Pair them with other holiday decorations for an extra festive touch.
- Consider using a wreath or garland: Incorporate your knitted Christmas balls into a wreath or garland for a unique and festive decoration. Attach them securely using hot glue or wire to ensure they stay in place.
- Experiment with different colors and patterns: Have fun and be creative with your knitted Christmas balls. Mix and match different colors and patterns to create a unique and personalized display.
With these tips, you’ll be able to showcase your knitted Christmas balls in style, adding a touch of charm and handmade warmth to your holiday decor!