
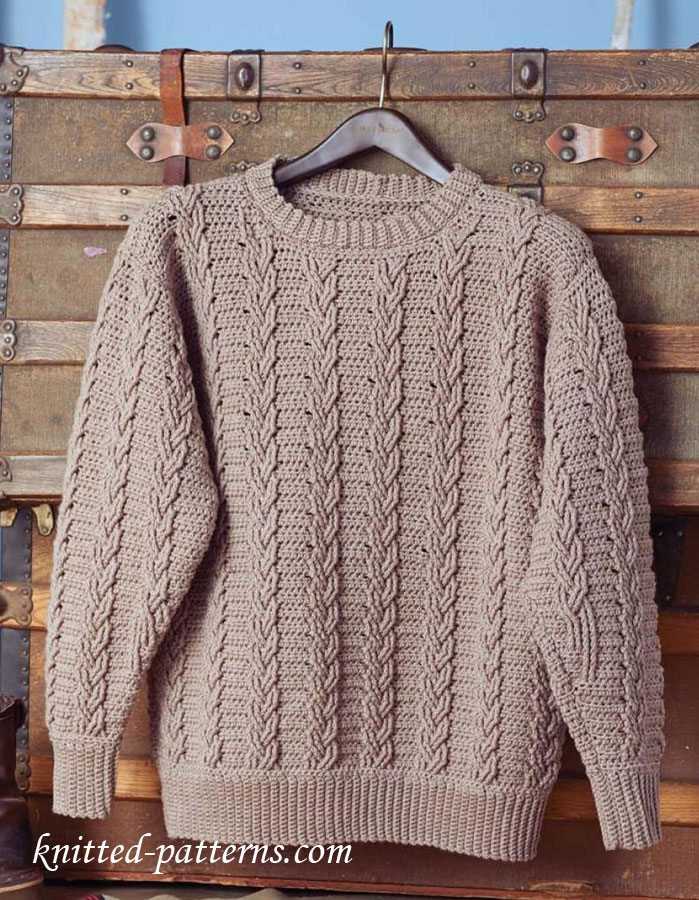
A knitted sweater is a timeless and classic piece of clothing that is perfect for the colder months. It is not only warm and cozy, but it can also be a stylish addition to any outfit. Knitting your own sweater allows you to customize it to your exact preferences, including the fit, color, and pattern. One popular choice for a knitted sweater pattern is the cable pattern.
The cable pattern is created by twisting the stitches in different directions, creating a beautiful texture that resembles a cable. This pattern is not only visually appealing, but it also adds thickness and warmth to the sweater. The cable pattern can be used to create various designs, from simple and understated to intricate and eye-catching. It is a versatile pattern that can be used on different parts of the sweater, such as the front, back, or sleeves.
Knitting a sweater with a cable pattern can be a rewarding project for both beginners and experienced knitters. It allows you to practice different knitting techniques, such as cabling and following a pattern. The process of knitting a sweater can be time-consuming, but it is also a relaxing and enjoyable activity. Plus, the end result is a beautiful and unique piece of clothing that you can be proud of.
If you are interested in knitting a sweater with a cable pattern, there are many resources available to help you get started. You can find free knitting patterns online or purchase a knitting book that includes sweater patterns. Additionally, there are numerous online communities and forums where you can connect with other knitters and get advice and support throughout your knitting journey. So why not add a knitted sweater with a cable pattern to your wardrobe and enjoy the warmth and style it brings?
Knitted Sweater Pattern
A knitted sweater is a stylish and cozy addition to any wardrobe. Whether you’re a seasoned knitter or just starting out, following a sweater pattern can help you create a beautiful and unique garment.
Materials:
- Yarn: Choose a soft and warm yarn in your desired color. The amount of yarn you’ll need will depend on the size of the sweater and the gauge of your knitting.
- Knitting needles: Use the recommended needle size for your yarn and to achieve the desired gauge.
- Stitch markers: These will help you keep track of your stitches and pattern repeats.
- Tapestry needle: This is used for weaving in ends and sewing any seams.
To begin your knitted sweater, you’ll need to take accurate measurements of your body to determine the size and shape of the pieces you’ll be knitting. These measurements will include your bust, waist, and arm length. Once you have your measurements, you can select the appropriate size from the pattern and cast on your stitches.
Tip: It’s important to always check your gauge before starting your project. This will ensure that your finished sweater will fit properly.
Follow the pattern instructions carefully, knitting each piece of the sweater separately. This will typically include the front and back panels, as well as the sleeves. You may also need to knit a ribbed collar or cuffs, depending on the style of the sweater.
Tip: Keep track of your progress by using stitch markers to mark the beginning and end of each pattern repeat.
Once all the pieces are knit, you’ll need to assemble your sweater. This may involve sewing seams, attaching sleeves, and adding any finishing touches, such as buttons or a zipper.
Note: If you’re new to knitting or unfamiliar with certain techniques, there are many online tutorials and videos that can help guide you through the process.
With a bit of patience and practice, you’ll soon have a beautiful knitted sweater that you can proudly wear or give as a gift. Customize your design by experimenting with different yarns, colors, and stitch patterns to make your sweater truly unique.
Choosing the Right Yarn and Needles
When it comes to knitting a sweater, choosing the right yarn and needles is essential to achieve the desired result. The yarn you select will not only affect the look and feel of the finished garment but also impact the ease of knitting and the overall durability of the sweater.
1. Consider the fiber: When choosing yarn for a sweater, consider the fiber content. Natural fibers like wool, alpaca, and cotton are popular choices, as they provide warmth and breathability. Synthetic fibers like acrylic and nylon are often used for their affordability and easy care. Each fiber has its own characteristics, so choose one that suits the intended purpose and climate.
2. Gauge and weight: The pattern you are using will specify the recommended gauge and yarn weight. The gauge refers to the number of stitches and rows per inch and is important to ensure the sweater fits correctly. Be sure to match the gauge with the recommended needle size to achieve the desired size and drape of the fabric.
3. Texture and color: Consider the texture and color of the yarn, as it will impact the appearance of the sweater. Smooth yarns are great for showing off stitch patterns, while textured yarns can add interest and depth to the fabric. As for color, choose one that complements your skin tone and personal style.
4. Needle size: The recommended needle size for your sweater pattern will depend on the yarn weight and the desired fabric density. Use the suggested needle size as a starting point, but you may need to adjust it to achieve the correct gauge. Knitting a swatch before starting the sweater will help you determine if you need to go up or down a needle size.
5. Personal preference: Lastly, consider your personal preferences and knitting style. If you enjoy knitting with a certain type of yarn or needle material, it’s important to factor that into your decision. You want to enjoy the knitting process and feel comfortable while working on your sweater.
By carefully considering the fiber, gauge, texture, color, and needle size, you can choose the right yarn and needles for your knitted sweater pattern. This will ensure a successful project and a sweater that you will be proud to wear.
Understanding the Basic Knitting Stitches
Knitting is a craft that involves creating fabric by interlocking loops of yarn with knitting needles. It is a popular hobby that allows people to create beautifully textured and patterned garments such as sweaters, scarves, and hats. To get started with knitting, it is important to understand the basic knitting stitches.
1. Knit Stitch: The knit stitch is the most fundamental stitch in knitting. It creates a smooth and flat fabric. To knit, insert the right needle from left to right into the first stitch on the left needle. Wrap the yarn counterclockwise around the right needle and pull it through the stitch, sliding the stitch off the left needle. Repeat this process for each stitch on the left needle.
2. Purl Stitch: The purl stitch is the opposite of the knit stitch and creates a bumpy texture on the fabric. To purl, insert the right needle from right to left into the first stitch on the left needle. Wrap the yarn counterclockwise around the right needle and pull it through the stitch, sliding the stitch off the left needle. Repeat this process for each stitch on the left needle.
These two stitches form the foundation of many knitting patterns and can be combined in various ways to create different textures and patterns. Knitting patterns often use combinations of knit and purl stitches to create ribbing, cables, lace, and other intricate designs. Understanding how to work these basic stitches will allow you to follow knitting patterns and create beautiful knitted garments.
Casting On and Knitting the Ribbing
When starting a knitted sweater, one of the first steps is casting on. Casting on is the process of creating the foundation row of stitches on the knitting needle. This is an essential step in setting up the project and creating the ribbing at the bottom of the sweater. The ribbing adds elasticity and structure to the sweater, making it snug and comfortable to wear.
To cast on, you can use different methods, such as the long-tail cast on or the knitted cast on. The long-tail cast on is a popular method that creates a neat and stretchy edge. It involves using two strands of yarn, one as the working yarn and the other as the tail. The knitted cast on is another simple method that uses the knit stitch to create the initial row of stitches. Both methods are commonly used for knitting ribbing.
Once the stitches are cast on, you can start knitting the ribbing pattern. The most common ribbing pattern is the knit one, purl one (K1, P1) ribbing. This creates alternating columns of knit stitches and purl stitches, resulting in a textured and stretchy fabric. The K1, P1 ribbing is often used for cuffs, collars, and bottom hems of sweaters.
When knitting the ribbing, it’s important to maintain an even tension and avoid making the stitches too tight or too loose. This will ensure that the ribbing has the desired stretchiness and elasticity. It’s also important to pay attention to the stitch pattern and make sure to knit the knit stitches and purl the purl stitches correctly. Consistency in the stitch pattern will create a uniform and professional-looking ribbing.
Steps for casting on and knitting the ribbing:
- Choose your preferred cast on method – long-tail cast on or knitted cast on.
- Cast on the desired number of stitches for the ribbing.
- Begin knitting the ribbing pattern, such as K1, P1, by knitting the knit stitches and purling the purl stitches.
- Continue knitting the ribbing pattern for the desired length, usually a few inches.
- Ensure that the tension is even and consistent throughout the ribbing.
Following these steps will help you successfully cast on and knit the ribbing for your knitted sweater. It is an important foundation for the rest of the sweater and sets the tone for the overall look and fit of the garment. Take your time and enjoy the process of creating the ribbing before moving on to the next steps of the sweater pattern.
Knitting the Body of the Sweater
Once you have completed the ribbing for the bottom hem, it is time to start knitting the body of the sweater. This is where you will see your project really start to take shape.
To begin, continue using your main color yarn and switch to the larger needle size. Begin knitting in the round, making sure to keep the stitches loose and even.
Knitting Instructions:
- Knit every round until the body of the sweater reaches your desired length. You can refer to the pattern for measurements or customize it to fit your own preferences.
- You may choose to add shaping to the body of your sweater by increasing or decreasing stitches. This will create a more fitted or flared look, depending on your preference.
- If you want to add texture or pattern to the body of your sweater, you can incorporate various stitch patterns such as cables, lace, or colorwork. The pattern you are following may also include specific stitch instructions for the body.
- Continue knitting in the round until you reach the underarm area. At this point, you may need to separate the front and back of the sweater to create openings for the armholes.
- Once the body is complete, you can finish off the top with a ribbed collar, a crew neck, or any other neckline style that suits your taste.
Knitting the body of the sweater requires focus and attention to detail. Make sure to count your stitches and check your gauge regularly to ensure the finished garment fits properly. Take breaks as needed to rest your hands and enjoy the process of creating a beautiful knitted sweater.
Shaping the Neckline
The neckline of a knitted sweater is an important feature that can greatly affect the overall look and fit of the garment. Shaping the neckline involves creating a gradual or sharp curve at the front of the sweater to create a flattering and comfortable fit. There are several techniques and methods that can be used to shape the neckline, depending on the desired outcome and the pattern being followed.
One common technique for shaping the neckline is to use short rows. Short rows are worked by partially knitting across a row and then turning the work before reaching the end of the row. This creates extra stitches that are gradually worked into the knitting, creating a gentle curve or slope. Short rows can be used to shape the neckline in a symmetrical or asymmetrical manner, depending on the desired design.
Another method for shaping the neckline is to use decreases. Decreases are used to eliminate stitches and create a narrower neck opening. There are several types of decreases that can be used, such as knit two stitches together (k2tog) or slip, slip, knit (ssk). These decreases can be strategically placed to create a clean and tailored look, and they can also be used to create interesting stitch patterns or textures along the neckline.
The shaping of the neckline can also be enhanced with the use of ribbing or other textured stitches. Ribbing is commonly used around the neckline to create a stretchy and comfortable edge. It can also be used to add visual interest and create a decorative border. Other textured stitches, such as cables or lace, can also be incorporated into the neckline to create unique and eye-catching designs.
Overall, shaping the neckline of a knitted sweater is an important step in creating a finished and polished look. Whether using short rows, decreases, or textured stitches, careful attention to detail and precision is key. With the right technique, the neckline can be shaped to fit the wearer perfectly and enhance the overall style of the sweater.
Knitting the Sleeves
When it comes to knitting a sweater, one of the most important parts is the sleeves. The sleeves not only provide warmth and coverage to the arms, but they also contribute to the overall style and design of the garment.
Choosing the Right Sleeve Length: Before beginning to knit the sleeves, it is important to decide on the desired length. This will depend on personal preference as well as the intended use of the sweater. Shorter sleeves are great for more casual or transitional pieces, while longer sleeves are perfect for colder weather.
Measuring and Casting On: To start knitting the sleeves, it is crucial to measure the arm circumference and length. This will ensure a proper fit. Once the measurements are obtained, the next step is to cast on the appropriate number of stitches onto the needles. This can be determined using a gauge swatch or following the instructions provided in the pattern.
Knitting the Body of the Sleeve: After casting on, the sleeves are usually worked in the round or flat, depending on the pattern. This will determine the type of knitting needles to use. Knitting the body of the sleeve involves following the stitch pattern and shaping instructions provided in the pattern. This may include increases, decreases, ribbing, or other stitch patterns.
Shaping the Sleeve: As the sleeve progresses, there may be shaping involved to create the desired fit. This can include decreases at the underarm, shaping for the elbow, or any other design details specified in the pattern. It is important to carefully follow the instructions to achieve the desired shape and fit.
Finishing the Sleeve: Once the desired length is reached, the sleeve is usually finished off with a bind-off technique. This can be a simple bind-off or a more decorative one, depending on the design. It is important to make sure the bind-off is not too tight to ensure a comfortable fit.
Repeating for the Second Sleeve: After finishing one sleeve, the process is repeated for the second sleeve to ensure symmetry. It is important to pay attention to the stitch count and shaping instructions to achieve a matching pair of sleeves.
Overall, knitting the sleeves of a sweater requires attention to detail and followinýg the pattern instructions. With proper planning, measuring, and execution, the sleeves can be a beautiful and functional part of the finished garment.
Adding a Pattern or Design
Adding a pattern or design to a knitted sweater can add visual interest and personalization to your garment. There are several ways to incorporate patterns into your knitting project, whether you are a beginner or an experienced knitter.
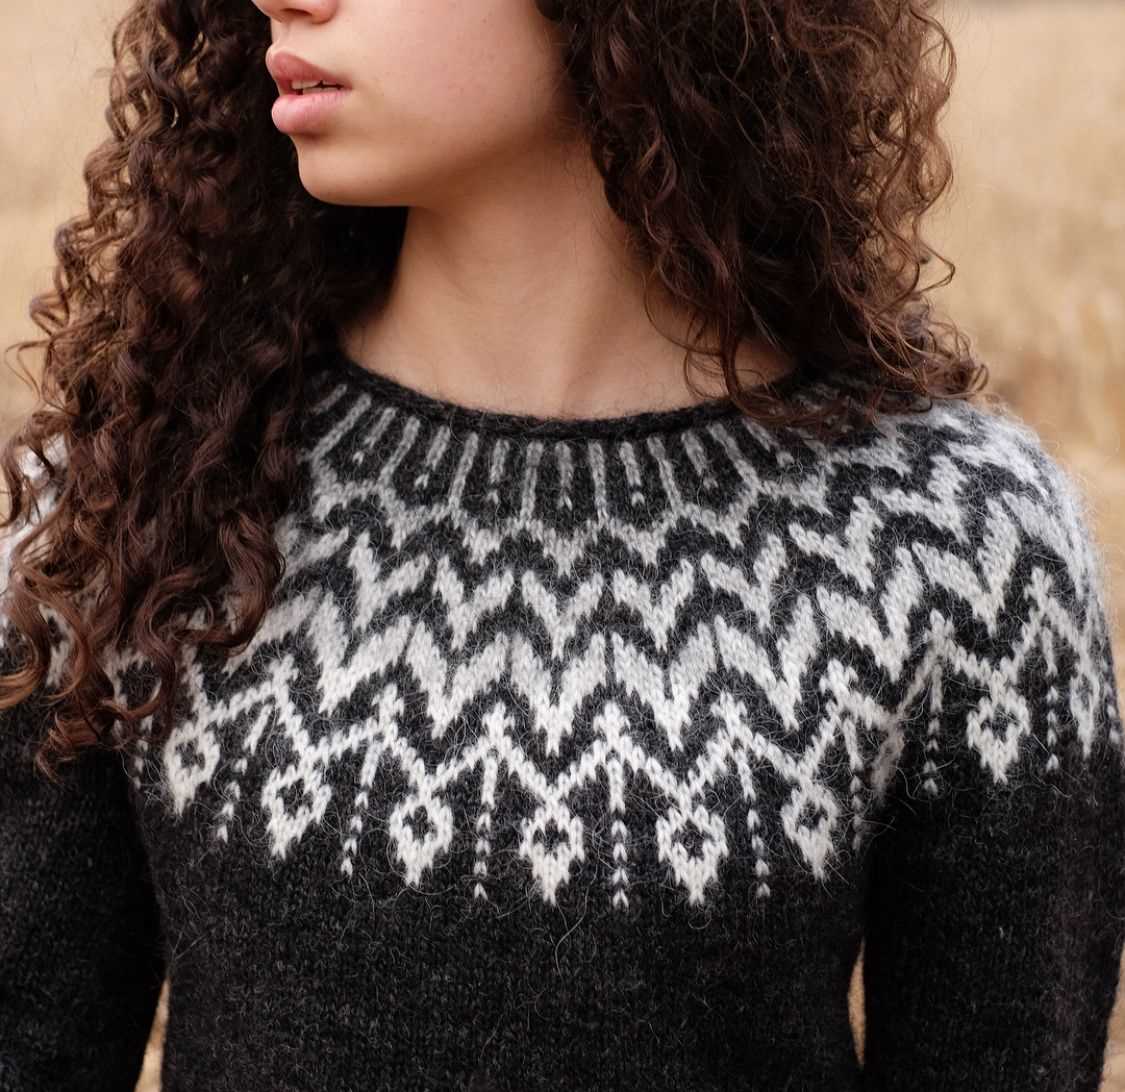
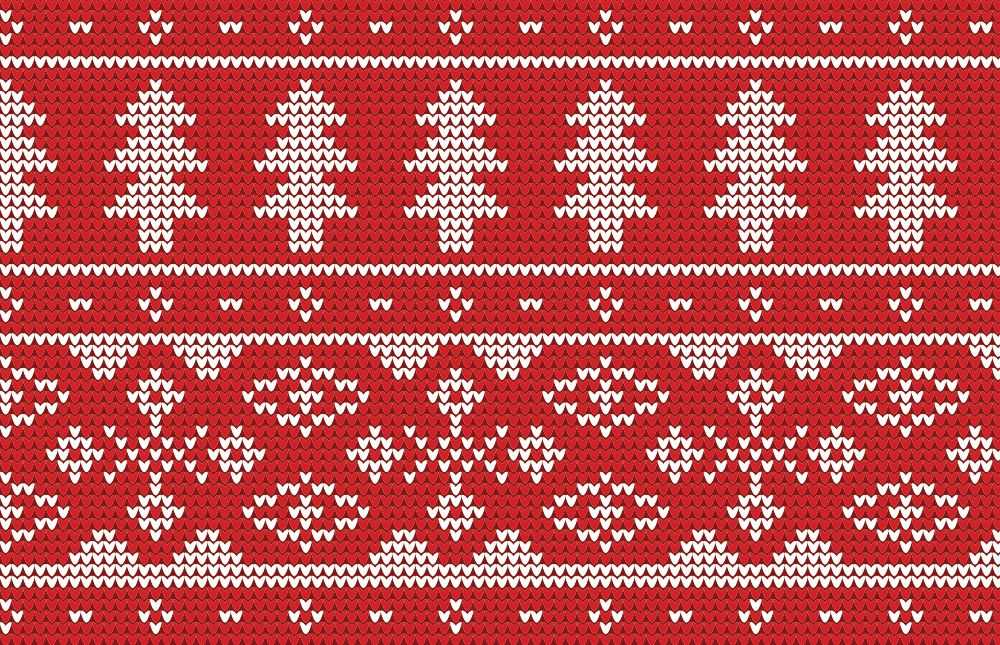
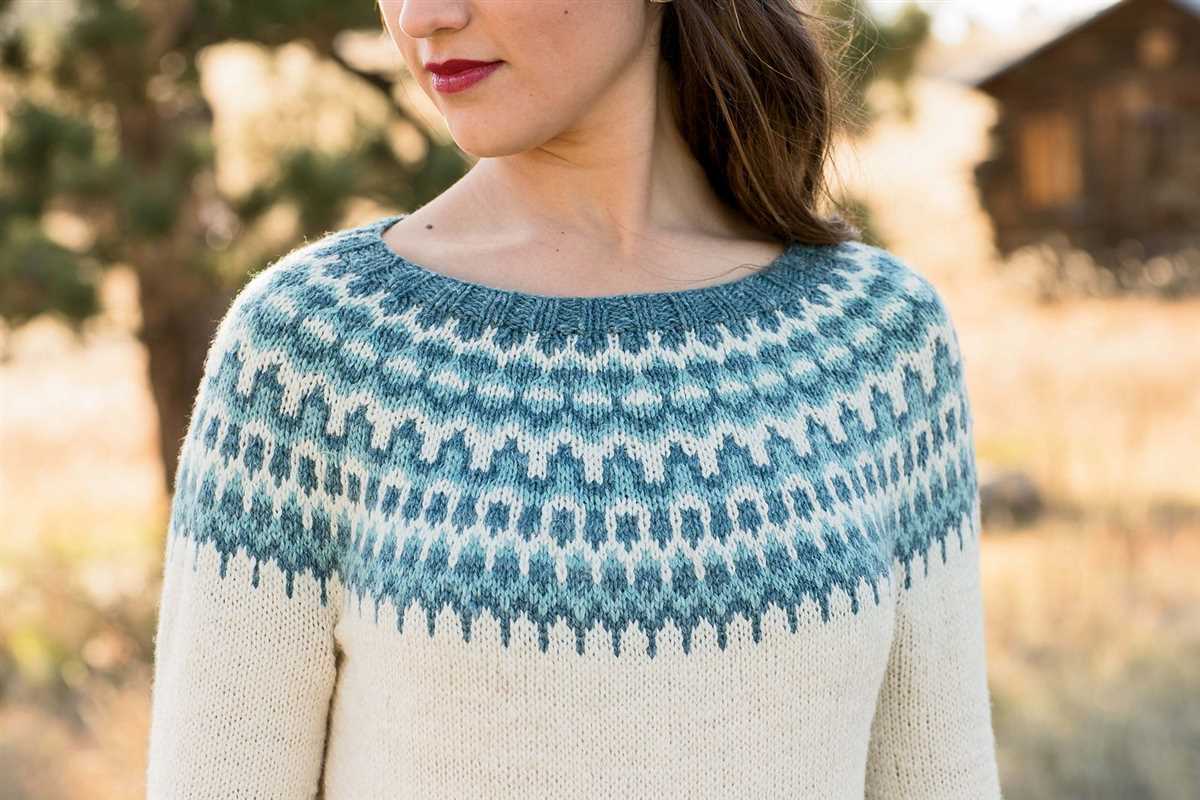
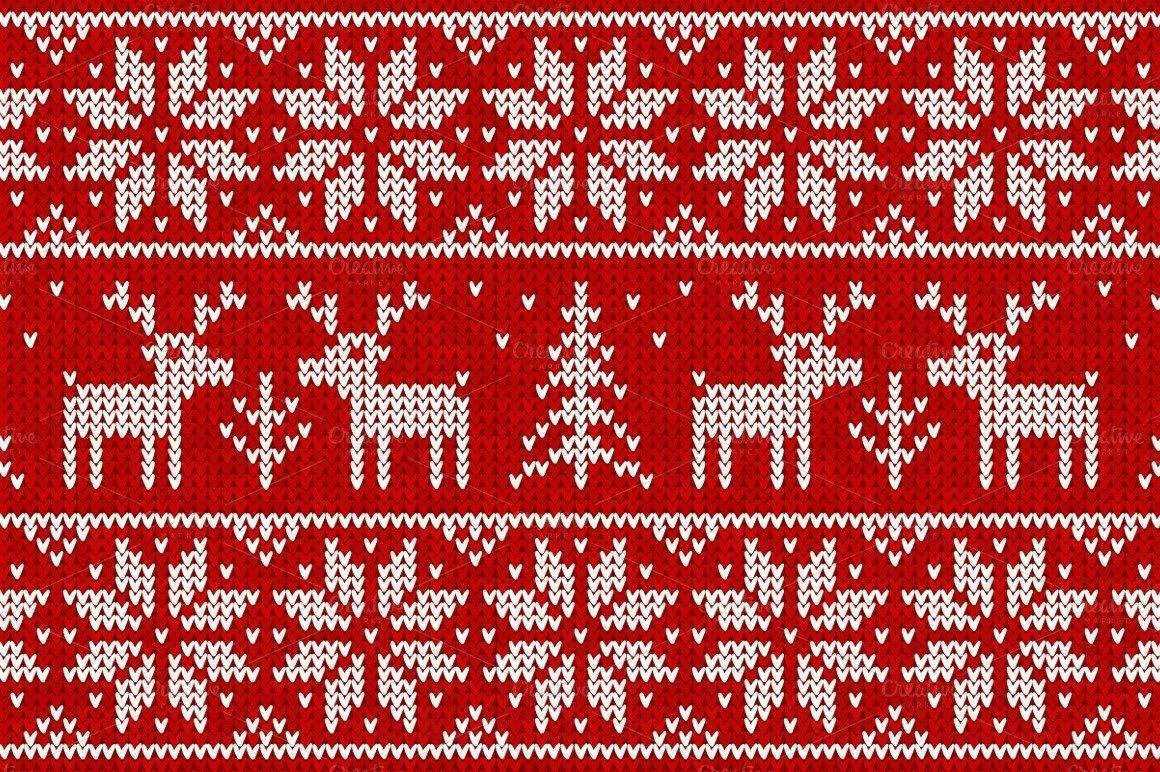
Fair Isle technique: The Fair Isle technique involves knitting with two or more colors in a row. This technique creates intricate patterns and designs on the fabric of the sweater. Fair Isle patterns often feature geometric motifs or repeating motifs inspired by traditional Nordic or Scottish designs.
Cable knitting: Cable knitting is another popular way to add a pattern to a knitted sweater. This technique involves crossing stitches over each other to create cables, which can form various patterns and textures on the fabric. Cable patterns can range from simple twists to more complex braided or diamond designs.
Intarsia knitting: Intarsia knitting allows you to knit separate blocks of color to create patterns or images on your sweater. This technique is great for adding large-scale designs or intricate motifs to your garment. With intarsia, you can easily incorporate pictures, letters, or other custom designs into your knitting project.
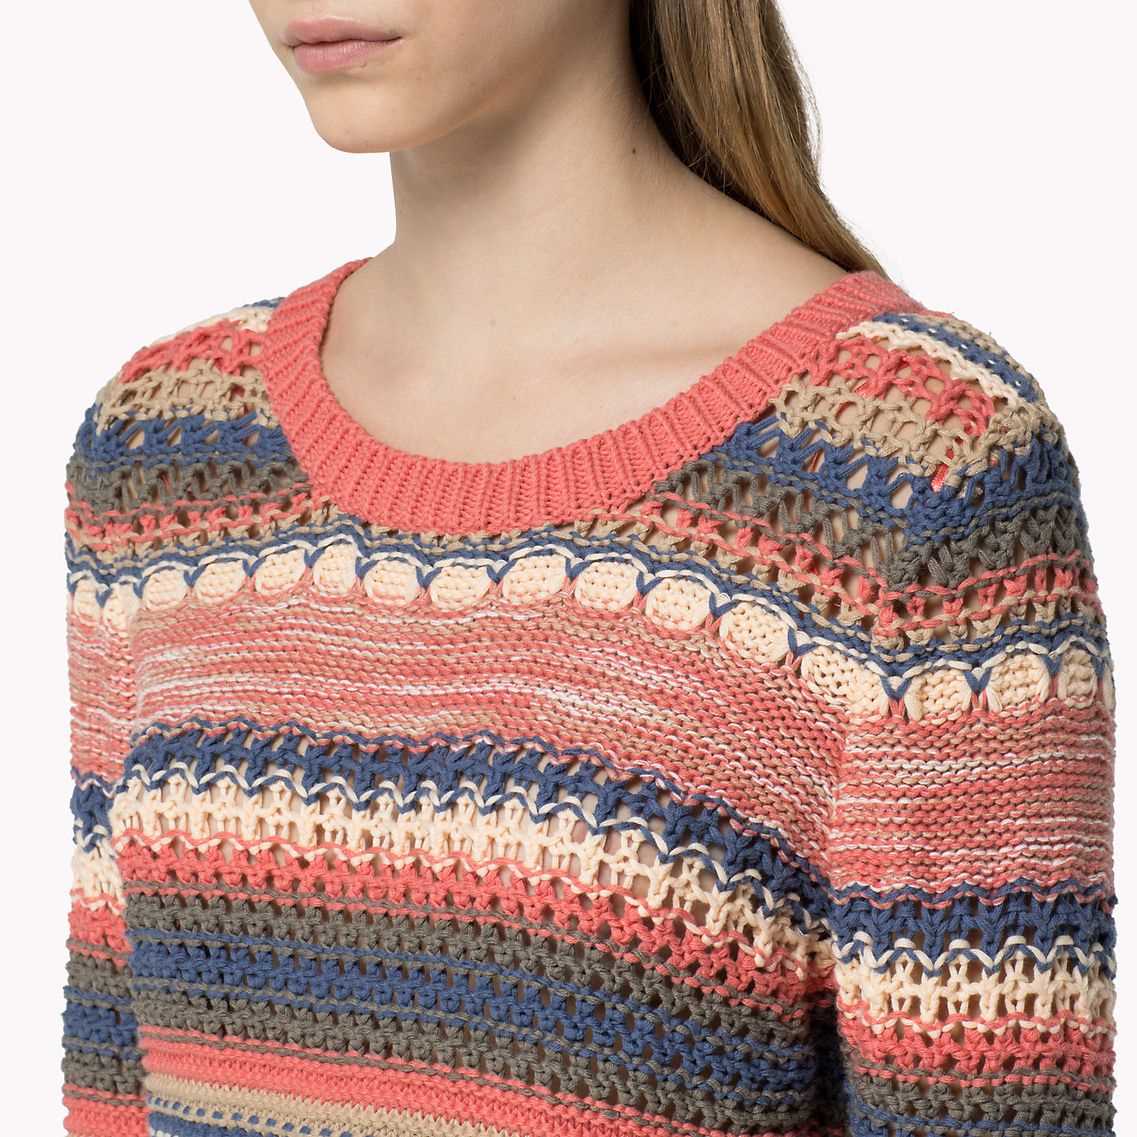
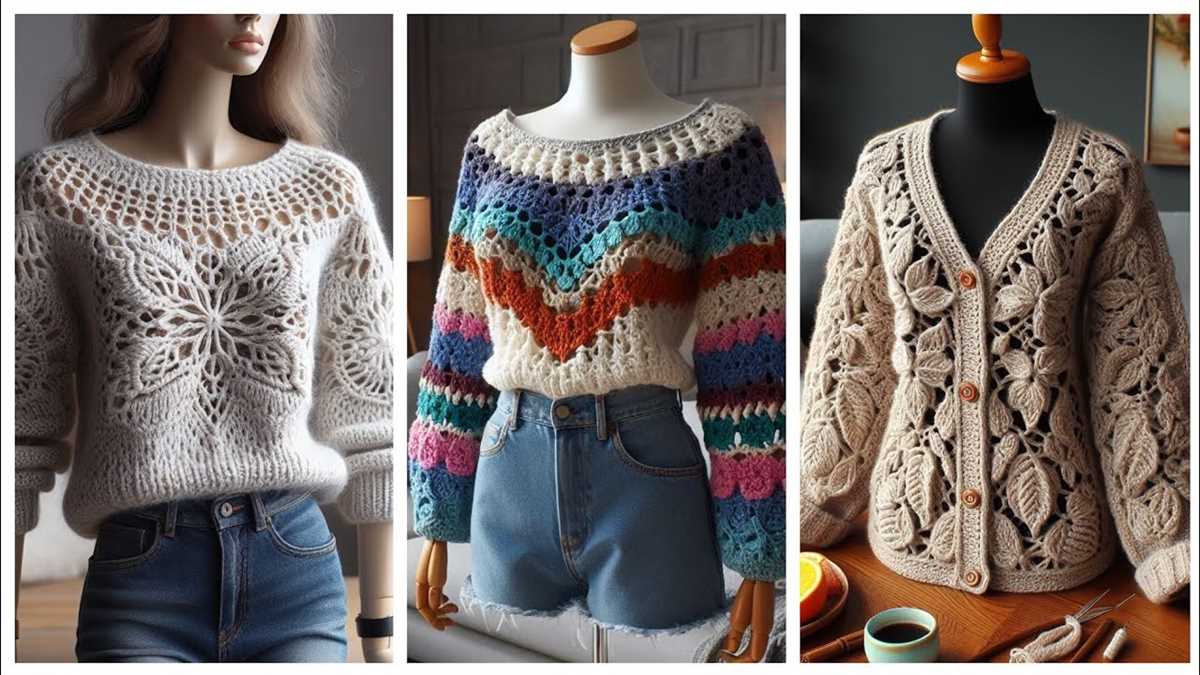
Lace knitting: Lace knitting involves creating patterns of holes and eyelets in the fabric, resulting in a delicate and airy texture. Lace patterns can add a feminine touch to a knitted sweater and are often used for shawls or lightweight garments. You can incorporate lace motifs into your sweater design to create a unique and elegant look.
When adding a pattern or design to your knitted sweater, it is important to choose a pattern that complements the style and shape of your garment. Consider the skill level required for the pattern and the type of yarn you are using. Experiment with different techniques and designs to create a sweater that reflects your personal style and creativity.
Finishing the Sweater

Once you have completed knitting your sweater according to the pattern, it’s time to finish it off and make it ready to wear. The finishing touches are important to give your sweater a polished look and ensure its durability. Here are some steps you can follow to finish your knitted sweater:
Blocking
Blocking is a process of gently shaping and stretching the knitted fabric to its correct measurements. It helps to even out stitches, open up lace patterns, and give the sweater its final shape. To block your sweater, you’ll need to soak it in lukewarm water and a mild detergent, then gently squeeze out the excess water. Lay the sweater flat on a dry towel, shaping it according to the desired dimensions, and pinning it in place. Allow the sweater to dry completely before unpinning.
Seaming
If your sweater was knit in separate pieces, such as front, back, sleeves, and collar, you’ll need to seam them together. Use a needle and matching yarn to stitch the pieces together using a mattress stitch or an appropriate seaming technique. Take your time to ensure neat and even seaming, as it will contribute to the overall appearance of the sweater.
Adding Buttons or Fastenings
If your sweater has a button placket or requires any other type of fastening, now is the time to add them. Sew on buttons or attach the desired fastenings using a sturdy thread or yarn, making sure they are properly secured. This step is essential for functional sweaters and adds an extra touch of charm to your knitted garment.
Weaving in Loose Ends
Throughout the knitting process, you may have left loose yarn ends from color changes or joining new yarn. Take the time to weave in these loose ends using a yarn needle, hiding them within the stitches to ensure they won’t unravel over time. This step will give your sweater a clean and professional finish.
Once you have completed these finishing steps, your knitted sweater will be ready to showcase your talent and provide warmth and style. Remember to always follow the specific instructions of your knitting pattern for finishing techniques, as different patterns may require variations in the process. Enjoy wearing your finished knitted sweater!
Blocking Your Knitted Sweater
Blocking is an essential step in finishing your knitted sweater. It involves shaping and setting the final dimensions of the garment by wetting and then carefully stretching and pinning it into shape. This process not only gives the sweater a more professional and polished look, but it also helps to even out any inconsistencies in tension and stitch definition, and it can also help the fibers relax and settle into place.
To block your knitted sweater, start by gently soaking it in lukewarm water with a small amount of wool wash or mild detergent. Allow the sweater to soak for about 15-20 minutes, until it is fully saturated. Be sure to avoid agitating or wringing the sweater, as this can cause stretching or distortion.
Next, carefully remove the sweater from the water and gently squeeze out any excess moisture. Lay a clean, absorbent towel on a flat surface and place the sweater on top of it. Gently roll up the towel, pressing down to help further remove moisture from the sweater. Unroll the towel and transfer the damp sweater to a clean and dry surface.
Now it’s time to shape the sweater. Begin by patting and stretching the sweater to its desired dimensions, being mindful of any style or fit considerations. Pay attention to the neckline, hem, and sleeve lengths. You can use measurements from a swatch or a guiding template to ensure accuracy.
Once you’re happy with the shape, it’s time to pin the sweater into place. Use rust-proof blocking pins to secure the edges and any lace or decorative elements in place. Pin along the neckline, down the front, around the armholes, and along the side seams. Make sure the pins are evenly spaced and that the edges are smooth and straight.
Leave the sweater to dry completely, which can take anywhere from a few hours to overnight, depending on the humidity and ventilation in the room. Once dry, carefully remove the pins and marvel at the beautifully blocked sweater before wearing or storing it.
Remember, blocking is an important step in achieving professional-looking results with your knitted sweaters. It’s worth taking the time and effort to ensure your hard work shines through in the finished garment.
Proper Care and Washing Instructions

Knitted sweaters require proper care and maintenance to ensure they maintain their shape and appearance. Follow these washing instructions to keep your knitted sweater looking its best:
1. Hand Wash or Delicate Cycle
To minimize the risk of damaging the delicate fibers, it is recommended to hand wash your knitted sweater. Fill a basin or sink with lukewarm water and add a mild detergent specifically designed for wool or delicate fabrics. Gently agitate the sweater in the soapy water, paying extra attention to any stained areas. Rinse thoroughly with clean water until all the detergent is removed. Alternatively, you can use the delicate cycle on your washing machine, but be sure to place the sweater in a mesh laundry bag to protect it from snagging on other items.
2. Dry Flat
After washing, never wring or twist your knitted sweater, as this can cause it to lose its shape. Instead, gently press out any excess water by rolling the sweater in a clean towel. Lay the sweater flat on a clean, dry towel or a breathable drying rack. Reshape the sweater to its original dimensions and let it air dry away from direct sunlight or heat sources, which can cause shrinkage or fading.
3. Store Properly
When not in use, it’s important to store your knitted sweater properly to prevent stretching or damage. Fold the sweater neatly and store it in a drawer or on a shelf, away from direct sunlight and moisture. To avoid creases, you can place tissue paper or acid-free archival paper between the folds. If you prefer to hang your sweaters, use padded hangers to avoid stretching the shoulders. It’s also a good idea to rotate the sweaters in your wardrobe periodically to prevent excessive wear on one particular piece.
By following these care and washing instructions, you can prolong the life of your knitted sweater and keep it looking beautiful for years to come.
Troubleshooting Common Knitting Issues
Knitting is a wonderful craft that allows you to create beautiful and unique garments. However, like any craft, it can sometimes be frustrating when things don’t go according to plan. In this article, we will explore some common knitting issues and how to troubleshoot them.
1. Tension Problems
One of the most common knitting problems is tension issues. If your stitches are too tight, it can be difficult to work with the yarn and create an even fabric. On the other hand, if your stitches are too loose, your fabric may end up looking sloppy and uneven. To achieve the right tension, make sure you are consistently pulling the yarn with the same amount of force. Practice can also help improve your tension, so don’t get discouraged if it doesn’t come naturally at first.
2. Dropped Stitches
Dropped stitches can be a nightmare for any knitter, but they can be easily fixed if caught early. If you notice a dropped stitch, don’t panic! Take a crochet hook or a spare knitting needle and “fish” the stitch back up from below. Insert the hook or needle through the dropped stitch and carefully pull it up. Once it’s back on the needle, snug it up and continue knitting as normal.
3. Twisted Stitches
Twisted stitches can happen when you accidentally twist your stitch or when you knit through the back loop instead of the front loop. This can lead to an uneven fabric and affect the overall look of your project. To fix twisted stitches, you can use a crochet hook or a knitting needle to gently untwist the stitch and then place it back on the needle correctly. Make sure to pay attention to your stitches as you work to avoid twisting them in the future.
- Tension Problems
- Dropped Stitches
- Twisted Stitches
By being aware of these common knitting issues and knowing how to troubleshoot them, you can save yourself from frustration and create beautiful, well-crafted garments. Remember, practice makes perfect, so don’t be discouraged if you encounter some bumps along the way. Happy knitting!
Tips for Customizing Your Knitted Sweater

Customizing your knitted sweater allows you to make it truly unique and suited to your own personal style. Here are some tips to help you get started:
1. Choose the Right Yarn: The type of yarn you use can make a big difference in the look and feel of your sweater. Consider the fiber content, weight, and texture of the yarn to achieve the desired effect.
2. Adjust the Size: If the pattern doesn’t provide instructions for your size, you can easily resize it by adjusting the number of stitches and rows. Keep in mind that altering the pattern may affect the overall design, so make sure to swatch and check your gauge before making any changes.
3. Modify the Neckline: The neckline can dramatically change the look of your sweater. You can add a deeper or shallower neckline, or even experiment with different neck shapes like boatneck or cowl neck. Just make sure to adjust your stitch count accordingly.
4. Add Personal Embellishments: Consider adding your own touch to the sweater by incorporating cables, lace, or colorwork. You can also experiment with different stitch patterns or add decorative buttons, pockets, or trims.
5. Lengthen or Shorten: Customize the length of your sweater by adding or subtracting rows in the body and sleeves. Keep in mind that altering the length may affect the fit and drape of the sweater, so make adjustments carefully.
6. Try Different Sleeve Options: If the pattern has set-in sleeves, you can opt for a different sleeve style like raglan or drop-shoulder. This can give your sweater a completely different look and fit.
7. Consider Color: Experimenting with different color combinations can greatly impact the overall appearance of the sweater. Try using variegated or self-striping yarns, or incorporate color blocking techniques for a bolder look.
Remember, when customizing your knitted sweater, it’s important to keep track of your modifications and make notes as you go along. This will help ensure consistency and accuracy if you decide to make more sweaters in the future.
By following these tips, you can create a knitted sweater that is truly unique and reflects your personal style. Happy knitting!