
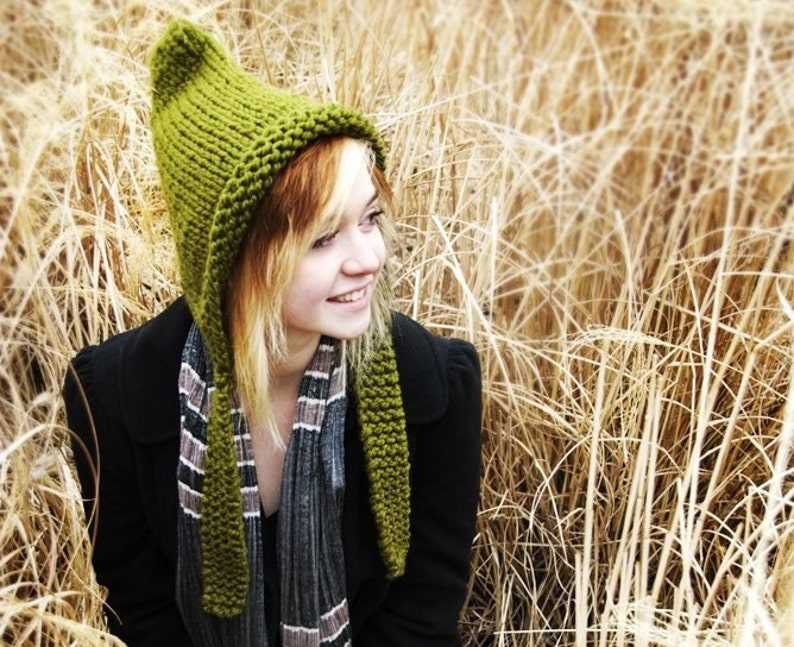
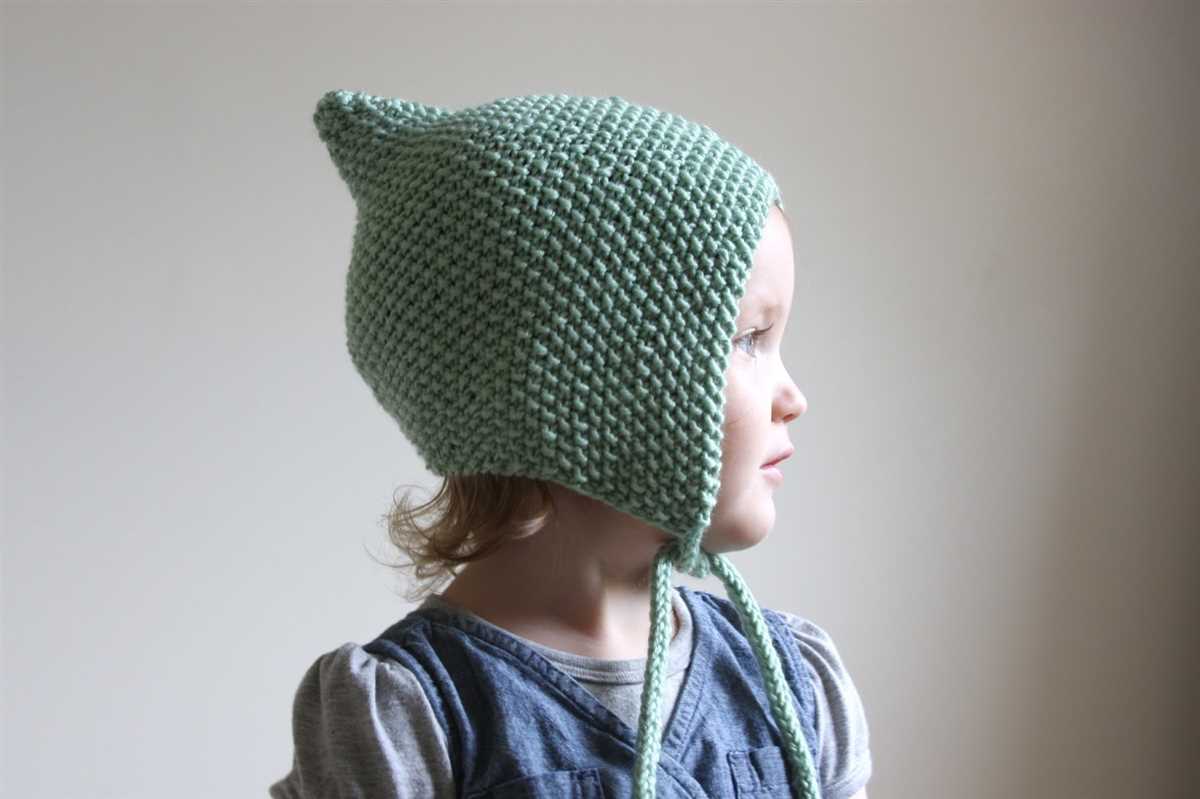
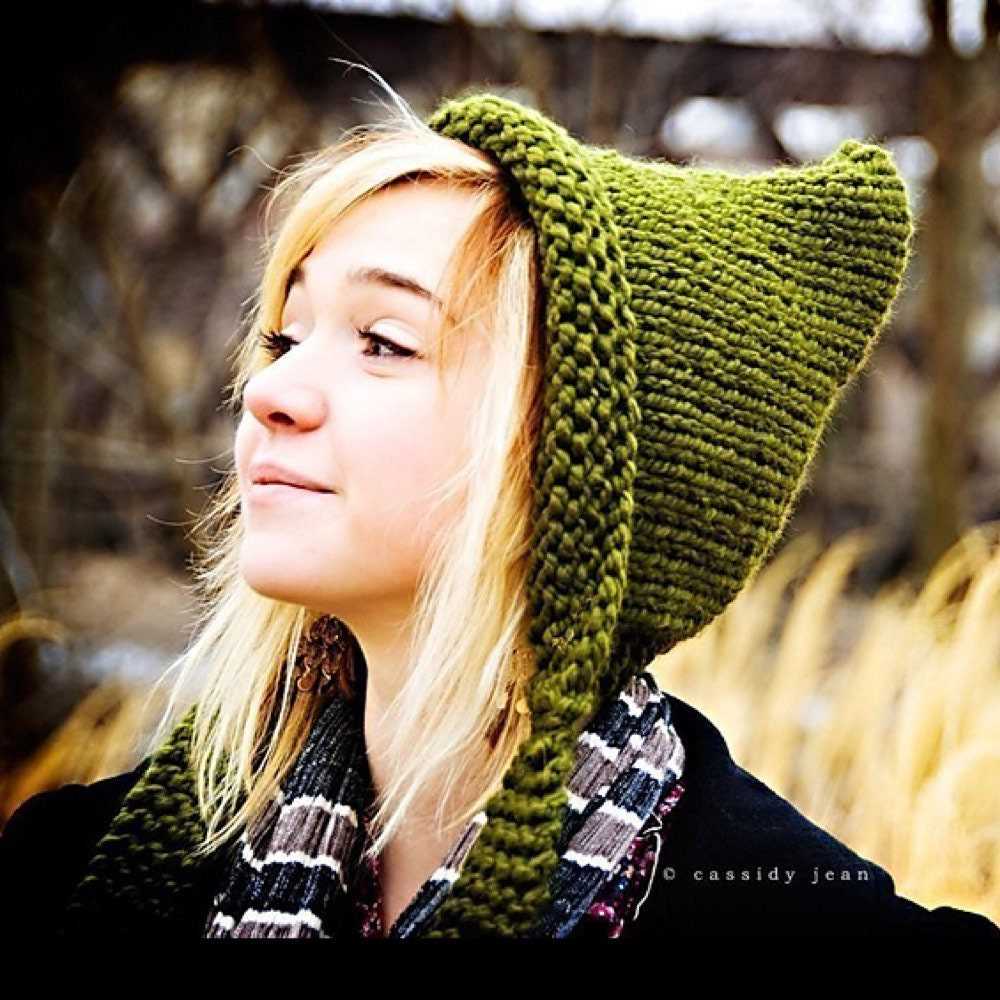
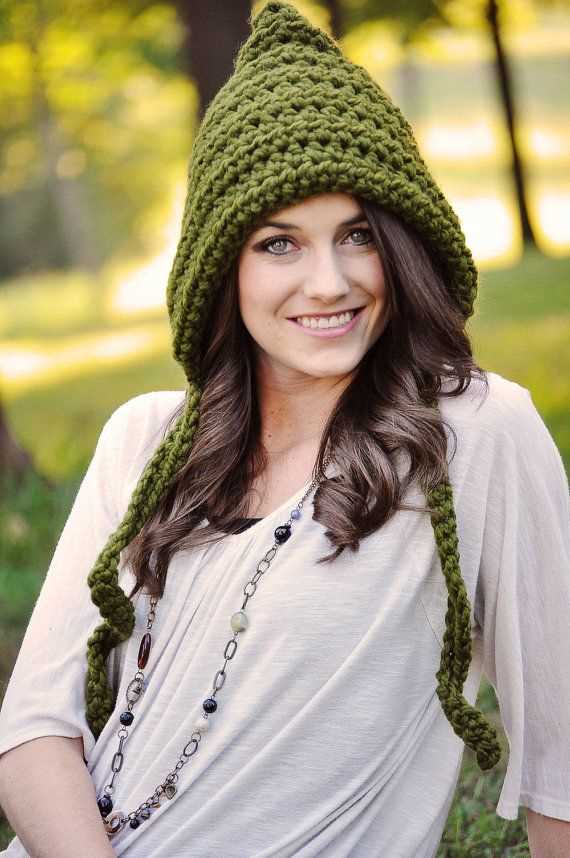
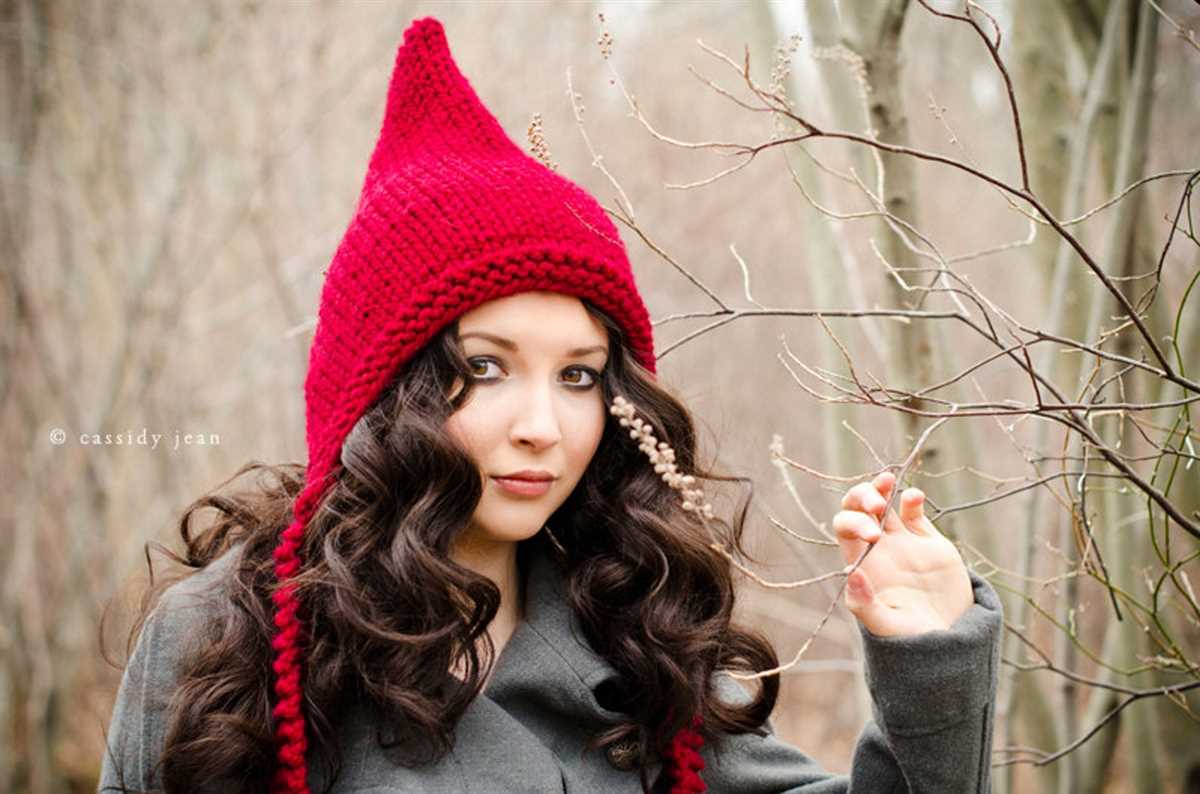
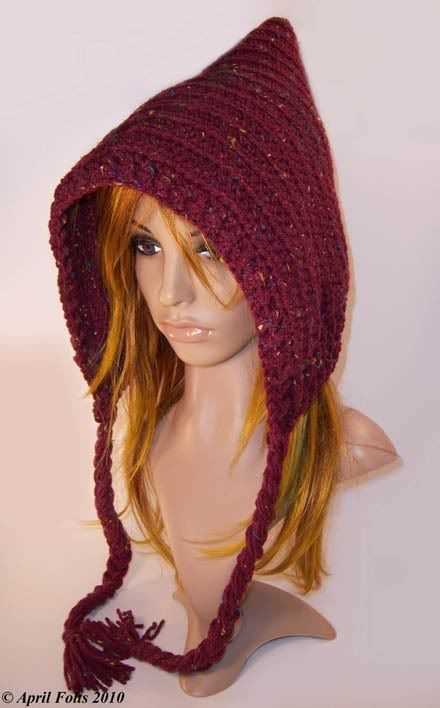
Looking for a cozy and stylish accessory to keep you warm during the colder months? Look no further than our free knitted pixie hat pattern for adults! This adorable hat is not only a practical choice for those chilly days, but it also adds a touch of whimsy to your winter wardrobe.
This pattern is suitable for knitters of all skill levels, from beginners to experts. With its simple yet elegant design, the knitted pixie hat is sure to become a staple in your collection of handmade accessories. Whether you’re a knitting enthusiast or someone new to the craft, this pattern is a great way to hone your skills and create something beautiful.
The best part? This pattern is completely free! All you need is a pair of knitting needles, some yarn, and a little bit of time. With our step-by-step instructions and helpful tips, you’ll be able to create your very own knitted pixie hat in no time.
So why wait? Get started on your knitting adventure today and add a touch of charm to your winter wardrobe with our free knitted pixie hat pattern for adults. Whether you’re knitting for yourself or someone special, this hat is sure to bring warmth and joy to your cold-weather days.
Free Knitted Pixie Hat Pattern for Adults

In the world of knitting, the ability to create unique and stylish accessories is always in demand. One such accessory that has gained popularity in recent years is the pixie hat. With its whimsical design and cozy fit, it’s no wonder that adults are embracing this playful headwear option. If you’re looking to add a touch of charm to your winter wardrobe, look no further than this free knitted pixie hat pattern for adults.
This pattern is designed specifically for adults and features a unique pixie-like shape that is both stylish and warm. The hat is knitted using chunky yarn, which not only adds to its cozy appeal but also makes it a quick and satisfying project to complete. Whether you’re an experienced knitter or just starting out, this pattern is suitable for all skill levels.
Materials:

- Chunky yarn in your choice of color
- Size 10mm knitting needles
- Yarn needle
- Scissors
Instructions:
- Cast on 48 stitches using your chosen yarn and knitting needles.
- Work in a 2×2 rib stitch pattern (knit 2 stitches, purl 2 stitches) for 4 inches.
- Begin the decrease rounds:
- Row 1: *Knit 6, knit 2 together* – repeat to the end of the row.
- Row 2 and all even rows: Knit all stitches.
- Row 3: *Knit 5, knit 2 together* – repeat to the end of the row.
- Row 5: *Knit 4, knit 2 together* – repeat to the end of the row.
- Continue in this manner, decreasing 2 stitches every odd row until 8 stitches remain.
- Break yarn, leaving a long tail. Thread the tail through the remaining stitches, draw tight, and secure.
- Use the yarn needle to weave in any loose ends.
- Your knitted pixie hat is now complete and ready to be worn!
With the help of this free knitted pixie hat pattern, you can easily create a cozy and stylish accessory that will keep you warm throughout the winter months. Have fun experimenting with different colors and yarn types to create a hat that truly reflects your personal style. Whether you’re heading out for a winter hike or simply running errands around town, this knitted pixie hat is sure to become a staple in your cold-weather wardrobe.
Materials

Before you start knitting your pixie hat, make sure you have all the necessary materials at hand. Here is a list of what you’ll need:
- Yarn: Choose a soft and warm yarn suitable for the winter season. You can use any worsted weight yarn in your preferred color.
- Knitting Needles: You will need a set of size 8 (5mm) knitting needles or the size needed to achieve the gauge.
- Tapestry Needle: This needle will be used for weaving in the loose ends and sewing any necessary seams.
- Scissors: A sharp pair of scissors will be essential for cutting the yarn.
- Stitch Markers: Optional, but helpful for marking certain stitches or sections of your hat.
- Measuring Tape: To ensure you achieve the correct gauge and measurements for your hat.
Once you have gathered all the materials, you are ready to get started on your knitted pixie hat!
Yarn
Yarn is an essential material for knitting and crochet projects. It is a long continuous thread made from various fibers, such as wool, cotton, acrylic, or blends of these materials. The type of yarn you choose can greatly affect the outcome of your project, as each fiber brings its own unique qualities and characteristics. It is important to consider factors such as the warmth, softness, and durability of the yarn when selecting the perfect one for your project.
Wool yarn is a popular choice for knitting hats, sweaters, and other winter garments. It is known for its warmth and ability to retain heat, making it perfect for cold weather. Wool can come in different weights, such as bulky or fingering, which determines the thickness of the yarn. This allows for a variety of options when it comes to creating different textures and patterns in your knitted or crocheted items.
Cotton yarn is another popular option, especially for garments worn in warmer climates or during the summer months. It is lightweight, breathable, and has excellent absorbency, making it comfortable to wear even in hot weather. Cotton yarn is also known for its durability, making it a great choice for items that need to withstand frequent washing and wear.
- Acrylic yarn is a synthetic option that is often chosen for its affordability and wide range of colors. It is soft, lightweight, and easy to care for, making it suitable for a variety of projects. Acrylic yarn is also a great option for those with wool allergies or sensitivities, as it is hypoallergenic.
- Blended yarns combine different fibers to create a unique combination of qualities. For example, a wool and acrylic blend offers the warmth and softness of wool with the affordability and easy care of acrylic. These yarns can give your projects a nice balance of warmth, durability, and affordability.
When choosing yarn for your knitting and crochet projects, consider the desired outcome, the weather or climate it will be worn in, and any specific requirements or preferences you may have. Experimenting with different types of yarn can add variety and excitement to your projects, and help you create beautiful, one-of-a-kind items.
Needles
When it comes to knitting, the choice of needles can greatly affect the outcome of your project. Whether you prefer circular needles, straight needles, or double-pointed needles, it’s important to choose the right size and material for your needs.
Size: The size of the needles you use will determine the gauge and tension of your knitting. It’s important to check the yarn label for the recommended needle size, but you may need to adjust the size based on your personal knitting style and desired outcome. Generally, larger needles create looser and more drapey fabric, while smaller needles create tighter and more structured fabric.
Material: Knitting needles can be made from various materials, each with its own advantages and disadvantages. Metal needles are durable and slide smoothly over the yarn, but they can be slippery and noisy. Bamboo needles are lightweight and have a natural grip, making them great for beginners, but they may break more easily. Plastic needles are affordable and flexible, but they can be prone to bending and warping. It’s a matter of personal preference, so try different materials to find what works best for you.
Types of needles: Circular needles are great for knitting in the round or creating large projects such as sweaters or blankets. They have two needle tips connected by a flexible cord, allowing you to comfortably hold many stitches. Straight needles are the classic knitting tool, with a pointed tip on one end and a stopper on the other. They are used for flat knitting, such as scarves or dishcloths. Double-pointed needles (DPNs) are shorter and have a pointed tip on each end. They are used for knitting in the round, particularly for small projects like socks or mittens.
In conclusion, choosing the right needles for your knitting project is essential for achieving the desired outcome. Consider the size, material, and type of needles that work best for your knitting style and project requirements. Experiment with different options to find the needles that make your knitting experience enjoyable and successful.
Additional Supplies
While the pattern provides the basic instructions for knitting the pixie hat, there are a few additional supplies that you will need to complete the project:
- Yarn: Choose a soft, medium weight yarn in the color of your choice. Make sure you have enough yarn to complete the entire hat.
- Knitting Needles: You will need a pair of circular knitting needles in size 8 (5mm) to accommodate the number of stitches.
- Double-Pointed Needles: You will also need a set of double-pointed needles in the same size for the crown shaping.
- Tapestry Needle: A tapestry needle with a large eye will be useful for weaving in ends and sewing up the seams.
- Stitch Marker: A stitch marker can be helpful for keeping track of the beginning of the round.
- Scissors: A small pair of scissors will come in handy for cutting the yarn.
Having these additional supplies on hand will ensure that you have everything you need to complete the knitted pixie hat for adults. Gather all your materials before you start, and you’ll be ready to get knitting!
Gauge
Gauge is an important factor to consider when knitting a hat. It refers to the number of stitches and rows that are knit within a given measurement area. Knitting with the correct gauge ensures that the finished hat will have the desired size and fit.
Before starting your project, it is crucial to check your gauge by knitting a swatch. The pattern usually specifies the required gauge, which is usually measured in stitches and rows per inch or centimeter. To obtain an accurate gauge, use the recommended needle size and yarn specified in the pattern.
Why is gauge so important?
Gauge determines the size of the hat. If your stitches are too tight, your hat may turn out smaller than intended, while loose stitches will result in a larger hat. By knitting a swatch and checking your gauge, you can make necessary adjustments to ensure the hat fits perfectly.
Gauge affects the drape and fabric of the hat. Different stitch patterns and tension can alter the texture and appearance of the knitted fabric. By matching the gauge, you can achieve the desired look and feel of the hat.
Gauge impacts the amount of yarn used. If your gauge is significantly different from the pattern’s gauge, you may run out of yarn or have excess left over. Following the recommended gauge allows you to estimate how much yarn you will need for your hat.
Tips for obtaining the correct gauge:
- Use the recommended needle size: Changing the needle size can affect your gauge, so it is essential to follow the pattern recommendations.
- Block your swatch: After knitting your swatch, wet-block it to relax the stitches and get accurate measurements.
- Measure your gauge in the correct area: Make sure to measure your stitches and rows within the specified measurement area. A slight variation can affect the overall fit of your hat.
- Make adjustments if needed: If your gauge does not match the pattern’s gauge, you can try changing your needle size or adjusting your tension until you achieve the desired results.
- Keep practicing: Gauge consistency comes with practice, so don’t get discouraged if it takes a few attempts to get it right.
Instructions
If you love knitting and want to make a cozy pixie hat for yourself or a loved one, this free pattern is just what you need. Follow these easy instructions to create your own stylish hat.
Materials:
- Yarn: Choose any soft and warm yarn in your favorite color. Worsted weight yarn works best for this pattern.
- Needles: Use size 8 (5 mm) circular needles and double-pointed needles (DPNs).
- Stitch markers: You will need at least 2 stitch markers to keep track of your stitches.
- Tapestry needle: This needle will be used for weaving in ends and sewing up any seams.
- Scissors: A pair of scissors will be handy for cutting yarn.
Instructions:
- Cast on: Start by casting on 96 stitches using circular needles.
- Ribbing: Work in a 2×2 rib stitch (k2, p2) for 2 inches. This will create a stretchy and comfortable band for the hat.
- Switch to stockinette stitch: Continue knitting in stockinette stitch (knit every round) until the hat measures 6 inches from the cast on edge.
- Decrease rounds: Begin the decrease rounds by knitting 8 stitches, then k2tog (knit 2 stitches together) and repeat this pattern until the end of the round. You will have decreased 8 stitches in total.
- Continue decrease rounds: Repeat the decrease rounds every other round until you have 16 stitches remaining.
- Finishing: Cut the yarn, leaving a long tail. Thread the tail through a tapestry needle and slip the needle through the remaining stitches. Pull tight to close the top of the hat. Weave in any remaining ends and sew up any seams if necessary.
With these simple instructions, you’ll be able to knit your own cozy and stylish pixie hat. Enjoy the process and stay warm!
Cast On
When starting the knitting project, the first step is to cast on. This is the process of creating the initial row of stitches onto the knitting needle. There are several methods for casting on, but for this particular pattern, the long tail cast on method is recommended.
Long Tail Cast On:
To begin the long tail cast on, you will need to estimate the amount of yarn needed for your project. For this adult-sized pixie hat, it is recommended to leave a tail that is approximately three times the width of the finished hat. Make a slip knot at this point.
Hold the knitting needle in your right hand, with the slip knot on your left thumb. Insert the needle into the slip knot from front to back, making sure the long tail is hanging over the back of your hand. With your index finger, bring the working yarn (the yarn attached to the skein) over the needle to the front, wrapping it around the needle.
Squeeze the needle with your thumb and middle finger, and pull the needle with the yarn through the slip knot loop. This will create your first stitch. Repeat this process, inserting the needle through the loop created by the last stitch, wrapping the yarn around the needle, and pulling it through the loop. Continue this until you have cast on the required number of stitches for your pattern.
Once you have successfully cast on the desired number of stitches, you can proceed to the next step of the pattern, which is knitting the first row.
Ribbing
Ribbing is a common technique used in knitting to create a stretchy and elastic fabric. It is typically used for cuffs, hems, and neckbands of garments. The ribbing pattern is characterized by alternating columns of knit and purl stitches, creating raised ridges and valleys.
The most common ribbing pattern is called the 1×1 rib, where one knit stitch is followed by one purl stitch. This creates a pattern with equal columns of knit and purl stitches. Another popular ribbing pattern is the 2×2 rib, where two knit stitches are followed by two purl stitches. This pattern creates wider columns and is commonly used for thicker fabrics.
Ribbing is often used to give garments a snug and fitted look. The elastic nature of ribbed fabric allows it to stretch and fit comfortably around the body. It is also used to prevent the edges of garments from rolling up and to provide a polished and finished look.
To create ribbing, you can use a smaller needle size compared to the main body of the garment. This helps to create a tighter and denser fabric, enhancing the stretch and elasticity of the ribbing. Additionally, using a different color or type of yarn for the ribbing can add visual interest and make it stand out.
Overall, ribbing is an important technique in knitting that adds both functionality and aesthetic appeal to garments. Whether you’re knitting a hat, sweater, or scarf, incorporating ribbing can give your project a professional and polished finish.
Body
The knitted pixie hat pattern for adults is designed to fit snugly around the head, providing warmth and comfort during cold weather. The hat features a ribbed brim that stretches to fit different head sizes, ensuring a secure and comfortable fit. The body of the hat is knitted in a soft and warm yarn, such as wool or acrylic, to provide insulation and keep the head cozy.
To knit the body of the hat, follow the instructions provided in the pattern. The pattern usually includes the number of stitches to cast on and the specific stitch pattern or design to use. Common stitch patterns for the body of a knitted hat include stockinette stitch, rib stitch, or a combination of different stitches to create texture and visual interest.
Depending on the style of the hat, the body may be knitted in a single color or in multiple colors using stranded or intarsia knitting techniques. The pattern may also include instructions for shaping the hat, such as decreasing stitches towards the top to create a tapered or pointed shape.
Once the body of the hat is complete, it is usually finished by binding off the stitches to secure the edge. Some patterns may also include instructions for adding embellishments, such as pom-poms or buttons, to further personalize the hat. With the body of the hat finished, you can now move on to knitting the brim or any additional design elements specified in the pattern.
Decrease Rounds
Once you have completed the ribbing and the main body of the hat, it’s time to start decreasing. Decreasing is important to create the shape of the hat and to ensure that it fits snugly on the head.
To begin the decrease rounds, you will need to divide your stitches evenly between four double-pointed needles. This will make it easier to work the decreases and ensure that the hat maintains its shape. Start by knitting two stitches together to form a decrease, then knit the next stitch. Repeat this pattern until you reach the end of the round.
After completing the first decrease round, you will need to knit one round without making any decreases. This will help maintain the integrity of the hat’s shape. Then, on the next decrease round, knit one stitch, followed by knitting two stitches together. Repeat this pattern until the end of the round.
Continue alternating between a decrease round and a plain knit round until you have 12 stitches remaining. At this point, cut your yarn, leaving a long tail. Thread the tail through a yarn needle and slip the remaining stitches onto the needle. Pull tight to close the top of the hat. Secure the yarn by weaving it through the stitches once more, then trim any excess. Your hat is now complete and ready to wear!
Finishing
Once you have finished knitting your pixie hat, it’s time to add the finishing touches to complete the look. Follow these steps to finish your hat:
1. Weave in the loose ends: Take a tapestry needle and thread the loose yarn ends through the stitches on the inside of the hat. Make sure to weave in the ends securely to prevent them from unraveling.
2. Block the hat: Blocking is a technique used to shape and smooth out the knitted fabric. To block your hat, gently wet it with lukewarm water and lay it flat on a clean towel. Use your hands to shape the hat into the desired form. Allow it to dry completely before wearing or storing.
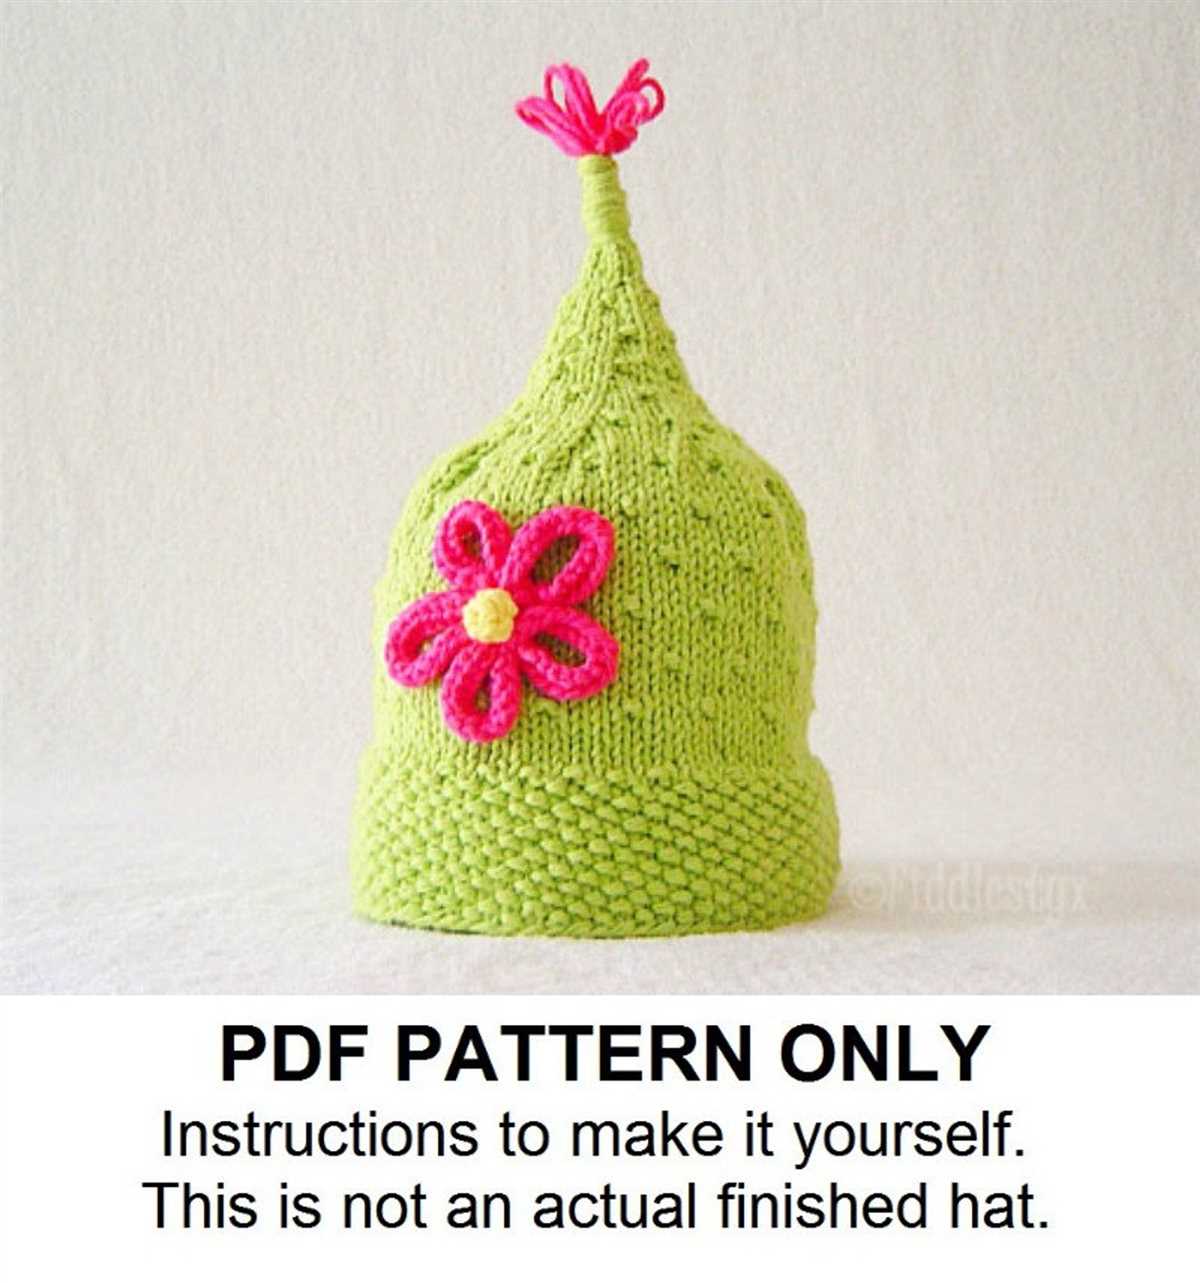
3. Add embellishments (optional): If desired, you can add embellishments to your pixie hat to personalize it. Consider attaching a decorative button, a pompom, or even a small fabric flower. Be creative and have fun!
By following these finishing steps, you will have a completed and stylish pixie hat that is ready to wear. Enjoy your new accessory and stay warm!
Q&A:
Where can I find a free knitted pixie hat pattern for adults?
You can find free knitted pixie hat patterns for adults on various crafting websites, such as Ravelry, LoveCrafts, and AllFreeKnitting. These websites offer a wide range of patterns for different skill levels and styles.
What materials do I need to knit a pixie hat?
To knit a pixie hat, you will need a pair of knitting needles, usually in sizes US 6-8 (4-5 mm), and a ball of yarn suitable for the desired hat size. It’s recommended to use a soft and warm yarn, such as acrylic or wool blends, for a comfortable and cozy hat.
Are there different sizes available for the knitted pixie hat pattern?
Yes, many knitted pixie hat patterns offer different sizes for adults, ranging from small to large. The pattern instructions usually specify the finished measurements and the corresponding head circumference for each size. Make sure to choose the size that best fits your head measurements.
Are the knitted pixie hat patterns suitable for beginners?
Some knitted pixie hat patterns are suitable for beginners, especially those labeled as “easy” or “beginner-friendly.” These patterns usually involve basic knitting stitches, such as knit and purl, and simple shaping techniques. However, it’s always a good idea to read through the pattern instructions and gauge requirements before starting to ensure it matches your skill level.
Can I modify the knitted pixie hat pattern to add my own touch?
Definitely! Knitting is a versatile craft that allows for customization and personalization. You can modify the knitted pixie hat pattern by adding different stitch patterns, changing the brim length, or adding embellishments like buttons or pom-poms. Just make sure to note any modifications you make so you can replicate them if desired.
Where can I find a free knitted pixie hat pattern for adults?
You can find free knitted pixie hat patterns for adults on various online platforms such as knitting blogs, knitting websites, and knitting communities. Some popular websites for finding free knitting patterns include Ravelry, Knitty, and AllFreeKnitting. Additionally, you can try searching on social media platforms like Pinterest or Instagram, as many knitters share their patterns and projects there.
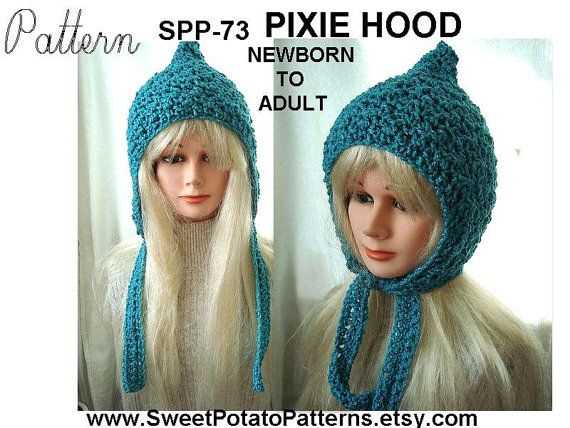
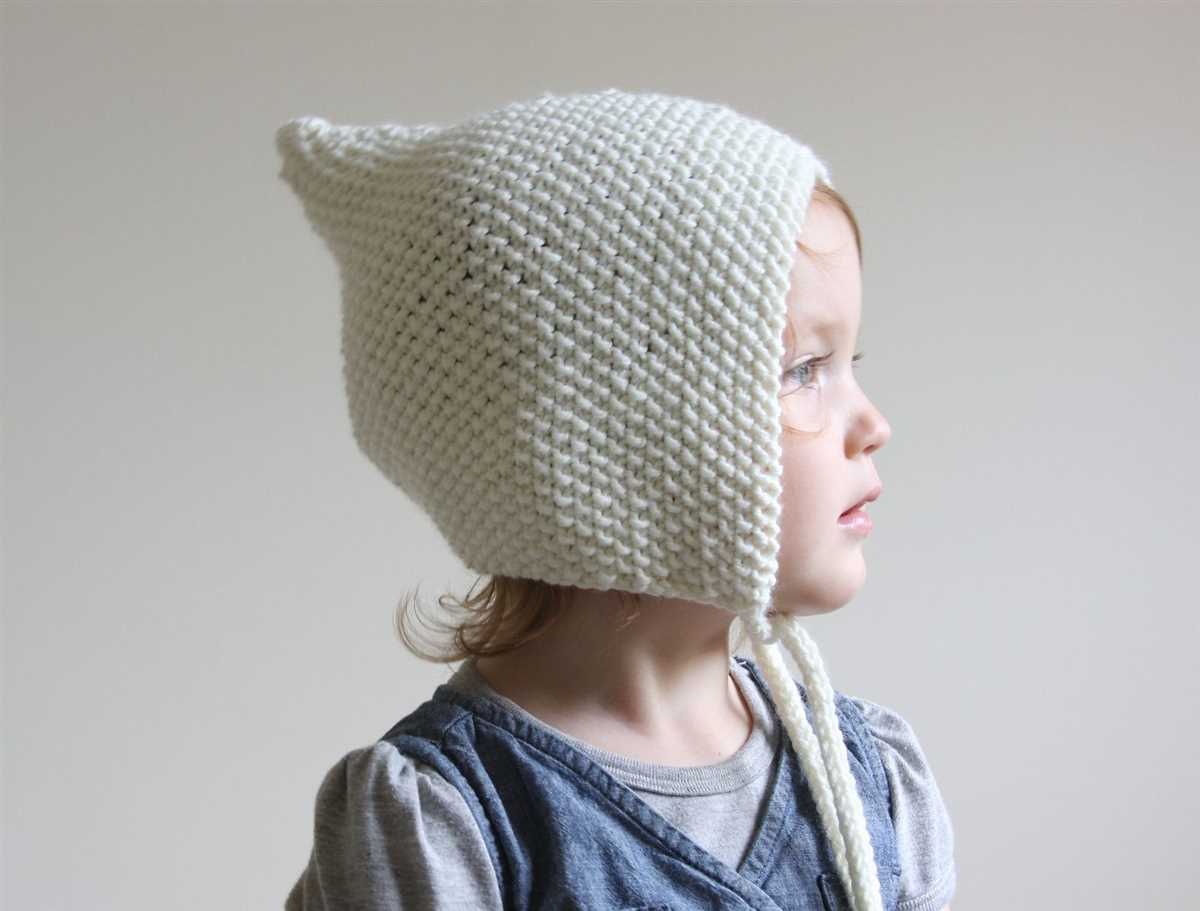
Are there different styles of knitted pixie hats for adults?
Yes, there are various styles of knitted pixie hats for adults. Some common variations include a traditional pointed pixie hat, a slouchy pixie hat with a longer body, or a pixie hat with ear flaps for added warmth. Additionally, you can customize your knitted pixie hat pattern by adding different stitch patterns, colors, or embellishments, making it unique to your personal style.