
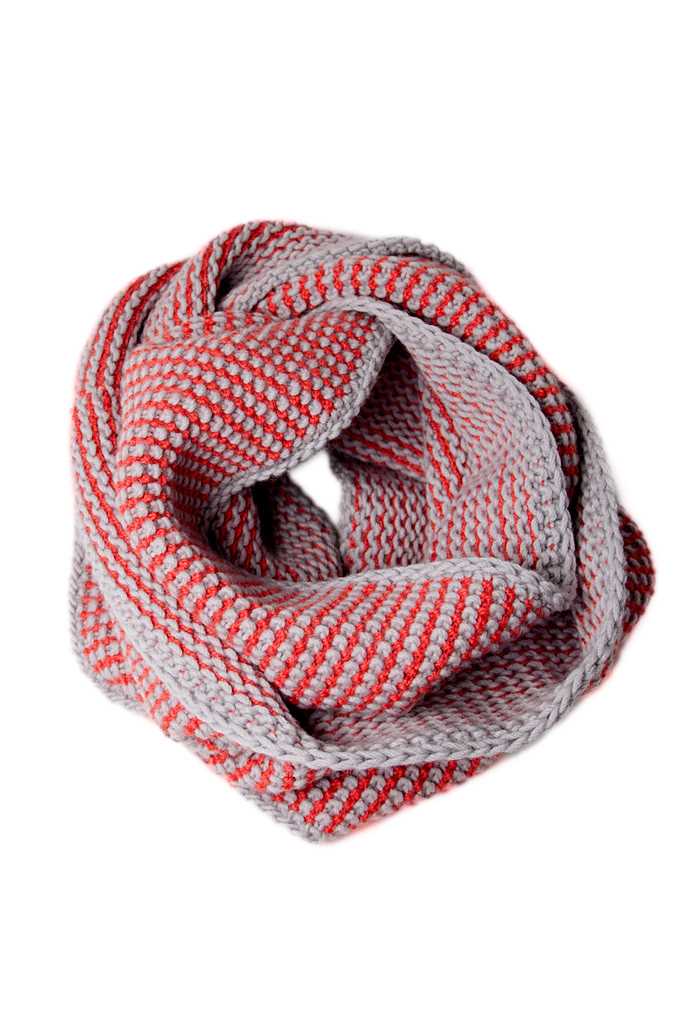
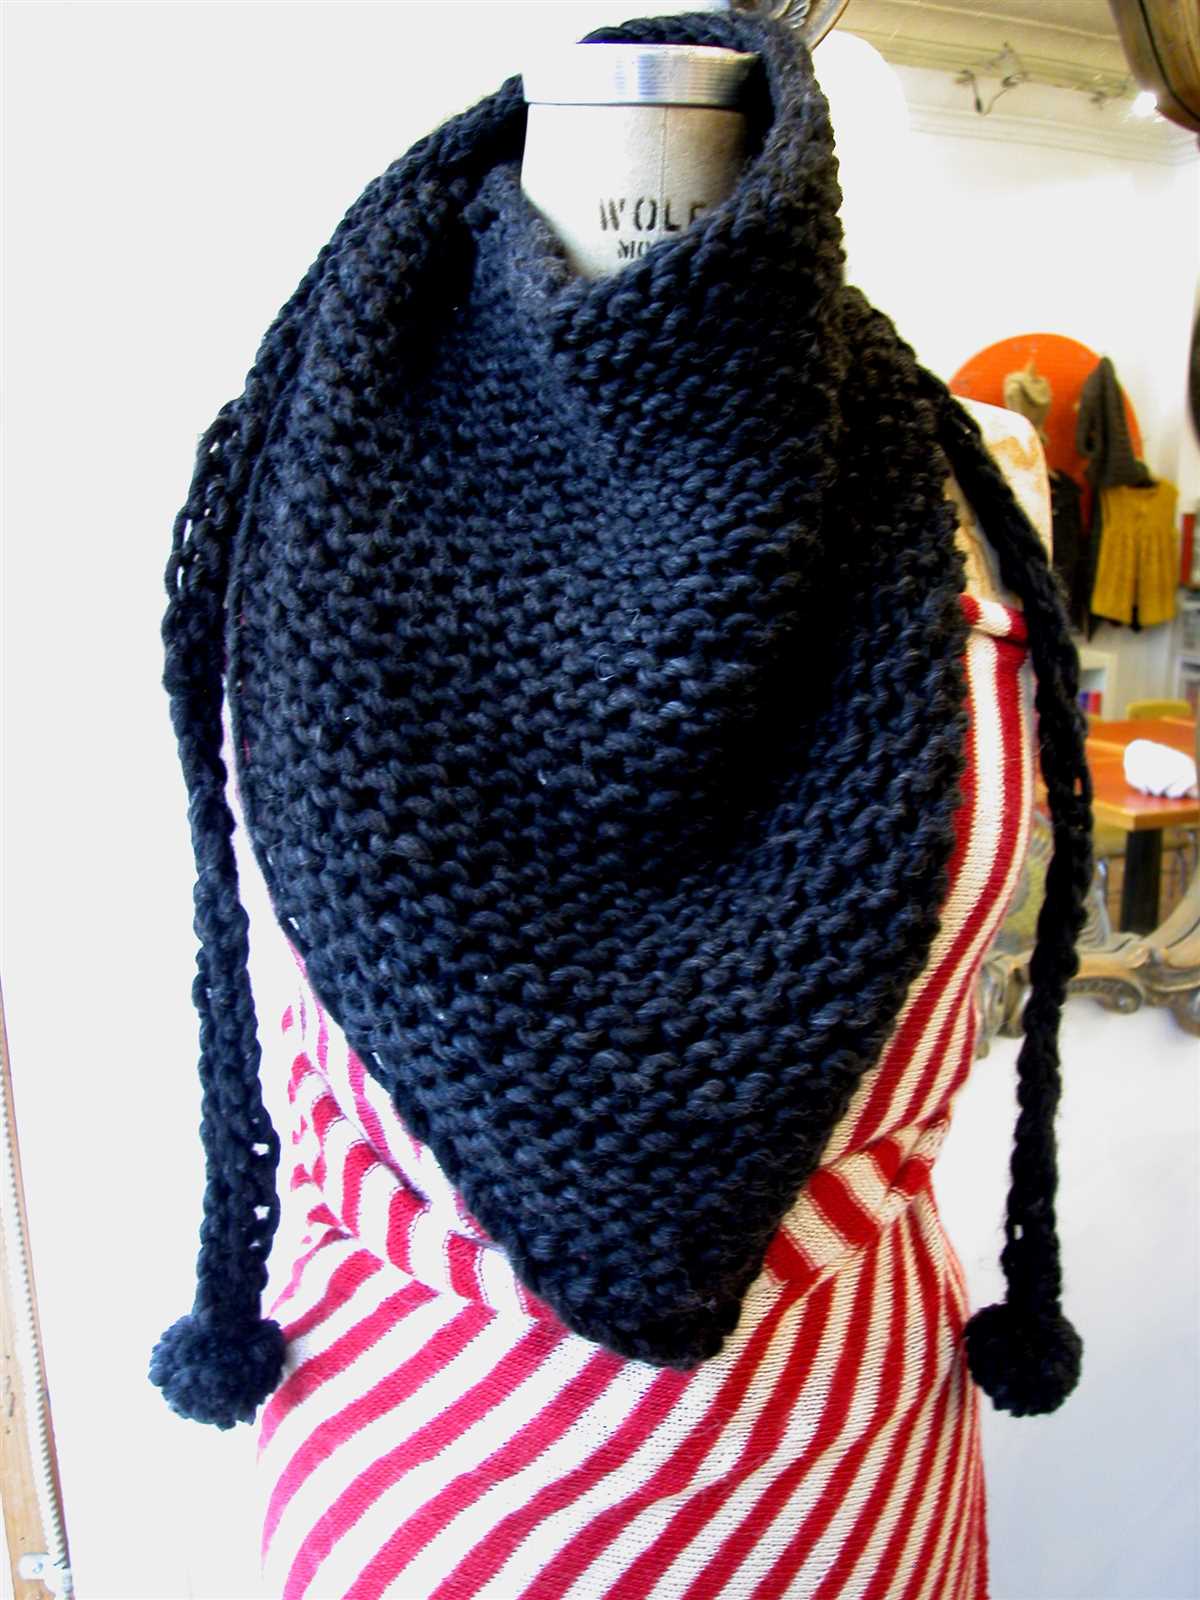
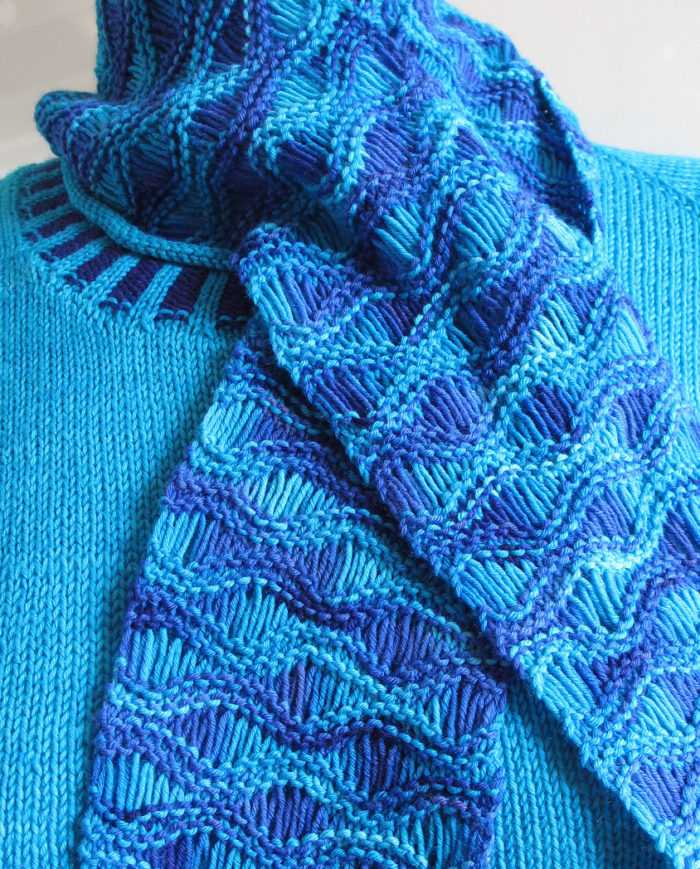
When the temperature starts to drop and you can see your breath in the crisp air, it’s time to start bundling up in cozy knits. A knit scarf is a must-have accessory for the winter season. Whether you’re a beginner or a seasoned knitter, this pretty knit scarf pattern is perfect for anyone looking to add a touch of warmth and style to their wardrobe.
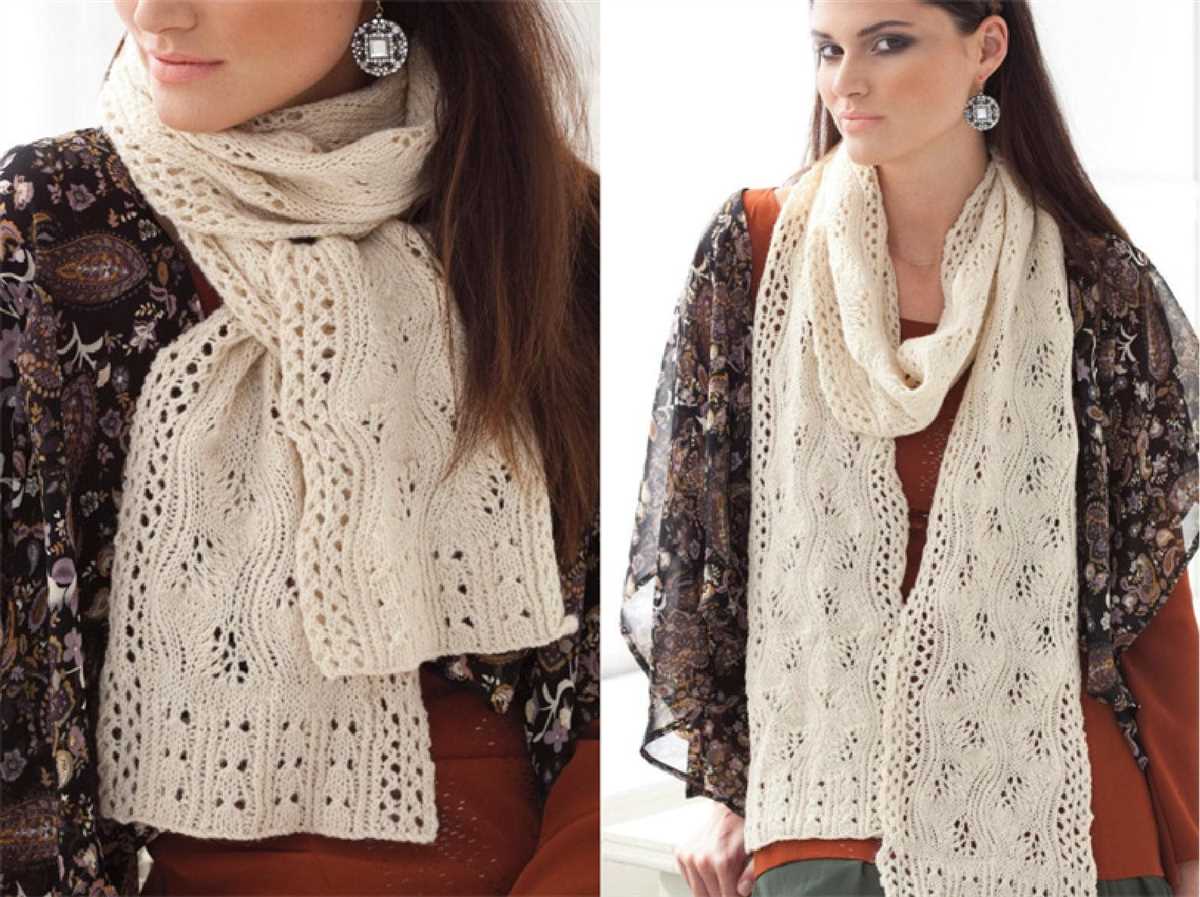
The pattern features a beautifully textured stitch that adds visual interest to the scarf. The stitches create a rich, luxurious fabric that is both soft and warm. The pattern also incorporates a delicate lace border that gives the scarf a feminine and elegant touch. With its delicate details and cozy feel, this scarf is sure to become a favorite accessory for chilly days.
Not only is this scarf stylish and warm, but it’s also a great project for knitters of all skill levels. The pattern uses basic techniques and stitches, making it perfect for beginners who are looking to expand their skills. If you’re an experienced knitter, this pattern offers a relaxing and enjoyable project that can be easily customized to your preferred length and width.
Pretty Knit Scarf Pattern: A Step-by-Step Guide to Creating a Beautiful Scarf
Knitting your own scarf is not only a cozy and rewarding project, but it also allows you to create a unique accessory that reflects your personal style. This step-by-step guide will walk you through the process of creating a pretty knit scarf that is sure to turn heads and keep you warm during the colder months.
Materials:
- Size 8 knitting needles
- 2 skeins of worsted weight yarn in your preferred colors
- Yarn needle
- Scissors
Step 1: Cast On
Begin by casting on 40 stitches using your size 8 knitting needles. This will be the width of your scarf. If you prefer a wider or narrower scarf, you can adjust the number of stitches accordingly.
Step 2: Knit the First Row
Once you have cast on your stitches, begin knitting the first row. Knit every stitch across the row until you reach the end. This will create the base for your scarf.
Step 3: Begin the Pattern
Now it’s time to introduce the pretty knit pattern. The pattern consists of a combination of knit and purl stitches, creating a textured and visually appealing design. Follow this pattern:
- Row 1: *Knit 2, purl 2* – repeat this pattern across the row
- Row 2: *Purl 2, knit 2* – repeat this pattern across the row
- Repeat these two rows until your scarf reaches your desired length.
Step 4: Bind Off
Once you have reached your desired length, it’s time to bind off your stitches. Knit the first two stitches, then use your left needle to lift the first stitch over the second stitch and off the needle. Continue this process until you have one stitch left, then cut your yarn and pull it through the remaining stitch to secure it.
Step 5: Finishing Touches
Use a yarn needle to weave in the loose ends of your yarn, making sure to hide them within the stitches of your scarf. Once all ends are secured, give your scarf a gentle block to ensure it lays flat and retains its shape.
Now you have a beautiful and cozy knit scarf that you can proudly wear or give as a thoughtful handmade gift. Experiment with different color combinations and enjoy the process of creating your own unique accessory.
Choosing the Right Yarn for Your Knit Scarf
When it comes to knitting a scarf, choosing the right yarn is essential for achieving the desired look and ensuring the durability of your project. With so many different types and weights of yarn available, it’s important to consider a few factors before making your selection.
Determine the Functionality:
Before diving into the world of yarn choices, consider the intended functionality of your knit scarf. Will it be a fashionable accessory or a cozy, warm piece for winter? The answer to this question will guide you in selecting the appropriate yarn weight and fiber content.
If you’re aiming for a lightweight, stylish scarf, opt for a yarn with a thin weight, such as fingering or sport weight. These yarns are often made from natural fibers like merino wool or silk, giving the scarf a luxurious touch. On the other hand, if you’re looking for maximum warmth, bulky yarns made from acrylic or wool blends are the way to go.
Think About Texture and Drape:
The texture and drape of a yarn can greatly influence the appearance of your scarf. Smooth and tightly spun yarns, like cotton or acrylic, tend to result in a flatter, more structured fabric. This is perfect if you prefer a polished, defined look. Alternatively, if you want your scarf to have a softer, more fluid appearance, opt for yarns with loft and halo, such as mohair or alpaca blends.
Moreover, consider the stitch pattern you’ll be using for your scarf. Some yarns highlight certain stitches better than others. For example, a highly variegated yarn might hide intricate stitch patterns, while a solid or subtly variegated yarn will allow the stitches to shine.
Maintainability and Personal Preferences:
Lastly, think about how easy it will be to care for your knit scarf. Certain fibers, like superwash wool or acrylic, are machine washable, making them ideal choices for everyday wear. Others may require more delicate handling or dry cleaning.
Additionally, take into account your personal preferences. Do you like yarns with vibrant, bold colors, or do you prefer more subtle, neutral tones? Consider your personal style and the overall aesthetic you want to achieve with your scarf. After all, knitting is more than just a practical activity – it’s a chance to express your creativity and personality.
By carefully considering the functionality, texture, drape, maintainability, and personal preferences, you can choose the right yarn for your knit scarf project. This will ensure that your finished piece not only looks beautiful but also meets your expectations in terms of warmth, comfort, and style.
Selecting the Perfect Needles for Your Knitting Project
When starting a knitting project, choosing the right needles is crucial to achieve the desired results. The type and size of needles can greatly influence the overall look and feel of your finished piece. Here are some factors to consider when selecting the perfect needles for your knitting project:
Type of Needles:
There are various types of knitting needles available, including straight needles, circular needles, and double-pointed needles. Straight needles are the traditional choice and are ideal for flat knitting, such as scarves and blankets. Circular needles come with a flexible cable connecting two needle tips and are popular for knitting in the round or large projects like sweaters. Double-pointed needles have a point at both ends and are used for knitting small, tubular projects like socks or hats.
Needle Size:
The size of the needles will determine the gauge and tension of your knitting. Needles are typically labeled with numbers or letters to indicate their size, with smaller numbers indicating thinner needles. The size of needles required for a project usually depends on the yarn weight and the desired fabric density. Thicker needles create looser stitches, while smaller ones produce tighter stitches.
- Yarn Weight: When selecting the needle size, consider the recommended needle size range provided on the yarn label. This will help you determine whether you need a larger or smaller needle to achieve the desired gauge.
- Pattern Requirements: Some knitting patterns may specify a particular needle size to achieve the intended design. Be sure to check the pattern instructions and adjust accordingly if needed.
Material:
Knitting needles come in various materials, including wood, metal, and plastic. Each material has its own characteristics that can affect your knitting experience. Wood needles are lightweight and provide a warm feel, while metal needles are durable and offer smooth stitching. Plastic needles are affordable and often chosen by beginners. Consider your personal preferences and the project requirements when selecting the needle material.
By carefully considering the type, size, and material of your knitting needles, you can ensure a successful and enjoyable knitting project. Remember to experiment and explore different options to find the perfect needles for your individual knitting style and project needs.
Casting On: Starting Your Knit Scarf Project
When starting your knit scarf project, the first step is to cast on. Casting on is the process of creating the foundation row of stitches on your knitting needles. It’s important to cast on with the right amount of stitches to ensure that your scarf is the desired width.
There are several different methods you can use to cast on, but the most common method is the long-tail cast on. To do this, you’ll need to estimate the length of yarn you’ll need for the cast on. This can be done by taking the length of your knitting needle and multiplying it by the number of stitches you want to cast on, then adding a little extra for the tail. Once you have your estimated length of yarn, create a slipknot and place it on the needle.
With the slipknot on your needle, hold the needle in your right hand and the tail end of the yarn in your left hand. Then, using your left thumb and forefinger, make a loop with the working yarn (the yarn connected to the ball) and pass it through the slipknot from back to front. This creates a second loop on your needle. Repeat this process with each stitch until you have cast on the desired number of stitches.
As you cast on, it’s important to keep your tension consistent. You don’t want your stitches to be too tight or too loose. Practice and experience will help you find the right balance. Once you’ve finished casting on, you can begin knitting the first row of your scarf.
Remember to take your time and be patient with the casting on process. It may take a few tries to get the hang of it, but with practice, you’ll be able to cast on confidently and start knitting your beautiful scarf.
Basic Knitting Stitches for Your Scarf
Knitting a scarf can be a rewarding project for beginners and experienced knitters alike. To create a beautiful and cozy scarf, it’s important to understand some basic knitting stitches. These stitches will not only help you create different patterns and textures, but they will also improve your overall knitting skills.
One of the most commonly used stitches in knitting is the knit stitch. This stitch is created by inserting the right-hand needle into the front of the first stitch on the left-hand needle, wrapping the yarn around the right-hand needle, and pulling it through the stitch. The knit stitch creates a smooth, right-side fabric and is perfect for creating a simple and classic look for your scarf.
Alternate between the knit and purl stitches
In addition to the knit stitch, the purl stitch is another essential stitch for knitting scarves. The purl stitch is created by inserting the right-hand needle into the front of the first stitch on the left-hand needle, but instead of wrapping the yarn around the right-hand needle, you bring the yarn in front of the work and then wrap it around the right-hand needle. The purl stitch creates a bumpy, textured fabric, which adds visual interest to your scarf.
To create different patterns and designs in your scarf, you can alternate between the knit and purl stitches. For example, you can knit a row and then purl a row, or you can create ribbing by knitting a few stitches and then purling a few stitches. The possibilities are endless, and experimenting with different stitch patterns can add uniqueness and creativity to your scarf.
Casting on and binding off

Before you begin knitting your scarf, you’ll need to cast on stitches to create the foundation. There are several methods for casting on, but the long-tail cast-on is one of the most commonly used. This method creates a neat and stretchy edge, making it ideal for scarves.
When you’ve finished knitting your scarf, you’ll need to bind off the stitches to secure the edges. The basic bind-off method involves knitting two stitches and then passing the first stitch over the second stitch and off the needle. Repeat this process until all the stitches have been bound off. This will create a clean and even edge for your scarf.
By mastering these basic knitting stitches – knit, purl, cast on, and bind off – you’ll be able to create a beautiful and cozy scarf that you can be proud of. So grab your knitting needles and yarn, and get ready to create a scarf that will keep you warm and stylish all winter long!
Creating a Stunning Pattern with Cable Knitting
Knitting is an art form that has been passed down through generations, and one of the most beautiful techniques in this craft is cable knitting. Cable knitting involves twisting stitches to create intricate patterns that resemble the twists and turns of a cable. With just a few simple techniques, you can create stunning patterns that will impress everyone who sees your work.
To start creating your cable knitting pattern, you will need a set of cable needles. These needles are usually shorter and have a pointed end on each side. They are used to hold the stitches in place while you create the twisted cables. Once you have your cable needles, you can choose a cable pattern from a knitting pattern book or create your own unique design.
When working with cable knitting, it’s important to understand the basics of the technique. The main idea is to create twists and crosses by working stitches out of their natural order. This can be achieved by holding some stitches on the cable needle and working the next set of stitches before returning to the cables. By repeating this process, you can create cables that move in different directions and create intricate patterns.
One of the key elements of a stunning cable knitting pattern is symmetry. Whether you are working with a simple twist or a complex cable pattern, ensuring that the twists match up evenly on both sides of your work is crucial. This can be achieved by counting stitches and paying attention to the placement of each twist.
With cable knitting, the possibilities are endless. You can create patterns with one or multiple cables, experiment with different stitch combinations, and even incorporate colorwork into your design. The key is to practice, experiment, and have fun with your knitting. With time and dedication, you will be able to create stunning cable knitting patterns that will be admired by all.
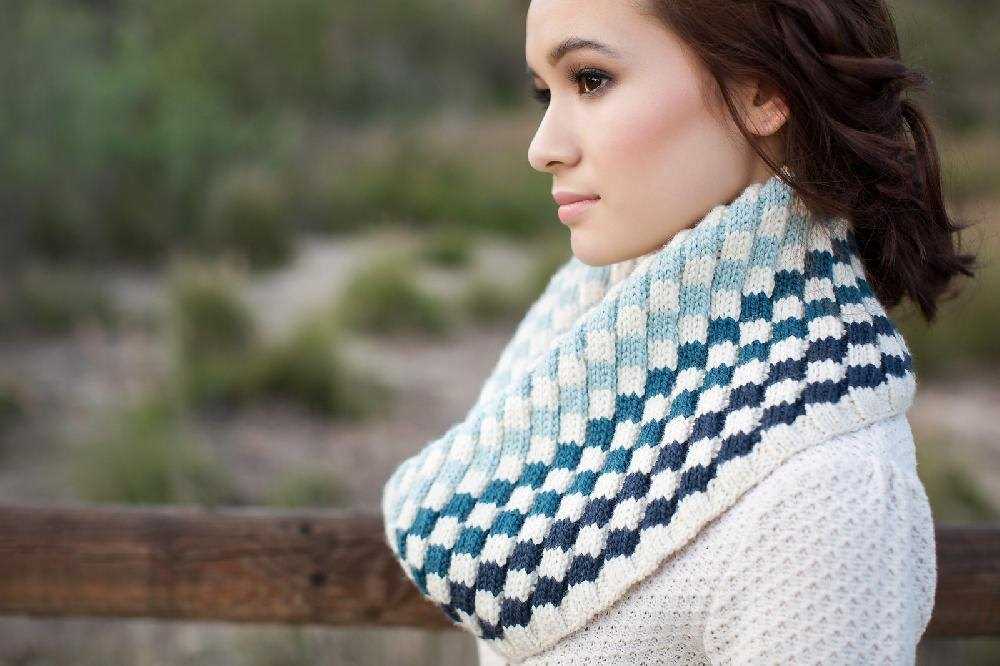
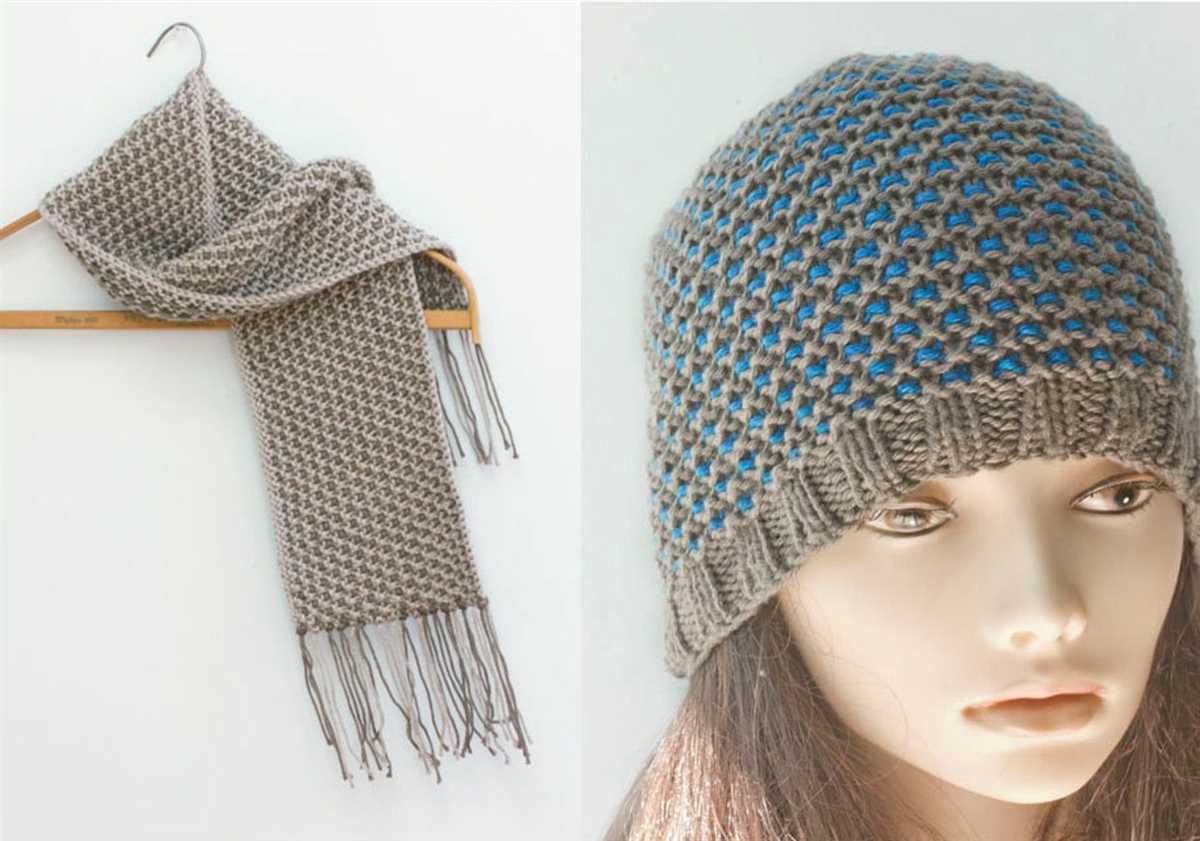
Incorporating Colors in Your Knit Scarf Design
Adding different colors to your knit scarf can transform a simple design into a visually stunning piece. Whether you want to showcase your favorite colors or create a unique pattern, incorporating colors in your knit scarf design is a creative way to make your accessory stand out.
1. Contrast colors: One of the easiest ways to incorporate colors in your knit scarf design is to choose contrasting colors. Opt for colors that are on opposite ends of the color spectrum, such as blue and orange or purple and yellow. This will create a strong visual impact and make your scarf eye-catching.
2. Gradient effect: Another option is to create a gradient effect by using different shades of the same color. Start with a lighter shade at one end of the scarf and gradually transition to a darker shade on the other end. This will give your scarf a soft, blended look and add depth to your design.
3. Color blocking: If you prefer a more bold and modern look, consider color blocking. Divide your scarf into sections and knit each section in a different color. You can choose colors that complement each other or go for a contrasting combination for a bolder look. This technique allows you to play with different colors and create a unique pattern.
4. Stripes: Stripes are a classic design choice for a knit scarf. To incorporate colors using stripes, simply alternate between two or more colors as you knit. You can choose different widths for the stripes or opt for equal-sized stripes. Stripes add a timeless and versatile look to your scarf design.
5. Fair Isle knitting: If you’re looking for a more intricate and detailed design, consider trying Fair Isle knitting. This traditional technique involves knitting with two or more colors in a row to create intricate patterns. The result is a stunning and unique scarf design that will surely catch attention.
With these different techniques, you can easily incorporate colors into your knit scarf design and create a beautiful accessory that will keep you warm and stylish.
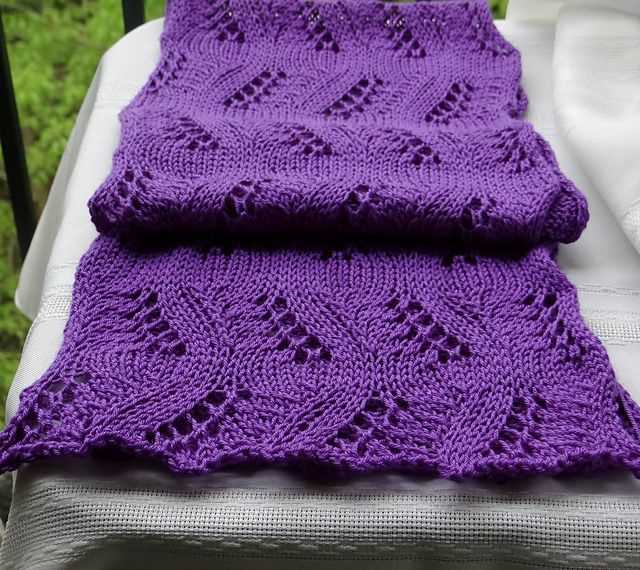
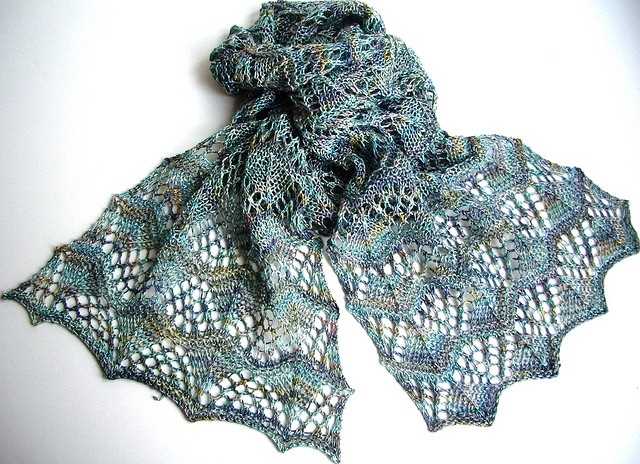
Adding Texture to Your Scarf with Different Stitch Patterns
Creating a beautifully textured knit scarf can add dimension and interest to your finished project. By incorporating different stitch patterns, you can achieve a unique and eye-catching design. Whether you’re a beginner or an experienced knitter, experimenting with various stitch patterns can elevate your scarf to the next level.
One way to add texture to your scarf is by using cable stitches. Cable stitches create a twisted design that stands out and adds depth to your knitting. By crossing stitches over one another, you can create intricate cable patterns that will impress others. These stitches can be simple or complex, depending on your skill level and desired look.
Seed Stitch
The seed stitch is another versatile stitch pattern that can add texture to your scarf. This stitch alternates between knit and purl stitches in a regular pattern, creating a bumpy texture. The seed stitch is great for beginners and can be easily memorized. It’s a simple yet effective way to make your scarf visually interesting.
Ribbing
Ribbing is a classic stitch pattern that adds both texture and stretchiness to your scarf. Commonly used for the edges of sweaters and cuffs, ribbing is created by alternating between knit and purl stitches in a pattern, typically in a 1×1 or 2×2 pattern. This stitch pattern adds a neat and tidy look to your scarf while providing a comfortable fit.
- Garter Stitch: The garter stitch is the simplest of all stitch patterns and creates a bumpy texture. It is achieved by knitting every row, resulting in a fabric that lies flat and is reversible. The garter stitch is perfect for showcasing the beauty of your yarn or for adding a textural contrast to other stitch patterns.
- Mock Cable Stitch: The mock cable stitch is a simpler version of the cable stitch. By using twisted stitches and decreases, you can create a cable-like effect that mimics the look of traditional cables. This stitch pattern is a great option for those who want to incorporate texture without the complexity of true cable stitches.
Overall, experimenting with different stitch patterns is a great way to add texture and interest to your knit scarf. Whether you choose cable stitches, seed stitch, ribbing, or other patterns, don’t be afraid to mix and match or combine multiple stitch patterns in your design. The possibilities are endless, and by incorporating texture, your scarf will become a unique and stylish accessory.
Shaping Your Scarf: Increasing and Decreasing Stitches
When knitting a scarf, you may want to create shaping and add visual interest by increasing or decreasing stitches. These techniques can help create a tapered or shaped scarf, or even add decorative elements like lace or cables. Understanding how to increase and decrease stitches will allow you to customize your scarf pattern and create beautiful designs.
Increasing Stitches: To increase stitches, you can use a few different techniques. One common method is the yarn over (YO) increase, where you simply wrap the yarn around the needle before knitting the next stitch. This creates an extra stitch and a small hole in the fabric. Another method is the make one (M1) increase, where you pick up the bar between stitches and knit into it to create a new stitch. Both techniques can be used to add stitches at the beginning, middle, or end of a row, depending on your desired shaping.
Decreasing Stitches: Decreasing stitches is another way to shape your scarf. The most basic decrease is the knit two together (K2tog), where you knit two stitches together as if they were one. This decreases the stitch count by one and creates a slant in the fabric. Another common decrease is the slip, slip, knit (SSK), where you slip two stitches knitwise, insert the left needle into the fronts of those two slipped stitches, and then knit them together through the back loop. This creates a left-slanting decrease. Both decreases can be used at the beginning, middle, or end of a row to achieve your desired shaping.
By incorporating increases and decreases into your knitting, you can create a scarf that is uniquely shaped and visually appealing. Whether you want a simple tapered design or a more intricate lace or cable pattern, understanding how to shape your scarf with these techniques will give you the ability to create a stunning finished project.
Knitting a Beautiful Border for Your Scarf
When it comes to knitting a beautiful border for your scarf, there are many options to consider. Whether you prefer a simple and understated design or something more intricate and eye-catching, adding a border can elevate your scarf from ordinary to extraordinary.
One popular option is to use a contrasting color for the border. This can create a visually striking effect and make your scarf stand out even more. You can choose a color that complements the main color of your scarf or go for a bold, contrasting shade to make a statement.
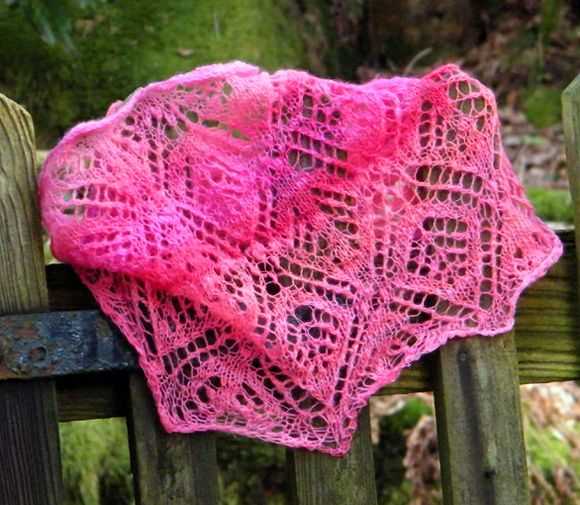
To add more texture to your border, you can experiment with different stitch patterns. For instance, you can incorporate a lace pattern to create an elegant and delicate border. This can be achieved by using yarnovers and decreases to form intricate lace motifs. Alternatively, you can opt for a ribbed border for a more structured and defined look.
If you’re feeling adventurous, you can even try adding some embellishments to your border. This can be in the form of beads, sequins, or even embroidery. Adding these extra touches can give your scarf a unique and personalized touch, making it truly one-of-a-kind. Just make sure to choose embellishments that are durable and won’t easily come off with wear and tear.
Overall, knitting a beautiful border for your scarf allows you to showcase your creativity and adds an extra touch of style to your finished piece. Whether you choose a contrasting color, experiment with different stitch patterns, or add embellishments, the options are endless. So go ahead and let your imagination run wild as you create a stunning border that will make your scarf the envy of all your friends!
Blocking and Finishing Your Knit Scarf Project
Once you have completed knitting your scarf, it is important to block and finish the project to give it a polished and professional look. Blocking is the process of shaping and setting the stitches, while finishing refers to the final steps of sewing in loose ends and adding any desired embellishments.
Blocking:
Before blocking, it is essential to check the care instructions for the yarn you used for your scarf. Some fibers require wet blocking, while others can be steam blocked. Wet blocking involves soaking the scarf in water, gently squeezing out the excess moisture, and then shaping it to the desired dimensions. Steam blocking, on the other hand, requires using a steam iron to gently press and shape the scarf.
Finishing:
Once your scarf is blocked and dry, it’s time to finish the project. Start by checking for any loose ends and weave them in using a tapestry needle. Take care to secure them properly to prevent unraveling. If you want to add any embellishments, such as fringe or tassels, now is the time to do so. Measure out the desired length for the fringe or tassels and attach them to the ends of the scarf using a crochet hook or by sewing them on with a needle and matching yarn.
To add a professional touch, give the scarf one final steam or press with an iron to smooth out any wrinkles or creases. This will help ensure that your scarf looks neat and polished when worn.
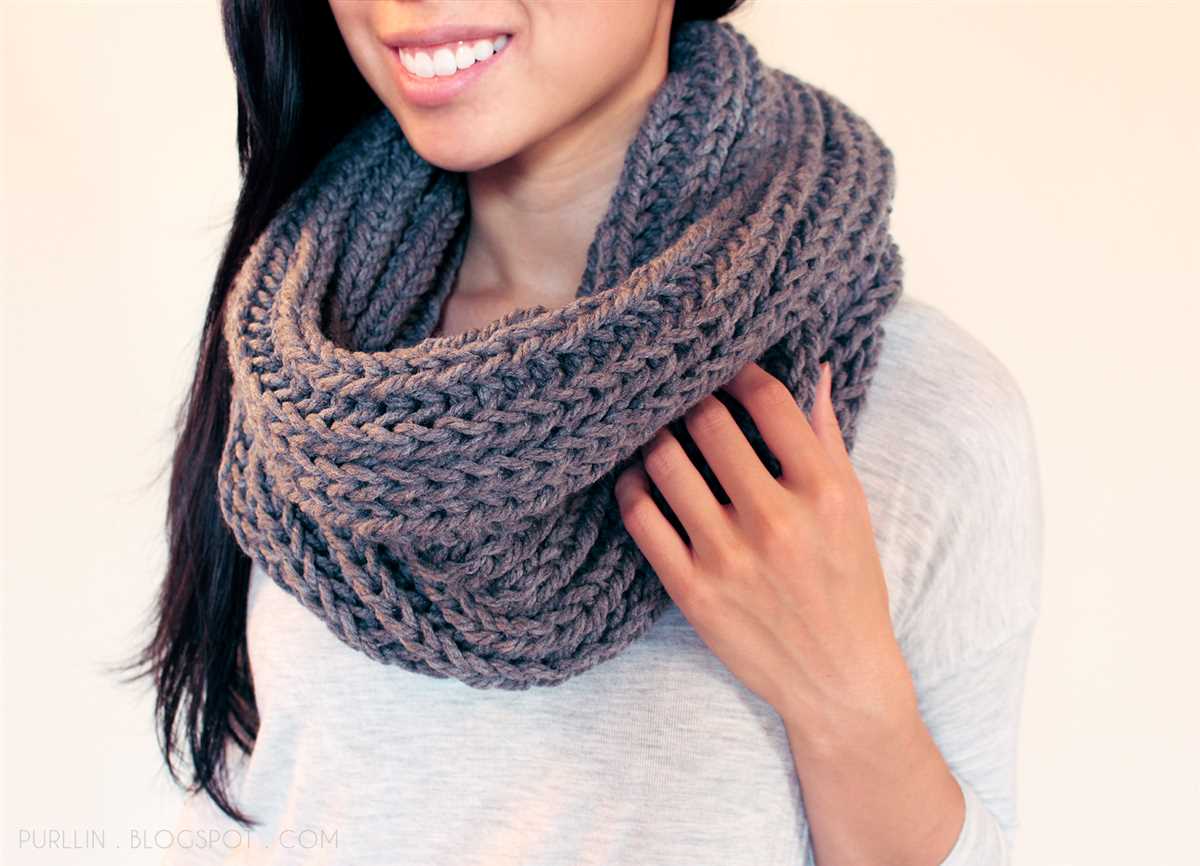
Styling and Wearing Your Finished Knit Scarf
Once you have completed knitting your beautiful scarf, it’s time to style and wear it to add a cozy and fashionable touch to your outfits. Here are a few ways you can showcase your finished scarf:
1. Classic Loop
One of the simplest and most popular ways to wear a knit scarf is by looping it around your neck. Simply drape the scarf around your neck, then take one end and loop it around the other end. Adjust the loop to your desired length and let the ends hang down the front or over one shoulder. This style is timeless and adds an elegant touch to any winter ensemble.
2. Snug Wrap
If you prefer a more cozy and warm look, try the snug wrap. Start by folding the scarf in half lengthwise and placing it around the back of your neck. Take the loose ends and feed them through the folded end, creating a loop. Pull the ends gently to tighten the loop and adjust it to your desired snugness. This style will keep you feeling warm and stylish during cold winter days.
3. Belted Chic
If you want to take your scarf styling to the next level, try belting it. Fold the scarf in half lengthwise and wrap it around your neck. Then, take a wide belt and wrap it around your waist, including the scarf. This creates a trendy and chic look that can transform a simple outfit into a fashion-forward statement. Experiment with different belt colors and styles to match your personal style and add a touch of elegance to your overall appearance.
4. Sophisticated Shawl
If you have a longer and wider knit scarf, you can wear it as a shawl for a more sophisticated and versatile look. Simply drape the scarf over your shoulders, allowing it to hang down your back and cover your arms. You can secure it in place with a pin or brooch for added flair. This style is perfect for formal occasions or when you want to add a touch of elegance to your outfit.
Remember, the key to styling your knit scarf is to have fun and experiment with different techniques and looks. Whether you prefer a classic, cozy, or trendy style, your finished scarf will add warmth and personality to any outfit during the winter months.
Troubleshooting Common Knitting Mistakes in Your Scarf Project
Knitting can be a relaxing and enjoyable hobby, but it’s not without its challenges. Mistakes are bound to happen, especially when you’re just starting out. Fortunately, most knitting mistakes can be fixed with a little patience and some basic problem-solving skills. In this section, we’ll explore some common knitting mistakes you might encounter while working on your scarf project and provide some troubleshooting tips to help you overcome them.
1. Dropped stitches
Dropping a stitch is a common knitting mistake that can be easily fixed if caught early. If you notice a dropped stitch, use a crochet hook or a smaller knitting needle to pick up the stitch and work it back into the pattern. Take care to ensure that the stitch is properly oriented before continuing with your knitting.
2. Uneven tension
Uneven tension can result in a scarf that looks lumpy or stretched in some areas. To achieve more consistent tension, try to hold your needles and yarn more loosely or tightly, depending on your needs. Take breaks if you feel tension building up in your hands and wrists. Practicing and experimenting with different knitting techniques can also help you achieve more even tension over time.
3. Twisted stitches
Twisted stitches can make your scarf look distorted and messy. To prevent twisted stitches, ensure that your stitches are properly seated on your needle before knitting them. Be mindful of the direction of your knitting and make sure your stitches are not twisted when you transfer them from one needle to the other.
4. Yarn overs
If you accidentally create a yarn over when it’s not intended in your pattern, you can simply drop the extra yarn over off your needle. If you’re missing a yarn over that should be present in your pattern, carefully examine your knitting to identify the missing stitch. Once you’ve located it, you can create the yarn over by simply wrapping the yarn around the needle as you would for a regular yarn over.
5. Uneven edges
Uneven edges can be frustrating and detract from the overall appearance of your scarf. To achieve neater edges, you can try using a smaller needle size for the first and last few stitches of each row. Additionally, slipping the first stitch of every row purlwise can create a more defined edge.
Remember, making mistakes is a natural part of the learning process. Each mistake presents an opportunity to improve your knitting skills and gain a deeper understanding of the craft. Don’t be discouraged if your scarf project doesn’t turn out perfect – embrace the imperfections and enjoy the journey of creating something beautiful with your own hands.