
If you’re a knitting enthusiast looking for new patterns to try, you’re in luck! In this article, we’ll explore a variety of knitting patterns that are not only free but also easy to create. Whether you’re a beginner or an experienced knitter, these patterns are perfect for anyone looking for a quick and satisfying project.
Knitting is a wonderful hobby that allows you to create beautiful clothing and accessories with just a few simple tools. With these free easy knitting patterns, you’ll be able to make stylish hats, cozy scarves, comfortable socks, and more. The best part is that these patterns are designed to be accessible to knitters of all skill levels, so even if you’re a beginner, you’ll be able to complete these projects with ease.
Not only are these knitting patterns free and easy, but they also provide an opportunity to unleash your creativity. There’s something incredibly satisfying about working with your hands and seeing your creation come to life. Whether you prefer classic designs or more modern and trendy styles, there’s a pattern here that will suit your taste.
So, if you’re ready to embark on a new knitting adventure, grab your needles and yarn, and dive into these amazing knitting patterns. Whether you’re knitting for yourself or for a loved one, these projects are sure to bring joy and satisfaction as you watch your finished pieces take shape. Get ready to create something beautiful and cozy with these free easy knitting patterns!
Knitting Patterns Free Easy
If you are a beginner knitter looking for easy and free knitting patterns, you’re in the right place! Knitting is a great hobby to relax and be creative. With these free and easy knitting patterns, you can create beautiful and functional items for yourself or as gifts for your loved ones.
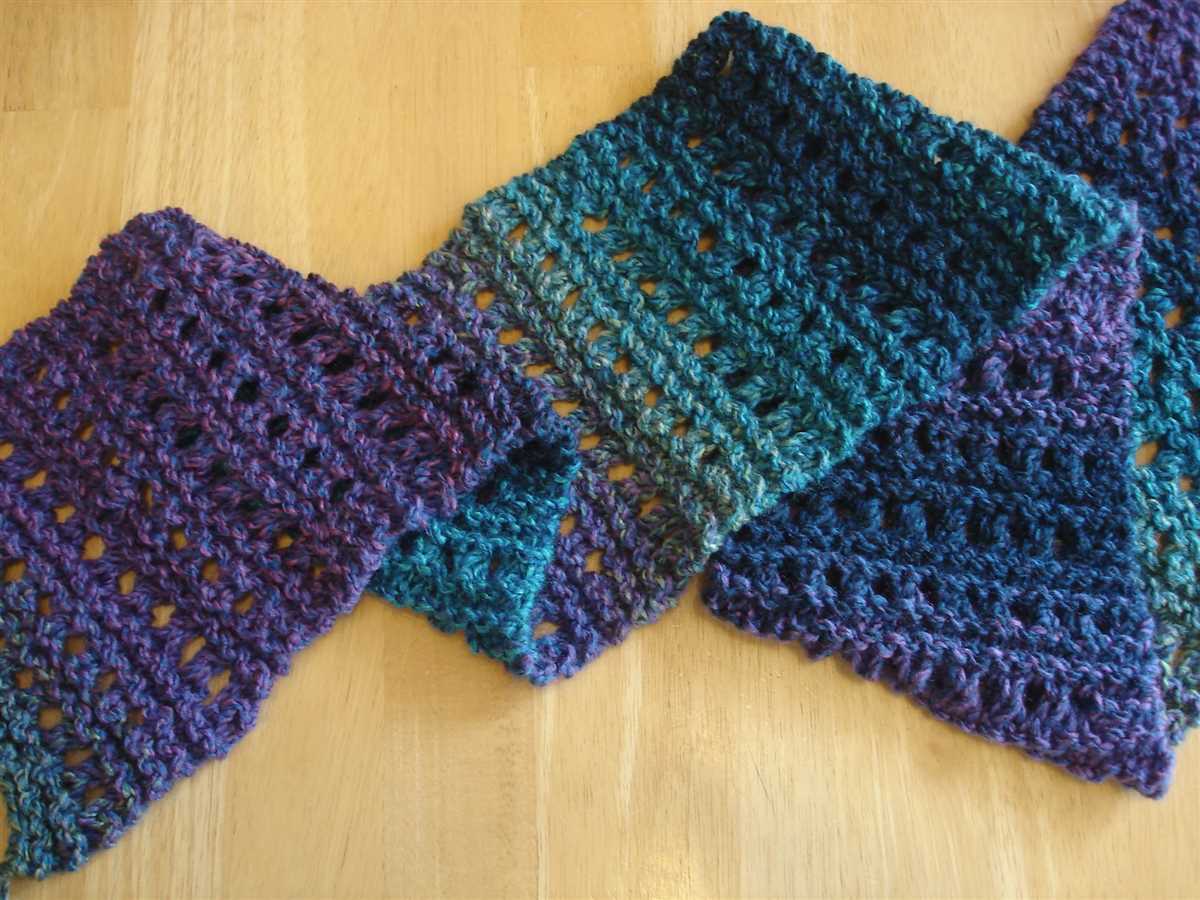
One of the easiest knitting patterns for beginners is the garter stitch scarf. This pattern uses only the knit stitch, making it perfect for practicing the basic knitting technique. You can choose any color of yarn you like and knit a cozy and stylish scarf to keep warm during the winter months.
Knitted Dishcloth Pattern
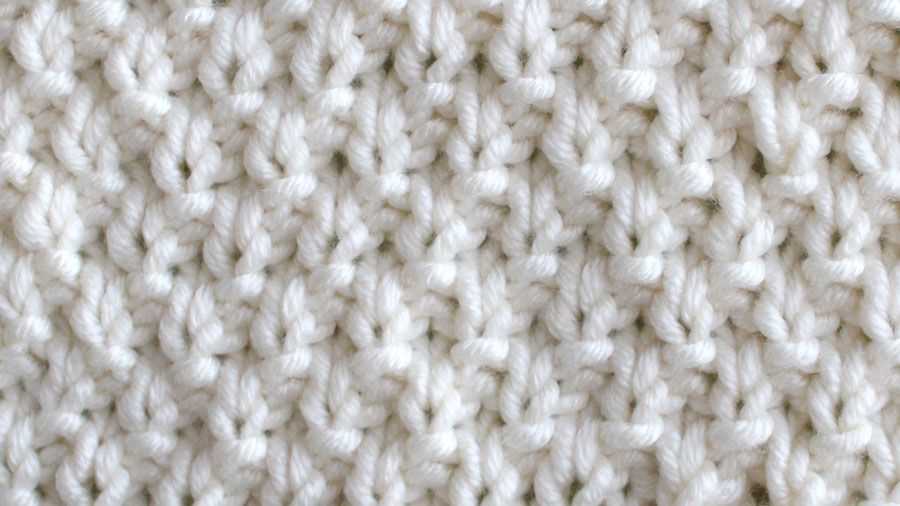
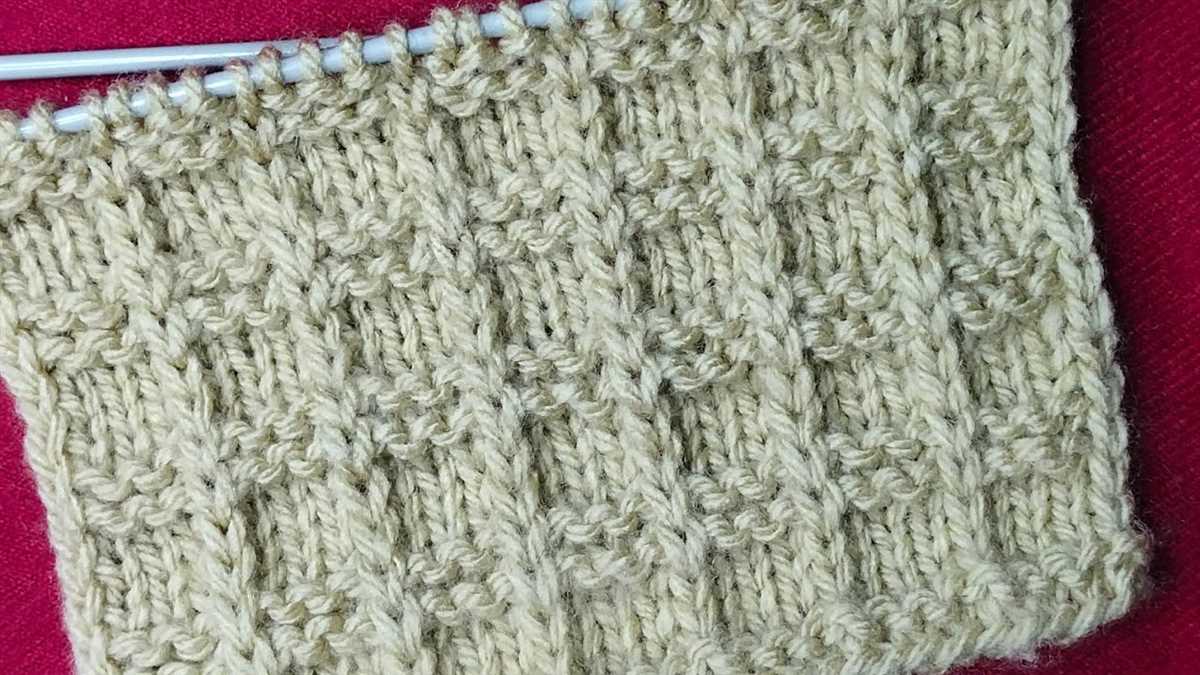
Another simple and practical knitting pattern is a dishcloth. Dishcloths are quick to knit and can be used in the kitchen for cleaning or as decorative accents. The basketweave stitch pattern is a popular choice for dishcloths as it adds texture and interest to the finished piece. You can experiment with different color combinations to create unique and personalized dishcloths.
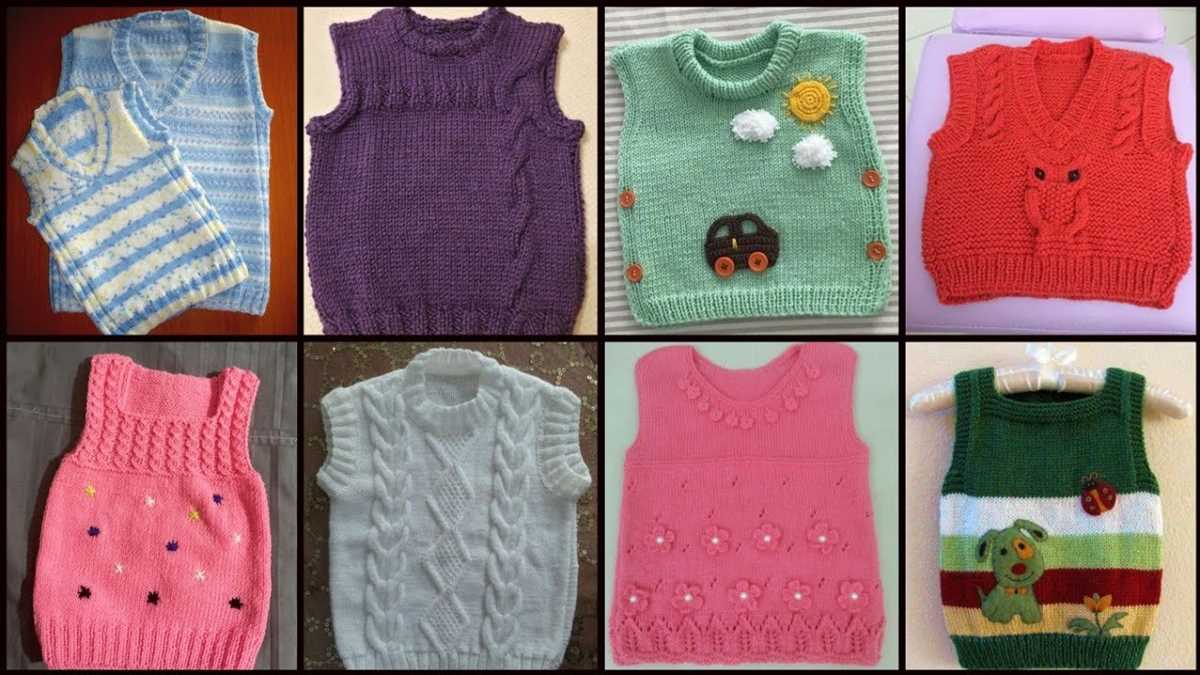
Baby Hat Knitting Pattern
If you want to knit something adorable for a baby, a baby hat is a perfect choice. This easy knitting pattern is suitable for beginners and can be customized with different colors and embellishments. Knitting a baby hat is a great way to practice shaping and following a basic pattern. Plus, it makes a thoughtful and personalized gift for a new baby.
Knitted Headband Pattern
A knitted headband is a fashionable and practical accessory that can be worn year-round. This easy knitting pattern is great for beginners and can be completed in just a few hours. You can choose a chunky yarn for a cozy winter headband or a lightweight yarn for a stylish summer accessory. With an endless variety of yarn colors and stitch patterns, you can create unique headbands to match any outfit.
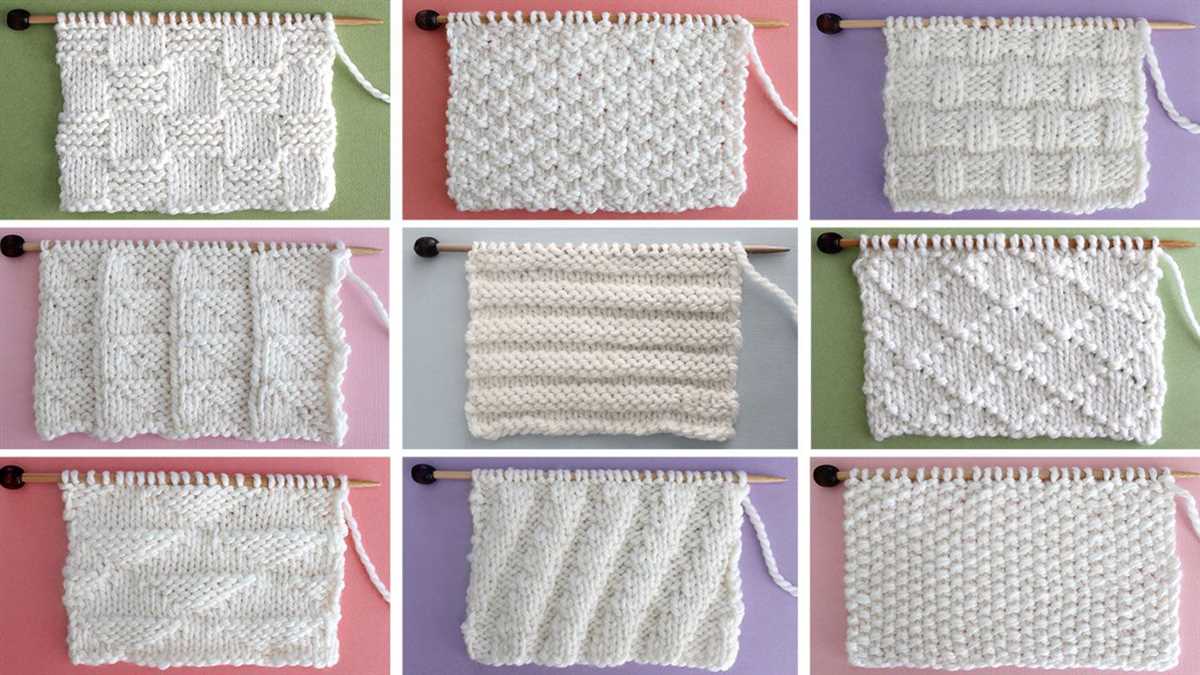
Basic Knitting Stitches
When it comes to knitting, there are a few basic stitches that every beginner should know. These stitches are the foundation of most knitting projects and can be easily learned with a little practice. Here are a few of the most common basic knitting stitches:
Garter stitch
Garter stitch is the simplest of all knitting stitches. It is created by knitting every stitch on every row. This stitch creates a fabric that is reversible and has a textured appearance. Garter stitch is often used for scarves, blankets, and other simple projects.
Stockinette stitch
Stockinette stitch is one of the most widely used knitting stitches. It is created by knitting one row and purling the next row. This creates a smooth, flat fabric with a V-shaped pattern on one side and a purl bump pattern on the other side. Stockinette stitch is commonly used for sweaters, hats, and other garments.
Rib stitch
Rib stitch is a combination of knitting and purling stitches. It is created by alternating knit stitches and purl stitches in a pattern. This stitch creates a fabric that is stretchy and often used for cuffs, collars, and other areas that need elasticity. Rib stitch can have different variations, such as 1×1 rib (alternating one knit stitch and one purl stitch) or 2×2 rib (alternating two knit stitches and two purl stitches).
These are just a few of the basic knitting stitches that every knitter should know. Once you have mastered these stitches, you can start exploring more complex stitch patterns and techniques to create beautiful knitted projects.
Simple Scarf Knitting Pattern
A scarf is a timeless and versatile accessory that can add warmth and style to any outfit. If you’re new to knitting or looking for a quick and easy project, try this simple scarf knitting pattern.
MATERIALS:
- Size 10 knitting needles
- 2 skeins of worsted weight yarn
- Tapestry needle
- Scissors
INSTRUCTIONS:
- Cast on 20 stitches.
- Knit every row until the scarf reaches your desired length.
- Bind off all stitches.
- Weave in any loose ends using a tapestry needle.
This simple scarf pattern uses basic knitting stitches, making it perfect for beginners. The size 10 knitting needles and worsted weight yarn create a cozy and warm scarf that is both comfortable and stylish.
You can customize this pattern by using different colors or types of yarn, or by adding embellishments such as fringe or tassels. The possibilities are endless, so let your creativity shine!
Easy Hat Knitting Pattern
If you’re in need of a quick and easy knitting project, an easy hat pattern is the perfect choice. Whether you’re a beginner knitter or an experienced crafter, this pattern is versatile and can be customized to suit your style.
Materials:
- Yarn of your choice (worsted weight is recommended)
- Knitting needles (size 8 or size needed to obtain gauge)
- Circular or double-pointed needles (size 8 or size needed to obtain gauge)
- Tapestry needle
Instructions:
- Cast on 80 stitches.
- Work in a rib stitch pattern (knit 2, purl 2) for 2 inches.
- Switch to stockinette stitch (knit every row) and work until piece measures 5 inches from cast on edge.
- Begin decreasing:
- Row 1: *Knit 6, k2tog* repeat to end of row (70 stitches)
- Row 2 and all even rows: Knit
- Row 3: *Knit 5, k2tog* repeat to end of row (60 stitches)
- Row 5: *Knit 4, k2tog* repeat to end of row (50 stitches)
- Continue in this pattern, decreasing by one stitch every odd row, until 20 stitches remain.
- Cut yarn, leaving a long tail. Thread the tail through a tapestry needle and slip the needle through the remaining stitches on the needle. Pull tight to close the top of the hat.
- Weave in any loose ends and adjust the fit of the hat as needed.
This easy hat knitting pattern can be customized by using different stitch patterns, adding stripes, or embellishing with pom-poms or buttons. It’s a versatile project that can be completed in just a few hours, making it perfect for last-minute gifts or personal accessories.
Beginner’s Guide to Knitting Sweaters
Knitting sweaters can be a fun and rewarding project for beginners who are looking to take their knitting skills to the next level. Sweaters can be a bit more complex than scarves or hats, but with the right pattern and some practice, you’ll be able to create beautiful and cozy garments in no time.
Choosing the right pattern: When starting out with sweater knitting, it’s important to choose a pattern that is labeled as “beginner-friendly” or “easy.” Look for patterns that have clear instructions, simple construction, and minimal shaping. This will help you build confidence and allow you to focus on the basics of sweater knitting.
Gather the materials:
- Yarn: Choose a yarn that is recommended for the pattern you’ve selected. Consider the weight, fiber content, and color of the yarn. As a beginner, it’s best to stick to a medium-weight yarn in a solid color, as this will make it easier to see your stitches.
- Needles: Check the pattern for the recommended needle size. You may need different types of needles, such as straight needles, circular needles, or double-pointed needles, depending on the pattern and the style of the sweater.
- Other supplies: You’ll also need a tape measure, stitch markers, a yarn needle, and scissors. These tools will come in handy throughout the knitting process.
Understanding the pattern:
Before you start knitting, take some time to read through the entire pattern and make sure you understand all the instructions. Pay attention to the stitch pattern, gauge, and any special techniques or abbreviations used in the pattern. If there’s anything you’re unsure of, don’t hesitate to refer to knitting resources or ask for help from more experienced knitters.
Starting the sweater: Once you have your materials ready and understand the pattern, it’s time to cast on and begin knitting your sweater. Follow the instructions step by step, making sure to check your gauge as you go. Take your time and don’t rush through the process – sweater knitting is a bit more time-consuming than smaller projects, but the end result will be worth it!
Finishing touches: After you’ve finished knitting all the pieces of your sweater and stitched them together, it’s time to add any final touches, such as ribbing, collars, cuffs, or buttons. Follow the pattern instructions for these finishing details, and take your time to make sure everything looks neat and professional.
Remember, knitting sweaters can be a learning experience, so don’t be discouraged if your first attempt doesn’t turn out perfectly. With practice and patience, you’ll improve your skills and be able to tackle more complex sweater patterns in the future.
Cozy Blanket Knitting Pattern
Are you looking for a knitting project that will keep you warm and cozy during those chilly winter months? Look no further than this cozy blanket knitting pattern. This pattern is perfect for beginners and experienced knitters alike, and it’s a great way to add some warmth and comfort to your home.
To start, gather your materials. You’ll need a pair of knitting needles, a crochet hook, and a soft, bulky yarn in the color of your choice. This pattern is customizable, so feel free to choose a yarn that matches your decor or personal style.
Once you have your materials ready, cast on the desired number of stitches for your blanket size. The pattern recommends using a large, long circular needle to accommodate the width of the blanket. This will make the knitting process easier and more comfortable.
The pattern itself is simple and easy to follow. It consists of basic knit and purl stitches, which create a gorgeous textured design. The pattern also includes instructions for adding a border and finishing off the blanket with a crochet edge for a polished look.
As you knit, you’ll notice the blanket growing and becoming cozier with each stitch. The soft, bulky yarn creates a warm and inviting texture that is perfect for snuggling up with on a cold winter day. Whether you choose to keep the blanket for yourself or give it as a gift, it’s sure to be cherished and used for years to come.
So why wait? Grab your knitting needles and get started on this cozy blanket knitting pattern today. You’ll love the feeling of creating something warm and beautiful with your own two hands, and you’ll enjoy the comfort and coziness this blanket brings to your home.
Knitted Dishcloth Pattern
Knitted dishcloths are a practical and easy project for knitters of all skill levels. They are perfect for beginners looking to practice their knitting skills and create functional items for their home. Knitted dishcloths can be used for washing dishes, cleaning surfaces, or even as decorative accents in the kitchen or bathroom. With a wide range of patterns available, you can easily find one that matches your style and adds a personal touch to your space.
When choosing a knitted dishcloth pattern, it’s important to consider the type of yarn you want to use. Cotton yarn is a popular choice for dishcloths as it is absorbent and durable. It also holds its shape well and can withstand regular use and washing. Look for a soft and smooth cotton yarn that is easy to work with and will feel comfortable against the skin.
To get started, you’ll need a set of knitting needles in the appropriate size for your chosen yarn. A size 7 or 8 needle is usually recommended for dishcloth patterns, but you can adjust the needle size to achieve the desired tension and fabric density. Make sure to check the pattern for any specific needle size recommendations.
Once you have your materials, follow the instructions in the pattern to cast on the required number of stitches. Most dishcloth patterns use basic stitches such as knit and purl, making them easy to follow even for beginners. You can experiment with different stitch patterns and textures to create unique designs.
Knitting dishcloths can be a relaxing and satisfying hobby that allows you to create functional and beautiful items for your home. With a wide variety of free and easy patterns available, you’ll never run out of inspiration for your next project. So grab your needles, pick a pattern, and start knitting your way to a more colorful and cozy kitchen!
Quick and Easy Baby Booties
When it comes to knitting baby booties, quick and easy patterns are a great option. These booties are perfect for beginners or for those who are short on time but still want to create a cute and functional accessory for their little ones.
One popular pattern is the garter stitch baby booties, which utilizes simple knit stitches throughout. These booties can be made in a variety of colors and are great for both boys and girls. The garter stitch creates a nice texture and adds an extra layer of coziness to keep tiny feet warm.
To add a touch of elegance to the booties, you can also incorporate a lace pattern. Knitting lace can seem daunting, but there are many easy lace patterns available that can be mastered by beginners. Lace adds a delicate and beautiful touch to the booties, making them perfect for special occasions or as a gift for new parents.
Another option for quick and easy baby booties is to use a simple ribbed pattern. Ribbing adds elasticity to the booties, ensuring a snug fit on baby’s feet. It also adds a bit of visual interest to the design. These booties can be made in a solid color or with contrasting colors for a fun and playful look.
No matter which pattern you choose, quick and easy baby booties are a great way to get creative and make something special for the little ones in your life. With just a few basic knitting skills, you can create adorable booties that will keep tiny feet cozy and stylish.
Knitting a Headband: Step-by-Step Tutorial
Knitting a headband is a quick and easy project that can be completed in just a few hours. Whether you’re a beginner or an experienced knitter, this step-by-step tutorial will guide you through the process of creating a cozy and stylish headband.
To start, gather your materials. You’ll need a pair of knitting needles, a size appropriate for your chosen yarn. Speaking of yarn, choose a soft and warm yarn that will feel comfortable against your skin. You may also want to have a set of stitch markers on hand to help you keep track of your progress.
Step 1: Begin by casting on the desired number of stitches. This will depend on the width of the headband you want to create. A typical adult headband might require around 80 stitches, but adjust accordingly to fit your head size.
Step 2: Once you have cast on, begin knitting in your chosen stitch pattern. This can be as simple as knitting each row, or you can experiment with different textures and patterns such as ribbing or cables. Continue knitting until the headband reaches your desired length.
Step 3: When you are satisfied with the length of your headband, it’s time to bind off. This is done by knitting two stitches, then passing the first stitch over the second and off the needle. Repeat this process until you have only one stitch remaining, then cut the yarn, leaving a long tail for sewing.
Step 4: To finish your headband, fold it in half and stitch the two ends together using a darning needle and your yarn tail. Make sure to stitch securely to ensure the headband won’t come apart during wear. Once the ends are sewn together, weave in any loose ends and trim excess yarn.
Step 5: Finally, try on your new headband and make any adjustments as needed. You can also embellish your headband with buttons, bows, or other decorations if desired. Enjoy the warmth and style of your hand-knitted headband all winter long!
Knitted Fingerless Gloves Pattern
Fingerless gloves are a practical and stylish accessory, and knitting your own pair can be a fun and rewarding project. Whether you’re a beginner or an experienced knitter, there are many free and easy fingerless gloves patterns available online. These patterns come in a variety of styles, from classic and basic designs to more intricate and decorative options.
If you’re a beginner knitter, a simple pattern with basic stitches like ribbing and stockinette stitch could be a great place to start. These patterns typically only require basic knitting skills and can be completed relatively quickly. You can customize your gloves by adding colorwork or simple embellishments like buttons or pom-poms.
Here is an example of a basic fingerless gloves pattern:
- Using double-pointed needles, cast on 36 stitches.
- Work in a K2, P2 ribbing for 2-3 inches.
- Switch to stockinette stitch and work until the piece measures 6-7 inches from the cast-on edge.
- Begin the thumb opening by binding off 6 stitches in the center of the row.
- Continue working in stockinette stitch for another 1-2 inches.
- Switch back to the K2, P2 ribbing and work for 2-3 inches.
- Bind off all stitches.
This is just one example, and there are countless variations to explore. You can experiment with different stitches, yarns, and colors to create unique fingerless gloves that suit your style. Whether you’re knitting for yourself or as a gift for someone else, fingerless gloves are a practical and fashionable accessory that will keep your hands warm while allowing you to maintain dexterity.
Knitting for Pets: Simple Dog Sweater Pattern
As a pet owner, you want the best for your furry friend, and that includes keeping them warm and cozy during the colder months. One way to do that is by knitting a sweater for your beloved pup. Knitting a dog sweater is not only a practical way to keep them warm, but it’s also a fun and rewarding project for pet-loving knitters.
With this simple dog sweater pattern, you’ll be able to create a cozy and stylish sweater for your canine companion in no time. The pattern is designed for beginners and requires basic knitting skills, making it perfect for those who are new to knitting or looking for a quick and easy project.
To get started, you’ll need a few supplies. Choose a soft and warm yarn in a color that suits your dog’s personality. You’ll also need knitting needles, a measuring tape, and a set of stitch markers. Once you have your materials ready, you can begin casting on and knitting the sweater according to the pattern instructions.
This pattern utilizes simple knit and purl stitches to create a ribbed texture, providing a great fit for your furry friend. The sweater is designed to be adjustable, so you can easily customize it to fit your dog’s measurements. Measure your dog’s chest circumference and length to ensure a perfect fit.
As you knit the sweater, you’ll see it gradually take shape, and before you know it, you’ll have a beautiful handmade sweater for your pet. Not only will they stay warm during the colder months, but they’ll also look adorable in their new outfit.
In conclusion, knitting a dog sweater is a wonderful way to show your love and care for your furry friend. With this simple dog sweater pattern, you’ll be able to create a cozy and stylish sweater that fits your dog perfectly. So grab your knitting needles and get started on this fun and rewarding project!
Step-by-Step Guide to Knitting Socks
If you’re new to knitting or looking for a new project, knitting socks can be a fun and rewarding endeavor. Not only do handmade socks make great gifts, but they also provide warmth and comfort during the colder months. In this step-by-step guide, we’ll walk you through the process of knitting socks from start to finish.
1. Gather Your Materials
Before you begin, make sure you have all the necessary materials. This includes knitting needles (typically size 1-3), a skein of sock yarn, measuring tape, a stitch marker, and a yarn needle for finishing.
2. Measure Your Foot
Proper measurements are crucial for a well-fitting pair of socks. Use a measuring tape to determine the length of your foot, as well as the circumference of your ankle and calf. This will help you choose the right size and adjust the pattern if needed.
3. Choose a Pattern
There are countless sock knitting patterns available online, ranging from simple to complex. For beginners, it’s best to start with an easy, basic pattern. Look for patterns that include detailed instructions and step-by-step photos or videos to help you along the way.
4. Cast On
Once you’ve chosen your pattern, it’s time to cast on. Follow the pattern instructions to determine the right number of stitches for your size. Use a flexible cast-on method, such as the long-tail cast-on, to ensure a comfortable fit.
5. Knit the Leg
Now it’s time to start knitting the leg of the sock. Follow the pattern instructions to knit the desired length, whether it’s a short ankle sock or a taller calf-length sock. Be sure to use a stitch marker to keep track of your rounds.
6. Heel Flap and Turn
The next step is to create the heel flap. This involves knitting back and forth on a portion of the stitches, creating a sturdy and comfortable heel. Follow the pattern instructions for the specific heel flap technique, which may involve slipping stitches and working short rows.
7. Gusset and Foot
Once the heel flap is complete, it’s time to pick up stitches along the edge and start shaping the gusset. The gusset helps create a better fit by decreasing the number of stitches from the ankle to the foot. This is followed by knitting the foot section, which is worked in the round until reaching the desired length.
8. Toe Decreases
The final step in knitting socks is shaping the toe. This involves decreasing stitches gradually to create a rounded toe shape. Follow the pattern instructions to determine the right number of decreases and the specific decrease technique.
Once you’ve completed the toe decreases, it’s time to weave in any loose ends and block your socks to give them a professional finish. Now you can proudly wear your handmade socks or gift them to someone special.
Fun and Easy Knitted Toys
Knitting toys can be a delightful and enjoyable pastime for both kids and adults. Not only does it allow you to create unique and personalized gifts, but it also provides a great opportunity to unleash your creativity and imagination. Whether you’re an experienced knitter looking for a new challenge or a beginner just starting out, there are plenty of fun and easy knitted toy patterns available for you to explore. In this section, we will highlight some popular and beginner-friendly options.
1. Stuffed Animals
Stuffed animals are a classic choice for knitted toys. From cuddly teddy bears to adorable bunnies, there are countless patterns available to suit any skill level. These toys can be a great way to practice your knitting techniques, as they often involve shaping, colorwork, and even simple embroidery for facial features. Whether you choose to knit a small keychain-sized animal or a larger huggable companion, these toys are sure to bring joy to anyone who receives them.
2. Finger Puppets
Finger puppets are another fun and easy option for knitted toys. They are small, portable, and can be made in a variety of shapes and characters. Children especially love playing with finger puppets, as they can create imaginative stories and engage in interactive play. You can choose to knit a set of animal finger puppets or create your own characters, making them perfect for storytelling or entertaining young ones during long car rides or quiet moments at home.
3. Baby Rattles
If you’re looking to make a gift for a newborn or a baby shower, knitted baby rattles can be a wonderful choice. These toys often feature a combination of soft yarn and a noise-making insert, creating a sensory experience for babies. Knitted rattles can be shaped like animals, fruits, or various geometric shapes, providing visual stimulation and encouraging grasping and fine motor skills development. They are quick to make and can be customized with different colors and textures, making them not only functional but also aesthetically pleasing.
In conclusion, knitting toys can be a fun and rewarding way to showcase your knitting skills and create unique gifts for yourself or others. With a wide range of patterns available, you can easily find options that are suitable for beginners while still providing an enjoyable knitting experience. So grab your needles, pick a pattern, and start knitting your way to fun and creative toys!