
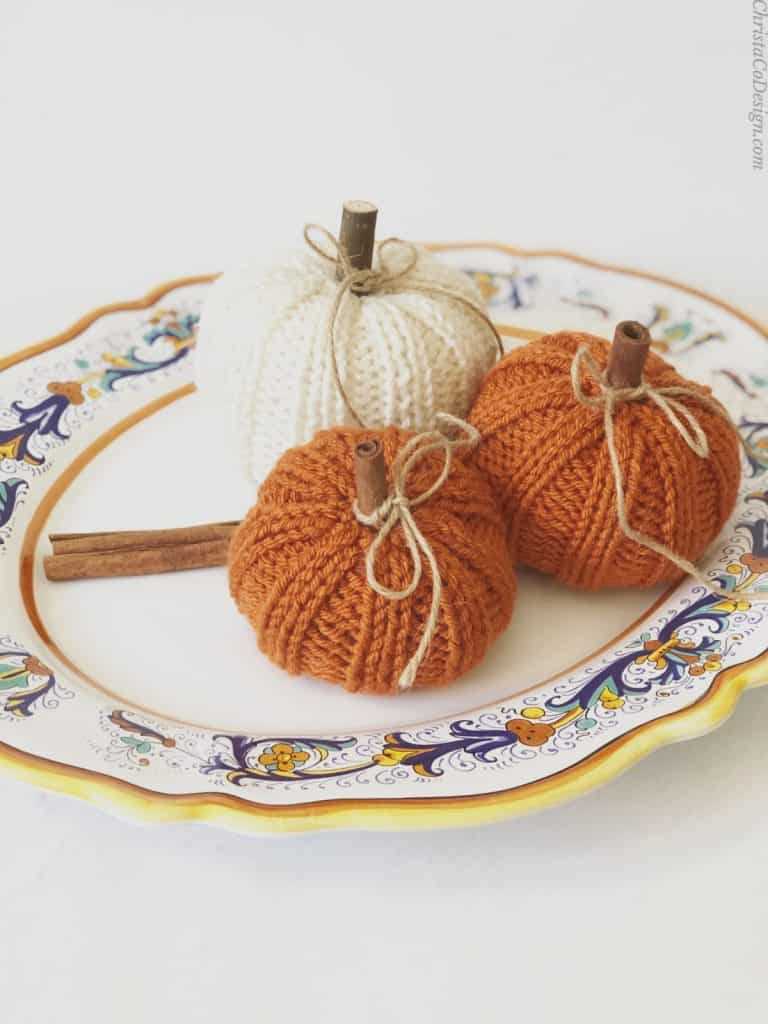
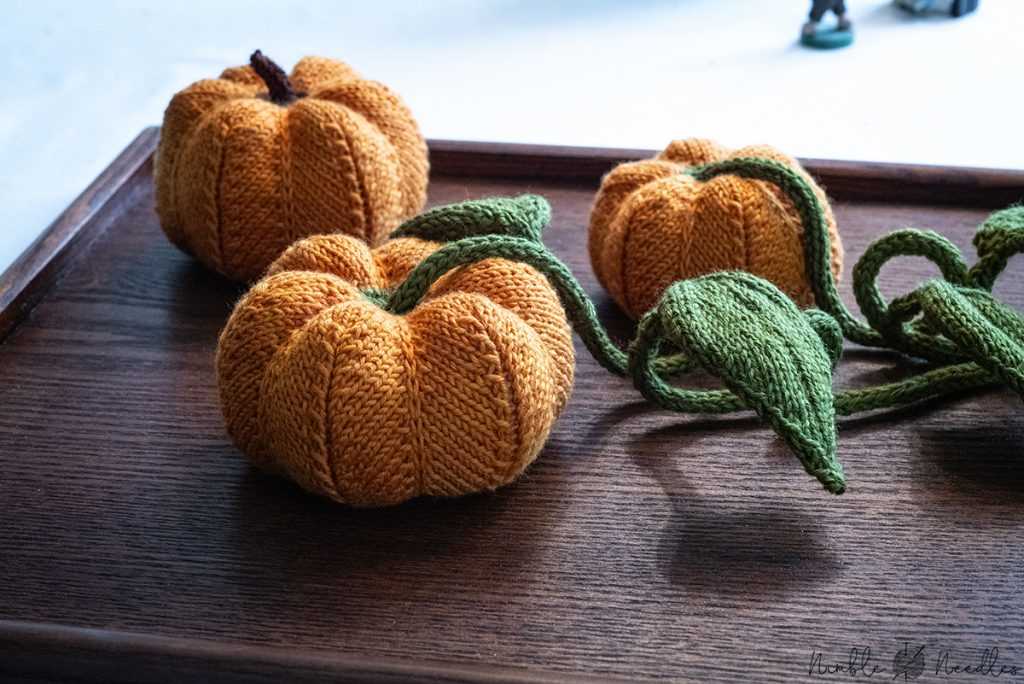
Are you looking to add a touch of coziness and charm to your home this fall? Look no further than this free knit pumpkin pattern! With just a few simple stitches and some soft, autumn-colored yarn, you can create your very own knitted pumpkins to decorate your space.
Knit pumpkins are a fun and unique way to bring the spirit of the season into your home. Whether you use them as cute table centerpieces, scatter them on your mantel, or incorporate them into a festive wreath, these little pumpkins are sure to add a warm and inviting feel to any space.
This free knit pumpkin pattern is perfect for knitters of all skill levels. The pattern includes detailed instructions and step-by-step photos to guide you through the process. If you’re new to knitting, don’t worry – this pattern is beginner-friendly and a great way to practice your skills.
Gather your knitting needles, pick out your favorite fall-colored yarns, and get ready to create some adorable knit pumpkins. With this free pattern, you’ll be able to add a handmade touch to your autumn decor in no time!
What is a free knit pumpkin pattern and how to make one
A free knit pumpkin pattern is a set of instructions that allows you to create your own knitted pumpkin. Knitting a pumpkin can be a fun and festive way to decorate your home for the fall season or to add a touch of charm to your Halloween display. The pattern typically includes details such as the type and weight of yarn to use, the size of knitting needles, and the specific stitches and techniques required to create the pumpkin shape.
To make a free knit pumpkin, you will need some basic knitting skills and a few supplies. First, gather your materials, including yarn in your desired color, knitting needles in the appropriate size, stuffing or filling material, a darning needle, and scissors. Once you have everything you need, you can begin following the pattern instructions.
The pattern may start by instructing you to cast on a certain number of stitches, typically using a long-tail cast on method. Then, you may be instructed to work various knitting stitches, such as knit, purl, and possibly some shaping stitches like increases and decreases, to create the rounded shape of the pumpkin. The pattern may also specify how many rows or rounds to work before moving on to the next step.
Once you have completed the main body of the pumpkin, the pattern may instruct you to bind off the stitches and cut the yarn, leaving a long tail for seaming. You will then use your darning needle to sew the ends of the knitting together, creating the closed bottom of the pumpkin. Next, you may be instructed to stuff the pumpkin with filling material, such as polyester fiberfill or even dried beans or rice for added weight.
Finally, the pattern may guide you through creating the pumpkin’s stem by knitting a smaller piece or using a different stitch pattern. Once the stem is finished, you can attach it to the top of the pumpkin with your darning needle. The finishing touches may include weaving in any loose ends of yarn and shaping the pumpkin by gently molding and arranging the knitting.
Overall, a free knit pumpkin pattern provides step-by-step instructions to help you create your own knitted pumpkins for seasonal decoration. Whether you are a beginner or an experienced knitter, knitting pumpkins can be a enjoyable project to embrace the cozy vibes of fall.
Materials needed for knitting a pumpkin
In order to knit a pumpkin, you will need a few essential materials. These include:
- Yarn: You will need orange yarn to create the body of the pumpkin. Choose a soft and bulky yarn for a plump and cozy pumpkin.
- Knitting needles: Use a pair of size 9 or 10 knitting needles, depending on your yarn gauge and personal preference.
- Tapestry needle: A tapestry needle is essential for sewing up the pumpkin and weaving in loose ends.
- Stuffing: To give your pumpkin its shape, you will need some stuffing material. You can use polyester fiberfill, cotton, or even scrap yarn.
- Scissors: A good pair of scissors is necessary for cutting the yarn and trimming any excess.
These materials are readily available at craft stores and online. You can choose different shades of orange yarn to create a variety of pumpkins with unique designs. Additionally, you may want to gather some green yarn or felt for the pumpkin stem. Get creative and have fun with your materials to make your knitted pumpkins truly special!
Step-by-Step Instructions for Knitting a Pumpkin
Knitting a pumpkin can be a fun and festive way to add a touch of autumn to your home decor. Whether you are an experienced knitter or just starting out, this free knit pumpkin pattern is a great project to try. Follow these step-by-step instructions to create your own cozy pumpkin.
Materials:
- Medium-weight yarn in pumpkin orange
- Size 8 knitting needles
- Polyfill stuffing
- Tapestry needle
Instructions:
- Cast on 24 stitches using the long-tail cast-on method. This will be the bottom of your pumpkin.
- Knit in the round, making sure to use circular needles or Double Pointed Needles (DPNs) once your stitches no longer fit comfortably on straight needles.
- Continue knitting in the round until your work measures approximately 2 inches in height.
- Next, you will start decreasing stitches to create the curved shape of the pumpkin. Knit 2 stitches together (k2tog) every 6th stitch until the end of the round.
- Knit one round without decreasing stitches.
- Repeat steps 4 and 5 until you have just a few stitches left.
- Cut the yarn, leaving a long tail. Thread the tail through a tapestry needle, then slip the needle through the remaining stitches to gather them tightly.
- Stuff the pumpkin with polyfill, making sure to fill it evenly.
- Using the long tail of yarn, cinch the top of the pumpkin closed by sewing through the gathered stitches and pulling tight.
- Weave in any loose ends and trim the excess yarn.
Once you have finished knitting your pumpkin, you can embellish it to your liking. You can add a stem using brown yarn and embroider details like ridges or a face onto the pumpkin using black yarn. This free knit pumpkin pattern allows for plenty of creativity, so feel free to personalize your pumpkin with your own unique touches. Happy knitting!
Tips for choosing the right yarn for your knit pumpkin
When it comes to knitting a pumpkin, choosing the right yarn is key to achieving the desired look and texture. Here are some tips to help you select the perfect yarn for your project:
Consider the weight: The weight of the yarn will affect the overall size and density of your knit pumpkin. If you want a larger and more substantial pumpkin, opt for a bulky or super bulky yarn. For a smaller and lighter pumpkin, choose a fingering or sport weight yarn.
Think about the texture: The texture of the yarn will also impact the appearance of your knit pumpkin. If you want a smooth and polished look, go for a yarn with a tight twist and minimal fuzziness. If you prefer a more rustic and textured pumpkin, opt for a yarn with a looser twist or even a boucle yarn.
Consider the color: The color of the yarn will play a big role in the final look of your pumpkin. Traditional pumpkin colors like orange, yellow, and brown can give your knit pumpkin a realistic and festive appearance. However, don’t be afraid to experiment with non-traditional colors like white, black, or even sparkly yarn for a unique and whimsical pumpkin.
Check the yardage: Make sure to check the yardage of the yarn to ensure that you have enough for your project. Depending on the size of the pumpkin and the pattern you are using, different amounts of yarn may be required. It’s always better to have a little extra yarn than to run out in the middle of your project.
Consider the fiber content: The fiber content of the yarn will determine how the pumpkin holds its shape and how easy it is to care for. Natural fibers like wool or cotton can provide excellent stitch definition and durability. However, synthetic fibers like acrylic can also work well and are often more affordable and easy to care for.
By considering these factors and choosing the right yarn for your knit pumpkin, you can create a beautiful and unique decoration that will add a touch of handmade charm to your home or fall festivities.
Different variations of a knit pumpkin pattern
If you’re looking to knit a pumpkin, there are many different variations of patterns available to suit your style and skill level. Whether you’re a beginner or an experienced knitter, there is a pattern out there for you.
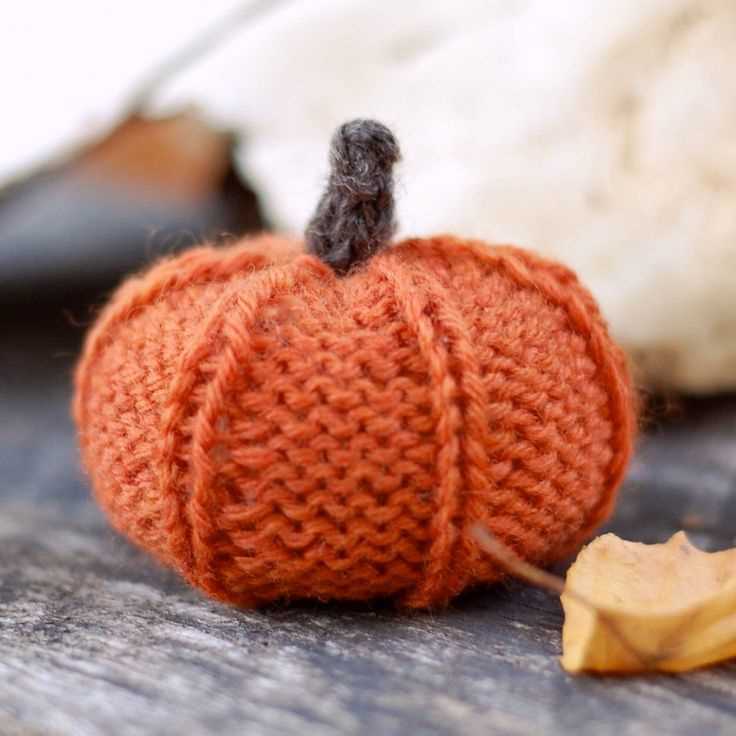
Classic Knit Pumpkin: The classic knit pumpkin pattern is a great place to start if you’re new to knitting or looking for a simple and timeless design. This pattern typically involves knitting in the round to create a seamless pumpkin shape, and using increases and decreases to shape the pumpkin and create its ridges.
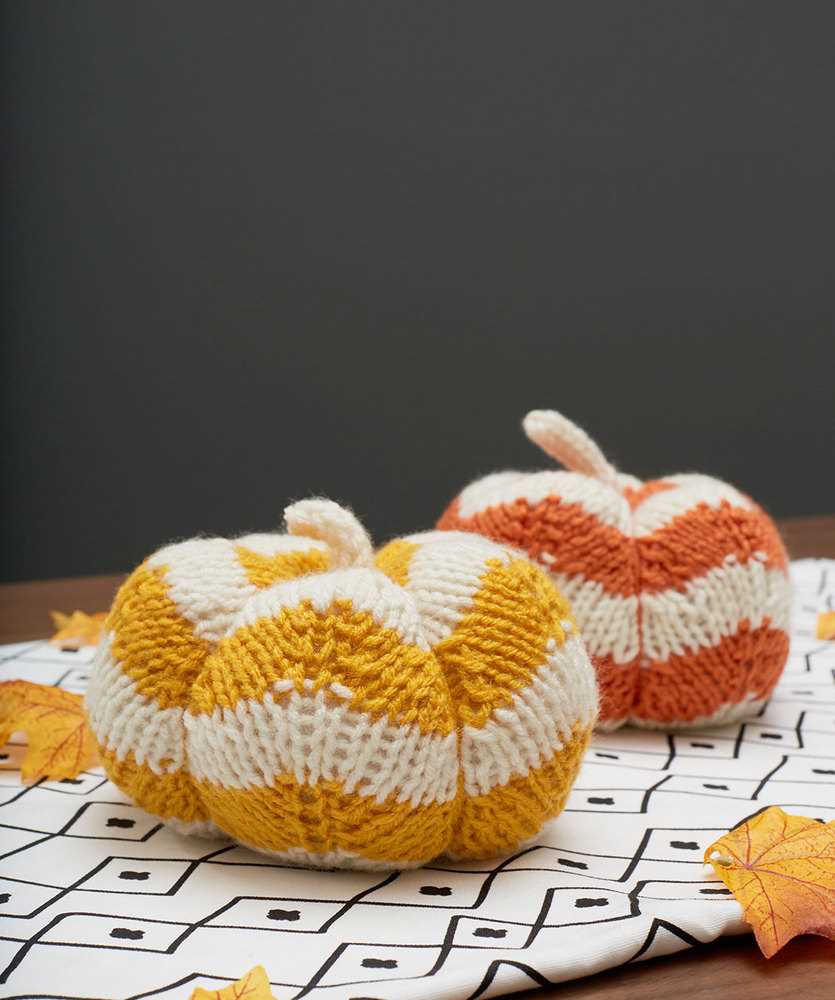
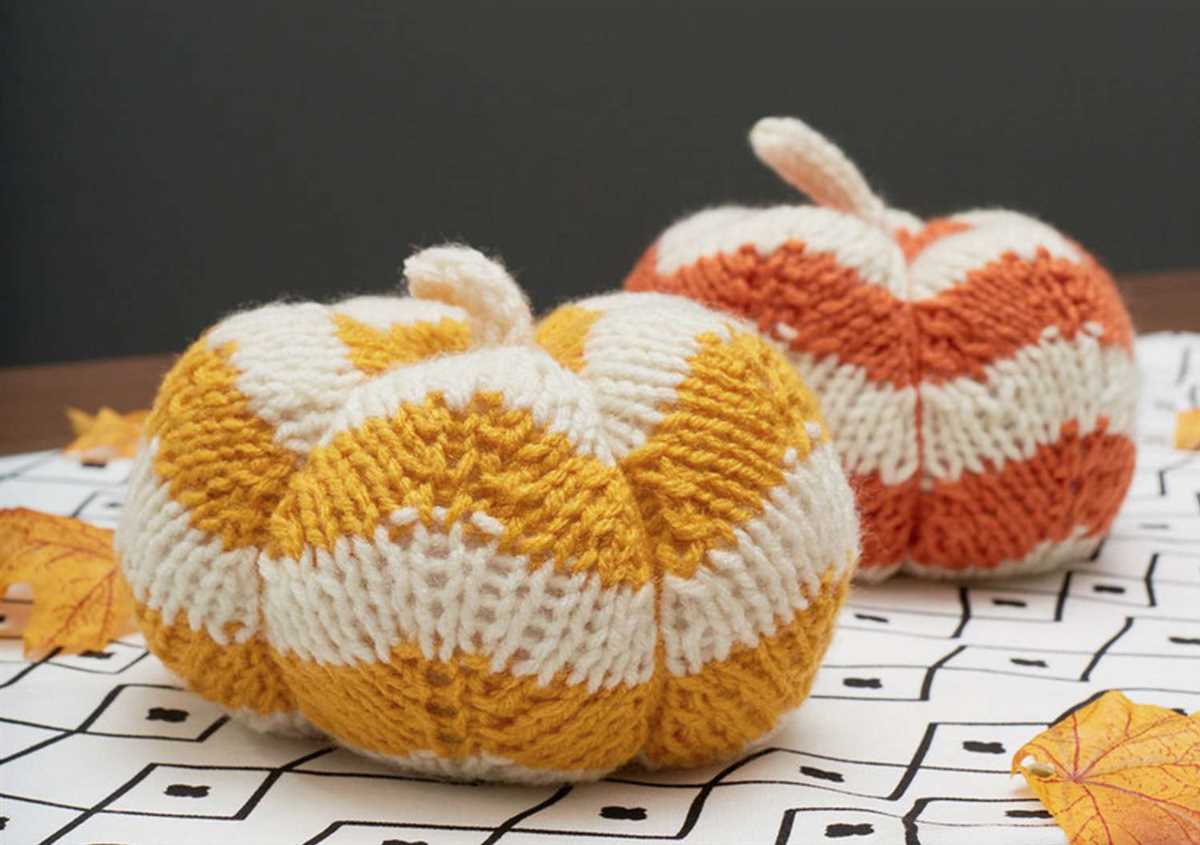
Striped Knit Pumpkin: If you’re looking to add a pop of color to your pumpkin, a striped knit pumpkin pattern might be the perfect choice. This pattern involves knitting each section of the pumpkin in a different color, creating a vibrant and eye-catching design. You can choose to knit the stripes vertically or horizontally, depending on your preference.
Lace Knit Pumpkin: For a more delicate and intricate pumpkin design, you can try a lace knit pumpkin pattern. This pattern typically involves using lace stitches to create a lacy, openwork effect on the pumpkin. The result is a beautifully detailed pumpkin that adds an elegant touch to your autumn decor.
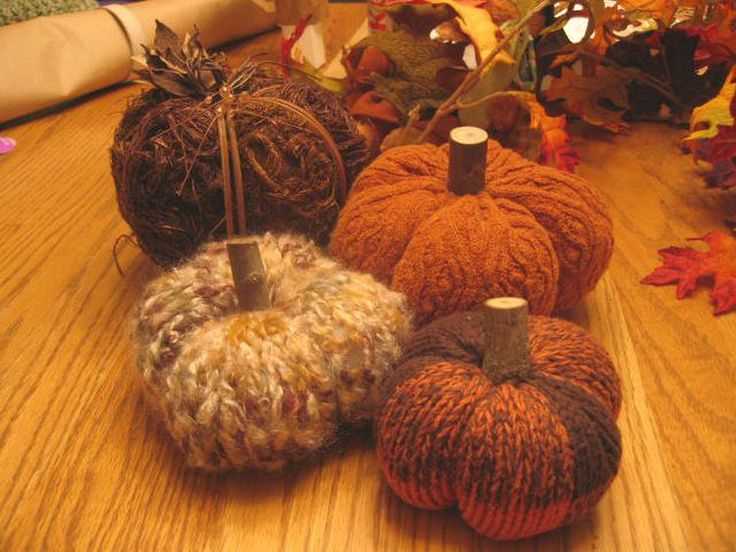
Cable Knit Pumpkin: If you enjoy working with cables, a cable knit pumpkin pattern might be the perfect project for you. This pattern typically involves using cable stitches to create a textured and three-dimensional pumpkin. The cables can be used to create ridges, swirls, or other decorative elements, adding interest and complexity to the design.
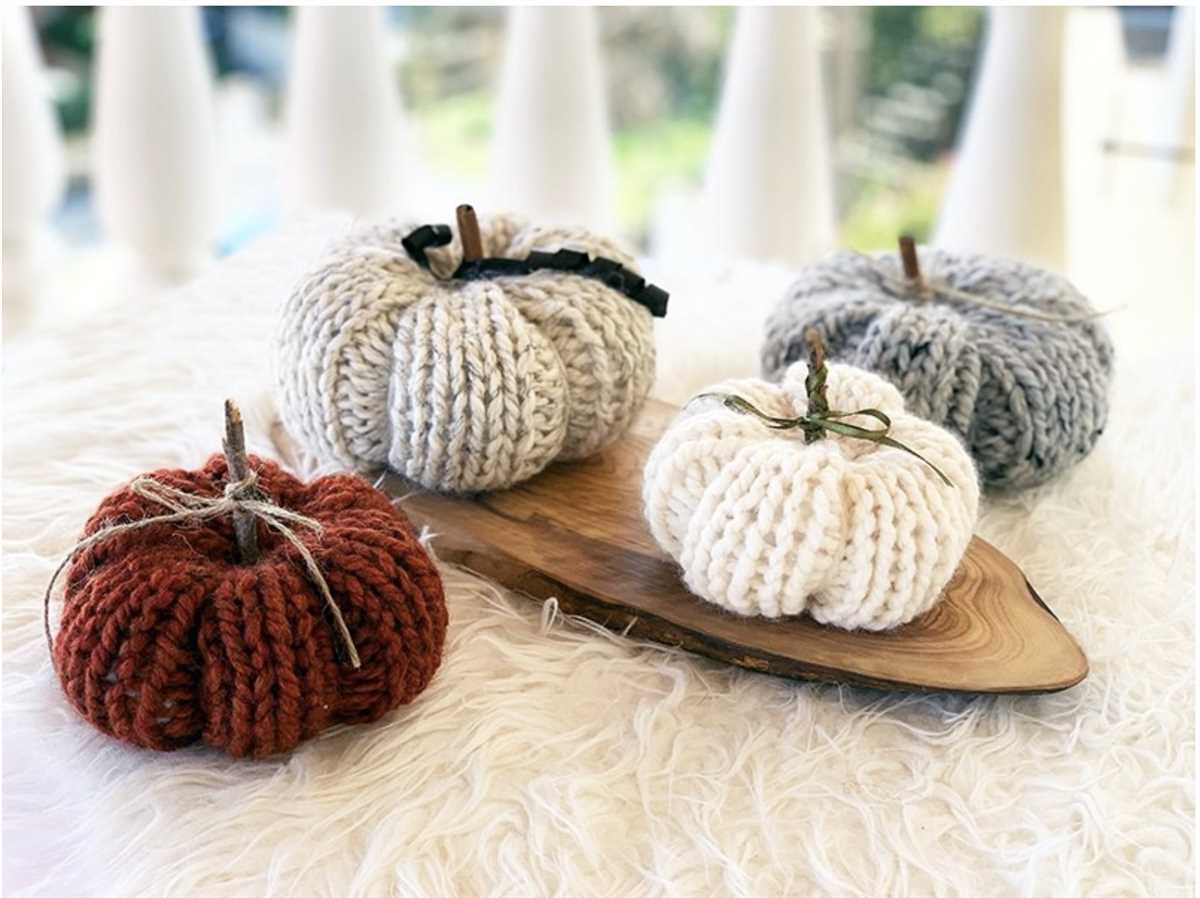
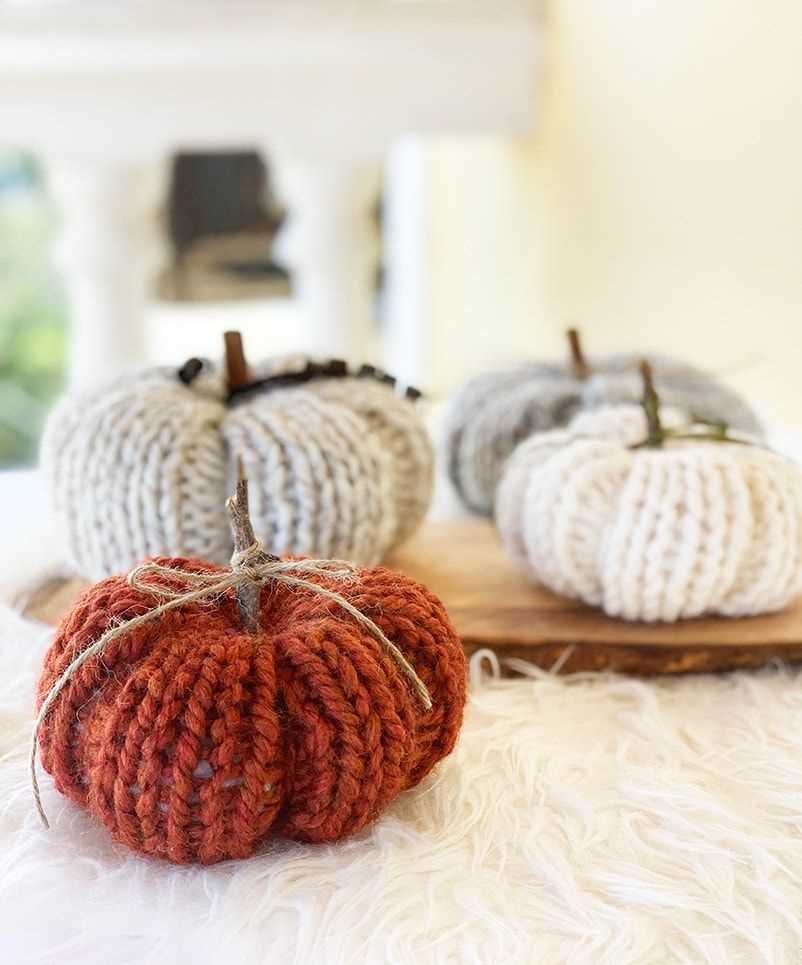
Chunky Knit Pumpkin: If you prefer a more cozy and oversized pumpkin, a chunky knit pumpkin pattern might be just what you’re looking for. This pattern typically involves using bulky or super bulky yarn and larger needles to create a larger, more substantial pumpkin. The result is a plush and cuddly pumpkin that makes a statement in any room.
Chunky Knit Pumpkin Pattern
If you’re looking for a fun and festive knitting project, why not try making a chunky knit pumpkin? This pattern is perfect for beginners and experienced knitters alike, and the finished result is an adorable decoration that can be used year after year.
To start, you’ll need some chunky yarn in your desired pumpkin color. You can choose any shade you like – orange is traditional, but you could also go for a more modern twist with a white or green pumpkin. You’ll also need a pair of knitting needles in a suitable size for your chosen yarn, and a tapestry needle for finishing.
Begin by casting on 30 stitches. This will create the base of your pumpkin. Knit every row until the piece measures approximately 10 inches in length. This will be the height of your pumpkin. Then, bind off all stitches.
Next, you’ll need to sew up the sides of your knitted rectangle to create the shape of a pumpkin. Fold the piece in half lengthwise and use a tapestry needle and some matching yarn to sew the sides together. Once you reach the top, pull the yarn tight to gather the fabric and create a rounded shape. Secure the yarn with a knot to hold everything in place.
Now it’s time to add the pumpkin’s ridges. Using a tapestry needle and some additional yarn in a contrasting color, thread the yarn through the top and bottom of the pumpkin, pulling it tight to create ridges. Repeat this process every few inches until you have the desired number of ridges.
To finish off your chunky knit pumpkin, create a stem using some brown or green yarn. You can either knit this separately and sew it onto the top, or you can use the same knitting needles and yarn to create a small tube shape directly on top of the pumpkin.
And there you have it – your very own chunky knit pumpkin! This pattern is versatile and can be customized in so many ways. You can experiment with different yarn colors, sizes, and even add embellishments like leaves or a cute little face. Use your imagination and enjoy creating these adorable decorations for yourself or as gifts for friends and family.
Cable Knit Pumpkin Pattern
If you’re looking for a fun and festive knitting project to decorate your home in the fall season, a cable knit pumpkin pattern is a perfect choice. This pattern allows you to create adorable knit pumpkins that can be used as decorations or even as unique gifts for friends and family.
The cable knit pumpkin pattern typically involves using chunky yarn and cable knitting techniques to create a textured and intricate design that resembles the ridges and curves of a real pumpkin. It’s a great way to practice your cable knitting skills while also creating something beautiful and functional.
To begin the cable knit pumpkin pattern, you’ll need to gather your materials, including chunky yarn in your desired color, knitting needles, a cable needle, and stuffing material. Once you have your materials ready, you can start by casting on the required number of stitches and then following the pattern instructions for the cable knitting design.
The cable knitting technique creates the unique textures and patterns on the pumpkin, giving it depth and visual interest. As you continue knitting, you’ll see the intricate cables forming, creating the illusion of the pumpkin’s ridges and curves. Once you’ve completed the cable knitting portion of the pattern, you can then stitch the pumpkin closed, leaving a small opening for stuffing.
After stuffing the pumpkin, you can then close up the opening and continue to add any final touches, such as a stem or leaf, to complete the look. The end result is a cozy and charming knit pumpkin that will add a warm and festive touch to your home decor.
Whether you’re an experienced knitter or a beginner looking for a new challenge, the cable knit pumpkin pattern is a great project to try. It’s a fun and creative way to add a touch of autumn to your home and showcase your knitting skills. So grab your yarn and needles and get ready to knit some adorable pumpkins!
Creative ideas for using knit pumpkins
If you’ve recently downloaded a free knit pumpkin pattern or are looking for creative ways to use knit pumpkin decorations, you’ve come to the right place. Knit pumpkins can add a cozy and festive touch to your home decor, and there are plenty of fun and unique ways to incorporate them into your space.
1. Table centerpiece
Knit pumpkins make for a charming and eye-catching centerpiece, whether you’re hosting a dinner party or just want to liven up your dining table. Arrange a few different sizes and colors of knit pumpkins in a cluster and pair them with some fall foliage or candles for an elegant and autumnal look.
2. Door wreath
Add a cozy touch to your front door by creating a knit pumpkin wreath. Use a foam wreath form as the base and attach knit pumpkins of various sizes using hot glue or small pins. You can also weave in some autumn leaves or other fall-themed elements to make it even more festive.
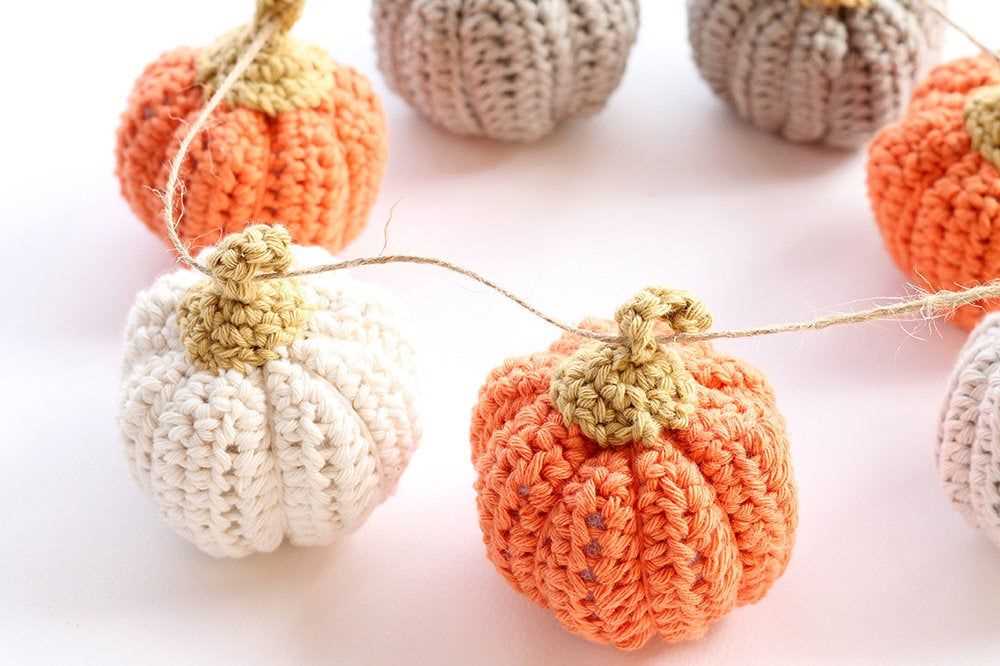
3. Garland
Create a charming garland by stringing together knit pumpkins, either alone or alternating with other fall-themed elements like acorns or leaves. Hang it along a fireplace mantel, staircase railing, or even across a window for a whimsical and cozy touch.
4. Gift topper
Instead of traditional bows or ribbons, use a small knit pumpkin as a unique and festive gift topper. Simply tie it to the package with some twine or ribbon for an instant fall-themed decoration.
5. Thanksgiving table setting
For a rustic and cozy Thanksgiving table setting, use knit pumpkins as place card holders. Simply attach a name tag to each pumpkin stem, and your guests will be delighted by the personalized touch.
6. Nursery or kids’ room decor
If you’re looking to add some autumn vibes to a nursery or kids’ room, consider using knit pumpkins as decor. They’re soft, safe, and add a playful touch to the space. You can even use them as props for fall-themed photoshoots or playtime.
These are just a few ideas for using knit pumpkins in creative ways. Let your imagination run wild and experiment with different arrangements and settings to showcase these cozy and festive decorations.
Knit Pumpkin Patterns for Different Skill Levels
Knitting pumpkin patterns are perfect for adding a cozy and festive touch to your home decor during the fall season. Whether you are a beginner or an experienced knitter, there are patterns available to suit your skill level. These patterns allow you to create adorable knitted pumpkins that can be used as decorations, centerpieces, or even as toys for children. Below, you will find a selection of knit pumpkin patterns for different skill levels.
1. Beginner Knit Pumpkin Pattern:
If you are new to knitting, a beginner-friendly pumpkin pattern is a great place to start. This pattern typically uses basic knitting stitches such as knit and purl. It may also incorporate simple shaping techniques. With easy-to-follow instructions, you can create a cute little pumpkin in no time.
2. Intermediate Knit Pumpkin Pattern:
If you have some knitting experience and are looking for a slightly more challenging project, an intermediate knit pumpkin pattern is a great option. This pattern may incorporate additional stitches and techniques, such as increasing and decreasing stitches, to create more realistic pumpkin shapes and textures.
3. Advanced Knit Pumpkin Pattern:
If you are an experienced knitter looking for a complex and intricate project, an advanced knit pumpkin pattern will provide the challenge you seek. These patterns often involve intricate lace or cable stitches, colorwork, and more detailed shaping. The end result is a stunning knitted pumpkin that will impress everyone who sees it.
Whether you are a beginner or an advanced knitter, there is a knit pumpkin pattern available to suit your skill level. Knitting these adorable pumpkins is a fun way to celebrate the fall season and add a touch of warmth and coziness to your home.
Easy Knit Pumpkin Pattern for Beginners
Are you a beginner knitter looking for an easy project to practice your skills? Look no further than this simple knit pumpkin pattern! With just a few basic knitting techniques, you can create a cute and festive pumpkin decoration that will add a touch of autumn to your home.
To get started, you will need some yarn in your favorite fall colors and a pair of knitting needles. Worsted weight yarn works well for this project, as it is easy to work with and creates a nice, sturdy pumpkin. Choose orange for a traditional pumpkin look, or get creative with colors like white, yellow, or even purple!
The pattern itself is straightforward and perfect for beginners. It uses basic knit and purl stitches, as well as some simple decreases to shape the pumpkin. You will start by knitting a small rectangle for the base, then gather the stitches to create the pumpkin shape. After that, it’s just a matter of stuffing and closing the pumpkin to finish off your adorable knit creation.
- Materials needed:
- – Worsted weight yarn
- – Size 8 knitting needles
- – Yarn needle
- – Polyfill stuffing
With this easy knit pumpkin pattern, you can make as many pumpkins as you like to decorate your home or give as gifts. They are perfect for adding a cozy touch to your fall decor, and they can be used year after year. So grab your knitting needles and get ready to create your own adorable pumpkins!
Intermediate Knit Pumpkin Pattern
Creating a beautiful knit pumpkin can be a fun and rewarding project for intermediate knitters. With some basic knitting skills and a little bit of patience, you can create a stunning pumpkin decoration that will be perfect for the fall season.
To get started, you will need some medium-weight yarn in your desired pumpkin color. You can choose traditional orange or get creative with other autumn shades like yellow, red, or even a muted green. It’s up to you! You will also need a set of double-pointed knitting needles in a size appropriate for your yarn, and a small amount of stuffing to give your pumpkin its shape.
Begin by casting on stitches to create the base of your pumpkin. You can use a circular or double-pointed needle for this part, whichever you feel more comfortable with. Next, you will start knitting in the round, gradually increasing your stitch count to create the rounded shape of the pumpkin. This will require some basic knowledge of knitting techniques such as knitting in the round and increasing stitches.
As you continue knitting, you can experiment with different stitch patterns to add texture to your pumpkin. You could try a simple ribbing pattern or even incorporate some cables for a more intricate design. Remember to follow the pattern instructions carefully and keep track of your stitch count as you go along.
Once you have finished knitting the main body of the pumpkin, it’s time to stuff it to give it a plump and realistic shape. Use small amounts of stuffing at a time and distribute it evenly throughout the pumpkin. Don’t overstuff it, as you want the pumpkin to have some squishiness to it.
To finish off your knit pumpkin, you will need to close up the top. This can be done by either pulling the stitches together and cinching them tight, or by using a technique like a three-needle bind off. You can then attach a small stem or create a crochet chain to serve as the pumpkin’s stem.
Once you have completed your knit pumpkin, you can use it as a seasonal decoration for your home. Group it together with other knitted pumpkins of varying sizes and colors, or display it on its own as a statement piece. Either way, your intermediate knit pumpkin will be a unique and eye-catching addition to your fall decor.
Advanced Knit Pumpkin Pattern
If you’ve already mastered the basic knit pumpkin pattern and are looking to take your skills to the next level, then the advanced knit pumpkin pattern is perfect for you. This pattern offers a more intricate design and requires a bit more experience with knitting techniques.
Materials Needed:
- Yarn in desired colors
- Knitting needles in appropriate size
- Stitch markers
- Tapestry needle
- Fiberfill stuffing
Instructions:
- Begin by casting on the desired number of stitches, depending on how big you want your pumpkin to be.
- Knit in the round using a circular knitting needle, or knit flat and seam the edges together later on.
- As you knit, create additional sections by incorporating different stitch patterns, such as cables or lace, to add texture and interest to your pumpkin.
- Use stitch markers to indicate the start and end of each section, making it easier to keep track of your progress.
- Once you’ve completed all the sections, stuff your pumpkin with fiberfill until it reaches your desired level of plumpness.
- Using a tapestry needle, close up the top of the pumpkin by weaving the yarn through the remaining stitches and pulling it tight.
- Finally, use a contrasting color of yarn to embroider a stem onto the top of the pumpkin.
This advanced knit pumpkin pattern allows you to showcase your knitting skills and create a unique and intricate decoration for the autumn season. Have fun experimenting with different stitch patterns and color combinations to make each pumpkin truly one-of-a-kind.
Where to find free knit pumpkin patterns
Knitting pumpkin patterns are widely available online and can be found on various websites. If you’re looking for some free knit pumpkin patterns to try, here are a few popular sources:
- Ravelry: Ravelry is a popular online community for knitters and crocheters, and it offers a wide range of free patterns. Simply create an account, search for “knit pumpkin pattern,” and browse through the numerous options available.
- Knitting blogs: Many knitting bloggers share free patterns on their websites, and some of them offer exquisite knit pumpkin patterns. A simple Google search for “free knit pumpkin pattern blog” will lead you to a variety of choices.
- Knitting magazines: Knitting magazines often feature seasonal patterns, and many of them include pumpkin designs. Check out the websites of popular knitting magazines like “Interweave Knits” and “Knit Picks” to see if they have any free pumpkin patterns available.
- YouTube: While not strictly a pattern source, YouTube is a great place to find video tutorials on knitting pumpkins. Many talented knitters share their techniques and patterns in video form, making it easier for beginner knitters to follow along.
With so many options available, you’re sure to find the perfect free knit pumpkin pattern that suits your style and skill level. Happy knitting!