
Knitting is a popular hobby for many people, and there is no shortage of projects to keep knitters busy. One of the most common items to knit is socks, and while there are plenty of patterns available, finding a pattern specifically designed for men’s socks can be a bit more challenging.
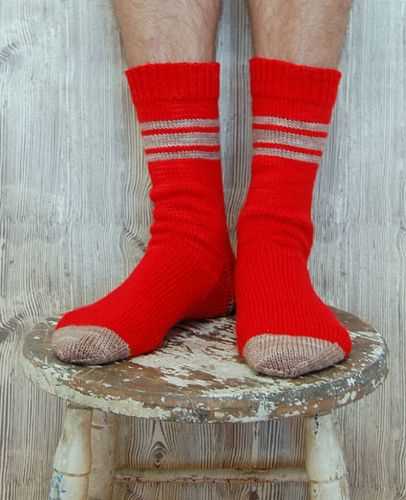
If you’re on the hunt for a free knitting pattern for men’s socks, look no further! We have a pattern that is not only easy to follow, but also designed specifically for the larger feet and wider calves of men. Whether you’re knitting a pair of socks for yourself or as a gift, this pattern is perfect for beginners and experienced knitters alike.
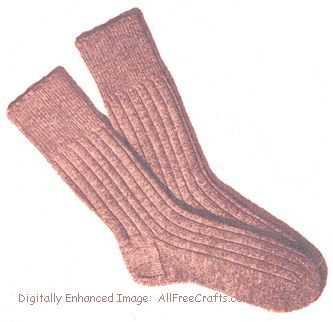
This free knitting pattern for men’s socks features a classic ribbed design that not only adds a touch of style, but also ensures a comfortable fit. The pattern includes instructions for multiple sizes, allowing you to create socks that fit perfectly every time. Plus, the ribbed pattern provides some stretch, making these socks ideal for those with wider calves.
So, if you’re ready to try your hand at knitting men’s socks, grab your knitting needles, some soft and warm yarn, and get started with this free pattern. Whether you’re a seasoned knitter or just starting out, you’ll love the simplicity and versatility of this pattern, and the end result will be a cozy pair of socks that any man would be proud to wear.
Choosing the right yarn
When it comes to knitting men’s socks, choosing the right yarn is crucial. The right yarn can make all the difference in the final result, ensuring that the socks are not only comfortable to wear but also durable and long-lasting.
Here are some factors to consider when choosing the yarn:
- Fiber content: Different fibers have different properties, so it’s important to consider what you want from the socks. Wool, for example, is a popular choice for socks due to its warmth and moisture-wicking abilities. However, if you’re looking for a more lightweight option, you may want to consider a blend of wool and nylon.
- Weight: The weight of the yarn will determine the thickness of the socks. For men’s socks, it’s generally recommended to use a medium or heavy weight yarn to ensure durability and warmth.
- Color and pattern: Think about the color and pattern you want for the socks. Solid colors are versatile and can be paired with any outfit, while variegated or self-striping yarns can add visual interest to the socks.
- Softness: Consider how soft you want the socks to be. Some yarns may feel rough or scratchy, while others are known for their softness. If comfort is a priority, opt for a softer yarn.
- Care instructions: Check the care instructions of the yarn to make sure it aligns with your preferences. Some yarns may require hand washing, while others can be machine washed.
By considering these factors and choosing the right yarn, you’ll be able to create high-quality men’s socks that are not only fashionable but also comfortable to wear.
Understanding sock sizes
When it comes to knitting socks, it’s important to understand sock sizes in order to create a perfect fit. Socks that are too big or too small can be uncomfortable to wear, so taking the time to find the right size is essential.
One way to determine sock size is by using foot length measurements. This involves measuring the length of the foot from the back of the heel to the tip of the longest toe. It’s important to measure both feet, as there may be slight differences in size. Once the foot length is determined, it can be compared to a sock sizing chart to find the appropriate size.
Men’s sock sizes can vary depending on the region or manufacturer, but they generally range from small to extra-large. In the United States, these sizes typically correspond to shoe sizes, with small being for shoe sizes 6-8, medium for shoe sizes 8-10, large for shoe sizes 10-12, and extra-large for shoe sizes 12-14. However, it’s important to consult the specific sizing information provided by the pattern or yarn manufacturer, as there may be variations.
International sizing can also be used to determine sock sizes. The European shoe size system is commonly used and can be helpful, particularly for those who are familiar with European shoe sizes. It’s worth noting that European sizing may not always correspond directly to US sizes, so checking the conversion chart is recommended.
Overall, understanding sock sizes is crucial for knitters who want to create socks that fit well and are comfortable to wear. Taking accurate foot measurements and consulting size charts will help ensure that the finished socks are the perfect fit for the intended recipient.
Getting started with the cuff

When starting to knit a pair of men’s socks, it is important to begin with the cuff. The cuff is the top part of the sock that sits around the leg and helps to keep the sock in place. It is typically knit in a ribbed pattern to allow for stretch and flexibility.
To start the cuff, cast on the desired number of stitches using a long-tail cast-on method. This cast-on method is ideal for creating a neat and stretchy edge. Make sure to leave a long tail of yarn for later use when finishing the cuff.
Once the stitches are cast on, join the round by knitting the first stitch and slipping the last cast on stitch onto the left-hand needle. This creates a seamless circle and prevents a gap from forming in the cuff. Remember to place a stitch marker on the right-hand needle to mark the beginning of the round.
Next, work the cuff in a rib pattern of your choice. The most common rib pattern for socks is a K2, P2 rib, which alternates between knitting two stitches and purling two stitches. This pattern creates a nice stretchy fabric that hugs the leg comfortably.
Continue knitting the cuff in the rib pattern for the desired length. The length of the cuff can vary depending on personal preference and the style of sock being knit. Typically, a cuff length of 1-2 inches is common.
Once the desired length is reached, it’s time to bind off the cuff stitches. Use a stretchy bind-off method, such as the suspended bind-off or the sewn bind-off, to ensure the cuff has enough elasticity to easily fit over the foot and ankle.
With the cuff complete, you are now ready to move on to the next section of the sock, such as the leg or heel. Following a detailed knitting pattern can provide guidance on the specific instructions for each section and help ensure that your socks turn out well-fitting and comfortable.
Creating the leg
Once you have completed the cuff of your men’s socks, it’s time to move on to creating the leg. The leg is the section of the sock that will go up the calf and provide comfort and warmth. To create the leg, you will continue working in the round with your chosen knitting needles and yarn.
To begin, knit the first stitch and then continue knitting in the desired stitch pattern for the leg. This could be a simple stockinette stitch, a ribbed pattern, or any other stitch pattern of your choice. Make sure to follow the pattern instructions for the desired stitch pattern and repeat the necessary rows to achieve the desired length.
If you are using a stitch pattern that requires a specific number of stitches, make sure to cast on the correct number of stitches to begin with. This will ensure that your leg is the proper width and fits comfortably on the calf. If you prefer a looser or tighter fit, you can adjust the number of stitches accordingly.
As you work on the leg, it’s important to periodically check the length to make sure it will fit your intended recipient. You can do this by trying the sock on or measuring against a similar pair of socks. Remember that the leg will stretch slightly when worn, so you may want to account for this in your measurements.
Continue knitting in the desired stitch pattern until the leg reaches the desired length. Then, you can move on to shaping the heel or any other additional components of the sock pattern. Enjoy the process of creating the leg and know that you are one step closer to completing your men’s socks!
Shaping the Heel
When knitting socks, one of the most important steps is shaping the heel. This is where the sock transitions from the leg to the foot, providing a comfortable and snug fit. There are various methods for shaping the heel, but one common technique is known as the “short-row” or “wrap and turn” method.
To start shaping the heel, you will first need to divide your stitches. Typically, half of the stitches will be used for the heel, while the other half will continue to be worked on the instep. You can use stitch markers to help keep track of the two sections.
Next, you will begin working short rows. Short rows involve knitting or purling a portion of the stitches and then turning the work before reaching the end of the row. This creates extra fabric in the heel area, allowing it to cup around the back of the foot.
One important technique used in short-row shaping is the “wrap and turn” method. To do this, you will knit or purl to a specific stitch, then slip that stitch from the left needle to the right needle without working it. Next, bring the yarn to the front if it isn’t already there, slip the stitch back to the left needle, and turn the work.
After turning the work, you will continue working in the opposite direction, knitting or purling to the next “wrapped” stitch. When you come to a wrapped stitch, you will need to pick up the wrap and work it together with the stitch to prevent a hole from forming. This creates a smooth transition and eliminates any gaps in the fabric.
Repeat these steps, working short rows and wrapping and turning, until you have shaped the desired heel. Once the heel is complete, you can resume working in the round to finish the foot of the sock. Following a well-written pattern and practicing the shaping techniques will result in a professional-looking and comfortable pair of men’s socks.
Knitting the foot
After completing the cuff and knitting the leg of the sock, it’s time to move on to knitting the foot. This is where the sock starts to take shape and fit the wearer’s foot.
When knitting the foot, it’s important to continue using the desired stitch pattern or texture from the leg. This will help maintain consistency throughout the sock. If using a pattern with a ribbed or textured design, make sure to follow the instructions to create the desired pattern.
Start by knitting the stitches for the top of the foot, then turn the work and purl the stitches for the bottom of the foot. Repeat these two rows until the foot measures approximately 1.5-2 inches less than the desired foot length.
Next, it’s time to shape the toe of the sock. This can be done using various methods such as toe decreases or a short row toe. Follow the pattern instructions to shape the toe in a way that fits your preferences. It’s important to try on the sock periodically to ensure it fits well and make any necessary adjustments.
Once the toe is shaped and the desired foot length is reached, it’s time to finish off the sock. This can be done by grafting the toe stitches together using the Kitchener stitch or by binding off the stitches using a stretchy bind-off method.
Remember to weave in any loose ends and block the finished sock to give it a polished look. Voila! You’ve successfully knitted a sock!
Adding the Toe
Once you have finished knitting the foot of the sock, it’s time to add the toe. This is the final step in completing your men’s socks. The toe is a crucial part of the sock, as it provides a comfortable and snug fit for the wearer.
To start adding the toe, you will need to decrease the number of stitches gradually. This creates the tapered shape that allows the sock to fit nicely around the toes. You can use various decrease techniques such as kitchener stitch, short rows, or a simple decrease pattern. Choose the technique that you are most comfortable with or experiment with different methods to find the one that suits your preference.
Method 1: Kitchener Stitch
The kitchener stitch is a popular method for creating the toe of a sock. It involves weaving the live stitches together to create a seamless and smooth finish. To use this technique, you will need a tapestry needle and a small amount of yarn. Follow these steps:
- Thread the tapestry needle with the yarn tail.
- Hold the sock with the right sides together, with the needles parallel and the working yarn at the back.
- Insert the tapestry needle into the first stitch on the front needle as if to knit and leave the stitch on the needle.
- Insert the tapestry needle into the first stitch on the back needle as if to purl and leave the stitch on the needle.
- Repeat steps 3 and 4 until all the stitches are worked, alternating between the front and back needles.
- Once all the stitches are worked, gently pull the yarn through the stitches, remove the needles, and tighten the yarn to secure the toe.
Method 2: Short Rows
Short rows are another option for creating the toe. This technique involves working partial rows to shape the toe area. Here’s how you can use short rows to add a toe to your men’s socks:
| Row | Instructions |
|---|---|
| 1 | Knit to the desired number of stitches before the center of the toe. |
| 2 | Turn the work and purl back to the desired number of stitches before the center of the toe. |
| 3 | Repeat steps 1 and 2, working one stitch fewer before the center of the toe each time, until you have reached the desired number of stitches for the toe. |
| End | Continue working in rounds with all the stitches to complete the toe. |
With these techniques, you can confidently add the toe to your men’s socks and create a comfortable and well-fitting final product. Experiment with different techniques and find the one that works best for you and your knitting style.
Finishing touches
Once you have completed knitting the men’s socks according to the free pattern, it’s time to add the finishing touches to give them a polished look. Here are some key steps to consider:
- Weaving in ends: Make sure to carefully weave in all loose ends of yarn inside the socks. This will ensure that they stay secure and won’t unravel.
- Blocking: Blocking is an important step to shape your socks and make them look more professional. You can use blocking mats or towels to gently stretch the socks to their desired shape and size.
- Seaming: If your free knitting pattern requires any seaming, such as closing the toe seam, make sure to do it neatly and securely. This will help the socks stay comfortable and long-lasting.
- Adding reinforcement: To make your men’s socks more durable, you can add reinforcement to high-wear areas such as the heel and toe. This can be done by duplicate stitching or adding a reinforcing thread while knitting.
- Embroidery or embellishments: If you want to add a personal touch to the socks, you can consider embroidery or adding small embellishments such as buttons or beads. These details can make the socks unique and eye-catching.
Remember to always follow the specific instructions provided in the free knitting pattern for the best results and to ensure that your men’s socks turn out exactly as you envisioned. With a little extra care and attention to detail, you can create a pair of cozy and stylish socks that will be cherished by their recipient.
Tips for a Perfect Fit
When knitting socks for men, it is essential to ensure a perfect fit. Here are some tips to help you achieve just that:
- Measurements: Take precise measurements of the intended wearer’s foot, including the length and width. This will help you select the right size and make any necessary adjustments.
- Gauge: Pay attention to the gauge specified in the pattern. Use the recommended needle size and yarn to match the gauge and achieve the desired size and fit.
- Try-ons: Have the wearer try on the sock as you progress to check the fit. This will allow you to make any necessary modifications, such as adding or removing stitches, to ensure a snug and comfortable fit.
- Adjustments: Feel free to adjust the pattern according to the wearer’s preferences. This can include adding a few extra rows or stitches to accommodate larger or wider feet, or making the cuff longer or shorter.
- Elasticity: Consider using a ribbed or stretchy stitch pattern for the cuff and leg sections to ensure a secure and flexible fit. This will also help the socks stay up without slipping down.
By following these tips, you can knit men’s socks that are not only stylish, but also fit perfectly. Remember to experiment, ask for feedback, and make adjustments as needed to achieve the best fit for the wearer.