
Knitting patterns are a great way to spice up your knitting projects, and one that is gaining popularity is the dragon stitch pattern. This unique pattern creates a textured fabric that resembles the scales of a dragon, making it the perfect choice for a variety of projects, from scarves to blankets.
The dragon stitch pattern gets its name from the intricate pattern of alternating knit and purl stitches that create the scale-like texture. While it may look complicated, it is actually quite simple to knit once you understand the basic technique.
In this article, we will take a closer look at how to knit the dragon stitch pattern, including step-by-step instructions and tips for success. Whether you’re a beginner knitter looking to expand your skills or an experienced knitter looking for a new challenge, the dragon stitch pattern is a fun and rewarding project to try.
What is Dragon Stitch Knitting Pattern?
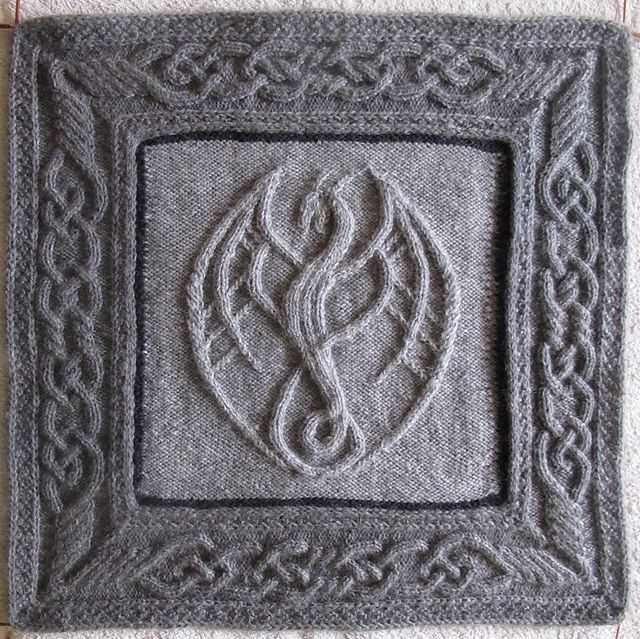
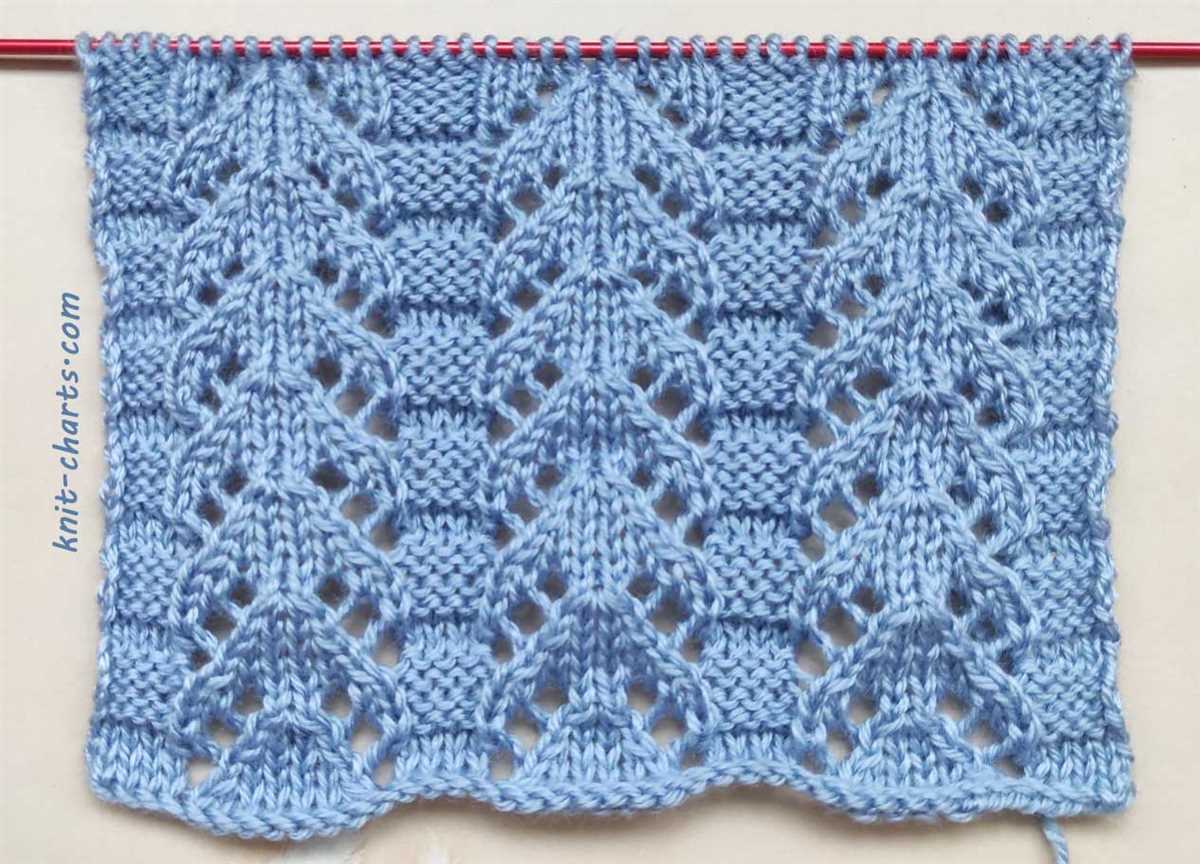
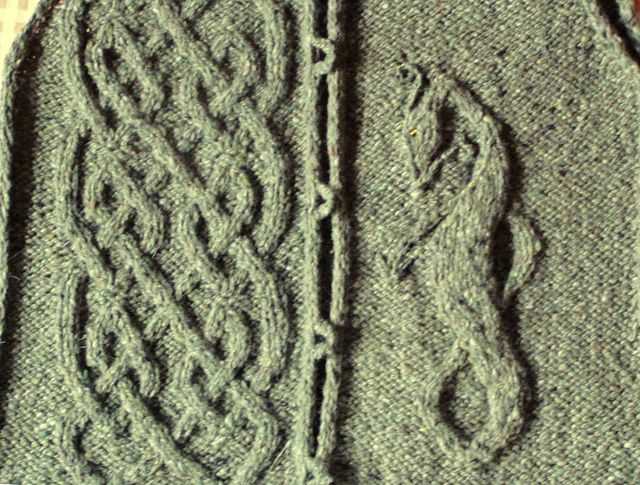
The Dragon Stitch is a unique and eye-catching knitting pattern that resembles the scales of a dragon. It is a complex and intricate stitch pattern that is often used in advanced knitting projects to create texture and visual interest. The combination of different knit and purl stitches creates a three-dimensional effect that mimics the scales of a dragon.
This knitting pattern is not for beginners and requires some experience and skill to master. The Dragon Stitch involves various techniques such as cabling, twisted stitches, and slip stitches, which may be challenging for those who are new to knitting. However, with practice and patience, it is possible to create stunning pieces using this intricate stitch pattern.
To knit the Dragon Stitch, it is essential to follow a detailed pattern or tutorial that provides step-by-step instructions. The pattern will specify the combination of stitches and the number of rows required to achieve the desired scale-like effect. It is important to pay close attention to each stitch and carefully follow the instructions to create an accurate and consistent pattern.
Once mastered, the Dragon Stitch can be used to make a variety of projects, such as scarves, blankets, or even sweaters. The unique texture and visual appeal of this stitch pattern make it a popular choice for those looking to add a touch of elegance and sophistication to their knitting projects. Whether you are a seasoned knitter or just starting out, the Dragon Stitch offers a challenging and rewarding pattern to showcase your skills and creativity. So, grab your knitting needles and let the dragons come to life in your next project!
Materials and Tools Needed for Dragon Stitch Knitting Pattern
The Dragon Stitch knitting pattern requires a few specific materials and tools to create the intricate dragon scale design. Here is a list of everything you will need:
Materials:
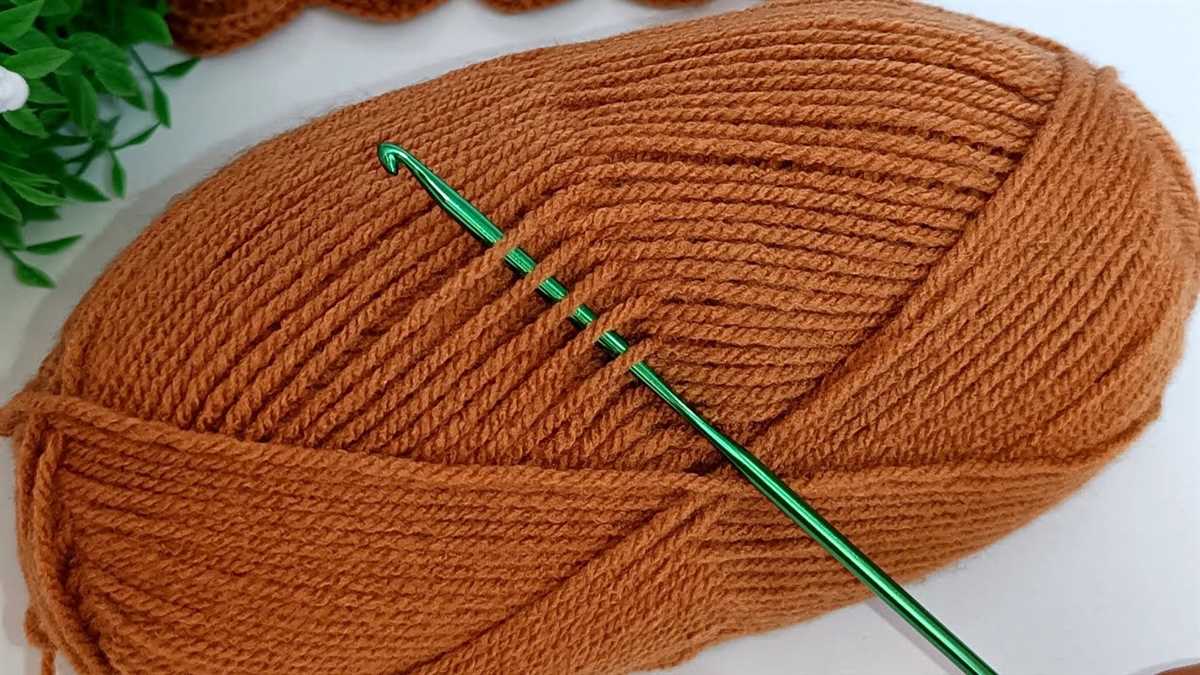
- Yarn: Choose a medium to heavy weight yarn in the color of your choice. The dragon stitch pattern works well with solid or variegated yarns.
- Knitting Needles: Use a pair of knitting needles in the appropriate size for your chosen yarn. Check the label or gauge swatch to determine the recommended needle size.
- Cable Needle: A cable needle will be necessary for creating the twisted stitches that form the dragon scales. Choose a cable needle with a smooth surface to prevent snagging.
- Tapestry Needle: A tapestry needle is used to weave in the loose ends of yarn and finish the project.
Tools:
- Scissors: A pair of sharp scissors is essential for cutting the yarn when needed.
- Stitch Markers: Stitch markers can be useful for marking specific stitches or sections of the pattern. They can help you keep track of your progress and make it easier to count stitches.
- Row Counter: A row counter is a handy tool for keeping track of the number of rows you have knitted. This can be particularly useful when working on larger projects.
- Blocking Tools: Blocking the finished dragon stitch project can help to even out the stitches and enhance the overall appearance. You may need blocking mats, T-pins, and a spray bottle for wet blocking or a steam iron for steam blocking.
Having these materials and tools on hand will ensure that you have everything you need to successfully complete the dragon stitch knitting pattern. Gather your supplies and get ready to create a unique and beautiful dragon scale design!
How to Cast on for Dragon Stitch Knitting Pattern
The dragon stitch is a beautiful and intricate knitting pattern that creates a textured design resembling dragon scales. Before you can begin knitting the dragon stitch, you need to cast on your stitches. The cast on method you choose will depend on your preference and the project you are working on.
One popular cast on method for the dragon stitch is the long tail cast on. This method creates a neat and flexible edge that is ideal for the dragon stitch pattern. To cast on using the long tail method, start by estimating how much yarn you will need for your desired number of stitches. Leave a tail that is approximately three times the width of your knitting project.
To cast on using the long tail method:
- Make a slipknot with the yarn, leaving a long tail.
- Insert your right hand needle through the slipknot from front to back, and then bring the working yarn (the yarn attached to the ball) under the needle.
- With your left hand, use your thumb and index finger to grip the yarn tails and secure them.
- Using your right hand needle, insert it into the loop on your left hand needle, going under the working yarn.
- Bring the working yarn over the right hand needle and through the loop on your left hand needle, creating a new stitch.
- Repeat steps 4-5 until you have cast on the desired number of stitches for your dragon stitch pattern.
Once you have cast on your stitches, you are ready to start knitting the dragon stitch pattern. Refer to a dragon stitch knitting pattern for specific instructions on how to work the stitches and create the textured dragon scale design.
How to Knit the Dragon Stitch
The dragon stitch is a unique knitting pattern that creates a textured design resembling the scales of a dragon. It adds a fun and interesting touch to any knitting project, such as scarves, hats, or even blankets. While it may look complex, the dragon stitch is actually quite simple to learn and execute.
Materials Needed:
- Yarn of your choice
- Knitting needles suitable for your yarn
- Scissors
- Yarn needle
To start knitting the dragon stitch, cast on an even number of stitches onto your needles. The basic pattern consists of two rows, which are repeated throughout the project. This makes it easy to memorize and follow along as you knit.
Row 1: Knit all stitches
Row 2: Purl all stitches
Repeat these two rows until your project reaches the desired length. When you’re ready to finish, bind off all stitches. Weave in any loose ends using a yarn needle to ensure a clean and polished look.
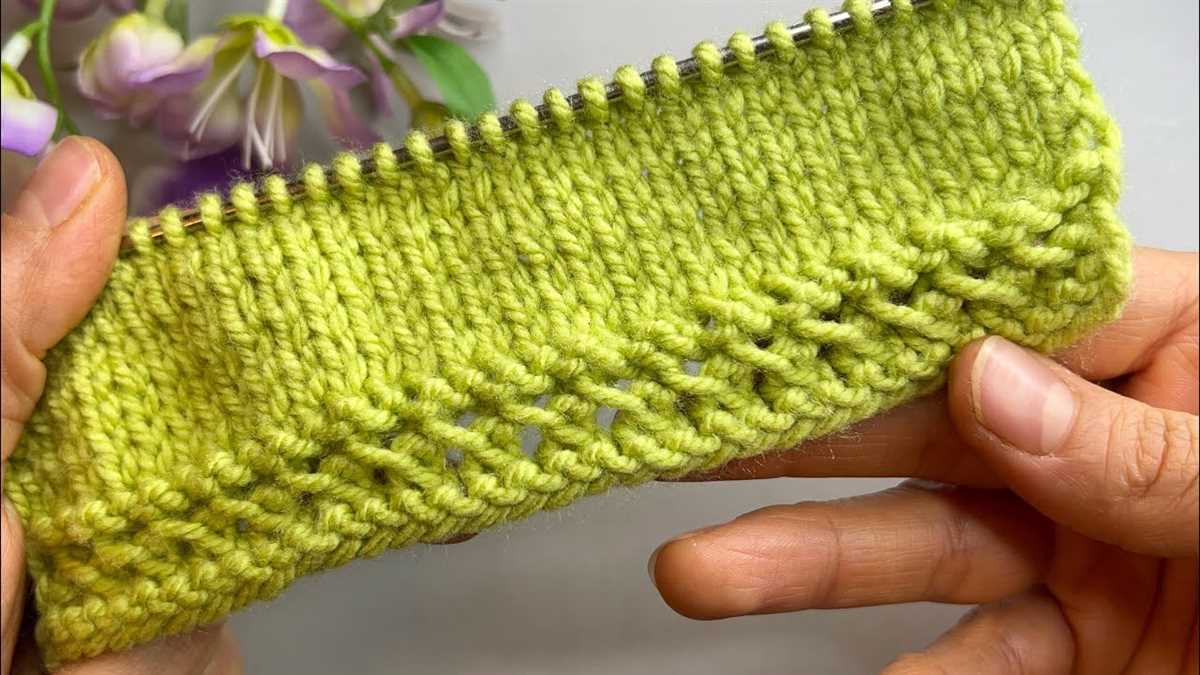
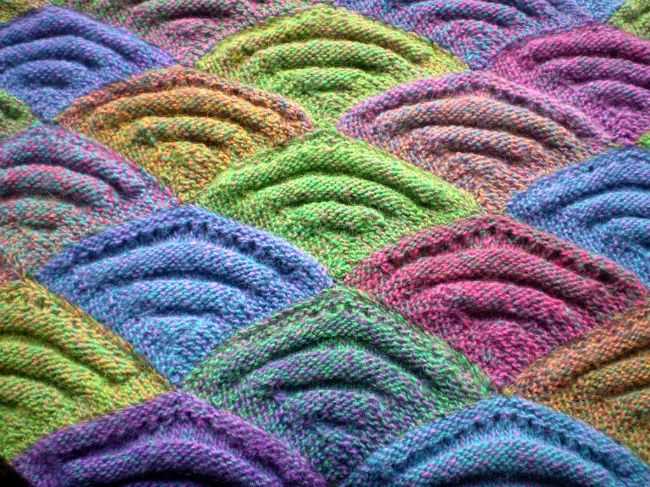
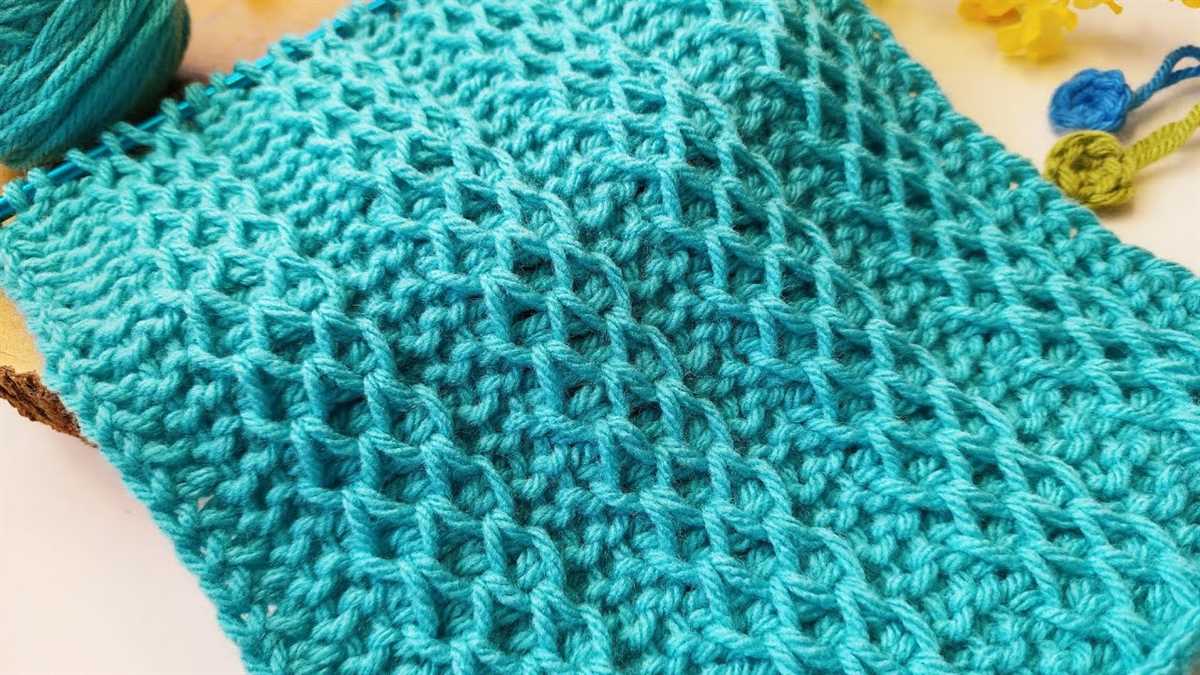
The dragon stitch creates a raised pattern with a textured appearance. It is achieved by alternating between knitting and purling rows. The resulting fabric has a beautiful and unique scale-like design that resembles the skin of a dragon. This stitch is perfect for adding an element of fantasy and creativity to your knitting projects.
Experiment with different yarn colors and thicknesses to create different effects with the dragon stitch. You can also combine it with other stitches to create even more intricate and interesting patterns. Once you’ve mastered the dragon stitch, you’ll have a versatile technique that you can use to enhance all your future knitting projects.
How to Purl the Dragon Stitch
If you’re looking to add a touch of whimsy and enchantment to your knitting project, the dragon stitch is the perfect choice. This intricate pattern features textured scales that resemble the skin of a dragon. While it may look daunting, mastering the dragon stitch is easier than you think, especially when it comes to purling.
Step 1: Set Up
Before you begin purling the dragon stitch, make sure you have the necessary supplies. You’ll need a pair of knitting needles, a ball of yarn in your chosen color, and basic knitting skills. If you’re new to knitting, it’s helpful to practice basic stitches like the knit and purl stitches before attempting more complex patterns.
Step 2: Understanding the Pattern
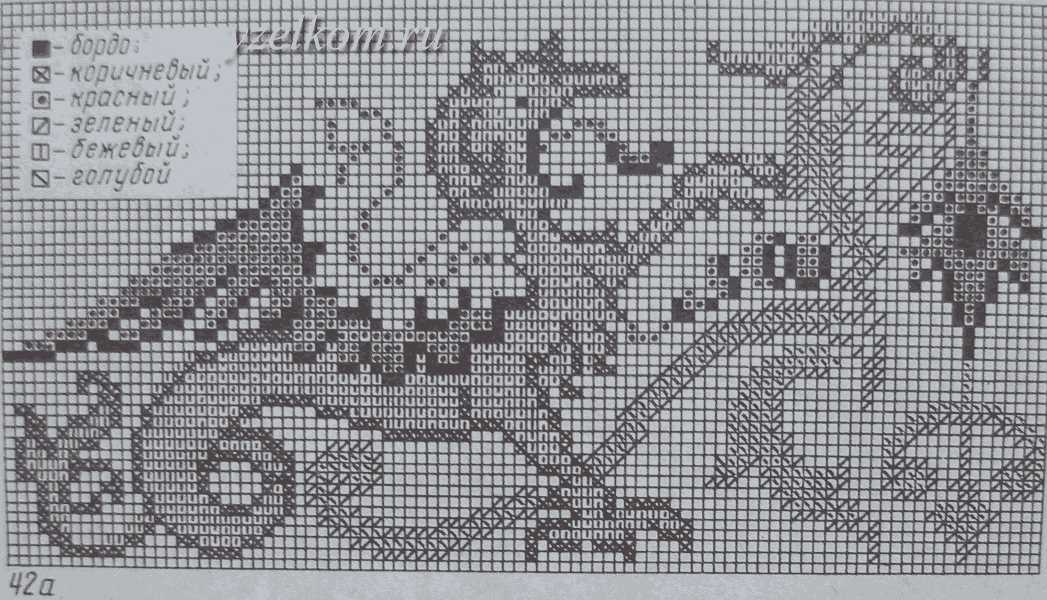
The dragon stitch pattern typically consists of a series of knits and purls, creating the textured scales. To purl the dragon stitch, you’ll need to familiarize yourself with the pattern. It’s helpful to write out the pattern or use a stitch chart to keep track of the stitches.
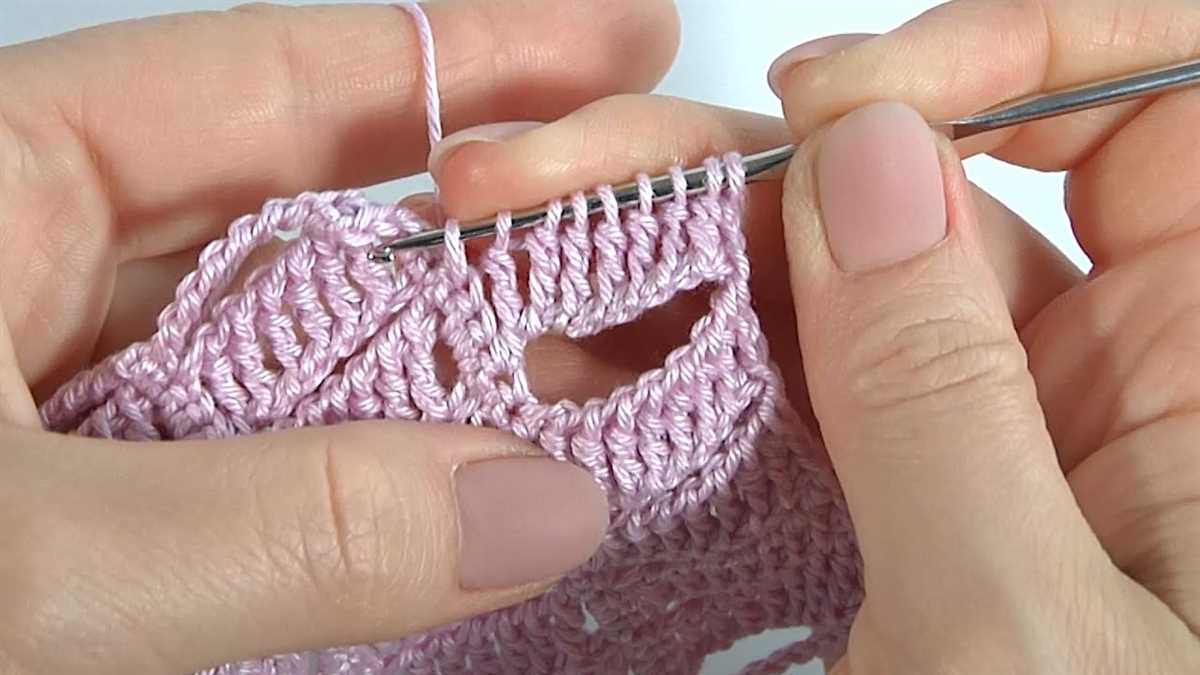
Step 3: Purling the Dragon Stitch
To purl the dragon stitch, follow these steps:
- Hold your knitting needle with the stitches in your left hand and the empty needle in your right hand.
- Insert the right needle into the first stitch on the left needle from right to left.
- Bring the yarn to the front of the work, positioning it between the needles.
- With the right needle, wrap the yarn counterclockwise around the right needle from right to left.
- Use the right needle to pull the yarn through the stitch, creating a loop on the right needle.
- Slip the original stitch off the left needle, transferring it to the right needle.
- Repeat these steps for each purl stitch in the dragon stitch pattern.
With practice, you’ll become more comfortable purling the dragon stitch and develop a rhythm with the pattern. Remember to take your time and enjoy the process, as creating the dragon stitch is a labor of love. Soon, you’ll have a beautiful knitting project adorned with the whimsical scales of a dragon.
How to Increase Stitches in Dragon Stitch Knitting

When knitting the dragon stitch pattern, you may come across the need to increase stitches. Increasing stitches is important for shaping your project or adding decorative elements. Here are a few methods you can use to increase stitches in the dragon stitch knitting pattern.
1. Make One (M1) Increase
A common method to increase stitches in knitting is the Make One (M1) increase. In dragon stitch knitting, you can use this technique to add stitches between two existing stitches. To do this, look for the horizontal yarn that connects the two rows of stitches. Insert your right-hand needle from front to back under this yarn, then knit into the back of the loop to create a new stitch. This method creates a nearly invisible increase.
2. Knit Front and Back (KFB) Increase
Another method to increase stitches in dragon stitch knitting is the Knit Front and Back (KFB) increase. This method is slightly more visible than the M1 increase, but it creates a distinctive raised stitch that can add texture to your project. To perform this increase, knit into the front of a stitch as usual, but before slipping the stitch off the left-hand needle, knit into the back of the same stitch. This creates two stitches from one.
These are just a couple of methods you can use to increase stitches in the dragon stitch knitting pattern. Experiment with both techniques to find the one that works best for your project. Remember to always follow the pattern instructions and adjust the stitch count accordingly when incorporating increases into your knitting.
How to Decrease Stitches in Dragon Stitch Knitting
When working on the dragon stitch knitting pattern, it may be necessary to decrease stitches to shape your project. Decreasing stitches allows you to create curves, angles, or achieve a specific design. Here are a few methods you can use to decrease stitches in the dragon stitch knitting.
1. Knit Two Together (K2Tog)
The knit two together (K2Tog) decrease is a commonly used method in knitting. To perform this decrease in dragon stitch knitting, insert your right needle through the next two stitches on the left needle as if to knit. Then, wrap the yarn around the right needle and pull it through both stitches, slipping them off the left needle. This decreases two stitches into one.
2. Slip, Slip, Knit (SSK)
The slip, slip, knit (SSK) decrease is another popular method in knitting. To perform this decrease in dragon stitch knitting, slip the next two stitches individually from the left needle to the right needle as if to knit. Then, insert the left needle into the front loops of both slipped stitches from left to right. Wrap the yarn around the right needle and pull it through the two stitches, slipping them off the left needle. This decreases two stitches into one.
3. Slip, Knit, Pass Slipped Stitch Over (SKP)
The slip, knit, pass slipped stitch over (SKP) decrease is a commonly used left-leaning decrease. To perform this decrease in dragon stitch knitting, slip the next stitch from the left needle to the right needle as if to knit. Knit the next stitch on the left needle. Then, insert the left needle into the slipped stitch from left to right and pass it over the knit stitch, slipping it off the right needle. This decreases two stitches into one.
4. Central Double Decrease
The central double decrease is a decrease method that creates a centered decrease. To perform this decrease in dragon stitch knitting, insert the right needle through the second stitch on the left needle as if to knit, but do not slip it off the left needle. Then, insert the right needle through the first stitch on the left needle as if to knit, and slip it off the left needle. Finally, insert the right needle through both slipped stitches from left to right and knit them together. This decreases three stitches into one.
By using these decrease methods, you can shape your dragon stitch knitting project to your desired outcome. Experiment with different decreases to create unique textures, patterns, and shapes in your knitting.
How to Bind off in Dragon Stitch Knitting
Binding off in the Dragon Stitch knitting pattern can be slightly different from traditional bind offs, as it requires working with the unique texture of the dragon stitch. Here is a step-by-step guide on how to successfully bind off in dragon stitch knitting:
- Complete the final row: Before starting the bind off, make sure you have finished knitting the last row of the dragon stitch pattern. Ensure that all stitches are correctly worked, as any mistakes can affect the bind off.
- Work the first stitch: To begin the bind off, knit the first stitch in the dragon stitch pattern as usual. This involves wrapping the yarn around the right-hand needle and pulling it through the stitch on the left-hand needle.
- Pass the second stitch over: Once you have worked the first stitch, insert the left-hand needle into the second stitch on the right-hand needle. Lift this second stitch over the first stitch and off the right-hand needle. This is similar to a regular bind off, but with the dragon stitch texture.
- Continue binding off: Repeat the previous step by knitting the next stitch and passing the following stitch over it. Continue this process for each stitch until all stitches have been bound off.
- Finish off: After all stitches have been bound off, cut the working yarn, leaving a tail of around 6 inches (15 cm). Thread the yarn tail through the last loop and gently pull to secure the bind off. Weave in any remaining yarn ends to finish off your project.
Binding off in dragon stitch knitting requires attention to detail and careful handling of the stitches. By following these steps, you can successfully complete the bind off and create a neat edge for your dragon stitch project.
Dragon Stitch Knitting Pattern Variations
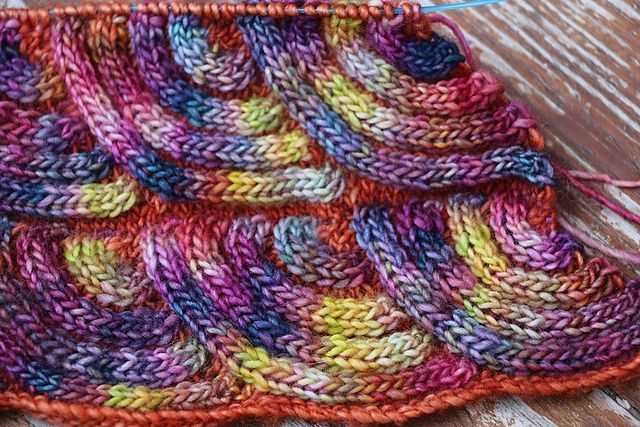
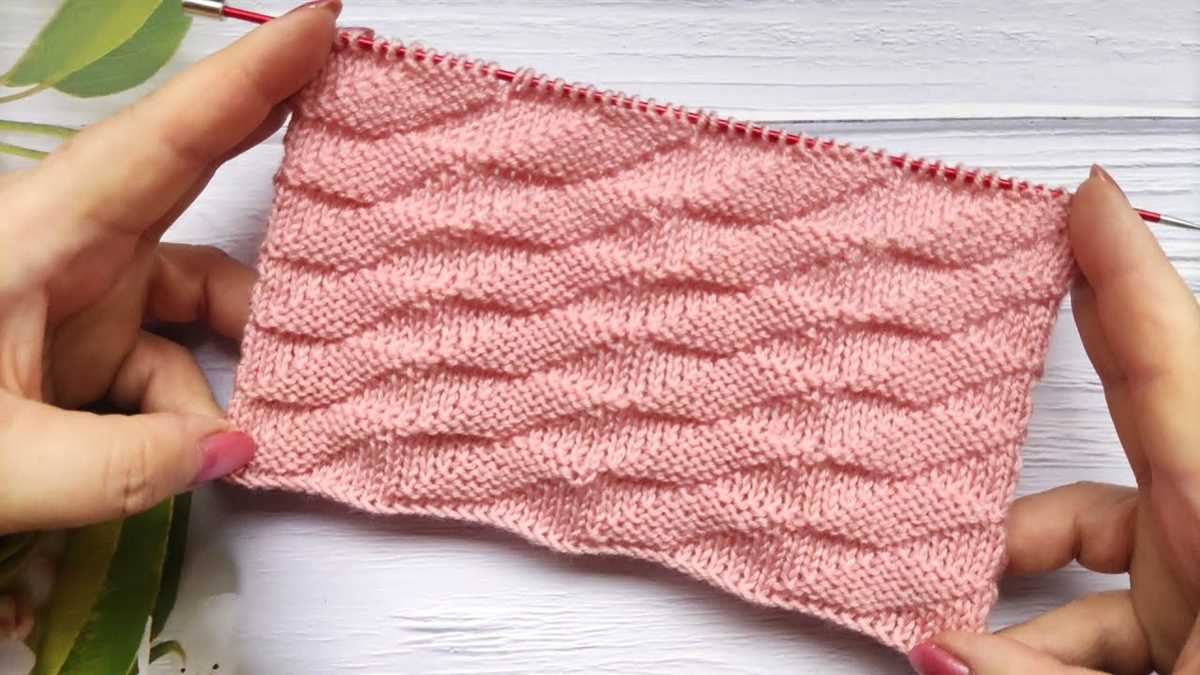
The dragon stitch knitting pattern is a popular choice for creating intricate and unique designs in knitting. The pattern features a dragon scale-like texture, with raised bumps that create a three-dimensional effect. This pattern can be used to create a wide range of projects, from scarves and hats to blankets and sweaters.
There are several variations of the dragon stitch knitting pattern that can add even more visual interest to your projects. One variation involves using different colors of yarn to create a striped effect within the dragon scales. This can be done by switching between two or more colors every few rows, creating a striking and colorful design.
- Mirror image: Another variation of the dragon stitch pattern involves knitting the pattern in a mirror image, meaning that the dragon scales appear in opposite directions on each side of the project. This can create a symmetrical and balanced design.
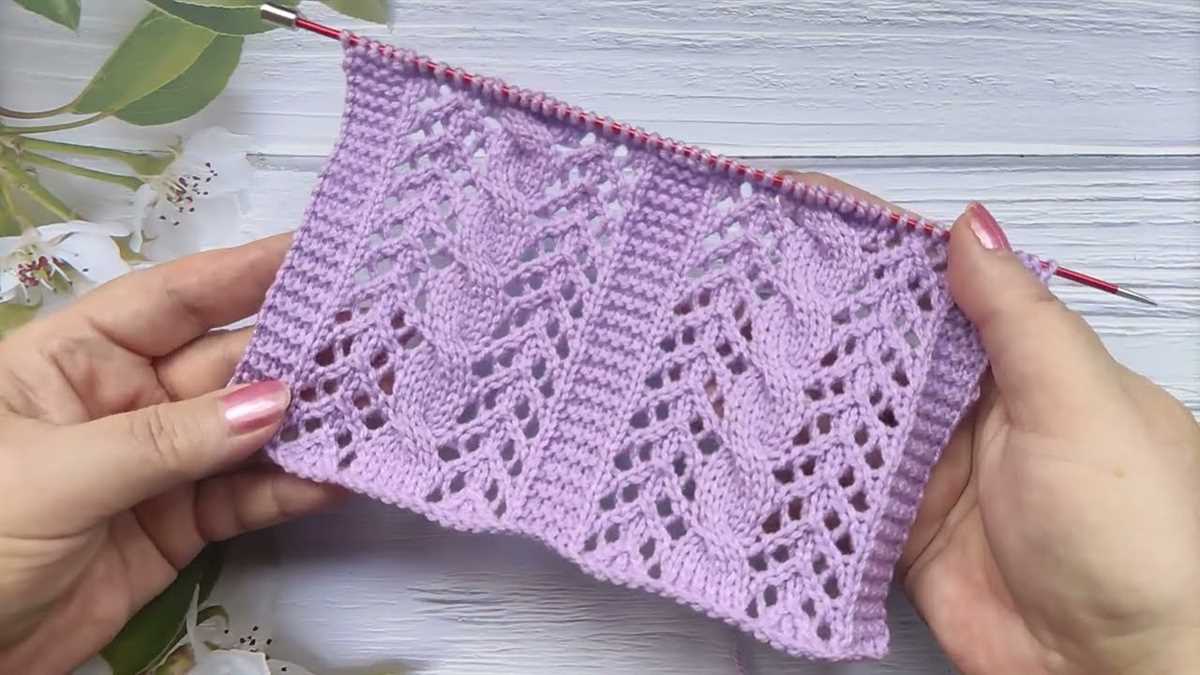
- Lace dragon stitch: For a lighter and more delicate look, the dragon stitch pattern can be modified to include lace stitches. By incorporating yarn overs and decreases, you can create an open and airy dragon stitch pattern that is perfect for lightweight garments or accessories.
- Cable dragon stitch: If you want to add even more texture to your dragon stitch pattern, you can incorporate cables into the design. This involves crossing stitches over each other to create a twist effect, similar to the scales on a dragon’s back. The cable dragon stitch pattern can add depth and complexity to your knitting projects.
Overall, the dragon stitch knitting pattern is a versatile and visually stunning choice for knitters looking to add some excitement to their projects. Whether you stick to the classic pattern or experiment with variations, the dragon stitch is sure to impress with its unique texture and design.
Dragon Stitch Knitting Pattern Tips and Tricks
Knitting the dragon stitch pattern can be an exciting and challenging project for any knitter. The dragon stitch pattern creates a textured design that resembles scales, making it perfect for creating unique and eye-catching garments and accessories.
Choosing the right yarn: When knitting the dragon stitch pattern, it is important to choose a yarn that has good stitch definition. Yarns with a tight twist and a smooth texture will showcase the dragon stitch pattern beautifully. Avoid fluffy or fuzzy yarns, as they can obscure the details of the stitch pattern.
Using stitch markers: One helpful tip when knitting the dragon stitch pattern is to use stitch markers. The dragon stitch pattern often includes multiple repeats of the pattern, and using stitch markers can help you keep track of where each repeat begins and ends. This can be especially helpful if you need to stop or pause your knitting and then pick it up again later.
Pro tip: Place a stitch marker at the beginning and end of each repeat to easily count the number of rows you have completed.
Reading the pattern: The dragon stitch pattern can be quite intricate, with different stitches and techniques used throughout. Take the time to thoroughly read and understand the pattern before you begin knitting. Pay attention to any special instructions or abbreviations used in the pattern, and refer to knitting resources or tutorials if needed.
Pro tip: Highlight or mark the sections of the pattern that you find particularly challenging or need to reference frequently to make it easier to follow along as you knit.
Tension and gauge: Achieving the correct tension and gauge is crucial when knitting the dragon stitch pattern. The texture and structure of the dragon stitch pattern can impact the final size and fit of your project. Take the time to swatch and measure your gauge before starting your project to ensure the finished piece turns out as planned.
Pro tip: If you find that your gauge is off, try using a different needle size to achieve the desired tension. Make sure to swatch again and measure to ensure you have made the necessary adjustments.
With these tips and tricks in mind, you’ll be well-equipped to take on the dragon stitch knitting pattern and create stunning projects that showcase the intricate scale-like design. Whether you’re making a sweater, a scarf, or even a dragon-themed stuffed toy, the dragon stitch pattern is sure to impress and delight.
Dragon Stitch Knitting Pattern FAQs
Here are some frequently asked questions about the Dragon Stitch knitting pattern:
1. What is the Dragon Stitch knitting pattern?
The Dragon Stitch knitting pattern is a unique stitch pattern that resembles scales or the texture of a dragon’s skin. It is created by knitting cable sections and alternating them with purl stitches.
2. How do I create the Dragon Stitch?
To create the Dragon Stitch, follow these steps:
- Cast on the required number of stitches.
- Follow the specific pattern instructions for the Dragon Stitch, which will typically include a combination of knitted cables and purl stitches.
- Repeat the pattern rows until you have reached the desired length.
- Bind off and finish your project as desired.
3. Can I use any type of yarn for the Dragon Stitch?
Yes, you can use any type of yarn for the Dragon Stitch. However, keep in mind that the stitch pattern is more pronounced and visually appealing when worked with a yarn that has a good stitch definition, such as a smooth and medium weight yarn.
4. Can I use the Dragon Stitch in any knitting project?
Yes, you can incorporate the Dragon Stitch into various knitting projects, such as scarves, hats, blankets, and even sweaters. It adds an interesting texture and can be a great focal point in your design.
5. Are there any variations of the Dragon Stitch pattern?
Yes, there are variations of the Dragon Stitch pattern that you can explore. Some variations include adding additional cables or adjusting the number of purl stitches between cable sections. These variations can give your project a unique look.
6. Are there any video tutorials available for learning the Dragon Stitch?
Yes, there are many video tutorials available online that demonstrate how to create the Dragon Stitch knitting pattern. These tutorials can be helpful for visual learners and provide step-by-step instructions to guide you through the process.
Overall, the Dragon Stitch knitting pattern is a fun and unique stitch to incorporate into your knitting projects. Whether you’re a beginner or an experienced knitter, give this pattern a try and see how it can elevate your knitting creations!