
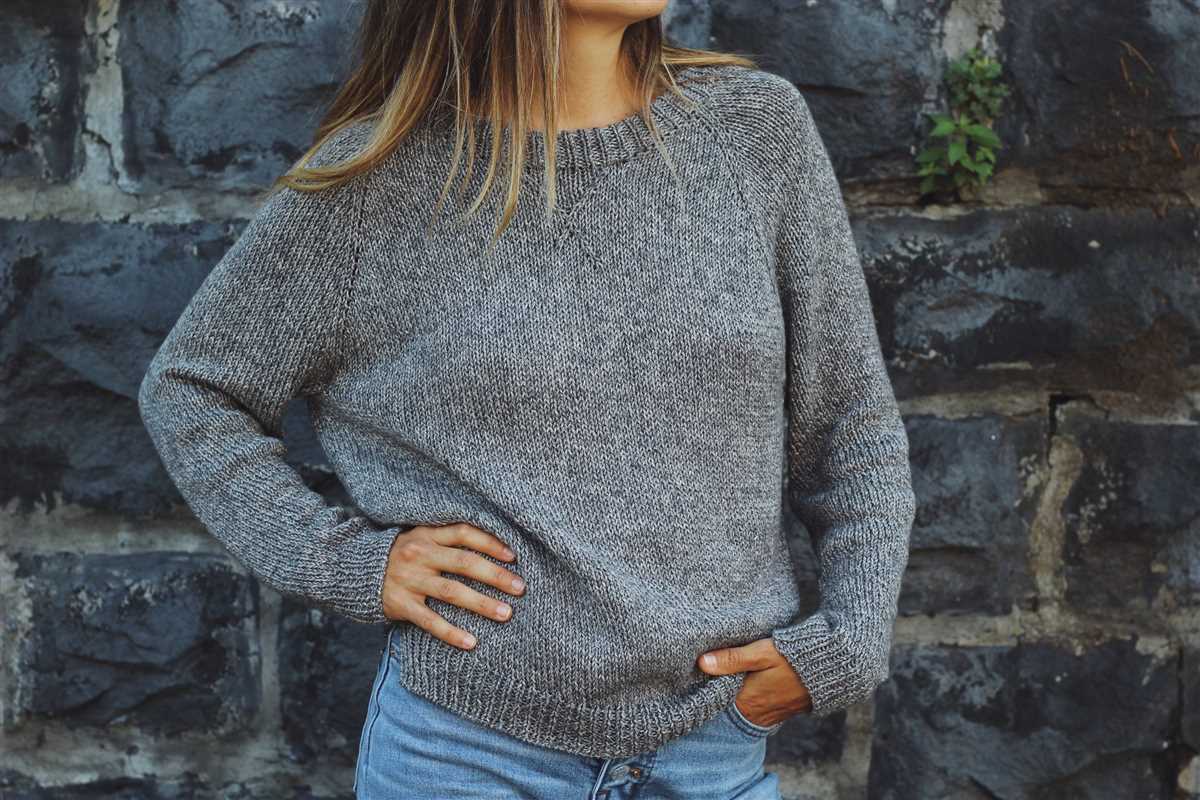
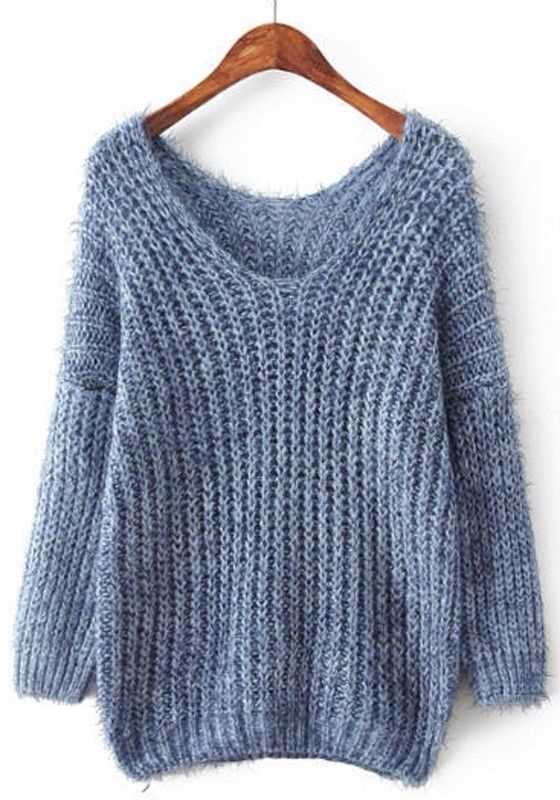
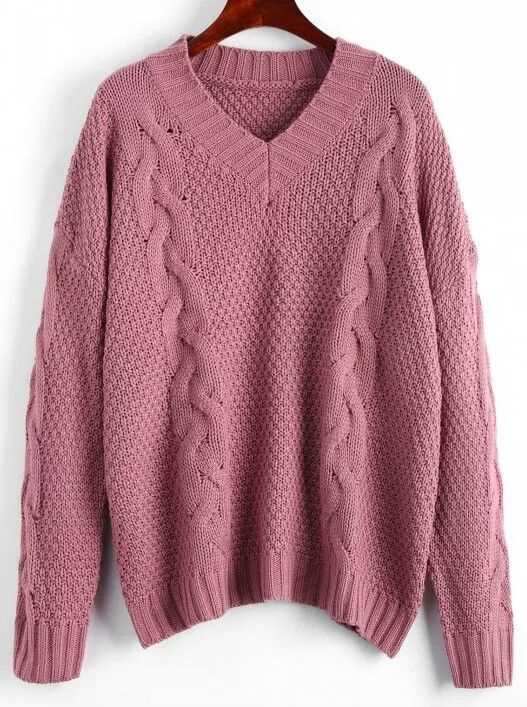
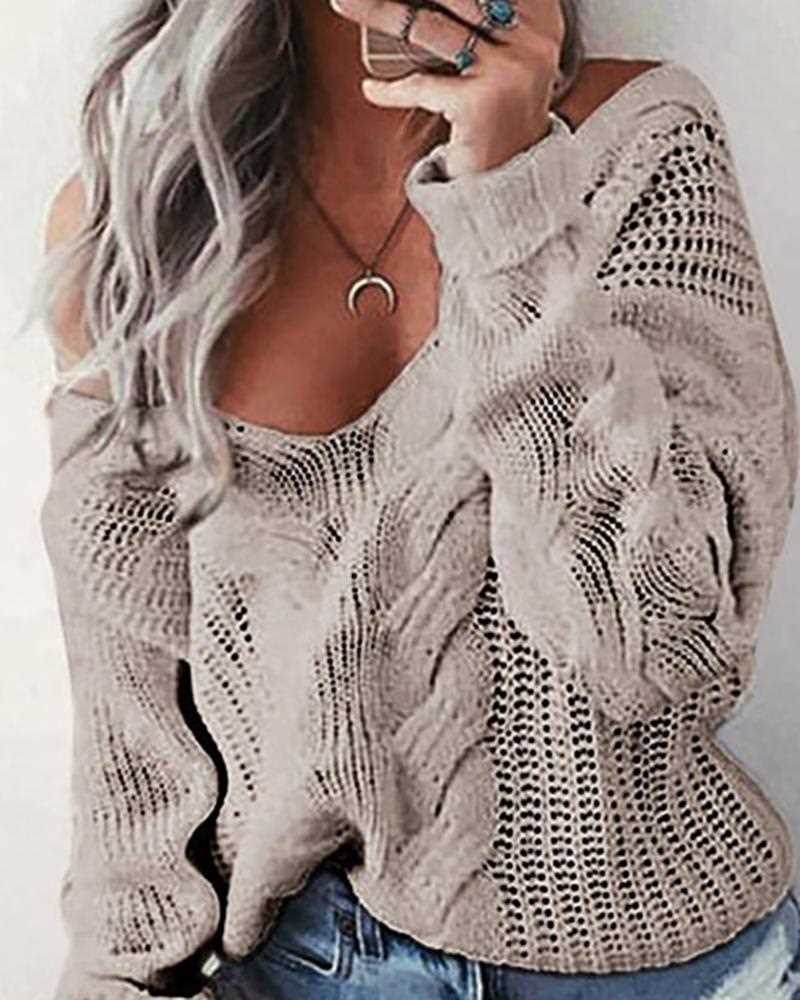
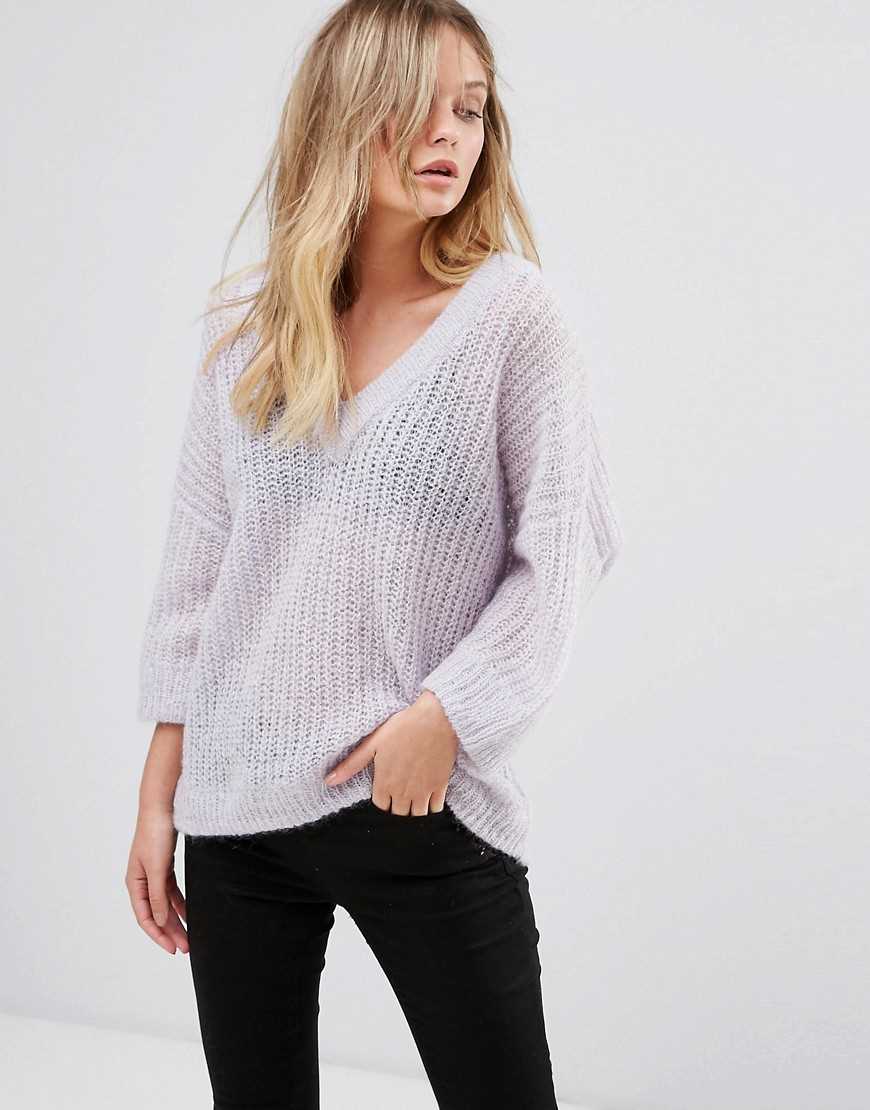
Knitting your own sweater is not only a chance to express your creativity, but it also allows you to have a unique piece of clothing that fits you perfectly. If you’re looking for a cozy and stylish sweater to add to your winter wardrobe, an oversized V neck sweater is a great choice. The loose fit and V neck design make it both comfortable and flattering, and the oversized look is on-trend right now.
With this knitting pattern, you can create your own oversized V neck sweater. The pattern is suitable for knitters of all levels, from beginners to more advanced. It includes detailed instructions and step-by-step photos to guide you through the process. You can choose your own yarn and color to make the sweater truly personalized.
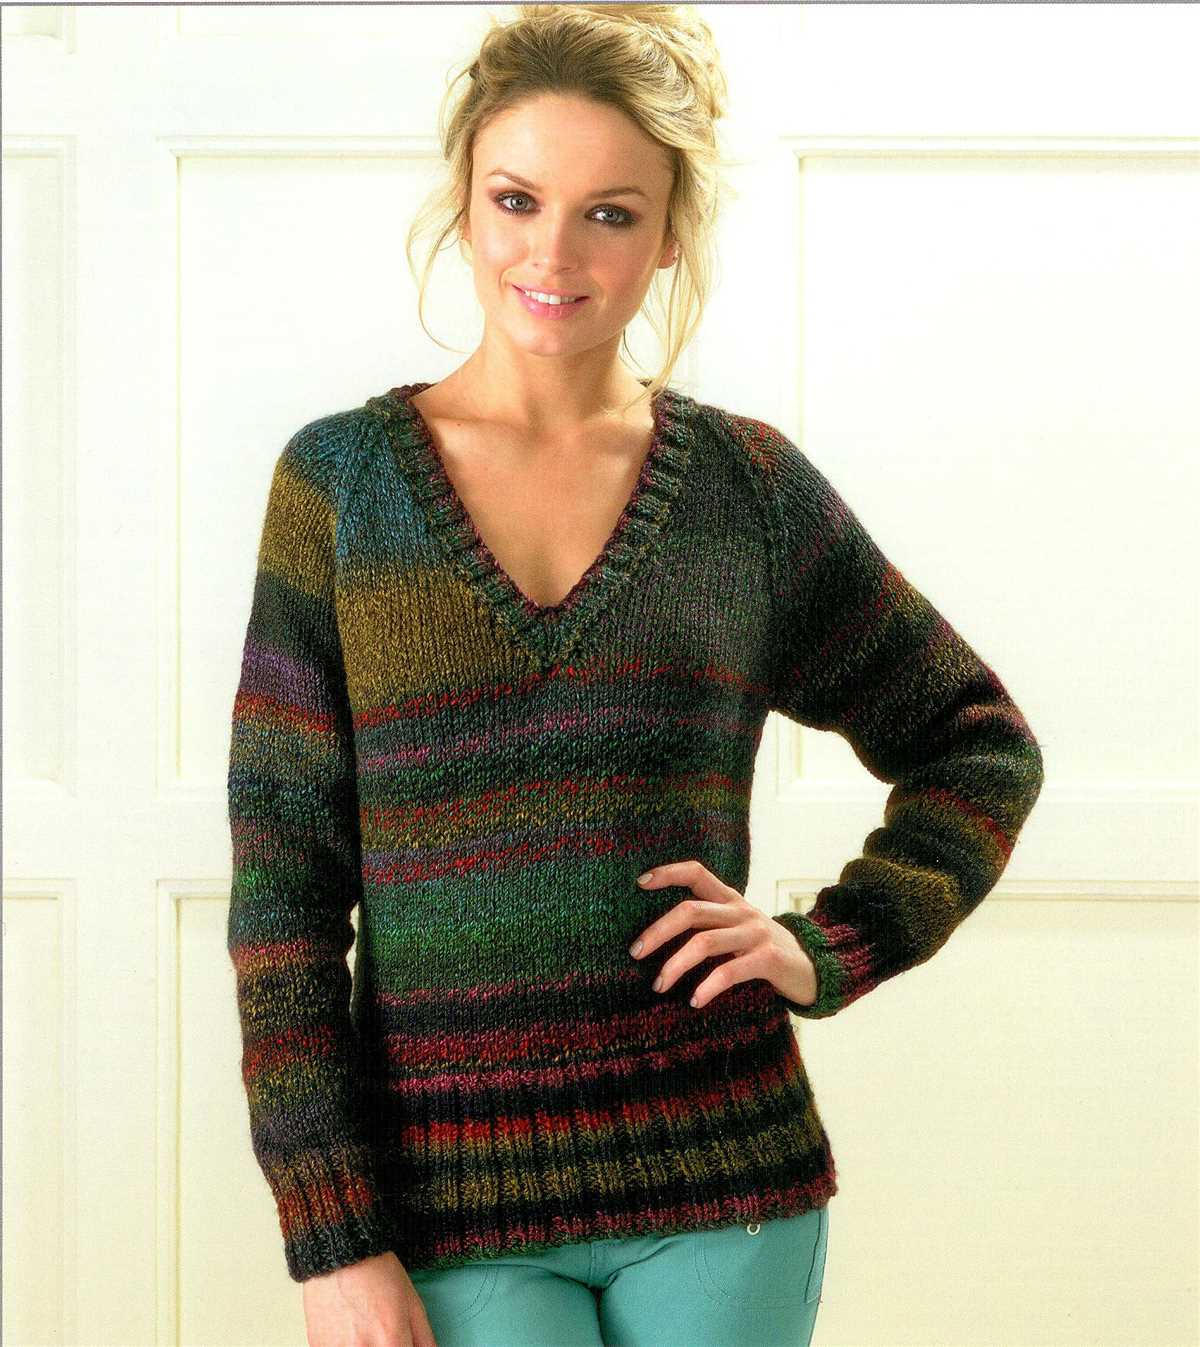
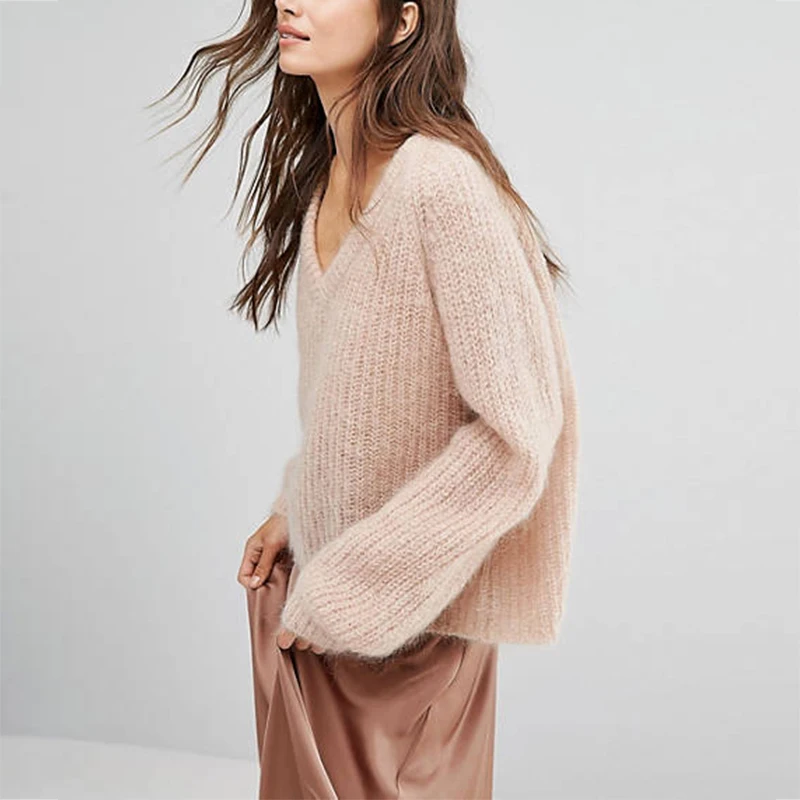
Once you have finished knitting your oversized V neck sweater, you can pair it with jeans for a casual look, or dress it up with a skirt and boots for a more put-together outfit. It’s a versatile piece that can be worn for various occasions, from a cozy night in to a day out with friends. So why not give this knitting pattern a try and create your own trendy oversized V neck sweater?
Oversized V Neck Sweater Knitting Pattern
When it comes to cozy and comfortable clothing, oversized sweaters are a must-have. They provide warmth and style, making them the perfect addition to any wardrobe. One popular style of oversized sweater is the V neck design.
The V neck is a classic neckline that adds a touch of elegance and femininity to any sweater. It draws attention to the collarbone and creates a flattering silhouette. Knitting an oversized V neck sweater can be a rewarding project for both beginners and experienced knitters.
Materials:
- Chunky yarn
- Knitting needles
- Tapestry needle
- Scissors
Instructions:
- Start by casting on the desired number of stitches for the back of the sweater.
- Continue knitting in the desired stitch pattern until the back reaches the desired length.
- Divide the stitches in half and place the second half on a stitch holder or spare needle.
- Knit the front of the sweater in the same stitch pattern as the back, decreasing for the V neck shape.
- When the front reaches the desired length, join the front and back sections together by knitting the stitches from the stitch holder or spare needle onto the main needle.
- Continue knitting in the round until the sweater reaches the desired length.
- Finish the sweater by binding off and sewing in any loose ends.
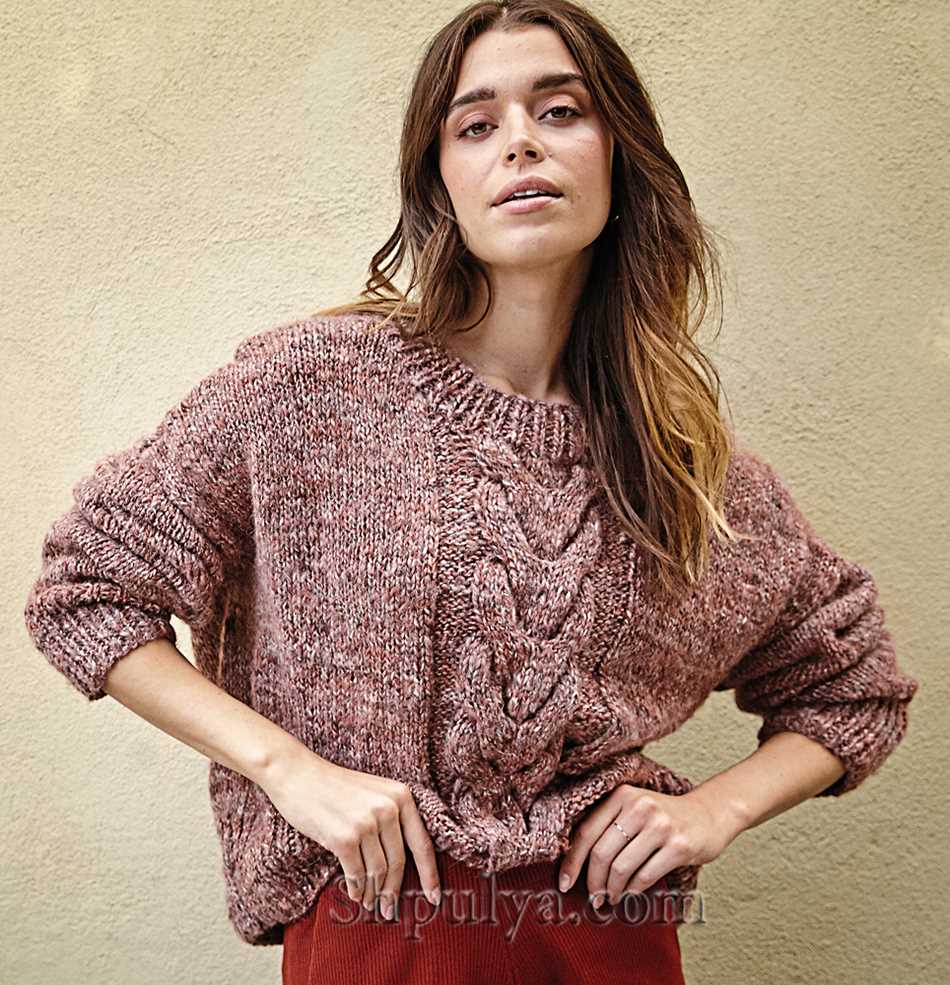
Once the oversized V neck sweater is complete, it can be styled in a variety of ways. Pair it with jeans and boots for a casual look, or dress it up with a skirt and heels for a more polished outfit. The possibilities are endless with this versatile and trendy piece.
Why Choose an Oversized V Neck Sweater?
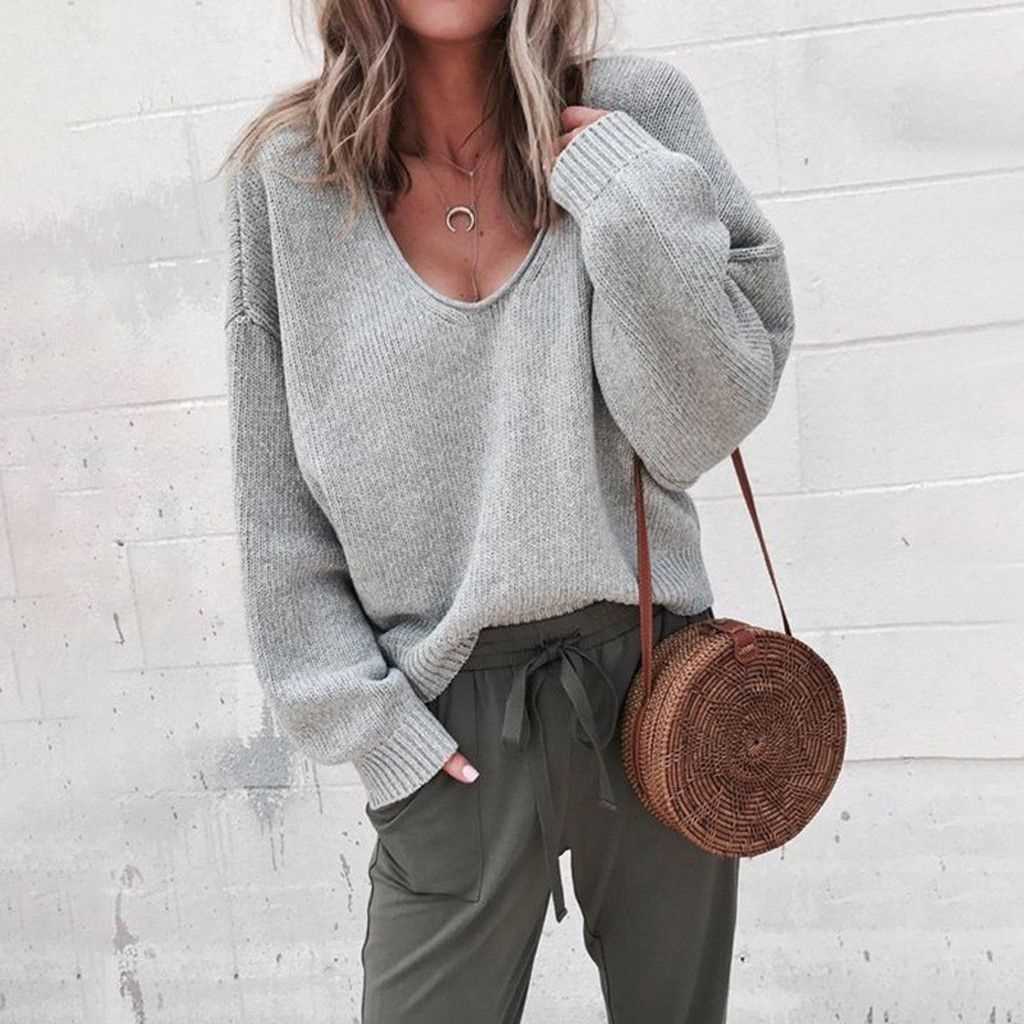
An oversized v neck sweater is a comfortable and stylish addition to any wardrobe. Its loose, relaxed fit makes it perfect for casual days or lounging around at home. The v neck design adds a touch of femininity and elegance to the sweater, making it suitable for both casual and dressier occasions. Here are a few reasons why choosing an oversized v neck sweater is a great choice:
- Comfort: The loose fit of an oversized v neck sweater provides ultimate comfort. It allows for freedom of movement and doesn’t restrict the body, making it perfect for everyday wear.
- Style: Oversized sweaters are currently on-trend and can be a versatile addition to your wardrobe. They can be paired with jeans or leggings for a casual look, or dressed up with a skirt or tailored trousers for a more polished outfit.
- Warmth: The oversized fit of the sweater allows for layering, making it ideal for colder months. You can easily wear a long-sleeve shirt or turtleneck underneath for extra warmth.
- Versatility: An oversized v neck sweater can be styled in various ways to suit different occasions. It can be worn as a statement piece on its own or layered with other clothing items to create different outfits.
- Flattering: Despite its loose fit, an oversized v neck sweater can still flatter the body. The v neck design draws attention to the neck and collarbone area, making it flattering for most body types.
Overall, an oversized v neck sweater is a practical and stylish choice for any fashion-conscious individual. It offers comfort, style, warmth, versatility, and flattery, making it a must-have item in your wardrobe.
Choosing the Right Yarn and Needles
When it comes to knitting an oversized V-neck sweater, the choice of yarn and needles plays a crucial role in achieving the desired results. The right combination of these two elements will ensure that your sweater is not only comfortable but also has the perfect drape and structure.
Yarn: Opting for a bulky or super bulky yarn is recommended when knitting an oversized sweater. These yarn weights provide the necessary thickness and warmth required for a cozy and oversized look. You can choose from a variety of natural fibers such as wool, alpaca, or cashmere, which will not only offer excellent insulation but also add a luxurious touch to your sweater. Alternatively, you can go for an acrylic blend that is both affordable and low-maintenance.
Needles: To ensure that your stitches are loose and airy, it is advisable to use larger-sized needles. Circular needles with a long cable length are recommended for knitting the body of the sweater, as they can accommodate a large number of stitches. Additionally, using interchangeable needles can be beneficial, as they allow you to easily adjust the needle size as needed throughout the project. Pay attention to the material of your needles as well – wooden or bamboo needles can help prevent your stitches from slipping off.
- Gauge: Before diving into your knitting project, make sure to check the gauge. This involves knitting a swatch using your chosen yarn and needles, and measuring the number of stitches and rows within a specified measurement. This step is crucial as it ensures that your finished sweater will have the correct dimensions. Remember to always follow the pattern’s recommended gauge to achieve the desired fit.
- Color: When selecting the color of your yarn, consider your personal style and the overall look you want to achieve. Neutral shades like beige, gray, or cream offer a timeless appeal, while bold and vibrant colors can make a statement. If you’re unsure, you can always opt for a versatile color that can easily be paired with different outfits in your wardrobe.
- Care Instructions: Finally, take note of the care instructions for your chosen yarn. Some fibers require handwashing or specialized care, which is important to consider before investing time and effort into your knitting project.
By carefully selecting the right yarn and needles, you can ensure that your oversized V-neck sweater turns out just the way you envisioned – cozy, stylish, and perfect for keeping you warm during the colder months.
Getting Started: Casting on and Creating the Ribbing
In order to begin knitting the oversized v neck sweater, you will first need to cast on the required number of stitches. The pattern should specify the recommended cast on method and the number of stitches needed for the ribbing section of the sweater. Typically, a long tail cast on method is used for its stretchiness and stability.
Once you have cast on the stitches, you can begin creating the ribbing for the sweater. The ribbing is often done using a combination of knit and purl stitches, which creates a textured pattern and helps to make the sweater more fitted and flexible. The most common ribbing patterns are the 1×1 rib and the 2×2 rib, where the numbers represent the number of knit stitches and purl stitches in each repeat.
To create the ribbing, you will work the specified number of rows in the ribbing pattern. This may involve alternating between knitting and purling stitches in the required pattern repeat. It is important to pay attention to the pattern instructions to ensure that you are following the correct sequence of stitches.
If you are new to knitting or are unsure about the ribbing pattern, it is recommended to practice the pattern on a smaller swatch before starting the sweater. This will give you a chance to familiarize yourself with the stitches and ensure that you are comfortable with the pattern before starting on the larger project.
Creating the ribbing is an essential step in the knitting process for an oversized v neck sweater. It not only adds structure and elasticity to the sweater but also creates a visual interest in the finished piece. Take your time to cast on the stitches correctly and follow the ribbing pattern accurately to ensure a successful start to your knitting project.
Knitting the Body of the Sweater
Now that you have completed the ribbing for the neckline and the collar of your oversized V-neck sweater, it’s time to move on to knitting the body. The body of the sweater will determine the overall size and shape, so it’s important to follow the pattern carefully.
Start by continuing in the same stitch pattern that you used for the collar, whether it’s stockinette stitch, garter stitch, or a combination of stitches. Follow the instructions provided in the pattern for the body, knitting each row as directed. Take your time to ensure that your tension remains consistent throughout the knitting process.
As you work on the body of the sweater, you may need to make adjustments to the length and width to achieve the desired oversized fit. Some patterns may provide specific measurements for each size, while others may give instructions for customizing the fit. It’s important to refer to the pattern and make any necessary modifications as you go along.
Remember to periodically try on the sweater as you go, to ensure that it fits comfortably and has the desired drape. Be sure to take accurate measurements of your body and compare them to the pattern to ensure you’re on track.
Depending on the pattern, you may need to shape the body of the sweater by decreasing or increasing stitches. This is typically done to create a more tailored fit or to achieve specific design elements. Follow the pattern instructions for any shaping and adjust your stitch count accordingly.
Continue knitting the body of the sweater until you reach the desired length, as specified in the pattern. Once you’ve completed the body, you can move on to knitting the sleeves.
Shaping the V Neckline
When knitting an oversized V neck sweater, the shaping of the neckline is an important step to ensure a comfortable and flattering fit. Depending on the design of the sweater, you may need to follow specific shaping instructions to achieve the desired V neck effect.
To start shaping the V neckline, you will typically be working decreases on both sides of the center front stitches. This will create the V shape and allow the sweater to lay nicely on the shoulders. The decreases can be worked evenly on each row or spaced out over a few rows, depending on your pattern.
One common method of shaping the V neckline is by working paired decreases. This involves working two decreases at the beginning and end of each row until the desired depth of the V is reached. You can choose from various decrease techniques, such as knit 2 together (k2tog) or slip slip knit (ssk), to create a clean and neat decrease line.
Another method of shaping the V neckline is by working short rows. Short rows are partial rows that are worked across a portion of stitches. By working short rows on one side of the center front stitches, you can create a subtle curve that adds interest to the neckline. This technique is especially useful if you want to achieve a more gradual slope for the V shape.
It’s important to follow the shaping instructions provided in your knitting pattern, as each pattern may have different techniques for shaping the V neckline. Take the time to read through the instructions carefully and make sure you understand how the shaping will affect the overall fit of your oversized V neck sweater. By paying attention to the shaping details, you can create a beautifully fitting garment that you’ll love to wear.
Knitting the Sleeves
When knitting the sleeves for your oversized v-neck sweater, it’s important to follow the pattern carefully to ensure a proper fit. The sleeve length should be measured from the shoulder to the desired length, and the pattern will specify the number of stitches to cast on for each size.
Start by casting on the required number of stitches onto your knitting needles. You may find it helpful to use stitch markers to indicate the beginning and end of each round. Join the round and knit in the round until you reach the desired length for the cuff of the sleeve.
The pattern may include specific stitch patterns or instructions for shaping the sleeve. Pay close attention to any decreases or increases that are necessary to achieve the desired shape. It’s also important to check your gauge periodically to ensure that the sleeve is matching the measurements in the pattern.
Once you reach the desired length for the sleeve, you can start working on the sleeve cap. This may involve shaping the top of the sleeve with gradual decreases or short rows. Follow the pattern instructions carefully for the shaping and continue until you have the required number of stitches remaining.
Finally, bind off the remaining stitches and weave in any loose ends. Try on the sleeve to check the fit, and make any adjustments if necessary. Repeat the process for the second sleeve, and then you’ll be ready to attach the sleeves to the body of the sweater.
Joining the Sleeves to the Body
When it comes to knitting an oversized V-neck sweater, one of the key steps is joining the sleeves to the body. This step is crucial in creating the shape and structure of the sweater. Here is a simple guide on how to join the sleeves to the body:
1. Prepare the Sleeves and Body
Before joining the sleeves to the body, make sure that you have completed knitting the sleeves and body separately. Ensure that both the sleeves and the body have the same number of rows and stitches.
- Size and Fit: Take the time to check the measurements of the sleeves and body to ensure a proper fit. Adjustments can be made by adding or reducing rows if needed.
- Marking the Placement: Use stitch markers or yarn scraps to mark the placement of the sleeves on the body. This will help you align the pieces accurately.
2. Seam the Sleeves
Start by laying the body flat on a surface with the right side facing up. Place the sleeves on top of the body, aligning the stitch markers with the side seams of the body. The right side of the sleeves should be facing down and the wrong side facing up.
- Whip Stitch: Use a whip stitch or mattress stitch to seam the sleeves to the body. Insert your needle under the first stitch on the body and then under the corresponding stitch on the sleeve. Continue stitching back and forth, alternating between the body and sleeve, until the seam is secure. Repeat this process for both sleeves.
- Finishing the Seams: Once the sleeves are securely attached to the body, weave in any loose ends or yarn tails to ensure a clean finish.
3. Try it On!
After joining the sleeves to the body, it’s time to try on your oversized V-neck sweater. Slip it over your head and check the fit and overall look. Make any necessary adjustments or modifications to ensure that you’re happy with the final result.
By following these steps and taking the time to join the sleeves to the body properly, you’ll be one step closer to completing your oversized V-neck sweater. Enjoy the process of creating a cozy and stylish garment that you can proudly wear during the colder months.
Adding Details: Cuffs and Hem
When knitting an oversized V-neck sweater, adding details like cuffs and hem can really enhance the overall look and style of the garment. These small but important features not only provide a polished and finished appearance, but they also serve functional purposes in terms of fit and durability.
Cuffs:
The cuffs of a sweater are the areas around the wrists where the sleeves end. To create cuffs that complement an oversized V-neck sweater, consider using a ribbed or folded design. Ribbing provides a stretchy and snug fit, while a folded cuff adds an extra layer of texture and style. Whichever design you choose, it’s important to measure the circumference of your wrists and knit the cuffs accordingly to ensure a comfortable fit.
Hem:
The hem of a sweater refers to the bottom edge that sits at the waist or hip level. For an oversized V-neck sweater, a wide and slightly longer hem can create a flattering and elongating silhouette. To achieve this, you can incorporate a welt or garter stitch pattern for added texture and structure. Additionally, you may want to consider adding side slits or a stepped hem for a unique and modern touch.
When adding details like cuffs and hem to your oversized V-neck sweater, it’s important to pay attention to the materials and techniques you use. Depending on the weight and drape of your chosen yarn, your cuffs and hem may require different knitting techniques or needle sizes to achieve the desired result. Remember to always swatch and test different options to find the perfect balance of comfort, functionality, and style for your oversized V-neck sweater.
Finishing Touches: Blocking and Assembly
In order to achieve a professional and polished look for your oversized v neck sweater, it is important to give it the finishing touches it deserves. This includes blocking and assembly, which will help to shape and refine the garment.
Blocking: Before assembling the sweater, it is recommended to block the individual pieces. Blocking involves wetting the knitted pieces and then shaping them to the correct measurements and allowing them to dry. This process helps to even out any uneven stitches and ensures that the final garment is the correct size and shape. To block your sweater pieces, you will need a clean surface, such as a blocking mat or towels, and pins or blocking wires to secure the pieces in place. Gently smooth out any wrinkles or folds in the fabric and pin the pieces to the desired shape. Allow the pieces to dry completely before proceeding to assembly.
Assembly: Once the individual pieces of the sweater are blocking and dry, it is time to assemble them. Start by laying out the pieces in their proper positions, following the schematic or pattern instructions. Use stitch markers to hold the pieces together, ensuring that they align correctly. Then, using a tapestry needle and yarn in a matching color, sew the pieces together using a mattress stitch or another suitable seaming method. Pay attention to tension and make sure the seams are secure but not too tight. Take your time with this step, as a clean and well-executed assembly will greatly enhance the overall look of the sweater.
When the sweater is completely assembled, give it a final check for any loose threads, uneven seams, or other imperfections. Make any necessary adjustments or repairs before wearing or gifting the garment. With the proper blocking and assembly techniques, your oversized v neck sweater will be transformed from a collection of knitted pieces into a beautiful and functional garment that you can proudly wear or give as a thoughtful handmade gift.
Styling Tips for Your Oversized V Neck Sweater
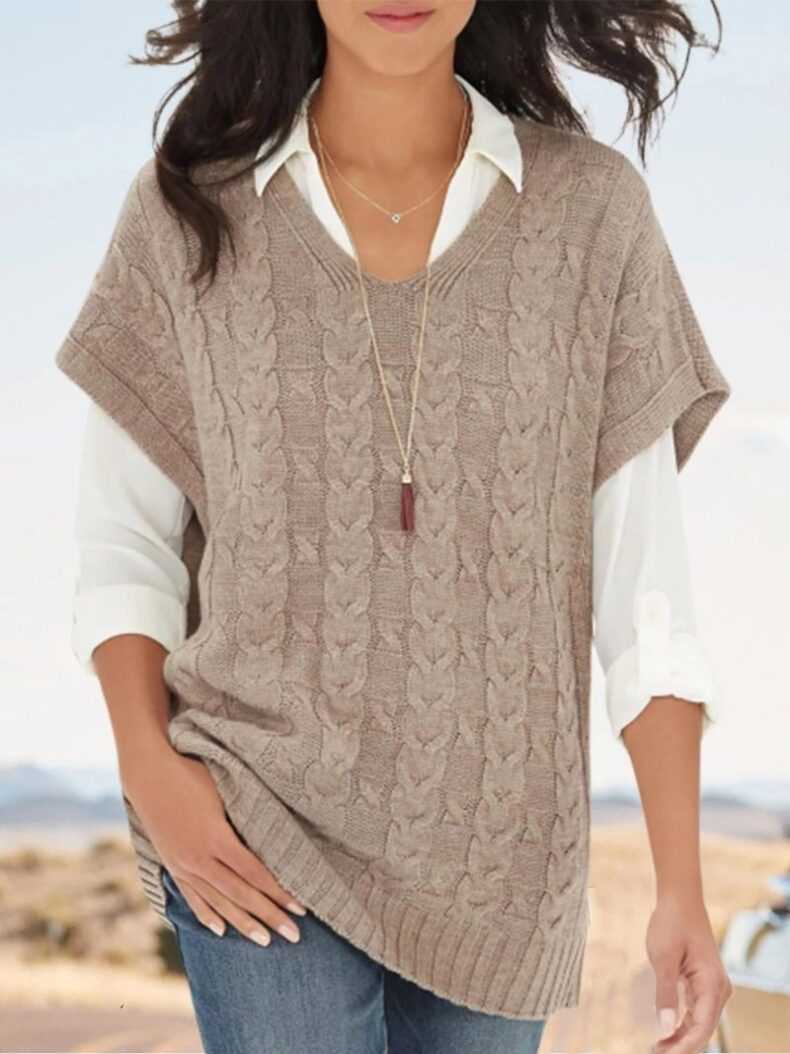
Now that you’ve completed knitting your oversized v neck sweater, it’s time to explore different ways to style it. Whether you’re going for a casual or dressy look, this versatile piece of clothing can be dressed up or down to suit any occasion. Here are some styling tips to help you make the most of your oversized v neck sweater:
- Layer it with a collared shirt: For a preppy and polished look, layer your oversized v neck sweater over a collared shirt. Opt for a crisp white button-down or a patterned blouse. Leave the collar and cuffs peeking out for added style.
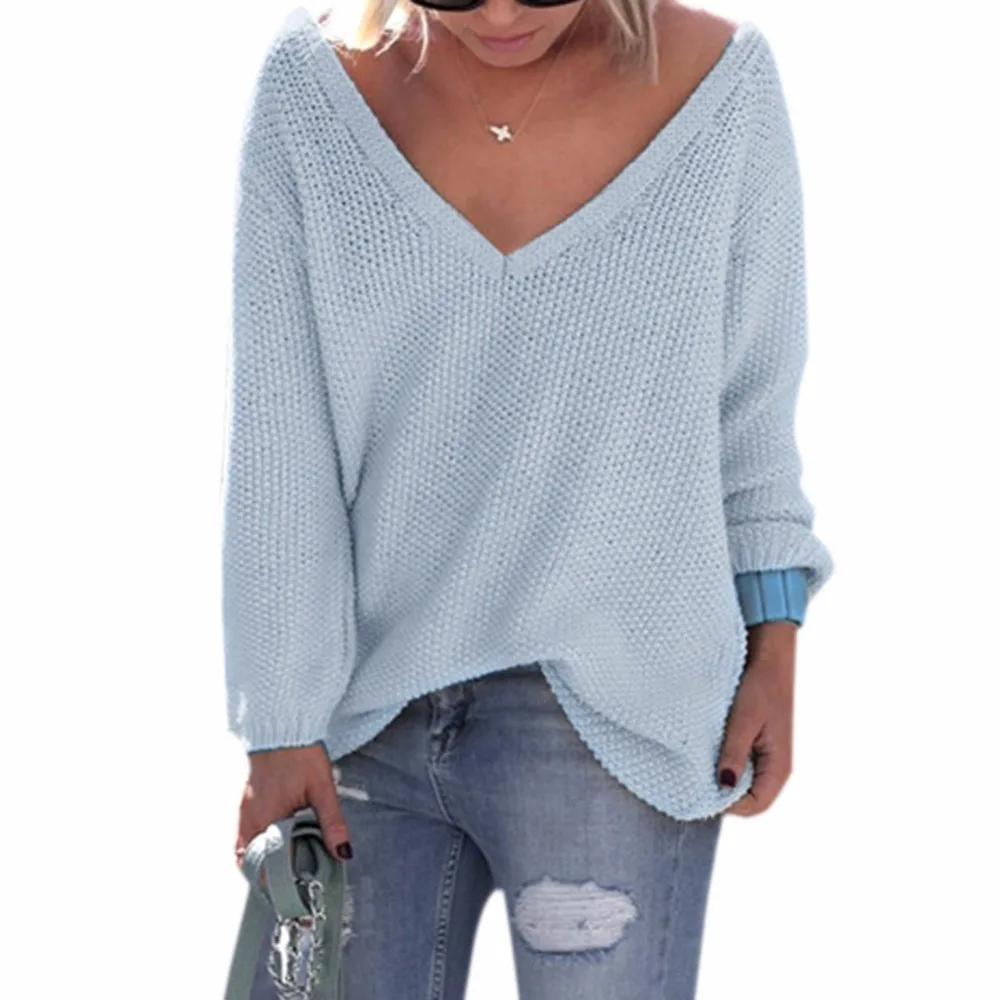
- Pair it with skinny jeans: To balance out the voluminous silhouette of your oversized sweater, opt for slim-fitting bottoms like skinny jeans or leggings. This will create a more streamlined look and show off your figure.
- Add a belt: If you want to define your waist and add some structure to your oversized sweater, try cinching it at the waist with a belt. This will create a more tailored and flattering silhouette.
- Experiment with layering: Have fun with layering by adding different textures and lengths to your outfit. Try layering your oversized sweater over a turtleneck or under a coat. Play around with different proportions to create a unique and fashion-forward look.
- Tuck it into a skirt: For a feminine and chic look, tuck the front of your oversized sweater into a high-waisted skirt. This will create a flattering shape and showcase your waist. Finish off the look with a pair of ankle boots or heels.
- Accessorize: Complete your outfit with the right accessories. Add a statement necklace, a chunky scarf, or a wide-brimmed hat to enhance your overall look. Don’t be afraid to mix and match different accessories to add a personal touch.
With these styling tips, you can create endless outfit combinations with your oversized v neck sweater. Whether you’re going for a casual, trendy, or sophisticated look, this versatile sweater will keep you cozy and stylish all season long.