
Looking for a knitting pattern that will add a touch of elegance to your wardrobe? Look no further than the knit fishnet pattern. This delicate and intricate pattern creates a stunning, yet versatile fabric that can be used in a variety of projects.
The fishnet pattern is perfect for creating airy and lightweight garments and accessories, making it ideal for warmer weather. Whether you want to create a breezy summer top, a delicate shawl, or even a pair of lacey socks, this pattern is sure to impress.
With its combination of dropped stitches and yarnovers, the fishnet pattern creates an open and lacy look that is both visually appealing and fun to knit. Plus, the pattern is highly customizable, allowing you to adjust the size of the holes and the overall size of the fabric to fit your needs.
So, grab your knitting needles and some lightweight yarn, and get started on your next knitting adventure with the stunning knit fishnet pattern. Whether you’re a beginner looking to expand your skills or an experienced knitter searching for a new project, this pattern is a great choice. Happy knitting!
What is a knit fishnet pattern?
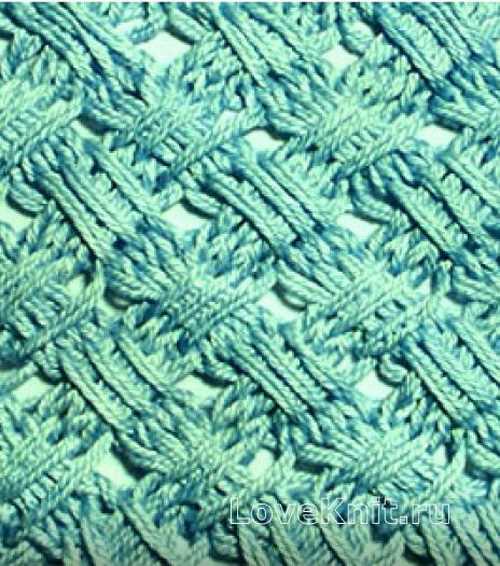
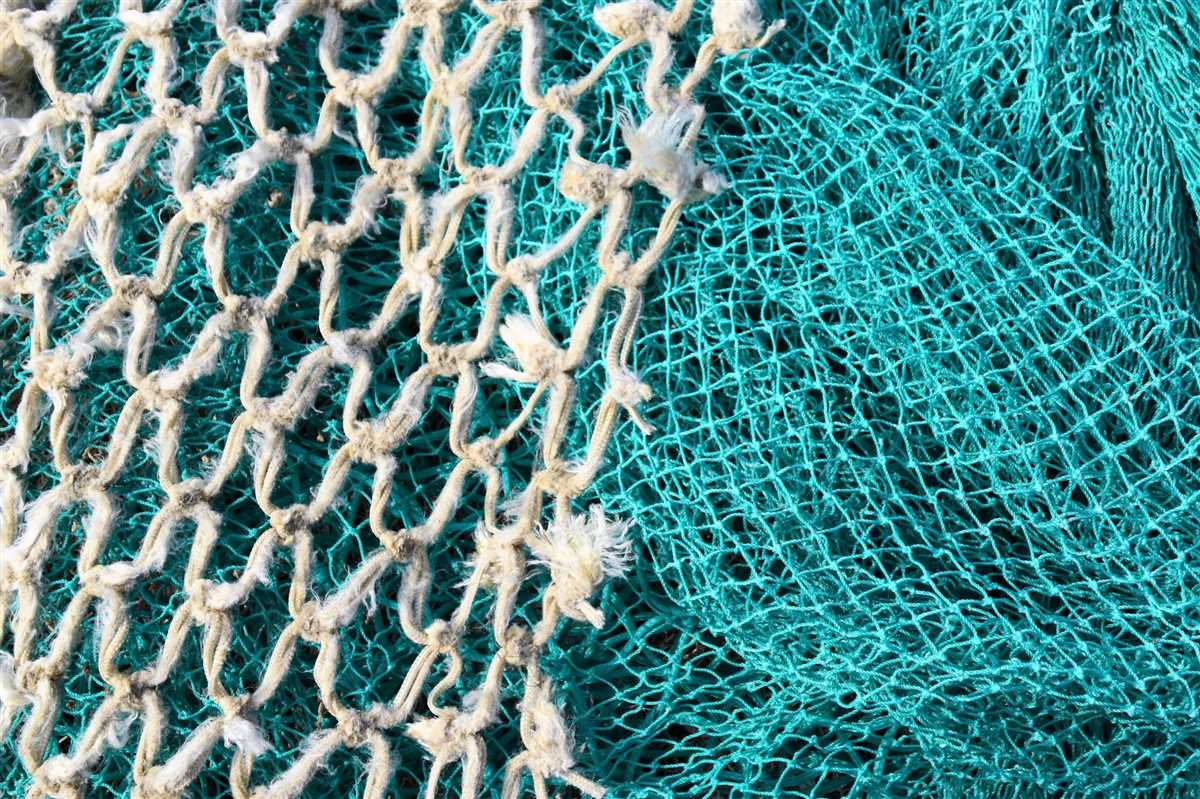
A knit fishnet pattern is a type of knitting design that replicates the look of a fishnet. It is characterized by a series of open, diamond-shaped holes and a grid-like structure. The pattern is created by alternating knit and purl stitches to form a mesh-like fabric.
Typically, fishnet patterns are used in accessories such as scarves, shawls, and even garments like sweaters and tops. The openwork design of the pattern adds a touch of texture and visual interest to the knitted piece.
The knit fishnet pattern can be created using various knitting techniques, such as lace knitting or filet knitting. It requires attention to detail and precision to ensure that the holes are evenly spaced and the overall pattern remains consistent.
To knit a fishnet pattern, knitters often use lightweight or lace-weight yarns to achieve a delicate and airy fabric. The pattern can be modified by adjusting the number of stitches and rows, allowing for customization to fit different projects and personal preferences.
How to choose the right yarn for a fishnet pattern
Choosing the right yarn for a fishnet pattern is essential to ensure your project turns out as desired. The yarn you select will determine the overall look and feel of the fishnet, as well as its durability and drape. Here are some factors to consider when choosing yarn for a fishnet pattern:
Fiber Content
The fiber content of the yarn is an important consideration. For a fishnet pattern, it is recommended to choose a yarn that has some stretch and elasticity, such as a blend of wool, acrylic, or nylon. These fibers will allow the fishnet to stretch and conform to the body, making it comfortable to wear. Natural fibers like cotton or linen can also be used, but they may result in a fishnet with less stretch.
Weight
The weight of the yarn will determine the size of the fishnet holes and the overall look of the project. For a fishnet pattern, you’ll want to choose a yarn that is lightweight and has an open weave. Lace weight or fingering weight yarns are typically used for fishnet patterns. These thinner yarns will create delicate and intricate fishnet designs. Chunky or bulky yarns may result in larger, more pronounced holes.
Texture
The texture of the yarn can add dimension and interest to your fishnet pattern. Consider choosing a yarn with a textured or novelty effect, such as a boucle or slub yarn. These yarns will create an interesting surface texture and enhance the visual appeal of your fishnet. Alternatively, you can opt for a smooth and sleek yarn for a more classic and refined look.
By considering the fiber content, weight, and texture of the yarn, you can select the perfect yarn for your fishnet pattern. Experimenting with different yarns can also help you achieve different effects and create unique fishnet designs.
Essential knitting tools for creating a fishnet pattern
Knitting fishnet patterns can be a fun and rewarding project for any knitting enthusiast. To ensure that you have all the tools you need to create a beautiful fishnet pattern, here are some essential knitting tools to consider:
1. Knitting Needles
To create a fishnet pattern, you will need a pair of knitting needles. The size of the needles will depend on the desired tightness of the fishnet. For a larger fishnet, you can use larger needles, while smaller needles will create a tighter fishnet. It is recommended to use circular needles to accommodate the width of the fishnet.
2. Yarn

Choosing the right yarn is crucial when creating a fishnet pattern. Opt for a lightweight and flexible yarn that will allow the fishnet to drape nicely. You can choose from different colors to add variety to your fishnet pattern. Fine cotton or silk yarns are popular choices for creating delicate fishnet patterns.
3. Stitch Markers
Stitch markers are handy tools that help keep track of stitch patterns. When knitting a fishnet pattern, it is essential to mark certain stitches or sections to ensure accuracy and consistency. You can use stitch markers to mark increases, decreases, or specific stitch combinations that form the fishnet pattern.
4. Row Counter
A row counter is another useful tool to have when knitting a fishnet pattern. It helps you keep track of the number of rows completed, making it easier to stay organized. As fishnet patterns often involve repeating patterns, a row counter will help ensure that you maintain the pattern’s rhythm.
5. Tapestry Needle
Once you have finished knitting your fishnet pattern, a tapestry needle will be needed to weave in any loose ends or seams. It is essential to secure any loose threads to prevent unraveling and to give your finished fishnet pattern a polished look. A tapestry needle with a blunt tip works best for this task.
With these essential knitting tools, you will be well-equipped to create a stunning fishnet pattern. Whether you’re a beginner or an experienced knitter, knitting a fishnet pattern can be a rewarding and enjoyable project. So gather your tools, choose your yarn, and get ready to create a beautiful and intricate fishnet pattern.
Step-by-step instructions for knitting a basic fishnet pattern
Creating a fishnet pattern is a great way to add a unique texture and style to your knitting projects. Whether you’re knitting a scarf, a shawl, or even a sweater, the fishnet pattern can give your piece a modern and trendy look. Here is a step-by-step guide to help you knit a basic fishnet pattern.
Gauge and supplies:
Before you start, it’s important to determine your gauge. This will help ensure that your finished piece will have the desired measurements. To complete the fishnet pattern, you’ll need the following supplies:
- Yarn of your choice (preferably a lightweight yarn)
- Knitting needles in a size appropriate for your yarn
- Yarn needle
Step 1: Cast on stitches
Start by casting on an even number of stitches. The number of stitches you cast on will depend on the width of your desired fishnet pattern. For a smaller pattern, you can cast on around 20 stitches, while for a wider pattern, you may cast on around 40 stitches.
Step 2: Knit the first row
Once you’ve cast on the desired number of stitches, knit the first row. You can use the knit stitch or any other stitch pattern you prefer for this row. This will serve as the base for your fishnet pattern.
Step 3: Begin the fishnet pattern
Now it’s time to start creating the fishnet pattern. To do this, you’ll alternate between knit and yarn over stitches. On the next row, purl all the stitches. Repeat these two rows until you’ve reached the desired length of your project.
Step 4: Bind off
Once you’ve completed the desired length of your project, bind off all stitches. This will help secure the edges of your piece and give it a clean finish.
By following these step-by-step instructions, you’ll be able to knit a basic fishnet pattern and add a touch of elegance and intricacy to your knitting projects. Have fun experimenting with different yarns and stitch patterns to create unique and stunning fishnet designs!
Tips and tricks for customizing your fishnet pattern
Creating your own fishnet pattern can be a fun and creative way to add a unique touch to your knitting projects. By customizing your pattern, you can tailor it to your preferences and make it truly one-of-a-kind. Here are some tips and tricks to help you get started.
1. Choose the right yarn
The type of yarn you use can greatly affect the overall look and feel of your fishnet pattern. For a traditional fishnet design, opt for a lightweight and stretchy yarn that will allow for the desired openwork effect. If you want a more solid and structured pattern, choose a thicker yarn. Experiment with different yarns to see which one creates the desired effect.
2. Adjust the needle size
The size of your needles also plays a role in the final appearance of your fishnet pattern. Smaller needles will create a tighter mesh, while larger needles will result in a looser and more open design. If you want a delicate and intricate pattern, use smaller needles. For a more dramatic and bold look, go for larger needles.
3. Experiment with stitch variations
Don’t be afraid to play around with different stitch variations to create a unique fishnet pattern. You can try using basic knitting stitches like knit and purl, or explore more advanced techniques like lace knitting or cable knitting. Mixing different stitch patterns can create interesting textures and visual effects.
4. Add decorative elements
To make your fishnet pattern truly stand out, consider adding decorative elements like beads, sequins, or embroidery. These embellishments can add a touch of sparkle and glamour to your design. You can also experiment with different colors to create a vibrant and eye-catching fishnet pattern.
5. Size it to fit
When customizing your fishnet pattern, be mindful of the size of the finished product. Consider the intended use of your knitted item and make adjustments to the pattern accordingly. For example, if you’re knitting fishnet socks, you’ll need to ensure that the pattern stretches and fits comfortably on the foot. Take measurements and make any necessary modifications to achieve the perfect fit.
By following these tips and tricks, you can unleash your creativity and create a fishnet pattern that reflects your personal style and preferences. Whether you’re knitting a scarf, a pair of gloves, or a decorative accessory, customizing your fishnet pattern will make it truly unique and special.
Adding decorative elements to your fishnet pattern
The fishnet knitting pattern is a classic and timeless design that adds a touch of elegance and sophistication to any garment. To make your fishnet pattern even more eye-catching and unique, you can incorporate various decorative elements. These elements not only enhance the overall aesthetic appeal but also allow you to personalize your knitted piece.
One way to add decorative elements to your fishnet pattern is by including lace inserts. Lace inserts can be placed strategically within the fishnet design, creating intricate patterns and adding a delicate and feminine touch to your garment. You can choose from a wide range of lace patterns, from simple floral motifs to more intricate and ornate designs. The lace inserts can be worked in a contrasting yarn color to create a stunning visual contrast.
- Embroidered details: Another way to enhance your fishnet pattern is by incorporating embroidered details. You can use colorful thread to embroider small flowers, leaves, or other motifs onto the knitted fabric. These embroidered details can be scattered randomly or placed in specific areas of the fishnet pattern for a more structured look.
- Beads and sequins: For an added touch of sparkle and glamour, you can incorporate beads and sequins into your fishnet pattern. These embellishments can be sewn onto the knitted fabric at regular intervals or used to highlight specific areas of the design. Beads and sequins come in a wide range of colors and sizes, allowing you to create endless variations and combinations.
- Ribbons and bows: If you want to give your fishnet pattern a more playful and whimsical look, you can add ribbons and bows. You can thread satin or grosgrain ribbons through the knitted fabric, weaving them in and out of the fishnet pattern. Additionally, you can attach small bows made of ribbon to key areas of the design, such as the corners of a shawl or the center of a knitted top.
By incorporating these decorative elements into your fishnet pattern, you can transform a simple and traditional design into a unique and personalized masterpiece. Whether you choose lace inserts, embroidered details, beads and sequins, or ribbons and bows, these decorative elements will add an extra dimension of beauty and creativity to your knitted garments or accessories.
Creating an intricate design with advanced fishnet patterns
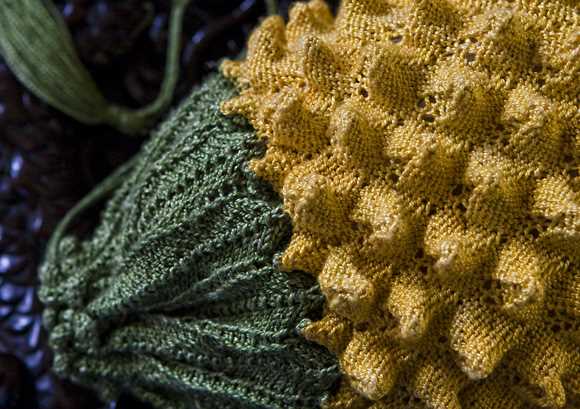
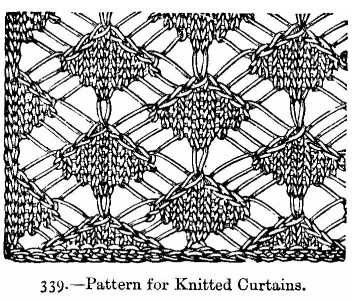
The art of knitting has been around for centuries, and one of the most captivating aspects of this craft is the ability to create intricate designs using advanced fishnet patterns. These patterns are characterized by their delicate and intricate lace-like appearance, which adds an elegant and timeless touch to any knitted item.
One of the key features of advanced fishnet patterns is the use of multiple stitches and techniques to create a complex and detailed design. These patterns often incorporate lace stitches, such as yarn overs and decreases, to create an open and airy fabric. The repetition of these stitches in different combinations allows for the formation of unique and visually stunning patterns.
To successfully create an advanced fishnet pattern, it is important to have a solid understanding of basic knitting techniques, such as casting on, knitting, purling, and binding off. Additionally, familiarity with lace knitting techniques, such as reading charts and executing stitches with precision, will greatly aid in creating the desired intricate design.
Advanced fishnet patterns provide endless possibilities for creativity and experimentation. Knitters can incorporate various motifs, such as flowers, leaves, or geometric shapes, into their designs to add further complexity and interest. They can also play with different yarn weights and fibers to achieve different effects, such as a delicate and ethereal look with fine laceweight yarn or a more substantial and textured fabric with a thicker yarn.
Whether it’s a delicate shawl, an intricate sweater, or a stunning pair of socks, creating an advanced fishnet pattern can elevate any knitted item to a work of art. It requires patience, skill, and a keen eye for detail, but the end result is a truly unique and breathtaking piece that showcases the beauty and versatility of the knitting craft.
- Delicate and intricate lace-like appearance
- Use of multiple stitches and techniques
- Incorporation of lace stitches
- Solid understanding of basic knitting techniques
- Familiarity with lace knitting techniques
- Possibilities for creativity and experimentation
- Incorporation of various motifs
- Playing with different yarn weights and fibers
How to Fix Common Mistakes When Knitting a Fishnet Pattern
Knitting a fishnet pattern can be a fun and challenging project, but it’s not uncommon to make mistakes along the way. Whether it’s dropping stitches, losing track of the pattern, or creating uneven tension, these mistakes can be frustrating. However, there are several ways to fix these common errors and continue with your knitting project.
1. Fixing dropped stitches
One of the most common mistakes in knitting a fishnet pattern is dropping a stitch. When you notice a dropped stitch, it’s important not to panic. Take a deep breath and carefully examine your work. Using a crochet hook or a knitting needle, insert it through the dropped stitch and bring it up to the row above. Then, carefully ladder the stitch up to your current row and secure it by knitting or purling as usual.
2. Correcting pattern mistakes
If you find that you’ve made an error in the fishnet pattern, don’t worry. Depending on the complexity of the mistake, you may be able to simply undo a few rows to the point where the mistake occurred and then reknit. Alternatively, you can use a technique called “tinking,” which involves carefully unraveling the stitches one by one until you reach the mistake, then reknitting them correctly. For more complex pattern mistakes, you may need to consult a knitting pattern editor or instructor for guidance.
3. Managing uneven tension
Uneven tension can be a common issue when knitting a fishnet pattern, especially if you’re new to lace knitting. To fix uneven tension, take a moment to evaluate your knitting technique. Check that you’re holding the yarn consistently and using steady tension. If you notice drastic variations in tension within your work, you can try blocking the finished project to even out the stitches. Blocking involves wetting or steaming the knitted piece and shaping it to the desired dimensions, which can help smooth out any uneven tension and create a more balanced fishnet pattern.
By being patient and using these methods to fix common mistakes, you can overcome any challenges that arise while knitting a fishnet pattern. Remember to take breaks if you’re feeling frustrated and always keep a spare crochet hook or knitting needle on hand for any dropped stitches or pattern errors. With practice and perseverance, you’ll be able to create beautiful fishnet patterns with confidence.
Ways to style and wear your finished fishnet creation
Once you have completed your fishnet knitting project, there are several stylish ways you can wear and incorporate your creation into your wardrobe. Whether you are looking to add a touch of texture to your outfit or make a bold fashion statement, the versatility of fishnet patterns allows for endless possibilities.
If you want to achieve a trendy and edgy look, consider pairing your fishnet creation with distressed jeans and a leather jacket. The fishnet pattern will add an interesting juxtaposition of textures to your ensemble, creating a unique and fashionable outfit. Complete the look with a pair of ankle boots or chunky heels to add an extra dose of edge.
For a more subtle and elegant approach, you can layer your fishnet creation over a solid-colored dress or skirt. The peekaboo effect of the fishnet pattern will add a tasteful and feminine touch to your outfit. Pair it with some delicate jewelry and a pair of heels, and you’ll have a chic and sophisticated ensemble for a night out or a special occasion.
If you’re feeling adventurous, you can even use your fishnet creation as a hair accessory. Simply wrap it around a high ponytail or bun to add a unique and playful twist to your hairstyle. This unexpected accessory will surely turn heads and add an element of fun to your look.
Another way to style your fishnet creation is by wearing it as a statement piece on its own. Whether it’s a fishnet top, skirt, or even a jumpsuit, the intricate pattern will speak for itself and make a bold fashion statement. Keep the rest of your outfit simple and let your fishnet creation take center stage.
In conclusion, there are countless ways to style and wear your finished fishnet creation. Whether you prefer a casual, edgy, or elegant look, the versatility of the fishnet pattern allows you to experiment and express your personal style. Have fun exploring different outfit combinations and don’t be afraid to take risks with your fashion choices.
Exploring Different Variations of the Fishnet Pattern
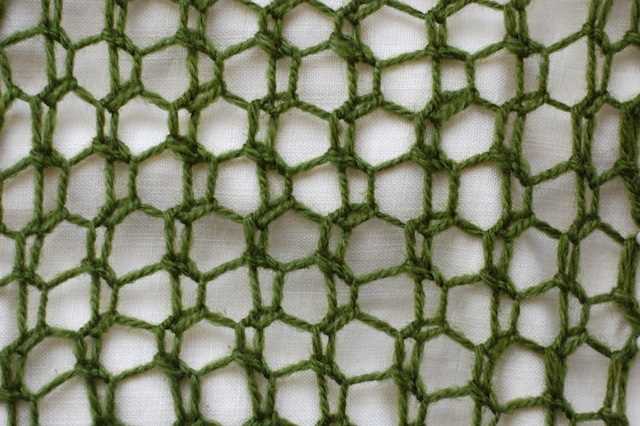
The fishnet pattern is a versatile and popular choice for knitters who want to add some texture and visual interest to their projects. While the traditional fishnet pattern consists of diamond-shaped holes created by alternating knit and purl stitches, there are various variations of this pattern that can create different effects. Let’s explore some of these variations:
1. Lace Fishnet Pattern
The lace fishnet pattern is a delicate and feminine variation of the traditional fishnet pattern. It incorporates lace stitches, such as yarn overs and double decreases, to create an intricate and airy look. This variation is perfect for lightweight shawls, scarves, or summer garments.
2. Cable Fishnet Pattern
The cable fishnet pattern combines the classic fishnet pattern with cables, adding a twist to the traditional design. By incorporating cables in between the diamond-shaped holes, you can create a more textured and visually appealing fabric. This variation is ideal for cozy sweaters, hats, or blankets.
3. Intarsia Fishnet Pattern
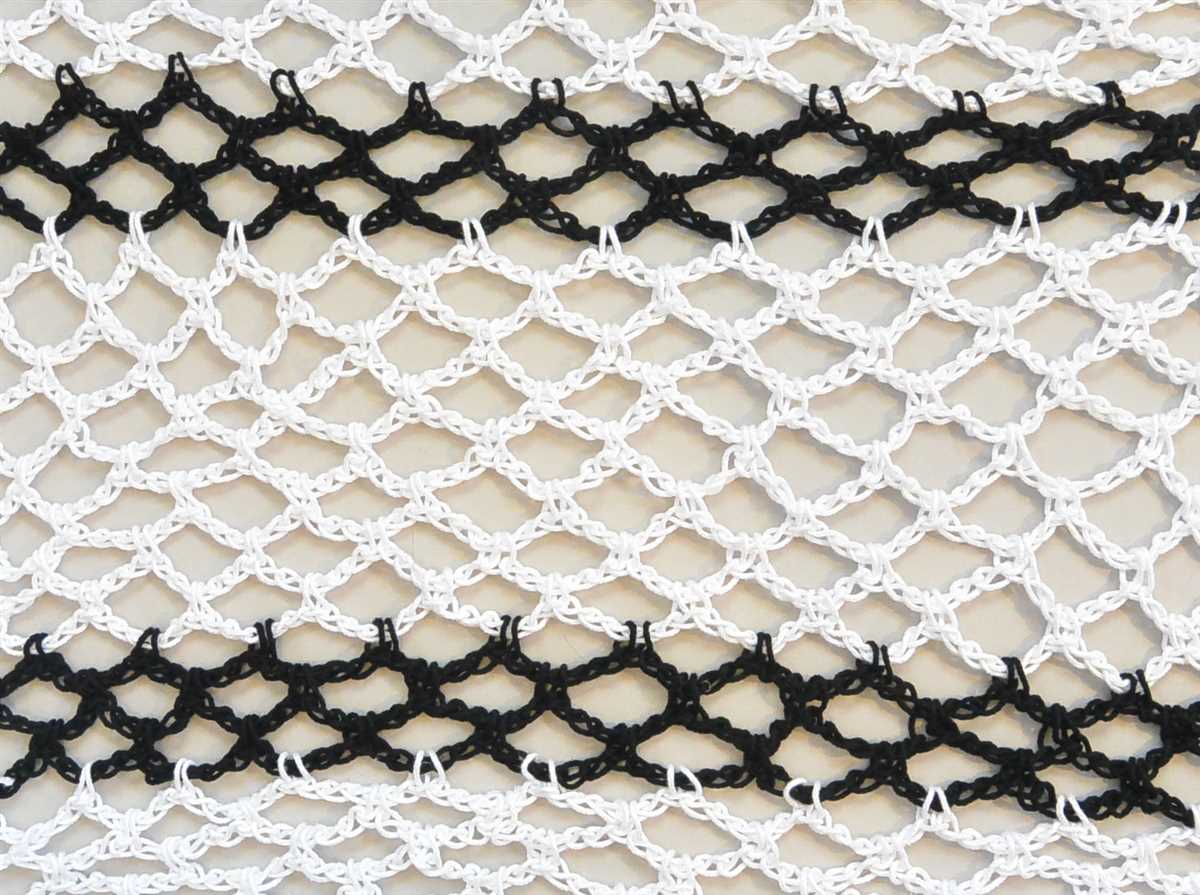
The intarsia fishnet pattern allows you to add color and create intricate designs within the fishnet pattern. By using different colored yarns and intarsia techniques, you can create geometric shapes, flowers, or any other design you desire. This variation is perfect for adding a unique touch to accessories like mittens, socks, or bags.
These are just a few examples of the many variations you can explore when working with the fishnet pattern. Whether you’re looking for a delicate lacey look, a textured cable design, or a colorful intarsia pattern, the fishnet pattern offers endless possibilities for creativity in your knitting projects.
So go ahead and experiment with different variations of the fishnet pattern to add a touch of elegance, texture, or color to your next knitting project. Let your creativity run wild and enjoy the endless possibilities this versatile pattern has to offer!
Q&A:
What is a knit fishnet pattern?
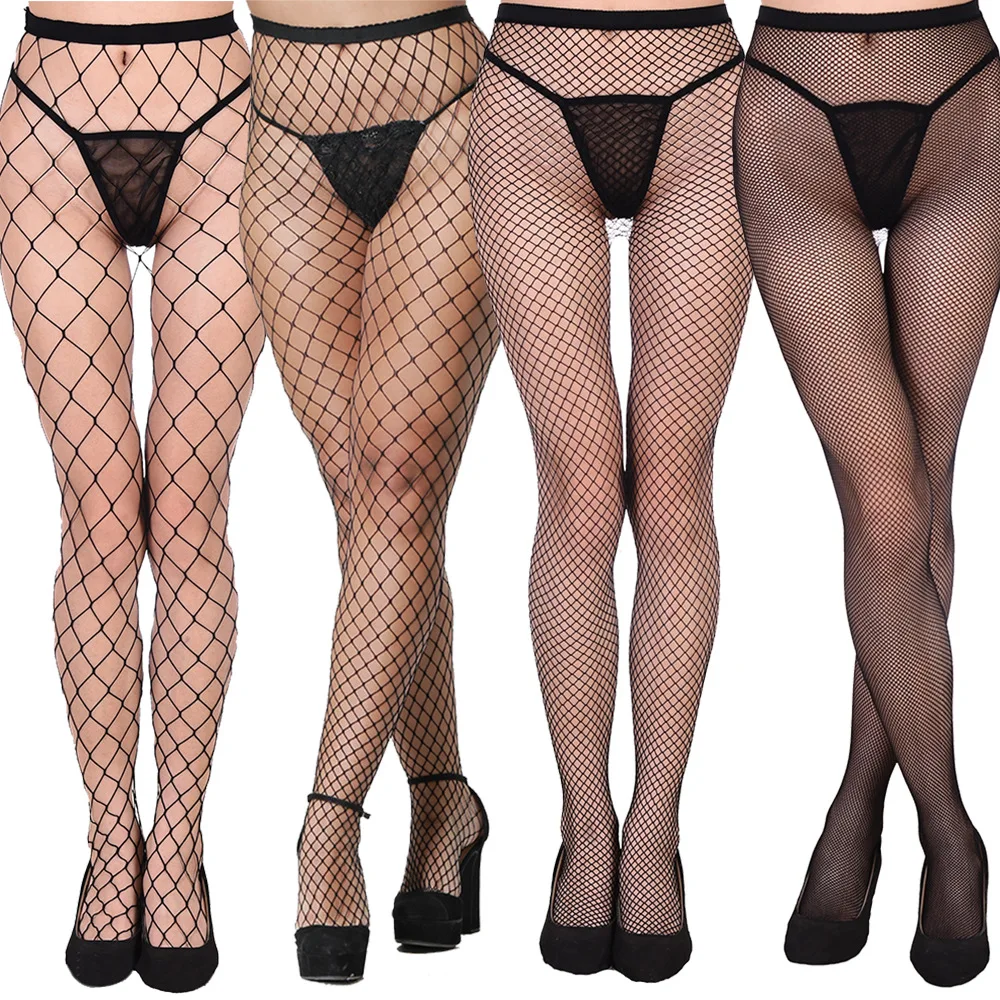
A knit fishnet pattern is a pattern used to create a fabric that resembles fishnet, with a series of holes or gaps that are typically diamond-shaped or rectangular.
How do you knit a fishnet pattern?
To knit a fishnet pattern, you will need to use a combination of knit and purl stitches to create the desired effect. You will typically start by casting on a multiple of stitches, then follow a specific sequence of knit and purl stitches to create the fishnet pattern.
What types of projects can you create with a knit fishnet pattern?
A knit fishnet pattern can be used to create various projects, such as scarves, shawls, sweaters, and even socks. The pattern adds a unique texture and visual interest to the finished item.
Are there any variations of the knit fishnet pattern?
Yes, there are various variations of the knit fishnet pattern. Some variations may involve different arrangements of the diamond or rectangular-shaped gaps, while others may incorporate additional stitches or lace-like patterns within the fishnet design.
Are there any tips for knitting a fishnet pattern?
When knitting a fishnet pattern, it’s important to maintain an even tension throughout your work to ensure that the gaps or holes are consistent in size. It may also be helpful to use a slightly larger needle size to create a looser fabric, as this can enhance the fishnet effect.