
Knitting is a versatile and enjoyable craft that allows you to create beautiful and functional items. One popular project for knitters is wristers, also known as wrist warmers or fingerless gloves. Wristers are a cozy accessory that can keep your hands warm while still allowing you to use your fingers freely. They are perfect for chilly autumn and winter days when you need a little extra warmth.
If you’re looking for a free wristers knitting pattern, you’ve come to the right place. In this article, we will share some of the best free knitting patterns for wristers that you can find online. These patterns range in difficulty, so whether you’re a beginner or an experienced knitter, there’s something here for everyone.
One of the great things about knitting wristers is that they are relatively quick and easy projects. They require only a small amount of yarn and can be completed in just a few hours. With so many different patterns to choose from, you can easily find a style that matches your personal taste and fashion sense. From intricate lace patterns to simple ribbing, there’s a wrister pattern for every knitter.
So grab your knitting needles and get ready to create your own pair of cozy and stylish wristers. Whether you’re knitting them as a gift for a friend or as a treat for yourself, these patterns are sure to be a hit. With a little time and effort, you can have a beautiful and functional accessory that you can wear all winter long.
What are wristers? Benefits and uses
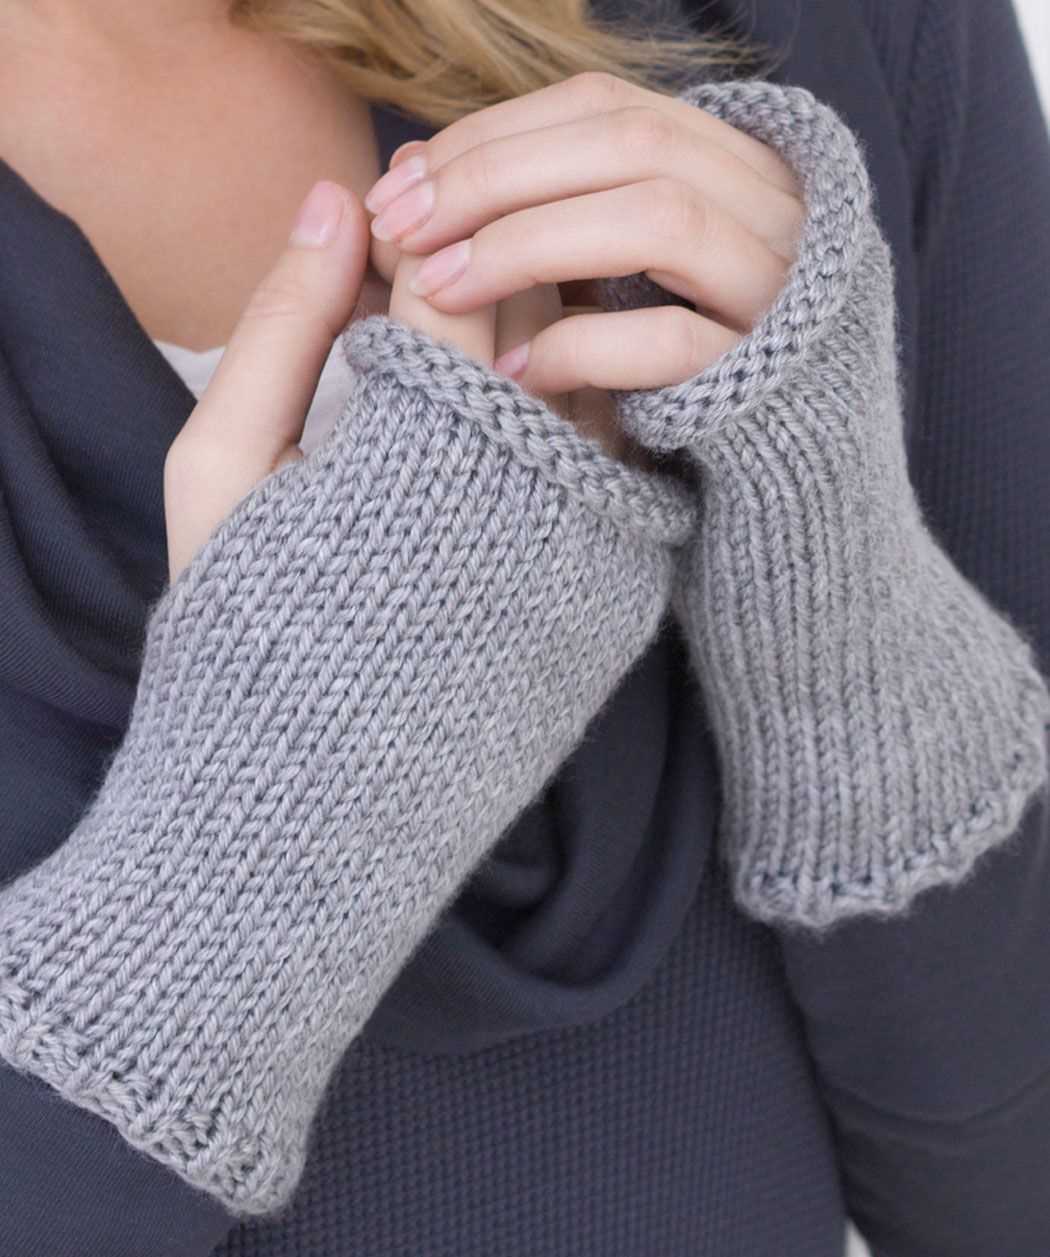
Wristers, also known as wrist warmers or fingerless gloves, are a type of accessory that cover the wrists and lower part of the hands while leaving the fingers free. They are typically knitted or crocheted and provide both practical and fashionable benefits.
One of the main benefits of wristers is their ability to keep the hands and wrists warm while still allowing full hand mobility. This makes them ideal for individuals who need to use their hands frequently, such as those who work on computers, play musical instruments, or participate in outdoor activities. Wristers provide insulation to the most vulnerable areas of the hands while keeping the fingers free to perform delicate tasks.
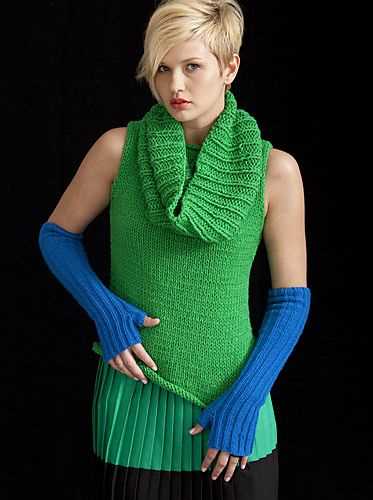
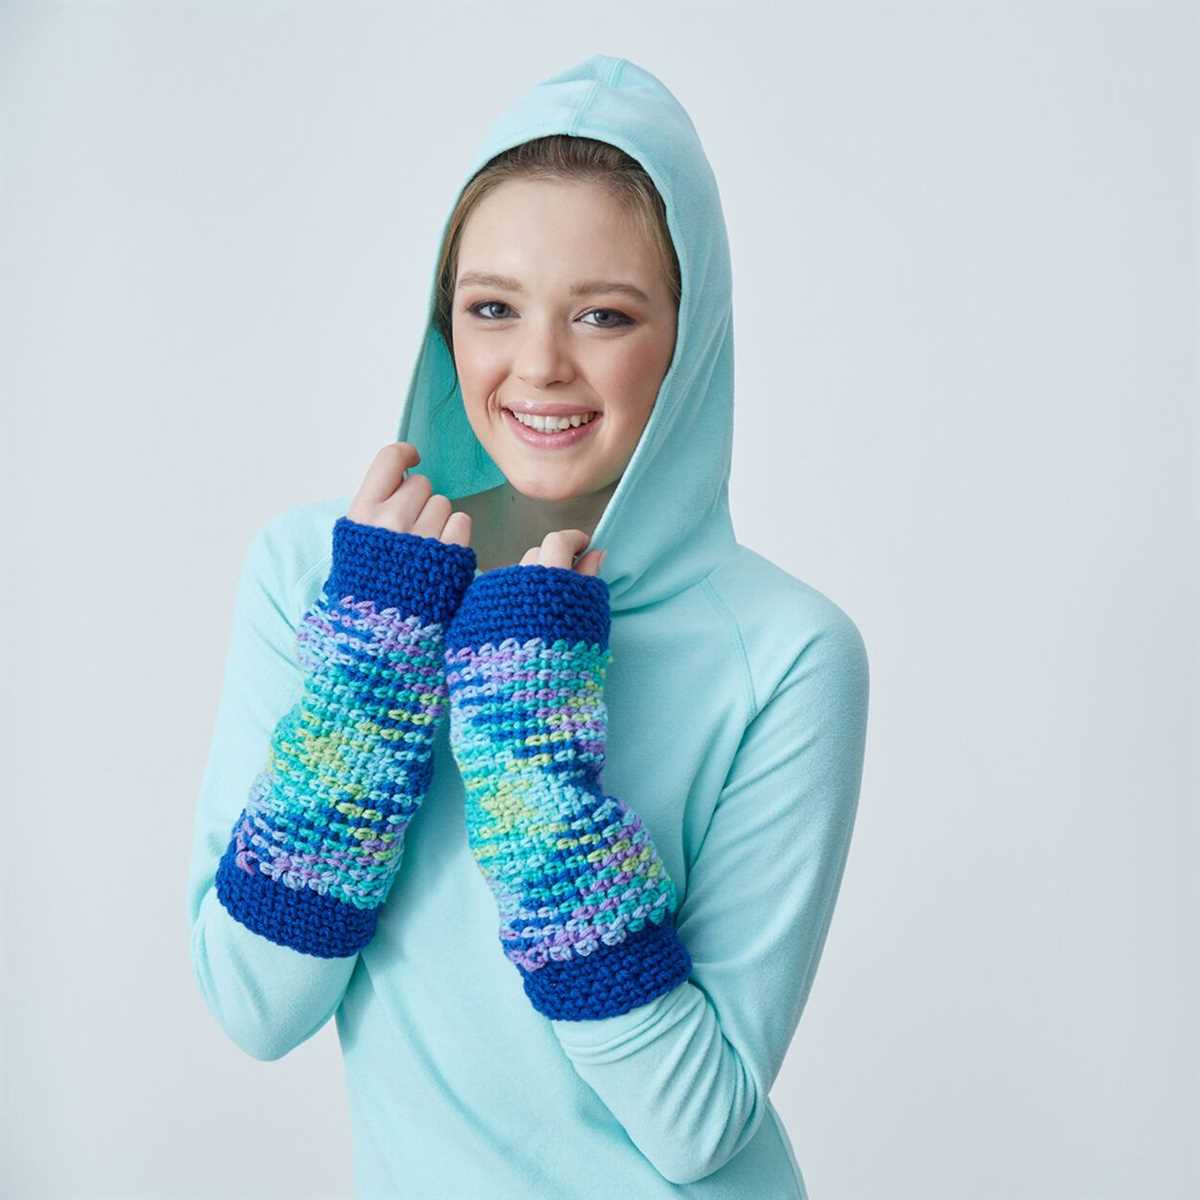
Another advantage of wristers is their versatility. They can be worn indoors as a stylish accessory, adding a touch of warmth and flair to any outfit. They can also be used outdoors as an additional layer under gloves or mittens, providing extra warmth and protection against the elements. Wristers come in various designs, colors, and patterns, allowing individuals to express their personal style and creativity.
Furthermore, wristers are often used for therapeutic purposes. In certain conditions like arthritis or carpal tunnel syndrome, they can provide gentle compression and support to the wrists, helping to alleviate pain and discomfort. Wristers with added padding or ergonomic features may offer additional benefits for individuals with specific hand or wrist conditions.
In conclusion, wristers are a practical and fashionable accessory that can benefit individuals in various situations. Whether it’s for keeping warm, adding style to an outfit, or providing therapeutic support, wristers are a versatile and functional choice.
Choosing the right yarn and needles

When knitting wristers, it’s important to choose the right yarn and needles to achieve the desired result. The yarn weight and fiber content can greatly affect the drape, warmth, and comfort of the wristers. Additionally, the size and material of the needles can influence the overall look and feel of the finished project.
Yarn weight: When selecting yarn for wristers, consider the weight of the yarn. Lighter weight yarns, such as lace or fingering weight, will create a delicate and lightweight fabric, while heavier weight yarns, like bulky or super bulky, will yield a more substantial and warmer fabric. Choose a yarn weight that complements the desired style and purpose of the wristers.
Fiber content: Different fibers have different properties, so choose a yarn fiber that suits your needs. For example, a wool yarn will provide warmth and elasticity, making it a good choice for winter wristers. Cotton yarns are breathable and perfect for warmer climates or those with sensitive skin. Silk yarns can add a luxurious sheen and drape to the wristers. Consider the qualities you want in your wristers and select a yarn fiber accordingly.
Needle size: The size of the needles will determine the gauge and overall size of the wristers. Generally, smaller needles create a tighter and denser fabric, while larger needles produce a looser and drapier fabric. To achieve the desired fit and appearance of the wristers, follow the recommended needle size stated in the knitting pattern. However, you can also experiment with different needle sizes to adjust the gauge and create a unique effect.
Needle material: The material of the needles can also affect the knitting experience. Metal and plastic needles are smooth and slippery, allowing the stitches to glide easily. This makes them great for quick and smooth knitting. On the other hand, wooden or bamboo needles have a natural grip, which can help control the tension and prevent stitches from sliding off. Choose the needle material that feels most comfortable and suits your knitting style.
Overall, choosing the right yarn and needles for wristers involves considering factors such as yarn weight, fiber content, needle size, and needle material. By paying attention to these details, you can create wristers that not only look beautiful but also feel comfortable and suit your preferences.
Essential Knitting Techniques for Wristers

Wristers, also known as wrist warmers or fingerless gloves, are a popular accessory in the world of knitting. They provide warmth and style while allowing ease of movement for the fingers. Whether you’re a beginner or an experienced knitter, mastering a few essential techniques will help you create beautiful wristers.
Casting On: The first step in any knitting project is casting on. For wristers, you can use a variety of casting on techniques, such as the long tail cast-on or the cable cast-on. These techniques create a neat and sturdy edge for your wristers.
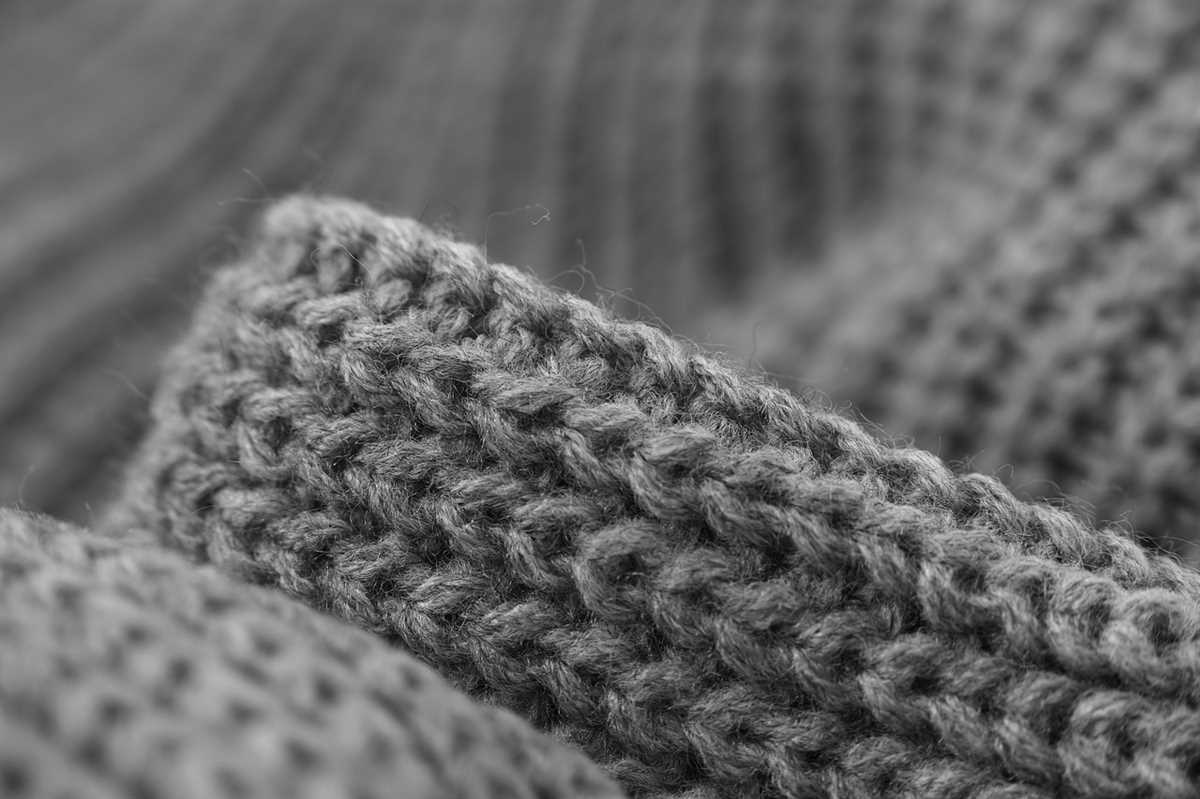
Ribbing: Ribbing is a common pattern used in wristers to create a stretchy and snug fit around the wrist. The most commonly used ribbing pattern is the 1×1 rib, which alternates between knitting one stitch and purling one stitch. This creates a textured fabric that stretches comfortably.
Thumb Gusset: One of the unique features of wristers is the thumb hole, also known as the thumb gusset. This allows the wristers to cover the hand while leaving the thumb free. There are different ways to create a thumb gusset, such as using increases or a separate thumb flap. Depending on the pattern, you may need to keep track of your thumb stitches using stitch markers.
Hand Shaping: Proper hand shaping is essential to ensure a comfortable fit for your wristers. This involves decreasing or shaping the stitches on the hand section to create a tapered shape. Common shaping methods include decreasing evenly across a row or creating a diagonal line of decreases. Paying attention to the hand shaping will result in wristers that fit well and allow for easy movement.
Bind Off: The final step in knitting wristers is binding off. A stretchy bind off method is recommended to ensure a comfortable fit around the hand. Techniques such as the standard bind off or the stretchy bind off can be used. It’s important to bind off loosely so that the wristers don’t feel tight or constricting on the hand.
By mastering these essential knitting techniques for wristers, you’ll be able to create stylish and functional accessories that will keep your hands warm in style. With practice, you can even customize your wristers with different patterns, stitches, and yarns to create unique pieces that reflect your personal style.
How to cast on and start knitting wristers
Knitting wristers is a great project for both beginner and experienced knitters. Wristers are cozy hand warmers that can help keep your wrists and hands warm during the colder months. If you’re new to knitting, casting on and starting your first wrister can seem a bit intimidating, but with these simple steps, you’ll be on your way to creating your own wristers in no time.
1. Gather your materials
Before you start knitting your wristers, make sure you have all the necessary materials. You’ll need a pair of knitting needles that are the appropriate size for your chosen yarn, as well as a ball of yarn in your desired color. It’s also helpful to have a tapestry needle for weaving in ends and a pair of scissors to cut the yarn.
2. Start by casting on
To begin your wrister, start by casting on the required number of stitches. The pattern you’re using will specify the number of stitches needed. One common casting on method is the long-tail cast-on. This method creates a neat, elastic edge. To do the long-tail cast-on, make a slipknot with a long tail, leaving enough yarn to cast on the required number of stitches. Then, using your knitting needle, pick up the slipknot and place it on the needle.
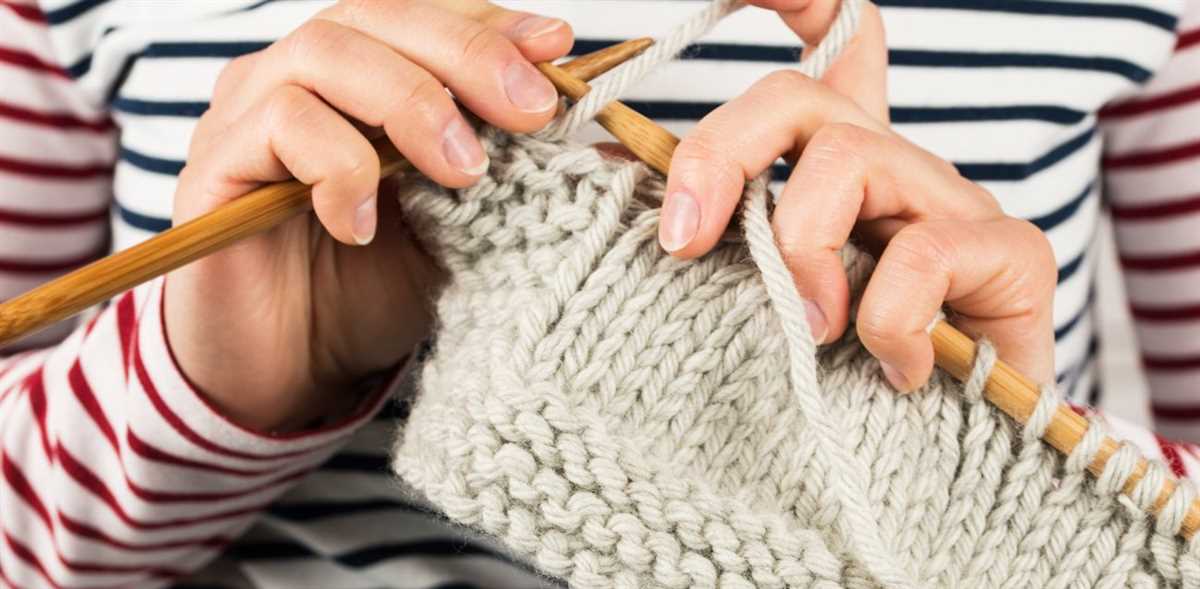
3. Begin knitting

Once you have cast on the required number of stitches, you’re ready to start knitting! Follow the pattern instructions for the type of stitch or stitch pattern you’ll be using. Most wrister patterns use basic knit stitches, which are simple to learn and create a nice fabric. Knit each stitch across the row, and then turn your work and knit back across the row. Continue knitting in this manner until your wrister reaches the desired length.
4. Finish off your wrister
Once your wrister has reached the desired length, you’ll need to finish it off. Cut the yarn, leaving a tail that’s long enough to weave in later. Thread the tail through a tapestry needle, and then slip the needle through the remaining stitches on your knitting needle, removing them from the needle as you go. Once all the stitches are off the needle, pull the yarn tight to close up the top of the wrister. Use the tapestry needle to weave in the ends of the yarn, and then your wrister is complete!
Creating different stitch patterns for wristers
When knitting wristers, there are endless possibilities for creating unique stitch patterns that add texture and visual interest to the finished piece. Whether you are a beginner or an experienced knitter, experimenting with different stitch patterns can elevate your wristers from simple accessories to eye-catching fashion statements.
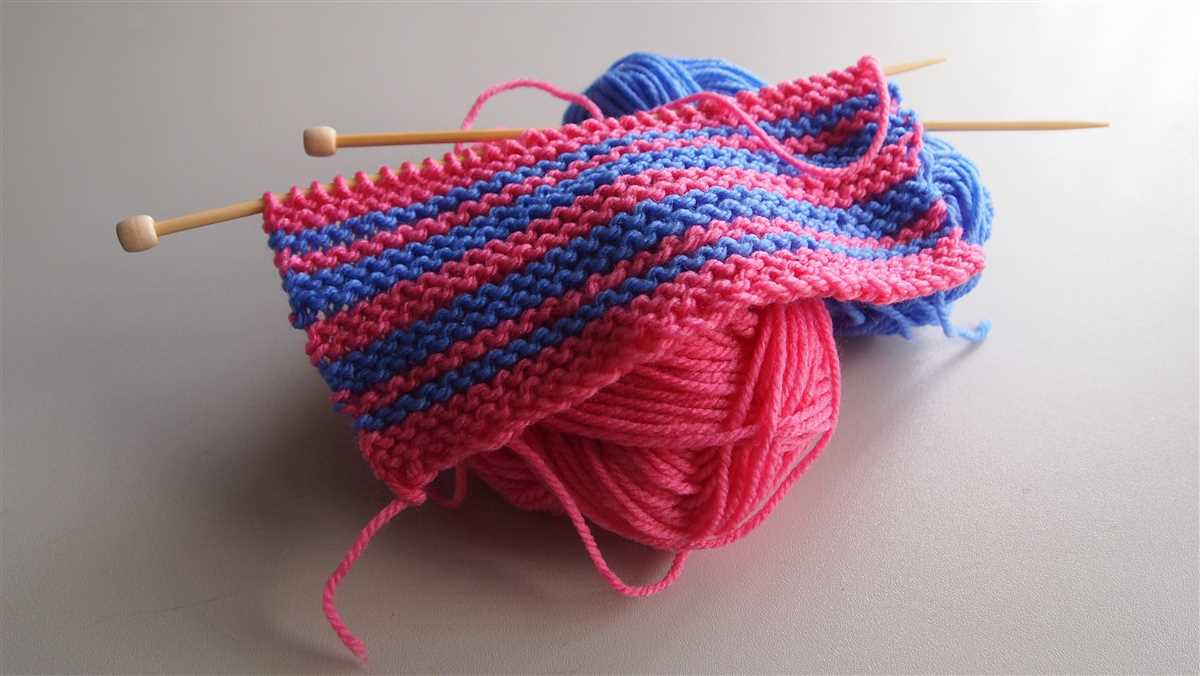
1. Ribbing stitch: One of the most common stitch patterns for wristers is ribbing. This pattern creates a stretchy and snug fit that is perfect for keeping your hands warm in chilly weather. The ribbing stitch involves alternating between knitting and purling stitches in a specific pattern, such as k1, p1 or k2, p2.
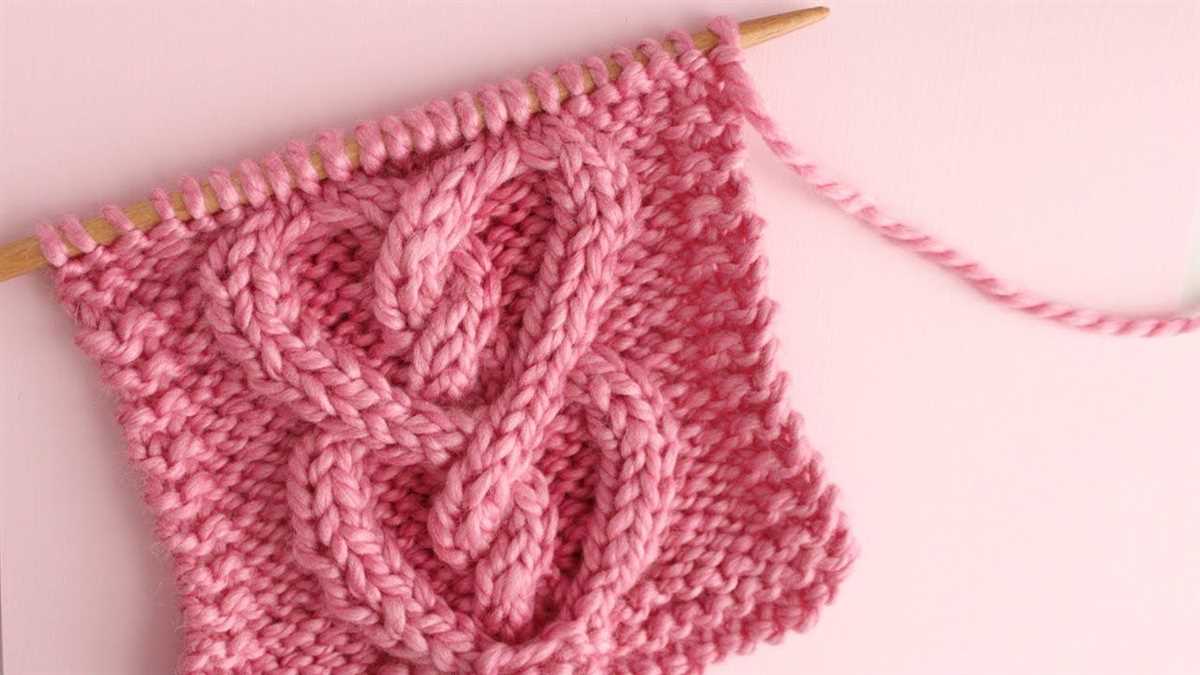
2. Cable stitch: If you want to add a touch of elegance and sophistication to your wristers, try incorporating cable stitches. Cable stitches create beautiful twisted patterns that resemble interwoven ropes. By crossing stitches over each other, you can achieve intricate designs that make your wristers stand out.
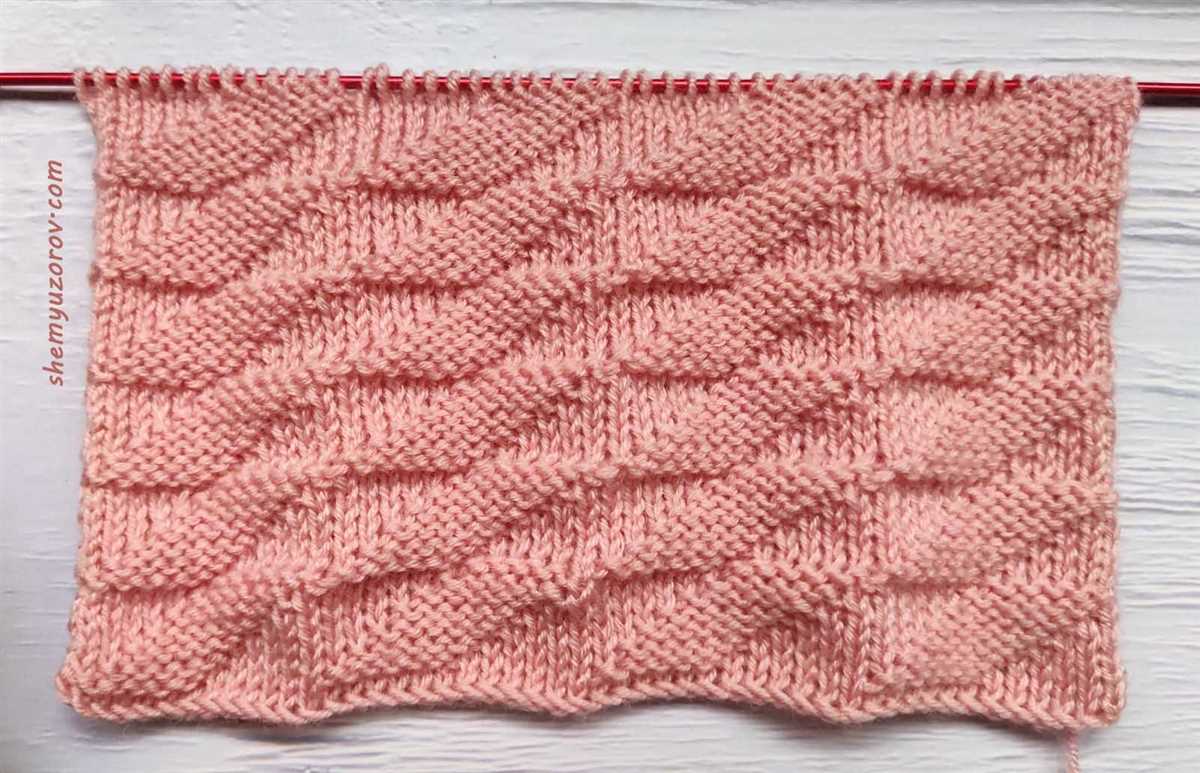
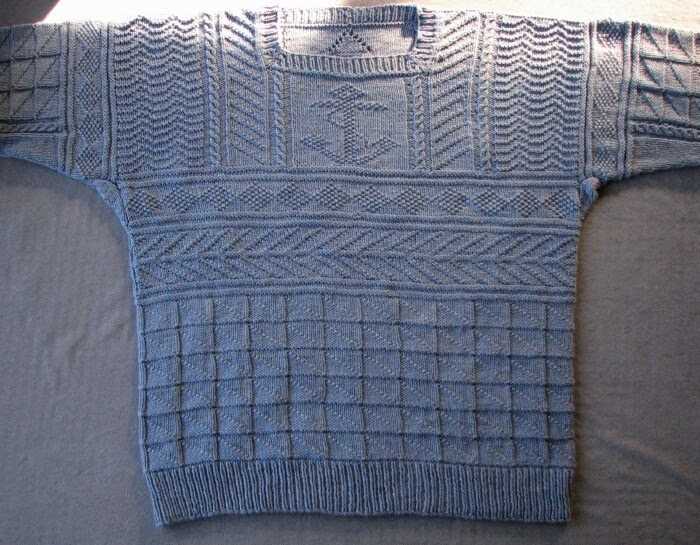
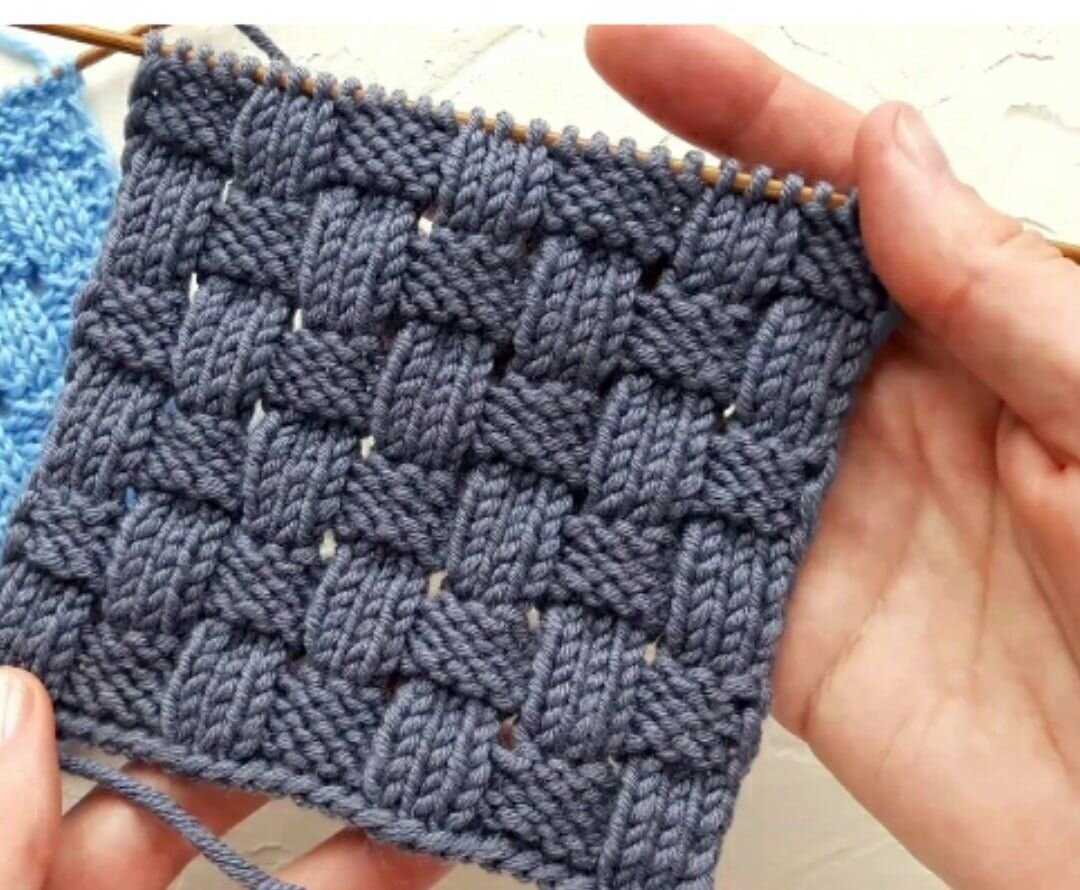
Other stitch patterns you can experiment with include lace stitches, seed stitch, basketweave stitch, and fair isle. Each stitch pattern offers its own unique look and texture, allowing you to customize your wristers to match your personal style.
By using different stitch patterns, you can also create wristers that suit different occasions. For example, a lacy stitch pattern would be perfect for a special event, while a simple ribbing stitch would be great for everyday wear. Don’t be afraid to mix and match stitch patterns or even create your own unique combination.
Adding decorative elements to your wristers
Wristers are a great accessory to knit, not only for their functionality in keeping your wrists warm, but also for the opportunity to add decorative elements to make them truly unique. Whether you’re an experienced knitter or just starting out, there are many different techniques you can use to customize your wristers.
1. Cables: One popular way to add visual interest to your wristers is by incorporating cables into your design. Cables are created by crossing stitches over each other, creating an intricate pattern that adds depth and texture to your knitting. You can use a cable needle or even knit cables without one, depending on your skill level and preference.
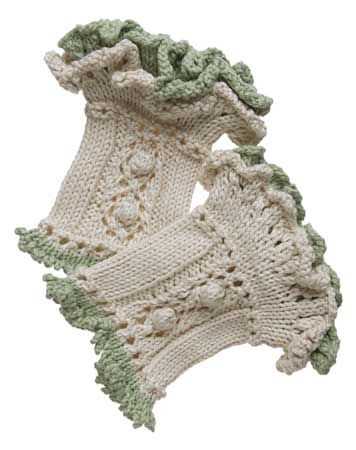
2. Lace: If you prefer a more delicate and feminine look, consider adding lace to your wristers. Lace patterns are created by a combination of yarn overs and decreases, resulting in a beautiful and airy design. There are countless lace stitch patterns to choose from, so you can find one that suits your style and skill level.
3. Colorwork: Another way to make your wristers stand out is by incorporating colorwork into your design. Colorwork involves working with multiple yarn colors in the same row or round, creating patterns and motifs. Fair Isle and Intarsia are two popular colorwork techniques that can be used to create intricate and eye-catching designs on your wristers.
4. Embellishments: In addition to incorporating different stitch patterns, you can also add embellishments to your wristers for an extra touch of flair. This can include buttons, beads, ribbons, or even embroidery. These small details can make a big difference in the overall look of your wristers, allowing you to show off your personal style.
By adding decorative elements to your wristers, you can create a unique and personalized accessory that reflects your individual style and creativity. Whether you choose cables, lace, colorwork, or embellishments, the possibilities are endless for customizing your wristers and making them truly one-of-a-kind.
Shaping and sizing your wristers
When knitting wristers, it’s important to consider the shape and size to ensure a proper fit. Although the pattern may provide general instructions, individual wrist measurements and personal preferences should also be taken into account.
Measuring your wrist: To determine the appropriate size for your wristers, measure the circumference of your wrist using a flexible measuring tape. Wrap the tape around the widest part of your wrist, just above the wrist bone. Note down this measurement as it will be used to determine the number of stitches to cast on.
Sizing options:
- Small: For a snug and fitted look, cast on fewer stitches than your wrist circumference measurement. This is suitable for those with petite wrists or who prefer a tight fit.
- Medium: If you prefer a standard fit, cast on the same number of stitches as your wrist circumference measurement. This will provide a comfortable and average-sized wrister.
- Large: If you prefer a looser fit or have larger wrists, cast on more stitches than your wrist circumference measurement. This will result in a wider and roomier wrister.
Shaping the wristers: Depending on the desired style, wristers can have different shaping techniques. Some patterns may include instructions for increases or decreases to create a tapered or flared shape at the wrist or hand. Follow the pattern instructions carefully to achieve the desired shaping.
Remember to always check your gauge before starting the project to ensure the wristers will fit correctly. If you find that your gauge doesn’t match the pattern, adjust your needle size accordingly to achieve the desired measurements.
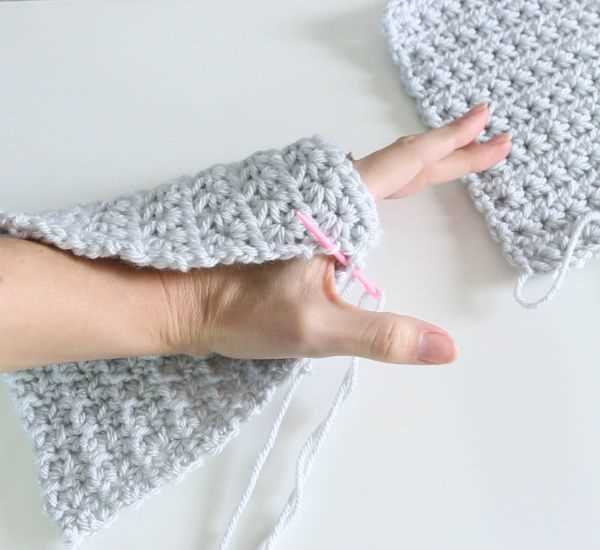
Working on the Thumbhole
As you continue knitting the wristers, it’s important to pay attention to the thumbhole. The thumbhole is a crucial part of the pattern that allows for easy movement of the hand.
To create the thumbhole, you will need to divide the stitches on your needles. This can be done by slipping a certain number of stitches onto a stitch holder or a spare piece of yarn. Make sure to count the stitches correctly to ensure the thumbhole is in the right position.
Next, continue knitting the remaining stitches until you reach the desired length of the wrister. This will create a gap where the thumb will go through.
Once the wrister has reached the desired length, you’ll need to start working on the thumbhole edging. This is typically done by picking up stitches along the edge of the thumbhole and knitting a few rows in a rib stitch to create a neat and stretchy edge.
It’s important to follow the specific instructions provided in the knitting pattern for the thumbhole edging, as different patterns may have different techniques or stitches to use. Make sure to take your time and create a clean and professional looking finish for the thumbhole.
You may find it helpful to use stitch markers to help keep track of where the thumbhole begins and ends. This will ensure that you maintain the correct number of stitches and the thumbhole is properly positioned within the wrister.
Remember to be patient and take your time when working on the thumbhole, as it can be a more intricate and detailed part of the pattern. With practice and attention to detail, you’ll be able to create beautiful and functional wristers with a comfortable and well-fitting thumbhole.
Binding off and finishing your wristers
After you have completed knitting your wristers, the next step is to bind off the stitches to finish your project. Binding off is crucial to ensure that your wristers have a neat and clean edge. To bind off, simply knit the first 2 stitches as usual, then insert the left needle into the first stitch on the right needle. Lift the first stitch over the second stitch and off the right needle. One stitch is now bound off. Repeat this process with the next stitch, lifting it over the previous stitch and off the needle. Continue binding off each stitch until you reach the end of the row.
If you want to add some extra flair to your wristers, you can try different bind off techniques. For example, the picot bind off creates a decorative edge by adding small loops between each bound off stitch. To do this, bind off 2 stitches as usual, then knit the next stitch. Insert the left needle into the first bound off stitch and lift it over the knit stitch and off the needle. Repeat this process, binding off 2 stitches, then knitting 1 stitch, and lifting the bound off stitch over the knit stitch. This will create a scalloped edge for your wristers.
Once you have finished binding off, you can weave in the loose ends of yarn to give your wristers a polished look. Use a yarn needle to thread the loose ends through the stitches on the wrong side of the wristers. Be careful to weave the ends in securely so that they don’t come loose with wear. Trim any excess yarn once you have woven in all the ends.
To complete your wristers, you may also want to block them. Blocking can help even out the stitches and make your wristers look more professional. To block your wristers, soak them in lukewarm water for about 15 minutes. Gently squeeze out the excess water and lay the wristers flat on a towel. Shape the wristers to the desired size and let them dry completely. Once dry, your wristers will be ready to wear!
Blocking and Caring for Your Wristers
Once you have finished knitting your wristers, it is important to block them to ensure proper shape and sizing. Blocking helps to even out your stitches and make the fabric more drapey. Here are some steps to follow for blocking your wristers:
1. Soak the wristers: Fill a basin or sink with lukewarm water and add a gentle wool wash or mild shampoo. Gently submerge the wristers in the water and allow them to soak for about 15-20 minutes.
2. Remove excess water: After soaking, gently press the wristers against the side of the basin or sink to remove excess water. Do not wring or twist the fabric, as this can lead to stretching.
3. Shape and dry: Lay a clean towel on a flat surface and place the wristers on top. Gently shape the wristers to the desired size by smoothing out any wrinkles and reshaping the edges. Leave the wristers to air dry completely, away from direct heat or sunlight.
Once your wristers are dry, you can take steps to care for them properly to ensure their longevity:
1. Handwash: It is best to handwash your wristers to avoid any damage from machine agitation. Use a gentle wool wash or mild shampoo and lukewarm water to gently clean them.
2. Dry flat: After washing, carefully squeeze out excess water and lay the wristers flat on a clean towel or drying rack to air dry. Avoid hanging them, as this can cause stretching.
3. Store properly: When not in use, store your wristers in a cool, dry place, preferably in a drawer or a fabric bag to protect them from dust and insects. Avoid folding them to prevent creases.
By following these blocking and caring steps, you can ensure that your wristers stay in great condition and continue to keep your wrists warm and cozy for many seasons to come!
Conclusion
In conclusion, wristers knitting patterns are a great way to add style and warmth to your winter wardrobe. Whether you are a beginner or a seasoned knitter, there are plenty of free patterns available for you to try. From simple designs to more intricate lace patterns, there is something for everyone. Whether you prefer thumbless wristers or ones with thumbholes, you can find a pattern that suits your personal style and needs.
Knitting wristers is not only a fun and enjoyable activity, but it also allows you to create unique and personalized accessories. By choosing the right yarn and color combination, you can make wristers that perfectly match your outfits or make them as thoughtful gifts for your loved ones. Additionally, wristers make for great portable projects that you can take with you anywhere, making them ideal for knitting on the go.
Start Knitting Wristers Today!
With so many free wristers knitting patterns available online, there is no reason not to give it a try. Whether you are looking to learn a new knitting technique or simply want to add some stylish accessories to your wardrobe, knitting wristers is a rewarding and fulfilling hobby. So grab your knitting needles and yarn, and start creating beautiful wristers that will keep you warm and stylish all winter long!