
Are you in search of a fun and adorable knitting project? Look no further! The owl mittens knitting pattern is just what you need. These cute and cozy mittens are perfect for staying warm during the colder months, and they also make a great gift for friends and family.
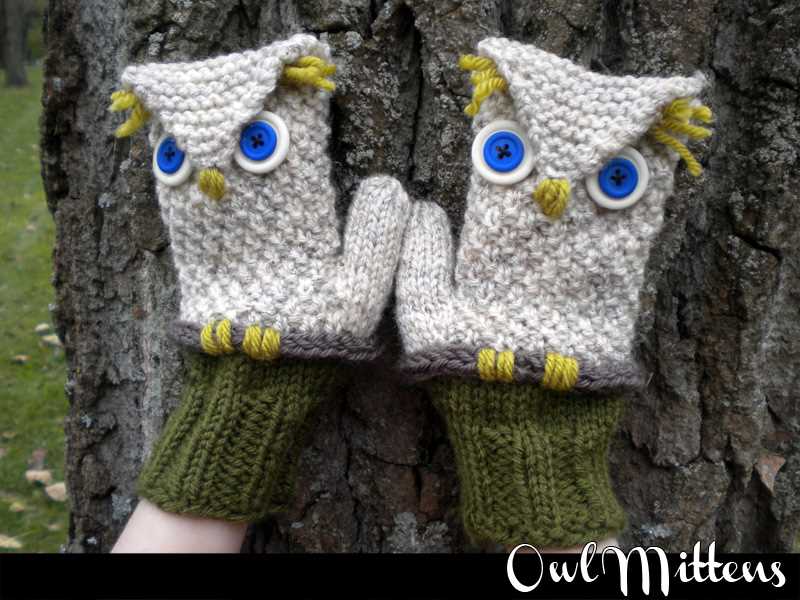
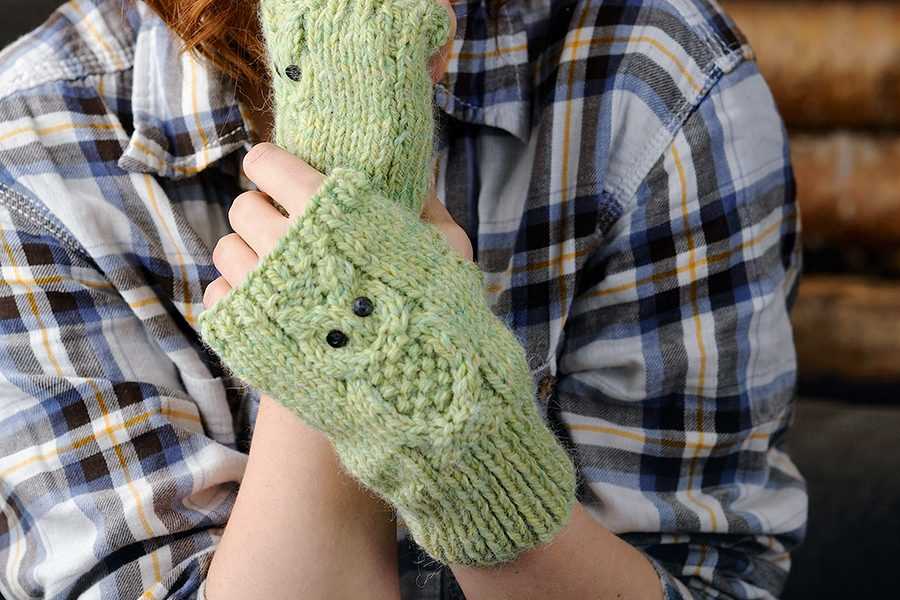
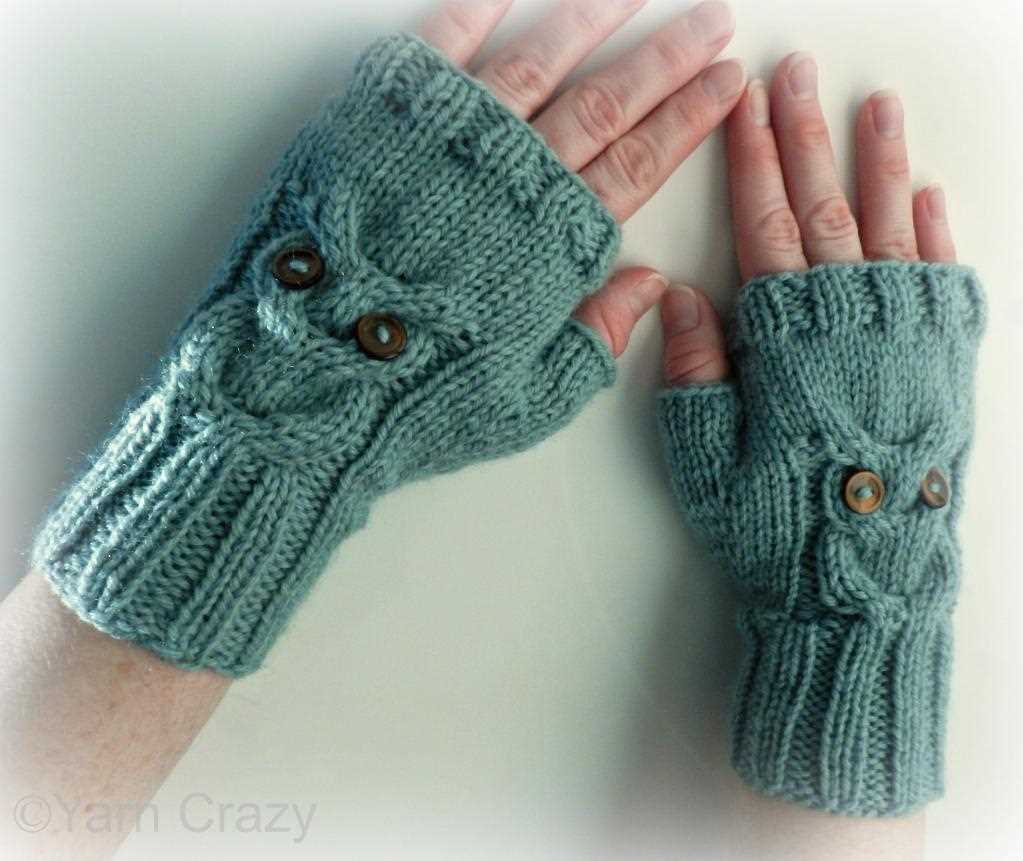
With this knitting pattern, you’ll be able to create your own pair of owl-themed mittens. The pattern includes instructions for both child and adult sizes, so you can make a matching set for yourself and your little ones. The mittens feature a charming owl design, complete with button eyes and a textured body.
Whether you’re an experienced knitter or just starting out, this pattern is suitable for all skill levels. The instructions are clear and easy to follow, and there are even helpful tips and tricks included to ensure your mittens turn out perfectly. So grab your knitting needles and yarn, and get ready to create a pair of cozy owl mittens!
Owl Mittens Knitting Pattern
Knitting owl mittens can be a fun and rewarding project for those who love both knitting and owls. With their cute and intricate designs, owl mittens are not only practical but also make a stylish accessory for the colder months.
The owl mittens knitting pattern typically includes instructions for creating a pair of mittens that feature an owl face on the back of each hand. The pattern may involve using various knitting techniques, such as knitting in the round, colorwork, and shaping. Knitters will need to have basic knitting skills and be familiar with techniques like knit, purl, and increasing and decreasing stitches.
To start the project, knitters will need the necessary materials, including yarn in different colors, knitting needles, and a set of double-pointed needles. The pattern usually specifies the type and weight of the yarn to achieve the desired size and appearance. Knitters can choose from a variety of colors to create their own unique owl mittens.
The owl mittens knitting pattern often includes charts or detailed written instructions for each section of the mittens, such as the owl’s face, eyes, and feathers. Some patterns may also include tips and tricks for achieving the best results, such as how to avoid gaps when switching colors or how to ensure an even tension throughout the project.
Knitting owl mittens can be a fun way to express creativity and showcase one’s knitting skills. Whether you are knitting them for yourself or as a gift for someone else, owl mittens are sure to be a hit. So grab your knitting needles and get started on this adorable and cozy project!
Overview
Owl mittens are a popular knitting pattern that features adorable owl designs on the hand portion of the mitten. This pattern is perfect for those who love owls and want to add a playful touch to their winter accessories. The owl mittens are not only cute but also practical, providing warmth and insulation during the cold weather.
The knitting pattern for owl mittens typically includes instructions for various sizes, allowing knitters to create mittens that fit both children and adults. The pattern may also include options for different color combinations, allowing for customization and personalization. Knitters can choose to make the owls in classic brown and white or get creative with colorful owl designs.
To knit owl mittens, basic knitting skills are required, including how to cast on, knit, purl, and decrease stitches. The pattern may also incorporate more advanced techniques, such as knitting in the round or cabling, to create additional texture and detail on the owl design.
Overall, owl mittens are a fun and whimsical knitting project that adds a touch of charm to any winter wardrobe. Knitters can enjoy the process of creating these adorable accessories while also keeping their hands warm and cozy during the chilly months.
Materials
To complete this owl mittens knitting pattern, you will need the following materials:
- Yarn: You will need worsted weight yarn in two contrasting colors – one for the main color (MC) and one for the accents (AC). Choose colors that resemble the colors of an owl for an authentic look.
- Knitting Needles: You will need a set of size 8 (5mm) double-pointed needles (DPNs) or a circular needle if you prefer to use the magic loop method. Make sure the needles are long enough to comfortably accommodate the number of stitches.
- Tapestry Needle: You will need a tapestry needle with a large eye for weaving in ends.
- Stitch Markers: It is helpful to have stitch markers to keep track of your rounds and any specific sections of the pattern.
- Scissors: You will need a pair of scissors to cut your yarn at the end of the project.
In addition to these materials, you may also want to have a row counter, stitch holders, or other knitting accessories that you find helpful for your knitting projects.
Gauge
Gauge refers to the number of stitches and rows in a set measurement of fabric. It is an essential aspect of knitting, as it determines the finished size and fit of the knitted item. To achieve accurate gauge, it is crucial to use the recommended yarn weight, needle size, and pattern instructions.
When working on owl mittens or any knitting project, it is essential to first knit a gauge swatch. A gauge swatch is a small sample of the pattern worked with the specified yarn and needles. By measuring the swatch, you can determine whether you have the correct gauge and make any necessary adjustments before starting the project.
How to measure gauge:
- Cast on a certain number of stitches, as specified in the pattern.
- Work the required number of rows in the specified stitch pattern.
- Use a ruler or a gauge measuring tool to measure the width and height of the swatch.
- Count the number of stitches and rows within the measured area.
It’s important to follow the pattern’s instructions for gauge, as even small deviations can significantly affect the final result. If your gauge doesn’t match the pattern’s gauge, you may need to adjust your needle size or modify your tension while knitting.
Achieving the correct gauge ensures that your owl mittens will fit properly and have the intended size and shape. It’s worth taking the time to swatch and measure your gauge before starting the project to avoid any surprises and ensure successful results.
Size
The size of the owl mittens can be adjusted by changing the yarn weight and needle size. By choosing a bulkier yarn and larger needles, you can create larger mittens, while using a lighter weight yarn and smaller needles will result in smaller mittens. The pattern is written for one size, but modifications can be made to accommodate different hand sizes.
When selecting the size for your owl mittens, it’s important to consider the intended recipient’s hand measurements. You can use a measuring tape to measure the circumference of the hand and the length from the wrist to the tip of the longest finger. This will help you determine if the pattern needs to be adjusted to fit the recipient’s hands properly.
To help with sizing, I have provided a chart below with approximate measurements for different hand sizes. It is always a good idea to check the gauge before you start knitting to ensure that your finished mittens will fit correctly.
| Hand Size | Circumference (in) | Length (in) |
|---|---|---|
| Child | 5-6 | 5-6 |
| Teen/Small Adult | 6-7 | 6-7 |
| Medium Adult | 7-8 | 7-8 |
| Large Adult | 8-9 | 8-9 |
Note: These measurements are just a guide and may vary depending on the individual’s hand shape and personal preference. It’s always best to measure the recipient’s hand for a more accurate fit.
Remember, it’s important to check your gauge and adjust the pattern accordingly to ensure the best possible fit for your owl mittens. With a little customization, you’ll have a cozy and adorable pair of mittens that are perfect for anyone!
Instructions
Follow these step-by-step instructions to create your adorable owl mittens:
Materials:
- Worsted weight yarn in your preferred colors
- Size US 8 (5mm) double-pointed needles
- Tapestry needle for weaving in ends
- Stitch marker
Gauge:
With US 8 needles, 18 stitches and 24 rows = 4 inches in stockinette stitch
Abbreviations:
- K: knit
- P: purl
- St(s): stitch(es)
- K2tog: knit two stitches together
- M1L: make one left
- M1R: make one right
Instructions:
- Cuff:
- Cast on 32 stitches and distribute evenly on double-pointed needles
- Join in the round, being careful not to twist stitches
- Work in 2×2 ribbing (K2, P2) for 2 inches
- Switch to stockinette stitch and knit every round until piece measures 6 inches from cast-on edge
- Place a stitch marker at the beginning of the round
- Knit 15 stitches, M1R, place marker, knit to end of round
- Knit 1 round
- Knit 15 stitches, M1L, slip marker, knit to end of round
- Repeat these last 2 rounds 3 more times (40 stitches total)
- Transfer the 9 gusset stitches from the stitch holder back onto the needles
- Knit these 9 stitches and pick up 2 more stitches from the thumb opening
- Divide these 11 stitches onto 3 needles and join in the round
- Work in stockinette stitch for 1 inch or desired length
- Decrease round: K1, K2tog, knit to last 3 stitches, K2tog, K1
- Repeat the decrease round every other round until 3 stitches remain
- Break yarn, thread through remaining stitches, and fasten off
- Weave in all loose ends and block the mittens if desired
- Repeat the instructions to make the second mitten
Note:
If you prefer a smaller or larger size for your mittens, you can adjust the number of stitches and follow the same pattern.
Cuff
The cuff is the part of the mitten that covers your wrist and helps keep the mitten in place. In the owl mittens knitting pattern, the cuff is knitted in a ribbing stitch to provide a stretchy and comfortable fit. The ribbing stitch is created by alternating knit and purl stitches, which gives the cuff a textured look.
To create the cuff, you will need to cast on a certain number of stitches, depending on the size of the mitten. The number of stitches will typically be a multiple of 2 or 4 to accommodate the ribbing pattern. Once the stitches are cast on, you will continue to knit the ribbing stitch for a certain number of rows to achieve the desired cuff length.
The owl mittens knitting pattern suggests using a 1×1 ribbing stitch, which means you will alternate knitting one stitch and purling one stitch for each row. This type of ribbing creates a neat and tight cuff that hugs the wrist without being too constricting. It also allows for some stretch, which makes it easier to put the mittens on and take them off.
It is important to pay attention to the tension and gauge of your knitting when creating the cuff. The ribbing stitch should have a slight elasticity to ensure a snug fit. If the cuff is too loose, the mitten may slide down or feel insecure on the wrist. If it’s too tight, it may be uncomfortable to wear or restrict movement. Adjusting the tension or needle size can help achieve the right fit.
Once the cuff is complete, you will move on to knitting the main body of the mitten, which will include the owl pattern. The cuff serves as the foundation for the mitten and sets the tone for the rest of the knitting process. It is important to take your time and ensure the cuff is knitted accurately to ensure a well-fitting and comfortable mitten.
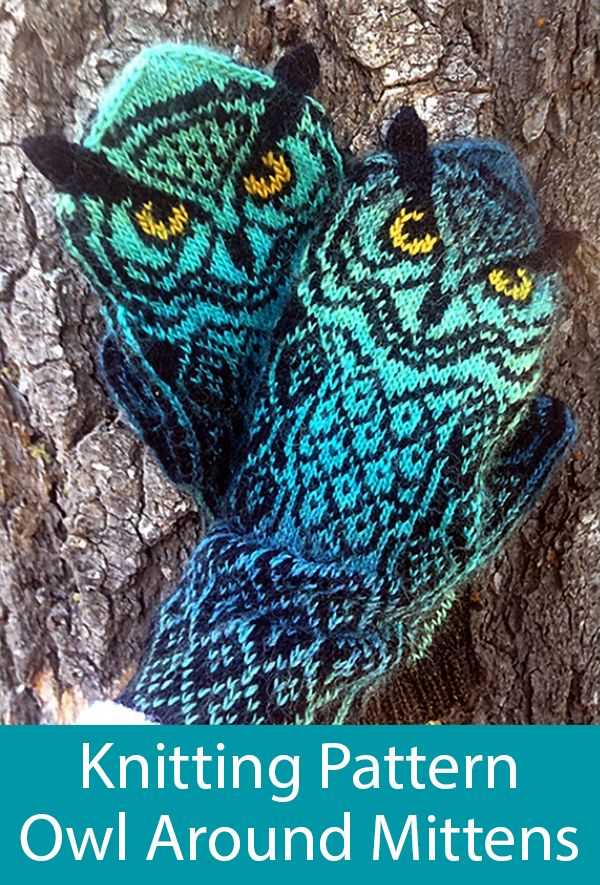
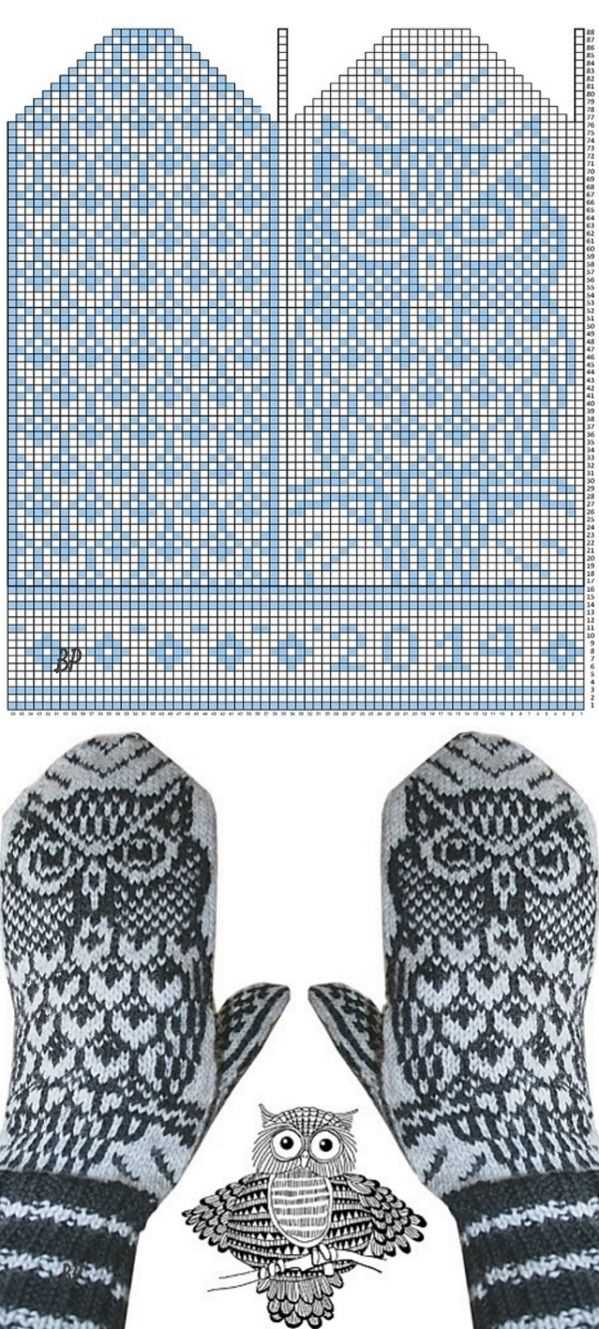
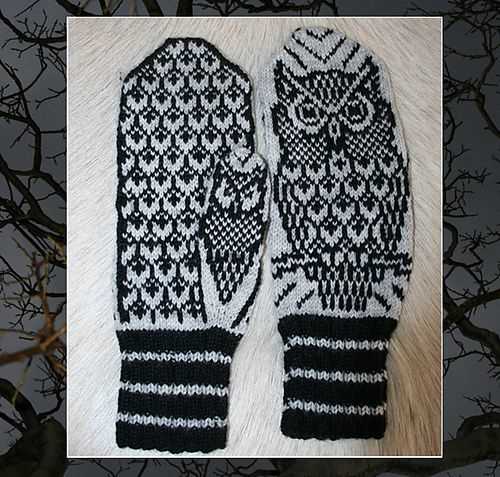
Owl Pattern
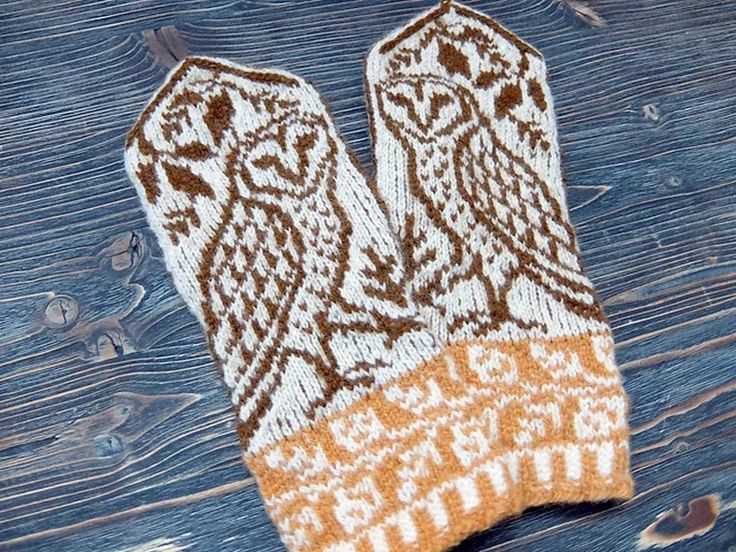
Owls are fascinating creatures, and with an owl pattern, you can create your very own knitted owl mittens. This adorable pattern features a charming owl design that adds a playful touch to your winter accessories.
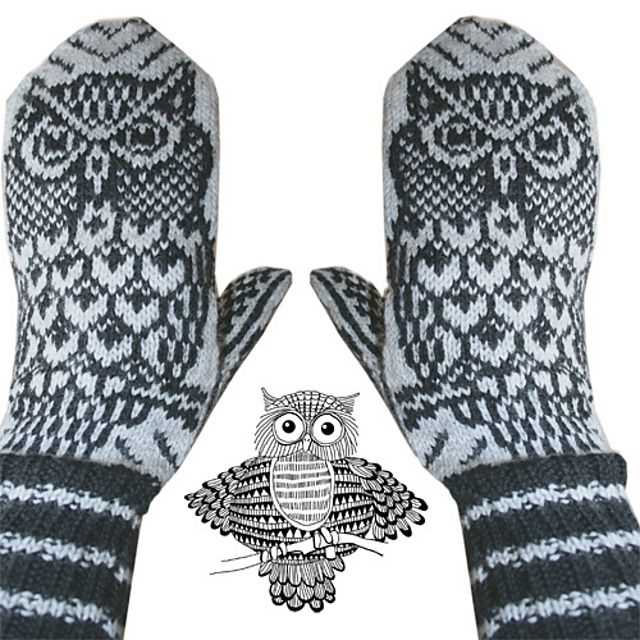
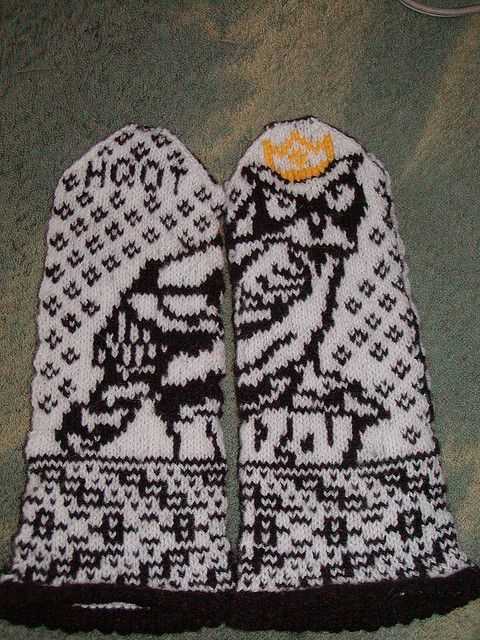
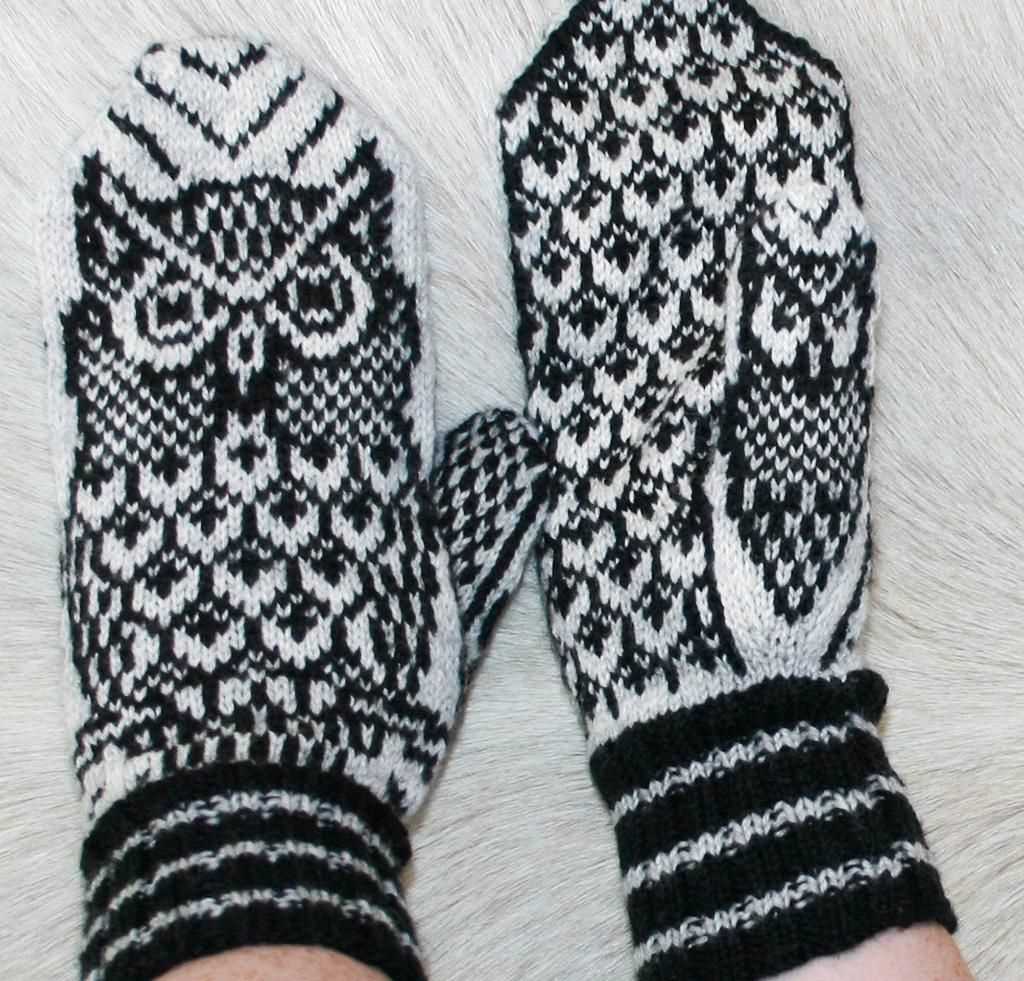
The owl pattern typically includes instructions for knitting mittens with an owl motif on the back of the hand. The design usually incorporates various stitches to create intricate details, such as the owl’s eyes, feathers, and beak. The pattern may also include colorwork techniques to bring the owl to life.
To begin knitting the owl mittens, you will need to gather your supplies, including the appropriate yarn, knitting needles, and any additional materials specified in the pattern. It’s important to choose yarn that is suitable for mittens to ensure warmth and durability.
The pattern will guide you through the steps of casting on, knitting the cuff, creating the thumb gusset, shaping the hand, and finishing off the mitten. When you reach the section for the owl motif, you will follow the chart or written instructions to create the owl design using the specified stitches and colors.
Knitting owl mittens can be a fun and rewarding project, especially for those who enjoy working on intricate patterns and designs. Once complete, you will have a unique pair of mittens that are sure to draw attention and admiration from others. So grab your knitting needles and get started on your own owl mittens today!
Thumb
The thumb is an essential part of the owl mittens knitting pattern. It is where the wearer’s thumb will go, allowing them to comfortably wear the mittens and have full use of their hands. Knitting the thumb requires careful attention to detail and precision to ensure that it is the perfect size and shape.
To knit the thumb, you will need to follow the specific instructions provided in the owl mittens knitting pattern. These instructions will guide you through the process of creating the thumb using the appropriate stitches and techniques. It is important to pay close attention to the pattern and follow it accordingly to achieve the desired results.
One common technique used when knitting the thumb is called “thumb gusset.” This technique involves increasing the number of stitches on either side of the thumb to create a wider area that will accommodate the wearer’s thumb. The thumb gusset is typically created by making yarn overs or knitting into the front and back of stitches to add additional stitches.
After knitting the thumb, it is important to try it on and check for proper fit. The thumb should be snug but not too tight, allowing for comfortable movement and flexibility. If the thumb is too tight, you may need to adjust the number of stitches or the size of your knitting needles. It is always a good idea to try on the thumb before moving on to the rest of the mitten to ensure a perfect fit.
Finishing
Once you have completed knitting your owl mittens, it’s time to finish them off and make them ready to wear. Follow these steps for a polished final product:
1. Weave in ends: Use a yarn needle to weave in any loose ends of yarn. This will give your mittens a neater and more professional look.
2. Block your mittens: Wet blocking or steam blocking your mittens will help improve their shape, size, and overall appearance. Follow the blocking instructions specific to the yarn you used.
3. Sew on buttons: If your owl mittens have button eyes or other decorative buttons, securely sew them onto the mittens using a matching thread. Make sure they are centered and attached tightly.
4. Add any desired embellishments: If you want to add any additional embellishments, such as embroidery or appliques, now is the time to do so. Get creative and personalize your mittens!
5. Enjoy your finished owl mittens: Once all the finishing touches are done, your owl mittens are ready to be worn or gifted. Show off your knitting skills and keep your hands warm in style!
In conclusion, knitting owl mittens can be a fun and rewarding project. With a cute and whimsical design, these mittens are sure to bring a smile to anyone’s face. Whether you’re knitting them for yourself or someone else, following the pattern and finishing them off properly will result in a pair of cozy and adorable owl mittens.