
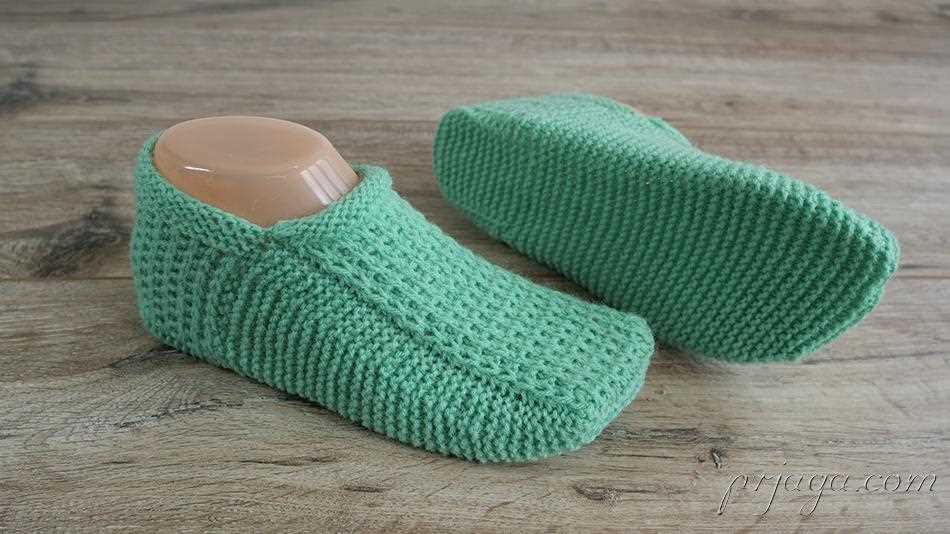
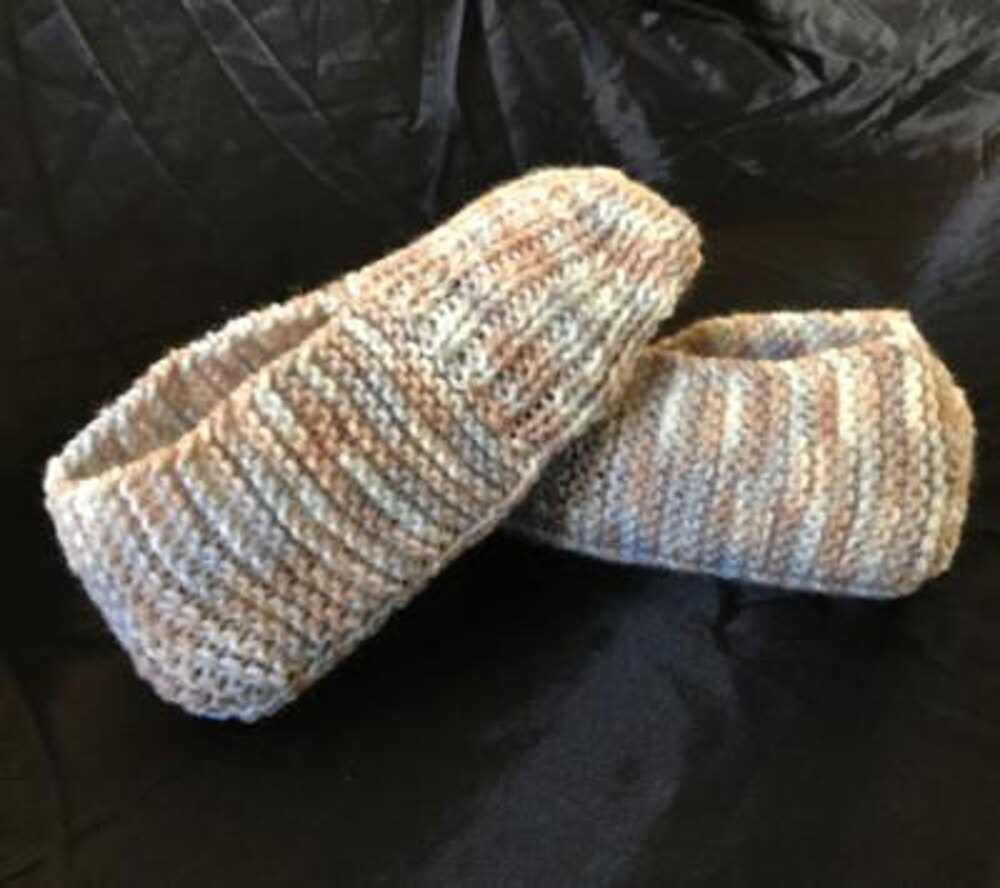
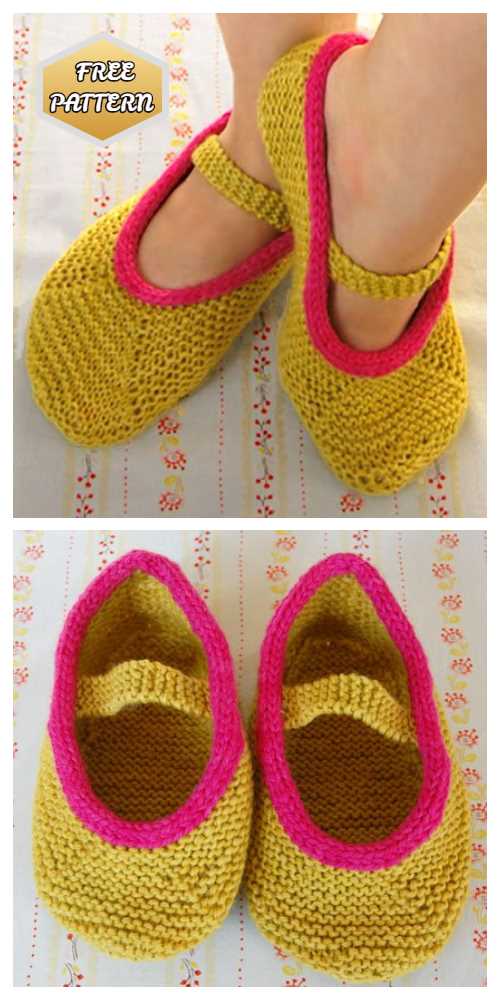
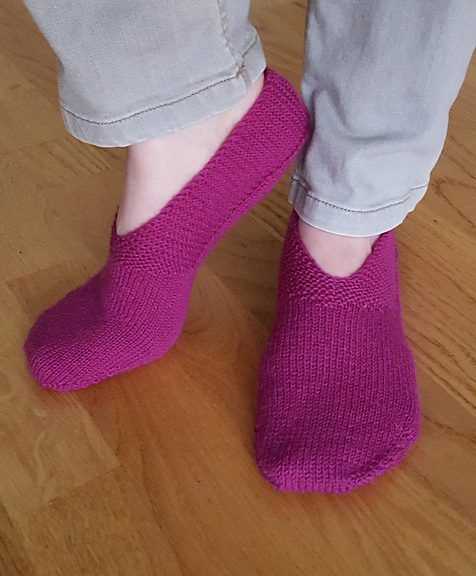
Looking for a fun and cozy knitting project to get started with? Why not try your hand at knitting a pair of slippers? Not only are slippers a practical item to have around the house, but they also make for a great gift idea. Whether you are a knitting beginner or looking for a quick and easy project, this beginner knitted slipper pattern is perfect for you!
This pattern is designed with beginners in mind, so even if you have never picked up knitting needles before, don’t worry! With step-by-step instructions and clear illustrations, you will be able to create a pair of cozy slippers in no time. These slippers are knit using basic stitches like knit and purl, making it a great project to practice and improve your knitting skills.
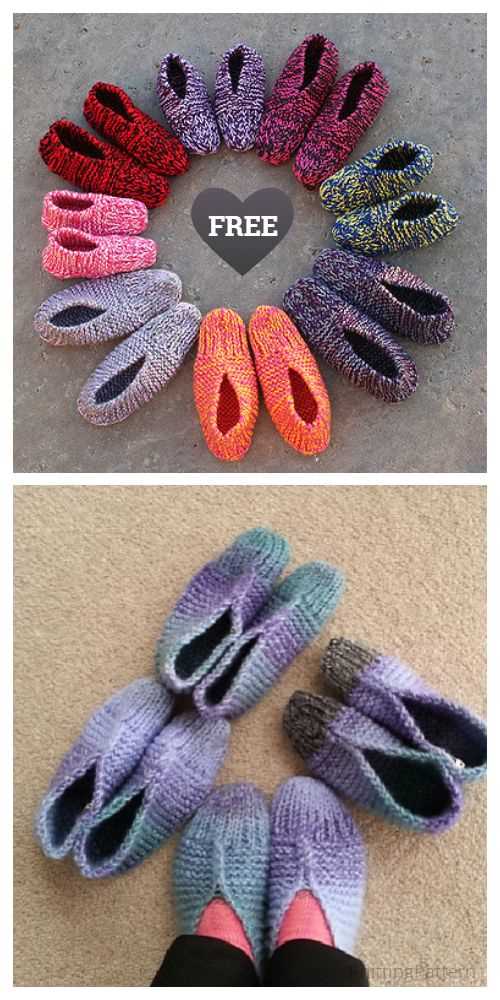
Not only are these slippers simple to make, but they are also customizable to suit your style. You can choose your favorite color of yarn and even add some decorative touches like buttons or pom-poms. With this pattern, you can create a pair of slippers that are truly unique and special.
Beginner Knitted Slipper Pattern
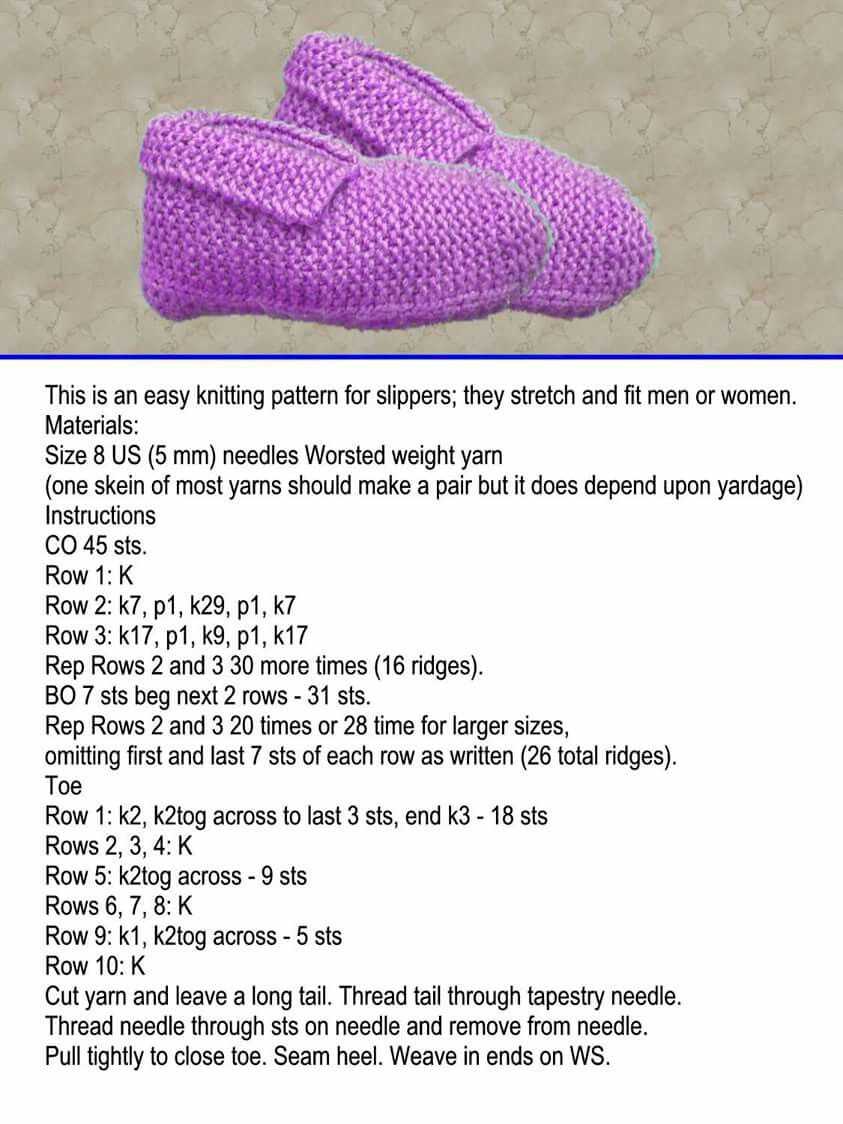
If you’re new to knitting and want to try making your own slippers, this beginner knitted slipper pattern is perfect for you. With just a few basic stitches and techniques, you’ll have a cozy and comfortable pair of slippers in no time.
Materials needed:
- Worsted weight yarn
- Size 8 knitting needles
- Tapestry needle
- Scissors
Instructions:
- Cast on 30 stitches using the long tail cast on method.
- Knit every row until the piece measures 6 inches from the cast on edge. This will be the sole of the slipper.
- Decrease 1 stitch at each end of the next row.
- Continue knitting every row until the piece measures 8 inches from the cast on edge.
- On the next row, knit 15 stitches, then bind off the next 20 stitches. Knit the remaining 15 stitches. This will create the opening for the foot.
- Knit every row until the piece measures 14 inches from the cast on edge.
- Decrease 1 stitch at each end of the next row.
- Continue knitting every row until the piece measures 16 inches from the cast on edge.
- Bind off all stitches.
- Repeat steps 1-9 to make the second slipper.
Once you have finished knitting both slippers, use the tapestry needle to sew the edges of the opening together. Make sure to weave in any loose ends, and your slippers are ready to be worn!
With this beginner knitted slipper pattern, you can create a cozy pair of slippers that are perfect for lounging around the house or giving as a gift. So grab your knitting needles and get started on this fun and simple project!
Choosing the Right Yarn and Needles
When it comes to knitting slippers, choosing the right yarn and needles is essential to achieve the desired outcome.
Firstly, consider the type of yarn you want to use. The pattern may recommend a specific type, such as worsted weight or bulky yarn, which will affect the size and thickness of the slippers. You should also choose a yarn that is comfortable against the skin, as slippers are meant to be worn for extended periods of time.
Next, select the appropriate needle size for your project. The needle size can determine the overall size and tension of your knitted fabric. If you want a tighter and denser slipper, choose smaller needles. Conversely, if you prefer a looser and more flexible slipper, opt for larger needles.
Furthermore, consider the type of needle you want to use. Straight needles are commonly used for flat knitting, while double-pointed needles are ideal for knitting in the round. Circular needles can also be used for both flat and circular knitting, offering convenience and flexibility.
Once you have chosen your yarn and needles, it’s a good idea to make a gauge swatch before starting your project. This will help ensure that your tension and stitches match the pattern’s requirements, resulting in a properly sized slipper.
Overall, selecting the right yarn and needles is crucial for creating comfortable and well-fitting slippers. Take the time to consider the pattern’s recommendations, as well as your personal preferences, to make the best choices for your project.
Gauge and Measurements
Before starting any knitting project, it is important to take proper measurements and check the gauge to ensure a good fit. For the beginner knitted slipper pattern, you will need to measure your foot and determine the gauge before casting on.
Measurements:
- Foot Length: Measure from the tip of the longest toe to the back of the heel.
- Foot Circumference: Measure around the widest part of the foot.
- Ankle Circumference: Measure around the narrowest part of the ankle.
These measurements will help you determine the size of the slipper you need to knit. It is also important to consider the stretchiness of the yarn you are using and adjust the measurements accordingly. For example, if you are using a yarn that has a lot of stretch, you may want to knit a size smaller to ensure a snug fit.
Gauge:
To check the gauge, knit a swatch using the recommended needles and yarn specified in the pattern. The pattern will specify the number of stitches and rows that should be knit in a 4-inch square. Use a ruler or a tape measure to measure your swatch, counting the number of stitches and rows within the 4-inch area.
If your gauge matches the pattern, you can proceed with confidence knowing that your finished slippers will have the correct measurements. If your gauge does not match, try changing needle sizes and knitting another swatch until you achieve the correct gauge. Remember, gauge is crucial for achieving the right fit, so take the time to measure and adjust accordingly.
Cast-On and Knitting the Sole
When starting to knit a pair of slippers, it is important to choose the right cast-on method to ensure a snug and comfortable fit. There are various cast-on techniques to consider, but for beginners, the long-tail cast-on method is recommended. This method creates a stretchy edge that will allow the slipper to fit easily over the foot. To cast on using the long-tail method, first, make a slipknot and place it on one of the knitting needles. Then, hold the needle with the slipknot in your right hand and the other empty needle in your left hand.
To begin knitting the sole of the slipper, start by casting on the required number of stitches. For this pattern, you will typically cast on around 20-30 stitches, depending on the size of the slipper. Once the stitches are cast on, make sure they are evenly distributed on both needles. This will ensure that the sole will be symmetrical and well-fitted.
After casting on, the next step is to knit the sole of the slipper. To do this, hold the needle with the slipknot in your right hand and the other empty needle in your left hand. Insert the right needle into the first stitch on the left needle, going from left to right. Then, bring the working yarn over the right needle and towards you, creating a loop. Use the right needle to pull this loop through the first stitch, transferring the stitch from the left needle to the right needle. Repeat this process for each stitch until all the stitches have been transferred to the right needle.
Key phrases:
- Cast-on method
- Long-tail cast-on
- Stretchy edge
- Slipknot
- Knitting needles
- Casting on stitches
- Evenly distributed
- Symmetrical sole
- Knitting the sole
- Working yarn
Adding the Toe and Heel
Once you have completed knitting the sole of the slipper, it’s time to add the toe and heel sections. These sections are important for providing extra cushioning and support to the foot.
1. Toe Section
To start the toe section, you will need to pick up stitches along the sides of the sole. This can be done using a knitting needle or crochet hook. The number of stitches you pick up will depend on the size of the slipper and the desired width of the toe section. Once you have picked up the stitches, you can start knitting in the desired stitch pattern, such as stockinette stitch or ribbing.
2. Heel Section
The heel section is typically worked separately from the toe section. To begin, you will need to divide the stitches on the sole evenly between two needles. This will create a gap in the middle for the heel section. Using the same needle or crochet hook, pick up stitches along the sides of the heel gap. Again, the number of stitches you pick up will depend on the size of the slipper and the desired width of the heel section. Once you have picked up the stitches, you can start knitting in the desired stitch pattern.
It is important to follow the pattern instructions for the specific slipper pattern you are using, as the construction of the toe and heel sections may vary. Once you have completed knitting the toe and heel sections, you can continue with the rest of the slipper pattern, such as shaping the foot and adding any decorative elements.
Creating the Upper Part of the Slipper
Once you have finished knitting the sole of the slipper, it’s time to move on to the upper part. This is where the slipper will actually cover your foot, so it’s important to pay attention to the instructions and take accurate measurements.
Start by picking up stitches along the edges of the sole. Using a crochet hook or knitting needle, insert it into the first stitch on the edge of the sole and loop the yarn through, creating a new stitch. Repeat this process along the entire edge, picking up the specified number of stitches to match the pattern.
Step 1: With the right side of the slipper facing you, insert your crochet hook or needle into the first stitch on the left edge of the sole and loop the yarn through.
Step 2: Continue picking up stitches along the left edge, making sure to maintain an even tension.
Step 3: Repeat the same process along the right edge of the sole, picking up the specified number of stitches.
Once you have picked up all the necessary stitches, you can proceed with the knitting pattern for the upper part of the slipper. This may involve working in a different stitch pattern or incorporating shaping techniques such as increases or decreases. Follow the instructions carefully to ensure that you achieve the desired shape and fit for the slipper.
Continue knitting the upper part of the slipper according to the pattern, making any necessary adjustments for sizing or personal preference. Remember to check your gauge and measure your foot as you go along to ensure that the slipper will fit snugly and comfortably.
Shaping the Toe and Decreasing Stitches
When knitting slippers, one of the key aspects is shaping the toe to create a comfortable and snug fit. This is achieved through a series of decreasing stitches. Decreasing stitches is the process of reducing the number of stitches on your needles, creating a tapering effect towards the toe of the slipper.
To start shaping the toe, you will need to follow the pattern’s instructions for how many stitches to decrease and at what intervals. Typically, this involves knitting two stitches together (known as K2tog) at regular intervals. This can be done by inserting the right needle through the front of the next two stitches on the left needle, and knitting them together as if they were a single stitch.
As you continue knitting, you will notice the toe of your slipper gradually taking shape. The stitch count on your needles will decrease, creating a tapered effect. It is important to follow the pattern’s instructions carefully to ensure that you decrease the correct number of stitches and at the specified intervals. This will ensure that the slipper fits properly when finished.
Some patterns may also incorporate other decreasing techniques, such as slipping stitches or knitting two stitches together through the back loop. These techniques can add texture or decorative elements to the toe of the slipper. Make sure to refer to the pattern instructions for specific details on how to execute these techniques.
Continuing to Knit the Foot
Now that you have completed the heel of the slipper, it’s time to continue knitting the foot. Follow the pattern instructions to transition smoothly from the heel to the foot section.
Row 1: Knit across the row until you reach the center stitch marker, then place it on a separate stitch holder or piece of scrap yarn. This will mark the beginning of the instep.
Row 2: Continue knitting across the row, working the stitches as they appear.
At this point, the slipper should start to take shape as you work on shaping the foot. Follow the specific instructions provided in the pattern to ensure proper fit and sizing.
Additional rows: Depending on the pattern, you may need to work additional rows in stockinette stitch or other specified stitch patterns. Continue following the instructions provided, taking care to maintain an even tension and correct stitch count.
As you knit the foot, remember to periodically try the slipper on to check for fit. This will help you make any necessary adjustments and ensure a comfortable finished product.
Decreasing stitches: In some patterns, you may be instructed to decrease stitches gradually as you continue knitting the foot. This is done to shape the slipper and create a snug fit around the toes. Follow the specific instructions provided in the pattern for when and how to decrease stitches.
Continue knitting the foot section until you have reached the desired length or until the pattern instructs you to stop. Make sure to keep track of your row count to ensure that both slippers are the same length.
Finishing the Slipper
Once you have finished knitting the slipper, it’s time to finish it off and make it ready to wear. Here are the steps to follow:
Step 1: Sew up the seams
Using a yarn needle and the yarn tails from the beginning and end of your work, sew up the seams of the slipper. Start at the toe and sew up the sides using a whipstitch or mattress stitch. Make sure to leave an opening at the top for your foot to slide in.
Step 2: Create the heel
To create the heel of the slipper, fold the back of the slipper in half so that the edges meet. Sew them together using the same stitch you used for the side seams. This will create a pocket for your heel to rest in.
Step 3: Add a sole
You can add a sole to your slipper to make it more durable and comfortable to walk in. Cut out a piece of felt or other sturdy fabric in the shape of your slipper’s sole. Sew it onto the bottom of the slipper using a whipstitch or blanket stitch. This will protect your knitted fabric and provide some cushioning.
Step 4: Finishing touches
Finally, trim any excess yarn or loose threads, and give your slipper a gentle block to shape it and smooth out any wrinkles. You can also add any desired embellishments, such as pom poms or buttons, to personalize your slipper.
Congratulations, you have finished your knitted slipper! Now you can put it on and enjoy the cozy comfort of your handmade creation.
Blocking the Slipper

Blocking is an important step in the finishing process of knitting projects, including slippers. It helps to shape and size the slipper, as well as to even out any uneven stitches or edges. Here are the steps to properly block your knitted slipper:
1. Gather your materials: You will need a clean towel or blocking mat, rust-proof pins or T-pins, and a spray bottle filled with water. Make sure your slippers are clean and dry before beginning the blocking process.
2. Wet your slipper: Use the spray bottle to dampen your slipper evenly. Be careful not to saturate it, as excessive moisture can damage the fibers. The slipper should be damp, but not soaking wet.
3. Shape your slipper: Gently stretch and shape your slipper to the desired size and shape. Pay attention to the toe and heel areas, making sure they are properly shaped. Use your hands to smooth out any wrinkles or unevenness in the fabric.
4. Pin your slipper: Place rust-proof pins or T-pins along the edges of the slipper to hold it in place. Make sure the pins are evenly spaced and secure, but not too tight that they distort the fabric. You can also use blocking wires or a blocking mat to help achieve the desired shape and size.
5. Allow the slipper to dry: Let your slipper dry completely before removing the pins. This can take anywhere from a few hours to overnight, depending on the humidity and air circulation. Avoid putting your slipper in direct sunlight or using heat sources, as this can cause the fibers to shrink or warp.
Once your slipper is dry and the pins are removed, it should be nicely shaped and ready to wear. Blocking not only enhances the appearance of your slipper but also helps it to fit better and maintain its shape over time. It’s a worthwhile step to ensure your knitted slippers look and feel their best!
Adding Non-Slip Soles to the Slipper
If you want to make your knitted slippers safer and more durable, you can add non-slip soles. Non-slip soles can prevent slipping accidents on smooth surfaces and provide extra cushioning and protection to the bottoms of the slippers. There are several methods you can use to add non-slip soles to your knitted slippers.
1. Sew-on Non-Slip Soles: One simple method is to sew on pre-made non-slip soles. These soles are usually made of rubber or silicone and have a textured surface that provides traction. Measure the dimensions of the slipper sole, cut the non-slip sole to the same size, and sew it onto the bottom of the slipper using a strong thread. Make sure to sew around the edges for secure attachment.
2. Liquid Non-Slip Coating: Another option is to apply a liquid non-slip coating to the bottom of the slippers. This type of coating is usually made of a rubber-like material that dries to a textured finish. Apply the coating evenly onto the slipper sole, following the manufacturer’s instructions. Allow it to dry completely before wearing the slippers.
3. Non-Slip Gripper Pads: You can also use non-slip gripper pads, which are adhesive-backed pads with a textured surface. Cut the pads to fit the bottom of the slipper, remove the adhesive backing, and press them firmly onto the sole. Make sure to overlap the gripper pads slightly for complete coverage.
Conclusion:
Adding non-slip soles to your knitted slippers is a great way to enhance their functionality and make them safer to wear. Whether you choose to sew on pre-made soles, apply a liquid coating, or use adhesive-backed gripper pads, these methods can provide the extra traction and protection you need on slippery surfaces. Experiment with different options to find the one that works best for you and enjoy your cozy and slip-resistant knitted slippers!