
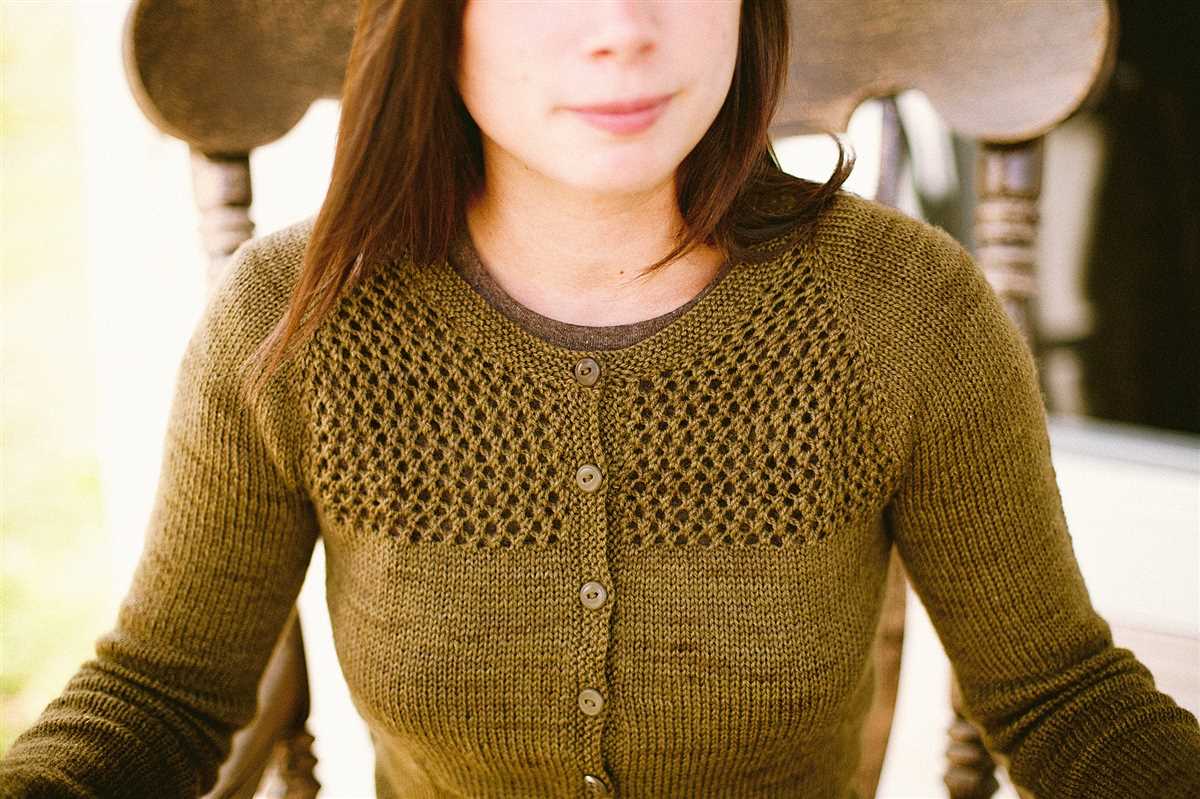
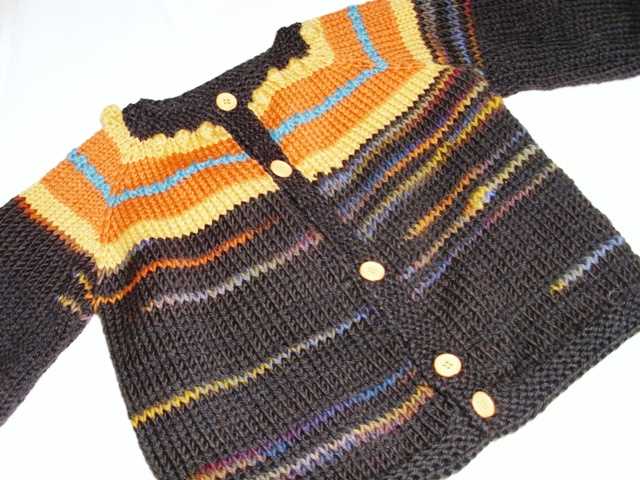
If you are a fan of knitting, then you know that there is nothing quite like the satisfaction of creating your own cozy cardigan. Knitting a top-down cardigan is a popular technique that allows you to knit the sweater seamlessly from the top down, starting at the neckline and working your way down to the bottom. In this article, we will explore a top-down knit cardigan pattern that is perfect for both beginners and experienced knitters.
One of the advantages of a top-down knit cardigan pattern is that it allows you to try on the garment as you go, ensuring a perfect fit. You can easily make adjustments to the length, width, and shaping of the cardigan by simply trying it on and making modifications as needed. This pattern also eliminates the need for tedious seaming, as the sweater is knit in one piece.
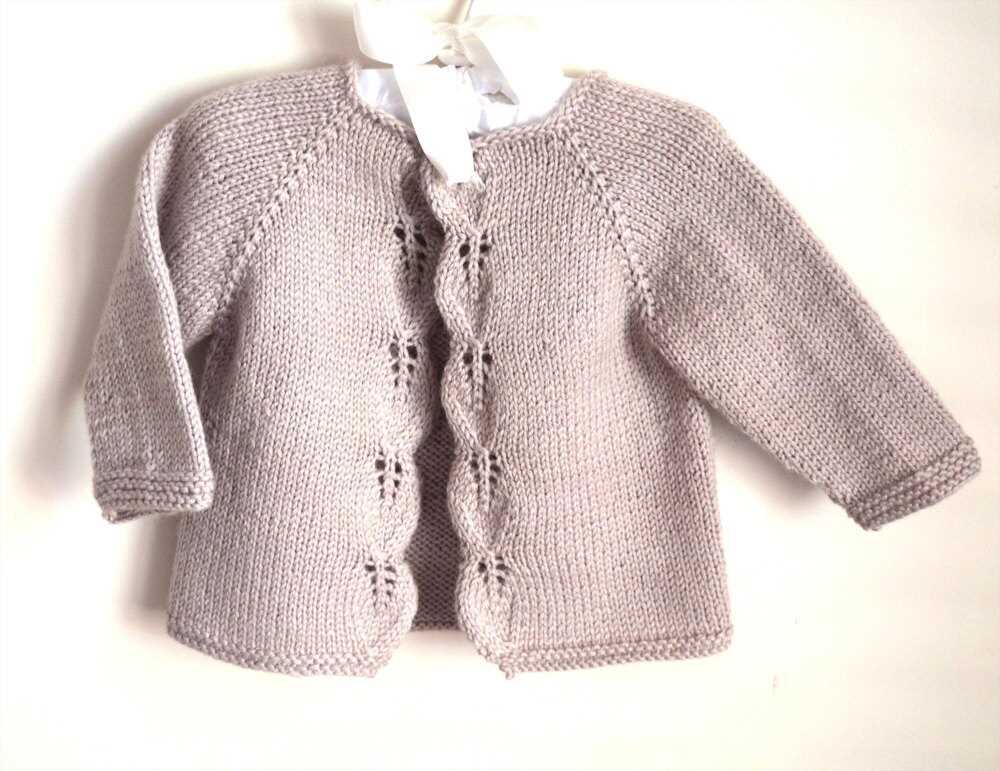
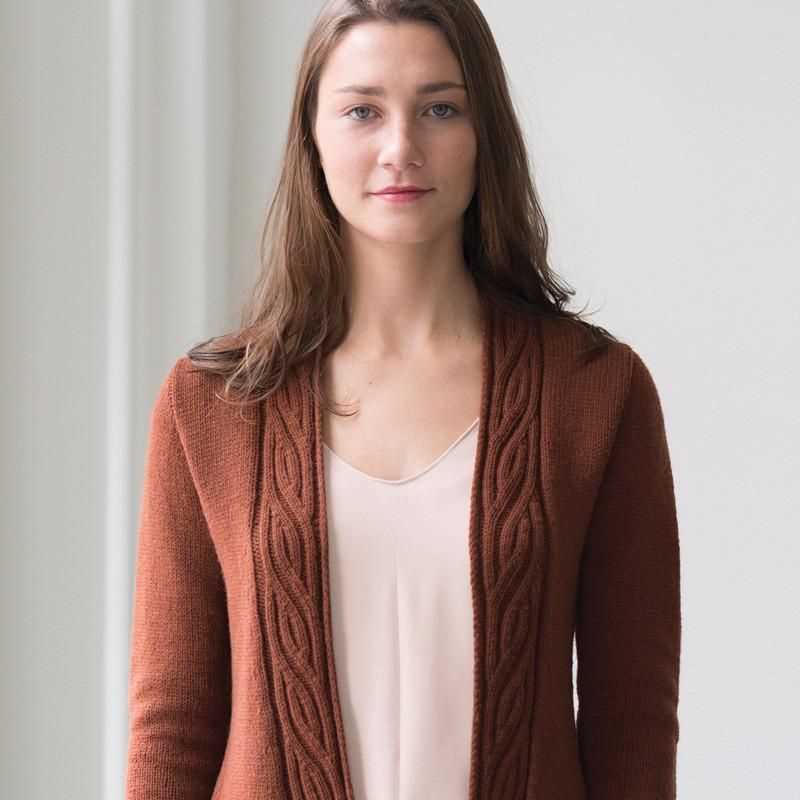
The top-down knit cardigan pattern we will be discussing features a classic v-neckline and a simple yet elegant cable pattern down the front. The pattern includes detailed instructions for each step, making it suitable for knitters of all skill levels. Whether you are a beginner looking to take on your first cardigan project or an experienced knitter looking for a versatile and timeless design, this top-down cardigan pattern is sure to become a favorite in your knitting collection.
Understanding the Basics of Top Down Knitting
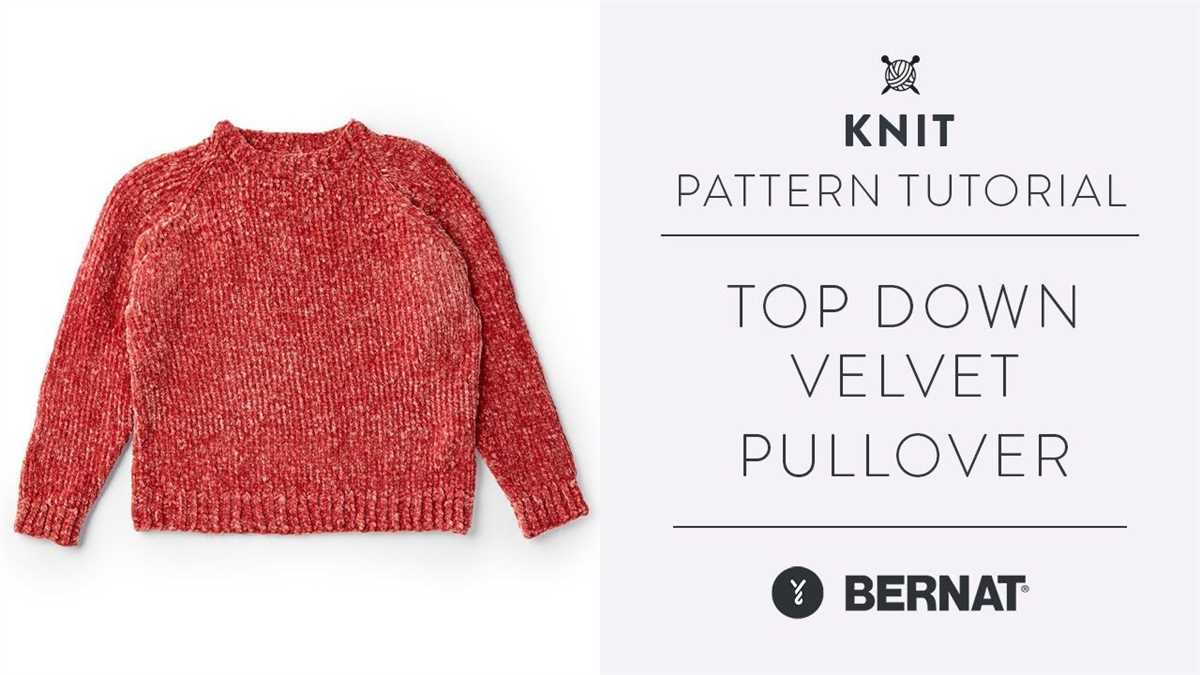
Top down knitting is a popular technique used to create seamless garments, including cardigans. Unlike traditional knitting methods that involve casting on stitches at the bottom and working upwards, top down knitting starts at the neckline and progresses to the hemline. This approach allows for greater flexibility in shaping the garment, as well as the ability to try it on as you go to ensure the perfect fit.
When starting a top down knit cardigan, the first step is to cast on the desired number of stitches for the neckline. This can be done using a variety of methods, such as the long-tail cast on or the provisional cast on. Once the stitches are cast on, they are divided onto multiple needles or placed on a circular needle to form a large loop.
To create the yoke of the cardigan, increases are made after a certain number of rows. This helps to shape the garment and accommodate the shoulders. Increases are typically made using techniques such as yarn overs, knit front and back (kfb), or make one (m1) stitches. The number and frequency of increases will depend on the desired fit and style of the cardigan.
As the yoke of the cardigan is worked, additional shaping may be introduced to create the armholes and neckline. This is usually done by binding off a certain number of stitches at the underarm and/or creating short rows to shape the back neck. These shaping techniques help to ensure a comfortable and well-fitting garment.
Once the yoke and shaping are complete, the body and sleeves of the cardigan are worked in separate sections. Stitches for each section are typically placed on separate circular needles or held on waste yarn until needed. The body is worked in a continuous spiral, while the sleeves are usually worked flat or in the round, depending on the desired style.
When all sections of the cardigan are complete, they are joined together to create the finished garment. This can be done using a variety of techniques, such as grafting, seaming, or picking up stitches. Once the cardigan is assembled, any remaining finishing touches, such as collar or button bands, can be added to complete the look.
Key Takeaways:
- Top down knitting starts at the neckline and progresses to the hemline
- Increases are made to shape the yoke and accommodate the shoulders
- Additional shaping may be introduced for armholes and neckline
- The body and sleeves are worked separately and joined together at the end
Choosing the Right Yarn
When it comes to knitting a top down cardigan, choosing the right yarn is crucial. The type of yarn you choose will impact the overall look, feel, and drape of the finished garment. It’s important to consider factors such as fiber content, weight, and texture when selecting your yarn.
Fiber Content: The fiber content of the yarn will determine its characteristics and properties. For a warm and cozy cardigan, you might opt for a wool or alpaca blend. If you prefer a lighter and more breathable fabric, cotton or linen can be good choices. Consider the season and climate in which you’ll be wearing the cardigan to help guide your decision.
Weight:
Weight: The weight of the yarn refers to its thickness or gauge. For a top down cardigan, you’ll want to choose a yarn that matches the pattern’s recommended gauge. This ensures that your finished garment will have the correct fit and proportions. The pattern should specify the recommended gauge and provide guidance on the appropriate yarn weight to use.
Texture: The texture of the yarn can play a role in the overall look and feel of the cardigan. Smooth and tightly spun yarns will give a more polished and refined appearance, while yarns with texture or slubs can create a more casual and rustic look. Consider the style and aesthetic you’re aiming for when selecting the yarn’s texture.
Once you’ve considered these factors, it’s also a good idea to swatch with your chosen yarn to ensure that it achieves the desired gauge and produces a fabric that you’re happy with. Taking the time to choose the right yarn will result in a top down cardigan that you’ll love wearing for years to come.
Selecting the Appropriate Needle Size
When it comes to knitting a top-down cardigan, selecting the appropriate needle size is crucial to achieving the desired fit and gauge. The needle size determines the size of the stitches and ultimately affects the size of the finished garment. It is important to carefully consider the pattern instructions and make swatches to ensure the right needle size is chosen.
Understanding the Pattern
Before selecting the needle size, it is important to thoroughly read and understand the pattern instructions. Look for any specific recommendations or requirements regarding the needle size. The pattern may suggest a range of needle sizes depending on the desired fit and gauge. Pay attention to any notes or explanations provided by the pattern designer, as they may offer valuable insights into the intended fabric and drape of the cardigan.
Making Swatches
To determine the appropriate needle size, it is recommended to make swatches. Swatches are small test pieces that allow knitters to measure their gauge and check if it matches the pattern’s requirements. Follow the pattern instructions to create a swatch using the recommended needle size or a size that you think might be appropriate based on the pattern. After completing the swatch, measure the number of stitches and rows per inch using a ruler or gauge tool. Compare these measurements to the pattern’s gauge requirements to determine if the needle size needs to be adjusted.
Considerations for Fit and Comfort
In addition to achieving the correct gauge, the needle size also plays a role in the fit and comfort of the cardigan. Using a larger needle size will create larger stitches and a looser fabric, resulting in a drapey and relaxed fit. Conversely, using a smaller needle size will create smaller stitches and a denser fabric, resulting in a more fitted and structured garment. Consider your personal preference for fit and the intended style of the cardigan when selecting the needle size.
Consulting with Other Knitters
If you are unsure about the appropriate needle size for your top-down cardigan, consider consulting with other experienced knitters or joining knitting communities online. They can provide guidance based on their own knitting experiences and help you make an informed decision. Remember, every knitter’s gauge may be slightly different, so it is essential to find what works best for you and your specific project.
Casting on and Creating the Neckline
When beginning your top-down knit cardigan, the first step is to cast on the required number of stitches. This will vary depending on the size and desired fit of your cardigan. You can use any cast-on method you prefer, such as the long-tail cast-on or the cable cast-on. Make sure to leave a long enough tail for later steps.
Once you have cast on your stitches, you will begin creating the neckline. To do this, you will work in a combination of knit and purl stitches to establish the ribbing pattern. The number of stitches you work in this ribbing pattern will determine the width of the neckline.
For example, you might start by working a few rows of k2, p2 ribbing across the first stitches. This creates a neat and stretchy edge for the neckline. As you continue knitting, you can switch to a different ribbing pattern, such as k1, p1 or k3, p2, to add visual interest to the neckline.
Shaping the Shoulders and Sleeves
The shaping of the shoulders and sleeves is an important step in creating a well-fitting cardigan. This is where you will determine the width and slope of the shoulders, as well as the length and width of the sleeves. It is essential to follow the pattern instructions carefully to achieve the desired fit.
To shape the shoulders, you will typically be instructed to bind off a certain number of stitches at each end of the row. This creates a gradual slope from the neck to the outer edges of the shoulders. The number of stitches to bind off will depend on the size and style of the cardigan. Using markers can be helpful to keep track of where to begin and end the bind off.
The sleeve shaping usually begins after the shoulder shaping is complete. You may be instructed to decrease a certain number of stitches at regular intervals to create the desired width for the arm. This can be achieved by working a decrease stitch, such as a knit-two-together or a slip-slip-knit, at the specified points in the row.
Example:
- Row 1: Knit to 3 stitches before marker, k2tog, k1, slip marker, knit to 3 stitches before end of row, ssk, k1.
- Row 2: Purl.
- Repeat these two rows until the specified number of stitches have been decreased.
Once the sleeve width is achieved, you will continue to work in the pattern until the desired sleeve length is reached. This can vary depending on the style of the cardigan and personal preference. Some patterns may instruct you to work the sleeves to a certain measurement, while others may specify a certain number of rows.
Remember to always check your gauge and adjust your knitting as necessary to ensure a proper fit. Following the pattern instructions and taking your time with the shaping will help you create a cardigan that fits comfortably and looks great.
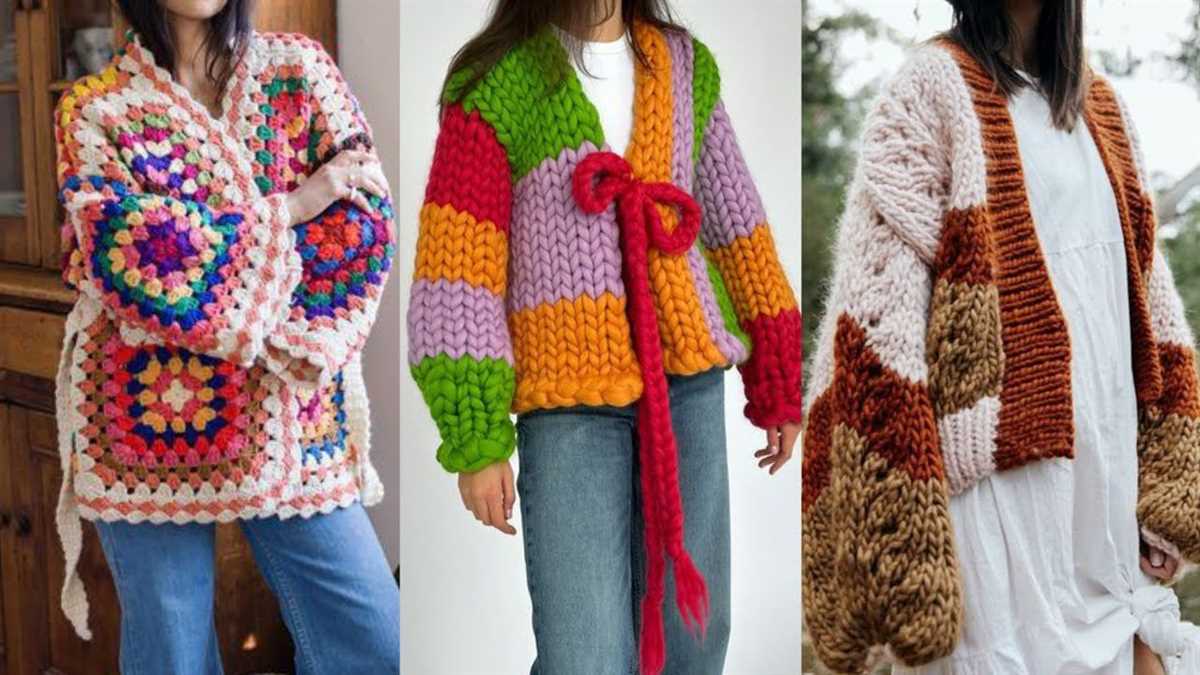
Deciding on a Design for Your Cardigan
When it comes to knitting a top-down cardigan, one of the first decisions you’ll need to make is the design. There are countless options available, and it can be overwhelming to choose the perfect one for your project. However, with a bit of thought and consideration, you can find a design that will suit your style and knitting skills.
Consider the Style: Before selecting a cardigan pattern, it’s important to think about the overall style you’re aiming for. Do you prefer a classic, timeless design, or are you looking for something more modern and trendy? Consider the length, neckline, and sleeve options that best reflect your personal style.
Evaluate Your Skills: Another crucial factor to consider when choosing a cardigan design is your knitting skills. Some patterns may require more advanced techniques, such as lace or cable knitting, while others are more suitable for beginners. Be honest with yourself about your skill level to ensure that you choose a pattern that you’ll be able to complete successfully.
Look for Versatility: If you’re investing time and effort into knitting a cardigan, it’s worth considering its versatility. Look for a design that can be easily dressed up or down, allowing you to wear it in a variety of occasions and settings. Additionally, think about the colors and yarn weights that will make it a versatile addition to your wardrobe.
Explore Different Sources: There are numerous sources where you can find cardigan patterns, such as knitting magazines, books, and online platforms. Take the time to explore different sources and browse through various patterns to get a sense of the different styles and options available. You might even find inspiration from other knitters’ finished projects.
Consider Your Body Type: When choosing a cardigan design, it’s important to consider your body type and how the specific style will flatter your figure. Certain necklines, lengths, and shapes can accentuate or minimize different body features. Take measurements and choose a design that will highlight your best features and make you feel confident and comfortable.
Make a Swatch: Once you’ve narrowed down your options and chosen a cardigan pattern, it’s a good idea to make a swatch before diving into the entire project. This will help you ensure that you’ve chosen the right yarn and needle size and that your gauge matches the pattern’s requirements. Making a swatch will also give you a chance to assess if you enjoy working with the specific stitch pattern or if it’s too challenging for your knitting style.
By taking these factors into consideration and carefully selecting a design for your cardigan, you’ll be on your way to creating a beautiful and functional garment that you’ll be proud to wear and show off.
Exploring Different Stitch Patterns
When it comes to knitting, there are countless stitch patterns that can be used to create unique and beautiful designs. Whether you’re a beginner or an experienced knitter, exploring different stitch patterns can add variety and excitement to your projects.
One popular stitch pattern is the seed stitch. This pattern involves alternating knit and purl stitches to create a textured fabric with a subtle, uniform look. It’s great for adding depth and interest to simple designs, such as scarves or hats. The seed stitch is also reversible, making it a versatile choice for projects that will be seen from both sides.
Another stitch pattern to try is the cable stitch. This pattern involves crossing stitches over each other, creating the appearance of twisted ropes or cables. Cable knitting can be a bit more complex, but the results can be stunning. Cable stitch patterns can be used to add visual interest to garments like cardigans or sweaters, or to create intricate designs on accessories like scarves or mittens.
Elongated stitches are another fun stitch pattern to experiment with. These stitches involve knitting or purling into the same stitch multiple times, creating a longer stitch that stands out from the fabric. Elongated stitches can be used to create lacy or openwork designs, or to add visual interest to plain areas of a project.
- Try a honeycomb stitch for a textured and visually appealing pattern.
- Experiment with a rib stitch for a stretchy and structured fabric.
- Consider a lace stitch for an elegant and delicate design.
- Explore a popcorn stitch for a raised and textured effect.
With so many options to choose from, exploring different stitch patterns can be a fun and creative way to enhance your knitting projects. Whether you’re looking to add texture, create intricate designs, or simply try something new, there’s a stitch pattern out there for every knitting enthusiast.
Adding Embellishments and Colorwork
Once you have completed the main body of your top-down knit cardigan, you may want to add some embellishments or colorwork to enhance the overall design. There are several ways to do this, depending on your skill level and preferences.
Embroidery: One option to add embellishments is through embroidery. You can use a contrasting color of yarn or thread to create decorative stitches on your cardigan. This can be done by embroidering motifs, such as flowers or geometric patterns, onto the fabric. You can also add embroidery stitches to outline or highlight certain areas of the cardigan, such as the collar or cuffs.
Colorwork: Another way to add visual interest to your cardigan is through colorwork. This involves using different colors of yarn to create patterns or designs on the fabric. One popular technique is Fair Isle knitting, which involves working with two different colors in a single row to create intricate patterns. Another option is intarsia knitting, where different colors are used to create blocks of color in specific areas of the cardigan.
If you’re new to embellishments and colorwork, you may want to start with simple designs or patterns. You can find many free knitting patterns online that provide step-by-step instructions for adding embellishments and colorwork to your cardigan. Additionally, there are plenty of video tutorials available that can guide you through the process.
Remember to practice on scrap yarn or swatches before applying these techniques to your cardigan. This will allow you to perfect your skills and ensure that you achieve the desired effect. Adding embellishments and colorwork can truly elevate the look of your top-down knit cardigan, making it a unique and eye-catching piece.
Following a Top Down Cardigan Pattern
If you’re an avid knitter, you’re probably familiar with the top down cardigan pattern. This popular knitting pattern allows you to knit a cardigan seamlessly from the top down, starting with the neck and working your way down to the hem. This method eliminates the need for sewing or seaming, resulting in a clean and professional-looking finished garment.
When following a top down cardigan pattern, it’s important to start with accurate measurements. You’ll need to know your bust, waist, and hip measurements, as well as the length you want the cardigan to be. Armed with these measurements, you can choose the appropriate size from the pattern and make any necessary adjustments to ensure a perfect fit.
Choosing the Right Yarn
Once you have your measurements and the right size, it’s time to choose the yarn for your cardigan. The pattern will typically specify the gauge you need to achieve, so be sure to choose a yarn that matches the recommended gauge. Pay attention to the fiber content of the yarn as well, as different fibers have different properties and may affect the drape and feel of the finished garment. It’s also a good idea to consider the season and climate in which you’ll be wearing the cardigan and choose a yarn that will provide the desired level of warmth.
Knitting Techniques
As you work through the top down cardigan pattern, you’ll encounter various knitting techniques. These may include common stitches like knit and purl, as well as more advanced techniques such as increases, decreases, and short rows. It’s important to read the pattern carefully and familiarize yourself with any new techniques before you begin. If you’re unfamiliar with a particular technique, there are many online resources and video tutorials available to help you learn.
Finishing Touches
Once you’ve completed knitting your top down cardigan, it’s time for the finishing touches. This may include adding buttons or other closures, sewing in ends, and blocking the garment to shape and size. Following the pattern’s instructions for these finishing touches will ensure that your cardigan looks polished and professional.
With a top down cardigan pattern, you can create a beautiful handmade garment that fits you perfectly. By carefully following the pattern and paying attention to details like measurements, yarn choice, and knitting techniques, you can knit a cardigan that you’ll be proud to wear.
Reading the Pattern Instructions
When starting a knitting project, it is important to carefully read and understand the pattern instructions. This will ensure that you have a clear picture of what needs to be done and will help prevent any mistakes or confusion along the way.
The first step in reading a pattern is to familiarize yourself with the abbreviations used. These abbreviations are commonly found in knitting patterns and serve as shorthand for various knitting stitches and techniques. It is important to refer to the pattern’s abbreviation key to understand what each abbreviation stands for.
Next, take a close look at the sizing and gauge information provided in the pattern. This will tell you the specified measurements and the number of stitches and rows per inch that the gauge should be. Checking your gauge before you start knitting will ensure that your finished project matches the size specified in the pattern.
The pattern instructions will then guide you through the steps to create each section of the cardigan, starting from the top down. It will indicate the number of stitches to cast on, the type of stitches to use, and any shaping or stitch patterns involved. It is important to follow these instructions closely to achieve the desired outcome.
If the pattern includes charts or diagrams, make sure to carefully study them before beginning. These visual representations can provide additional guidance and clarification on stitch patterns or shaping.
As you work your way through the pattern, keep track of your progress by checking off completed rows or sections. This will help you stay organized and prevent any mistakes or missed steps.
Remember, reading and understanding the pattern instructions is crucial for a successful knitting project. Taking the time to thoroughly comprehend the pattern will save you time and effort in the long run and will result in a beautifully knitted cardigan.
Adapting the Pattern to Fit Your Measurements
When working with a top down knit cardigan pattern, it is important to adapt the pattern to fit your specific measurements. This will ensure that the cardigan fits you perfectly and flatters your body shape. Fortunately, many top down patterns are easily adjustable, allowing you to customize the size and shape as needed.
One way to adapt the pattern is by understanding your own body measurements. Take accurate measurements of your bust, waist, and hips, as well as your arm length and shoulder width. Compare these measurements to the pattern’s suggested sizes and make adjustments accordingly. For example, if your bust measurement falls between two sizes, you can adjust the number of stitches to cast on to fit your exact measurement.
Another way to adapt the pattern is by adjusting the length of the cardigan. If you prefer a longer or shorter cardigan, you can simply add or subtract rows from the pattern. Keep in mind that altering the length may also require adjusting other elements such as the number of buttonholes or the placement of pockets.
Additionally, you can modify the fit of the cardigan by adjusting the shaping of the sleeves and the body. If you prefer a more fitted cardigan, you can decrease the number of stitches gradually along the sides. On the other hand, if you prefer a looser fit, you can increase the number of stitches. Just be sure to keep track of your stitch count and make any necessary changes to maintain the overall pattern.
Overall, adapting a top down knit cardigan pattern to fit your measurements requires careful planning and attention to detail. By understanding your own measurements and making adjustments as needed, you can create a cardigan that is tailored specifically to your body shape and preferences.
Finishing Touches and Blocking
Once you have finished knitting your top-down cardigan, there are a few finishing touches that you can add to complete the garment. These details will give your cardigan a polished look and ensure that it fits well.
Seaming and Weaving
One important step in finishing your cardigan is seaming the sleeves and sides together. Use a yarn needle and the same yarn you used for knitting to seam the edges. Make sure to align the stitches properly and sew them together with a neat and even stitch. This will create a seamless and professional finish.
After seaming, weave in any loose ends that may be left from the yarn changes or cast-on and bind-off edges. Thread the yarn through a yarn needle and carefully weave it back and forth through the fabric, making sure to secure it tightly. This will prevent any yarn ends from unraveling and give your cardigan a clean look.
Blocking
Blocking is an essential step in finishing your knitted cardigan. This process involves shaping and setting the garment by wetting and drying it to the desired dimensions. To block your cardigan, fill a basin or sink with lukewarm water and add a small amount of wool wash or mild detergent. Gently submerge the cardigan in the water, making sure it is completely saturated.
After soaking for about 15-20 minutes, carefully remove the cardigan from the water and gently squeeze out excess moisture. Lay the cardigan flat on a clean towel and gently shape it to the desired dimensions. Use blocking pins or rust-proof T-pins to secure the edges and help maintain the shape of the cardigan. Allow the cardigan to air dry completely before removing the pins.
By taking the time to properly seam, weave in ends, and block your cardigan, you will ensure that the final product is of the highest quality. These finishing touches will add durability and give your cardigan a professional finish, making it a cherished addition to your wardrobe.
Properly Seaming the Cardigan
Seaming is an important step in finishing your top-down knit cardigan. Properly seaming the pieces together will give your cardigan a polished and professional look. Here are some tips to help you seam your cardigan:
- Prepare the pieces: Before you start seaming, make sure all your knit pieces are blocked and laid out flat. This will ensure that they are the correct size and shape.
- Choose the right seaming method: There are different ways to seam knitting, including mattress stitch, whip stitch, and slip stitch. Choose the method that works best for your cardigan and desired finish.
- Match the stitches: When seaming, it’s important to match the stitches of each piece as closely as possible. This will help create an invisible seam and ensure a smooth transition between the pieces.
- Take your time: Seaming can be a time-consuming process, but it’s worth the effort. Take your time to carefully seam each piece to achieve a neat and tidy finish.
- Secure the ends: After seaming, make sure to secure any loose ends or threads. This will prevent them from coming undone while wearing the cardigan.
By following these tips and taking the time to properly seam your top-down knit cardigan, you’ll be able to create a beautiful and professional-looking garment that you can be proud of. So grab your yarn and needles, and get ready to start seaming!
Q&A:
Where can I find a top down knit cardigan pattern?
You can find top down knit cardigan patterns on various knitting websites, such as Ravelry, Knitty, and LoveKnitting. You can also find patterns in knitting books and magazines.
What is a top down knit cardigan?
A top down knit cardigan is a type of knitting pattern where you start at the neckline and knit downwards towards the hem. This method allows you to try on the cardigan as you go and easily adjust the fit and length to your liking.
Are there any beginner-friendly top down knit cardigan patterns?
Yes, there are many beginner-friendly top down knit cardigan patterns available. Look for patterns with simple stitch patterns and minimal shaping to start with. You can also find video tutorials and online classes to help you through the process.
Can I modify a top down knit cardigan pattern to fit my measurements?
Yes, you can easily modify a top down knit cardigan pattern to fit your measurements. As you knit, you can try on the cardigan and make adjustments to the width, length, and shaping to ensure a perfect fit. Make sure to take accurate measurements beforehand and keep track of your modifications as you go.