
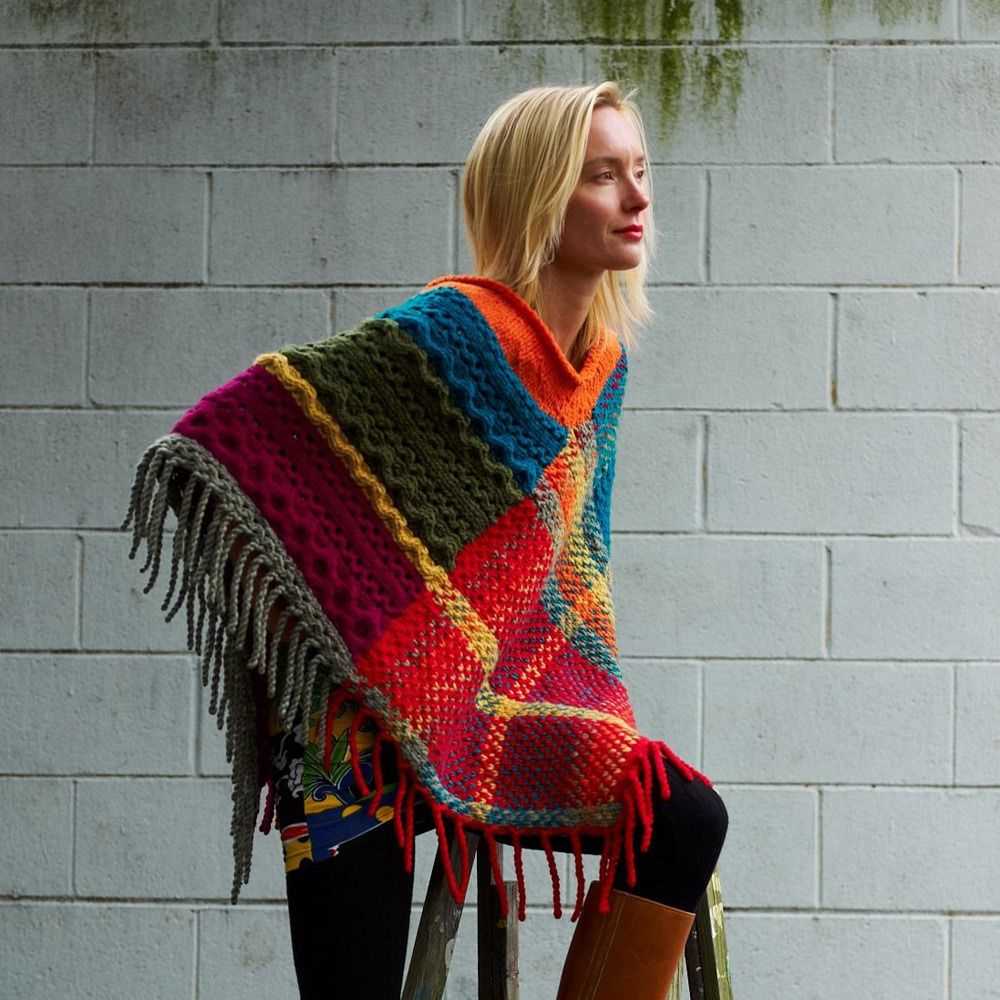
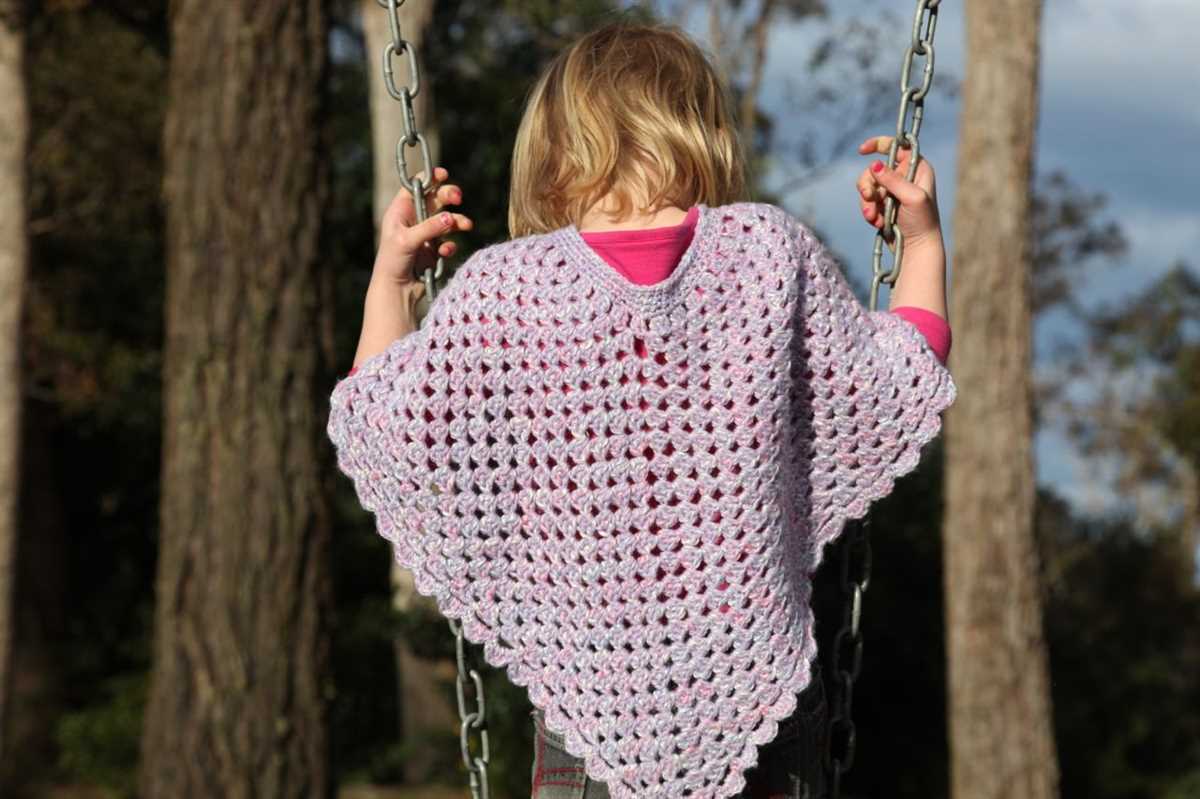
Ponchos are a versatile and fashionable clothing item, and knitting your own poncho allows you to customize the design and colors to suit your personal style. One piece ponchos are a popular choice for knitting enthusiasts, as they are relatively simple to make and require minimal sewing or seaming. In this article, we will explore a one piece poncho knitting pattern that is suitable for both beginners and experienced knitters.
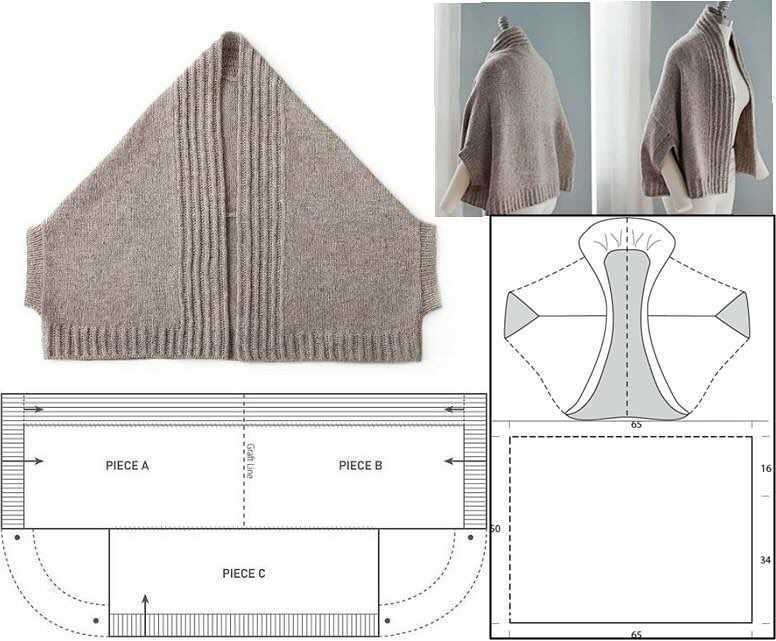
The one piece poncho knitting pattern is characterized by its seamless construction, with the body of the poncho knitted in a single piece, from neck to hem. This eliminates the need for assembly or sewing, making it an ideal project for those who prefer a quick and easy knitting experience. The pattern typically includes instructions for a variety of sizes, so you can create a poncho that fits you perfectly.
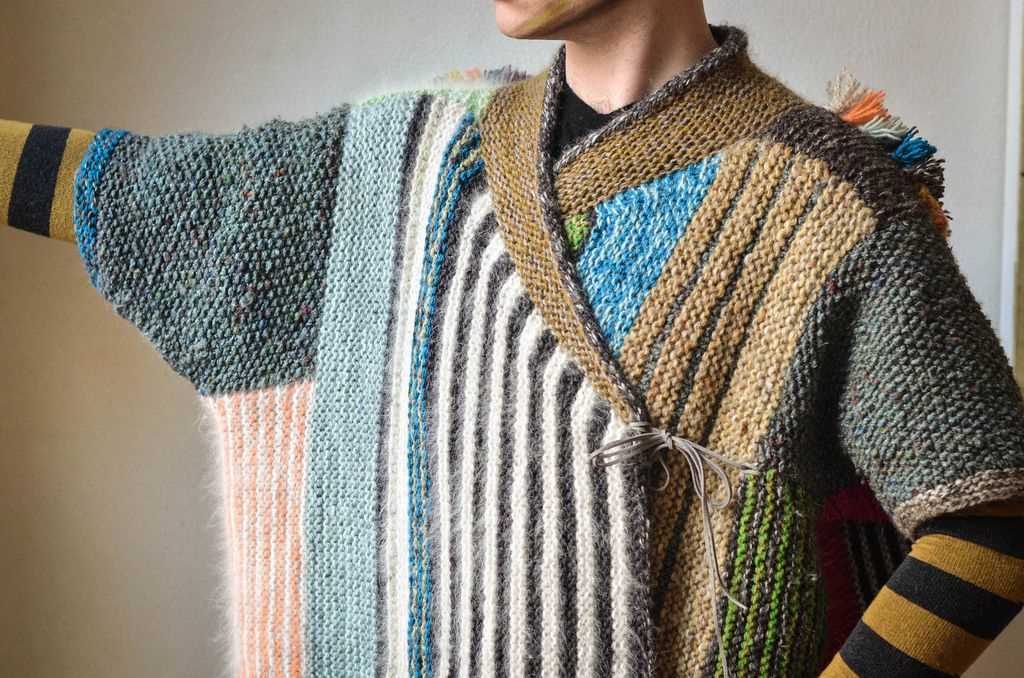
One of the advantages of knitting a one piece poncho is the ability to experiment with different stitches and patterns. You can choose to create a simple stockinette stitch pattern for a clean and classic look, or you can incorporate more complex stitch patterns to add texture and visual interest. The flexibility of the knitting pattern allows you to showcase your creativity and create a unique and stylish garment.
Whether you are a knitting novice or an experienced enthusiast, the one piece poncho knitting pattern is a great project to try. With its simple construction and customizable design, it is a versatile and satisfying project that can be completed in a relatively short amount of time. So grab your needles and yarn, and get ready to create your own cozy and stylish one piece poncho!
One Piece Poncho Knitting Pattern
If you’re looking for a cozy and stylish addition to your wardrobe, look no further than a one piece poncho. These versatile garments are perfect for keeping warm on chilly days, and can be easily customized to suit your own personal style. Whether you’re a seasoned knitter or just starting out, this one piece poncho knitting pattern is sure to become a favorite project.
To begin, gather your materials. You’ll need a pair of size 8 knitting needles, a skein of bulky weight yarn, and a tapestry needle for weaving in ends. It’s important to choose a yarn that is soft and warm, such as alpaca or merino wool, to ensure a cozy finished product.
Start by casting on the desired number of stitches. This will vary depending on the size of your poncho and the desired drape. A good starting point is to cast on 60-80 stitches for an average adult size. Once your stitches are cast on, join in the round and begin knitting in a simple stockinette stitch.
As you work, you can add some variety and texture to your poncho by incorporating different stitch patterns. For example, you could alternate between rows of stockinette stitch and rows of seed stitch, or try a simple ribbing pattern for a more structured look. The possibilities are endless!
Continue knitting until your poncho reaches the desired length, keeping in mind that it will stretch slightly when worn. Once you’re satisfied with the length, bind off the stitches and weave in any loose ends. Your one piece poncho is now complete and ready to wear!
This knitting pattern is a great choice for beginners, as it allows you to practice basic knitting techniques while creating a beautiful and functional garment. Once you’ve mastered the one piece poncho, you can experiment with different colors, yarn weights, and stitch patterns to create your own unique designs. So grab your knitting needles and start stitching – a cozy and stylish poncho is just a few rows away!
Why Knit a One Piece Poncho?
There are many reasons why knitting a one piece poncho can be a great project. First of all, it is a versatile piece of clothing that can be worn in multiple seasons. Whether it’s a chilly evening in spring or a brisk autumn day, a one piece poncho can provide just the right amount of warmth without being too heavy or bulky.
Moreover, knitting a one piece poncho is a convenient and practical option for knitters. As the name suggests, this style of poncho is knitted in one piece, which means there is minimal seaming required. This can be a huge time-saver for knitters who prefer to avoid intricate finishing work. Additionally, knitting a one piece poncho allows for more creative freedom in terms of color and stitch patterns. The continuous construction of the garment allows for seamless incorporation of different design elements, making each poncho unique and personalized.
Whether you’re a beginner or an experienced knitter, a one piece poncho can be a rewarding project to take on. With its simple construction and minimal seaming, it’s a great way to practice and improve your knitting skills. The repetitive nature of the pattern can also be soothing and therapeutic, providing a sense of relaxation and accomplishment as you see your poncho take shape.
Finally, a one piece poncho is a versatile and stylish addition to any wardrobe. It can be dressed up or down, depending on the occasion and personal style. With the right yarn choice and design details, a one piece poncho can become a statement piece that adds a touch of elegance and individuality to any outfit. So why not give it a try and knit a one piece poncho?
Choosing the Right Yarn for Your One Piece Poncho
When it comes to knitting a one piece poncho, choosing the right yarn is crucial. The yarn you select will determine not only the look and feel of your poncho, but also its durability and ease of care. With so many options available, it can be overwhelming to decide which yarn is best for your project. Here are some factors to consider when choosing yarn for your one piece poncho.
Weight and thickness:
One of the first things to consider is the weight and thickness of the yarn. The weight of the yarn refers to how thick or thin it is, while the thickness determines the drape and warmth of the finished poncho. The pattern for your one piece poncho may specify a certain weight of yarn, so be sure to check this before making your selection. Common weights for poncho yarn include bulky, worsted, and sport weight.
Fiber type:
The fiber content of the yarn is another important consideration. Different fibers have different properties, such as softness, warmth, and breathability. Popular choices for one piece ponchos include wool, acrylic, alpaca, and cotton. Wool is known for its warmth and elasticity, while acrylic offers affordability and ease of care. Alpaca is soft and luxurious, while cotton is lightweight and breathable. Consider the characteristics you want in your poncho and choose a fiber that aligns with your preferences.
Texture and color:
The texture and color of the yarn will also influence the overall look of your poncho. Some yarns have a smooth, even texture, while others have a more textured or boucle appearance. Consider the stitch pattern you plan to use for your poncho and how it will interact with the yarn’s texture. Additionally, think about the color palette you want for your poncho. Yarns come in a wide range of colors, from vibrant and bold to neutral and understated. Choose a color that complements your style and wardrobe.
Budget:
Lastly, consider your budget when choosing yarn for your one piece poncho. Yarn prices can vary significantly depending on the fiber content and brand. Decide on a budget that you are comfortable with and look for yarn options within that range. Keep in mind that higher-quality yarns may be more expensive but can result in a more luxurious and durable poncho.
By considering these factors, you can choose the perfect yarn for your one piece poncho. Remember to check the pattern requirements, consider the fiber type, texture and color, and stay within your budget. Happy knitting!
Getting Started: Casting On for Your One Piece Poncho
Knitting a one piece poncho can be a rewarding project, and casting on is the first step in bringing your creation to life. Whether you’re a beginner or an experienced knitter, following the right casting on technique is essential to achieve the right fit and drape for your poncho.
Before you begin, gather your materials including the appropriate size knitting needles and yarn. The pattern will specify the recommended needle size and yarn weight to ensure the best results. Additionally, make sure you have a stitch marker handy to keep track of your stitches as you go.
Start by creating a slipknot, which will act as your first stitch. To do this, make a loop with the yarn, then pass the tail end of the yarn through the loop. Pull the loop snugly to secure the slipknot, but not too tight. Insert your knitting needle into the slipknot, holding it in your right hand.
Next, using your left hand, bring the working yarn (the yarn connected to the ball or skein) under and over the needle, creating a loop. This is known as “wrapping the yarn.” Hold the loop in place with your left thumb, making sure it doesn’t slip off the needle.
Now, bring the needle with the loop towards you, hooking it under the front of the loop on your left thumb. With your right hand, pull the needle and loop through the slipped stitch, creating a new stitch on the right-hand needle.
Continue this process of wrapping the yarn and pulling it through the loop until you have the desired number of stitches on your needle, as specified in the pattern. Make sure to count your stitches as you go, as it’s easy to lose track, especially in the beginning.
Once you have finished casting on, you can remove the slipknot from your needle and continue onto the next steps of your one piece poncho pattern. With your stitches securely cast on, you’re ready to embark on the next stages of your knitting journey and create a cozy and stylish poncho to enjoy.
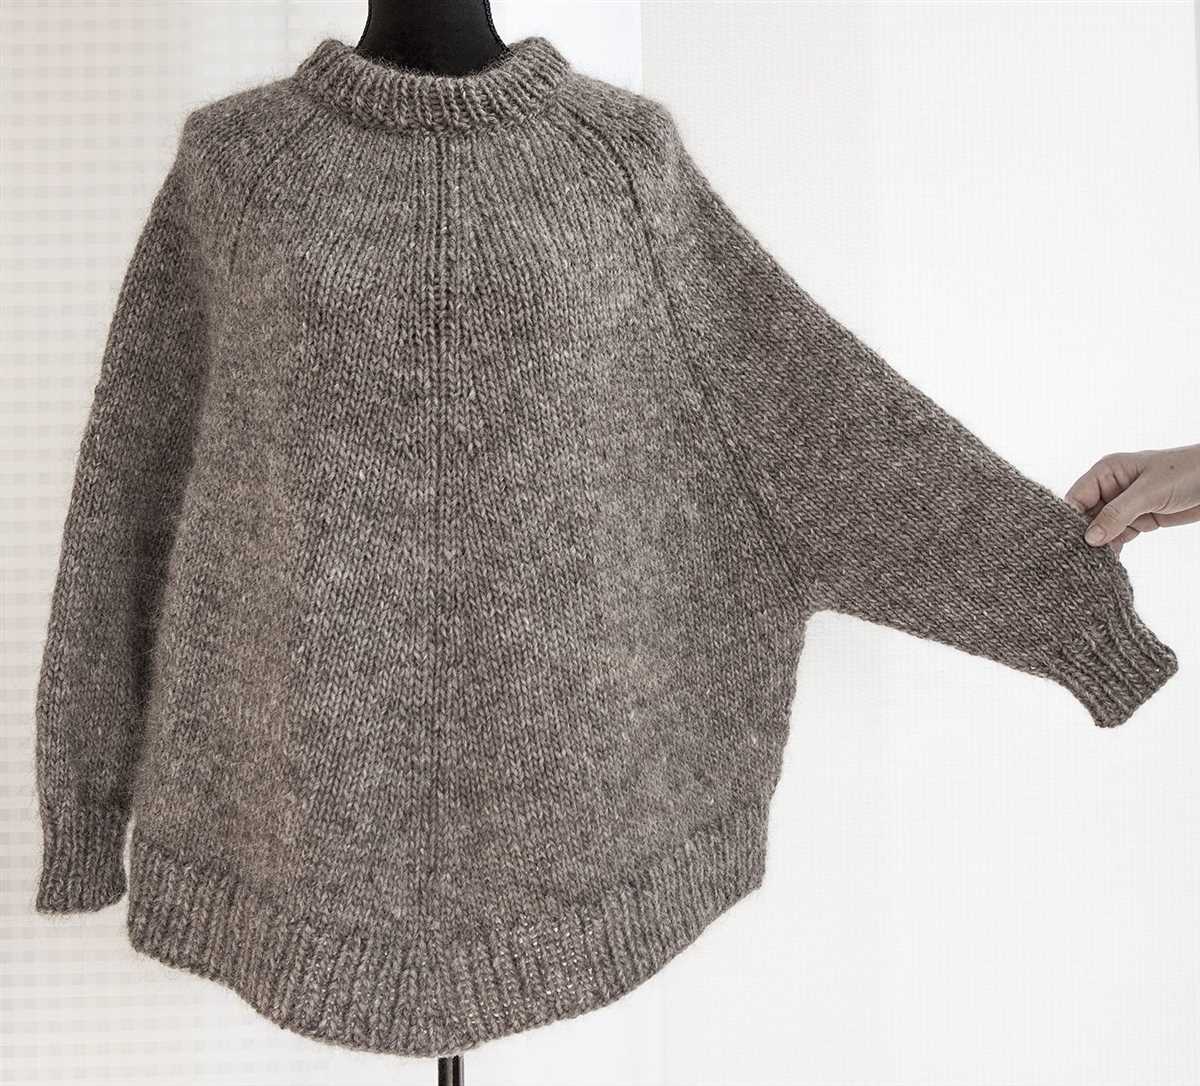
Knitting the Body of Your One Piece Poncho
Once you have finished knitting the neckline and shoulder shaping of your one piece poncho, it’s time to move on to knitting the body. This is where you will begin to see your poncho take shape and become the cozy and stylish garment you envisioned.
1. Continuing with the stitch pattern: As you start knitting the body, you will want to continue with the stitch pattern that you chose for your poncho. This could be a simple ribbed pattern, a lace pattern, or any other design that you prefer. Make sure to follow the pattern instructions carefully to maintain consistency throughout your project.
2. Increasing for the A-line shape: To achieve the desired A-line shape of your poncho, you will need to gradually increase the number of stitches as you knit the body. This can be done by adding one or more stitches at regular intervals, depending on your pattern. Take care to evenly distribute the increases to maintain a balanced look.
3. Lengthening the body: Decide on the length you want your poncho to be and continue knitting until you reach that measurement. You may need to adjust the number of rows or the stitch pattern to achieve the desired length. Consider trying on the poncho as you go to ensure it fits well and falls at the desired length.
4. Finishing the body: Once you have reached the desired length, bind off the stitches to complete the body of your poncho. Take care to weave in any loose ends and block your finished piece to ensure it maintains its shape and drapes nicely.
Following these steps will help you knit the body of your one piece poncho with ease. Remember to take your time and enjoy the process, as knitting can be a relaxing and gratifying hobby. Soon enough, you’ll have a beautiful poncho to add to your wardrobe or gift to someone special.
Creating the Neckline of Your One Piece Poncho
Making a neckline for your one piece poncho is an important step in creating a comfortable and stylish garment. There are several different techniques you can use to create the neckline, depending on your personal preference and skill level.
1. Ribbing: One of the most common ways to create a neckline for a poncho is to use ribbing. Ribbing is a knitted pattern that creates a stretchy and elastic fabric. It is often used for cuffs, hems, and necklines. To create ribbing, you will typically alternate knit and purl stitches in a specific pattern, such as K2, P2 or K1, P1. This creates a textured fabric that stretches easily and is perfect for creating a comfortable neckline.
- To create a ribbing neckline for your one piece poncho, you will need to determine the number of stitches to cast on. This will depend on the desired width of your neckline and the gauge of your knitting.
- Once you have determined the number of stitches, you can start knitting your ribbing pattern. Make sure to keep track of your stitches and regularly check the width and stretchiness of the fabric. You may need to adjust your tension or needle size to achieve the desired result.
- Continue knitting your ribbing pattern until the neckline reaches the desired height. You can then cast off your stitches and sew the neckline to the body of your poncho.
2. Garter Stitch: Another option for creating a neckline for your one piece poncho is to use garter stitch. Garter stitch is created by knitting every row, resulting in a fabric with ridges. This stitch pattern is simple yet effective and can create a neat and clean neckline.
3. Cowl Neck: If you prefer a more relaxed and cozy neckline, you can create a cowl neck for your one piece poncho. A cowl neck is created by knitting a separate piece of fabric, usually in a ribbing or garter stitch pattern, and attaching it to the neckline of the poncho. This creates a loose and drapey neckline that can be worn folded over or pulled up for added warmth.
Whichever technique you choose, creating a neckline for your one piece poncho allows you to customize the fit and style of your garment. Experiment with different stitch patterns and designs to create a unique and fashionable poncho that you will love to wear.
Shaping the Armholes of Your One Piece Poncho
When knitting a one piece poncho, shaping the armholes is an important step to ensure a comfortable fit. The armholes are the openings where your arms will go through, so it is crucial to get the measurements and shaping just right.
To begin shaping the armholes, you will need to carefully follow the knitting pattern instructions. These instructions will guide you on when and where to decrease stitches to create the desired armhole shape. It is important to pay attention to the specific measurements provided in the pattern to ensure accuracy.
Step 1: Identify the start of the armhole section. Look for the instructions in the pattern that indicate where the armhole shaping begins. This will typically be after a certain number of rows or inches of knitting.
Step 2: Decrease stitches. Once you have identified the start of the armhole section, you will need to decrease stitches to shape the armholes. The pattern will provide specific instructions on how many stitches to decrease and at what intervals. Common decrease methods include knitting 2 stitches together or slipping stitches.
Step 3: Continue shaping. After completing the initial decrease stitches, you will need to continue shaping the armholes according to the instructions provided in the pattern. This may involve decreasing stitches at specific intervals or maintaining a certain number of stitches until reaching the desired armhole length.
Step 4: Bind off. Once you have completed the armhole shaping according to the pattern instructions, you will need to bind off the remaining stitches to secure the armholes. Follow the pattern’s instructions to determine the appropriate bind off method.
By carefully following the knitting pattern instructions and paying attention to the measurements provided, you can successfully shape the armholes of your one piece poncho. This will ensure a comfortable and well-fitting garment.
Finishing Touches: Adding Ribbing to Your One Piece Poncho
Once you have completed knitting your one piece poncho, it’s time to add the finishing touches to give it a polished look. One way to do this is by adding ribbing to the edges of your poncho. Ribbing creates a stretchy and snug fit, while also adding a decorative element to your garment.
To start, you will need to determine the number of stitches you will need for your ribbing based on the size of your poncho and the desired width of your ribbing. The most common ribbing pattern is a 2×2 rib, which means alternating knit and purl stitches every two stitches. However, you can also experiment with different ribbing patterns, such as a 1×1 rib or a 3×3 rib, to achieve different textures and looks.
Once you have determined the number of stitches for your ribbing, you will need to pick up stitches along the edge of your poncho. Using a smaller sized needle, insert the needle into the edge stitch and pull the new stitch through to create a new stitch on your needle. Continue this process along the entire edge of your poncho, spacing out your stitches evenly.
Once you have picked up all the stitches for your ribbing, switch to your larger sized needle and start knitting the ribbing pattern. If you are using a 2×2 rib, knit the first two stitches, then purl the next two stitches, and continue this pattern until you reach the end of the row. Repeat this pattern for each row until your ribbing measures the desired length.
Once you have finished knitting your ribbing, you can bind off your stitches using a stretchy bind off method to ensure that the edge remains flexible and comfortable to wear. Some common stretchy bind off methods include the tubular bind off or the sewn bind off.
To add an extra touch of elegance to your ribbing, you can also consider adding a decorative edge, such as a picot edge or a seed stitch border. These small details can make a big difference in the overall look of your poncho.
Once you have completed the ribbing and any additional decorative edges, give your poncho a final block to even out the stitches and ensure that the ribbing lays flat. Lay your poncho flat on a blocking mat or towel, pinning it into shape and misting it with water. Allow it to dry completely before wearing or storing.
Adding ribbing to your one piece poncho is a great way to elevate your knitting project and create a professional-looking finish. With a little bit of time and effort, you can transform a simple poncho into a stylish and cozy garment that you’ll love to wear.
Blocking and Seaming Your One Piece Poncho
Once you have finished knitting your one piece poncho, the next step is to block it. Blocking is an important process that helps to shape and give your poncho a more polished and professional look. To block your poncho, you will need a blocking mat or towels, rustproof pins, and a spray bottle of water. Lay your poncho flat on the blocking mat or towels, making sure to smooth out any wrinkles or puckering. Use rustproof pins to secure the edges and corners of the poncho in place. Then, mist the entire poncho with the spray bottle of water until it is evenly damp. Allow the poncho to dry completely before removing the pins.
Once your poncho is blocked and dry, it is time to seam the sides together. The seaming process will create the armholes and give your poncho its final shape. To seam the sides, you will need your yarn and a tapestry needle. Start at the bottom edge of one side and thread your needle with the yarn. Begin stitching the sides together using a mattress stitch or whip stitch, making sure to line up the stitches and keeping the tension even. Repeat this process for the other side of the poncho. Once the sides are seamed, weave in any loose ends of yarn to secure them.
With the blocking and seaming complete, your one piece poncho is now ready to be worn! The blocking process will help the poncho to keep its shape and prevent it from stretching or shrinking. The seaming process will give the poncho structure and create a comfortable fit. Whether you are wearing your poncho for warmth or style, you can now enjoy the cozy and fashionable addition to your wardrobe.
Adding Embellishments to Your One Piece Poncho
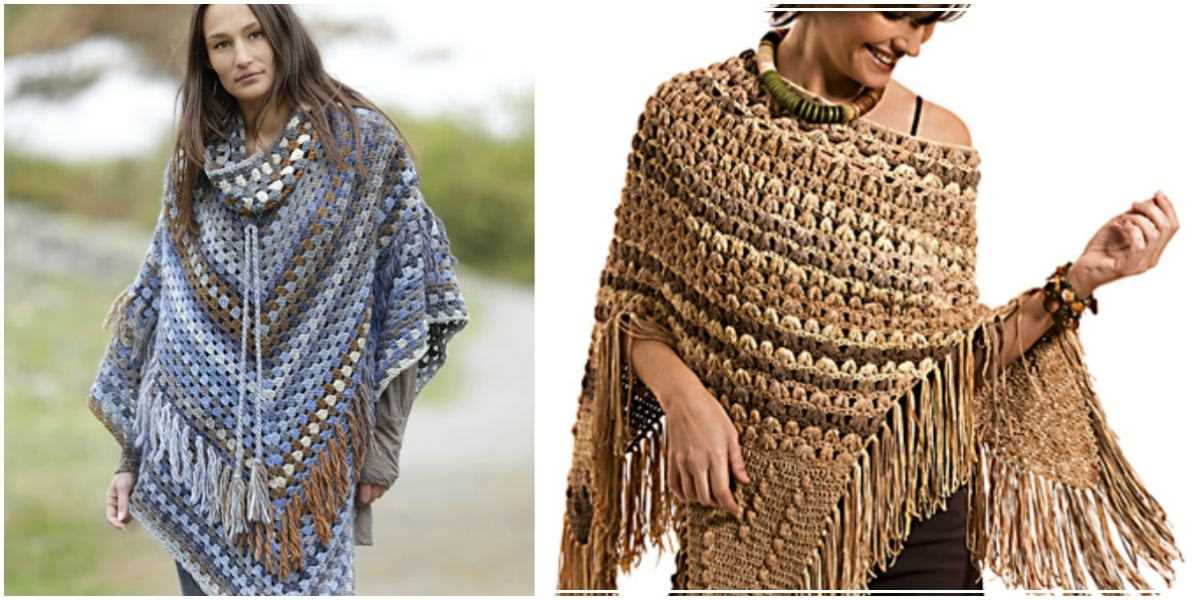
Knitting a one piece poncho is a wonderful project that allows you to create a cozy and stylish garment. Once you have completed the basic poncho pattern, you can add embellishments to make it even more unique and eye-catching. There are many different ways to embellish your poncho, from simple additions like fringe or tassels to more intricate designs like cables or lace patterns. Below are some ideas to inspire you in adding embellishments to your one piece poncho.
Fringe
A classic and versatile option, fringe can be added to the bottom edge or the sides of your poncho. You can use the same yarn as your poncho or contrasting colors to create an interesting visual effect. To add fringe, simply cut lengths of yarn and attach them evenly spaced along the edges. You can make the fringe as long or short as you like, depending on your personal preference.
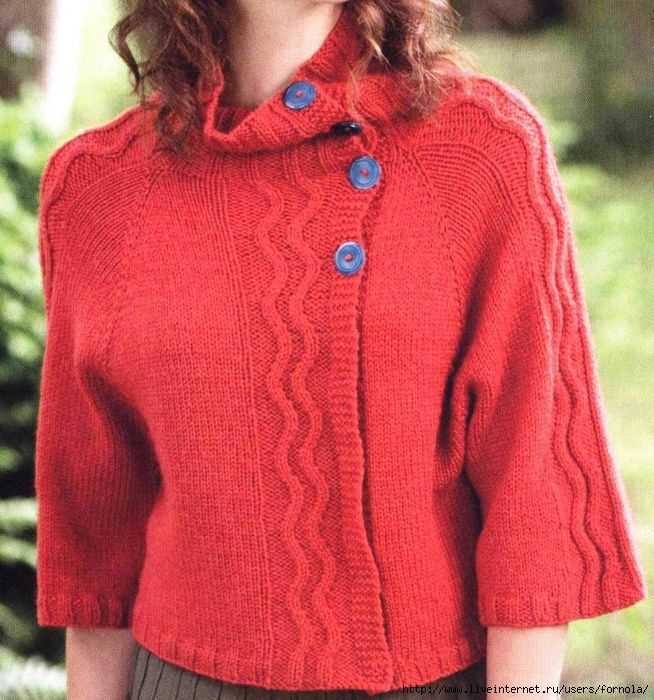
Buttons
Add a touch of elegance to your poncho by attaching buttons along the front opening. Choose buttons that complement the color and style of your poncho, and sew them on securely using a matching thread. Buttons can be arranged in a single row or in a decorative pattern, depending on the look you want to achieve.
Embroidery
If you have some basic embroidery skills, you can add beautiful designs to your poncho using colorful threads. Whether it’s flowers, geometric shapes, or intricate patterns, embroidery can instantly transform a plain poncho into a work of art. Consider using embroidery stitches like satin stitch, chain stitch, or French knots to create texture and depth.
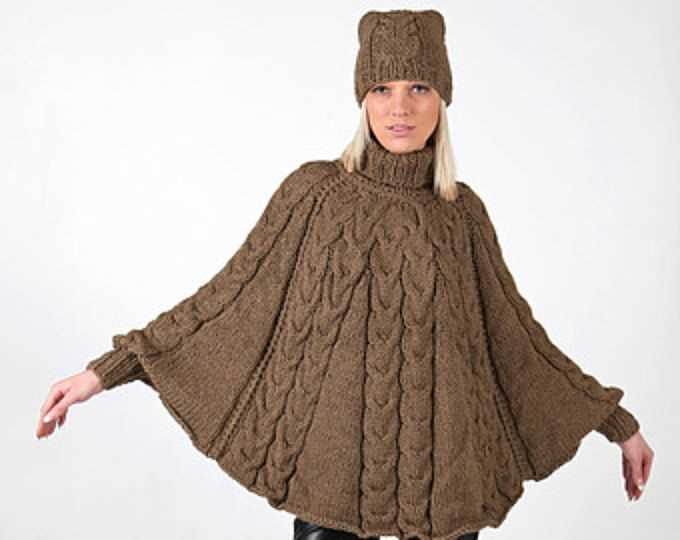
Cables
If you’re up for a challenge, consider adding cable patterns to your poncho. Cables are created by crossing stitches over each other, creating a raised and textured effect. There are many cable stitch patterns available, ranging from simple twists to more complex designs. Adding cables to your poncho will not only add visual interest but also give it a luxurious and cozy feel.
Lace

Lace patterns can add a delicate and feminine touch to your poncho. Whether it’s a simple eyelet pattern or an intricate lace motif, lace can elevate the overall look of your poncho. You can choose to add lace panels to the sides or the edges of your poncho, or incorporate lace throughout the entire garment. The openwork of lace patterns allows for breathability, making it a perfect choice for warmer weather.
These are just a few ideas to get you started on embellishing your one piece poncho. Feel free to mix and match these ideas or come up with your own unique embellishment techniques. Remember, the key is to have fun and make your poncho truly reflect your personal style.
Troubleshooting Common Issues with Your One Piece Poncho
Knitting a one piece poncho can be a fun and rewarding project, but sometimes you may encounter some issues along the way. Here are some common problems that knitters face and how to troubleshoot them:
1. Uneven tension

Uneven tension can lead to an ill-fitting poncho with uneven stitches. To fix this issue, make sure you are consistently knitting with the same tension throughout the project. Pay attention to your tension as you knit and adjust if necessary. If you notice that your tension is uneven, you can try blocking your poncho when it’s finished to help even out the stitches.
2. Yarn overs and dropped stitches
Yarn overs and dropped stitches can create holes or gaps in your poncho. To avoid this problem, double-check your work after every few rows and make sure you haven’t accidentally dropped any stitches or added extra yarn overs. If you do spot any mistakes, use a crochet hook or a small knitting needle to pick up the dropped stitch or correct the yarn over.
3. Poncho too big or too small
If your poncho turns out to be too big or too small, it could be due to incorrect gauge or measurements. Before starting your project, make sure to swatch and check your gauge to ensure you’re using the correct needle size and yarn weight. If your poncho is too big, you can try blocking it to shrink it slightly. If it’s too small, unfortunately, you may need to start over with larger needles or adjust the pattern accordingly.
4. Twisted stitches
Twisted stitches can occur when you twist your stitches while knitting, resulting in a twisted appearance in your poncho. To avoid this issue, pay close attention to your knitting technique and make sure to insert your needle into the stitch correctly. If you notice any twisted stitches while knitting, you can easily unravel them and fix them by re-knitting the stitches correctly.
By being aware of and addressing these common issues, you can ensure that your one piece poncho turns out beautifully. Happy knitting!
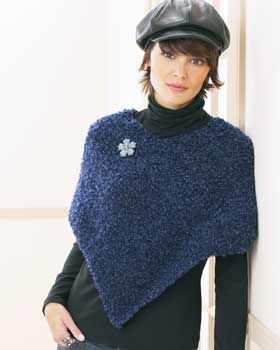
Styling Your One Piece Poncho: Tips and Inspiration
Once you’ve finished knitting your one piece poncho, it’s time to style it and make it your own. Here are some tips and inspiration to help you create the perfect look.
First, consider the occasion or event you’ll be wearing your poncho to. Is it a casual outing with friends or a special night out? This will help dictate the overall style and accessories you choose to pair with your poncho.
Tips for Styling Your Poncho:
- Layer it: If you’re wearing your poncho during cooler weather, layer it over a long-sleeved top or sweater for extra warmth and style.
- Cinch it: Add a belt around your waist to give your poncho a more structured and polished look.
- Accessorize: Pair your poncho with statement jewelry, such as a chunky necklace or oversized earrings, to elevate your outfit.
- Color coordination: Choose accessories and bottoms that complement the colors in your poncho for a cohesive and put-together look.
- Experiment with textures: Play with different textures in your outfit, such as pairing your poncho with leather leggings or a suede skirt, to add visual interest.
- Try different lengths: If you have multiple one piece ponchos of varying lengths, experiment with how they pair with different bottoms to create unique looks.
Inspiration for Styling Your Poncho:
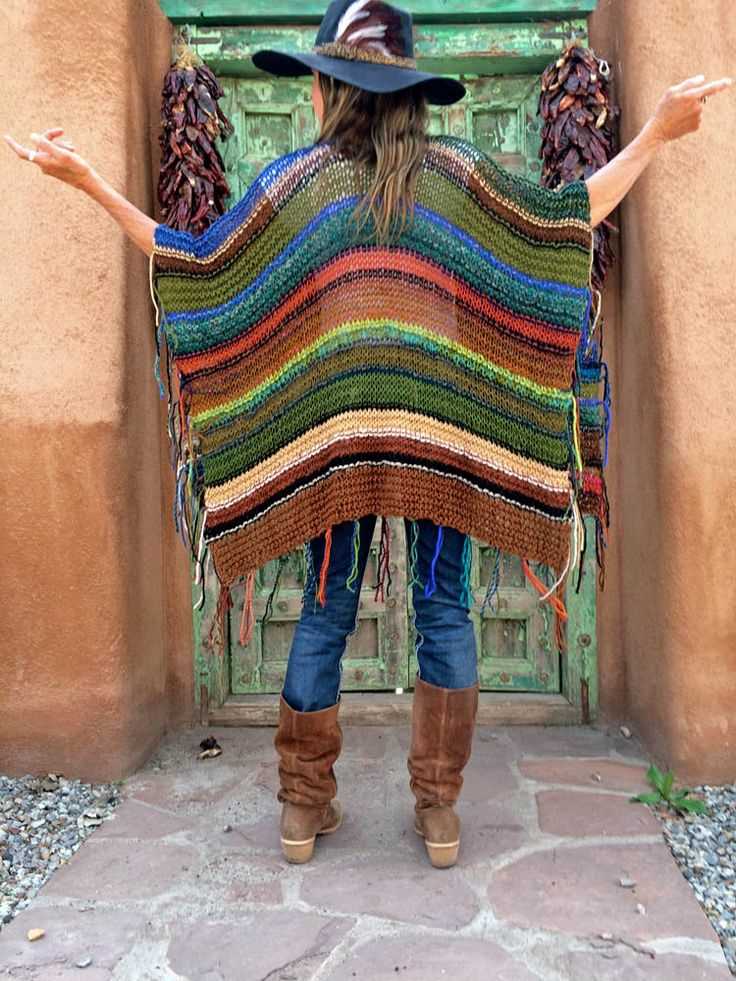
- Casual Chic: Pair your poncho with jeans, ankle boots, and a long pendant necklace for a stylish yet effortless everyday look.
- Boho Vibes: Style your poncho with a maxi skirt, floppy hat, and fringe boots for a free-spirited and bohemian-inspired outfit.
- Evening Glam: Layer your poncho over a little black dress, add some statement heels, and finish the look with a bold clutch for a glamorous evening ensemble.
- Office Ready: Wear your poncho with tailored trousers, a blouse, and heels for a sophisticated and professional look that still showcases your personal style.
- Festival Fun: Pair your poncho with denim shorts, a crop top, and ankle boots for a trendy and festival-inspired outfit.
Remember, the key to styling your one piece poncho is to have fun and experiment with different looks. Don’t be afraid to mix and match different pieces in your wardrobe to create unique and stylish outfits. With these tips and inspiration, you’ll be sure to turn heads wherever you go in your one piece poncho!