
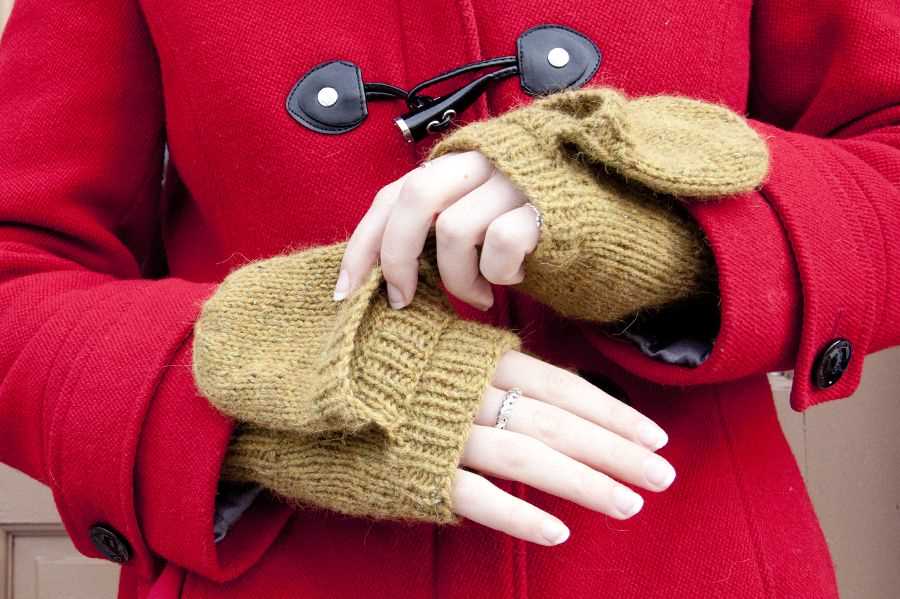
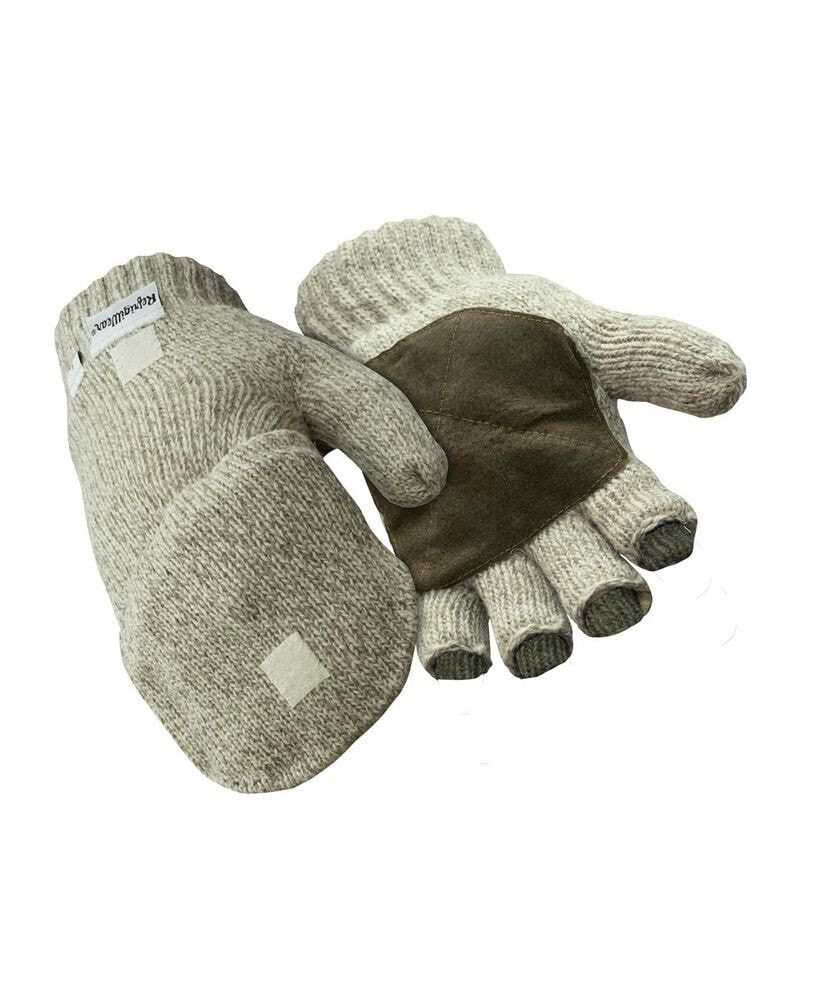
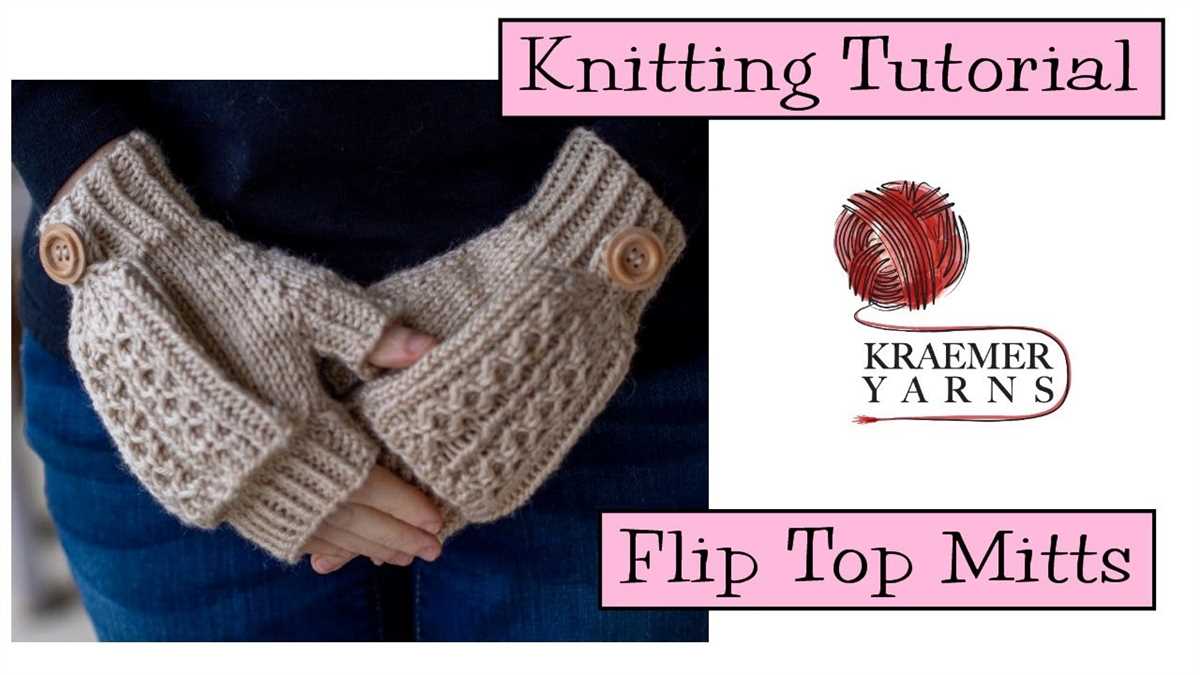
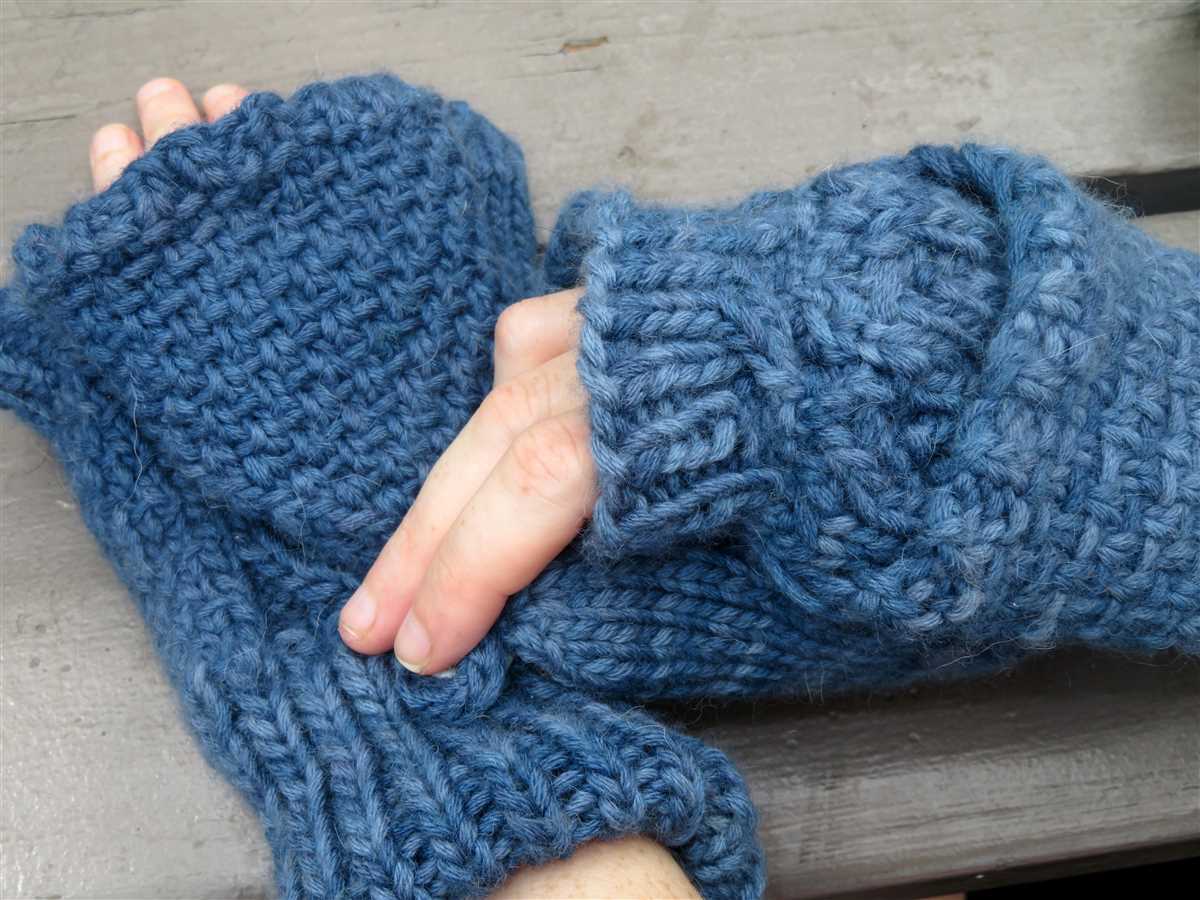
Are you tired of constantly taking off your mittens every time you need to use your fingers? Convertible mittens are the perfect solution for keeping your hands warm while still having the ability to use your fingers when needed. And the best part? We have a free knitting pattern just for you!
Knitting your own convertible mittens not only allows you to customize them to your own preferences, but it also gives you the opportunity to create a stylish and unique accessory to add to your winter wardrobe. Whether you prefer a classic color or a bold pattern, you can design your mittens to match your personal style.
This free knitting pattern includes detailed instructions and helpful tips to guide both beginner and experienced knitters through the process. The pattern covers all the essential techniques such as casting on, knitting, purling, and decreasing. If you’re new to knitting, this is a great project to build your skills and create something useful at the same time.
So why settle for ordinary mittens when you can make your own convertible ones? Get your knitting needles ready and start creating a cozy and convenient accessory that will keep your hands warm and stylish all winter long. Download our free knitting pattern today!
Convertible Mittens Knitting Pattern Free
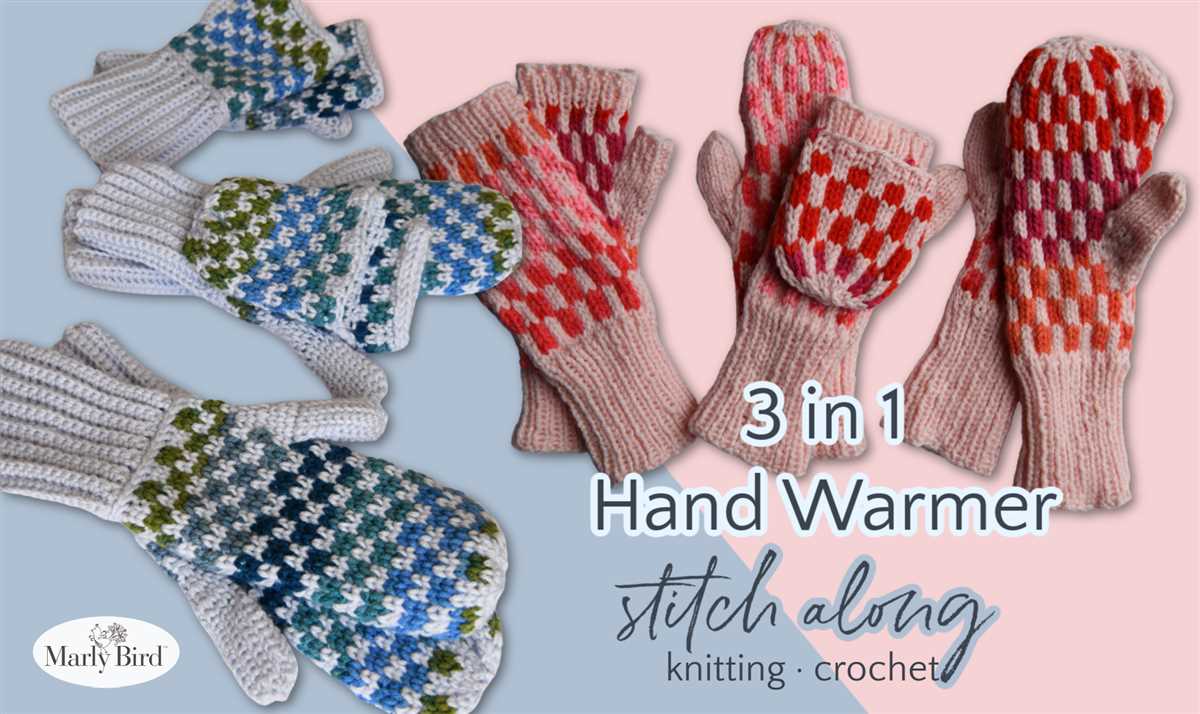
Are you looking for a free knitting pattern for convertible mittens? Look no further! We have an amazing pattern that you can use to create your very own convertible mittens. These mittens are not only functional but also stylish, making them the perfect accessory for the colder months.
The pattern we are sharing with you is easy to follow, even for beginners. You will need a set of double-pointed knitting needles and a few skeins of your favorite yarn. The pattern includes step-by-step instructions on how to knit the mittens, including the thumb and flip-top sections.
Materials:
- Double-pointed knitting needles, size 6
- Worsted weight yarn, approximately 200 yards
- Stitch markers
- Tapestry needle
- Scissors
Instructions:
- Cast on 40 stitches.
- Ribbing: Work in a *k2, p2* ribbing pattern for 2 inches.
- Main body: Switch to stockinette stitch and work in the round until the mitten measures 5 inches from the cast-on edge.
- Thumb gusset: Begin the thumb gusset by making a round with increases in the desired location.
- Thumb: Work the thumb stitches on waste yarn and continue working the hand of the mitten.
- Flip-top: Before starting the flip-top section, place stitch markers to mark the location of the flip-top opening.
- Complete the flip-top section and bind off all stitches.
- Seam the thumb and flip-top openings using a tapestry needle.
- Weave in any loose ends and trim excess yarn.
Once you have finished knitting your convertible mittens, you can customize them by adding buttons or other embellishments. These mittens make great gifts and are sure to keep your hands warm during the winter season. Use different colors of yarn to create a unique and personalized pair of mittens that you can be proud of.
Don’t wait any longer, download the free knitting pattern for convertible mittens and start knitting today!
Materials You’ll Need for This Project
In order to complete this knitting project for convertible mittens, you will need a few key materials. Here is a list of what you will need:
- Yarn: Choose a yarn that is suitable for the pattern and your desired level of warmth.
- Knitting Needles: Make sure you have the appropriate size needles for the yarn you have chosen. The pattern will typically specify the needle size.
- Tapestry Needle: This will be used for weaving in ends and sewing up any seams.
- Stitch Markers: These will help you keep track of your stitches throughout the pattern.
- Scissors: You will need a pair of scissors to cut your yarn and any excess material.
- Measuring Tape: A measuring tape will be useful for checking your gauge and ensuring proper sizing.
- Buttons or Snaps: If you want to add a closure to your convertible mittens, you will need buttons or snaps.
These materials should be easily accessible at your local craft store or online. Once you have gathered all of the necessary materials, you will be ready to start knitting your very own pair of convertible mittens!
Getting Started: Casting On
When starting a knitting project, the first step is to cast on. Casting on is the process of creating the first row of stitches on the knitting needles. There are several methods for casting on, but for this convertible mittens knitting pattern, we will be using the long tail cast on method.
To begin, you will need your knitting needles and the yarn you will be using for your project. Measure out a length of yarn that is approximately four times the width of the finished item. This will be the tail that you will use to create the first row of stitches.
Hold one knitting needle in your right hand and make a slip knot near the end of the yarn tail. This slip knot will be the first stitch on your needle. Make sure the slip knot is loose enough so that you can comfortably insert the other knitting needle through it.
Next, insert the empty knitting needle through the slip knot from front to back, with the slip knot loop on the left-hand needle. Hold the needle tips together with your left hand and use your right hand to bring the yarn tail over the top of the right-hand needle from back to front.
With your right hand, reach under the left-hand needle and catch the yarn with the tip of the needle, pulling it through the slip knot loop. This will create a new stitch on the right-hand needle.
Repeat this process, inserting the right-hand needle through the loop on the left-hand needle, bringing the yarn over the top, and pulling it through to create a new stitch. Continue until you have cast on the desired number of stitches for your project.
Knitting the Ribbing for the Cuff
The ribbing is an important part of the cuff as it provides stretch and helps to keep the mittens snug on your hands. To knit the ribbing, you will need to cast on the required number of stitches using the needle size recommended in the pattern. It’s best to use a smaller needle size for the ribbing to create a tight and elastic fabric.
Start by making a slipknot and place it on the needle. Insert the needle into the first stitch from back to front, and wrap the yarn around the needle. Pull the yarn through the stitch, creating a new stitch on the needle. Repeat this process for the remaining stitches, making sure to keep the tension even.
Once you have cast on all the stitches, you can begin working the ribbing pattern. The most common ribbing pattern is K1, P1, which means you knit one stitch and purl one stitch in a repeating pattern. This creates a series of raised ribs that give the cuff its stretchy and textured appearance.
Continue working the ribbing pattern for the specified number of rows, following the pattern instructions. Make sure to keep your tension consistent to maintain an even and neat ribbing. Once you have completed the ribbing, you can move on to the next section of the mitten pattern.
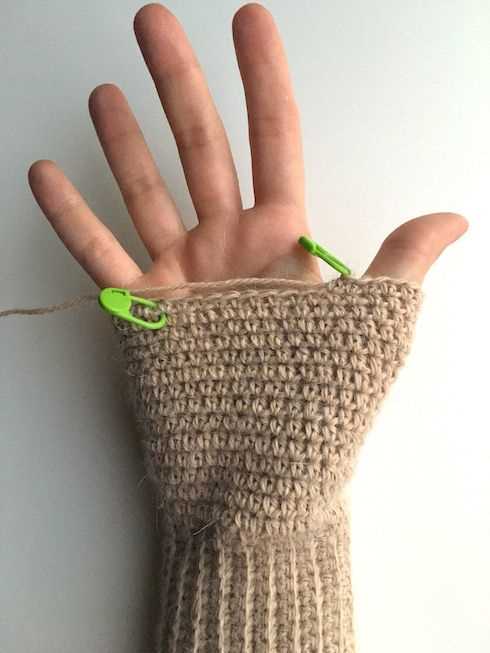
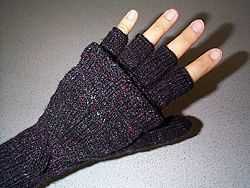
Creating the Thumb Hole
A thumb hole is an essential feature of convertible mittens, as it allows for easy access to your fingers when needed. Here is a step-by-step guide on how to create the thumb hole in your knitted mittens.
1. Determine the placement: Begin by identifying the location where you want the thumb hole to be on your mitten. Typically, it is located on the side of the mitten, slightly below the center. Mark this spot with a stitch marker or a different color yarn.
2. Divide the stitches: Count the number of stitches on your needle and divide it in half. Place half of the stitches onto a stitch holder or waste yarn. These stitches will form the thumb section of your mitten.
3. Provisional cast on: Using a provisional cast on technique, cast on an equal number of stitches to the number you placed on hold. This will create a bridge between the thumb section and the main body of the mitten.
4. Continue knitting: With all the stitches back on the needle, continue knitting in the pattern until you reach the desired length for the mitten. Make sure to keep track of any stitch pattern changes or decreases you need to make.
5. Reveal the thumb: Once you have finished knitting the main body of the mitten, it’s time to remove the provisional cast on and reveal the thumb section. Pick up the stitches from the provisional cast on and place them back on the needle.
6. Shape the thumb: Knit the thumb section in your desired stitch pattern, making any necessary decreases or increases to shape the thumb. Pay attention to maintaining the same gauge as the rest of the mitten.
7. Finish the thumb: Continue knitting the thumb section until it reaches the desired length. Bind off the stitches and weave in any loose ends.
8. Complete the mitten: Once the thumb is finished, you can continue knitting the mitten as per the pattern instructions. Don’t forget to attach any additional features like buttons or closures if desired.
By following these steps, you can easily create a thumb hole in your knitted convertible mittens. The thumb hole adds functionality to the mittens, allowing you to use your fingers freely while keeping your hands warm and cozy.
Shaping the Mittens: Increasing and Decreasing Stitches
The shaping of the mittens is an important step in creating the perfect fit. By increasing and decreasing stitches, you can create the desired shape and size of the mittens. Let’s take a look at how to do this.
Increasing Stitches
To increase stitches, you can use various methods such as yarn overs or make one (M1) increases. Yarn overs create an eyelet and are often used for decorative purposes. Make one increases involve picking up the horizontal strand of yarn between two stitches and knitting into it. This method creates a nearly invisible increase.
In the context of convertible mittens, increasing stitches can be done at the beginning or end of a row, or within the body of the mittens. Increasing at the beginning or end of a row is usually done to shape the thumb gusset. This creates more space for the thumb to move comfortably. For example, you may increase 1 stitch at the beginning and end of every third row until a certain number of stitches is reached. This ensures that the thumb gusset gradually widens.
Decreasing Stitches
Decreasing stitches is essential to create the tapering shape of the mittens towards the fingertips. There are various methods you can use, such as knit two together (K2tog), slip, slip, knit (SSK), or slip, slip, knit pass slipped stitches over (SSK psso).
In the context of convertible mittens, decreasing stitches can be done at the fingertips to create a snug fit. This can be achieved by decreasing stitches evenly across a row or decreasing at specific points. For example, you may decrease 2 stitches at the beginning and end of every other row until a certain number of stitches is reached. This ensures that the mitten tapers towards the fingertips.
With the knowledge of increasing and decreasing stitches, you can confidently shape your mittens to fit perfectly. Experiment with different methods and techniques to achieve the desired shape and size. Happy knitting!
How to Knit the Flap for the Fingers
In order to create the flap for the fingers on your convertible mittens, you will need to follow a specific knitting pattern. Below, I will outline the steps to help you successfully complete this part of the project.
Materials Needed:
- Worsted weight yarn
- Size 7 knitting needles
- Stitch markers
Instructions:
- Begin by casting on the required number of stitches for your desired mitten size. It is recommended to use a long-tail cast-on method to create a stretchy and secure edge.
- Knit in the round until the mitten reaches the base of your fingers. This will depend on the length you prefer for your mittens.
- When you reach the desired length, you will need to start shaping the flap for the fingers. To do this, you will divide your stitches into separate sections for each finger.
- Using stitch markers, mark off the stitches for each finger. Determine the number of stitches needed for each finger, taking into consideration the size and shape of your hand.
- Once the stitches are divided, you will knit each section separately. This will create individual flaps for each finger, allowing for maximum dexterity.
- Continue knitting each section until the flap reaches the desired length. This will depend on how much coverage you want for each finger.
- Once all the flaps are complete, you will then join them back together to continue knitting the body of the mitten. This will create a versatile convertible mitten design.
- After joining the flaps, you can continue knitting in the round until the mitten reaches the desired length. Remember to leave an opening for the thumb, if you wish to have a thumb flap as well.
- Finish off your mitten by binding off all the stitches and weaving in any loose ends. You can also add any additional embellishments or details to personalize your mittens.
By following these instructions, you will be able to knit a flap for the fingers on your convertible mittens. This will allow for easy and convenient access to your fingers when needed, while still providing warmth and protection when they are covered.
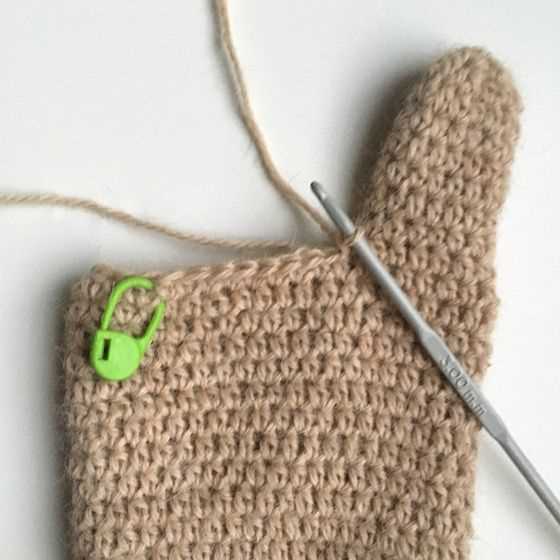
Joining the Flap: Knitting in the Round
In the convertible mittens knitting pattern, once you have completed the thumb opening, it’s time to join the flap and start knitting in the round. This technique allows you to continue knitting without a seam, creating a seamless and comfortable mitten.
To join the flap, first, thread a stitch marker onto your right-hand needle. This will mark the beginning of your round. Take your left-hand needle and insert it into the first stitch on your holder, which is the first stitch of the thumb opening. Slip this stitch onto your left-hand needle without knitting it, and then slip the stitch marker from your right-hand needle onto your left-hand needle.
Next, with your left-hand needle, insert it into the next stitch on your holder, which is the last stitch of the thumb opening. Knit this stitch together with the first stitch from your main mitten piece. This creates a secure join between the flap and the main mitten.
Once you have joined the flap, you can continue knitting in the round as you would normally. Follow the pattern instructions for the desired number of rounds, working the specified stitch pattern or design. Remember to keep track of your rounds using a stitch marker or a row counter if needed.
Knitting in the round allows you to create a seamless tube, providing a better fit and eliminating the need for seaming later on. It also speeds up the knitting process, as you won’t need to purl any stitches. Overall, joining the flap and knitting in the round is an important step in making your convertible mittens functional and comfortable.
Finishing Touches: Bind off and Weaving in Ends
Once you have completed knitting your convertible mittens, it’s time to give them the finishing touches. The first step is to bind off your stitches. To do this, knit the first two stitches as normal, then using the left-hand needle, lift the first stitch over the second stitch and off the right-hand needle. Continue this process until you reach the end of the row. Cut the yarn, leaving a long tail.
Next, it’s time to weave in the ends of your yarn to give your mittens a clean and professional finish. Thread the long tail of yarn onto a tapestry needle and insert it into the first stitch on the wrong side of the work. Weave the needle in and out of the stitches, following the path of the yarn, for about an inch, then trim off any excess yarn. Repeat this process for any other loose ends.
To ensure that your mittens are secure and won’t unravel, you can also reinforce the edges by sewing them down. Using the tapestry needle and matching yarn, sew along the edges of the cuffs and the thumb opening, using a whipstitch or a slip stitch. This will give your mittens added durability and prevent them from stretching out over time.
If desired, you can also add decorative elements to your mittens, such as buttons or embroidery. Sew on buttons at the cuff or stitch on a small design using embroidery floss, following a pattern or creating your own unique design. This will add a personal touch to your mittens and make them even more special.
With the bind off completed, ends woven in, and any additional embellishments added, your convertible mittens are now fully finished and ready to be worn or gifted. Enjoy the warmth and versatility of your handmade mittens!
Customizing Your Mittens: Embellishments and Variations
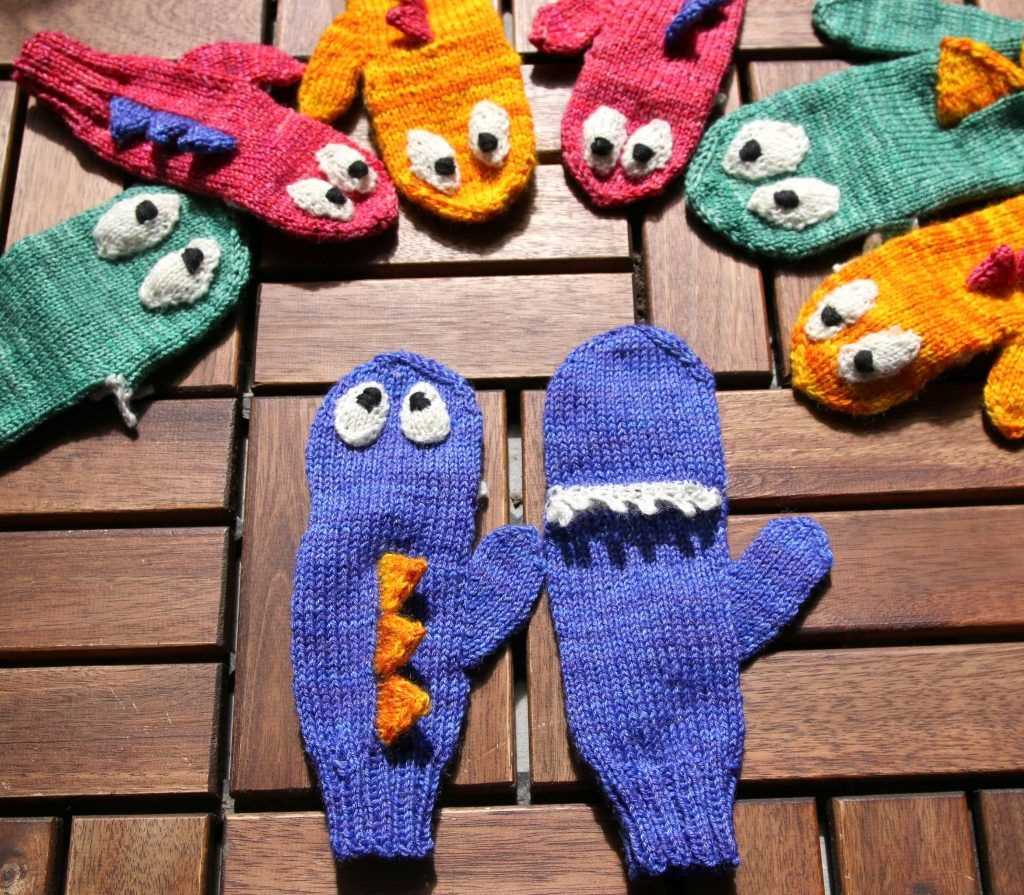
Once you have mastered the basic convertible mittens knitting pattern, you may want to experiment with different embellishments and variations to make your mittens truly unique. Here are some ideas to get you started:
1. Colorwork:
Add some color to your mittens by incorporating different shades or variegated yarns. You can create simple stripes or experiment with more intricate Fair Isle or intarsia designs. Colorwork can add visual interest and make your mittens stand out.
2. Embroidery:
Add a personal touch to your mittens by embroidering them with your favorite designs or motifs. You can use embroidery floss or yarn in contrasting colors to create intricate patterns or monograms. Embroidery can add texture and dimension to your mittens.
3. Button or Toggle Closure:
Instead of using a simple ribbed cuff, you can add a button or toggle closure to your mittens. This not only adds a decorative element but also allows you to secure the mitten flap in place when you convert them to fingerless gloves. Choose buttons or toggles that match the style and color of your mittens.
4. Cable or Lace Panel:
Add some elegance to your mittens with a cable or lace panel. You can incorporate a small panel along the back of the hand or along the mitten flap. Cables and lace patterns can add a touch of sophistication and make your mittens look more intricate.
5. Faux Fur Trim:
Add some warmth and luxury to your mittens by adding a faux fur trim to the edges. You can sew a strip of faux fur along the cuffs or the mitten flap. Faux fur trim can give your mittens a cozy and stylish look.
These are just a few ideas to inspire you to customize your mittens. Feel free to mix and match these embellishments and variations or come up with your own unique ideas. The possibilities are endless when it comes to making your mittens truly one-of-a-kind.
Tips and Tricks for a Perfect Pair of Mittens
Knitting mittens can be a fun and rewarding project, especially when using a convertible mittens pattern. However, it can also be challenging to make sure your mittens turn out just right. Here are some tips and tricks to help you create a perfect pair of mittens:
1. Choose the Right Yarn

When knitting mittens, it’s essential to choose a yarn that is warm, durable, and comfortable to wear. Look for a yarn that is specifically designed for mittens or socks, as these tend to have a higher wool content and are more resistant to wear and tear.
2. Gauge Swatch
Before starting your project, it’s crucial to make a gauge swatch to ensure that you’re using the correct needle size and achieving the correct stitch count. The gauge swatch will help you determine if you need to adjust your tension or needle size to achieve the right fit for your mittens.
3. Follow the Pattern
When knitting mittens, it’s important to carefully follow the pattern instructions. Pay attention to stitch counts, shaping, and any special techniques or stitches used. Following the pattern will ensure that your mittens have the correct measurements and fit as intended.
4. Use Stitch Markers
Stitch markers are helpful tools when knitting mittens, especially when working on the thumb gusset or any other shaping. Place stitch markers where indicated in the pattern to help you keep track of your progress and ensure that your mittens have a neat and even appearance.
5. Avoid Tight Bind-Offs
When finishing the cuff of your mittens, make sure not to bind off too tightly. A tight bind-off can make it difficult to get your hand in and out of the mitten. Use a stretchy bind-off method, such as the Jeny’s Surprisingly Stretchy Bind Off or the Russian Bind Off, to ensure a comfortable fit.
6. Block Your Mittens
Blocking your mittens is an essential step in finishing your project. This process will help even out the stitches, improve the overall appearance of your mittens, and ensure that they fit properly. Follow the blocking instructions provided by the yarn manufacturer or use a general blocking method suitable for your yarn type.
By following these tips and tricks, you can create a perfect pair of mittens that are not only stylish but also functional. Enjoy the process of knitting and stay warm with your handmade mittens!