
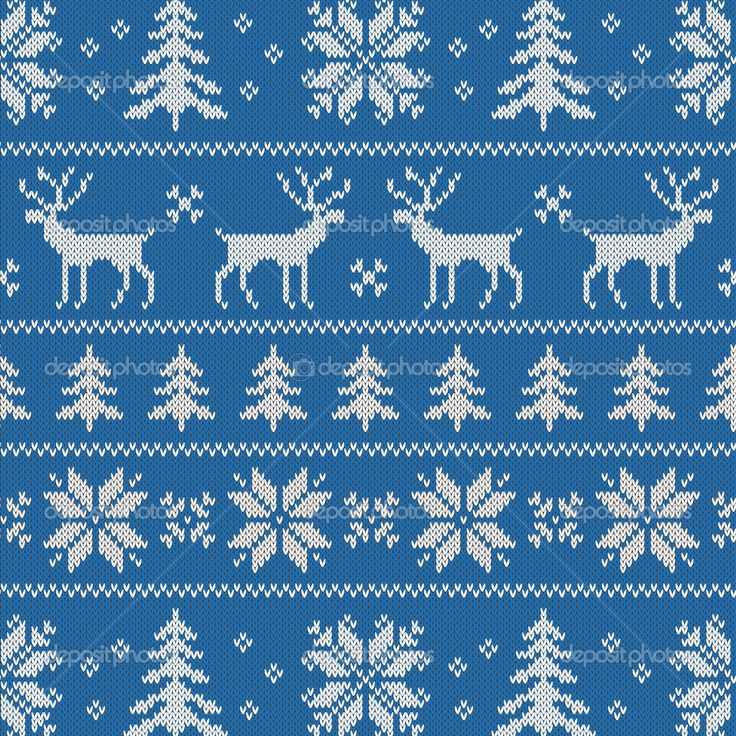
Knitting is not only a practical skill but also a creative outlet. The Norwegian snowflake knitting pattern is a popular design that showcases the intricate beauty of Norwegian knitting traditions. This pattern is characterized by its delicate snowflake motifs, making it perfect for winter-inspired projects.
Originating from Norway, this knitting pattern has a long history and is deeply rooted in the country’s cultural heritage. The Norwegian people have a strong tradition of knitting, and this pattern is just one of the many exquisite designs they have developed over the years. The snowflake pattern often features symmetric motifs and intricate details, reflecting the Norwegians’ meticulous attention to detail.
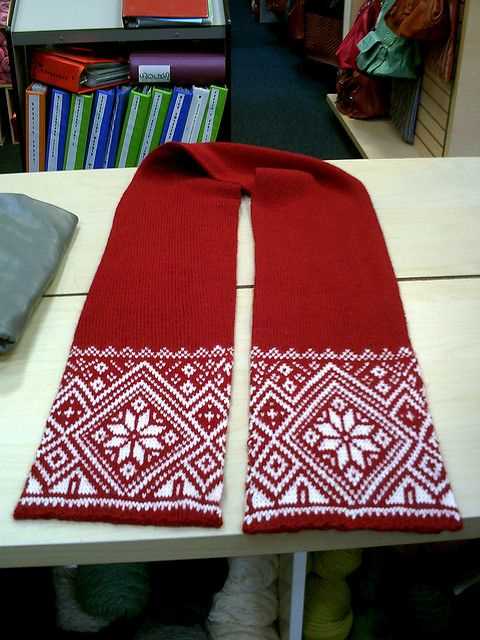
The Norwegian snowflake knitting pattern is versatile and can be used in various projects, such as sweaters, hats, scarves, and blankets. The use of different color combinations can create unique and stunning designs. With its timeless appeal, this pattern is suitable for knitters of all skill levels, from beginners to experienced enthusiasts.
Norwegian Snowflake Knitting Pattern
If you’re looking for a traditional and beautiful knitting pattern, look no further than the Norwegian snowflake pattern. This intricate design features delicate snowflakes scattered across a background of knit stitches. It’s perfect for adding a touch of Scandinavian charm to any winter project. Whether you’re making a cozy sweater or a festive holiday stocking, the Norwegian snowflake pattern is sure to impress.
To create the Norwegian snowflake pattern, you’ll need to have some experience with colorwork knitting. It involves working with multiple yarn colors to create the intricate snowflake design. The pattern typically uses a combination of knit, purl, and slip stitches to form the snowflakes, resulting in a textured and visually stunning piece. The contrasting colors help to highlight the individual snowflakes, making them stand out against the background.
To begin the Norwegian snowflake pattern, you’ll first need to choose your colors. Traditional color combinations include white and red, white and blue, or white and green. Once you’ve chosen your colors, you’ll need to cast on the required number of stitches. The pattern typically provides a gauge and stitch count to help you get started.
Next, you’ll start knitting the background stitches in the main color, following the pattern’s instructions for the stitch pattern. This usually involves a combination of knit, purl, and slip stitches to create a textured base. Once you’ve completed a few rows of the background, it’s time to introduce the contrasting color for the snowflake design.
To knit the snowflakes, you’ll follow a chart or written instructions that specify where to place the contrasting color. This is typically done using the intarsia or stranded colorwork techniques. As you work, you’ll switch between the main color and contrasting color to form the snowflake design. The pattern will guide you on which stitches to work with each color to create the desired effect.
As you progress through the pattern, you’ll see the snowflakes emerge and come to life. The combination of the textured background and contrasting snowflake design creates a stunning visual effect. Take your time and pay attention to the pattern instructions, making sure your tension remains consistent throughout.
Once you’ve completed the pattern, you can use the finished piece in a variety of ways. The Norwegian snowflake design is popular for sweaters, hats, mittens, scarves, and even home decor items like blankets or pillow covers. It adds a festive and cozy touch to any winter project and is sure to become a treasured heirloom.
In conclusion, the Norwegian snowflake knitting pattern is a beautiful and intricate design that adds a touch of Scandinavian charm to any winter project. With some experience in colorwork knitting and attention to detail, you can create stunning pieces featuring delicate snowflakes against a textured background. Whether you’re a seasoned knitter or looking to expand your skills, the Norwegian snowflake pattern is a must-try.
How to Choose the Right Yarn for Norwegian Snowflake Knitting Pattern

The Norwegian snowflake knitting pattern is a popular design that features intricate snowflake motifs. To bring this pattern to life, it is important to choose the right yarn. Here are some tips to help you select the perfect yarn for your Norwegian snowflake knitting project.
1. Consider the Fiber: When choosing yarn for the Norwegian snowflake pattern, consider the fiber content. Opt for natural fibers such as wool or alpaca, as they provide warmth and durability. These fibers also allow the intricate details of the snowflake pattern to shine.
2. Look for a Smooth Texture: Since the Norwegian snowflake pattern often includes intricate colorwork and detailed stitches, it is best to choose yarn with a smooth texture. This will ensure that the stitches glide easily on the needles and give the snowflake pattern a polished appearance.
3. Choose the Right Weight: The weight of the yarn determines the thickness and drape of the finished project. For the Norwegian snowflake pattern, choose a yarn that is medium to heavy weight. This will help the snowflake motifs stand out and create a cozy knitted fabric.
4. Consider the Colors: The Norwegian snowflake pattern often incorporates multiple colors, so it is important to choose yarn that comes in a wide range of shades. Look for yarn brands that offer a variety of color options, allowing you to create a stunning and vibrant snowflake design.
5. Check the Gauge: Pay attention to the recommended gauge for the Norwegian snowflake pattern. This will help you determine if the yarn you have chosen will result in the desired size and fit. It is important to swatch and adjust your needle size if necessary to achieve the correct gauge.
By considering the fiber, texture, weight, colors, and gauge when selecting yarn for your Norwegian snowflake knitting pattern, you can ensure that your finished project is both beautiful and functional. Happy knitting!
Tools and Materials Needed for Norwegian Snowflake Knitting Pattern
When embarking on a knitting project, it is important to gather all the necessary tools and materials beforehand. The Norwegian snowflake knitting pattern is no exception. Here is a list of the items you will need to successfully complete this beautiful pattern.
1. Yarn:
Choose a high-quality yarn in the colors of your choice. Traditionally, snowflakes are knitted using white or silver yarn to mimic the winter season. Make sure to select a yarn that is suitable for the desired finished product, such as fine or fingering weight yarn for delicate snowflakes or worsted weight yarn for larger ones.
2. Knitting Needles:
Have a set of double-pointed knitting needles or circular knitting needles in the appropriate size for your chosen yarn. The exact needle size will depend on the yarn weight and your personal tension, so refer to the pattern or gauge instructions for guidance.
3. Stitch Markers:
Stitch markers are essential for keeping track of stitch counts and pattern repeats. They can be in the form of simple plastic rings or decorative charms that can be easily attached to the knitting needles.
4. Yarn Needle:
A yarn needle, also known as a tapestry needle, is used for weaving in loose ends and seaming. Choose a needle with a large enough eye to accommodate the yarn you are working with.
5. Scissors:
A pair of small, sharp scissors is necessary for cutting the yarn and trimming any excess ends. It is important to have a clean cut to ensure a neat and professional-looking finished project.
6. Pattern:
Lastly, make sure to have a copy of the Norwegian snowflake knitting pattern. This can be in the form of a printed document or a digital file on your computer or mobile device. Follow the instructions carefully to achieve the desired result.
By having all these tools and materials ready, you will be well-prepared to begin knitting the Norwegian snowflake pattern. Enjoy the process and create beautiful snowflakes to embellish your winter projects!
Getting Started with Norwegian Snowflake Knitting Pattern
Knitting is a popular craft that allows you to create beautiful and intricate designs with just a few basic stitches. If you’re looking to try something new, the Norwegian snowflake knitting pattern is a great choice. This pattern features intricate snowflake motifs that add a touch of elegance to any project.
To get started with the Norwegian snowflake knitting pattern, you’ll need some basic supplies. These include knitting needles, yarn in your chosen colors, and a pattern. The pattern will provide you with step-by-step instructions on how to create each snowflake motif.
You can choose to knit the snowflake motifs individually and then sew them together to create a larger project, such as a scarf or blanket. Alternatively, you can incorporate the snowflakes into an existing knitting pattern, such as a hat or sweater.
The Norwegian snowflake knitting pattern typically involves using stranded knitting technique, also known as Fair Isle knitting. This technique involves holding two different colors of yarn at the same time and switching between them to create the desired design. It can take some practice to get the tension right and ensure that the floats of yarn are not too loose or too tight.
The snowflake motifs themselves are created using a combination of knit and purl stitches. You’ll need to follow the pattern closely to ensure that you’re knitting each stitch correctly and creating the right shape. With some patience and practice, you’ll soon be able to create beautiful snowflake motifs with ease.
Whether you’re a beginner or an experienced knitter, the Norwegian snowflake knitting pattern is a fun and challenging project to try. It allows you to create stunning designs that capture the beauty of winter and add an extra special touch to your handmade items. So gather your supplies, find a pattern, and get ready to create your own beautiful Norwegian snowflake knitting project.
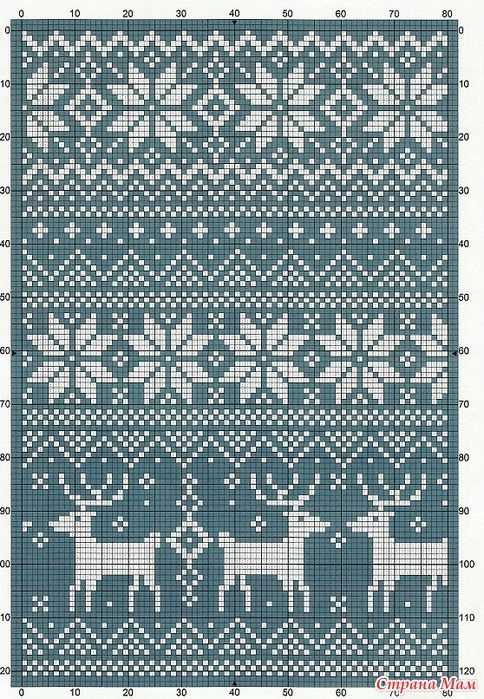
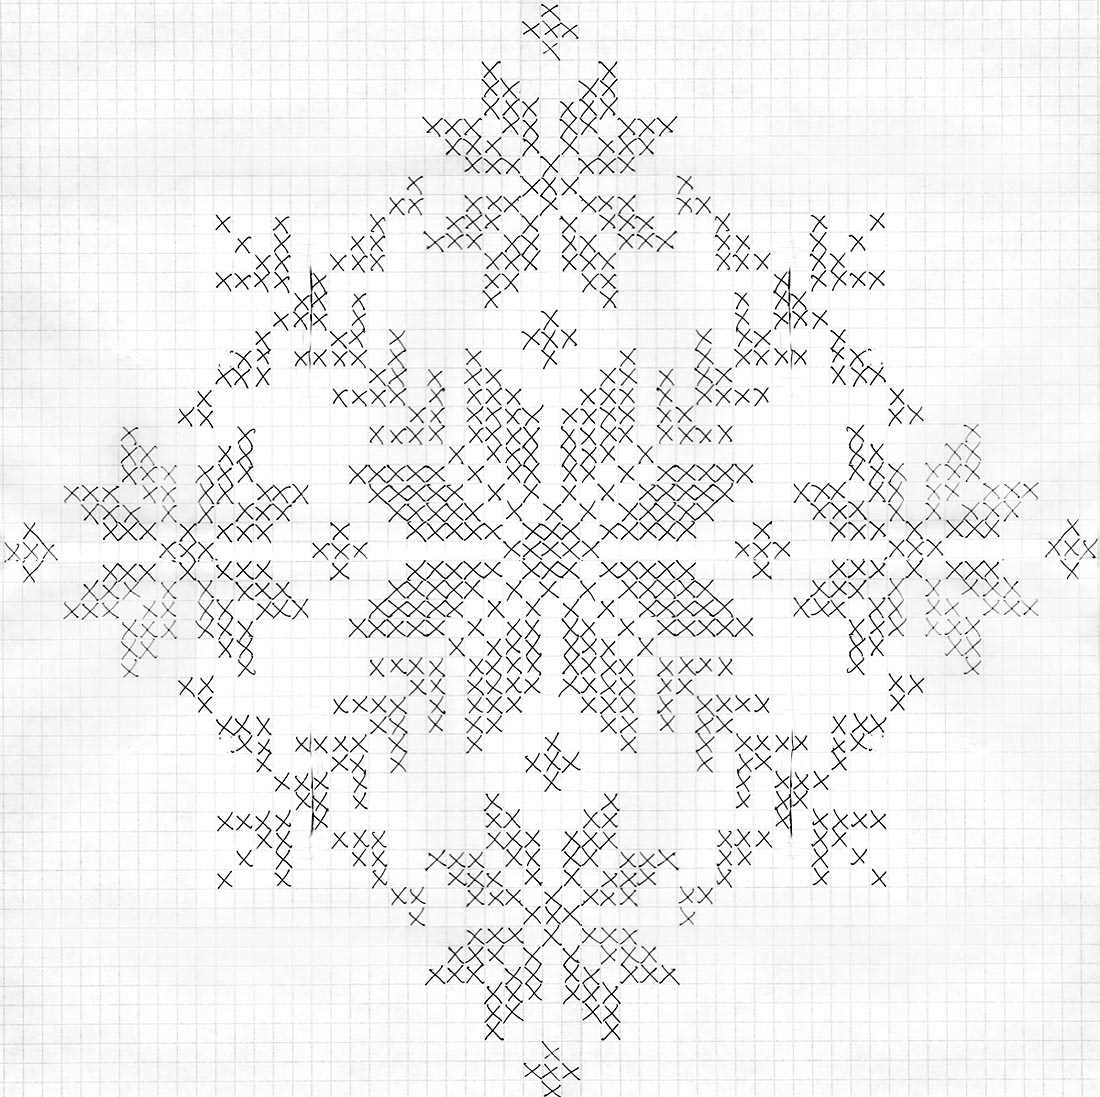
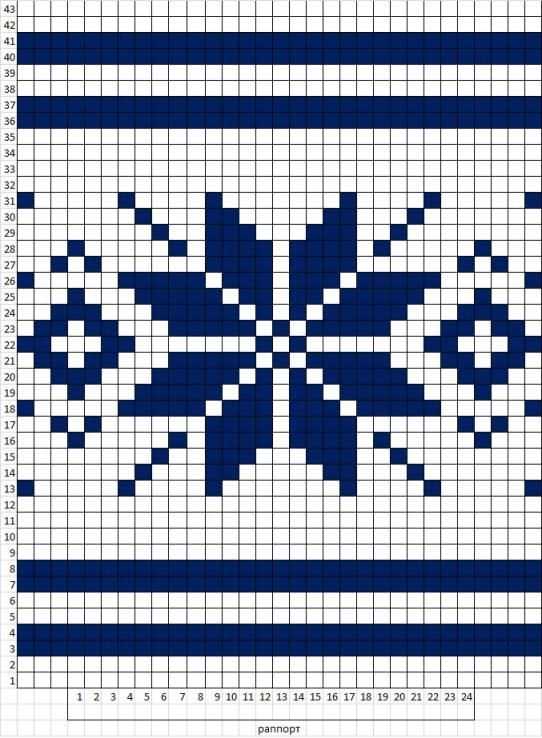
Reading and Understanding the Norwegian Snowflake Knitting Chart
Knitting snowflake patterns is a popular technique in Norwegian knitting, with its intricate and delicate designs. To successfully create a beautiful snowflake design, it is important to know how to read and understand the Norwegian snowflake knitting chart. This chart is a visual representation of the pattern, showcasing each stitch and color change.
Key Symbols:
The Norwegian snowflake knitting chart uses specific symbols to represent different stitches and techniques. Some common symbols include:
- K or k: Knit stitch
- P or p: Purl stitch
- O or o: Yarn over
- / or : Decrease stitch
- Color symbols: Each color in the pattern is represented by a unique symbol
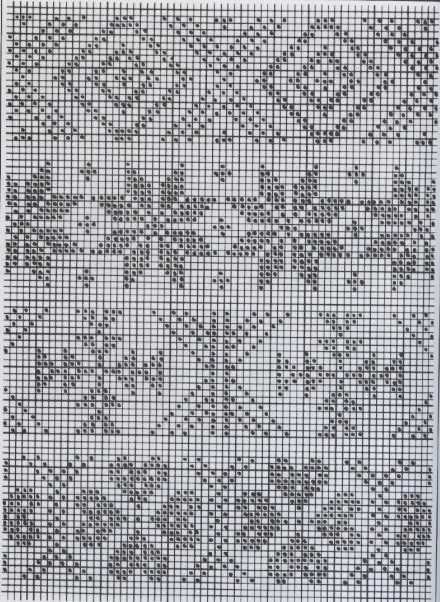
Chart Layout:
The Norwegian snowflake knitting chart is typically laid out on a grid, with each square representing one stitch. The chart is read from right to left for right-handed knitters, and left to right for left-handed knitters. The rows are read from bottom to top.
Color Changes:
One of the important aspects of the snowflake knitting chart is understanding the color changes. The chart will indicate which color to use for each stitch, and sometimes there will be multiple colors in one row. It’s important to follow the color key provided and keep track of the color changes as you knit.
Following the Chart:
To successfully knit the snowflake pattern, you will need to follow the chart row by row. Start with the first row at the bottom and work your way up. Use the symbols and color changes in the chart as your guide, and remember to read the chart from the correct direction based on your handedness.
Reading and understanding the Norwegian snowflake knitting chart may seem complex at first, but with practice and patience, you can master this technique and create stunning snowflake designs. Happy knitting!
Tips and Tricks for Knitting the Perfect Norwegian Snowflake
Knitting a Norwegian snowflake pattern can be a beautiful and intricate project. Here are some tips and tricks to help you create the perfect snowflake:
Choose the Right Yarn
When knitting a Norwegian snowflake pattern, it’s important to choose the right yarn. Opt for a traditional Norwegian yarn, such as Dale of Norway or Rauma, that is specifically designed for knitting intricate patterns. These yarns are often made of high-quality wool, which will provide excellent stitch definition and help the pattern stand out.
Use Small Needles
To achieve the delicate and intricate look of a Norwegian snowflake, it’s important to use small needles. Choose a size that is appropriate for your yarn, but aim for a smaller size than you would typically use for a standard knitting project. This will help create tight and defined stitches that showcase the intricate details of the snowflake design.
Pay Attention to Tension
Tension is crucial when knitting a Norwegian snowflake pattern. Consistent tension throughout your work will ensure that the stitches are even and the pattern is clear. Take your time and focus on maintaining an even tension as you knit. If you find that your tension is too loose or too tight, consider adjusting your needle size or the way you hold your yarn.
Use Stitch Markers
Stitch markers can be extremely helpful when knitting a complex snowflake pattern. Use them to mark the beginning of each repeat or any key points in the pattern. This will help you keep track of your progress and ensure that you’re following the pattern correctly. It’s also a good idea to use different colored markers to differentiate between different sections of the snowflake.
Block Your Finished Snowflake
Once you’ve finished knitting your Norwegian snowflake, it’s important to block it properly to bring out the intricate details and give it a polished look. Wet blocking is often the best method for lace knitting like the snowflake pattern. Gently soak your snowflake in lukewarm water, squeeze out the excess moisture, and then pin it down on a blocking mat or towel to dry. This will help the stitches relax and open up, enhancing the beauty of your snowflake.
By following these tips and tricks, you’ll be able to knit the perfect Norwegian snowflake pattern. Enjoy the process and take pride in creating a stunning piece of handknit art!
Blocking and Finishing Techniques for the Norwegian Snowflake Knitted Piece
Blocking is an essential step in the finishing process for the Norwegian snowflake knitted piece. It helps to shape and even out the stitches, giving the final product a polished and professional look. To block the piece, you will need a flat surface, such as a blocking board or a clean towel, rust-proof pins, and a spray bottle filled with water.
Start by soaking the knitted piece in lukewarm water for about 15 minutes. Gently squeeze out the excess water, being careful not to wring or twist the fabric. Lay the piece flat on the blocking board or towel, making sure to reshape it to the desired measurements. Use rust-proof pins to secure the edges of the piece, stretching it slightly if needed. Mist the fabric with water from the spray bottle to promote moisture absorption.
Once the piece is blocked, it is important to let it dry completely before removing the pins. This can take several hours or even overnight, depending on the thickness of the fabric and the humidity of the environment. Avoid moving or disturbing the piece while it is drying to maintain its shape.
After the piece is dry, carefully remove the pins and admire your beautifully blocked Norwegian snowflake knitted piece. If there are any loose ends or stray threads, use a yarn needle to weave them back into the fabric, ensuring a neat and tidy finish. Finally, give the piece one last gentle steam with an iron on a low setting to smooth out any remaining wrinkles or creases.
Variations and Customizations for the Norwegian Snowflake Knitting Pattern
The Norwegian snowflake knitting pattern is a beautiful and intricate design that can be customized and varied to create unique and stunning projects. Whether you are a beginner or an experienced knitter, there are endless possibilities to explore with this pattern.
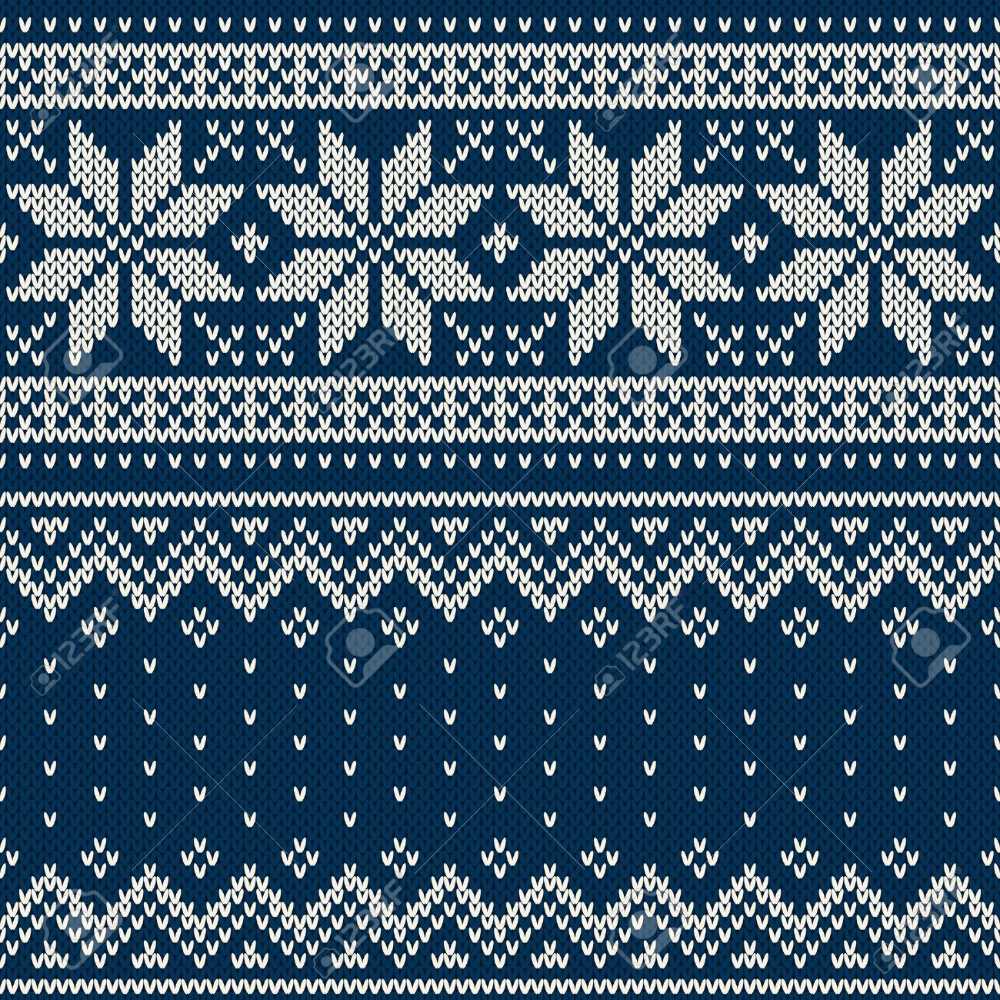
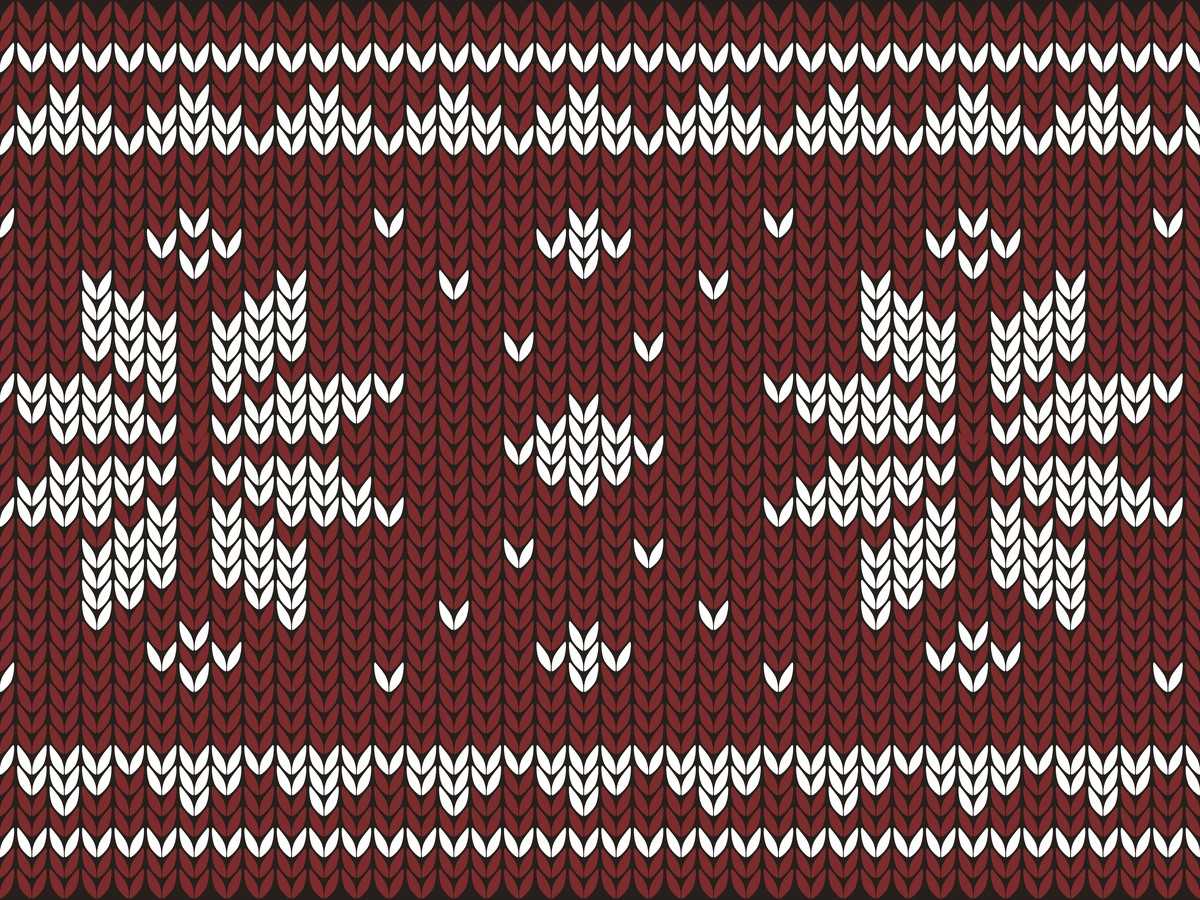
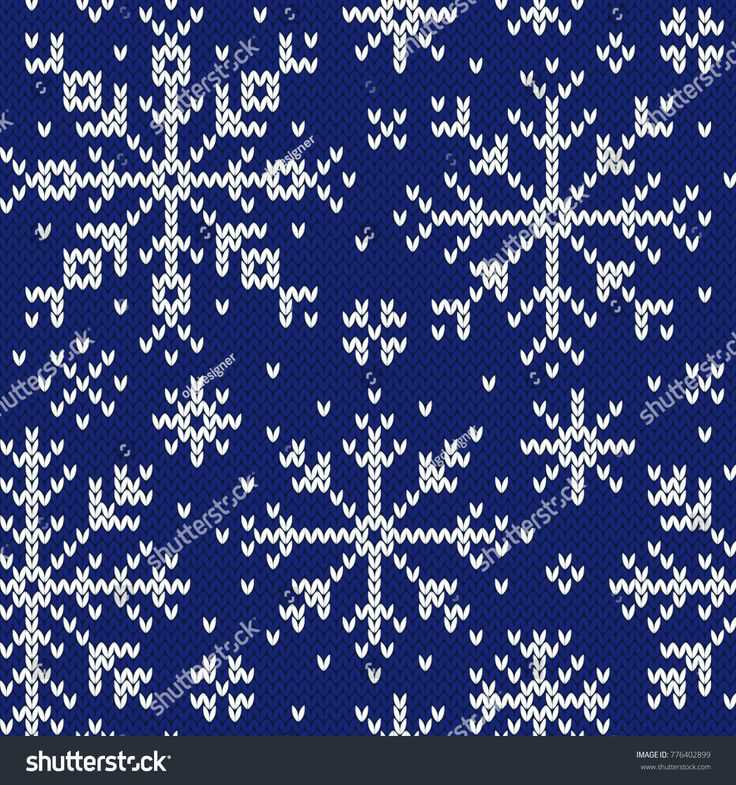
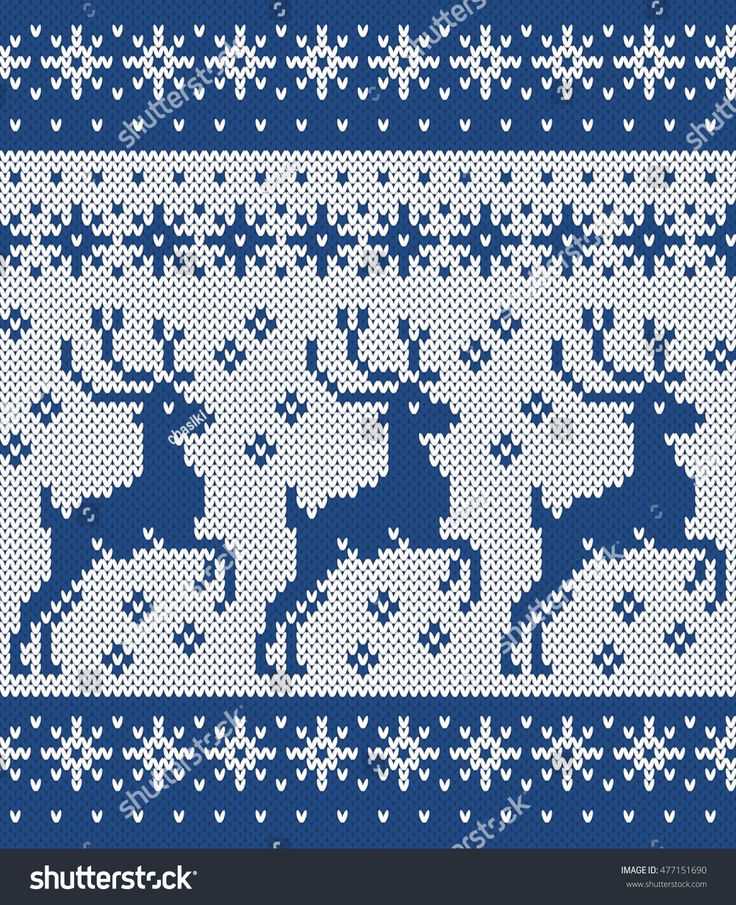
One way to customize the Norwegian snowflake pattern is by changing the color scheme. While the traditional pattern typically features a white snowflake on a dark background, you can experiment with different color combinations to create a more personalized look. For example, you could try using pastel colors for a softer and more delicate snowflake, or bold and vibrant colors for a more modern and eye-catching design.
Adding Embellishments
To further customize the Norwegian snowflake pattern, you can also consider adding embellishments such as beads or sequins. These small details can add an extra layer of texture and sparkle to your knitted project. You can place them strategically on the snowflake design or scatter them randomly throughout the piece to create a subtle or more pronounced effect.
Another way to customize the pattern is by varying the size of the snowflakes. While the traditional Norwegian snowflake pattern typically features one large snowflake in the center, you can experiment with different sizes to create a more dynamic and visually interesting design. Try knitting multiple smaller snowflakes and arranging them in a scattered or symmetrical pattern to create a unique and individualized look.
Combining with Other Patterns

If you’re feeling adventurous, you can also combine the Norwegian snowflake pattern with other knitting patterns to create a truly unique and personalized project. For example, you could incorporate the snowflake design into a larger garment such as a sweater or scarf, or use it as an accent on a hat or mittens. The possibilities are endless and limited only by your imagination.
In conclusion, the Norwegian snowflake knitting pattern is a versatile and customizable design that allows you to create unique and stunning knitted projects. Whether you choose to experiment with color, add embellishments, vary the size, or incorporate it into other patterns, the Norwegian snowflake pattern is a timeless and beautiful choice. Let your creativity and imagination guide you as you explore the endless variations and customizations that this pattern has to offer.
Projects and Ideas for Using the Norwegian Snowflake Knitting Pattern
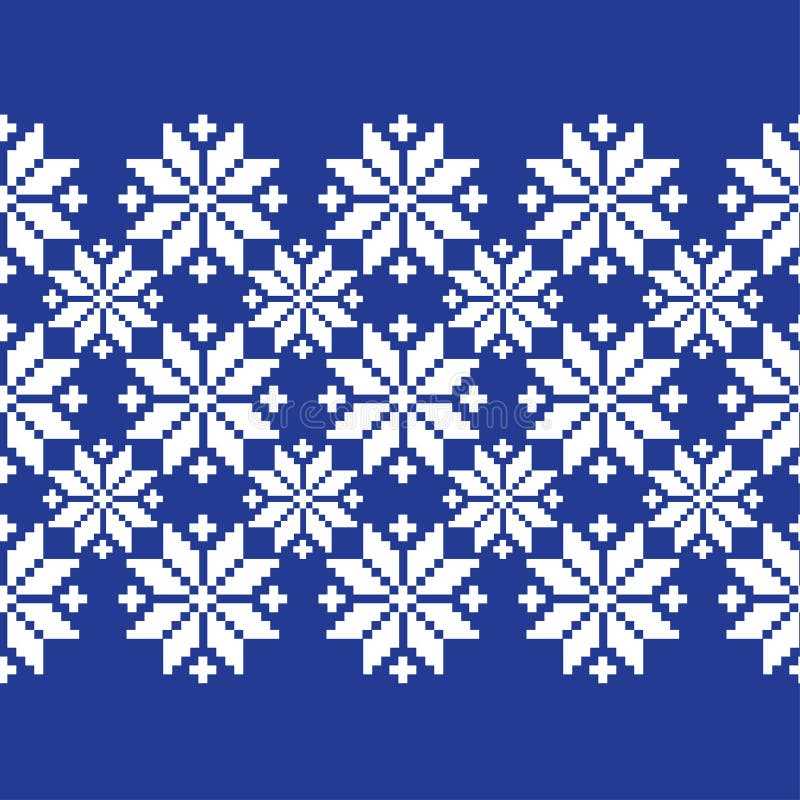
If you’re looking for a stunning knitting pattern to add some Nordic charm to your projects, the Norwegian snowflake pattern is a perfect choice. This classic design features intricate geometric shapes and delicate snowflake motifs, making it ideal for creating cozy winter accessories and home decor. Here are some projects and ideas to inspire you to use the Norwegian snowflake knitting pattern.
1. Winter Hats and Scarves
Keep warm and stylish during the cold winter months by knitting hats and scarves with the Norwegian snowflake pattern. Whether you choose to knit them in a single color or incorporate multiple contrasting shades, the snowflake design will add a touch of elegance to your winter wardrobe. Consider using soft and warm yarns such as merino wool or alpaca to enhance the cozy feel of the accessories.
2. Cozy Sweaters and Cardigans
Elevate your knitting skills by incorporating the Norwegian snowflake pattern into your sweater or cardigan projects. The intricate snowflake motifs can be featured on the yoke, sleeves, or as an all-over pattern, creating a stunning piece of winter fashion. Experiment with different color combinations to make your snowflakes stand out or go for a more subtle look with tone-on-tone shades.
3. Winter Home Decor
Bring the beauty of winter indoors by knitting home decor items with the Norwegian snowflake pattern. Create cozy cushions, blankets, or even curtains with the intricate snowflake design, adding a touch of Scandinavian charm to your living space. Consider using natural fibers such as cotton or linen for a light and airy feel, or opt for chunky wool for a cozy and warm texture.
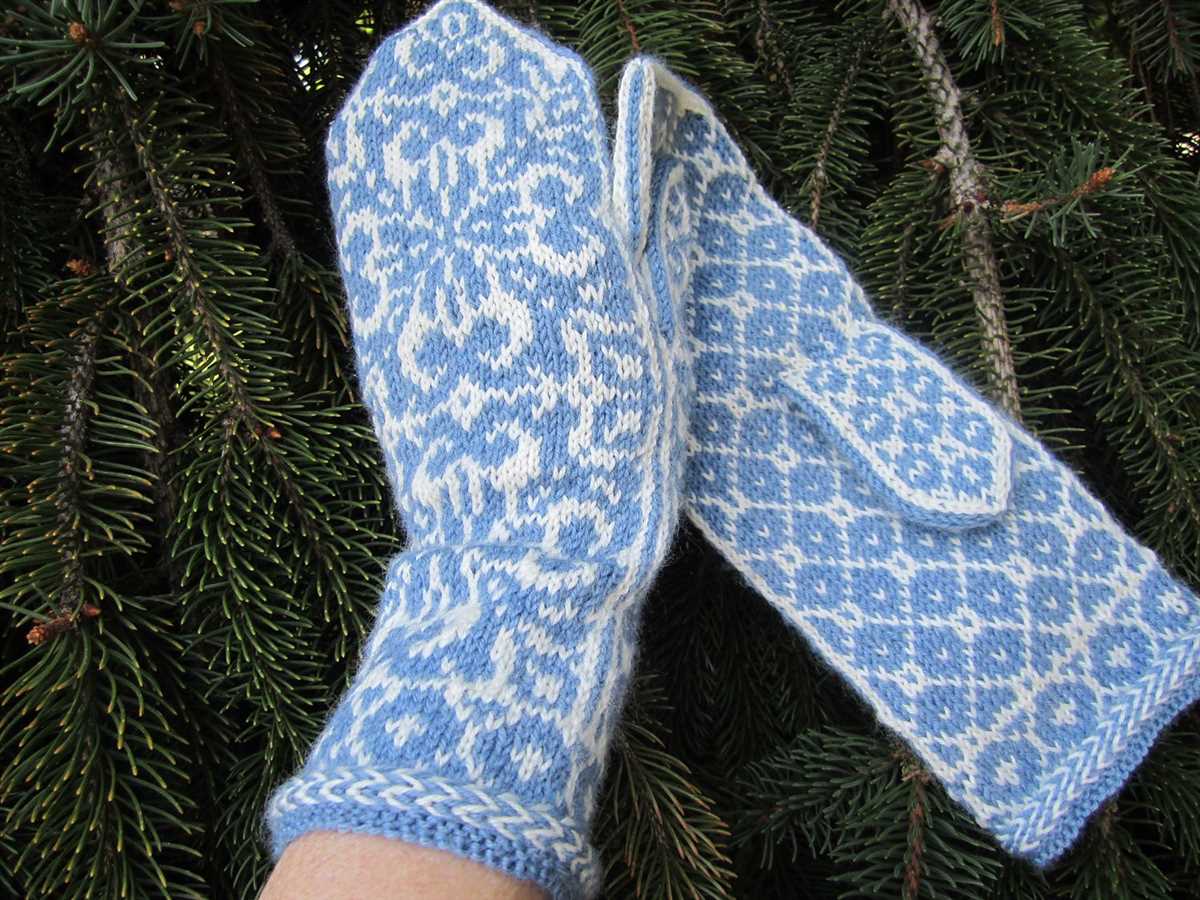
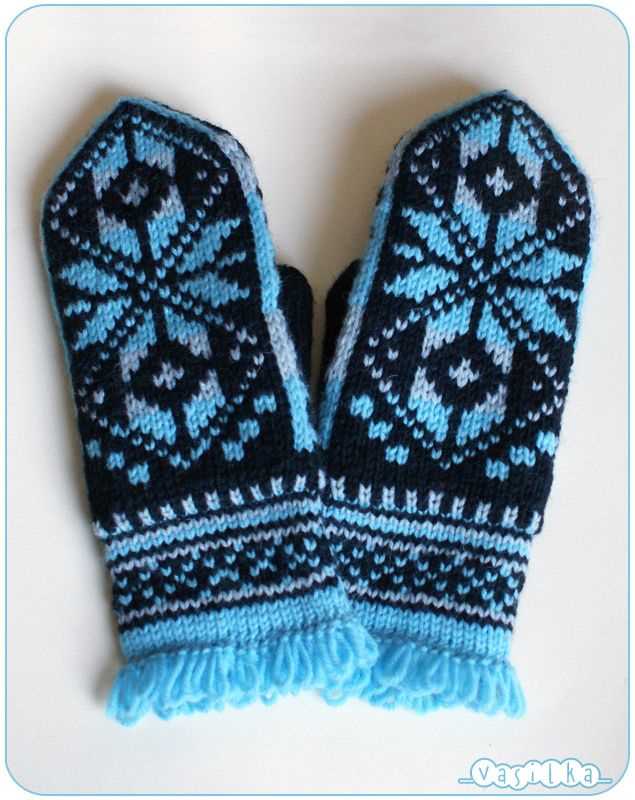
4. Mittens and Gloves
Knit stylish and functional mittens or gloves using the Norwegian snowflake pattern. The delicate snowflake motifs will add a unique touch to your cold-weather accessories while keeping your hands warm and cozy. Experiment with different color combinations and incorporate contrasting cuffs or fingertips for added visual interest.
5. Christmas Ornaments
Create beautiful and unique Christmas ornaments using the Norwegian snowflake pattern. Knit small snowflake motifs and attach them to strings or ribbons to hang on your Christmas tree. You can also knit larger snowflakes and attach them to embroidery hoops for a more intricate and decorative look. Personalize your ornaments by using different colors or adding beads and sequins.
Whether you choose to create winter accessories, home decor items, or Christmas ornaments, the Norwegian snowflake knitting pattern will add a touch of elegance and charm to your projects. Let your creativity soar and embrace the beauty of this timeless design.
Troubleshooting Common Issues with the Norwegian Snowflake Knitting Pattern
Knitting the Norwegian snowflake pattern can be a fun and rewarding experience, but like any knitting pattern, it can have its challenges. Here, we will address some common issues that knitters may encounter when working on this pattern and provide troubleshooting tips to help you overcome them.
1. Uneven Tension
One of the most common problems knitters face is achieving consistent tension throughout their work. Uneven tension can result in a snowflake pattern that looks distorted or asymmetrical. To tackle this issue, try the following:
- Relax and breathe: Begin by taking a few deep breaths and consciously relaxing your shoulders and fingers. Tension can build up when we hold our needles too tightly, so remind yourself to knit with a light touch.
- Practice: If you’re new to knitting, it may take some time to develop an even tension. Practice knitting more regularly to train your hands and fingers to maintain consistency.
- Check your needle size: Sometimes, using the wrong needle size can affect your tension. Make sure you are using the recommended needle size for the pattern and adjust if necessary.
2. Twisted Stitches
Twisted stitches can occur when the wrong stitch is inserted into the needle or when the stitches are not properly aligned. To fix this issue:
- Use a stitch marker: Placing a marker before and after the pattern repeat can help you keep track of the stitches and ensure they are not twisting.
- Pay attention to the stitch instructions: Carefully read and understand the pattern instructions before knitting. Make sure you are following the correct stitch placement and direction.
- Take your time: Double-check your work after completing each row to catch any twisted stitches early on. It’s easier to fix them sooner rather than later.
3. Mistakes in the Chart
Mistakes can happen in the charted pattern, leading to an incorrect snowflake design. Here’s how to handle this situation:
- Check for errata: Before starting the project, look for any published errata or corrections for the pattern. The pattern designer or publisher may have identified and shared any mistakes.
- Compare to finished samples: If you have access to a finished sample of the pattern, compare your work to it regularly to ensure you are on track and following the correct pattern.
- Contact the pattern designer: If you believe there is a mistake in the pattern and cannot find any published corrections, reach out to the pattern designer for guidance or clarification.
Remember, knitting is a process, and mistakes happen to even the most experienced knitters. Don’t get discouraged if you encounter issues with the Norwegian snowflake knitting pattern. With a little patience, practice, and troubleshooting, you can successfully knit beautiful snowflake designs.
Q&A:
What is a Norwegian snowflake knitting pattern?
A Norwegian snowflake knitting pattern is a traditional design used in Norwegian knitting. It typically features a snowflake motif and is often used to create warm and cozy sweaters, hats, and other winter accessories.
What are the characteristics of a Norwegian snowflake knitting pattern?
Characteristics of a Norwegian snowflake knitting pattern include intricate snowflake motifs, geometric designs, and often the use of traditional Norwegian knitting techniques such as stranded colorwork or fair isle knitting.
How do you create a Norwegian snowflake knitting pattern?
To create a Norwegian snowflake knitting pattern, you can either follow a pre-existing pattern or design your own. Typically, it involves knitting with multiple colors and following a chart or written instructions for the snowflake design.
Where can I find Norwegian snowflake knitting patterns?
You can find Norwegian snowflake knitting patterns in various places, including knitting books, online knitting communities, and knitting pattern websites. Traditional Norwegian knitting books and publications often feature snowflake patterns.
What types of projects can be made using a Norwegian snowflake knitting pattern?
A Norwegian snowflake knitting pattern can be used to make a wide range of projects, including sweaters, hats, scarves, mittens, socks, and even home decor such as blankets or pillows. The pattern can be adapted to fit different items and sizes.