
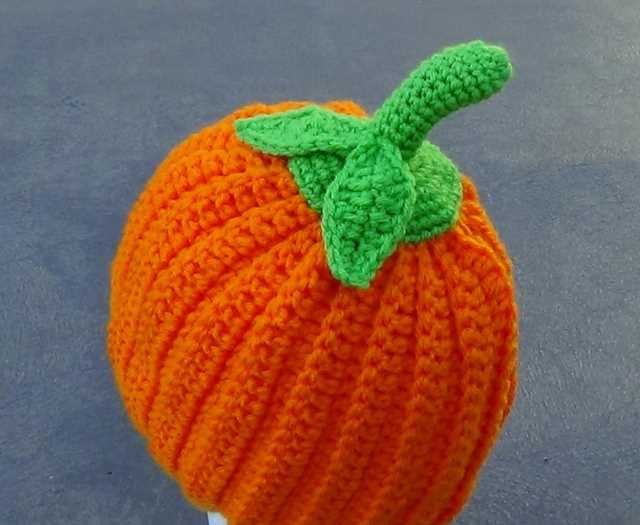
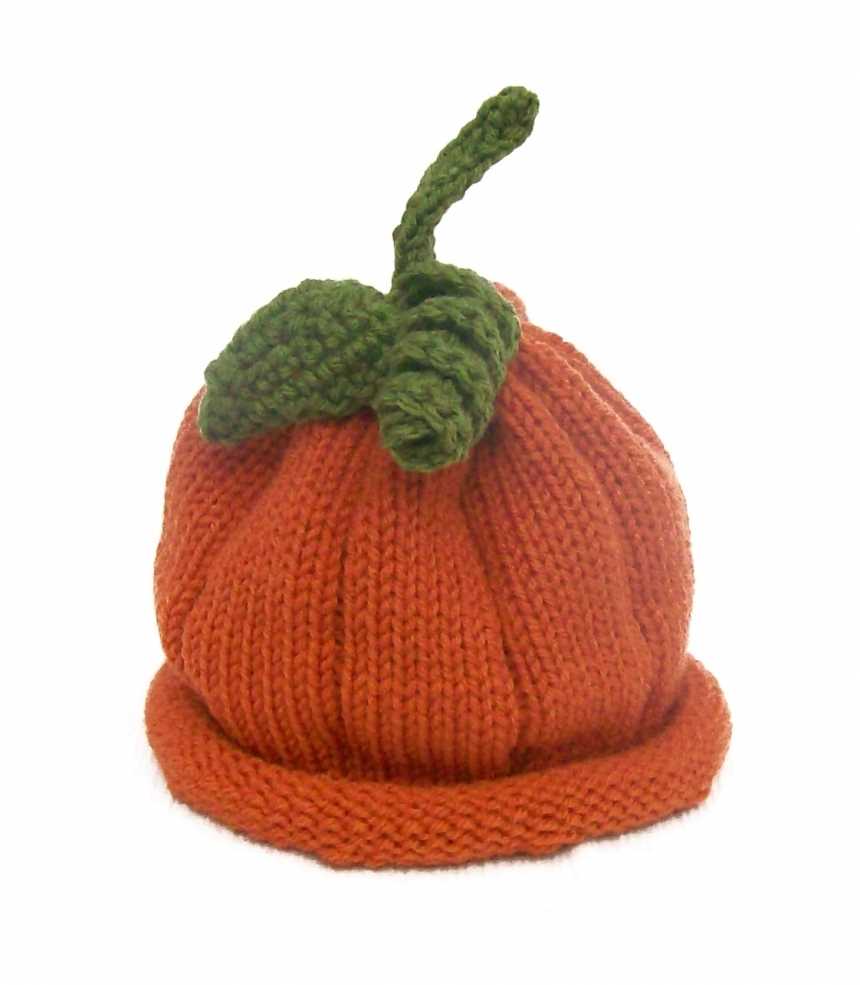
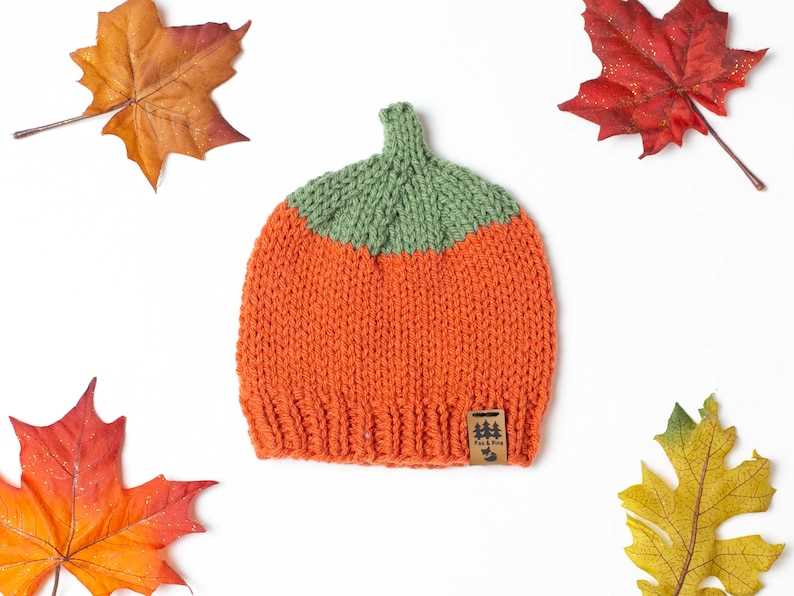
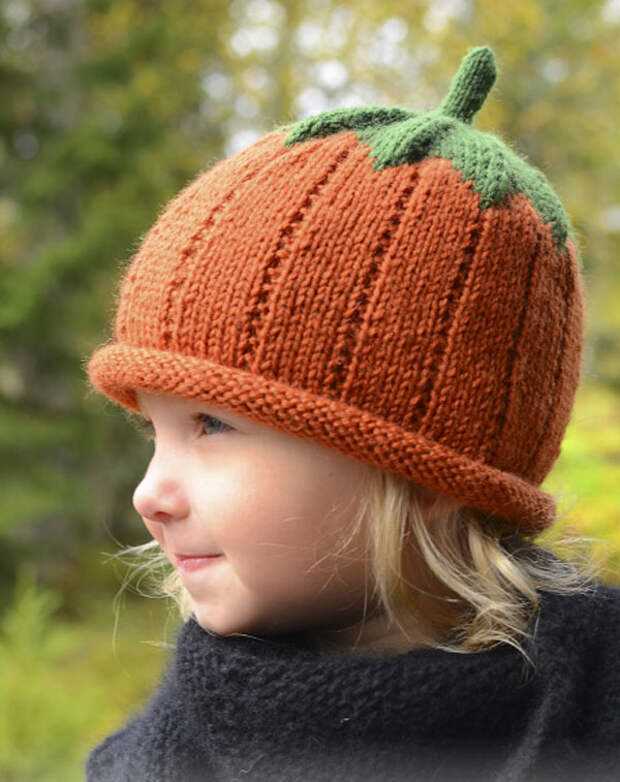
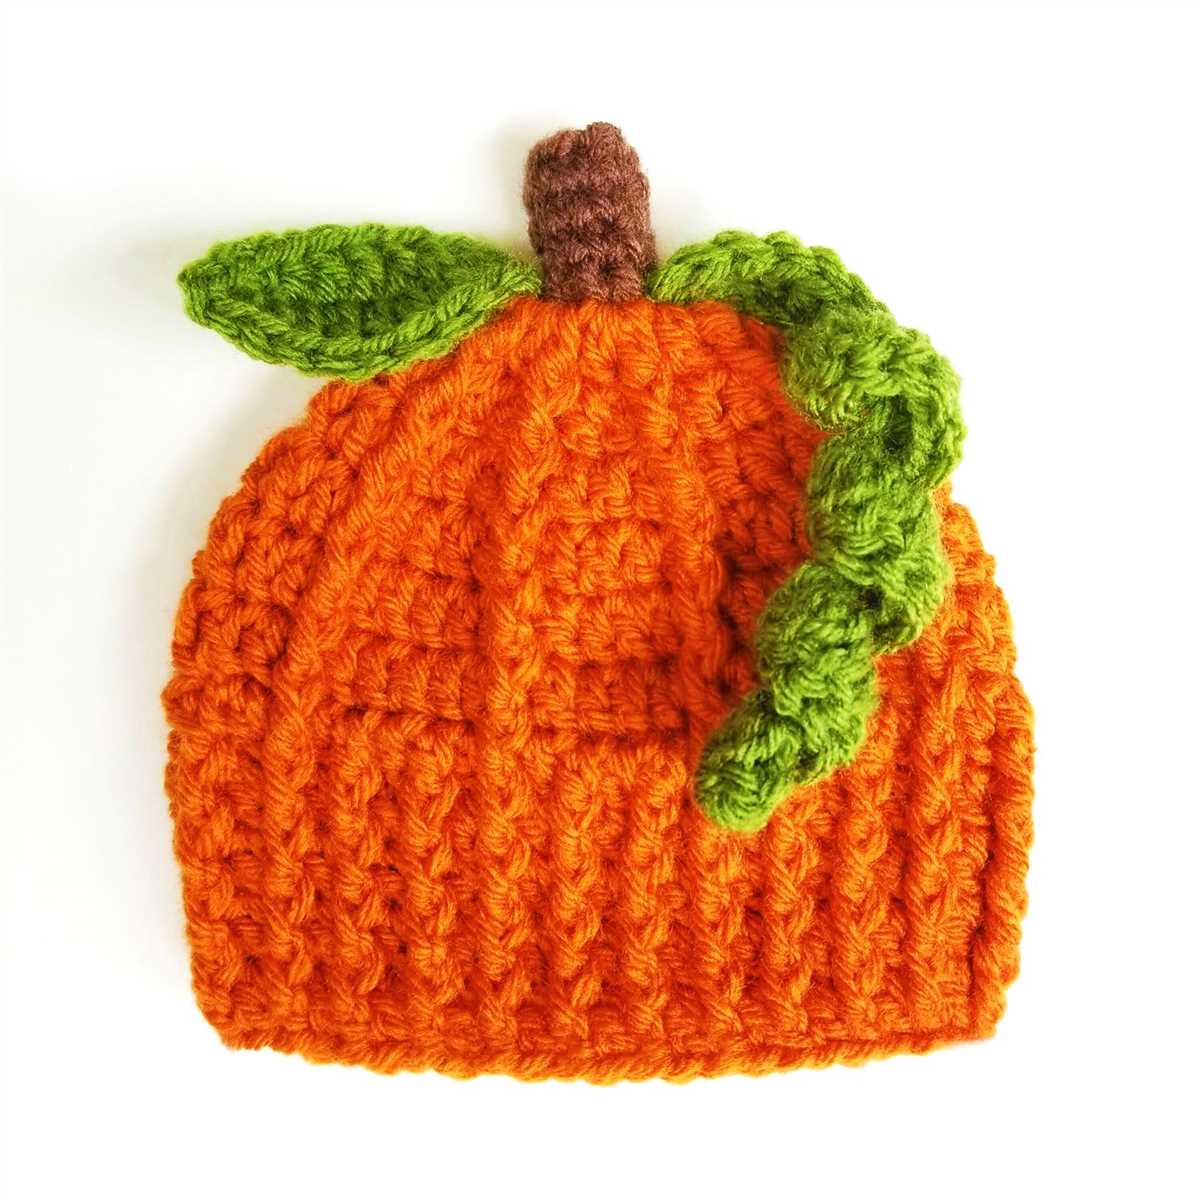
If you’re looking for a fun and festive project to knit this fall, a pumpkin hat is the perfect choice. Whether you’re knitting for yourself or a loved one, a pumpkin hat is sure to add a touch of whimsy to any outfit. With its vibrant orange color and adorable leaf and stem details, this hat is a must-have accessory for the autumn season.
Knitting a pumpkin hat is also a great way for beginners to practice their knitting skills. This pattern is straightforward and easy to follow, making it a great project for anyone new to knitting. The pumpkin hat can be knit in the round, using circular needles or double-pointed needles, which adds to its simplicity. If you’re new to knitting in the round, this pattern is a great opportunity to learn this technique.
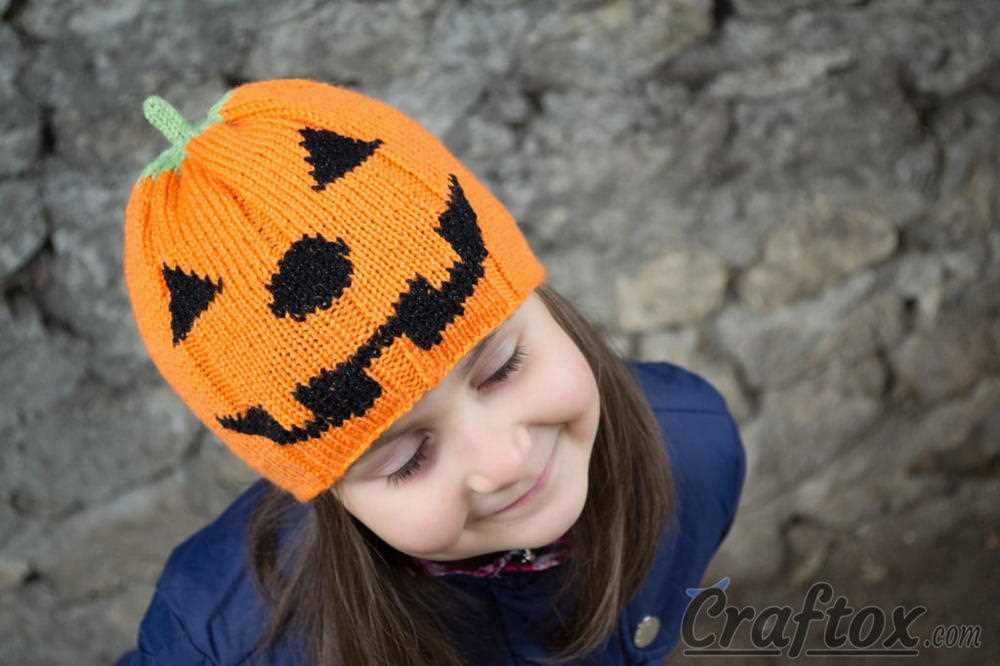
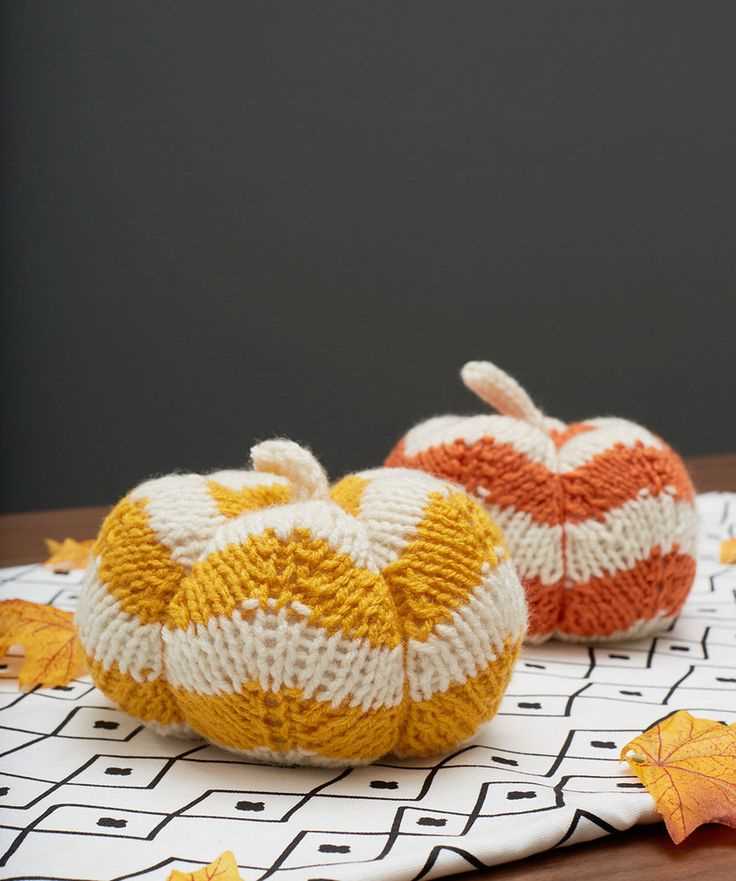
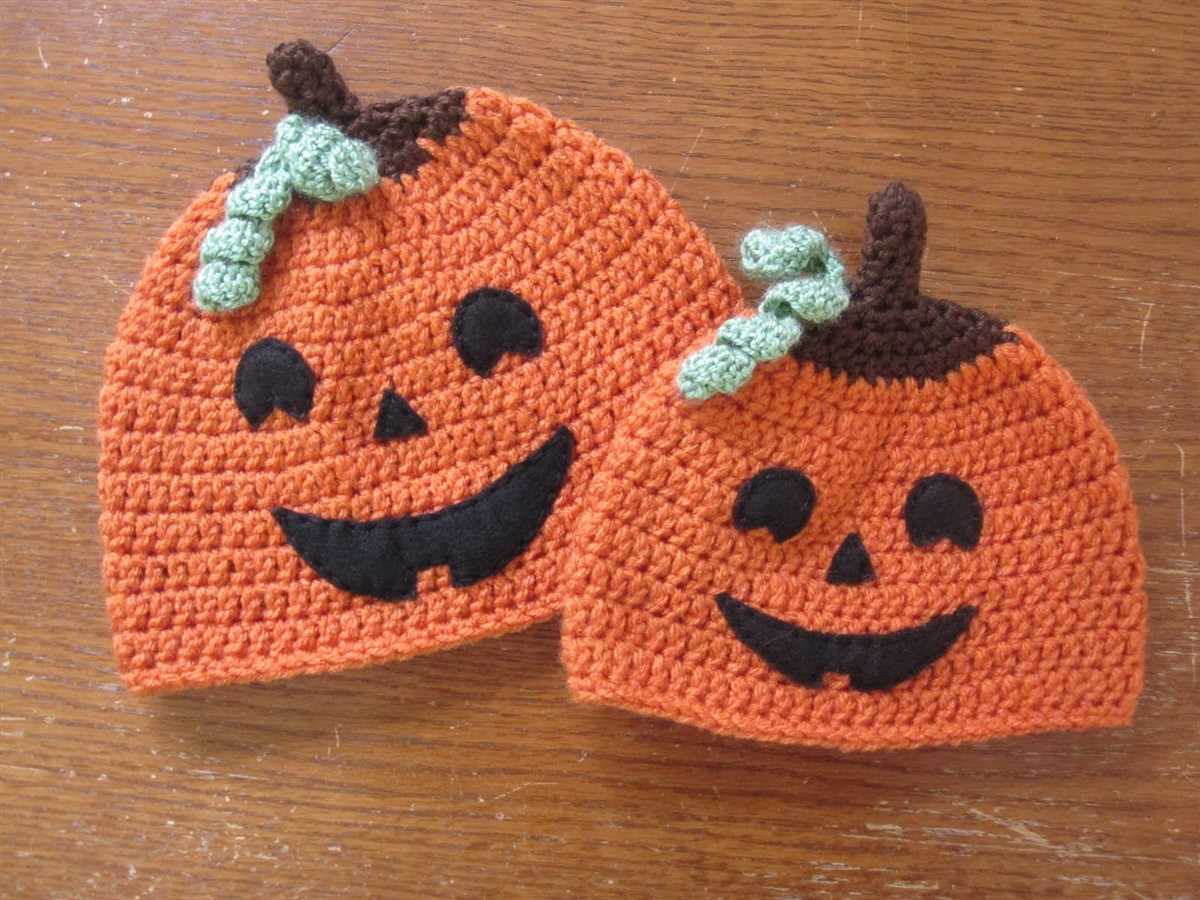
To make your pumpkin hat even more unique, you can customize it by adding your own personal touches. Consider embroidering a face on the front of the hat, or adding a cute bow or flower accent. You can also experiment with different yarn colors and textures to create a one-of-a-kind hat that reflects your personal style. Whether you choose a classic orange yarn or opt for a more unconventional shade like teal or purple, your pumpkin hat is sure to be a standout piece.
Pumpkin Knit Hat Pattern
If you’re looking to make a cute and festive hat for the fall season, look no further than this pumpkin knit hat pattern! This pattern is perfect for beginners and experienced knitters alike, and will add a touch of autumn charm to any outfit.
To get started on this project, you’ll need the following materials:
- Size 8 knitting needles
- Worsted weight yarn in orange and green
- Tapestry needle for weaving in ends
- Stitch markers
To begin, cast on 80 stitches using the long-tail cast-on method. Make sure to leave a long tail for sewing up the seam later.
Next, knit in rib stitch (knit 2, purl 2) for 10 rows, or until the ribbing measures about 2 inches. This will create a stretchy brim for the hat.
Once the ribbing is complete, switch to knitting in stockinette stitch (knit one row, purl one row) for the body of the hat. Continue knitting in stockinette stitch until the hat measures about 6 inches from the brim.
Now it’s time to shape the crown of the hat. To do this, start decreasing stitches in every other row. You can use stitch markers to keep track of where to decrease.
Continue decreasing stitches until you have about 8 stitches left. Cut the yarn, leaving a long tail. Thread the tail through the tapestry needle and slip the needle through the remaining stitches to gather them tightly. Secure the end by weaving it into the hat.
Finally, it’s time to add the pumpkin stem! Using the green yarn, cast on 6 stitches and knit in stockinette stitch for about 4 inches. Bind off, leaving a long tail for sewing. Fold the stem in half lengthwise and sew it onto the top of the hat, just off-center.
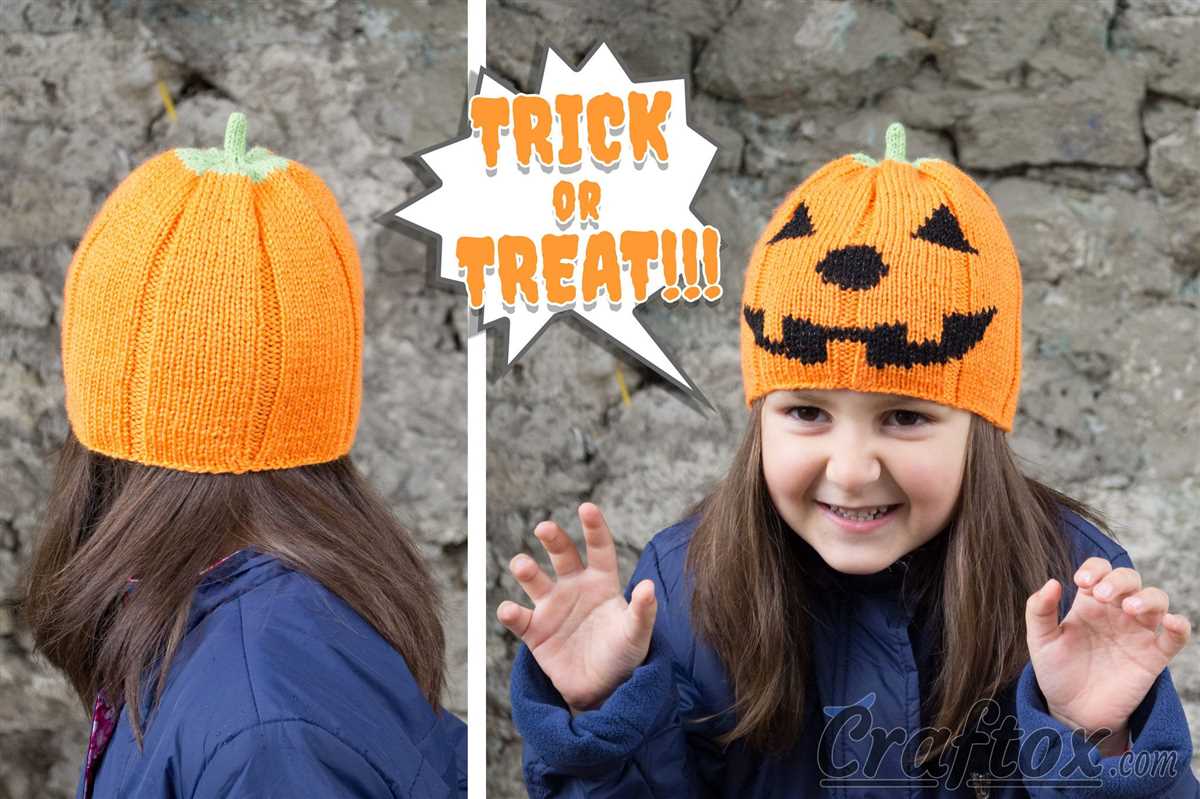
And there you have it – a cute and cozy pumpkin knit hat! This hat is perfect for wearing on crisp autumn days or even as a fun accessory for Halloween. Enjoy making this hat and showing off your knitting skills!
Materials Needed
Before you start knitting your pumpkin hat, make sure you have all the necessary materials. Here is a list of items you will need:
- Yarn: You will need orange yarn to create the body of the pumpkin hat. Choose a soft and chunky yarn for a cozy and warm hat.
- Knitting Needles: Use the recommended needle size for your chosen yarn. Typically, a US size 10 or 11 needle will work well with chunky yarn.
- Tapestry Needle: This needle will be used for weaving in ends and sewing any seams in the hat.
- Stitch Markers: These are helpful for keeping track of certain sections or patterns in your knitting.
- Scissors: You will need a pair of scissors for cutting the yarn.
- Measuring Tape: Use a measuring tape to ensure that your hat is the correct size as you progress with your knitting.
- Row Counter: A row counter is useful for keeping track of how many rows you have completed in your project.
Once you have gathered all of these materials, you will be ready to start knitting your pumpkin hat!
Gauge and Sizing
When knitting a pumpkin hat, it is important to pay attention to the gauge. The gauge refers to the number of stitches and rows that are needed to create a specific measurement of fabric. It is essential to achieve the correct gauge in order for the hat to fit properly.
Before starting the project, it is recommended to create a gauge swatch. This is a small sample of the knitting pattern that allows you to measure the number of stitches and rows per inch. By comparing the measurements of the swatch to the pattern’s gauge, you can determine if you need to adjust your knitting tension or needle size to achieve the desired gauge.
Sizing:
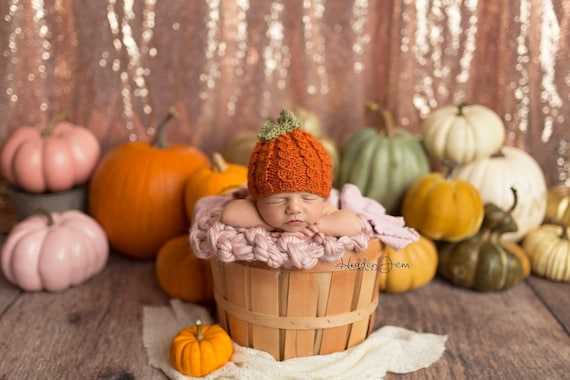
The sizing for the pumpkin hat pattern typically includes different sizes for newborns, infants, toddlers, and children. Each size may require different measurements and stitch counts. It is important to carefully read the pattern instructions and select the appropriate size based on the intended recipient’s head circumference.
Additionally, the pattern may include instructions for adjusting the hat size. This can be done by adding or subtracting stitches or by modifying the length of the hat. It is recommended to make any necessary adjustments before starting the knitting process to ensure a proper fit.
Overall, paying attention to gauge and sizing is essential when knitting a pumpkin hat. By achieving the correct gauge and selecting the appropriate size, you can create a hat that fits well and is comfortable to wear.
Cast On
Cast on is the first step in knitting a pumpkin knit hat. It is the process of creating the foundation row of stitches on your knitting needle. There are different methods of casting on, but the long-tail cast on method is commonly used for this pattern.
To cast on using the long-tail method, you will need to estimate the length of yarn required for your desired number of stitches. Leave a tail of yarn, which should be approximately three times the width of the knitting project. Then, create a slipknot by making a loop with the tail of the yarn and pulling the working yarn through. Slip the loop onto the knitting needle and tighten it by pulling the yarn tail.
Once the slipknot is secured on the needle, you can begin casting on the stitches. Hold the needle with the slipknot in your right hand and the working yarn in your left hand. Insert the right needle under the loop on the left needle and wrap the working yarn around both needles counterclockwise. With the right needle, pull the loop through the stitch on the left needle, slipping it onto the right needle. Repeat this process for the desired number of stitches.
The cast on stitches should be loose enough to easily slide along the needle, but not too loose that they are overly stretched. Once you have cast on all the stitches for your pumpkin knit hat pattern, you are ready to move on to the next step of the knitting process.
Ribbing
In knitting, ribbing is a technique used to create a stretchy fabric that is often used for cuffs, collars, and waistbands. Ribbing is created by alternating knit and purl stitches in a specific pattern. These alternating stitches create columns of raised ribs (knit stitches) and recessed valleys (purl stitches).
Ribbing is often used in garments and accessories because it provides an excellent stretch and helps maintain the shape of the finished item. It is especially popular for hat cuffs, as it ensures a snug fit and helps keep the hat in place.
The most common ribbing patterns are 1×1 ribbing and 2×2 ribbing. In 1×1 ribbing, one knit stitch is followed by one purl stitch, and this pattern is repeated. In 2×2 ribbing, two knit stitches are followed by two purl stitches, and this pattern is repeated. These patterns can be adjusted to create different variations, such as 3×1 or 2×4 ribbing.
When knitting ribbing, it is important to keep an even tension to ensure that the fabric maintains its elasticity. It is also important to use a smaller needle size than the main body of the knitting to create a tighter fabric. This helps the ribbing retain its shape and prevent it from becoming too loose or floppy.
- Ribbing is a technique used in knitting to create a stretchy fabric.
- It is commonly used for cuffs, collars, and waistbands in garments.
- 1×1 and 2×2 ribbing are the most common ribbing patterns.
- Even tension and using a smaller needle size are key to successful ribbing.
Main Body of the Hat
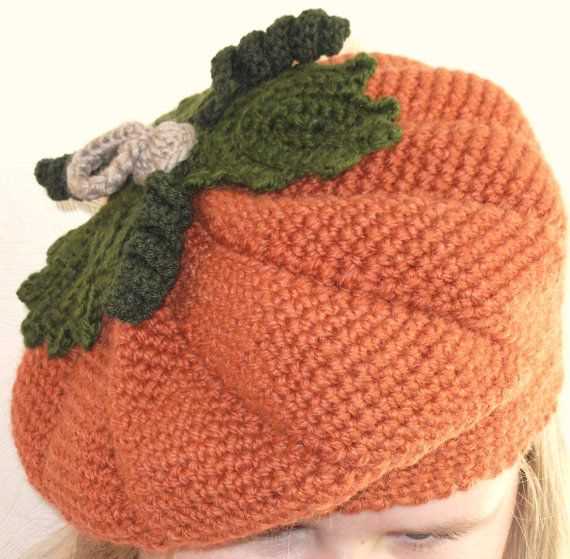
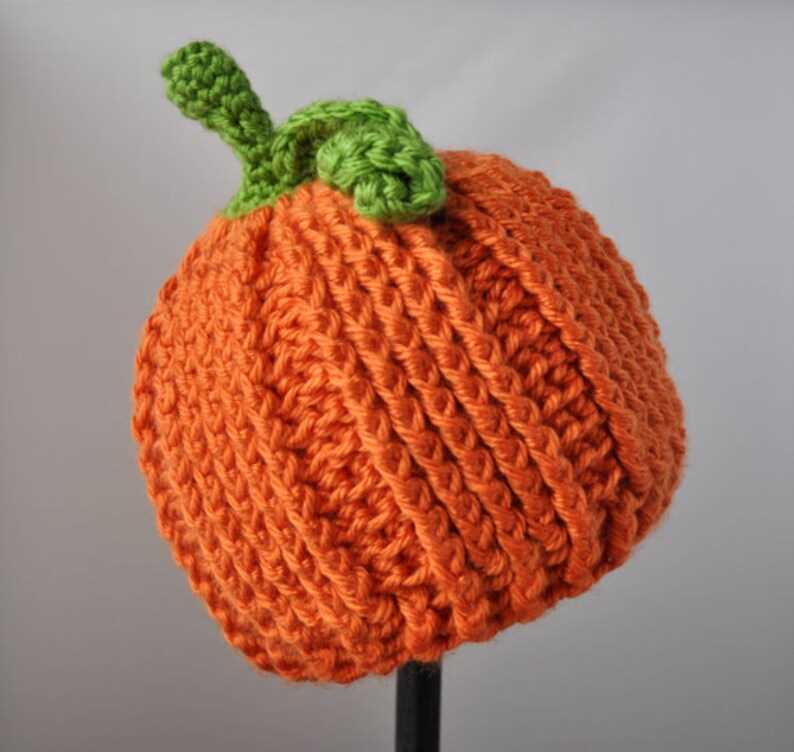
The main body of the pumpkin knit hat is worked in a combination of knit and purl stitches to create a textured pattern that resembles the skin of a pumpkin. This gives the hat a unique and festive look. To start, you will need to cast on the required number of stitches, which will depend on the size of the hat you are making.
Once you have cast on, you will begin working in the round, using either double-pointed needles or circular needles, depending on your preference. The pattern will instruct you on how many rows to knit and purl to create the desired texture. You can adjust the length of the main body of the hat by knitting more or fewer rows.
As you work the main body of the hat, it’s important to keep track of your stitches and rows to ensure that your pattern remains consistent. You may want to use stitch markers to mark the beginning of each round and to help you keep track of any pattern repeats. This will make it easier to follow the pattern and create a neat and tidy finished hat.
The main body of the hat is an essential part of the knitting process, as it sets the stage for the rest of the hat. It’s important to take your time and work carefully to ensure that your stitches are even and your tension is consistent. With practice and attention to detail, you’ll be able to create a beautiful pumpkin knit hat that you can wear with pride during the fall season.
Decrease Rounds
When you’ve reached the desired length of your pumpkin knit hat, it’s time to start the decrease rounds. These rounds will shape the crown of the hat and give it a snug fit. Follow the instructions below to complete the decrease rounds:
Round 1:
Decrease the number of stitches by dividing the total number of stitches on your needle evenly. For example, if you have 60 stitches, divide by 6. This means you will decrease 10 stitches per section.
Tip: Use stitch markers to mark the sections as you work through the decrease rounds. This will help you keep track of your stitches.
Round 2:
Knit the first stitch, then knit together the next two stitches. Repeat this pattern until you reach a stitch marker. Slip the marker and continue knitting the next section. Repeat this pattern for all sections of the hat.
Round 3:
Knit all stitches in this round. This round helps maintain the shape of the hat while decreasing the number of stitches.
Round 4:
Repeat Round 2. Knit the first stitch, then knit together the next two stitches. Continue until you reach a stitch marker, slip the marker, and continue knitting the next section.
Repeat Rounds 3 and 4:
Continue alternating between knitting all stitches and repeating Round 2 until you have a small number of stitches left. This will depend on the size of your hat and the desired fit. Typically, when you have about 10-20 stitches remaining, you can move on to the final round.
Final Round:
Knit all stitches together. Cut the yarn, leaving a long tail. Thread the tail onto a yarn needle, and slide the needle through the remaining stitches. Pull tight to close the top of the hat.
Now you’ve completed the decrease rounds for your pumpkin knit hat! Finish off any loose ends and try it on to see the finished result. Enjoy your cozy and festive hat for the fall season!
Shaping the Crown
When knitting a pumpkin knit hat, one of the key elements to pay attention to is shaping the crown. The crown refers to the top part of the hat that sits on the wearer’s head. It is important to shape the crown properly to ensure a comfortable fit and an aesthetically pleasing finished look.
To shape the crown, the knitting pattern typically includes instructions on decreasing stitches gradually towards the top of the hat. This is done to create a rounded shape that closely follows the shape of the wearer’s head. Decreasing stitches can be achieved through various techniques, such as knitting two stitches together or slipping stitches.
One common method of shaping the crown is using a technique called “decrease rounds”. In decrease rounds, the number of stitches gradually decreases with each round, creating a tapering effect. This is usually done by knitting two stitches together at regular intervals, following a specific pattern provided in the knitting instructions.
Another method that can be used to shape the crown is “crown shaping using short rows”. This technique involves working partial rows to create a rounded shape. By working short rows, where not all stitches are knitted or purled in each row, the crown of the hat can be shaped in a more precise manner, following the contours of the head.
- Regardless of the method used, it is important to follow the knitting instructions carefully, as shaping the crown requires attention to detail and precise execution.
- The number of decrease rounds or short rows needed will depend on the desired size and fit of the hat, as well as the stitch pattern used.
- By properly shaping the crown of a pumpkin knit hat, you can ensure that the finished product is both comfortable and visually appealing.
Finishing Touches
Once you have finished knitting your pumpkin hat, it’s time to add some finishing touches to complete the look. These little details will make your hat stand out and give it a professional touch.
One of the first finishing touches you can add is a pom-pom. Pom-poms are a fun and playful addition to any knit hat. You can make a pom-pom using the same color yarn as your hat or choose a contrasting color to make it pop. To make a pom-pom, you can use a pom-pom maker or create one by wrapping yarn around a piece of cardboard or a fork. Once your pom-pom is ready, simply attach it to the top of your hat using a yarn needle.
Embroidery
Another way to add a finishing touch to your pumpkin hat is through embroidery. You can embroider the face of a pumpkin onto the front of the hat using black yarn. Start by drawing the face on the hat with a disappearing fabric marker or pencil. Then, using a yarn needle, carefully sew over the lines with black yarn to create the features. This will give your hat a more detailed and personalized look.
Buttons and Ribbons
If you’re looking for a more decorative touch, you can add buttons or ribbons to your pumpkin hat. For buttons, choose ones that match the color and style of your hat. Sew them onto the hat in a pattern or randomly, depending on your preference. Ribbons can be tied around the base of the hat or used as a bow on the side. This adds a feminine touch and makes your hat even more stylish.
By adding these finishing touches to your pumpkin hat, you can transform it from a simple knitted accessory to a unique and eye-catching accessory that will turn heads. Get creative and have fun with the process, and soon you’ll have a one-of-a-kind hat that you can wear all autumn long.
Adding Embellishments
Once you have completed knitting your pumpkin hat, you can add embellishments to give it an extra special touch. There are many ways to embellish a hat, and the choice of embellishment will depend on your personal style and preferences.
A popular option is to attach a cute pom-pom to the top of the hat. You can make a pom-pom using yarn in a contrasting color. Simply wrap the yarn around a small piece of cardboard or your fingers until it reaches your desired thickness. Then, carefully remove the yarn from the cardboard or your fingers and tie another piece of yarn tightly around the center. Trim the loops and fluff the pom-pom. Finally, attach the pom-pom to the top of your hat by sewing it on securely.
Here are some other ideas for embellishing your pumpkin hat:
- Buttons: Sew on a few small buttons in coordinating colors to add a whimsical touch.
- Ribbons: Attach a grosgrain ribbon around the base of the hat for a feminine and pretty look.
- Embroidery: Use embroidery floss to add small details like a face or leaf motifs to your pumpkin hat.
- Sequins: Sew on a few sparkly sequins to create a hat that shines and catches the light.
- Felt shapes: Cut out small felt shapes, such as leaves or stars, and sew them onto the hat for a fun and playful design.
Remember to always securely attach any embellishments to your hat to ensure they stay in place while wearing. Let your creativity flow and have fun customizing your pumpkin hat to make it truly unique!
Tips and Tricks
When knitting a pumpkin hat, there are several tips and tricks that can help you achieve the best results. Here are a few to keep in mind:
1. Use the right yarn: Opt for a yarn that is soft and durable, such as acrylic or a mix of acrylic and wool. This will ensure that the hat is comfortable to wear and holds its shape well.
2. Choose the right needle size: Depending on the yarn you are using, you may need to adjust your needle size. Be sure to check the gauge of your pattern and make any necessary adjustments to ensure your hat has the correct size and fit.
3. Pay attention to stitch count: Counting your stitches is crucial to maintaining the shape and size of your pumpkin hat. Make sure to keep a close eye on your stitch count, especially when increasing and decreasing, to avoid any inconsistencies.
4. Experiment with different ribbing: The ribbing at the bottom of the hat can add extra stretch and ensure a snug fit. Consider using a different ribbing pattern, such as a twisted rib or seed stitch, to add texture and interest to your pumpkin hat.
5. Add embellishments: Get creative with embellishments to make your pumpkin hat truly unique. Consider adding buttons, pom-poms, or even embroidery to add a festive touch to your finished hat.
6. Practice, practice, practice: Like any knitting project, it may take a few tries to get the hang of knitting a pumpkin hat. Don’t get discouraged if your first attempt doesn’t turn out perfect – keep practicing and experimenting until you achieve the desired result.
Conclusion
Knitting a pumpkin hat can be a fun and rewarding project. By following these tips and tricks, you can create a stylish and cozy hat that is perfect for the fall season. Remember to choose the right yarn and needle size, pay attention to your stitch count, experiment with different ribbing, and add personalized embellishments. With practice and patience, you’ll be able to knit a beautiful pumpkin hat that you can be proud of.