
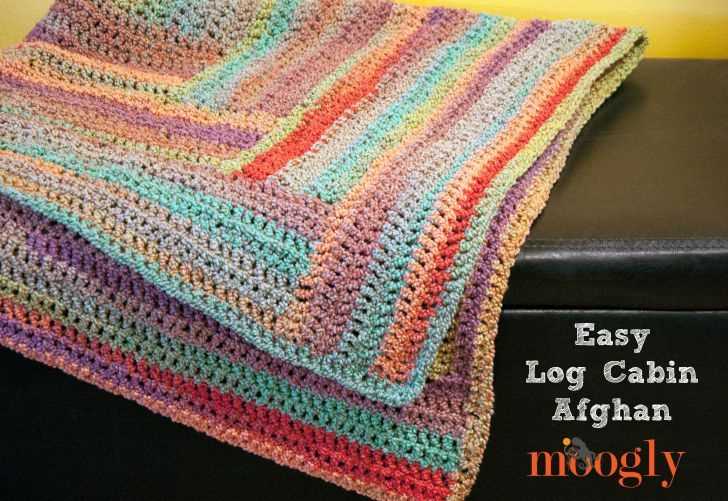
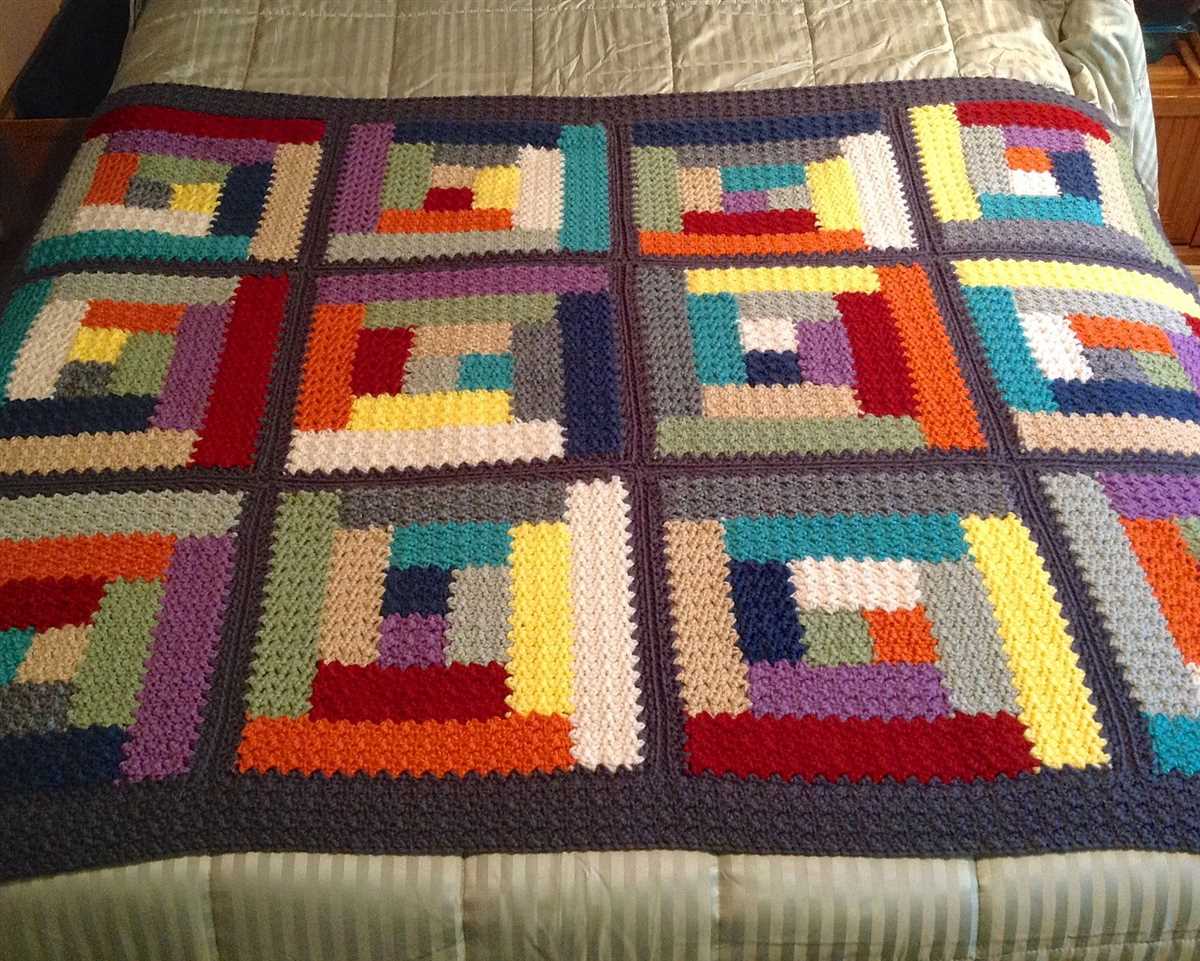
Knitting is not only a great way to pass the time, but it also allows you to create beautiful and unique pieces of clothing and home decor. One popular knitting project is the log cabin blanket. This pattern, inspired by traditional log cabin quilts, creates a stunning and cozy blanket that is perfect for snuggling up on cold winter nights.
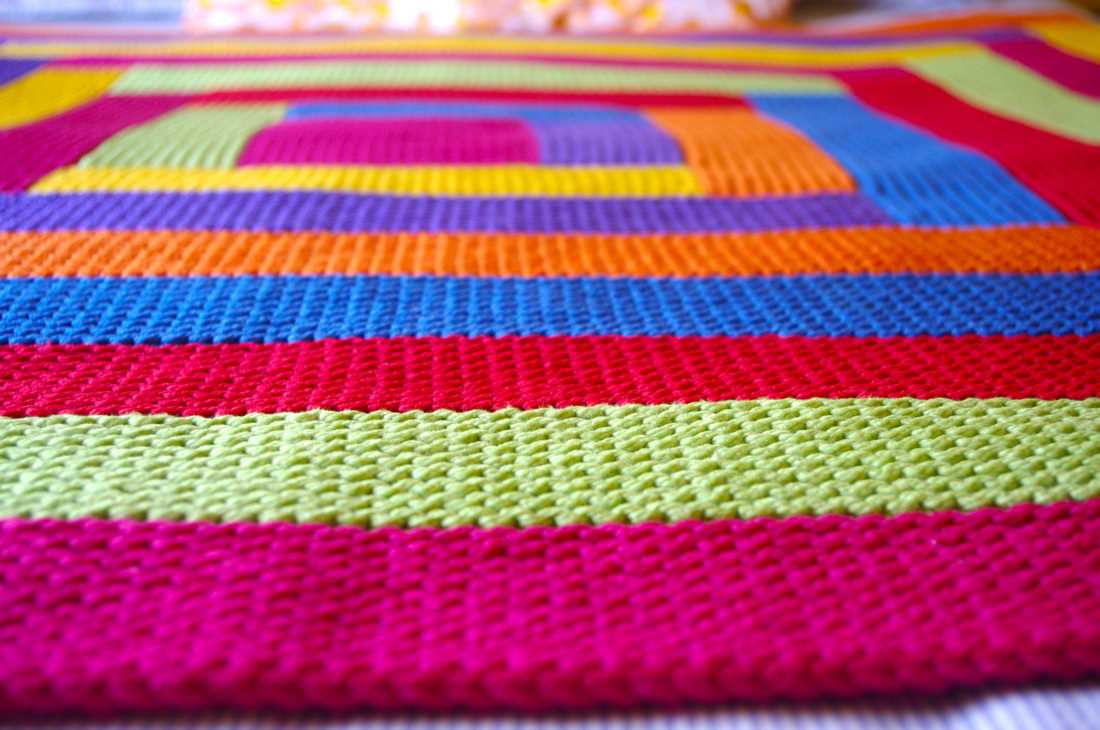
The log cabin blanket pattern is known for its geometric design, which is achieved by knitting different sized squares and rectangles and then joining them together. The result is a visually striking blanket that showcases various colors and textures.
This free knitting pattern for a log cabin blanket is perfect for knitters of all skill levels. Whether you are a beginner looking to expand your skills or an experienced knitter in need of a relaxing project, this pattern is for you. It provides clear instructions and a step-by-step guide, making it easy to follow along and create your own beautiful log cabin blanket.
What is log cabin knitting?
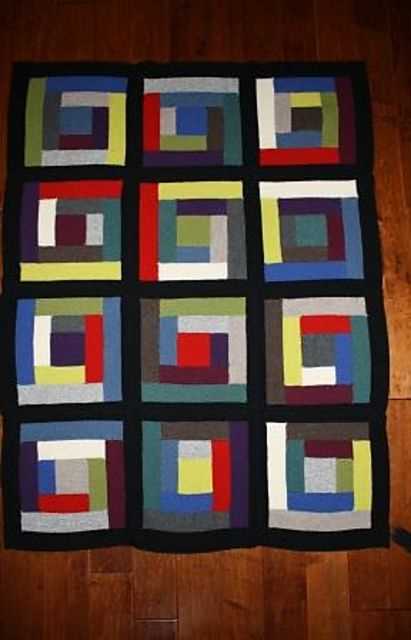
Log cabin knitting is a popular technique that creates a unique patchwork effect in knitting. It involves knitting small squares or rectangles in different colors and then arranging them in a specific pattern to create a log cabin design. This technique is often used to make blankets, scarves, and other accessories.
The name “log cabin” comes from the traditional log cabin quilting pattern, which consists of small fabric squares arranged in a similar way to create a log cabin appearance. Log cabin knitting follows the same principle but with yarn and needles.
How does log cabin knitting work?
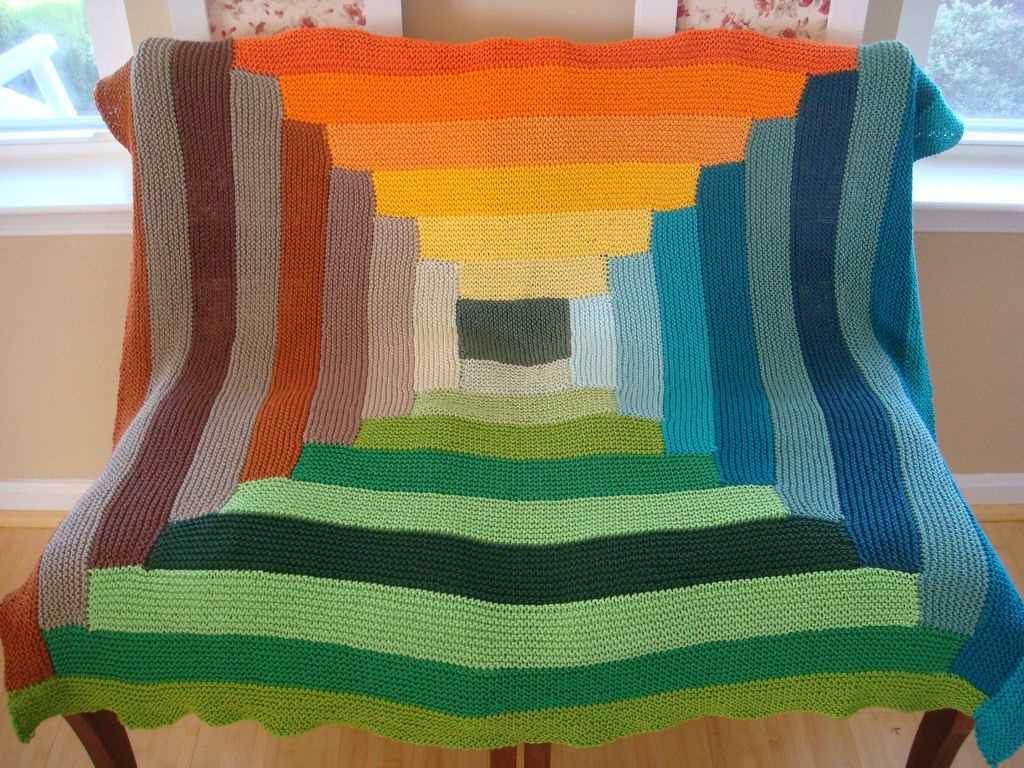
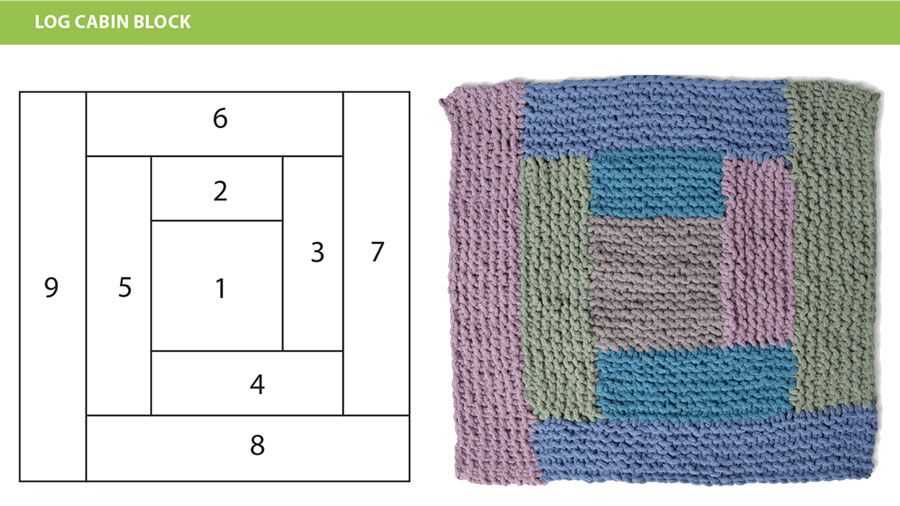
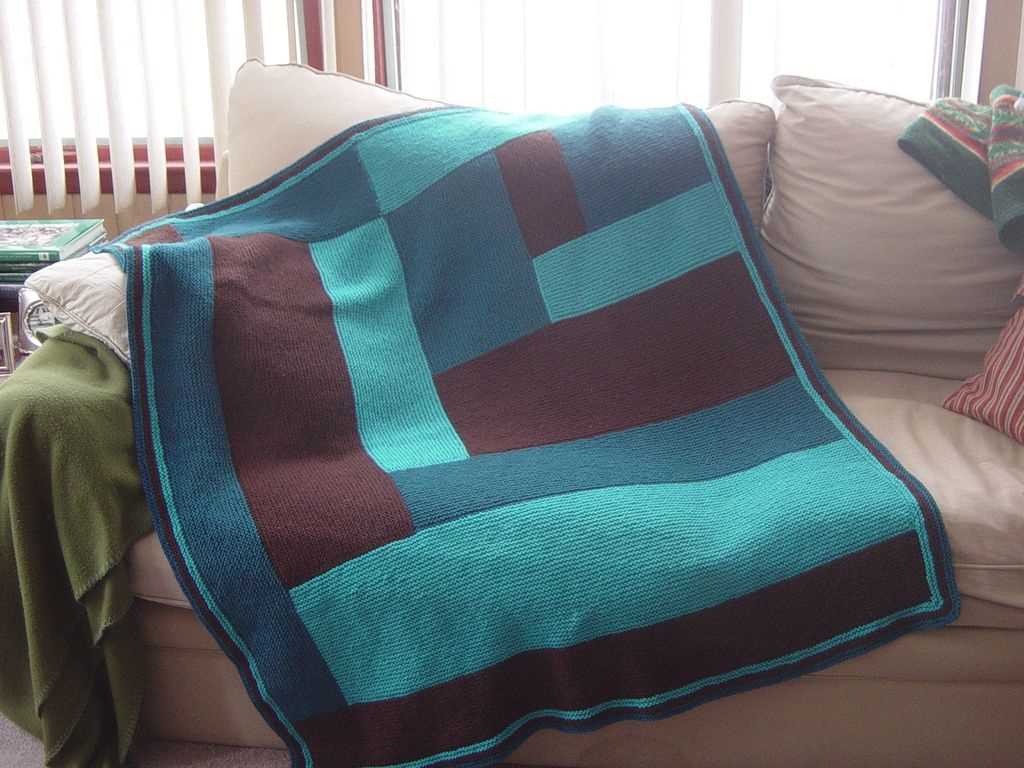
To create a log cabin blanket, you start with a central square or rectangle. The size of this central piece will determine the overall size of your blanket. From there, you knit additional squares or rectangles in different colors and sizes, attaching them to the sides of the central piece.
You continue adding squares or rectangles, working your way around the center in a clockwise or counterclockwise direction, until you reach the desired size of the blanket. The colors and sizes of the squares or rectangles can be varied to create different patterns and designs.
Tips for log cabin knitting:
- Choose a color palette that complements each other and creates the desired effect.
- Keep track of the number of stitches and rows for each square or rectangle to maintain consistency.
- Consider using different knitting techniques, such as garter stitch or stockinette stitch, to add texture and interest to your log cabin design.
- Experiment with different arrangements and placements of the squares or rectangles to create unique patterns.
- Block and seam your squares or rectangles before attaching them to ensure a neat and professional finish.
Log cabin knitting can be a fun and creative way to use up leftover yarn and create a one-of-a-kind blanket or accessory. With its patchwork-like appearance, it adds a touch of rustic charm to any project.
Choosing the right yarn and needles
In order to create a beautiful log cabin blanket, it is important to choose the right yarn and needles. The yarn you select will greatly impact the look and feel of your blanket, so it’s important to consider factors such as the weight, fiber content, and color.
Weight: When selecting yarn for your log cabin blanket, consider the weight or thickness of the yarn. A thicker yarn will create a chunkier blanket, while a thinner yarn will result in a more delicate and lightweight finish. The weight of yarn is typically indicated on the label, with categories such as fingering, sport, worsted, or bulky.
Fiber content: The fiber content of the yarn will also affect the final appearance and texture of your log cabin blanket. Different fibers have different characteristics, such as warmth, softness, and drape. Some commonly used yarn fibers for blankets include wool, cotton, acrylic, and blends.
Color: The color of your yarn will play a significant role in the overall look of your log cabin blanket. Consider the mood or theme you want to achieve, and select colors that complement each other. You can choose a monochrome palette for a minimalist look, or opt for contrasting colors for a bold and vibrant design.
Once you have chosen the right yarn for your log cabin blanket, it’s important to select the appropriate knitting needles. The size of the needles will depend on the thickness of the yarn and the desired tension of your knitting. The label on the yarn typically provides a recommended needle size range, which can serve as a starting point. However, it’s always a good idea to make a swatch to determine whether you need to adjust the needle size to achieve the desired gauge.
Circular or straight needles: Log cabin blankets are often knit in strips or blocks, and circular needles can be beneficial for easily accommodating a large number of stitches. However, if you prefer to work with straight needles, you can still create a log cabin blanket by knitting each strip separately and sewing them together.
Interchangeable needles: Another option to consider is using interchangeable knitting needles, which allow you to switch needle tips and cable lengths as needed. This can be helpful if you plan to knit different sections of your log cabin blanket with different needle sizes.
Getting started: casting on
Before you can begin knitting your log cabin blanket, you’ll need to cast on. Casting on is the process of creating the first row of stitches on your knitting needle. There are several different techniques for casting on, but for the log cabin blanket, we recommend using the long-tail cast-on method.
To begin, you’ll need a long tail of yarn that is approximately three times the width of your finished blanket. Take the end of the yarn and make a slipknot by creating a loop with the tail end on the top. Insert your knitting needle into the loop and pull the tail to tighten the knot around the needle.
Hold the needle with the slipknot in your right hand and the yarn in your left hand. Make sure that the tail end of the yarn is hanging over your thumb while the working end is wrapped around your index finger. This creates tension that will help you form the stitches.
To cast on, bring the needle under the loop that is on your thumb from back to front. Then, bring the needle over the loop on your index finger. With your right hand, catch the working yarn with the needle and pull it through the loop on your thumb. Drop the loop off your thumb and tighten the stitch by pulling the working yarn gently.
Knitting the center square
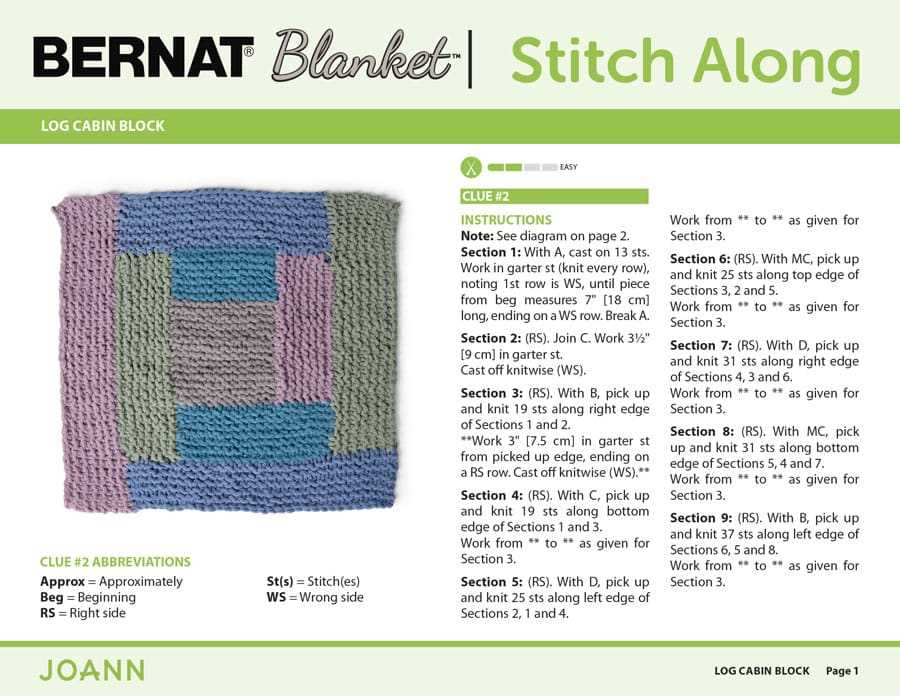
The center square is the starting point for your log cabin blanket. It serves as the foundation for the rest of your knitting. To begin, you will need to cast on the required number of stitches for the square. This will vary depending on the size of your blanket and your chosen yarn and needle size.
Once you have cast on, you will be working in garter stitch for the center square. Garter stitch is created by knitting every row, resulting in a textured fabric with ridges. This stitch pattern is perfect for the log cabin design as it creates a cozy and timeless look.
The center square should be large enough to serve as the focal point of your blanket. You can measure the size of the square as you go, or refer to the pattern for specific dimensions. If you prefer a more structured approach, you can also use a stitch marker to mark the center point and keep track of your rows.
- Start by knitting the required number of rows in garter stitch, making sure to leave a long enough tail for sewing up later.
- Once the center square is complete, you can move on to the next section, known as the “strip”.
- Casting on additional stitches as instructed in the pattern, begin knitting the strip in garter stitch, attaching it to one side of the center square.
- Continue knitting the strip until it reaches the desired length, then bind off the stitches.
- Repeat this process for each additional strip, attaching them to the sides of the previous sections to create a log cabin effect.
Remember to keep track of your color changes if you are using multiple yarns. This will help create a cohesive and visually appealing design. Once all the sections are complete, you can weave in any loose ends and sew the squares together to complete your log cabin blanket.
Adding the first log: picking up stitches

Once you’ve gathered all the necessary materials, it’s time to start adding the first log to your log cabin blanket. The first log is made up of a strip of knitting that is picked up along the edge of the central square. This creates a seamless and continuous look to your blanket.
To pick up stitches, start by choosing the color of yarn you want to use for the first log. Then, insert your knitting needle into the edge of the central square, picking up one stitch for every garter ridge or two stitches for every stockinette ridge. Make sure to keep your tension consistent as you pick up the stitches to ensure an even and professional-looking result.
As you pick up the stitches, it can be helpful to use stitch markers to keep track of your progress. Place a stitch marker after picking up every few stitches or after completing a full round. This will help you keep track of where you are in the pattern and prevent any mistakes.
Continue picking up stitches along the edge of the central square until you have reached the desired length for your first log. Remember to leave a long tail of yarn at the beginning and end of the log to weave in later. Once you have finished picking up stitches, you are ready to move on to the next step: knitting the first log of your log cabin blanket.
Continuing the log cabin pattern
Once you have completed the first section of your log cabin blanket, it’s time to continue with the pattern. The log cabin pattern is known for its modular construction, with each section built off of the previous one. This creates a unique and visually interesting design that truly showcases the beauty of the log cabin technique.
To continue with the log cabin pattern, you will need to decide on the size and placement of your next section. You can choose to add a section directly on top of the previous one, or you can create a separate section and sew it on later. Whichever method you choose, make sure to keep track of your stitch count to ensure that your sections line up correctly.
When adding a section directly on top of the previous one, begin by attaching your yarn to one corner of the previous section. Then, work your way around the edge, picking up stitches and knitting them onto your needle. Continue this process until you have reached the desired size for your next section. Make sure to maintain the same stitch pattern as the previous section, whether it be garter stitch, stockinette stitch, or another stitch pattern of your choice.
If you prefer to create separate sections, you can do so by knitting each section individually and then sewing them together. To do this, start by knitting the desired size and stitch pattern for each section. Once you have finished knitting all of the sections, lay them out in the desired pattern and use a yarn needle to sew them together. This method allows for more flexibility in terms of design and color placement.
As you continue with the log cabin pattern, feel free to experiment with different colors, stitch patterns, and sizes for each section. This pattern is highly adaptable and can be customized to suit your preferences. Whether you choose to create a large blanket or a smaller project, the log cabin pattern is sure to result in a beautiful and eye-catching finished piece.
Changing colors and creating stripes
When knitting a log cabin blanket, changing colors and creating stripes can add visual interest and depth to your project. Whether you want to use a limited color palette or incorporate a rainbow of hues, the possibilities are endless.
One way to change colors in a log cabin blanket is to use the intarsia technique. This involves knitting separate sections of color and joining them together as you go. By following a color chart, you can create intricate designs or simple stripes. Intarsia allows you to work with multiple colors in a row without carrying the unused yarn across the back of your work.
Using the intarsia technique:
- Select the colors you want to use and wind them into separate bobbins or small balls.
- Follow the pattern or chart to know when to change colors.
- When changing colors, drop the old color and start knitting with the new color, leaving a long enough tail to weave in later.
- If you need to use the same color later in the same row or section, bring the new color under the old color to avoid creating a hole.
- Continue knitting with the new color until the pattern or chart instructs you to change colors again.
- Repeat the process of changing colors and carrying the unused yarn across the back of your work as needed.
Another way to create stripes in a log cabin blanket is by simply knitting with different colors in each section. For example, you can use one color for the center square and then alternate between two or more colors for the surrounding strips. This creates a striped effect that adds visual interest and dimension to your blanket.
Creating stripes:
- Select the colors you want to use and decide on the order in which you will use them.
- Knit the first square or section using the first color.
- When starting the next square or section, switch to the next color in your sequence.
- Continue alternating between colors for each new square or section, following your chosen color sequence.
- Weave in the ends of each color as you go or save them to weave in later.
- Enjoy watching the stripes emerge and the color pattern develop as you continue knitting your log cabin blanket.
Joining the logs: picking up stitches or mattress stitch
When it comes to joining the logs of a log cabin blanket, there are two common methods: picking up stitches and using mattress stitch. Both techniques have their advantages, so it’s up to the knitter to choose which method suits them best.
Picking up stitches: This method involves using a knitting needle to pick up stitches along the edge of one log and then knitting them together with the stitches from the neighboring log. To start, simply insert the needle into the first stitch on one log, wrap the yarn around the needle, and pull it through to create a new stitch. Repeat this process along the edge of the log, picking up the desired number of stitches. Once all the stitches are picked up, you can begin knitting them together with the stitches from the adjacent log to create a seamless join.
Matress stitch: This technique involves using a sewing needle and yarn to create an invisible seam. To start, place the two logs side by side, with the right sides facing up. Thread the sewing needle with a length of yarn and insert it under the first horizontal bar of the first stitch on the bottom log. Then, insert the needle under the corresponding horizontal bar on the top log. Repeat this process, alternating between the bottom and top logs, until you reach the end of the seam. Pull the yarn tight after each stitch to create a clean and even join. The result is a nearly invisible seam that seamlessly connects the logs together.
- When picking up stitches, it’s important to make sure the number of stitches picked up along each edge is consistent. This will help maintain the square shape of the log cabin blocks.
- When using mattress stitch, it’s important to keep the tension even and consistent throughout the seam. Too loose or too tight stitches can distort the shape of the blanket.
- Both picking up stitches and mattress stitch can be used with any weight of yarn and any type of log cabin pattern.
- Experiment with both techniques to see which one you prefer. Some knitters may find one method easier or more enjoyable than the other.
Finishing the blanket: binding off
Binding off is the final step in completing your log cabin blanket. It is the process of securing the stitches along the edge of your knitting to create a neat and finished edge. There are several different methods for binding off, but the basic technique involves knitting two stitches, then passing the first stitch over the second stitch and off the needle. This process is repeated until all stitches have been bound off.
There are a few things to keep in mind when binding off your log cabin blanket. First, make sure to maintain an even tension throughout the process to avoid creating a tight or loose edge. You can achieve this by knitting the stitches neither too tightly nor too loosely. Additionally, be careful not to bind off too tightly at the corners of your blanket, as this can cause the edges to pucker. Instead, try to maintain a consistent tension throughout the entire binding off process.
If you prefer a decorative edge for your log cabin blanket, you can experiment with different binding off techniques. For example, you could use a picot edge by binding off one stitch, then casting on two stitches using the backward loop method, and binding off the next stitch. This creates a row of small loops along the edge of your blanket, adding a delicate and decorative touch.
Once you have completed the binding off process, take a moment to inspect your log cabin blanket for any loose ends or loose stitches. Use a tapestry needle to weave in any loose ends, ensuring that they are securely fastened and will not unravel with use. Give your blanket a final gentle block to even out the stitches and promote the overall shape and drape. Now your log cabin blanket is finished and ready to be enjoyed!
Blocking and caring for your log cabin blanket
After completing your log cabin blanket, it is important to block it to ensure that the stitches are even and the blanket maintains its shape. Blocking is the process of stretching and shaping the knitted fabric to the desired dimensions. Here are the steps to block your log cabin blanket:
- Prepare your blanket: Fill a basin or sink with lukewarm water and add a gentle wool wash. Submerge your blanket in the water, making sure it is fully saturated.
- Soak the blanket: Let the blanket soak in the water for about 20-30 minutes. This will help relax the fibers and remove any excess dye or chemicals.
- Remove excess water: Gently squeeze the blanket to remove excess water. Do not wring or twist the fabric, as this may cause damage.
- Block the blanket: Lay the blanket flat on a blocking mat or towel, shaping it to the desired dimensions. Use rust-proof T-pins to secure the edges of the blanket and maintain its shape.
- Allow to dry: Leave the blanket to dry completely in a well-ventilated area. This may take a day or two, depending on the thickness of the fabric.
Once your log cabin blanket is dry and blocked, it is important to properly care for it to ensure its longevity. Here are some tips for caring for your log cabin blanket:
- Hand wash: It is best to hand wash your log cabin blanket using a gentle wool wash. Avoid agitating the fabric too much, as this can cause pilling or stretching.
- Avoid direct sunlight: Prolonged exposure to direct sunlight can cause the colors of your log cabin blanket to fade. Keep it stored in a cool, dry place when not in use.
- Store properly: To prevent any damage or moth infestations, store your log cabin blanket in a breathable cotton bag or pillowcase.
- Spot clean: If there are any spills or stains on your log cabin blanket, spot clean them immediately using a gentle wool wash and a clean cloth. Do not rub the stain, as this may cause it to set.
By following these steps and taking proper care of your log cabin blanket, you can ensure that it remains beautiful and cozy for years to come. Enjoy the warmth and comfort of your hand-knitted masterpiece!
More Log Cabin Knitting Patterns to Try
If you enjoy knitting log cabin blankets, there are many other log cabin knitting patterns for you to try. These patterns offer different variations and techniques that will keep you engaged and inspired.
Here are some more log cabin knitting patterns to explore:
-
Log Cabin Throw: This pattern uses different stitch patterns to create the log cabin squares, creating a textured and cozy blanket.
-
Log Cabin Shawl: This pattern adapts the log cabin technique into a shawl design, creating a unique and stylish accessory.
-
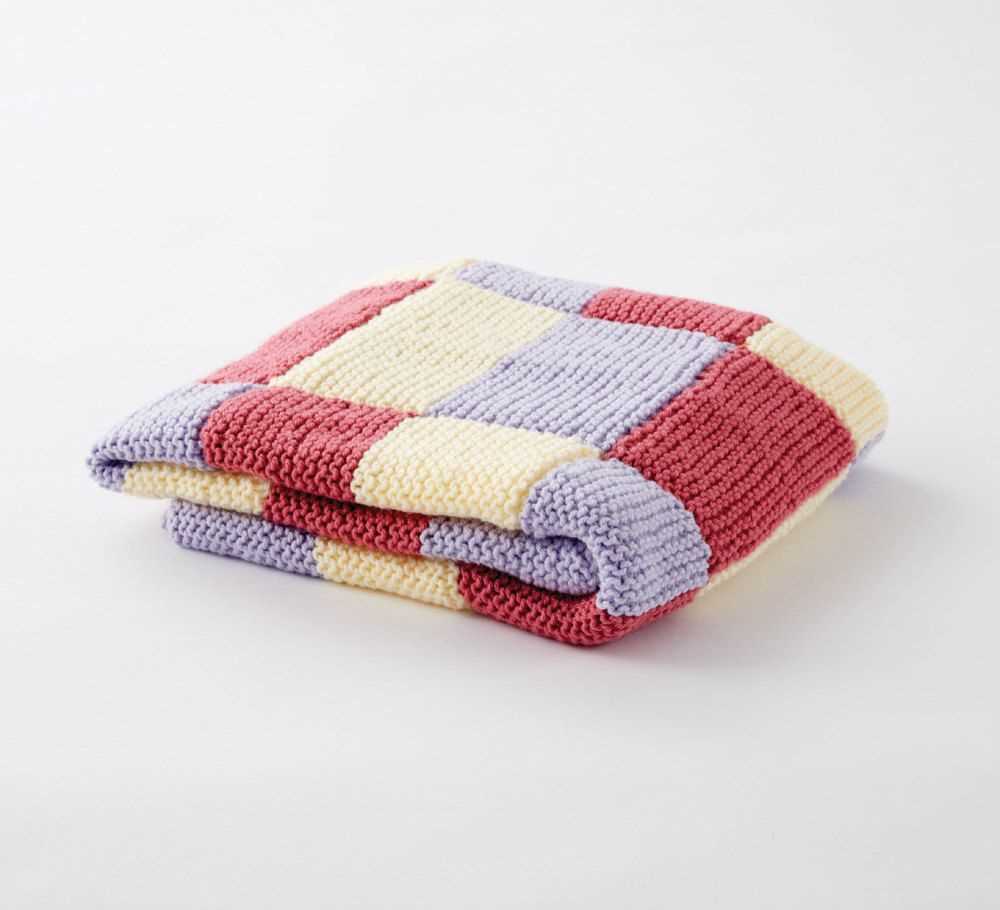
Log Cabin Baby Blanket: This pattern is specifically designed for baby blankets, using soft and gentle yarns to create a comforting and cuddly blanket.
-
Log Cabin Pillow: This pattern is perfect for adding a touch of log cabin style to your home decor. Knit multiple log cabin squares and sew them together to create a cozy pillow cover.
With these log cabin knitting patterns, you can continue to explore and expand your knitting skills while creating beautiful and functional pieces. Whether you choose to make a blanket, shawl, baby blanket, or pillow, the log cabin technique will provide endless creative possibilities.