
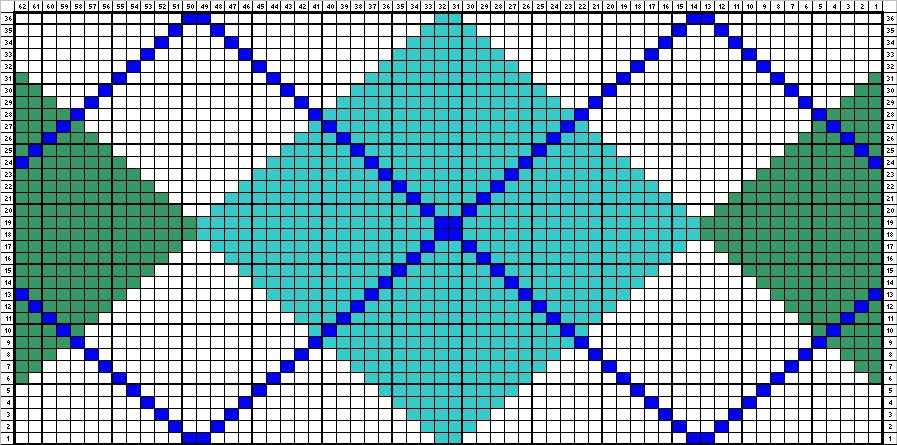
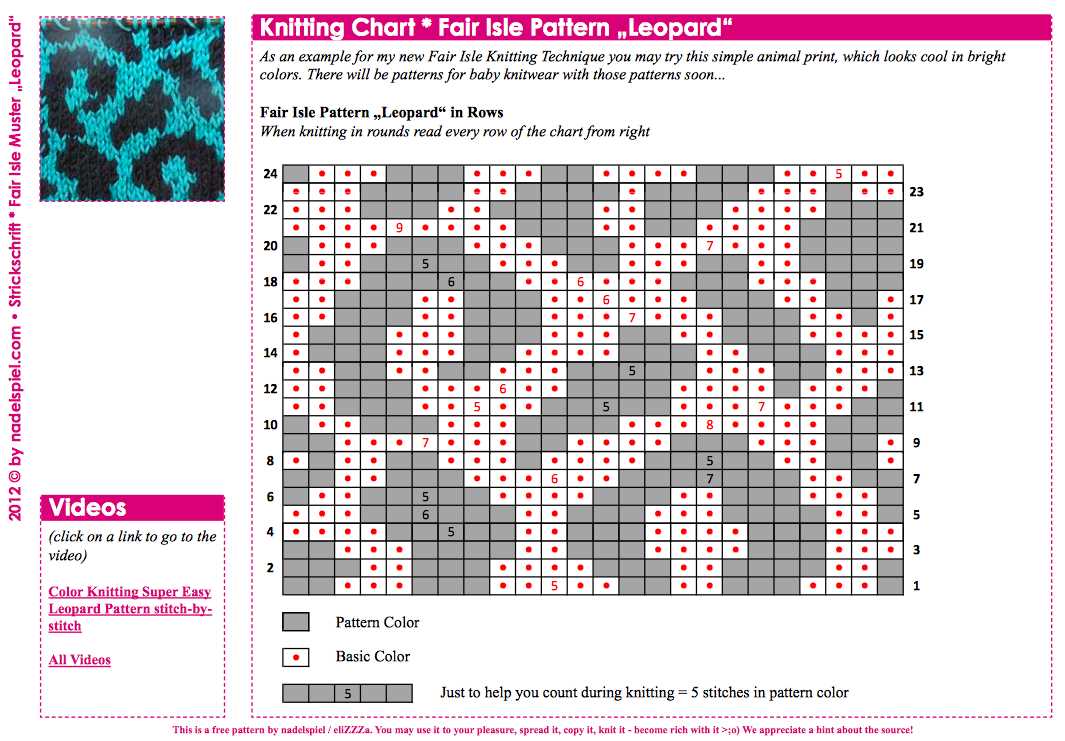
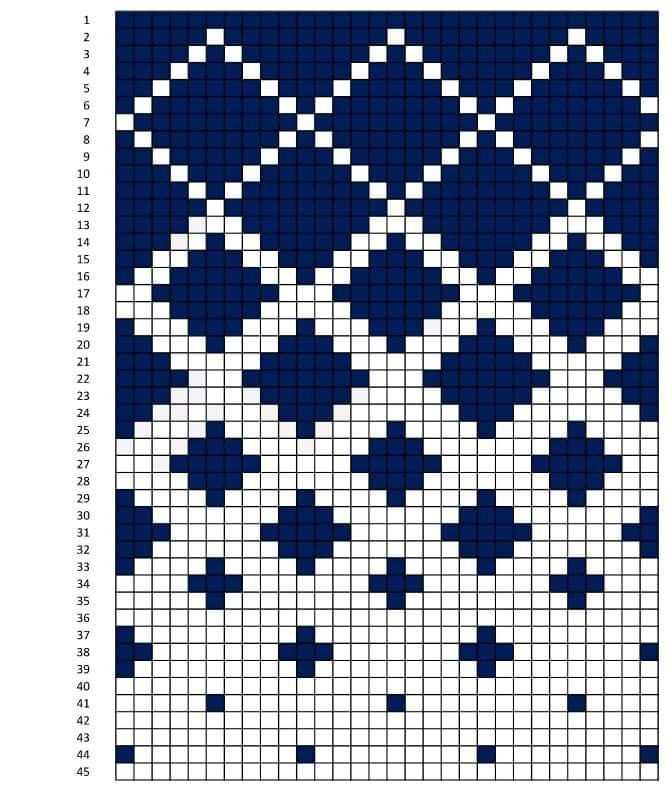
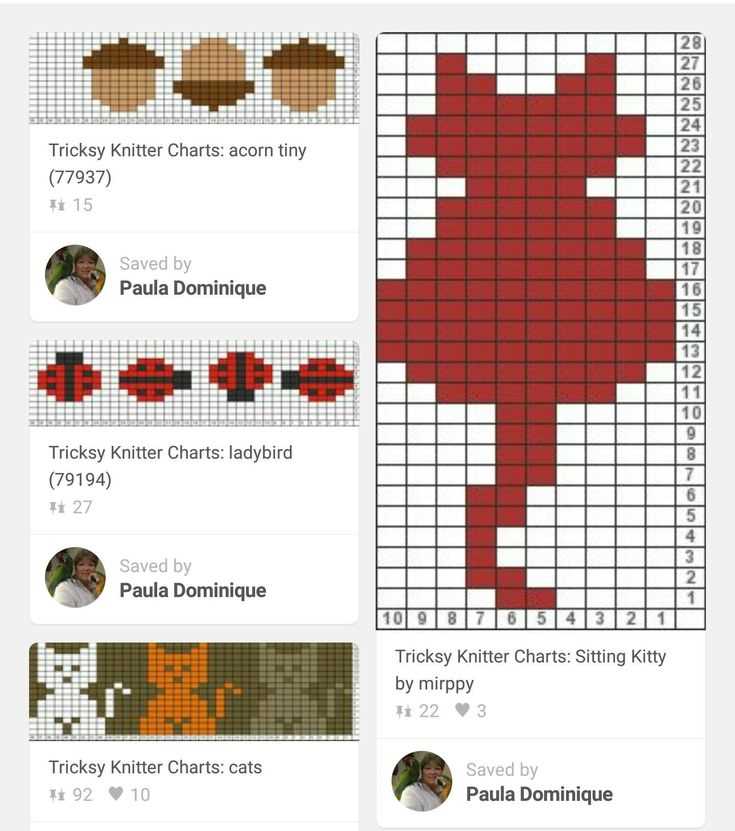
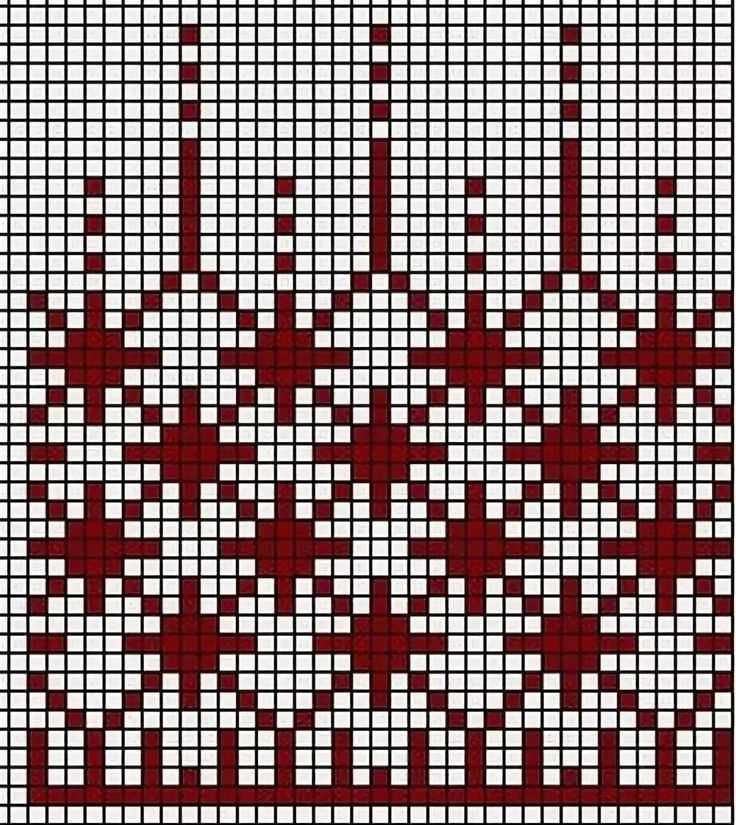
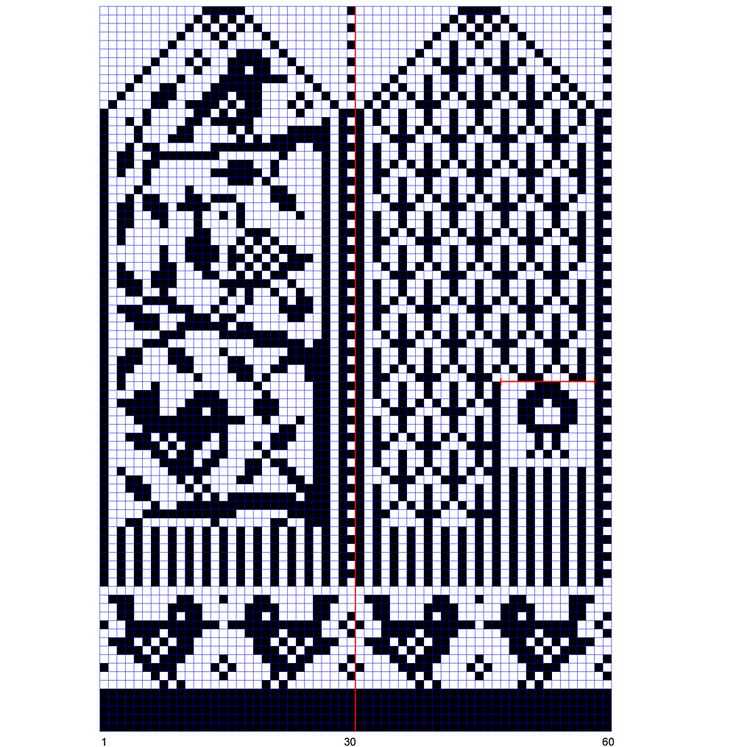
Knitting chart patterns are a popular method of designing and creating knitwear. Knitting charts are visual representations of stitch patterns, with each square representing a stitch. These charts are used to guide knitters as they create intricate and detailed designs, ranging from simple textured stitches to complex lace patterns.
By following a knitting chart, knitters can easily see how each stitch should be worked, allowing for precise and accurate results. Knitting charts are commonly used for colorwork and fair isle knitting, where different colors of yarn are used to create intricate designs and patterns. These charts make it easy for knitters to see which colors should be used and where. They can also be used for cables and lace patterns, helping knitters understand the stitch pattern and any changes that need to be made.
Knitting chart patterns are not only practical, but they also offer a level of creativity and customization. With knitting charts, knitters can experiment with different stitch patterns, colors, and designs, allowing them to create unique and personalized pieces. These charts can be found in knitting pattern books, magazines, and online resources, providing endless inspiration for knitters of all skill levels.
What are Knitting Chart Patterns?
Knitting chart patterns are visual representations of how to create specific designs or motifs using knitting stitches. They are commonly used in knitting patterns to provide a clear and concise way of communicating intricate designs and patterns.
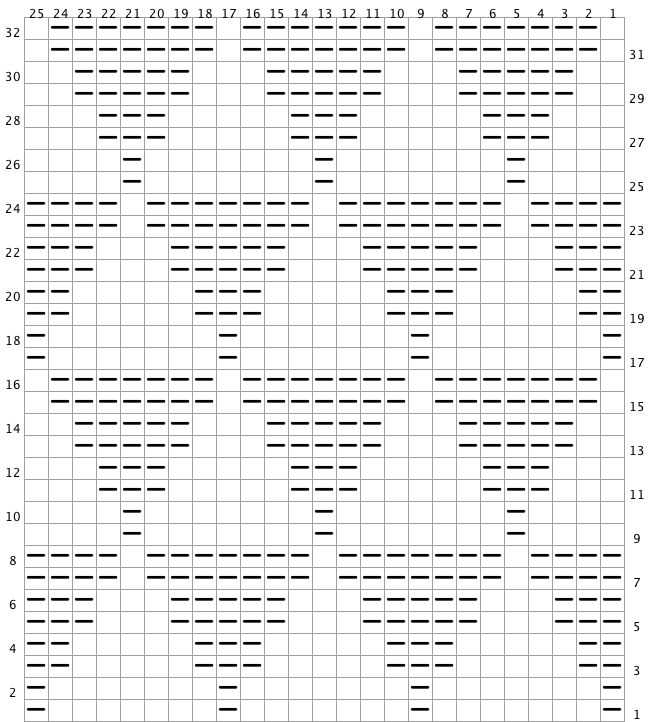
A knitting chart pattern uses symbols, usually represented in a grid format, to indicate different stitches and their placement within a knitted piece. Each symbol represents a specific knitting stitch, such as knit stitch, purl stitch, yarn over, or decrease. These symbols are placed in a grid, with each square representing a stitch or group of stitches.
The knitting chart pattern allows knitters to visualize the final design and understand how each stitch should be worked throughout the project. It enables them to see the pattern repeat, understand the stitch placement, and follow along more easily while knitting.
Knitting chart patterns are particularly useful for complex designs, such as Fair Isle or intarsia knitting, where multiple colors or intricate motifs are used. By using a chart, knitters can easily see how the different colors or motifs fit together and can keep track of their progress more effectively.
Many knitting patterns include both written instructions and a knitting chart pattern to cater to different preferences and skill levels. Some knitters may find it easier to follow written instructions, while others prefer the visual representation of a chart. Both methods have their advantages, and knitters can choose the one that works best for them.
Understanding the Basics
When it comes to knitting chart patterns, it’s important to have a strong understanding of the basics. This will help you read and follow knitting charts with ease, allowing you to create beautiful and intricate designs. Here are a few key concepts to keep in mind:
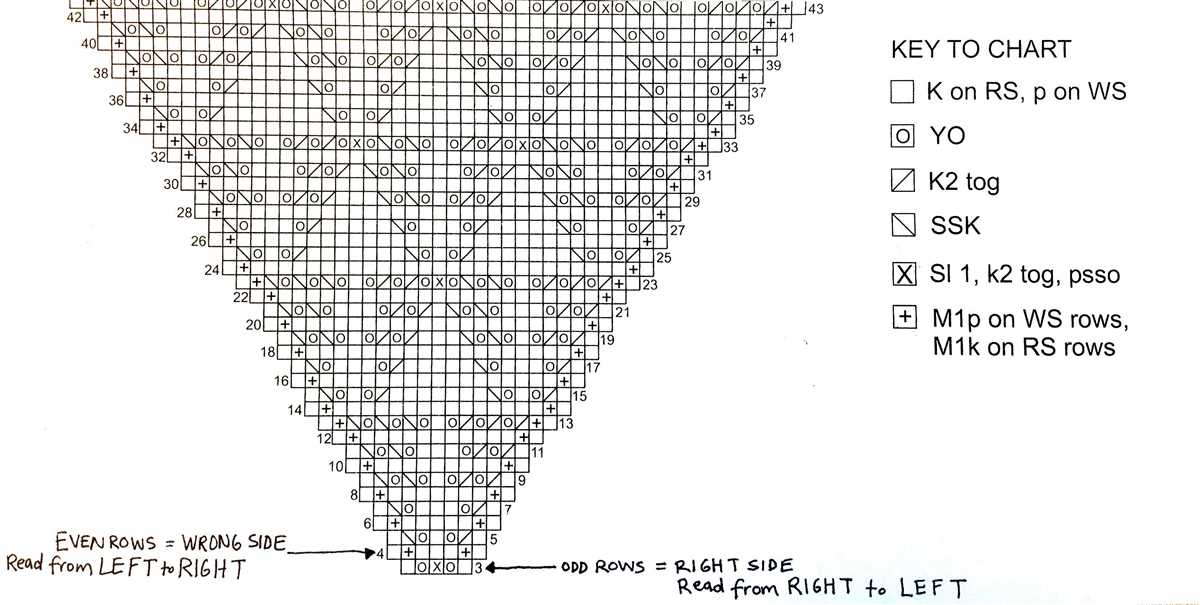
The Symbol Key: Every knitting chart will come with a symbol key, which explains what each symbol represents. It’s essential to familiarize yourself with these symbols before you begin knitting. Each symbol will represent a different stitch or action, such as knitting, purling, increasing, or decreasing.
Reading the Chart:
Row and Stitch Count: Knitting charts are typically read from right to left, with each row representing a specific row of your knitting project. The chart will indicate how many stitches are needed for each row and will guide you on which stitches to make.
Color Coding: Some knitting charts may include color coding to help differentiate between different stitches or actions. For example, one color may represent knit stitches, while another color may represent purl stitches. Pay attention to these color cues as you read and follow the chart.
Repeats: Many knitting chart patterns will include repeat sections, where a set of stitches or actions is repeated multiple times. These repeats are often indicated by brackets or other symbols. It’s important to carefully follow the repeat instructions to ensure your pattern turns out correctly.
Using a Chart Holder:
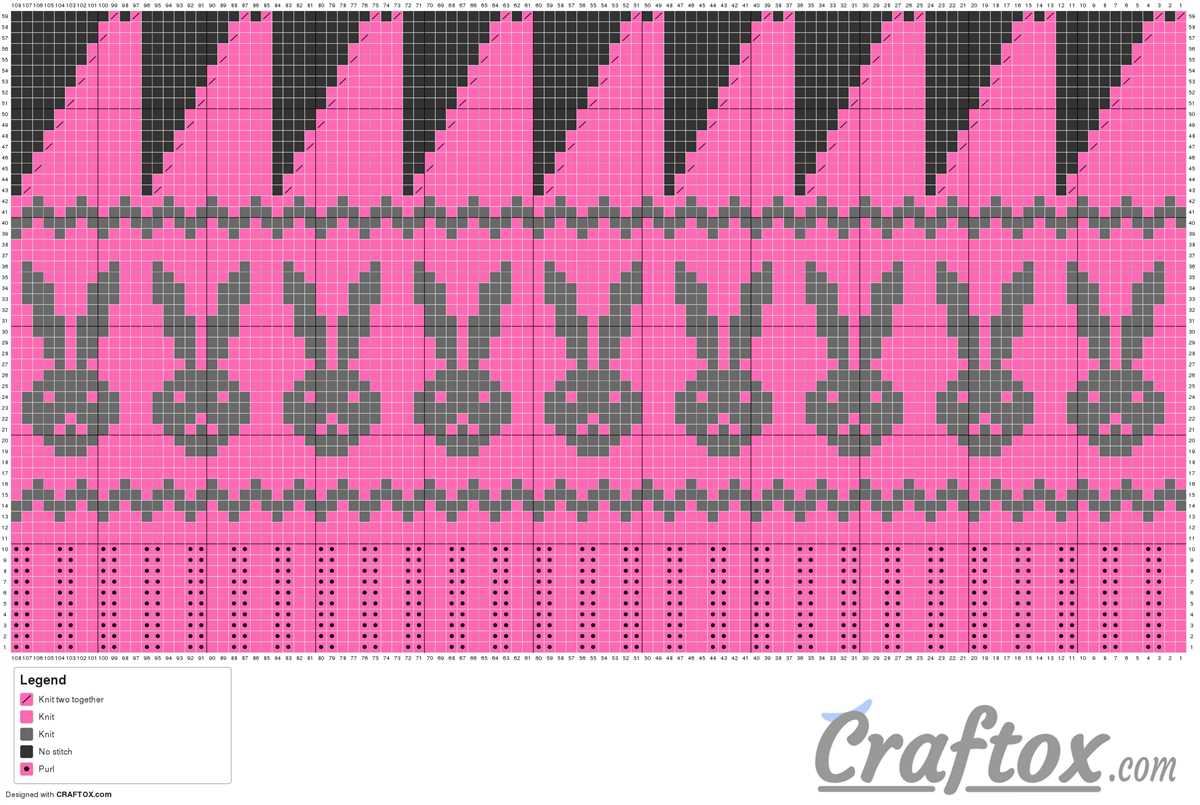
Chart holders: Chart holders are a useful tool when working with knitting chart patterns. These holders allow you to keep your chart close at hand without having to constantly refer back to the pattern. They often have built-in magnets or clips to keep the chart in place, making it easier to follow along as you knit.
Transferring: If you don’t have a chart holder, you can still use your knitting chart by transferring it onto a bigger piece of paper or by printing it out. This will give you a larger space to work with and make it easier to track your progress as you knit.
By understanding these basic concepts and utilizing the appropriate tools, you’ll be well-equipped to tackle any knitting chart pattern that comes your way. With practice, you’ll become more comfortable reading and following charts, opening up a world of possibilities for your knitting projects.
Choosing the Right Materials
When it comes to knitting chart patterns, choosing the right materials is crucial for a successful and enjoyable knitting experience. The materials you choose will not only affect the final look and feel of your project, but also play a big role in how easy or difficult it will be to work with the pattern.
Yarn: One of the most important materials to consider is the yarn. The type, weight, and fiber content of the yarn will all have an impact on the final result. Consider the pattern’s recommended yarn weight and fiber type to ensure the best outcome. For example, if the pattern calls for a worsted weight yarn, using a different weight could affect the size and drape of the finished piece. Additionally, different fibers will have different properties, such as warmth, breathability, and elasticity, so choose a fiber that suits your intended use for the project.
Needles: The needles you use can also greatly affect your knitting experience. The size and type of needles will determine the gauge or tension of your stitches, which in turn affects the size of your project. Be sure to check the pattern for the recommended needle size and type, as using a different size or type of needle could result in a different gauge and potentially an ill-fitting or misshapen final piece. Additionally, consider your personal preferences for needle material, such as metal, wood, or bamboo, as different materials can offer different levels of grip and comfort.
Notions: In addition to yarn and needles, there are various other notions that may be needed for knitting chart patterns. These can include stitch markers, row counters, tapestry needles, and crochet hooks, among others. Check the pattern’s list of required notions and ensure you have everything you need before starting. Having the right tools on hand will make the process smoother and more enjoyable.
Swatching: Before diving into the actual pattern, it’s always a good idea to make a swatch. This involves knitting a small sample using the chosen yarn and needles to check your gauge and ensure it matches the pattern’s requirements. Swatching allows you to make any necessary adjustments in needle size or tension before starting the actual project, ensuring a better fit and overall result.
How to Read Knitting Chart Patterns
Knitting chart patterns are a visual representation of the stitches and rows needed to create a specific design in a knitted piece. They are an essential tool for knitters who want to create complex patterns and motifs. Reading a knitting chart pattern may seem intimidating at first, but with a little practice, it becomes an invaluable skill.
To read a knitting chart pattern, start by understanding the symbols and abbreviations used. Each symbol represents a specific stitch or action, such as knit, purl, yarn over, or decrease. The chart key usually provides a legend that explains what each symbol means. Pay close attention to any special instructions or repeats indicated on the chart, as these can determine the overall pattern.
One important thing to remember when reading a knitting chart pattern is that each row of the chart corresponds to a specific row in your knitting. The numbers on the sides of the chart indicate the row numbers, which you can follow along as you progress. Most charts are read from right to left on right-side rows and from left to right on wrong-side rows, simulating the actual knitting process.
When working a knitting chart pattern, it can be helpful to use a row counter or highlighter to keep track of your progress. As you complete each stitch or action indicated by a symbol, mark it off on the chart to ensure accuracy. Additionally, it’s important to pay attention to any repeats or pattern sequences within the chart, as missing or adding a stitch can significantly impact the final design.
Overall, reading knitting chart patterns requires practice and attention to detail. Breaking down the pattern into smaller sections can make it more manageable and less overwhelming. With time and experience, you’ll become more comfortable reading and interpreting chart patterns, allowing you to create intricate and beautiful knitted designs.
Decoding Symbols and Abbreviations
Knitting charts are an essential tool for following complex patterns and creating beautiful designs. These charts are visual representations of a knitting pattern, using symbols and abbreviations to indicate different stitches and actions. Understanding these symbols and abbreviations is crucial for successfully interpreting the chart and completing your knitting project.
Symbols
The symbols used in knitting charts vary depending on the pattern, but there are some common ones that you will encounter frequently. The most basic symbol is a dot, which represents a knit stitch. A small filled-in square represents a purl stitch, and an empty square represents a knit stitch on the wrong side of the fabric. Other symbols you may come across include arrows to indicate the direction of the stitches, circles to mark stitch increases or decreases, and diagonal lines to indicate cables or twisted stitches.
Abbreviations
In addition to symbols, knitting charts also use abbreviations to represent different actions or stitches. Some common abbreviations include “k” for knit, “p” for purl, “yo” for yarn over, “ssk” for slip slip knit, and “k2tog” for knit two stitches together. These abbreviations are often accompanied by numbers or other symbols to indicate the number of stitches or the specific action to perform. It is important to familiarize yourself with these abbreviations and their meanings before starting a project.
When decoding symbols and abbreviations in a knitting chart, it is helpful to refer to the pattern’s key or legend. This key will provide a description or illustration of each symbol or abbreviation used in the chart, ensuring that you can accurately interpret the instructions. If you are unsure about a particular symbol or abbreviation, don’t hesitate to consult a knitting reference book or ask for help from experienced knitters. With practice and familiarity, you will become more confident in deciphering knitting charts and creating beautiful projects.
Following the Chart Instructions

When working with knitting chart patterns, it is important to follow the chart instructions carefully in order to create your desired design. The chart is a visual representation of the pattern and will guide you through each row of stitches. It is essential to understand the symbols and directions used in the chart before you begin.
Before you start knitting, make sure to read through the chart key or legend. This will provide you with an explanation of the symbols used in the chart and their corresponding stitches. Common symbols include squares for knit stitches, circles for purl stitches, and diagonal lines for decreases or increases.
When following the chart, begin at the bottom right corner and read each row from right to left for right-handed knitters, and from left to right for left-handed knitters. Some charts may also include a row numbering system to help you keep track of your progress. Pay close attention to any stitch repeats or special instructions indicated in the chart.
As you work each row, use a highlighter or row counter to mark off the stitches you have completed. This will help you stay organized and prevent mistakes. If you find the chart instructions difficult to read, you can also use a knitting app or software that allows you to enter the chart and display it row by row.
Remember that knitting charts are just a tool to guide you, and it’s important to also refer to any written instructions that may accompany the chart. Written instructions may provide additional details or explanations that can help clarify any confusion you may have.
Tips for following knitting chart instructions:
- Take your time to understand the symbols and instructions before you start knitting.
- Use a highlighter or row counter to keep track of your progress.
- Refer to any written instructions that may accompany the chart.
- Double-check your work at the end of each row to ensure accuracy.
- If you make a mistake, carefully unravel the stitches back to the error and re-work that section.
Tips and Tricks for Successful Knitting with Chart Patterns
Knitting chart patterns can add a beautiful and intricate design to your projects, but they can also be a bit challenging to follow. With a few tips and tricks, you can improve your knitting skills and create stunning charted pieces.
1. Read and understand the chart

Before you start knitting, take the time to carefully read and understand the chart. Familiarize yourself with the symbols used and any special instructions. This will help prevent mistakes and confusion later on.
2. Use stitch markers
Stitch markers are incredibly helpful when working with chart patterns. You can use them to mark the beginning and end of a repeat, or to keep track of specific sections in the chart. This will make it easier to follow along and stay on track.
3. Highlight or color code the chart

To make it easier to read and follow the chart, consider highlighting or color coding different sections. You can use colored pencils or markers to mark each stitch or repeat, making it visually clearer and reducing the chances of making mistakes.
4. Keep track of your progress
As you work through the chart, it’s important to keep track of your progress. You can use a row counter or simply a piece of paper and a pen to mark off each row as you complete it. This will help you stay organized and avoid accidentally repeating or skipping rows.
5. Practice with simpler charts first
If you’re new to knitting charts, it’s a good idea to start with simpler patterns and gradually work your way up to more complex designs. This will help you build your skills and confidence, making it easier to tackle more challenging chart patterns in the future.
- Most importantly, don’t be afraid to make mistakes. Knitting is a learning process, and even experienced knitters make errors. Embrace the journey and enjoy creating beautiful charted pieces.
Keeping Track of Rows and Stitches
When working on knitting projects, it is essential to keep track of rows and stitches to ensure that the pattern is followed correctly and the final product is as desired. Whether you are a beginner or an experienced knitter, keeping track of your progress will help you stay organized and avoid mistakes.
One way to keep track of rows is to use a row counter. This handy tool can be attached to your knitting needles or kept nearby. With each completed row, you simply click or turn the counter to keep track of your progress. This is especially useful when working on patterns with a high number of rows or when knitting in the round.
Another method is to use a knitting chart or pattern. These charts provide a visual representation of the pattern, with each stitch symbolized by a specific symbol or color. To keep track of your progress, you can highlight or mark off each row as you complete it. This allows you to easily see which row you are on and helps prevent mistakes.
Additionally, some knitters prefer to use stitch markers to help keep track of stitches within a row. These small, removable markers can be placed between stitches or rows to indicate a specific point in the pattern. Moving the marker as you progress through the pattern can help you keep track of where you are and identify any mistakes.
A knitting journal or notebook is another helpful tool for keeping track of rows and stitches. You can record the pattern, the number of stitches and rows, any modifications you made, and any issues or mistakes you encountered along the way. This not only helps you stay organized during the project, but it also serves as a valuable reference for future projects.
Regardless of the method you choose, maintaining an accurate record of your progress is crucial for successful knitting. By paying attention to your rows and stitches and using the appropriate tools, you can create beautiful knitted pieces with confidence and precision.
Fixing Mistakes in the Chart
When following a knitting chart pattern, it is not uncommon to make occasional mistakes. However, it’s important to know how to fix these mistakes in order to maintain the integrity of the design. Here are some tips for fixing mistakes in the chart:
1. Identifying the mistake:
If you notice a mistake in your knitting chart, the first step is to identify where the mistake occurred. Look for any discrepancies between the chart and your knitting work, such as an incorrect stitch count or an unrecognized symbol. Once you’ve identified the mistake, you can move on to fixing it.
2. Using stitch markers:
Stitch markers can be incredibly helpful when fixing mistakes in a knitting chart. By placing stitch markers at key points in the pattern, such as the beginning and end of a repeat, you can easily identify where the mistake occurred and backtrack to fix it. This can save you time and frustration when trying to correct errors in your knitting.
3. Tinking or frogging:
If you encounter a mistake in your knitting chart that is more than just a few stitches, you may need to unravel your work and redo the affected section. This is known as “tinking” (undoing one stitch at a time) or “frogging” (ripping out rows or sections of stitches). While it can be disheartening to undo your work, it’s better to fix the mistake now rather than regret it later.
4. Using a lifeline:
A lifeline is a useful technique for fixing mistakes in a knitting chart, especially when working on complex or intricate designs. To create a lifeline, thread a contrasting piece of yarn through all of the stitches on a particular row before you begin working that row. If you make a mistake later on, you can simply rip back to the lifeline and not have to worry about picking up the correct stitches.
Remember, making mistakes is a normal part of knitting, and even experienced knitters encounter them from time to time. The key is to stay calm, approach the mistake methodically, and use the appropriate techniques to fix it. With practice, you’ll become more proficient at catching and correcting mistakes in your knitting chart.
Creating Your Own Knitting Chart Patterns
Knitting chart patterns are a great way to create unique and personalized designs in your knitting projects. Whether you want to make a custom scarf, hat, or blanket, creating your own knitting chart pattern allows you to express your creativity and design something truly one-of-a-kind.
When creating your own knitting chart pattern, it’s important to start with a clear vision of what you want your finished project to look like. Consider the colors, textures, and motifs that you want to incorporate into your design. You can draw inspiration from nature, geometric shapes, or even your favorite works of art.
1. Choose the Right Charting Tool
A good charting tool is essential for creating knitting chart patterns. There are many options available, ranging from simple graph paper to specialized software programs. Choose a tool that suits your preferences and skill level. If you’re new to charting, start with a basic tool and gradually explore more advanced options as you gain experience.
2. Start with a Grid
Once you have your charting tool, start by drawing a grid. Each square on the grid will represent one stitch or one row of your knitting project. Use a ruler to ensure that your grid lines are straight and evenly spaced. The size of your grid will depend on the size of your project and the level of detail you want to include in your chart.
3. Transfer Your Design to the Chart
With your grid in place, it’s time to transfer your design to the chart. Use symbols or colors to represent different stitches or techniques. Common symbols include circles for knit stitches, crosses for purl stitches, and diagonals for decreases or increases. Experiment with different symbols and colors to find a system that works for you.
4. Test and Refine Your Chart

Once you have completed your knitting chart pattern, it’s time to test it out. Start by knitting a small swatch to see how your design looks in reality. This will give you an opportunity to make any necessary adjustments or refinements to your chart. Don’t be afraid to make changes and experiment until you are satisfied with the final result.
Creating your own knitting chart patterns can be a fun and rewarding process. It allows you to unleash your creativity and design unique projects that reflect your personal style. By following these steps and putting your own unique spin on traditional knitting techniques, you’ll be able to create beautiful and original pieces that you can be proud of.
Designing the Chart Layout
When creating a knitting chart pattern, one of the most important aspects to consider is the design of the chart layout. A well-organized chart can make it easier for knitters to follow the pattern and keep track of their stitches and rows. The layout should be clear and intuitive, ensuring that knitters can easily read and comprehend the chart.
One key element to include in the chart layout is a legend or key that explains the symbols used in the chart. This is essential for ensuring that knitters understand what each symbol represents and can follow the pattern accurately. The legend can be placed at the top or bottom of the chart, making it easily accessible for reference while knitting.
The chart itself should be laid out in a grid format, with each square representing a stitch. It is common to include row numbers on the side of the chart and stitch numbers along the top, to provide additional guidance for knitters. This allows them to easily locate their place on the chart and keep track of their progress.
In addition to the grid format, it can be helpful to include clear and concise instructions or notes within the chart. These can provide further clarification or guidance for specific stitches or sections of the pattern. Including these instructions directly in the chart can help knitters understand the pattern more easily and avoid mistakes.
Overall, designing the chart layout requires careful attention to detail and consideration of the knitter’s experience. By creating a clear and well-organized layout, knitters can more easily follow the pattern and create beautiful knitted items.
Converting a Written Pattern into a Chart
Converting a written knitting pattern into a chart can be a useful skill to have, as it allows for a visual representation of the pattern. This can make it easier to understand and follow the pattern, especially for more complex designs. Here are some steps to help you convert a written pattern into a chart:
- Choose a method: There are different methods for creating knitting charts. You can either use graph paper and draw the chart by hand, or you can use a computer program or knitting software to create a digital chart.
- Read and understand the pattern: Before you start creating the chart, it’s important to thoroughly read and understand the written pattern. Make sure you are familiar with the pattern abbreviations and instructions.
- Break down the pattern: Divide the written pattern into smaller sections or repeats. This will make it easier to create the chart and keep track of the pattern.
- Create the chart: If you’re using graph paper, draw a grid that corresponds to the number of stitches and rows in the pattern. Fill in the squares to represent the different stitches and rows according to the pattern instructions. If you’re using a computer program or knitting software, input the pattern instructions to generate the chart automatically.
- Annotate the chart: Add any additional information or reminders to the chart, such as stitch counts, yarn overs, or decreases. This will help you stay organized and prevent mistakes while knitting.
- Test the chart: Once you’ve created the chart, it’s a good idea to test it by knitting a swatch or small sample of the pattern. This will help you identify any errors or discrepancies in the chart.
Converting a written knitting pattern into a chart may require some practice and skill, especially for more complex designs. However, with time and experience, it can become a valuable tool in your knitting arsenal. So the next time you encounter a written knitting pattern, don’t be afraid to give charting a try!