
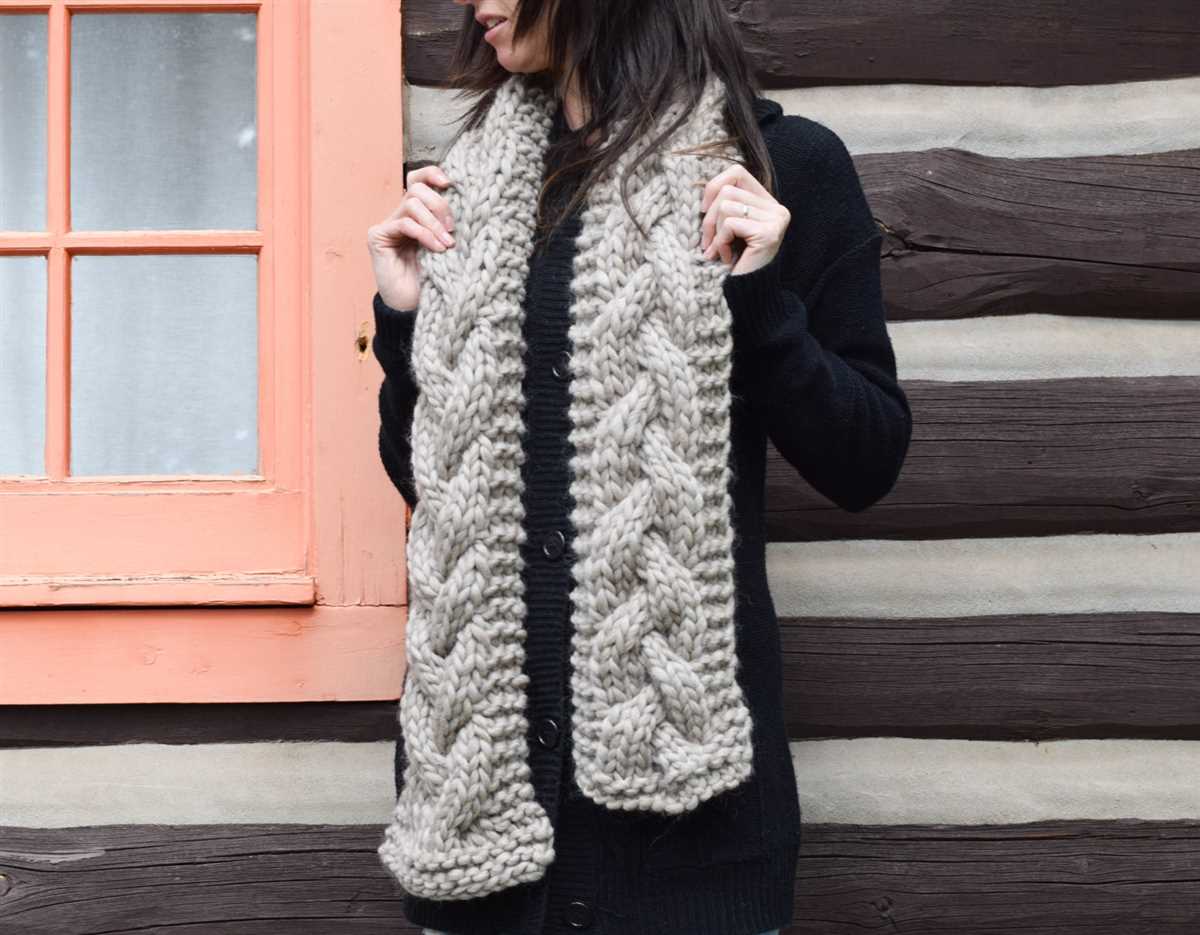
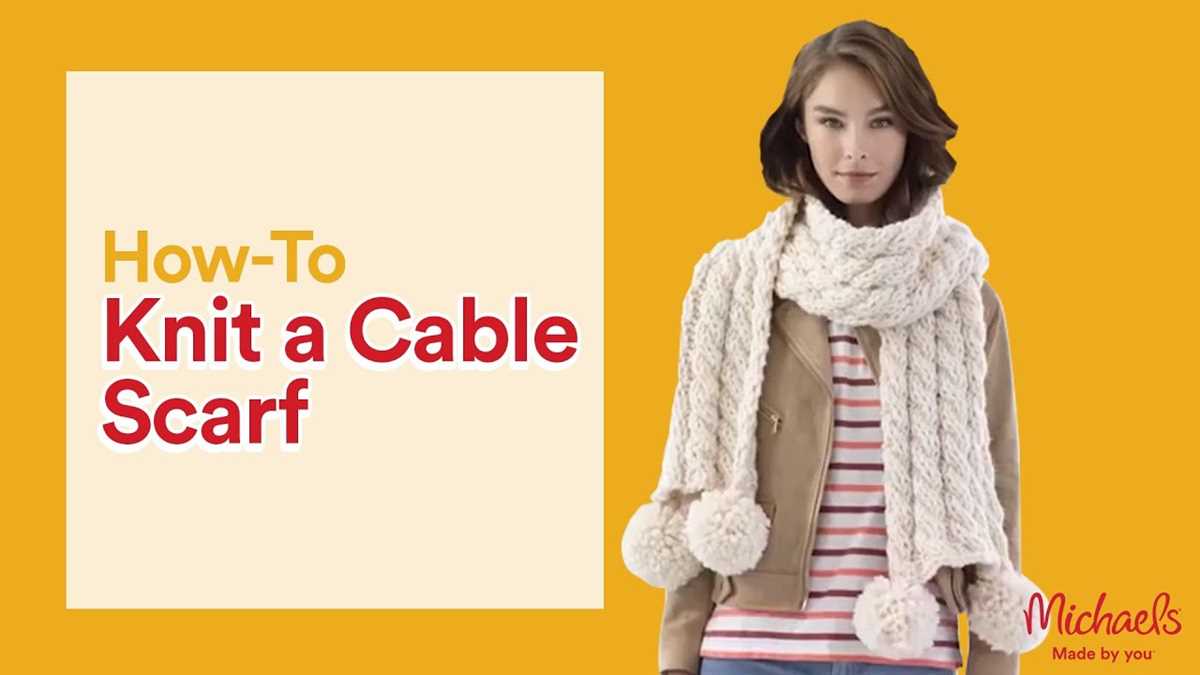
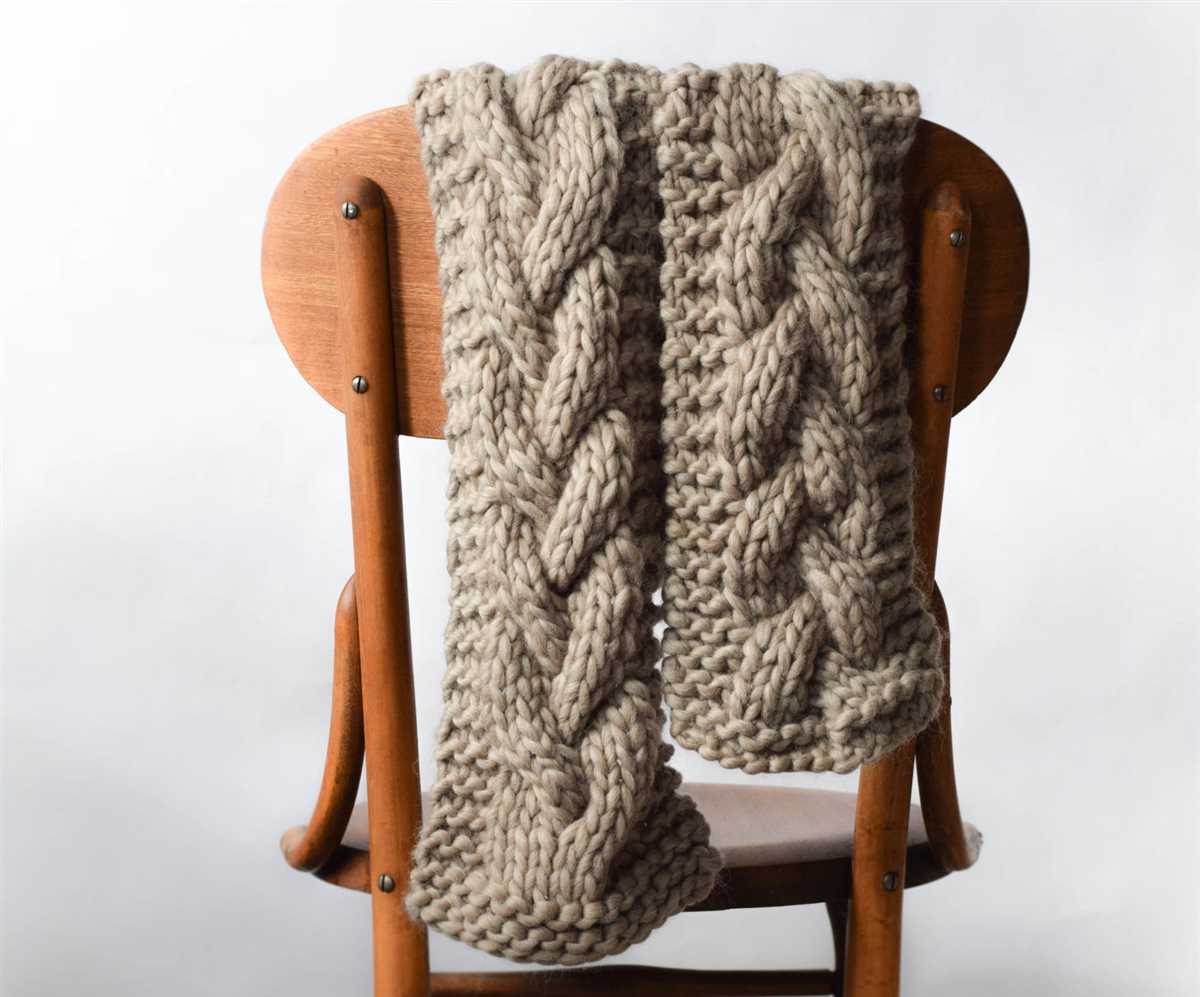
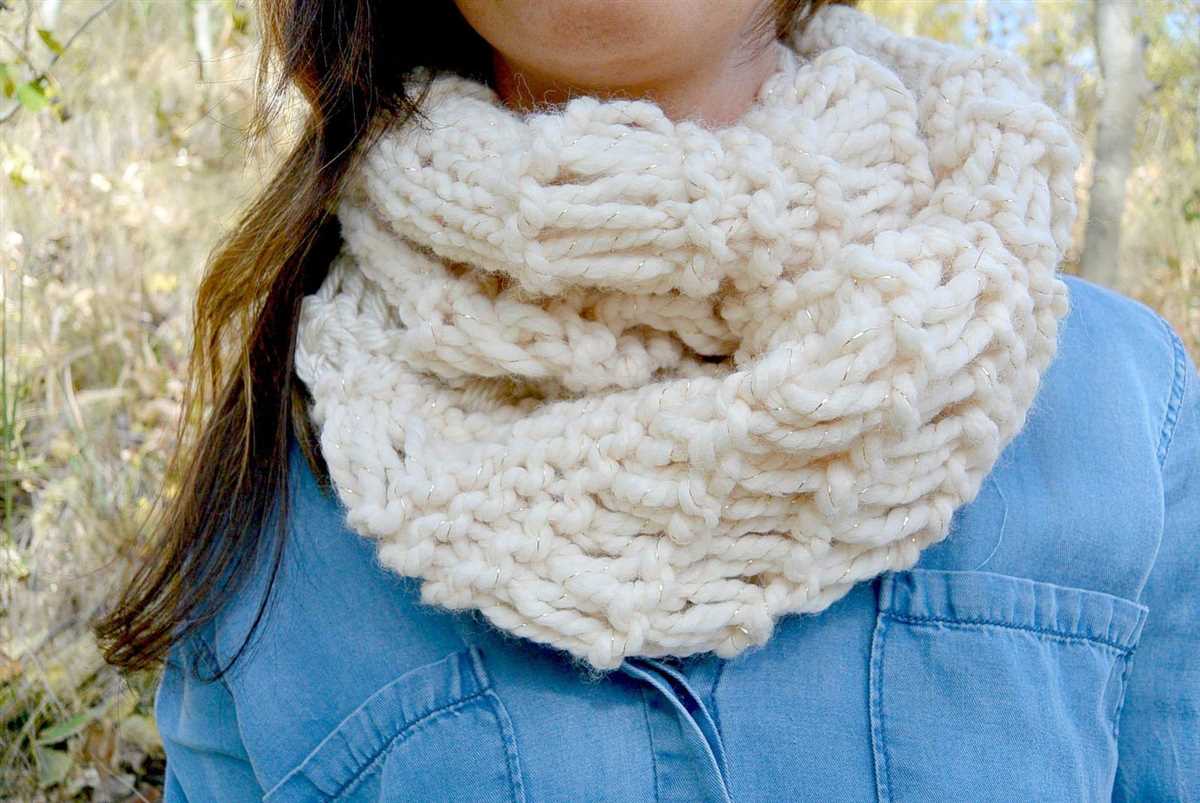
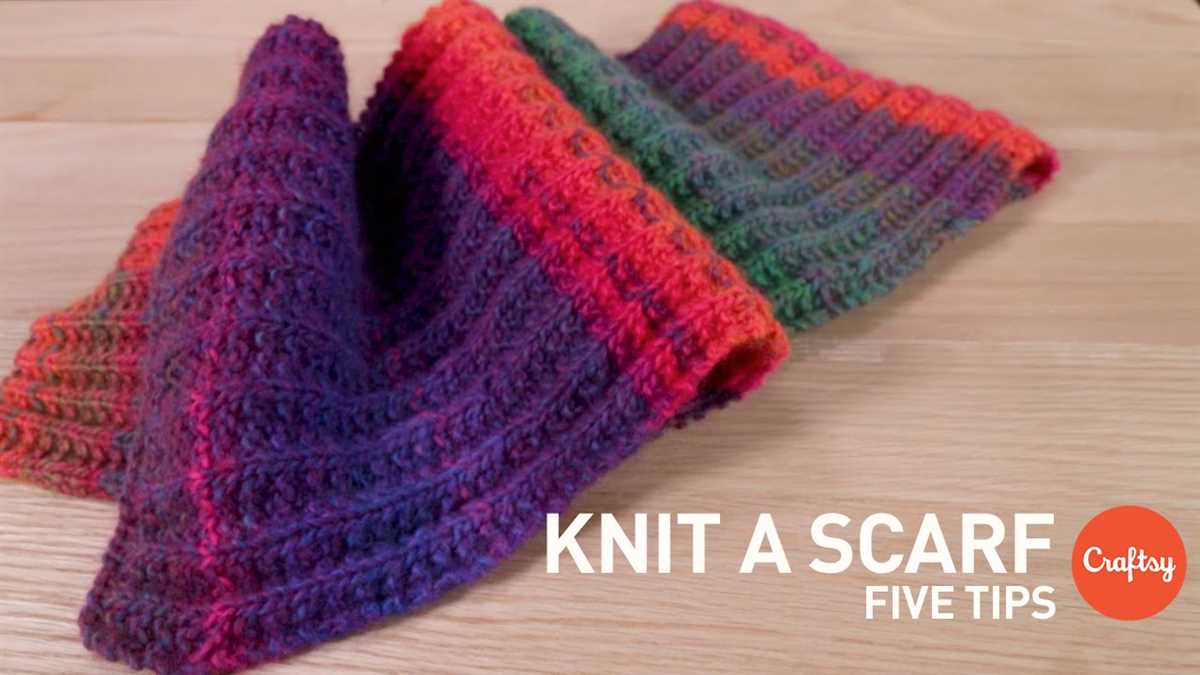
Winter is the perfect time to bundle up and keep warm, and what better way to do that than with a cozy, chunky cable knit scarf? Whether you’re a beginner knitter or an experienced one, this easy pattern is sure to become your go-to for colder days.
The chunky cable knit scarf is not only fashionable but also practical, providing extra warmth and comfort. The beautiful cables add texture and interest to the scarf, making it a stylish accessory to any winter outfit.
This easy pattern is ideal for those who want to challenge themselves and try their hand at cable knitting. With just a few basic knitting stitches and a simple cable pattern, you’ll have a stunning scarf that you can wear or give as a thoughtful handmade gift.
So grab your favorite chunky yarn, your knitting needles, and get ready to create a gorgeous cable knit scarf that will keep you warm and cozy all winter long.
What is a cable knit scarf?
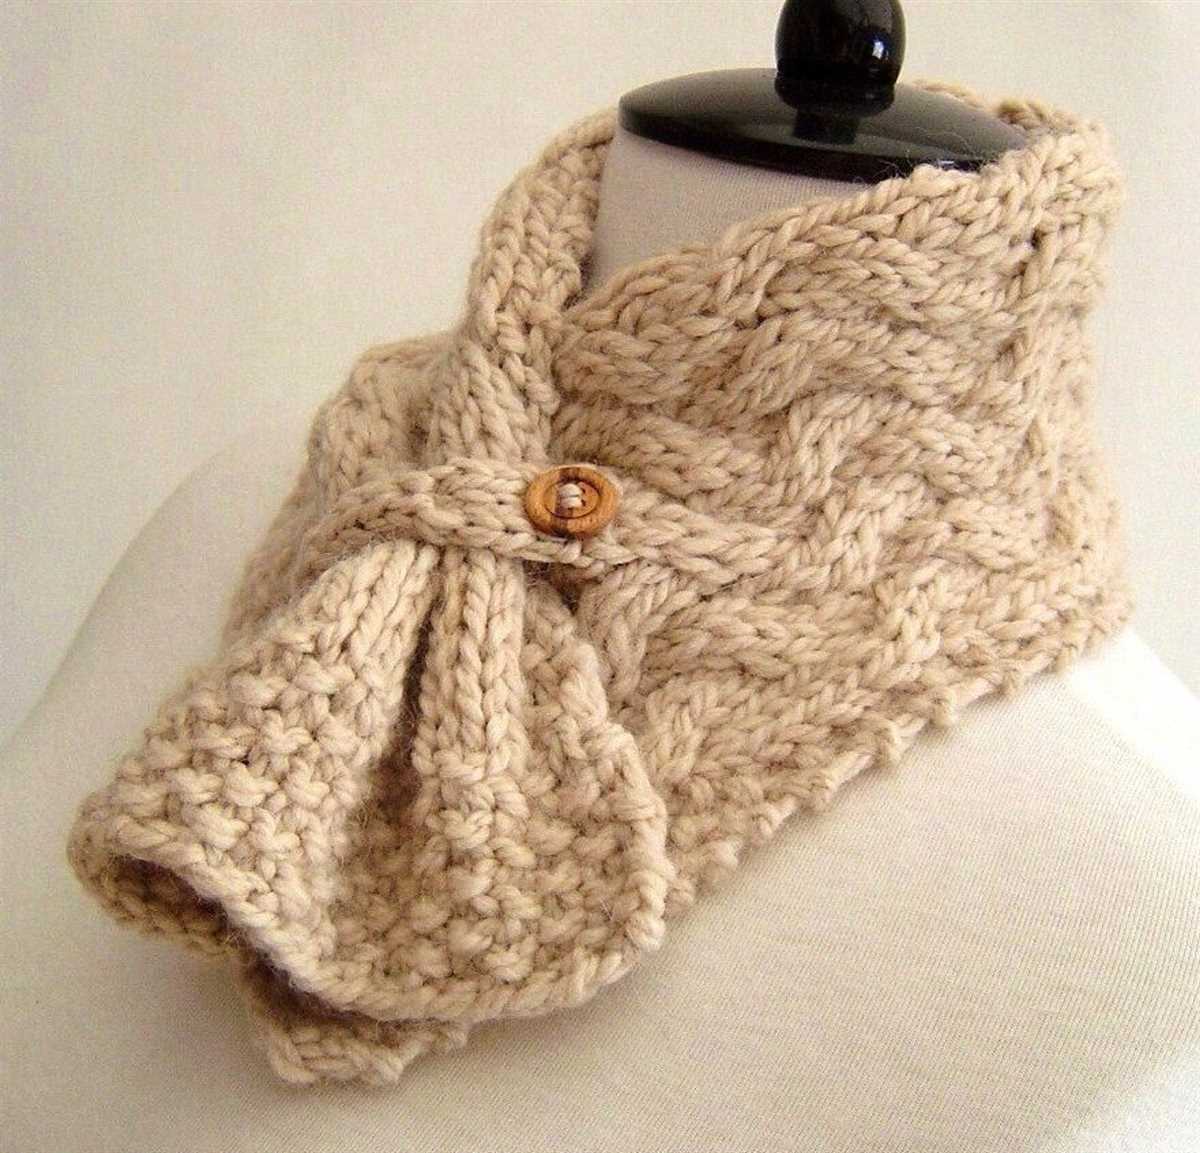
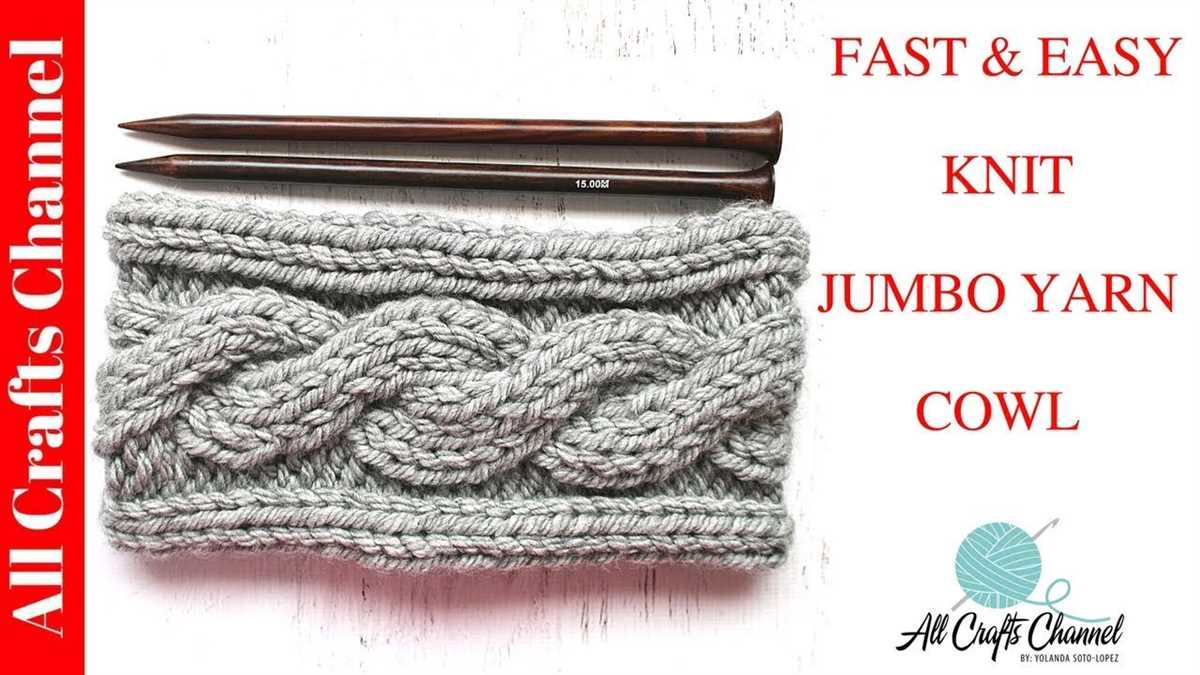
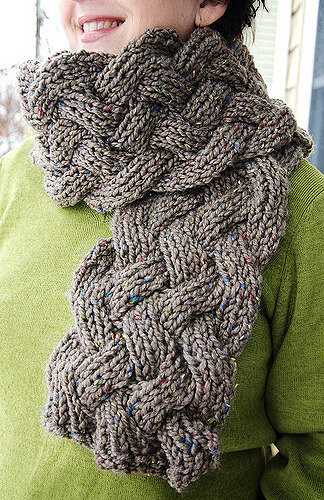
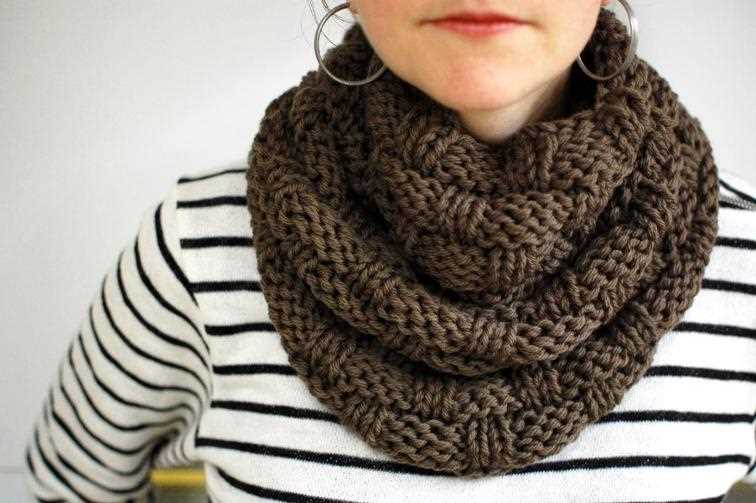
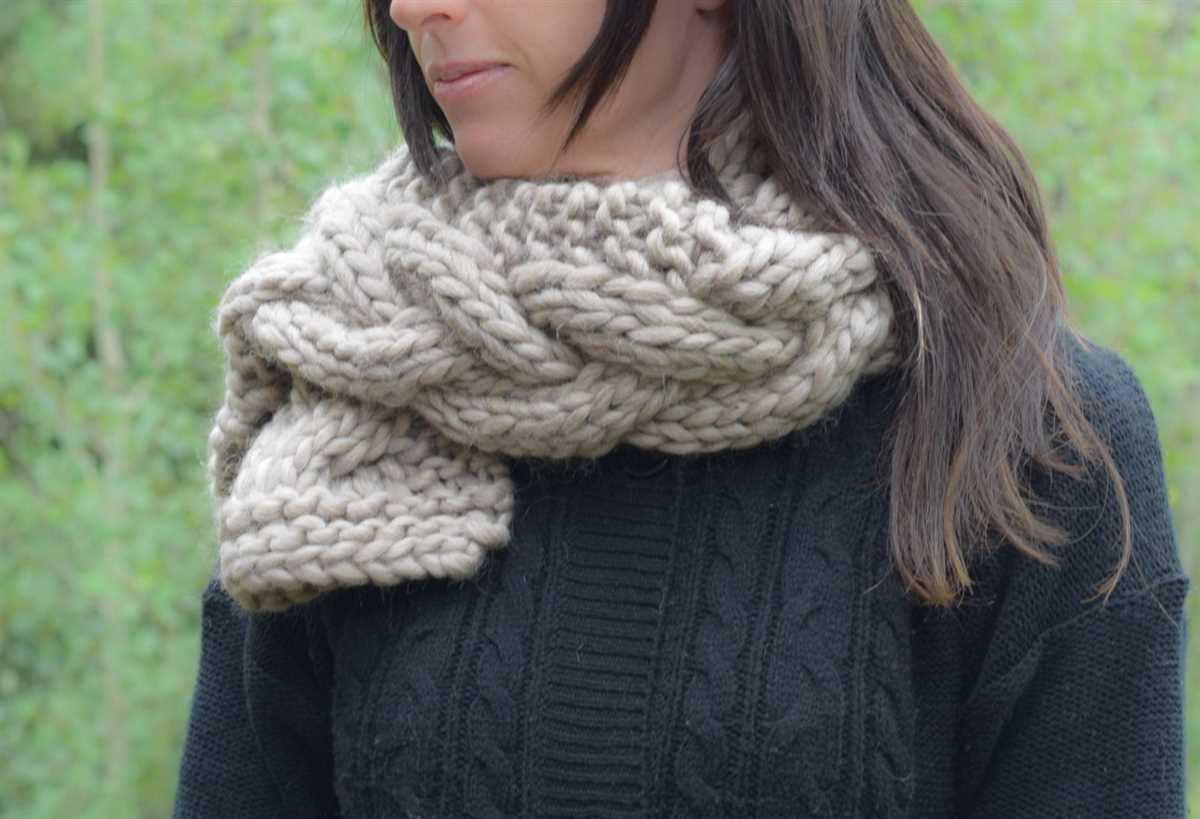
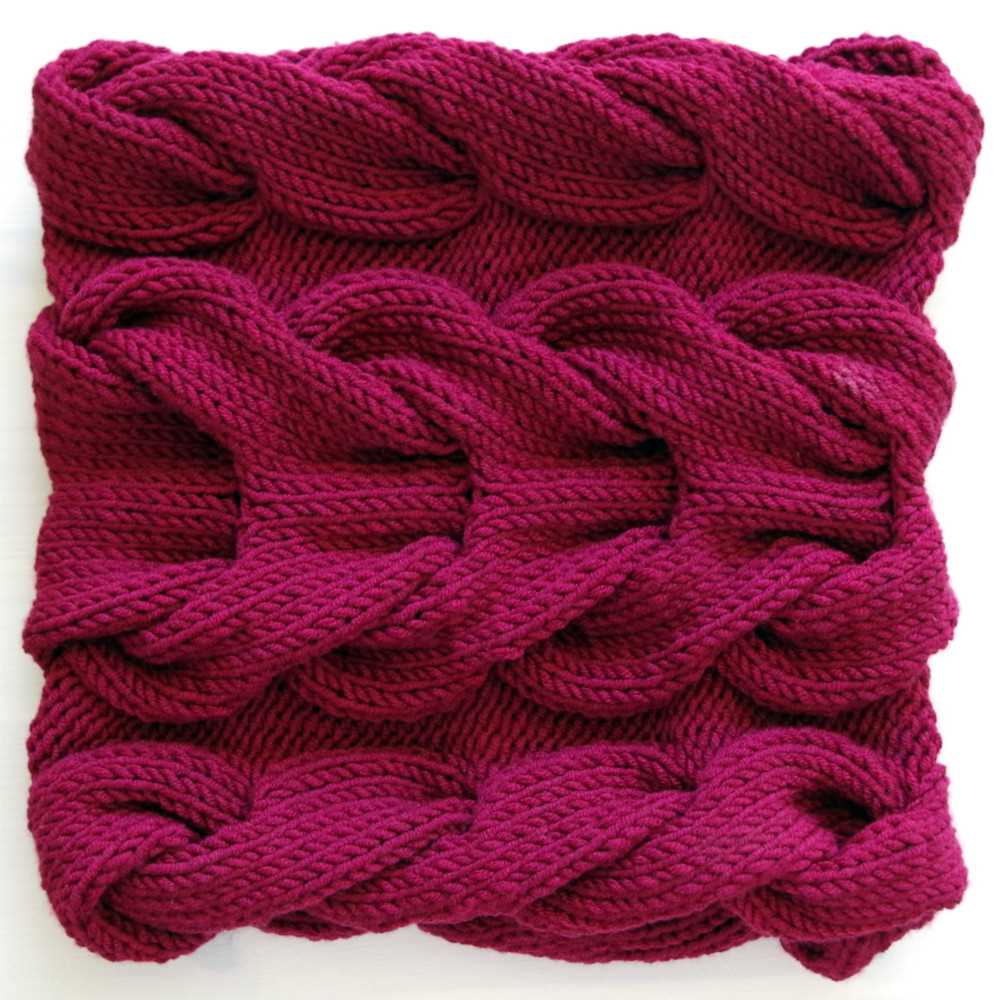
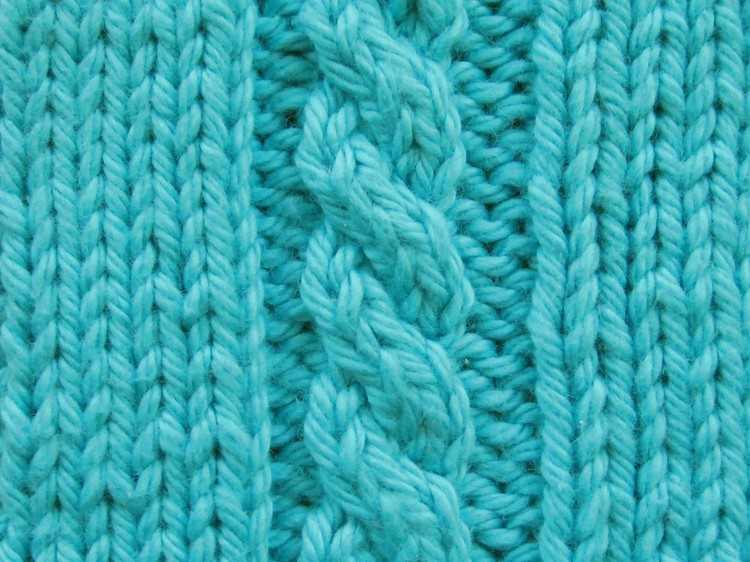
A cable knit scarf is a type of scarf that is made using a specific knitting technique called cable knitting. Cable knitting involves creating textured patterns and designs by crossing stitches over each other, giving the appearance of interlocking cables. Cable knit scarves are known for their chunky, cozy look and feel, making them popular accessories for cold weather.
The cable knitting technique originated from the Aran Islands in Ireland and is commonly used in traditional Irish and Scottish knitwear. It is characterized by its intricate patterns and the use of thick, bulky yarn to create a visually appealing and warm garment. Cable knit scarves are often designed with a wide variety of cable patterns, ranging from simple twists to complex braids and diamonds.
When making a cable knit scarf, knitters typically use a combination of knit and purl stitches to create the cables. The cables are created by crossing a set number of stitches over each other using a cable needle or by working the stitches out of order. This process creates the distinctive raised cables that give cable knit scarves their unique texture and visual interest.
Overall, a cable knit scarf is a stylish and practical accessory that adds warmth and visual appeal to any winter outfit. Whether you choose a simple cable pattern or a more intricate design, a cable knit scarf is a timeless and versatile accessory that can be worn for years to come.
Materials needed
To make the easy chunky cable knit scarf, you will need the following materials:
- Yarn: Choose a bulky weight yarn in your preferred color. It is recommended to use a wool or acrylic blend for warmth and durability. Approximately 300-400 yards of yarn is needed.
- Knitting needles: You will need a pair of size 10 (6mm) knitting needles, or the size needed to obtain the gauge.
- Cable needle: A cable needle is used to hold stitches while crossing the cables. Choose a cable needle that is the appropriate size for your yarn and needles.
- Tapestry needle: A tapestry needle is used for weaving in ends and finishing the scarf.
- Scissors: A pair of scissors is needed for cutting the yarn.
- Measuring tape: A measuring tape is useful for checking the length of the scarf as you work.
- Stitch markers: Stitch markers can be helpful for keeping track of stitch counts and defining sections of the pattern.
Gather these materials before you begin knitting your easy chunky cable knit scarf, and you will be ready to start creating a cozy and stylish accessory.
Choosing the right yarn
When it comes to knitting a chunky cable knit scarf, choosing the right yarn is essential. The yarn you select will not only determine the overall look of your scarf but also affect its feel, warmth, and durability. Here are a few key factors to consider when selecting the perfect yarn for your project:
Fiber content: Different yarn fibers have distinct characteristics that will impact your finished scarf. Wool is a popular choice due to its warmth and excellent stitch definition. Acrylic yarns are often more affordable and can be a good option for those with allergies or sensitivities to wool. Other natural fibers like cotton or silk may provide a different texture and drape. Consider the qualities you desire in your scarf and choose a fiber that best matches your needs.
Weight:
Choosing the right weight of yarn is crucial to achieving the desired look and feel for your cable knit scarf. Chunky or bulky weight yarns will create a thicker and warmer scarf, while lighter weight yarns will result in a more delicate and lightweight scarf. Take into account the climate and intended use of your scarf when deciding on the weight of yarn.
Color and texture:
The color and texture of the yarn will greatly impact the visual appeal of your scarf. You can choose a solid color yarn for a classic and timeless look or opt for variegated or self-striping yarns for added interest and dimension. Consider the overall aesthetic you want to achieve and match the yarn accordingly.
Price and availability:
Finally, consider the price and availability of the yarn. Some specialty or luxury yarns can be quite expensive, while others may be more affordable. Take into account your budget and the availability of the yarn in your area to ensure a smooth and enjoyable knitting experience.
By carefully considering these factors, you can choose the right yarn for your chunky cable knit scarf that will result in a beautiful and cozy accessory to keep you warm during the colder months.
Choosing the right needles
When it comes to knitting a chunky cable knit scarf, choosing the right needles is crucial. The size of the needles will not only affect the texture and appearance of the scarf but also the overall knitting experience.
First and foremost, consider the desired thickness and drape of the scarf. If you want a chunkier and more substantial scarf, opt for larger-sized needles. Typically, needles in the range of US size 10-13 (6-9mm) work well for a chunky cable knit scarf. These larger needles will produce a looser knit, allowing the cable pattern to stand out and giving the scarf a cozy, bulky feel.
Material of the needles
The material of the needles can also make a difference in your knitting experience. Wooden or bamboo needles are a popular choice for knitting chunky scarves as they provide a warmer and quieter knitting experience. These materials are less slippery compared to metal needles, which can be beneficial when working with thicker yarn and complex cable patterns. However, if you prefer the smoothness and speed of metal needles, you can still use them successfully for your chunky cable knit scarf.
Circular or straight needles
Another consideration is whether to use circular or straight needles. If you prefer to knit using straight needles, make sure they are long enough to accommodate the width of your scarf. However, using circular needles can be more convenient as they allow the weight of the scarf to be distributed evenly, reducing strain on your hands and wrists. Additionally, circular needles provide flexibility for knitting in the round or using the magic loop technique if you decide to expand your knitting repertoire in the future.
Ultimately, the choice of needles for your chunky cable knit scarf is a personal preference. Experimenting with different needle sizes and materials can help you find the perfect combination for achieving the desired texture, drape, and knitting experience. Happy knitting!
Getting started
Before you begin knitting your easy chunky cable knit scarf, there are a few things you need to gather and prepare. First, you will need to choose the yarn and knitting needles you want to use for your project. For a chunky and cozy scarf, it is best to choose a thick yarn such as a super bulky weight. You can find a variety of options at your local craft store or online.
Once you have your yarn, you will also need a pair of knitting needles that are suitable for the thickness of your chosen yarn. Check the label on the yarn for the recommended needle size or consult a knitting needle size chart to ensure you have the right tools for the job.
Before you begin casting on, it can be helpful to create a swatch to check your gauge. This will ensure that your stitches are the correct size and your scarf will turn out as expected. To create a gauge swatch, cast on a few stitches and knit a small square using your chosen yarn and needles. Measure the number of stitches and rows per inch to compare against the gauge listed in the pattern.
If your gauge does not match the pattern, you may need to adjust your needle size. If your stitches are too large, try using a smaller needle size. Conversely, if your stitches are too small, switch to a larger needle size.
Once you are satisfied with your gauge, you are ready to get started on your easy chunky cable knit scarf! Follow the pattern instructions carefully, and before you know it, you’ll have a beautiful and cozy scarf to keep you warm during those chilly winter months.
Creating the cable pattern
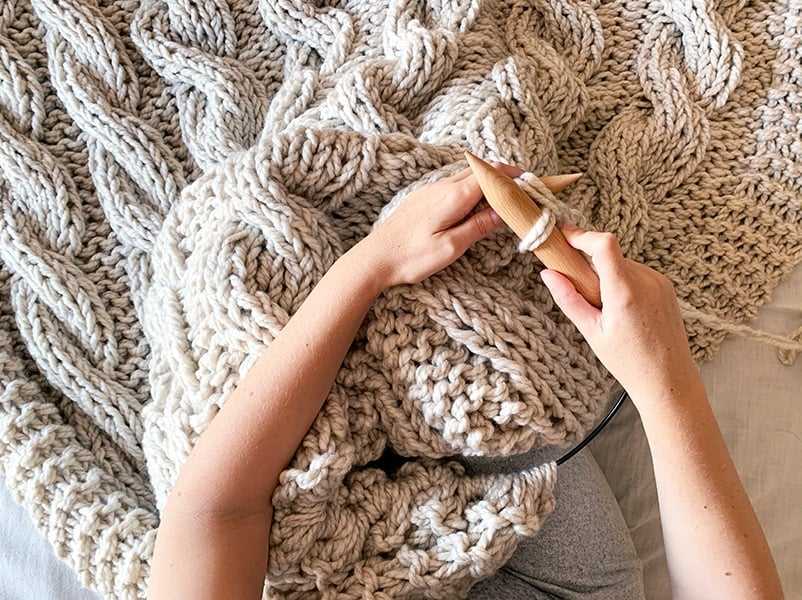
To create the cable pattern for the chunky knit scarf, you will need to understand the basic principles of cable knitting. The cable pattern is made by crossing stitches over each other, creating a raised texture and a visually interesting design. The pattern typically consists of a series of crosses, usually two or four stitches wide, that are worked over a number of rows.
To begin the cable pattern, you will need to determine the number of stitches that will be used for each cable cross. This will depend on the desired width of the cable and the overall width of the scarf. Once you have determined the number of stitches, you can begin to work the pattern.
To create a cable cross, you will typically need to move a set number of stitches to either the front or the back of your work. This is done by holding the stitches on a cable needle while you work the next set of stitches. After completing the stitches that will be crossed, you will then work the stitches from the cable needle, either knitting or purling them as specified in the pattern.
As you continue to work the cable pattern, you will notice that the crosses gradually form the desired cable design. It’s important to keep track of your rows and stitches to ensure that the cable pattern is symmetrical and consistent throughout the scarf. You may find it helpful to use stitch markers or a row counter to help you keep track.
Once you have completed the cable pattern for the desired length of the scarf, you can finish it off by working a few more rows of plain knitting, or by adding a border or fringe as desired. The end result will be a cozy and stylish chunky cable knit scarf that is perfect for those chilly winter days.
Knitting the main body of the scarf
Once you have cast on the required number of stitches for your scarf and have completed the ribbing, it’s time to start knitting the main body of the scarf. For this pattern, we will be using a simple chunky cable knit stitch to create a cozy and textured look.
To begin, you will need to follow the cable knitting chart or instructions provided in the pattern. The chart will outline the specific cable stitches and their order. Make sure to have a cable needle or double-pointed needle on hand to help with the cable twists.
Step 1: Start by knitting a few rows in the main stitch pattern. This will be a combination of knit and purl stitches, as specified in the pattern. These initial rows will help establish the base for the cable design.
Step 2: Once you have completed the initial rows, it’s time to start the cable twists. Follow the instructions in the pattern to know when and how to cross the stitches over each other. This will create the beautiful cable design that gives this scarf its unique look.
Step 3: Continue knitting in the cable stitch pattern, following the chart or instructions for the desired length of the scarf. Take your time with each cable twist to ensure that the stitches are crossed correctly and the pattern is consistent.
Step 4: As you knit the main body of the scarf, periodically check your gauge to ensure that you are maintaining the correct tension. If necessary, adjust your needle size to achieve the desired gauge.
Step 5: Once you have reached the desired length for your scarf, finish by knitting a few more rows in the main stitch pattern to create a neat and finished edge. Bind off the stitches and fasten off the yarn, leaving a tail for weaving in later.
With the main body of the scarf complete, you can now move on to adding any additional details or finishing touches, such as fringe or a decorative border. Refer to the pattern for specific instructions on how to complete these final steps.
Adding finishing touches
Once you have completed knitting your chunky cable knit scarf, it’s time to add the finishing touches to make it truly stand out. Here are some ideas to consider:
Blocking: Before adding any additional details or embellishments, it’s important to block your scarf. Blocking helps to even out your stitches and shape the scarf to its desired size. To block your scarf, dampen it with water and gently stretch it out on a flat surface. Leave it to dry completely before moving on to the next step.
Embroidery or appliques: To add a personal touch to your scarf, you can consider adding embroidery or appliques. Choose a motif or design that complements the cable knit pattern and use embroidery floss or fabric glue to attach it to the scarf. This will add visual interest and make your scarf unique.
Fringe or tassels: Another way to enhance the look of your scarf is by adding fringe or tassels. You can use the same yarn you used for knitting or opt for a contrasting color for a pop of color. To make fringe, cut equal length strands of yarn and attach them to the edges of the scarf. For tassels, wrap yarn around a piece of cardboard or your fingers, tie a separate strand of yarn around the top, and then cut the loops at the bottom.
Buttons or toggles: If you want to add a functional element to your scarf, consider sewing on buttons or toggles. This will allow you to fasten the scarf in different ways, providing versatility and added warmth. Choose buttons or toggles that complement the color and style of your scarf, and sew them securely onto the ends or along the sides.
Personalized tags: To add a professional finishing touch, consider attaching a personalized tag to your scarf. This can be as simple as a small fabric label with your name or initials, or you can get creative and design your own logo. Sew the tag onto a discreet spot on the scarf, such as the corner, so that it doesn’t interfere with the overall design.
Remember, these finishing touches are optional and should be tailored to your personal style and preferences. Have fun experimenting with different ideas and make your chunky cable knit scarf truly unique!
Blocking the finished scarf

Blocking is an important step in finishing any knitting project, and it is especially crucial for a chunky cable knit scarf. Blocking helps to shape and even out the stitches, giving the scarf a more polished and professional finish. It also helps to open up the cables and make them more defined.
To block the finished scarf, first, you will need to fill a sink or basin with lukewarm water. Avoid using hot water, as it can cause the fibers to shrink or felt. Gently submerge the scarf in the water, making sure it is fully saturated. Allow the scarf to soak for about 15 to 20 minutes to ensure that the fibers are thoroughly wet.
Once the scarf has soaked, carefully remove it from the water and gently squeeze out any excess moisture. Avoid wringing or twisting the scarf, as this can cause it to lose its shape. Lay the scarf flat on a clean, dry towel and roll it up to remove even more moisture. Unroll the towel and carefully transfer the scarf to a blocking mat or a padded surface.
Using T-pins or blocking wires, begin to shape and stretch the scarf to the desired dimensions. Pay special attention to the cables, gently pulling and pinning them into place to enhance their texture and definition. You can refer to the original pattern or use your own judgment to determine the desired dimensions and shape of the scarf.
Allow the scarf to dry completely in this stretched and pinned position. This can take anywhere from a few hours to a day, depending on the humidity and air circulation in your location. Once the scarf is dry, carefully remove the pins or wires, and admire your beautifully blocked chunky cable knit scarf.
Tips and tricks for knitting a cable knit scarf
Knitting a cable knit scarf can be a fun and rewarding project, but it can also be a bit challenging if you’re new to cable knitting. Here are some tips and tricks to help you along the way:
1. Use the right yarn and needles: When knitting a cable knit scarf, it’s important to choose a yarn that is suitable for cables. Look for a medium to bulky weight yarn that has good stitch definition. You’ll also need a pair of knitting needles that are appropriate for the yarn you’ve chosen. A size 8 or 9 needle is usually a good starting point.
2. Practice your cable stitches: If you’re new to cable knitting, it’s a good idea to practice your cable stitches before starting your scarf. You can create a small swatch with a few cable repeats to get the hang of the technique and make sure you understand how to cross the stitches without twisting them.
3. Use stitch markers: Stitch markers can be very helpful when knitting cables, especially if you’re working on a pattern with multiple cables or complex cable patterns. They can help you keep track of where you are in the pattern and ensure that you’re crossing the cables correctly.
4. Take breaks and stretch: Knitting cables can be more physically demanding than regular knitting, so it’s important to take breaks and stretch your hands, wrists, and arms to avoid strain or injury. You can also consider using ergonomic knitting needles to help reduce the strain on your hands.
5. Don’t be afraid to make mistakes: Cable knitting can sometimes be a bit tricky, and it’s common to make mistakes along the way. Don’t be too hard on yourself if you drop a stitch or cross the cables incorrectly. Remember that knitting is supposed to be fun and relaxing, so embrace your mistakes as learning opportunities and keep going!
6. Block your scarf: Once you’ve finished knitting your cable knit scarf, don’t forget to block it. Blocking helps even out the stitches, improve the drape of the fabric, and give your scarf a polished look. Follow the blocking instructions for your chosen yarn to ensure the best results.
Knitting a cable knit scarf can be a great way to challenge yourself and create a cozy and stylish accessory. With these tips and tricks, you’ll be on your way to knitting a beautiful cable knit scarf in no time!