
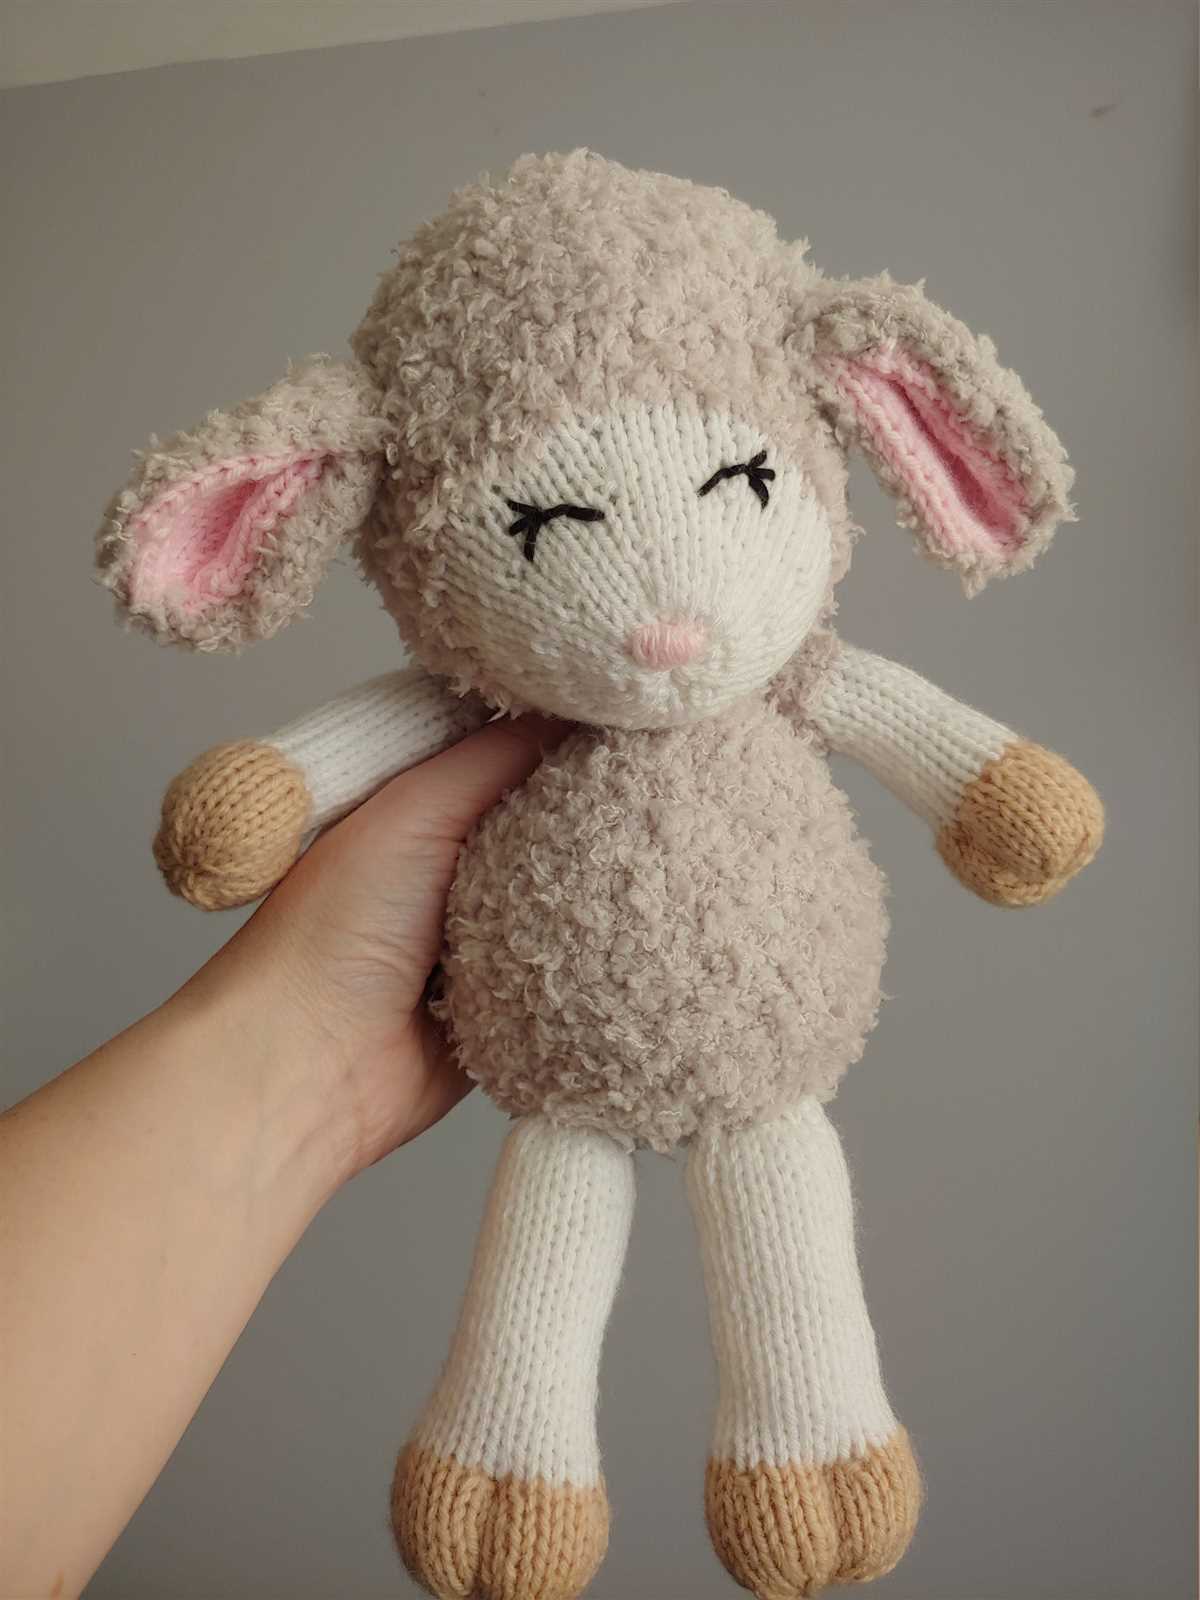
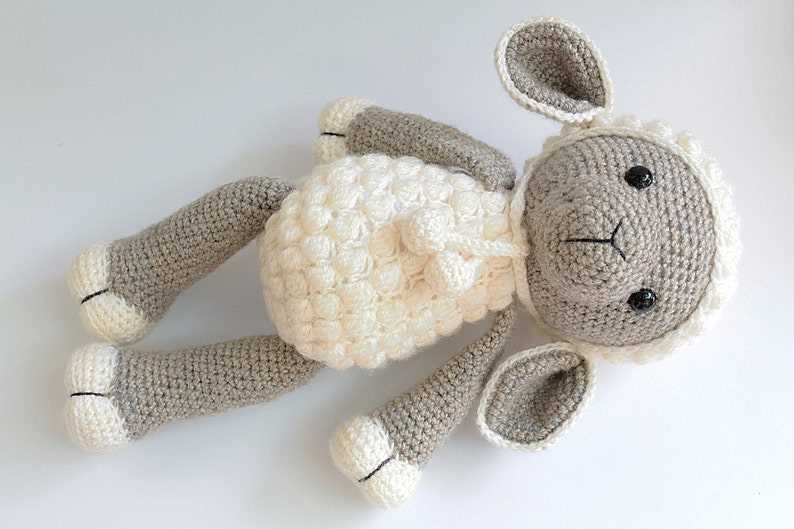
Knitting is a wonderful craft that allows you to create beautiful and unique items. If you’re a beginner knitter looking for a fun and easy project, why not try making a cute knitted sheep?
This easy knitted sheep pattern is perfect for both beginner and experienced knitters alike. With simple stitches and step-by-step instructions, you’ll have your very own adorable sheep in no time.
Not only is knitting a great way to relax and unwind, but it also allows you to create personalized gifts for friends and loved ones. Whether you’re making a sheep as a cuddly toy or as a decorative item for your home, this pattern is sure to bring joy to whoever receives it.
Materials needed:
In order to make an easy knitted sheep, you will need a few materials to get started. Here is a list of what you will need:
- Knitting needles: You will need a pair of knitting needles to create the sheep. Choose the size that is appropriate for your yarn and desired finished size of the sheep.
- Yarn: Select a soft and fluffy yarn in white for the body of the sheep. Make sure to choose a yarn that is suitable for knitting and compatible with the chosen needle size.
- Black yarn: To give the sheep its facial features, you will need a small amount of black yarn. This can be either a contrasting yarn or a black yarn that matches the weight of the white yarn.
- Scissors: A pair of scissors will be necessary to cut the yarn while knitting and to trim any excess yarn at the end.
- Yarn needle: A yarn needle with a large eye will be needed to weave in the loose ends of the yarn and to sew any parts of the sheep together.
- Stuffing: To give the sheep its shape, you will need stuffing material. This can be polyester fiberfill, cotton batting, or any other suitable stuffing material.
Gather these materials before you begin knitting your easy sheep pattern, and you will be all set to create your own adorable knitted sheep!
Step 1: Making the body
The first step in creating your easy knitted sheep is to make the body. This is the main part of the sheep where you will be working the stitches and creating the shape.
Materials needed:
- Yarn of your choice (white or cream color is typically used for sheep)
- Knitting needles (size may vary depending on the desired size of your sheep)
- Tapestry needle for weaving in ends
Instructions:
- Begin by casting on the required number of stitches for the body. This will depend on the size of your sheep and the thickness of your yarn. You can refer to the pattern for the specific number of stitches needed.
- Once you have cast on the stitches, you will begin working in the specified stitch pattern. This may be a simple knit stitch, purl stitch, or a combination of both. Follow the pattern instructions for the desired stitch pattern.
- Continue working in the stitch pattern until the body reaches the desired length. This length will again depend on the size of your sheep. You can refer to the pattern for the specific length needed.
- Once the body has reached the desired length, you can then bind off all the stitches. This will secure the stitches and prevent them from unraveling.
Once you have completed the steps above, you will have successfully created the body of your easy knitted sheep. You can now move on to the next step in the pattern, which is usually making the head. Follow the pattern instructions to continue working on your adorable knitted sheep.
Step 2: Knitting the head
After completing the body, it’s time to move on to knitting the head of the sheep. The head will be a separate piece that will later be attached to the body.
To start knitting the head, you will need to cast on a certain number of stitches, depending on the size of the sheep you want to create. You can refer to the pattern instructions for the specific number of stitches to cast on.
Once you have cast on the required number of stitches, you can begin knitting the head in the desired stitch pattern. This can be done using either straight knitting needles or double-pointed needles, depending on your preference.
Tip: It’s a good idea to use stitch markers to keep track of the beginning and end of each row, especially if you’re working on a stitch pattern with multiple repeats.
As you progress with knitting the head, make sure to follow the pattern instructions carefully for any shaping or increases that need to be done. These instructions will help give the sheep’s head its desired shape.
Continue knitting until the head reaches the desired height, as specified in the pattern. Once you have finished knitting the head, you can bind off the stitches and use a yarn needle to weave in any loose ends.
Congratulations! You have now completed the second step of knitting the sheep and have successfully knitted the head. The next step will be attaching the head to the body to bring your knitted sheep to life.
Step 3: Adding the ears
To complete your easy knitted sheep, you will need to add the ears. These adorable little features will bring your toy to life!
Materials:
- Yarn in a contrasting color (preferably a lighter shade than the body)
- Knitting needles
- Tapestry needle
- Scissors
Instructions:
- Start by cutting two pieces of yarn, each measuring approximately 4 inches long. These will be used to create the ears.
- Using your knitting needles, pick up stitches on each side of the sheep’s head where you want the ears to be positioned. Make sure to evenly distribute the stitches on each needle.
- With the contrasting yarn, knit the stitches on both needles, working in the round. This will create the base of the ear.
- Continue knitting in the round until the ear reaches your desired length. You can make the ears short and stubby or long and floppy, depending on your preference.
- Once the ear is the desired length, bind off the stitches and cut the yarn, leaving a tail long enough for sewing.
- Repeat steps 3-5 for the second ear.
- Using a tapestry needle, sew the ears securely onto the sheep’s head. Make sure to position them symmetrically and secure them firmly so they don’t droop or fall off.
Congratulations! You have successfully added the ears to your knitted sheep. Now your adorable toy is complete and ready to be enjoyed or gifted to someone special!
Step 4: Creating the legs
Now that we have finished knitting the body of the sheep, it’s time to move on to creating the legs. The legs will be knitted separately and then attached to the body later on. Follow the instructions below to create the legs.
Materials needed:
- Knitting needles (size may vary depending on desired leg size)
- Yarn in the color of your choice
- Tapestry needle
Instructions:
- Start by casting on the desired number of stitches for each leg. This will depend on the size and thickness of the yarn you are using. For a medium-sized sheep, you can start with around 20 stitches.
- Knit each row in stockinette stitch until the leg reaches the desired length. You can make the legs shorter or longer depending on your preference.
- Once the leg is at the desired length, bind off the stitches and cut the yarn, leaving a long tail for sewing.
- Repeat steps 1-3 to create the second leg.
After creating both legs, you can now proceed to attaching them to the body of the sheep. Use the long tails left from each leg to securely sew them onto the bottom of the body. Make sure to position the legs evenly and securely to give your sheep a stable stance. Once the legs are attached, you can continue on to the next step to complete your knitted sheep.
Step 5: Making the tail
Once you have completed knitting the body of the sheep, it’s time to move on to making the tail. The tail is a small but important part of the sheep’s overall appearance, adding a touch of charm and character to the finished toy.
To make the tail, you will need a separate ball of yarn in the desired color. Starting at the back of the sheep, where the tail should be positioned, insert the knitting needle into the stitch below the desired location and create a loop by wrapping the yarn around the needle.
Next, knit the loop, pulling the yarn through to create a new stitch. Repeat this process for a few more rows, gradually decreasing the number of stitches with each row to taper the tail. Finally, cut the yarn, leaving a long tail to secure and fasten off.
Remember to stuff the tail lightly with fiberfill before completely finishing it off. This will help give it a more defined shape and prevent it from looking flat or limp.
Once the tail is complete, you can attach it securely to the body of the sheep using a tapestry needle and the long tail left from fastening off. Weave the tail through the stitches on the body, making sure it is firmly attached. Trim off any excess yarn and adjust the tail as desired for the perfect finishing touch.
Step 6: Stitching the body and head
Now that you have completed knitting the separate pieces of the sheep’s body and head, it’s time to stitch them together to create the adorable stuffed sheep. This step is crucial in giving your knitted sheep its final shape and structure.
1. Prepare the body and head: Take the knitted body piece and fold it in half, along the centerline. Make sure that the right sides of the fabric are facing each other. Similarly, fold the knitted head piece in half, aligning the edges.
2. Align and pin: Place the folded head piece onto the folded body piece, aligning the open edges. Use pins to secure the pieces together, making sure they are aligned accurately.
3. Stitch the pieces: Using a darning needle and the same yarn you used for knitting, begin stitching the body and head together. Starting from the bottom of the body, insert the needle through both layers of fabric and pull the yarn through. Continue stitching along the edges, going through both layers of fabric, until you reach the top of the head.
4. Finish the stitching: Once you reach the top of the head, secure the yarn by making a knot. Trim any excess yarn. Check if the body and head are securely attached and make any adjustments if necessary.
5. Stuff the sheep: Before closing the bottom of the body, fill the sheep with stuffing material of your choice. This will give the sheep its soft and cuddly shape. You can use polyester fiberfill or any other suitable stuffing material. Fill the body firmly but avoid overstuffing.
6. Closing the bottom: Fold the open edge of the body inward and stitch it closed using the same darning needle and yarn. Make sure to join the edges neatly to give a clean and finished look to the bottom of the sheep.
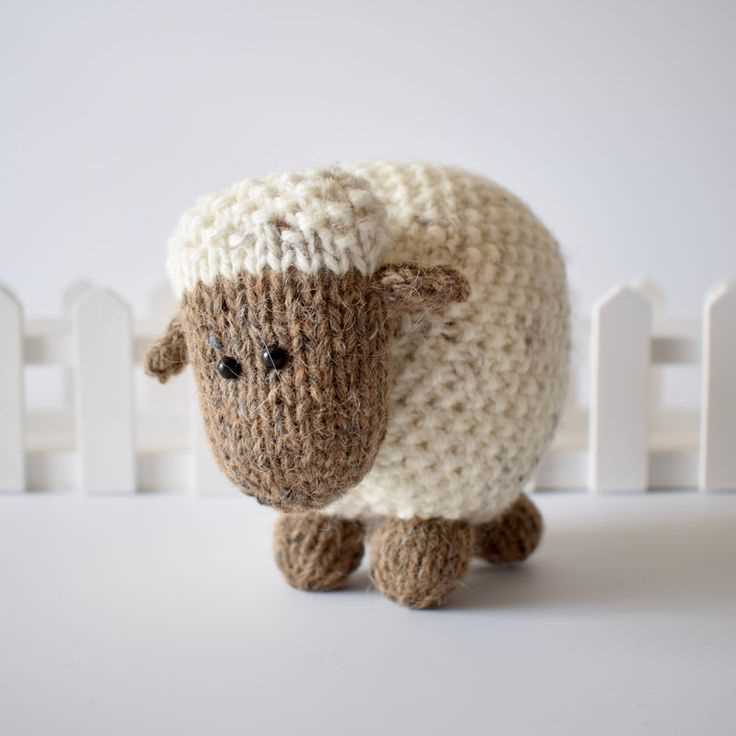
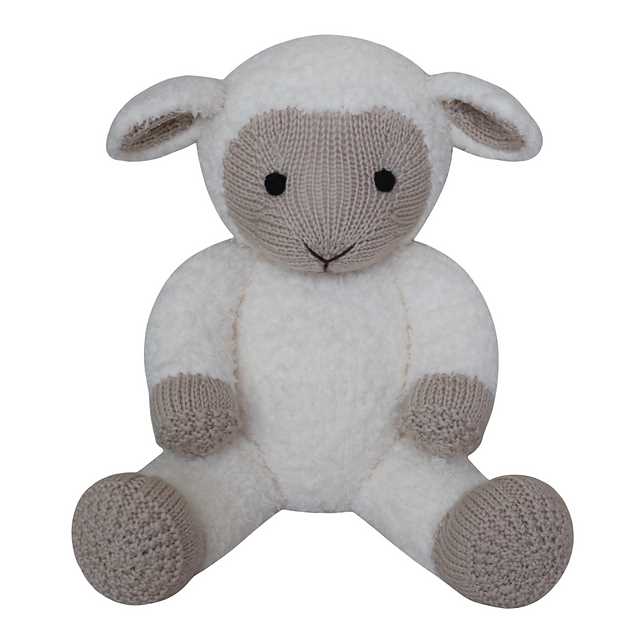
7. Final touches: Once the bottom is closed, take a moment to admire your finished knitted sheep. You can then add any additional details, such as embroidering eyes or attaching a small ribbon bow, to give your sheep a personalized touch. Your adorable knitted sheep is now complete and ready to be enjoyed or gifted to someone special.
Step 7: Sewing on the ears
Now that you have finished knitting the body of the sheep and attaching the legs, it’s time to sew on the ears. This step will give your sheep its signature look and bring it to life.
To sew on the ears, you will need a tapestry needle and the same yarn that you used for knitting the body. Start by threading the needle with the yarn. Take one of the ear pieces and position it on the head of the sheep. Use the tapestry needle to sew the ear onto the head, making sure to secure it firmly in place.
Take care to position the ears symmetrically and at the desired angle. You can use pins to hold them in place before sewing, if needed. Once the first ear is securely attached, repeat the process for the second ear. Make sure to leave a small gap between the ears to create the sheep’s adorable face.
Once both ears are sewn on, you can use the tapestry needle to weave in any loose yarn ends. Trim off any excess yarn, making sure not to cut the sewn-in ends. Your sheep is now complete with its cute, floppy ears!
Step 8: Attaching the legs
Now that we have completed knitting the legs, it’s time to attach them to the body of the sheep. This step will bring our knitted sheep to life!
Start by positioning the legs on either side of the bottom of the body section. Make sure they are evenly spaced and aligned with the stitches on the body. To attach the legs, use a yarn needle and a strand of yarn that matches the color of the body.
1. Thread the yarn needle with the strand of yarn.
Take one of the legs and place it against the body, lining up the stitches. Insert the yarn needle through both the body and leg stitches, going from the inside to the outside. Pull the yarn through until there is a small loop on the inside of the body.
Repeat this process with the other leg, making sure it is positioned symmetrically to the first leg.
2. Securing the legs in place.
Once both legs are attached to the body, take the yarn needle and thread it through the loop created by the first leg. Then, thread the needle through the loop created by the second leg. This will help secure the legs in place and prevent them from coming loose over time.
After securing the legs in place, tie a knot with the yarn on the inside of the body to further reinforce the attachment. Trim any excess yarn.
3. Repeat the process for the back legs.
If your sheep has back legs, repeat the same process to attach them to the back section of the body. Position them evenly and align them with the stitches on the body. Use the same techniques with the yarn needle and strand of yarn to secure the back legs in place.
By following these steps, you will successfully attach the legs to your knitted sheep, giving it the stability and structure it needs. Now you can move on to the next step and complete your adorable knitted sheep!
Step 9: Adding the tail
Now that you have completed knitting the body of the sheep, it’s time to add a cute little tail to complete the look. The tail will give your knitted sheep a more realistic and playful appearance.
Materials needed:
- Yarn in the color of your choice
- Knitting needles
- Tail pattern
- Tapestry needle
To start, choose a yarn color that matches the body of your sheep. You can use the same yarn that you used for knitting the body, or you can choose a contrasting color for a more vibrant look.
Next, find a tail pattern that you like. There are many tail patterns available online, or you can create your own. The tail can be a simple tube shape or a fluffy pom-pom. Once you have your pattern, cast on the required number of stitches and begin knitting the tail.
Once the tail is complete, use a tapestry needle to weave in any loose ends. Then, decide where you want to attach the tail to the body of the sheep. Most commonly, the tail is attached to the back of the sheep near the hind legs. Use the tapestry needle and yarn to securely sew the tail in place.
Once the tail is securely attached, you can fluff it up or shape it as desired. You can also trim the tail to make it shorter or neater, depending on your preference.
Your knitted sheep is now complete, with a cute and playful tail! Display your adorable creation proudly or give it as a gift to bring a smile to someone’s face.
Step 10: Embroidering the eyes and mouth
Once you have finished knitting your sheep, it’s time to add some personality by embroidering the eyes and mouth. This step will bring your sheep to life and give it a cute and friendly face.
To embroider the eyes, start by threading a needle with black embroidery thread. Decide where you want the eyes to be and make small stitches in the shape of an oval. You can either make the eyes round or elongated, depending on the look you want. Repeat the process for the second eye, making sure they are symmetrical.
Next, it’s time to embroider the mouth. Choose a color for the mouth that complements the color of your sheep. Thread your needle with the desired color of embroidery thread and start stitching the mouth. You can make the mouth smile or give it a neutral expression, depending on the look you want for your sheep. Take your time and make small, even stitches to create a clean and precise mouth.
Once you have finished embroidering the eyes and mouth, take a step back and admire your work. The eyes and mouth will add character and charm to your knitted sheep, making it even more adorable. If you’re not happy with the placement or shape of the eyes and mouth, don’t be afraid to undo the stitches and try again. Practice makes perfect, and you’ll eventually find the perfect expression for your sheep.
Step 11: Making the finishing touches
Once you have completed knitting your sheep, it’s time to add the finishing touches to give it that extra charm and personality. Here are a few steps to follow:
Add facial features:
To make your sheep come to life, sew on two small buttons or beads for the eyes. Use a needle and thread to attach them securely to the face. Next, select a color of yarn for the nose and mouth, and embroider it on using a tapestry needle. You can create a simple smile or even add a tongue if you want to get creative.
Create ears:
To make the ears, cut two small oval-shaped pieces of fabric or felt in the desired color. Sew them securely onto the head of the sheep, making sure they are positioned symmetrically. You can also use a contrasting color for the inside of the ears to add some extra flair.
Add woolly texture:
To give your sheep a fluffy and woolly texture, use a comb or brush to gently fluff up the knitted fabric. Be careful not to apply too much pressure, as you don’t want to damage the yarn. This will help create a more realistic look and add depth to your sheep.
Final touches:
Once you are satisfied with the facial features and texture, give your sheep a final inspection. Trim any loose ends or excess yarn to ensure a neat and polished appearance. You can also use a small amount of stuffing to fill out any areas that may be lacking in shape.
Now that your knitted sheep is complete, it’s ready to be displayed or gifted to someone special. Enjoy the satisfaction of creating your very own adorable woolly friend!
Step 12: Finalizing the sheep
After completing all the previous steps, your knitted sheep is almost ready! Now it’s time to add some final touches and bring your sheep to life.
First, make sure to securely fasten any loose ends of yarn using a tapestry needle. This will ensure that your sheep doesn’t unravel over time. Trim any excess yarn carefully, being careful not to cut through the stitches.
Next, you can add some details to your sheep to give it that extra charm. You can sew on buttons for eyes, or use small black beads to achieve a more realistic look. Embroider a nose and mouth using black yarn or thread, or even use a small piece of felt. Use your imagination to personalize your sheep and make it unique.
Finally, you can attach some ribbon or a small knitted scarf around your sheep’s neck to add a gorgeous finishing touch. This will not only enhance the overall appearance but also give your sheep a cozy and adorable look.
Once you have completed these final steps, your knitted sheep is ready to be displayed or gifted to someone special. Congratulations on completing this fun and rewarding knitting project!