
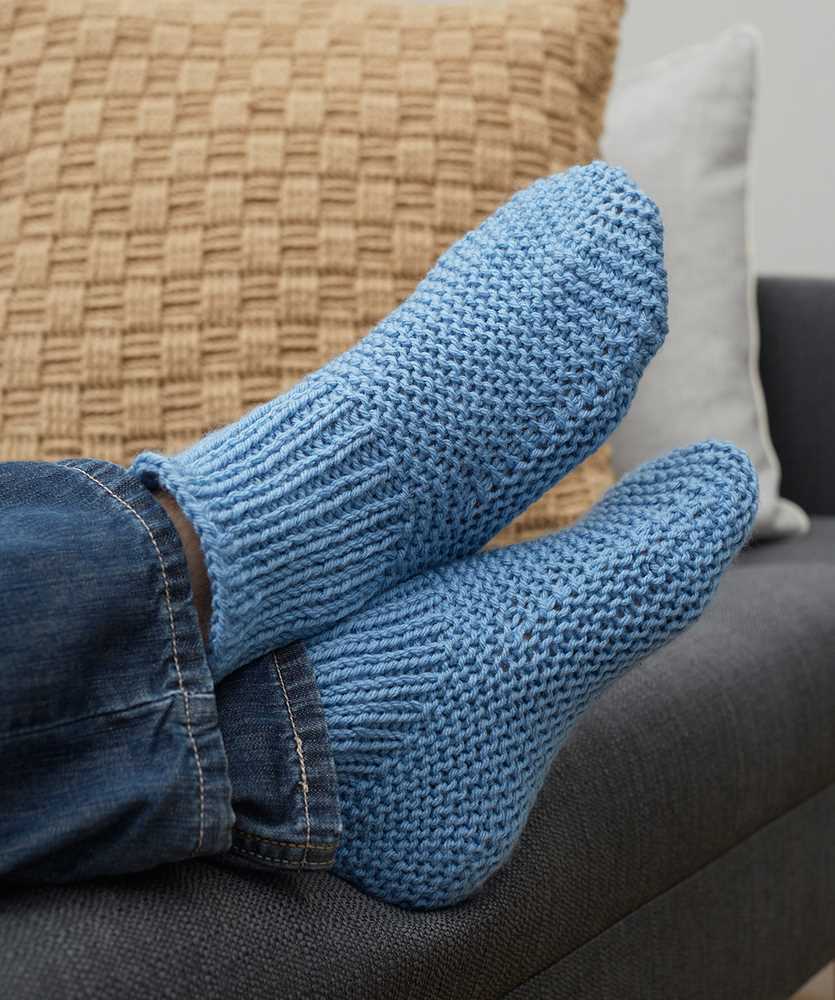
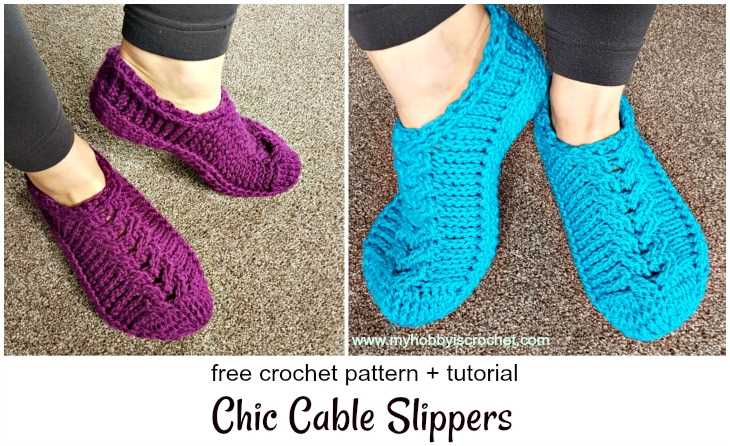
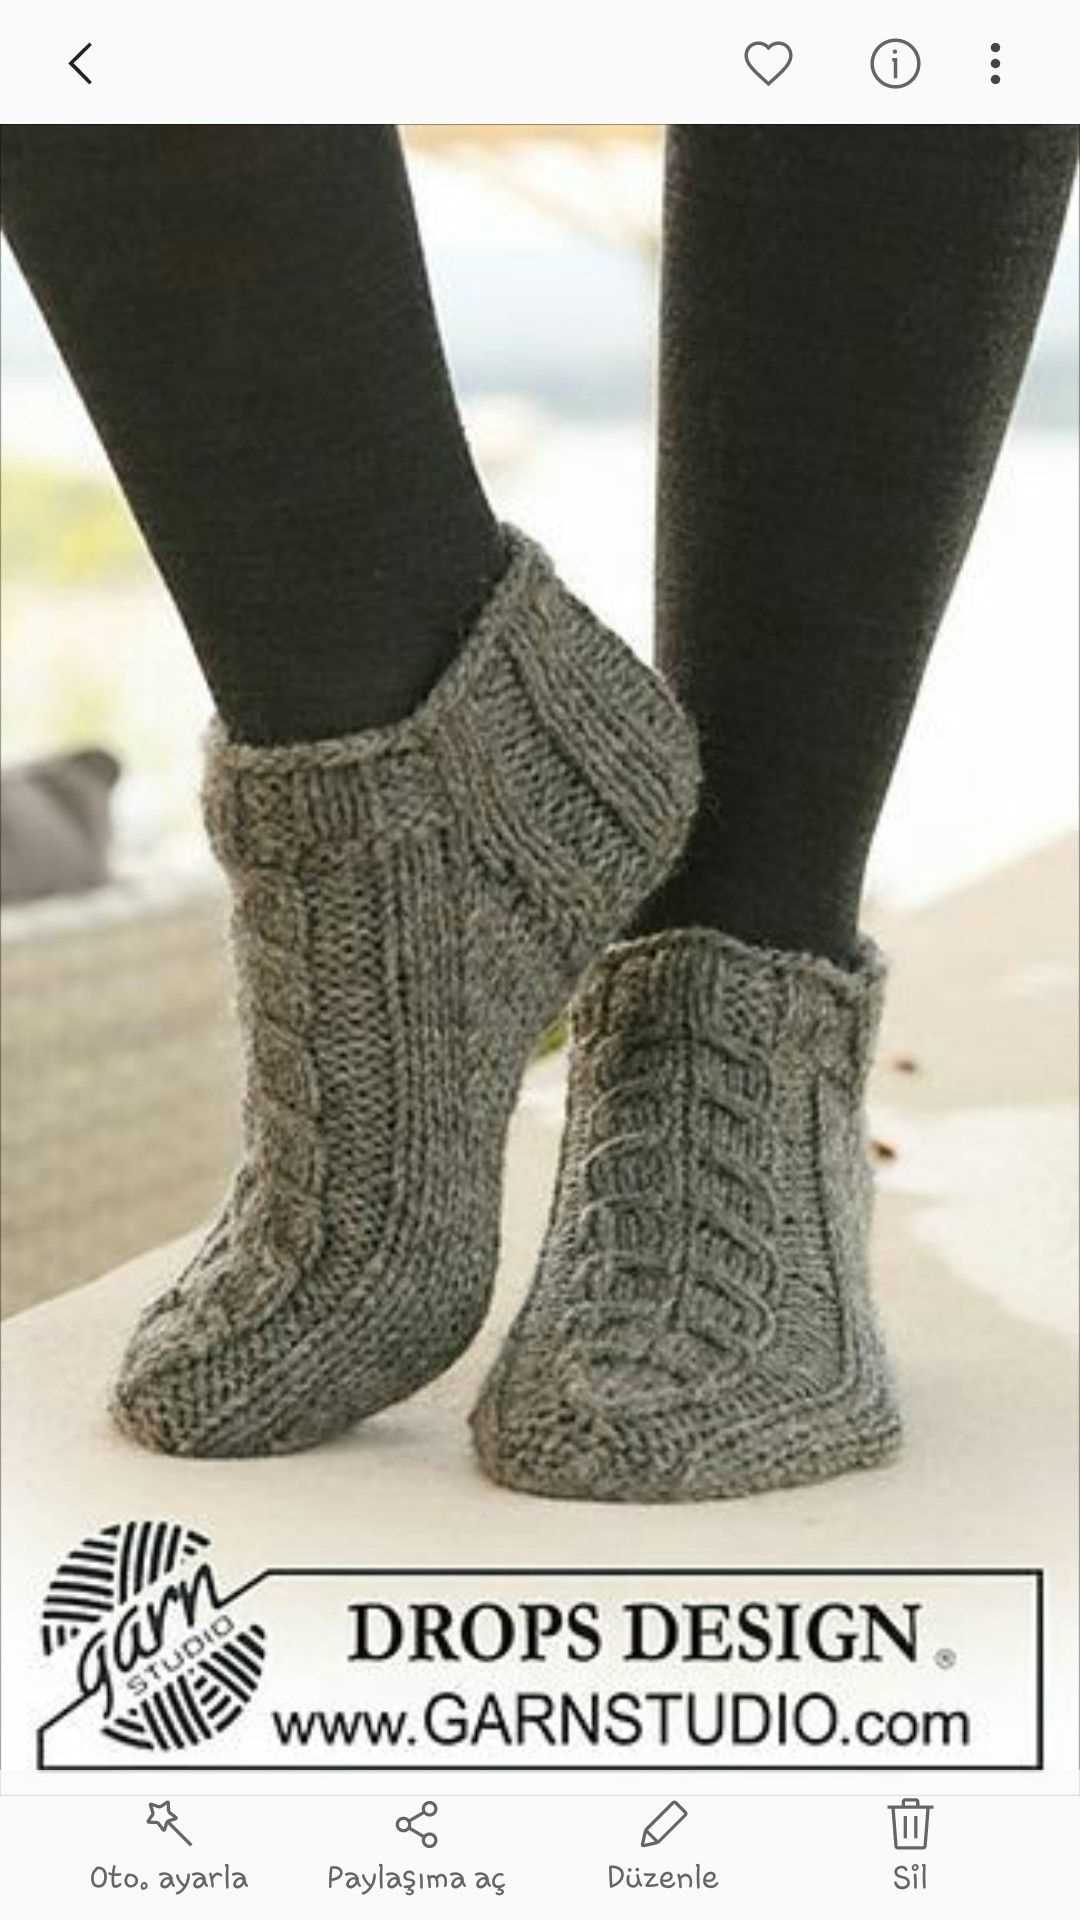
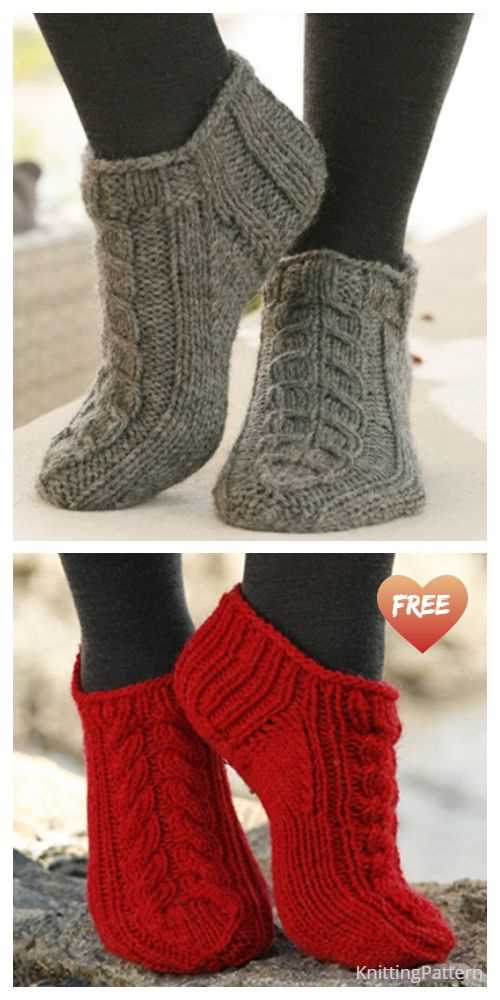
Nothing beats the feeling of slipping your feet into a pair of warm, cozy slippers on a cold winter’s day. If you love knitting and want to make a stylish and comfortable pair for yourself or your loved ones, look no further. This free cable knit slipper pattern is perfect for both beginners and experienced knitters.
The cable knit pattern adds a touch of elegance and sophistication to these slippers, making them not only functional but also fashionable. Whether you choose to make them in a classic neutral color or a bold and vibrant hue, these slippers are sure to be a hit.
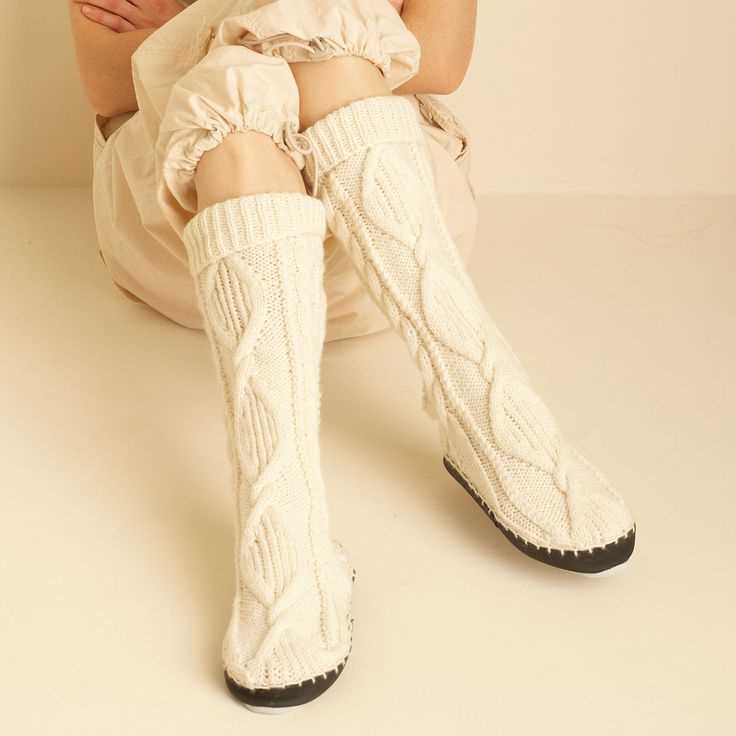
Not only are these slippers stylish, but they are also incredibly comfortable. The cable knit design creates a stretchy and snug fit that will conform to your feet, keeping them warm and cozy. The pattern includes detailed instructions on how to customize the size to ensure the perfect fit.
Free Cable Knit Slipper Pattern
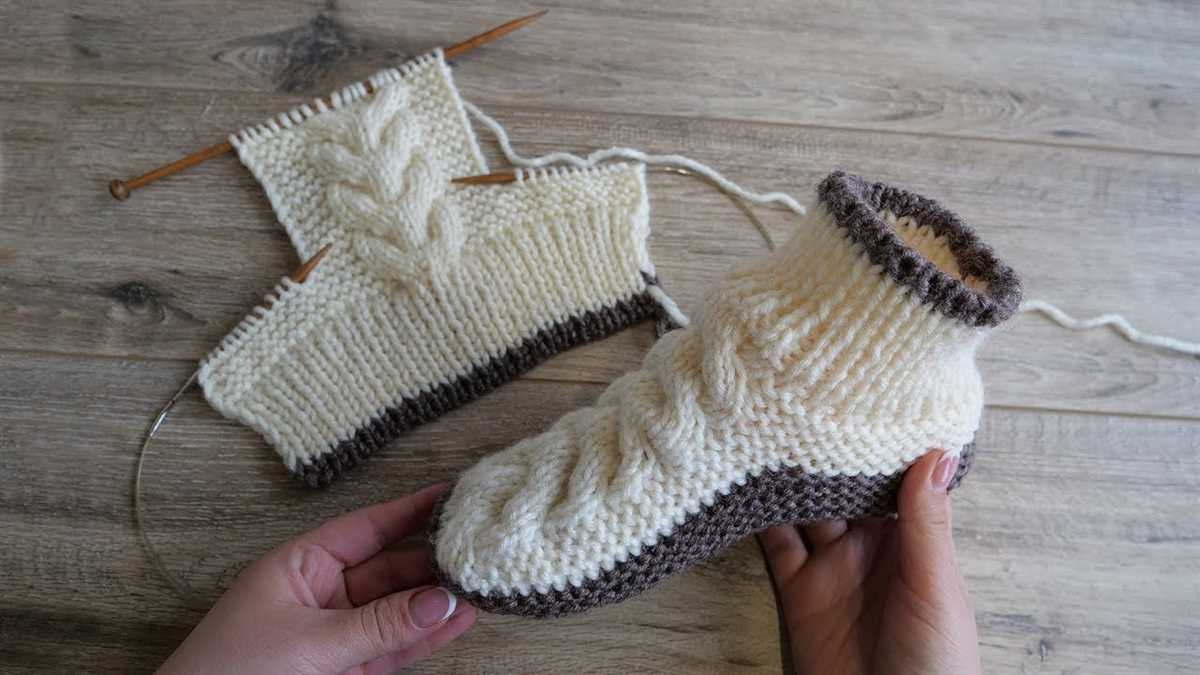
Looking for a cozy and stylish pair of slippers to keep your feet warm during the colder months? Look no further! We have a free cable knit slipper pattern that you can easily make at home. Whether you’re a beginner or an experienced knitter, this pattern is perfect for anyone looking to add a touch of luxury to their loungewear.
The cable knit design of these slippers adds an extra layer of warmth and texture, making them not only functional but also fashionable. The pattern includes step-by-step instructions and helpful tips to guide you through the knitting process, so even if you’re new to cable knitting, you’ll be able to create a beautiful pair of slippers.
Materials Needed:
- Worsted weight yarn (color of your choice)
- Knitting needles (size 7 or as recommended for your yarn)
- Cable needle
- Tapestry needle
- Scissors
Instructions:
- Start by casting on the desired number of stitches for your size.
- Work the ribbing stitch for the cuff of the slipper.
- Begin the cable pattern, following the chart or written instructions provided in the pattern.
- Continue knitting in the cable pattern until you reach the desired length for the foot of the slipper.
- Next, shape the toe of the slipper using decreases.
- Finish off the slipper by sewing up the toe and weaving in any loose ends.
- Repeat the above steps to make a matching slipper for the other foot.
Once you’ve completed both slippers, you’ll have a cozy and stylish pair of cable knit slippers that are perfect for lounging around the house. These slippers also make great gifts for friends and family, so why not knit up a few extra pairs to share the warmth with others?
So grab your knitting needles and get started on this free cable knit slipper pattern. Before you know it, you’ll have a pair of beautiful and warm slippers to keep your toes toasty all winter long!
About Cable Knit Slipper Patterns
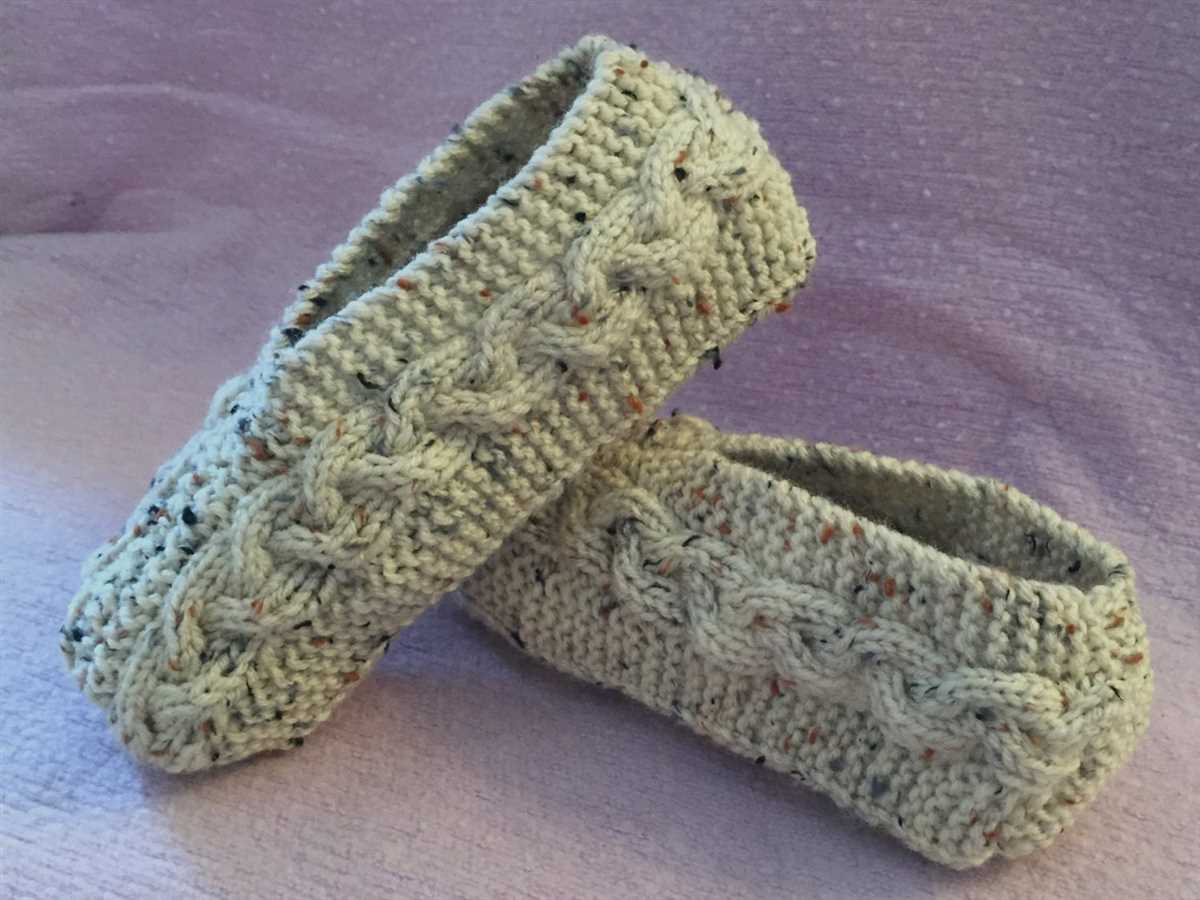
Cable knit slipper patterns are a popular choice for many knitters looking to create warm and cozy footwear. Cable knitting is a technique that creates a textured and intricate pattern by crossing stitches over each other, resembling the twists and turns of a cable. This style of knitting adds depth and dimension to the fabric, making it an attractive choice for slipper patterns.
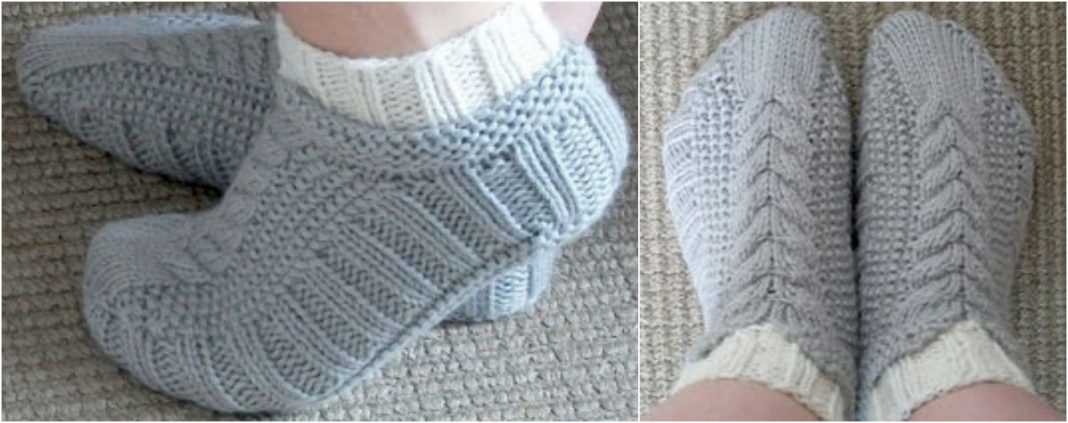
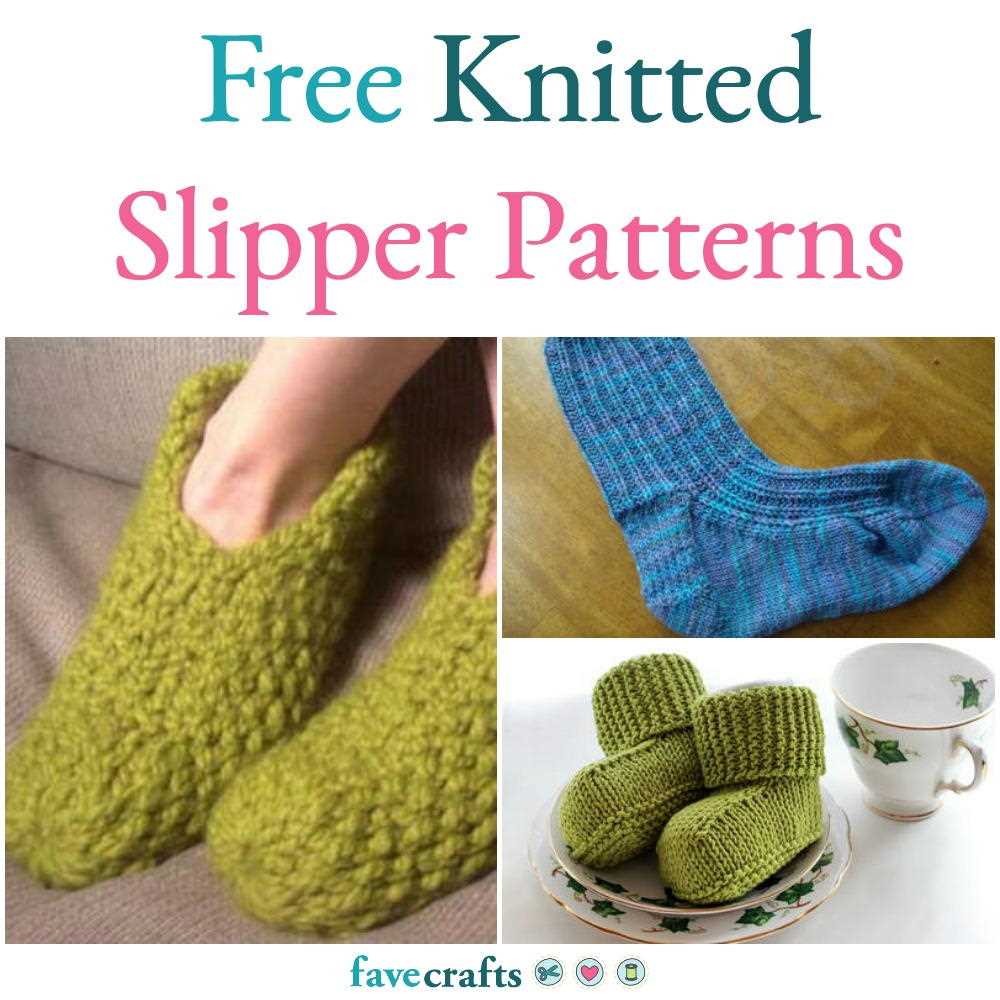
There are various cable knit slipper patterns available, ranging from simple designs with just a few cables to more complex patterns with intricate cable arrangements. Some patterns may include cables running vertically or horizontally across the slipper, while others may feature cable panels on the front or sides. The variety of patterns allows knitters to choose a design that matches their skill level and personal style.
Benefits of Cable Knit Slipper Patterns
One of the main benefits of cable knit slipper patterns is their warmth. The cable stitch creates thicker fabric, trapping more heat and providing insulation for the feet. This makes cable knit slippers perfect for colder climates or for those who tend to have cold feet.
In addition to warmth, cable knit slipper patterns offer comfort and durability. The snug fit and cushioned texture of the cable stitches make these slippers soft and cozy to wear. The cable pattern also adds some elasticity to the fabric, allowing the slippers to stretch and conform to the shape of the foot. Furthermore, the cable stitching adds strength to the fabric, making these slippers more resistant to wear and tear.
- Warm and cozy
- Comfortable and durable
- Variety of designs and styles
- Customizable
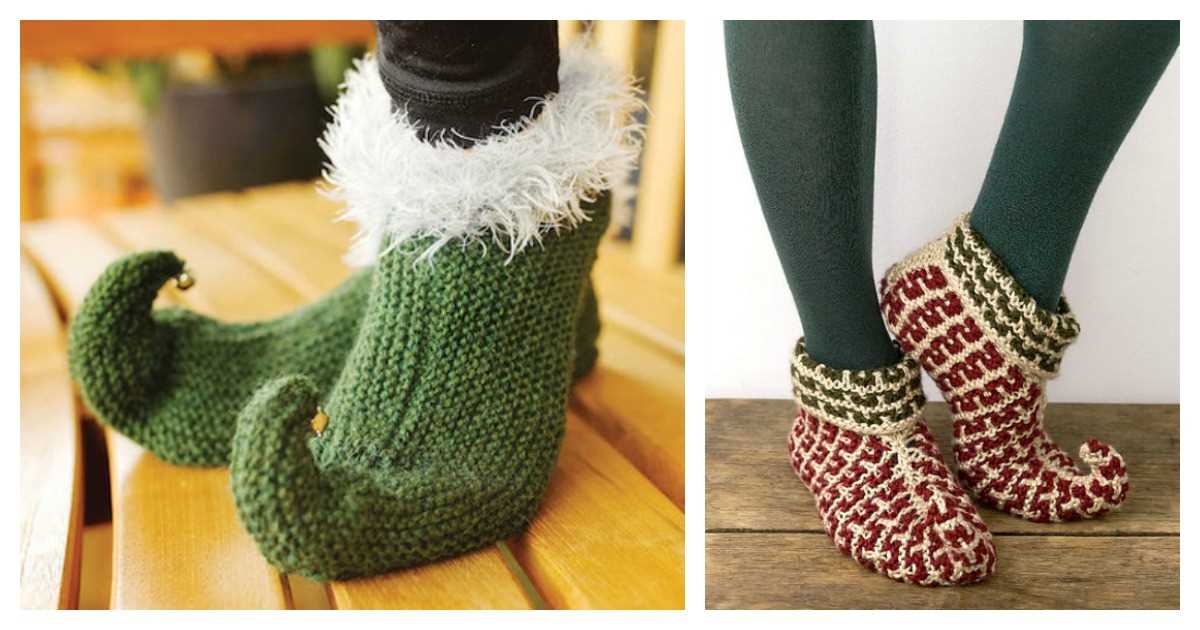
Another advantage of cable knit slipper patterns is the variety of designs and styles available. Knitters can choose from a wide range of patterns, including different cable arrangements, stitch patterns, and embellishments. This allows for customization and personalization, so each pair of cable knit slippers can be unique and tailored to the knitter’s preferences.
In conclusion, cable knit slipper patterns offer warmth, comfort, durability, and a variety of design options. Whether you are a beginner or an experienced knitter, there is a cable knit slipper pattern out there for you. So grab your knitting needles, choose your favorite cable pattern, and start creating cozy and stylish slippers to keep your feet warm all year round.
Materials Needed
In order to make the cable knit slippers, you will need the following materials:
- Yarn: Choose a soft and durable yarn for the slippers. A worsted weight yarn or a bulky weight yarn would work well for this project.
- Knitting needles: You will need a pair of knitting needles in the appropriate size for your chosen yarn. Check the yarn label for the recommended needle size.
- Cable needle: A cable needle is necessary for creating the beautiful cable pattern on the slippers. This tool helps to hold the stitches while crossing the cables.
- Tapestry needle: A tapestry needle is used for weaving in ends and sewing up any seams.
- Scissors: A pair of scissors is essential for cutting the yarn and trimming any excess ends.
These are the basic materials needed to create the cable knit slippers. You may also want to have stitch markers, a measuring tape, and a row counter on hand to help you keep track of your progress. Make sure you have all the materials before you start knitting, so you can enjoy a smooth and uninterrupted knitting experience.
Choosing Yarn for Cable Knit Slippers
When it comes to knitting cable knit slippers, choosing the right yarn is crucial. The yarn you select will determine not only the look and feel of the finished slippers, but also their durability and comfort. Here are a few factors to consider when choosing yarn for your cable knit slippers.
1. Fiber Content
The first thing to think about is the fiber content of the yarn. For slippers, it’s important to choose a yarn that is warm and soft, yet durable enough to withstand regular wear. Natural fibers like wool and alpaca are excellent choices as they provide warmth and comfort. Acrylic and nylon blends can also be a good option, as they are affordable and easy to care for.
2. Weight
The weight of the yarn will determine the thickness and warmth of the slippers. For cable knit slippers, a medium to bulky weight yarn is generally recommended. This will create a cozy and substantial fabric that will keep your feet warm during colder months. However, if you prefer a lighter slipper, you can opt for a lighter weight yarn, such as a sport or DK weight.
3. Color
The color of the yarn is a personal preference, but it can greatly affect the overall look of your cable knit slippers. Solid colors can showcase the intricate cable patterns beautifully, while variegated or self-striping yarns can add visual interest to the design. Consider the colors that you enjoy wearing and choose a yarn that matches your style.
Overall, when choosing yarn for cable knit slippers, it’s important to consider the fiber content, weight, and color. By taking these factors into account, you can ensure that your slippers are not only beautiful, but also cozy and durable.
Tools for Cable Knitting
When it comes to cable knitting, having the right tools can make a big difference in your knitting experience. Whether you are a beginner or an experienced knitter, here are some essential tools that you will need:
Knitting Needles:
Choose knitting needles that are suitable for cable knitting. Many knitters prefer using circular needles as they are more versatile and give you more room to move your stitches around. Look for needles that have a smooth finish and are the right size for your project.
Cable Needles:
Cable needles are specifically designed to hold stitches in a cable pattern. They are usually short and have a U or V shape, which helps prevent stitches from slipping off. You can choose from different materials like wood, metal, or plastic, depending on your preference.
Stitch Markers:
Stitch markers are essential for keeping track of your cable pattern. Use them to mark the beginning and end of your cable section or to indicate different sections of your pattern. They come in different shapes and sizes, so choose ones that are easy to see and won’t get tangled in your yarn.
Tapestry Needle:
A tapestry needle is used for weaving in ends and sewing pieces together. It is an essential tool for finishing your cable knit project. Look for a needle with a large eye that can easily accommodate your yarn.
Cable Stitch Holders:
Cable stitch holders are similar to cable needles but are longer and straight. They are used to hold stitches while you work on other sections of your cable pattern. They come in different sizes, so choose ones that are suitable for the number of stitches you need to hold.
Row Counter:
A row counter is handy for keeping track of the number of rows or pattern repeats. It can be a physical counter that you click after every row or a digital counter that you keep in your knitting bag. This tool will help you stay organized and ensure that your cable pattern is consistent.
With these essential tools in your knitting kit, you’ll be well-equipped to tackle any cable knitting project. Happy knitting!
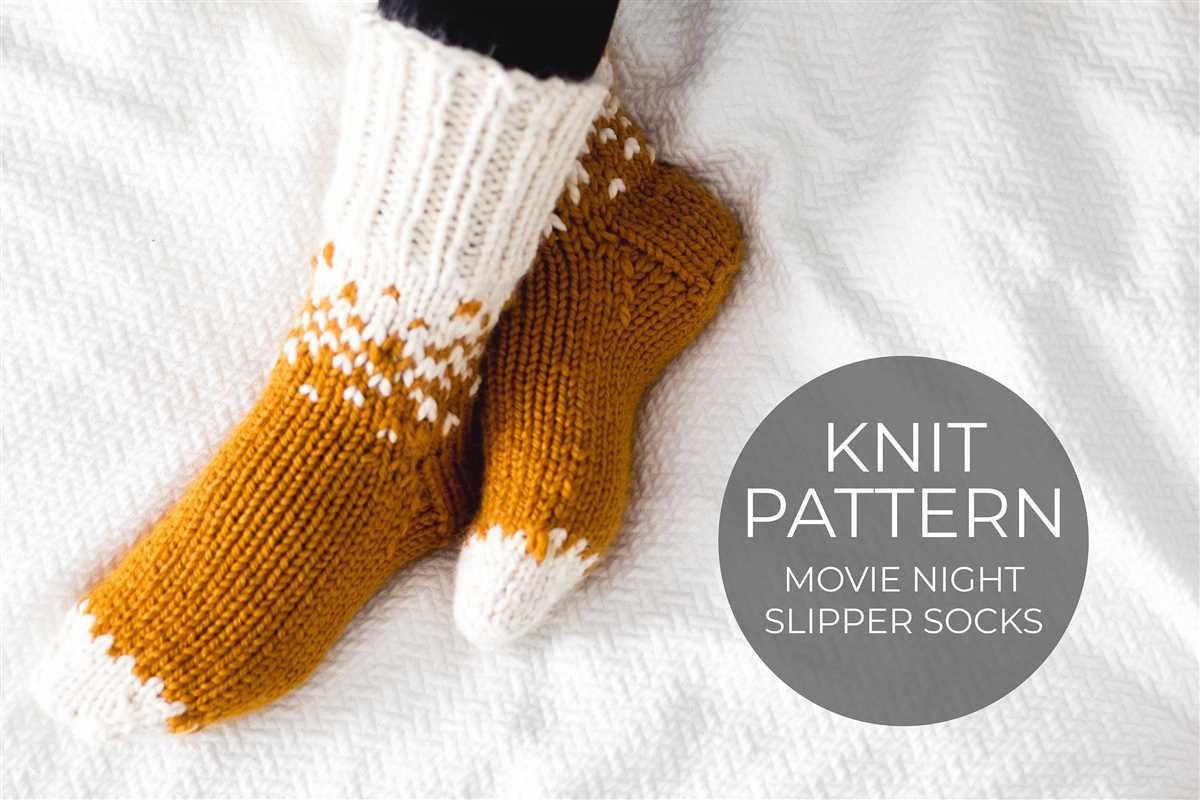
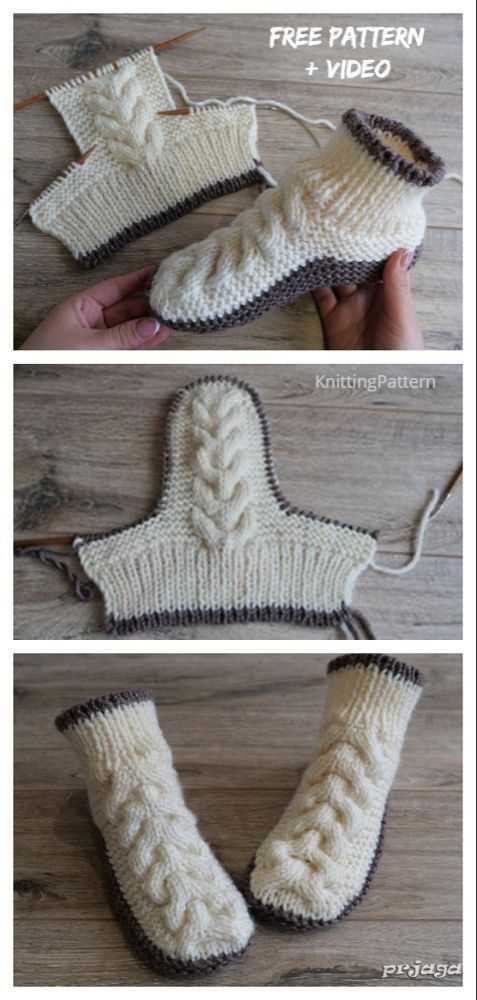
Step-by-Step Instructions
Are you ready to create your own cozy cable knit slippers? Follow these easy step-by-step instructions to make a pair of slipper socks that are perfect for lounging around the house.
Gather Your Materials
Before you get started, make sure you have all the materials you’ll need. You’ll need a set of double-pointed knitting needles in the appropriate size, a cable needle, and a skein of yarn in the color of your choice. Once you have everything ready, you can begin.
Cast On
Begin by casting on the desired number of stitches onto your double-pointed needles. This will depend on the size of slippers you want to make and the thickness of your yarn. Once you have cast on, distribute the stitches evenly across three of the needles, with one needle holding slightly more than half of the stitches.
Start Knitting
Now it’s time to start knitting! Begin by working the pattern stitch for the cuff of the slipper. This is usually a simple ribbing or seed stitch pattern. Follow the instructions for your specific pattern until the cuff is the desired length.
- For cable knit slippers, you’ll begin working the cable pattern once the cuff is complete.
- Using a cable needle, carefully slip the next few stitches onto the cable needle and hold them in the front or back of your work.
- Knit the stitches that are left on the needle, then knit the stitches from the cable needle.
- Repeat these cable rows as indicated in your pattern until the slipper is the desired length.
Shape the Toe
Once the slipper is the desired length, it’s time to shape the toe. This is usually done by decreasing stitches in a specific pattern. Follow the instructions in your pattern to shape the toe and finish off the slipper.
Once you’ve finished knitting both slippers, be sure to weave in any loose ends and block the slippers to ensure a perfect fit. Then, slip them on and enjoy the cozy warmth of your handmade cable knit slippers!
How to Cast On
When starting a new knitting project, casting on is the first step. Casting on creates the foundation row of stitches that you will work with throughout your project. There are several methods for casting on, but the technique you choose will depend on the type of stitch pattern you are using and your personal preference.
The simplest and most common method is the backward loop cast on. To do this, start with a slipknot and place it on the left-hand needle. Hold the needle with the slipknot in your right hand and the empty needle in your left hand. Insert the left-hand needle through the slipknot from front to back, wrapping the yarn around your thumb. Then, bring the right-hand needle under the loop on your thumb and pull the yarn through. This creates a new stitch on the left-hand needle. Repeat this process until you have the desired number of stitches.
If you prefer a more stretchy cast on, the long-tail cast on is a great option. Begin by making a slipknot and placing it on the left-hand needle. Hold the needle with the slipknot in your right hand and the empty needle in your left hand. Measure a length of yarn that is approximately three times the width of your project. With your right hand, hold the yarn between your thumb and index finger so that the tail end is hanging down and the working yarn is over your index finger. Insert the right-hand needle under the strand of yarn between your thumb and index finger, going from right to left. Then, bring the right-hand needle over the working yarn and back through the loop on your thumb. This creates a new stitch on the left-hand needle. Repeat this process until you have the desired number of stitches.
Once you have cast on your stitches, you are ready to begin knitting your project. Remember to keep your tension even and watch your stitch count as you work. Happy knitting!
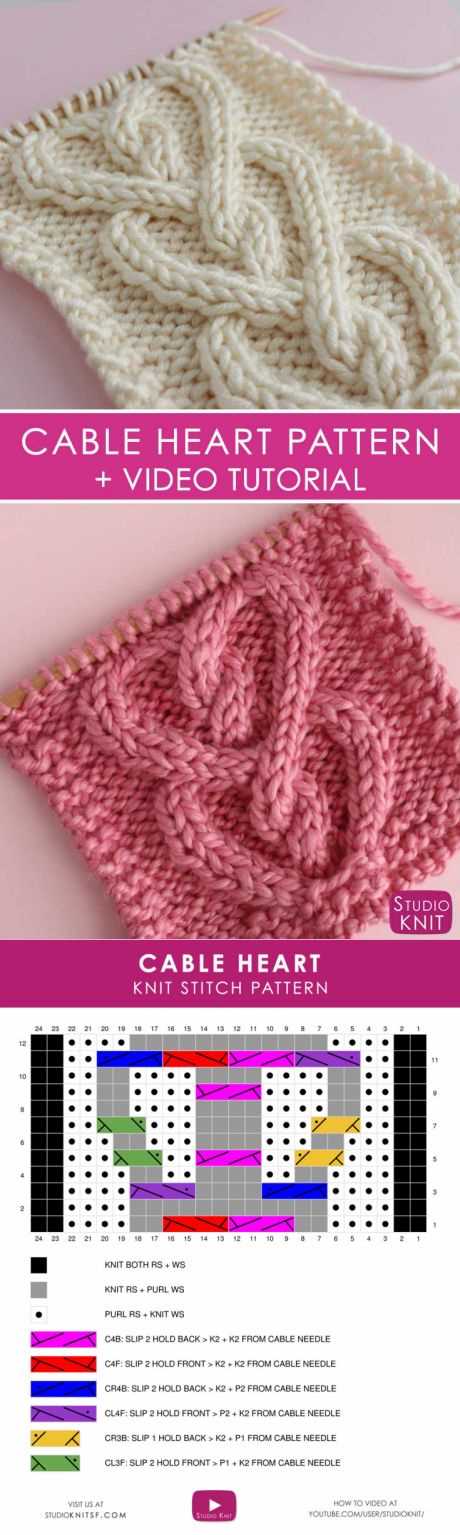
How to Knit the Cable Stitch

The cable stitch is a beautiful and intricate knitting technique that creates a raised pattern resembling crossing cables. It adds depth and texture to any knitting project, making it a popular choice for sweaters, scarves, and hats. While it may look complicated, the cable stitch is actually quite simple once you understand the basic steps involved.
To begin knitting the cable stitch, you will need a cable needle, which is a short, double-pointed needle. Start by knitting several rows in your desired stitch pattern until you reach the point where you want to create the cable. Take your cable needle and slip the next two or three stitches onto it, holding it behind your work.
Next, bring your working yarn forward and knit the same number of stitches from your left-hand needle. This will effectively cross the stitches over each other, creating the cable effect. Hold the cable needle with the crossed stitches behind your work and knit the stitches from your left-hand needle as usual.
Continue with your knitting pattern until you reach the next cable section. Repeat the process of slipping stitches onto the cable needle, crossing them over, and knitting them off the left-hand needle. You can create different cable designs by varying the number of stitches you slip onto the cable needle and how you cross them.
The cable stitch requires a bit of practice to master, but once you get the hang of it, you will be able to create stunning cable patterns. Whether you are a beginner or an experienced knitter, the cable stitch is a versatile technique that can elevate your knitting projects to the next level.
How to Shape the Slipper
A well-shaped slipper provides a comfortable fit and ensures that your feet stay warm and cozy. To shape the slipper, follow these simple steps:
1. Start with the heel
Begin shaping the slipper by focusing on the heel. Knit the required number of stitches for the heel section, usually mentioned in the pattern. Use a cable knit stitch or any other desired pattern to add texture and visual interest to the heel.
2. Decrease to shape the sides
Next, start decreasing stitches gradually to shape the sides of the slipper. This is done by knitting two stitches together at the beginning and end of certain rows, as specified in the pattern. Decreasing creates a rounded shape, allowing the slipper to hug your feet comfortably.
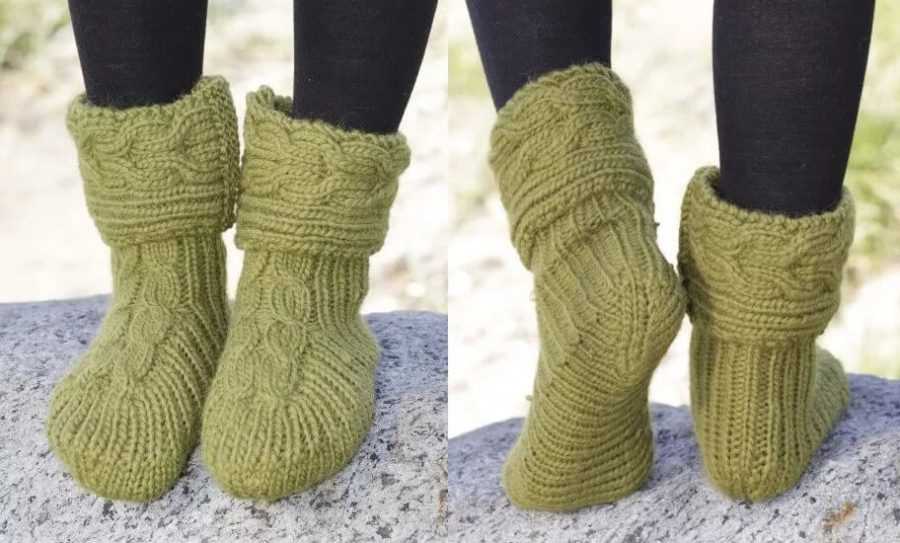
3. Continue shaping the top
After shaping the sides, continue knitting until you reach the desired height for the slipper. This could be the ankle length or a higher calf-length if you prefer. Pay attention to the instructions in the pattern to ensure you’re knitting the correct number of rows.
4. Toe shaping
To shape the toe, you’ll need to decrease stitches gradually, similar to shaping the sides. Follow the pattern for the specific decreases and continue until you have a desired number of stitches remaining. This will create a tapered shape that fits snugly around your toes without feeling tight.
By following these shaping techniques, you can create a well-fitting and stylish cable knit slipper that will keep your feet warm and cozy during the colder months.
How to Bind Off
Binding off is the final step in knitting a project. It is the process of securing the stitches and creating a finished edge. Here are step-by-step instructions on how to bind off your knitting project.
Step 1: Knit the first two stitches
Start by knitting the first two stitches of the row as you normally would.
Step 2: Pass the first stitch over the second stitch
Using your left needle, lift the first stitch over the second stitch and off the right needle. This leaves one stitch on the right needle.
Step 3: Knit the next stitch
Knit the next stitch on the left needle as you normally would. You should now have two stitches on the right needle.
Step 4: Pass the first stitch over the second stitch again

Repeat step 2 by passing the first stitch on the right needle over the second stitch and off the needle. You should now have one stitch on the right needle.
Step 5: Continue binding off
Repeat steps 3 and 4 until you have bound off all stitches except for one. Cut the yarn, leaving a long tail, and pull it through the final stitch to secure. Weave in any loose ends.
Binding off creates a neat and finished edge for your knitting project. It is an essential skill for any knitter and can be used for various projects, including free cable knit slippers. By following these step-by-step instructions, you can confidently bind off your knitted items.
How to Sew the Slipper Together
Once you have finished knitting all the pieces for your cable knit slipper, it’s time to sew them together. Here is a step-by-step guide on how to assemble your slipper:
1. Sole and Upper
a. Start by aligning the sole and upper of your slipper. Make sure the right sides are facing each other.
b. Using a tapestry needle and the same yarn you used for knitting the slipper, sew around the edges of the sole and upper. Make sure to stitch the pieces together securely, leaving no gaps.
2. Heel
a. Fold the heel piece in half, with the wrong side facing out.
b. Align the edges of the folded heel with the back of the slipper.
c. Use your tapestry needle to sew the heel to the slipper, making small, even stitches along the edges.
3. Cuffs
a. Take the two cuff pieces and fold them in half, with the wrong sides facing out.
b. Align the edges of the cuffs with the top openings of the slipper.
c. Sew the cuffs to the slipper, making sure to stitch them securely and evenly along the edges.
Once you have completed these steps, your cable knit slipper will be fully assembled and ready to wear. Make sure to secure any loose ends or threads. Enjoy your cozy new slipper!
Additional Tips and Variations
Here are some additional tips and variations you can try with this free cable knit slipper pattern.
1. Adjusting size: If you want to make these slippers in a smaller or larger size, you can easily do so by adjusting the needle size and yarn weight. Use a smaller needle size and finer yarn for a smaller size, and a larger needle size and bulkier yarn for a larger size. Keep in mind that you may need to adjust the number of stitches and rows accordingly as well.
2. Cable variations: While the pattern provided here features a simple cable design, you can experiment with different cable patterns and stitches to create unique variations. Try using more complex cables or incorporating different cable stitch combinations into your slippers.
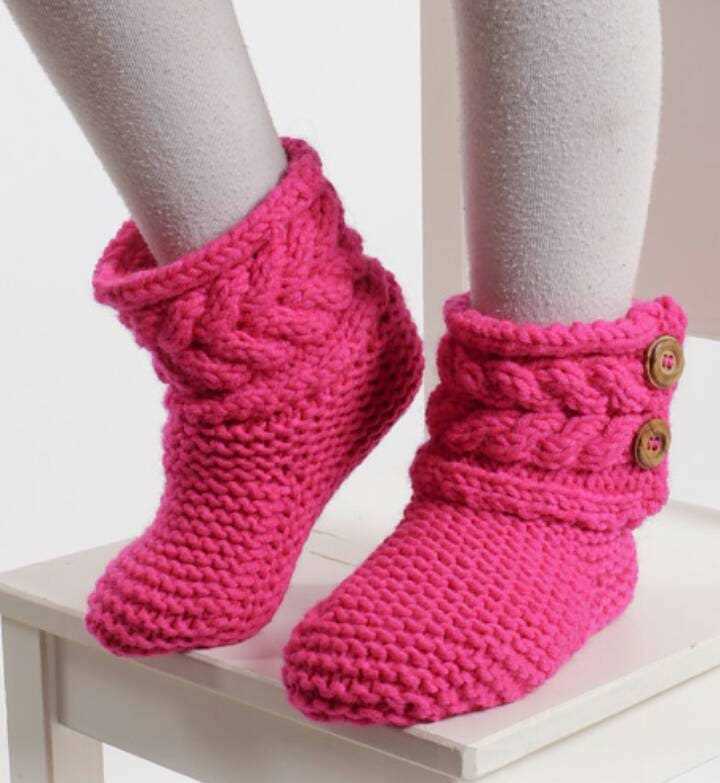
3. Embellishments: Once you’ve finished knitting your slippers, you can add embellishments to make them even more stylish and personalized. You can attach pom-poms, buttons, or ribbons to the front or sides of the slippers. Get creative and let your imagination run wild!
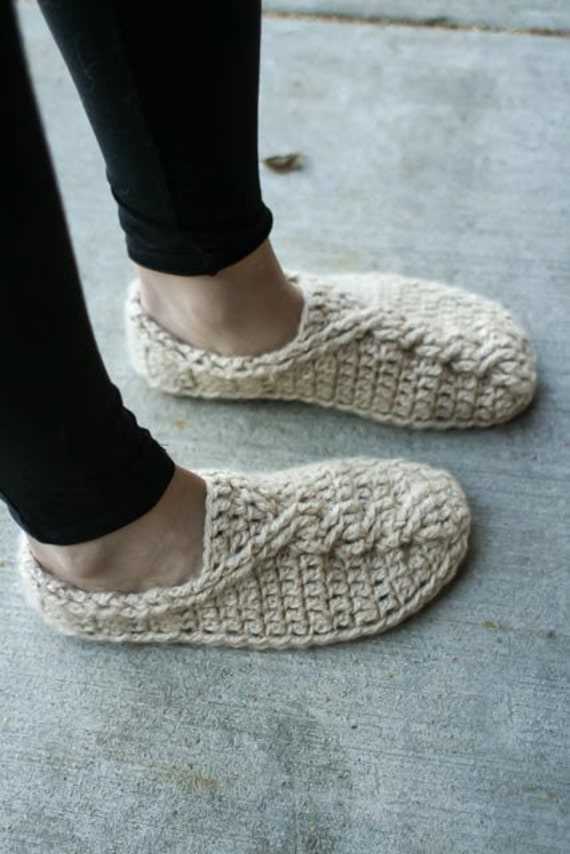
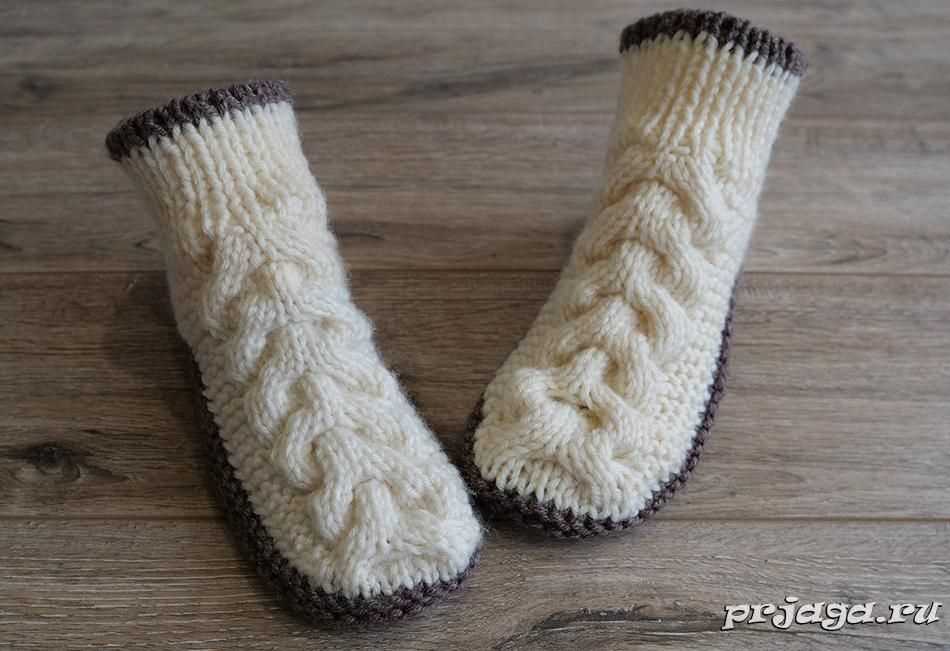
4. Color options: While the pattern suggests using a neutral color like beige or gray, feel free to use any color you prefer for your slippers. Experiment with different shades and create a pair of slippers that matches your personal style or complements your favorite loungewear.
- Adjust the size according to your needs
- Try different cable variations
- Add embellishments for a personal touch
- Experiment with different colors
With these additional tips and variations, you can make your cable knit slippers unique and tailored to your own preferences. Enjoy the process of knitting and creating cozy and fashionable footwear for yourself or your loved ones!
Q&A:
Where can I find a free cable knit slipper pattern?
You can find free cable knit slipper patterns on various websites such as Ravelry, AllFreeKnitting, and LoveCrafts. These websites offer a wide range of patterns for different skill levels.
What materials do I need to knit cable knit slippers?
To knit cable knit slippers, you will need yarn (preferably a chunky or bulky weight yarn), knitting needles (size will depend on the pattern), a cable needle, stitch markers, and a tapestry needle for weaving in ends.
Are cable knit slippers suitable for beginners?
Cable knit slippers can be a bit more advanced than basic knitting projects, so they may not be suitable for absolute beginners. However, if you have some experience with knitting and are comfortable with following patterns and working cables, you can give cable knit slippers a try!
Can I customize the cable knit slipper pattern?
Yes, you can definitely customize the cable knit slipper pattern to your liking. You can choose different colors of yarn, adjust the size of the slippers, or even modify the cable pattern to create a unique design. Just make sure to check the pattern instructions for any specific modifications or gauge requirements.
How long does it usually take to knit a pair of cable knit slippers?
The time it takes to knit a pair of cable knit slippers will depend on your knitting speed and the complexity of the pattern. On average, it may take anywhere from a few days to a couple of weeks to complete a pair of slippers. However, this can vary greatly depending on individual factors.
Where can I find a free cable knit slipper pattern?
You can find free cable knit slipper patterns on various websites, such as Ravelry, AllFreeKnitting, and LoveCrafts.