
Knitting sweaters for your beloved dachshund can be a fun and rewarding project. These adorable little dogs have a unique body shape that requires a special kind of sweater to keep them warm and cozy in the colder months. If you’re a proud dachshund owner and a knitting enthusiast, why not try your hand at creating a custom-made sweater for your furry friend?
Before you start, it’s important to find the right knitting pattern that is specifically designed for dachshunds. Their elongated bodies and short legs require a sweater that accommodates their unique body shape. The dachshund sweater knitting pattern will provide you with the measurements and instructions to ensure a perfect fit for your furry friend.
Knitting a sweater for your dachshund not only keeps them warm but is also a great way to express your love and affection for your pet. Plus, it’s a chance to showcase your knitting skills and create something unique and adorable. So, grab your knitting needles and get ready to create a cozy and stylish sweater that your dachshund will love!
Dachshund Sweater Knitting Pattern
Knitting a sweater for your dachshund can be a fun and rewarding project. Not only will it keep your furry friend warm during the colder months, but it also allows you to showcase your knitting skills and create a unique and stylish garment. If you are looking for a dachshund sweater knitting pattern, you have come to the right place!
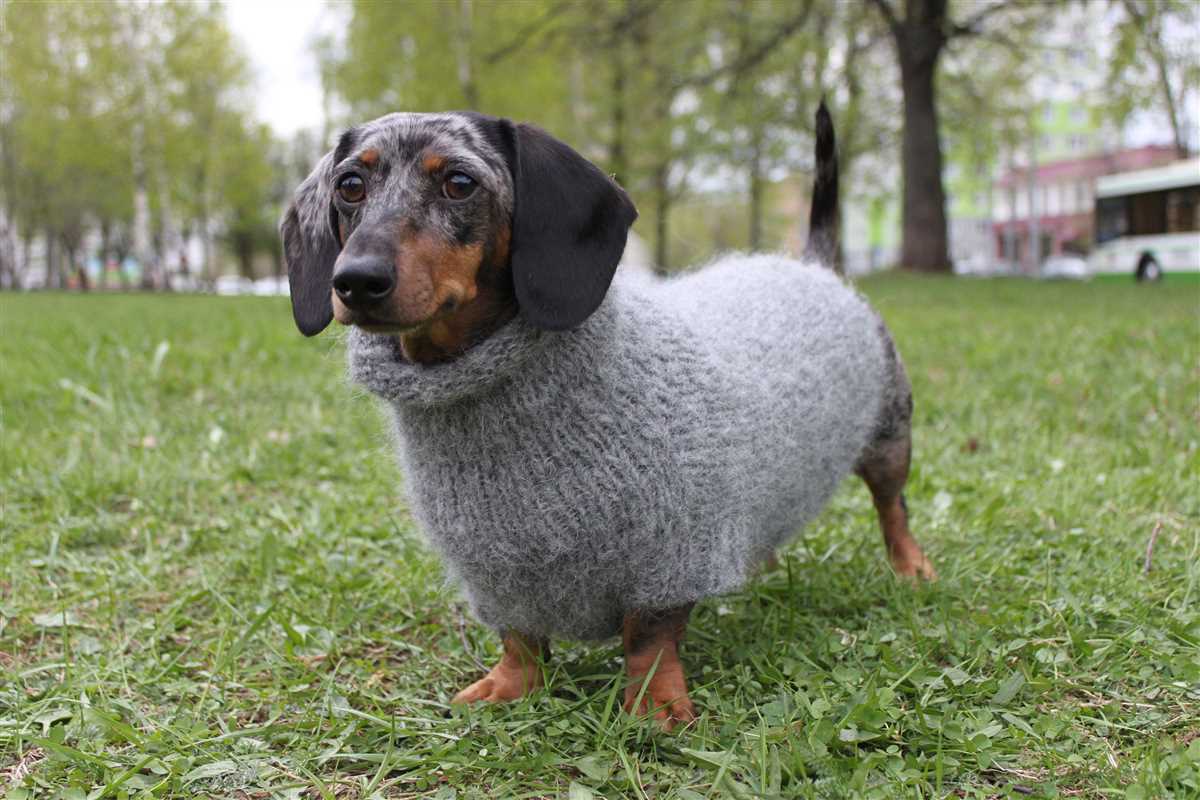
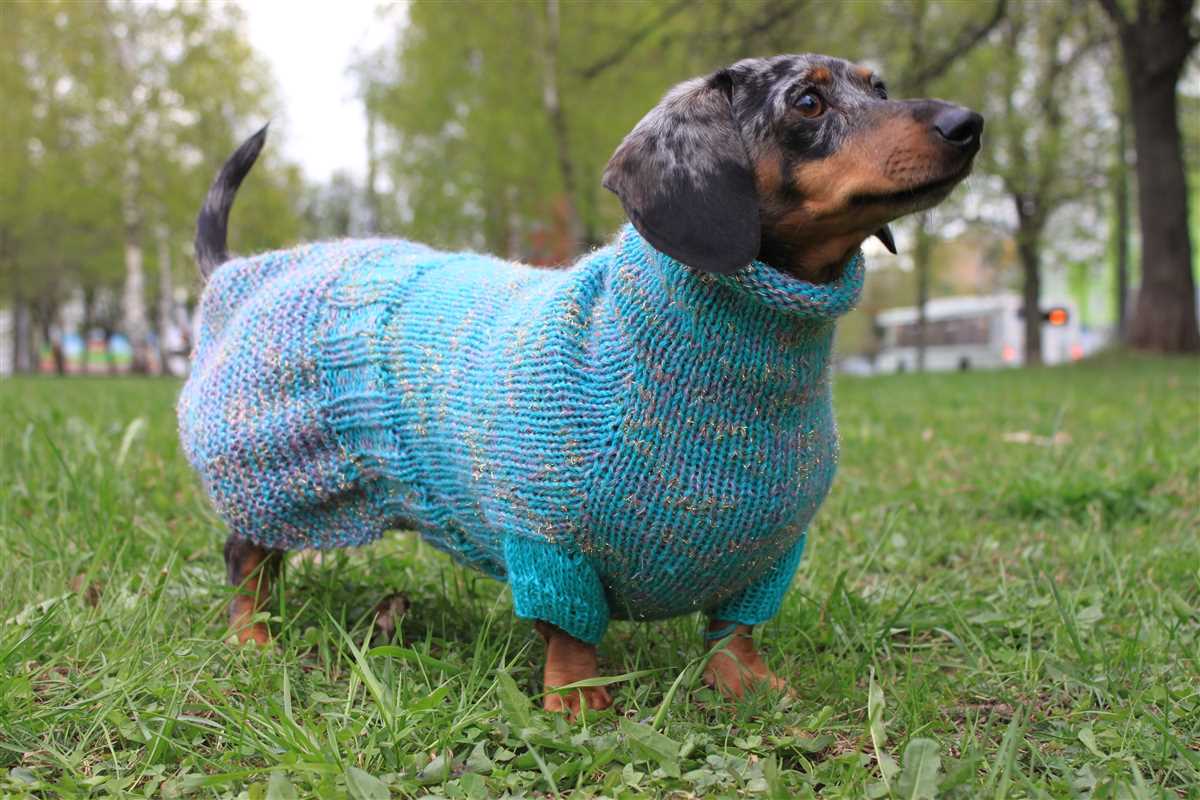
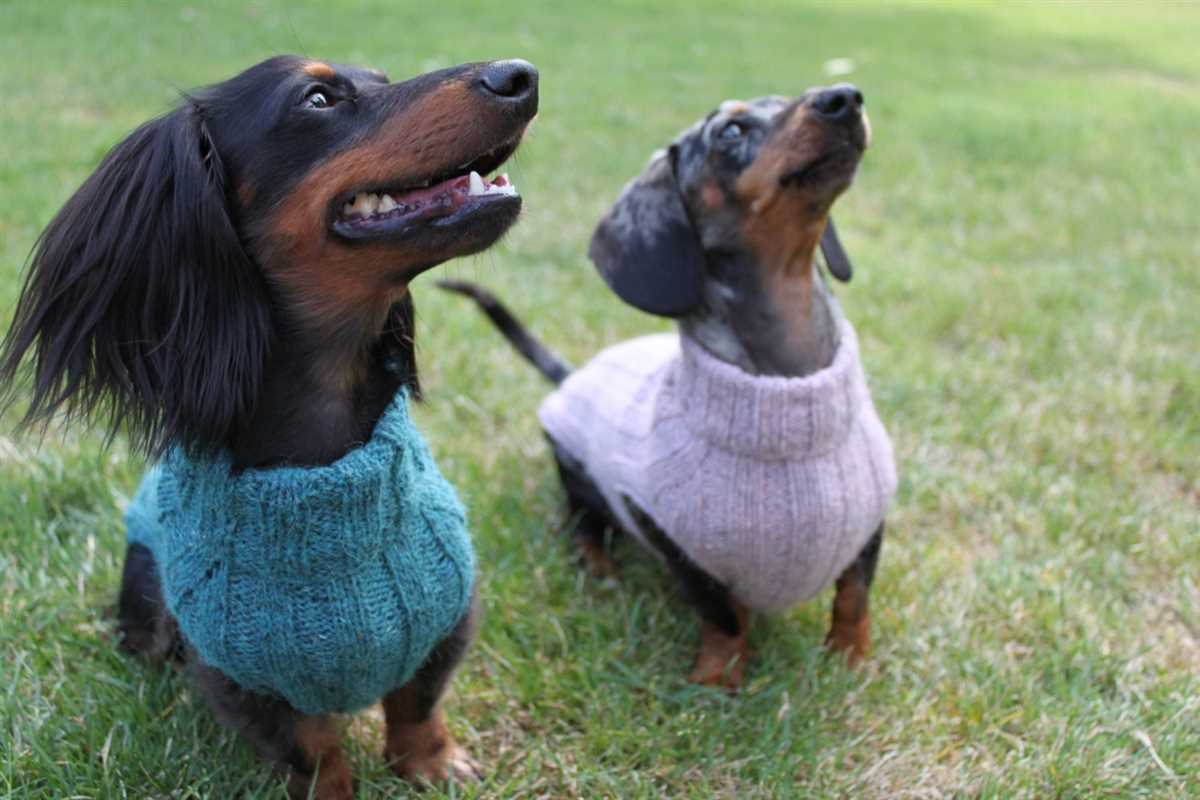
One popular dachshund sweater knitting pattern is the “Cozy Dachshund Pullover”. This pattern features a simple yet stylish design that is perfect for both beginner and experienced knitters. The pullover is knitted in the round and includes ribbed cuffs and a ribbed turtleneck for added warmth. It also has an adjustable belly strap to ensure a snug and comfortable fit for your dachshund. The pattern provides detailed instructions and a size chart to help you create the perfect fit for your furry friend.
Materials needed:
- Worsted weight yarn
- Circular knitting needles
- Double-pointed needles
- Cable needle
- Tapestry needle
- Stitch markers
- Buttons (optional)
Instructions:
- Start by measuring your dachshund to determine the size of the sweater.
- Cast on the required number of stitches and join in the round.
- Work the ribbing for the turtleneck and cuffs.
- Begin the main body of the sweater, following the pattern instructions for shaping and any stitch patterns.
- Continue knitting until the desired length is reached.
- Finish off the sweater by sewing the belly strap in place and adding any desired buttons or embellishments.
- Weave in any loose ends and give the sweater a final block to shape.
With this dachshund sweater knitting pattern, you can create a cozy and stylish garment for your beloved pet. Not only will your dachshund stay warm and comfortable, but they will also turn heads with their fashionable new sweater. So grab your knitting needles and get started on this fun and rewarding project!
Choosing the Right Yarn and Needles
When knitting a dachshund sweater, choosing the right yarn and needles is crucial to ensure a comfortable and well-fitting garment for your furry friend. Different yarns and needle sizes can drastically affect the final outcome of your project, so it’s important to select materials that will work well with the pattern and suit your dog’s needs.
First and foremost, consider the weight and type of yarn that will be best for your dachshund sweater. The pattern may specify a particular weight, such as DK (double knitting) or worsted, which will determine the thickness and warmth of the sweater. It’s important to choose a yarn that is both soft and durable, as dogs can be rough on their clothing. Wool or wool-blend yarns are often a good choice, as they provide warmth without being too heavy.
If you’re uncertain about the weight or type of yarn to use, the pattern should provide guidance and make suggestions. Additionally, consider your dog’s individual needs and preferences. For example, if your dachshund has sensitive skin, you may want to opt for a softer, hypoallergenic yarn. The color of the yarn is also important, as darker colors tend to absorb more heat and may make your dog too warm.
Next, you’ll need to choose the right needles for your project. The pattern should specify the size of needles to use, which will determine the gauge and overall size of the sweater. It’s important to use the correct needle size to achieve the desired fit and tension. Circular needles are often recommended for knitting dog sweaters, as they allow for easy knitting in the round and can accommodate the smaller circumference required for a dachshund’s body.
In summary, choosing the right yarn and needles for your dachshund sweater is essential to create a comfortable and well-fitting garment. Consider the weight and type of yarn that will work best for your dog’s needs, and select needles that match the pattern’s recommendations. With the right materials, you’ll be well on your way to knitting a cozy and stylish sweater for your beloved dachshund.
Measuring your Dachshund
Before starting to knit a sweater for your Dachshund, it is important to take accurate measurements of your dog’s body. Dachshunds are unique in their elongated body shape, so it is crucial to get the measurements right to ensure a proper fit.
To measure your Dachshund, you will need a flexible measuring tape or a piece of string that can be measured afterwards. The key areas to measure are the neck, chest, back length, and the girth or circumference of the widest part of the body.
Neck:
Start by measuring the neck circumference of your Dachshund. Place the measuring tape or string comfortably around the base of the neck, where the collar usually sits. Be sure to leave enough space for your dog to breathe and move comfortably.
Chest:
Next, measure the widest part of your Dachshund’s chest by placing the measuring tape or string around the chest, just behind the front legs. Make sure the tape or string is snug but not too tight.
Back Length:
Measure the length of your Dachshund’s back from the base of the neck to the base of the tail. Make sure to measure along the spine, following the natural curve of your dog’s body. This measurement will determine the overall length of the sweater.
Girth:
Finally, measure the girth or circumference of the widest part of your Dachshund’s body. This is usually around the middle of the belly, just behind the ribcage. Make sure the tape or string is snug but not constricting.
Once you have taken these measurements, make note of them and compare them to the sizing guide provided with the knitting pattern. This will help you determine the correct size to knit for your Dachshund and ensure a comfortable and well-fitting sweater.
Casting on Stitches
When starting a knitting project, the first step is to cast on stitches. This is the process of creating the initial row of stitches on your knitting needle. There are several methods for casting on stitches, but the most common method is the long-tail cast on.
To begin the long-tail cast on, you will need to estimate the length of yarn needed for the number of stitches you want to cast on. It’s better to overestimate the length of yarn, as it’s better to have too much than too little. Once you have estimated the length of yarn, make a slipknot at one end.
Insert the knitting needle through the slipknot and hold it in your right hand, with the slipknot on your thumb and the long tail of yarn on your index finger. Use your left hand to hold the other end of the yarn, creating tension. With your right hand, bring the needle under the thumb yarn, over the index finger yarn, and back under the thumb yarn again.
Continue this motion, creating loops on the needle until you have cast on the desired number of stitches. Make sure to keep an even tension and spacing between the stitches. Once all the stitches are cast on, you can proceed with the next step of your knitting pattern, whether it’s a ribbed edge or the main body of the sweater.
Remember, casting on stitches is an essential skill in knitting and sets the foundation for your entire project. Take your time to practice and perfect your casting on technique before diving into your Dachshund sweater knitting pattern.
Ribbing for the Neckline
When knitting a sweater for your dachshund, it is important to pay attention to the neckline. The ribbing for the neckline not only adds a decorative touch but also helps to create a snug fit. By properly knitting the ribbing, you can ensure that the sweater will stay in place and prevent any discomfort for your furry friend.
To create the ribbing for the neckline, you will need to use a smaller set of needles than what you used for the main body of the sweater. This will help to create a tighter, stretchy fabric that hugs the neck. Generally, a set of US size 3 or 4 circular needles will work well for this.
When starting the ribbing, it is common to use a variation of the knit one, purl one stitch pattern. This creates a textured ribbing that adds interest to the neckline. You can also experiment with different variations, such as knit two, purl two, to see which one you prefer.
It’s important to note that the number of stitches you cast on for the ribbing will depend on the size of your dachshund’s neck. Measure the circumference of their neck and then multiply it by the desired gauge to determine the number of stitches you will need. For example, if the neck measures 12 inches and your gauge is 6 stitches per inch, you will need to cast on 72 stitches.
Once you have cast on the desired number of stitches, you can begin knitting the ribbing. Work in the chosen stitch pattern for the desired length, typically around 1-2 inches. This will create a sturdy and secure neckline for your dachshund’s sweater. Finish off the ribbing by binding off all stitches in pattern.
By paying attention to the ribbing for the neckline, you can ensure that your dachshund’s sweater not only looks great but also fits comfortably. With the right needles, stitch pattern, and number of stitches, you can create a snug and stylish neckline that will keep your furry friend warm and cozy.
Creating the Leg Openings
Once you have completed knitting the body of the dachshund sweater according to the pattern, it’s time to create the leg openings. Follow these instructions to ensure a proper fit for your furry friend:
1. Mark the Leg Opening Locations: Begin by using stitch markers or safety pins to mark the desired locations for the leg openings on both sides of the sweater. Measure the distance between the front and back legs of your dachshund, and place the markers accordingly.
2. Bind Off Stitches: Starting at one of the marked leg opening locations, begin binding off the stitches to create the opening. Follow the pattern instructions for the appropriate bind off method, whether it’s a simple bind off, a three-needle bind off, or any other technique recommended in the pattern.
3. Continue Knitting: After binding off the stitches for the leg opening, continue knitting the remaining stitches according to the pattern. Make sure to maintain the stitch pattern and gauge as you work your way towards the next leg opening.
4. Repeat for Second Leg Opening: Once you have completed knitting the first leg opening, repeat the same steps to bind off stitches and create the second leg opening at the marked location.
5. Finishing Touches: After creating both leg openings, you can proceed with any remaining instructions in the pattern, such as adding ribbing or a border to the leg openings, or finishing off the sweater with a collar or button closures. Make sure to weave in any loose ends and give the sweater a final blocking if necessary.
Following these steps will ensure that your dachshund sweater has comfortable and properly fitting leg openings, allowing your furry friend to move freely while staying warm and stylish.
Knitting the Body
The first step in knitting a dachshund sweater is to begin with the body. To start, cast on the desired number of stitches for the back of the sweater. This will depend on the size of your dachshund and the gauge of your yarn. Make sure to check the pattern for specific instructions on the number of stitches to cast on.
Once you have cast on the stitches, you can begin knitting the body of the sweater in the specified stitch pattern. The pattern may instruct you to work in stockinette stitch, ribbing, or another stitch pattern of your choice. It is important to follow the pattern instructions carefully to ensure that you are creating the correct texture and fit for your dachshund’s sweater.
Tip: When knitting the body, it is helpful to use stitch markers to mark the beginning and end of each section, such as the back, front, and armhole areas. This will make it easier to keep track of your progress and ensure that you are knitting the correct number of rows.
Continue knitting the body of the sweater until it reaches the desired length, as specified in the pattern. This may involve knitting a certain number of inches or rows, or until the sweater covers the length of your dachshund’s back. Once you have reached the desired length, you can move on to knitting the other parts of the sweater, such as the front chest and the sleeves.
Shaping for the Chest
When knitting a Dachshund sweater, it is important to shape the chest area to ensure a proper fit. The chest shaping is usually done by increasing or decreasing stitches in specific areas. This shaping helps to create a comfortable and snug fit for your Dachshund, allowing them to move freely without restrictions.
To start shaping for the chest, you will need to work with the measurements of your Dachshund. Measure the circumference of their chest and use this measurement to determine where the increases or decreases should be made. It is recommended to start the shaping just below the neck opening and continue down towards the ribcage.
For increases, you can use techniques such as knitting into the front and back of a stitch or making yarn overs. These increases should be evenly distributed across the chest area to maintain balance. It is important to keep track of your stitches and ensure that the total stitch count remains consistent throughout the shaping process.
For decreases, you can use techniques such as knitting two stitches together or slipping stitches. These decreases are usually done to create a more tapered shape and should also be evenly distributed across the chest area.
Once the chest shaping is complete, you can continue knitting the rest of the sweater according to the pattern instructions. Your Dachshund will now have a custom-fit sweater that is snug and cozy, perfect for keeping them warm during colder days.
Knitting the Sleeves
When it comes to knitting the sleeves for your dachshund sweater, there are a few important steps to keep in mind. Whether you are an experienced knitter or just starting out, these tips will help you create a beautiful and comfortable sleeve for your furry friend.
1. Measuring and casting on: Before you start knitting, it’s important to measure your dachshund’s front legs to ensure a proper fit. Use a flexible measuring tape to measure the circumference of the widest part of the leg, and take note of this measurement. Then, using the recommended yarn and needle size specified in the pattern, cast on the required number of stitches for the sleeve.
2. Working the ribbing: The sleeve typically starts with a ribbed cuff to ensure a snug fit. This can be done using a combination of knit and purl stitches, such as 1×1 ribbing or 2×2 ribbing. Follow the pattern instructions to work the desired length of ribbing.
3. Shaping the sleeve: Once the ribbing is complete, you will need to shape the sleeve to fit your dachshund’s leg. This is usually done by increasing or decreasing stitches at specific points, as indicated in the pattern. Pay close attention to these instructions and make any necessary adjustments to achieve the desired shape and size.
4. Knitting the body of the sleeve: After shaping the sleeve, you will continue knitting in the main stitch pattern specified in the pattern. This could be stockinette stitch, garter stitch, or any other pattern that the designer recommends. Follow the pattern instructions to work the required length of the sleeve, taking breaks to check the fit on your dachshund’s leg and make adjustments if needed.
5. Binding off: Once the desired length is reached, it’s time to bind off the stitches to finish the sleeve. Follow the pattern instructions for the appropriate bind-off method, ensuring that the edge is not too tight or too loose.
6. Repeat for the second sleeve: Remember that you will need to repeat these steps to knit the second sleeve for the dachshund sweater. Take your time and ensure that both sleeves match in size and shape.
By following these steps and carefully following the pattern instructions, you will be able to knit the sleeves for your dachshund sweater with confidence. Remember to take breaks to check the fit and make adjustments as needed, and soon your furry friend will be rocking a cozy and stylish sweater!
Adding Buttonholes
Buttonholes are an essential part of any sweater design, including a dachshund sweater. They provide a functional and decorative element to the garment, allowing for easy fastening and adding a touch of style. Here’s a step-by-step guide on how to add buttonholes to your dachshund sweater.
1. Determine the Placement
First, decide on the number and placement of the buttonholes. Measure the distance between the edges of the front panels where the buttons will be attached. Divide this measurement by the number of buttonholes you want and mark the positions evenly along the edge. Remember to account for the size of the buttons you plan to use.
2. Mark the Buttonhole Positions
Using a contrasting yarn or stitch marker, mark the positions of the buttonholes on the right front panel. You can use small pieces of yarn or thread to make the markers easily visible. Make sure the markers are placed at regular intervals and centered along the edge.
3. Create the Buttonholes
Now it’s time to create the buttonholes. You can use a variety of techniques such as yarn overs, binding off stitches, or working special stitches. Consult your knitting pattern or refer to a buttonhole tutorial for specific instructions on your chosen method. Work the buttonholes on the marked positions, ensuring that they are secure and large enough to accommodate the buttons.
4. Reinforce the Buttonholes
To make the buttonholes more durable, reinforce them with a few extra rows of stitches. This will help prevent stretching and ensure that the buttonholes can withstand frequent use. You can use a reinforcing stitch pattern or simply work a few extra rows of stockinette stitch.
5. Attach the Buttons
Once the buttonholes are complete, it’s time to attach the buttons. Sew the buttons onto the left front panel, aligning them with the buttonholes. Make sure the buttons are securely attached, ensuring that they won’t come loose during wear. Use a thread that matches the color of the buttons or the yarn used for the sweater to create a seamless finish.
With these steps, you can easily add buttonholes to your dachshund sweater pattern. Experiment with different button and yarn colors to create a unique and stylish garment for your furry friend.
Finishing Touches
Once you have completed all the knitting and sewing, it’s time to add some finishing touches to your dachshund sweater. These final steps will ensure that the sweater fits well and looks polished.
1. Blocking: Before adding any decorative elements, it’s important to block your sweater. Wet blocking involves soaking the sweater in water, gently squeezing out the excess, and then laying it flat on a towel to dry. This will help even out any uneven stitches and give the sweater a more professional finish.
2. Embroidery: To add a personal touch to your dachshund sweater, consider embroidering your dog’s name or a fun design onto the fabric. You can use a contrasting color of yarn or embroidery thread to make the design pop. Take your time and use small, even stitches to create a clean and neat look.
3. Button or Velcro Closure: Depending on your preference, you can add a button or Velcro closure to the belly side of the sweater. This will make it easier to put on and take off your dachshund, while ensuring a snug fit. Sew the button or Velcro securely to the fabric, making sure it’s positioned correctly for fastening the sweater.
4. Trim: Finally, you can add a decorative trim along the edges of the sweater, such as a simple crochet border or a fabric ribbon. This will give the sweater a finished look and add some extra charm. Choose a trim that complements the color and style of your sweater.
- For a classic look, go for a neutral-colored trim that matches the main color of the sweater.
- If you want a pop of color, opt for a contrasting trim that stands out.
- Consider using a textured trim, such as pom-pom or tassel fringe, for a playful touch.
With these finishing touches, your dachshund sweater will be ready to keep your furry friend cozy and stylish during the colder months. Enjoy the process of knitting and personalizing your dog’s sweater, and don’t forget to take lots of adorable pictures of your dachshund wearing their new handmade outfit!