
Knitting is a popular hobby that allows people to create beautiful garments and accessories using nothing more than yarn and a pair of needles. While many intricate patterns exist, there is also an abundance of simple patterns that are perfect for beginners or those looking for a quick and easy project. These patterns often use basic stitches and repetitive patterns to create stunning results.
One of the simplest knitting patterns is the garter stitch, which is created by knitting every row. This pattern is perfect for knitting scarves, blankets, or even dishcloths. The garter stitch creates a ridged texture that is both visually appealing and durable. This pattern is an excellent choice for beginners as it only requires knowledge of the basic knit stitch.
Another simple pattern is the stockinette stitch, which creates a smooth and sleek fabric. This pattern is created by alternating between knitting one row and purling the next. The stockinette stitch is commonly used to create garments such as sweaters and hats, as well as accessories like scarves and gloves. While this pattern requires knowledge of both the knit and purl stitches, it is still relatively easy to master.
Knitting Simple Patterns
Knitting simple patterns is a great way to practice basic knitting techniques and create beautiful and functional items. Whether you are a beginner or an experienced knitter, simple patterns offer a variety of options and possibilities.
One of the most popular simple knitting patterns is the garter stitch. This stitch is created by knitting every row, resulting in a textured fabric that is great for scarves, dishcloths, and blankets. The garter stitch is an excellent choice for beginners, as it only requires knowledge of the basic knit stitch.
Another simple pattern that is often used is the stockinette stitch. This stitch is created by knitting one row and purling the next row, creating a smooth fabric with distinct “v” shapes on the right side. The stockinette stitch is commonly used for creating garments such as sweaters and cardigans, as well as accessories like hats and mittens.
For those looking to add a bit of texture to their knitting, the seed stitch is a great option. This pattern is created by alternating knit and purl stitches within the same row, resulting in a fabric with small bumps and ridges. The seed stitch is often used for creating scarves, cowls, and baby blankets.
In addition to these basic stitch patterns, simple knitting patterns can also include variations such as ribbing, cables, and lace. These techniques can add depth and interest to your knitting projects, while still being relatively easy to master.
Overall, knitting simple patterns allows you to practice your knitting skills while still creating beautiful and useful items. Whether you prefer the simplicity of the garter stitch or the versatility of the stockinette stitch, there are countless options to explore and experiment with. So grab your knitting needles and start creating!
Beginner’s Guide to Knitting
Knitting is a popular craft that allows you to create beautiful and functional items using yarn and knitting needles. Whether you’re looking to make a cozy scarf, a warm hat, or a stylish sweater, knitting is a versatile skill that can be enjoyed by people of all ages and abilities.
Getting Started: To begin knitting, you’ll need a few basic supplies. First, choose a pair of knitting needles that are appropriate for your project. The size of the needles will depend on the weight of the yarn you’re using and the desired thickness of your finished item. Additionally, select a ball or skein of yarn in the color and texture that you prefer. Finally, you may want to have a pair of scissors, a tapestry needle, and stitch markers on hand.
Learning the Basics: Once you have your supplies, it’s time to learn the basic knitting stitches. The two main stitches you’ll need to know are knit and purl stitches. Knit stitches create a smooth V-shaped texture, while purl stitches create a bumpy, raised texture. By combining these two stitches in different patterns, you can create an infinite variety of textures and designs.
Simple Patterns: As a beginner, it’s best to start with simple knitting patterns that allow you to practice and perfect your stitches. Scarves, dishcloths, and beanies are all great projects for beginners. These patterns typically use straightforward stitch combinations and can be completed relatively quickly. As you gain confidence and skill, you can challenge yourself with more complex patterns and techniques.
Joining a Knitting Community: One of the best ways to improve your knitting skills and stay motivated is to join a knitting community. Look for local knitting groups or online forums where you can connect with other knitters, share your progress, and ask for advice. Knitting is a wonderful hobby that fosters creativity and provides a sense of community, so don’t be afraid to reach out and seek support from fellow knitting enthusiasts.
Conclusion: Knitting is a rewarding and relaxing hobby that allows you to create personalized, handmade items. With the right supplies, basic stitches, and a bit of practice, you’ll be on your way to knitting beautiful and functional pieces. Remember to start with simple patterns, join a knitting community for support, and most importantly, enjoy the process of bringing your ideas to life through knitting!
Understanding Knitting Needles and Yarn
When it comes to knitting, understanding the different types of knitting needles and yarn is essential. Knitting needles come in various sizes and materials, each offering its own unique characteristics. Yarn, on the other hand, varies in thickness, fiber content, and texture, making it important to choose the right yarn for your project. By familiarizing yourself with these essential tools, you can set yourself up for success in your knitting endeavors.
Knitting Needles: There are two main types of knitting needles: straight needles and circular needles. Straight needles are the classic choice, consisting of two separate straight rods with a point at one end and a knob or stopper at the other. These are commonly used for flat knitting projects such as scarves or blankets. Circular needles, on the other hand, consist of two needle tips connected by a flexible cable. These are versatile and can be used for both flat and circular knitting projects, making them a popular choice among knitters.
Knitting needles also come in various sizes, denoted by numbers such as US 8 or metric measurements, such as 4mm. The size of the needle determines the thickness or gauge of your knitted fabric. Smaller needle sizes create tighter, denser stitches, while larger sizes result in looser, more open stitches. It’s important to choose the appropriate needle size based on the yarn and desired outcome of your knitting project.
Yarn: Yarn is available in a wide range of materials, such as wool, cotton, acrylic, and blends thereof. Each material has its own characteristics, such as warmth, durability, and drape. Additionally, yarn comes in different thicknesses or weights, ranging from super fine to super bulky. Thicker yarns create bulkier, warmer fabric, while thinner yarns produce lighter, more delicate fabric.
When choosing yarn for your project, consider the pattern’s recommended yarn weight and fiber content. It’s important to match the weight and fiber of the yarn specified in the pattern to achieve accurate gauge and desired results. Additionally, take into account the texture and color of the yarn, as it can greatly impact the overall appearance and feel of your finished project.
By understanding the different types of knitting needles and yarn available, you can confidently select the right tools for your knitting projects. Experimenting with various needle sizes and yarn types will allow you to explore different techniques and create unique and beautiful knitted creations.
Choosing the Right Pattern
When starting a new knitting project, one of the most important steps is choosing the right pattern. The pattern you select will determine the overall look, difficulty level, and size of the finished piece. It’s essential to take your time and consider your skill level, personal style, and the type of project you want to create before making a decision. With so many patterns available online and in books, it can be overwhelming, but by following a few guidelines, you can find the perfect pattern for your next knitting adventure.
Consider Your Skill Level: Before diving into a complex lace shawl or a colorwork sweater, it’s important to be honest about your knitting abilities. If you’re a beginner, it’s best to choose a pattern labeled as “easy” or “beginner-friendly.” These patterns typically use basic stitches and techniques that are easy to master. Intermediate knitters can try more intricate patterns that involve different stitch patterns or techniques, such as cables or color changes. Advanced knitters have the freedom to tackle complex patterns that require advanced skills and attention to detail. By selecting a pattern that matches your skill level, you can ensure an enjoyable knitting experience.
Consider Your Personal Style: Knitting is a fantastic way to express your personality and sense of style. When choosing a pattern, consider the types of garments, accessories, or home decor items that resonate with you. Do you prefer classic, timeless designs or more modern, trendy pieces? Are you drawn to vibrant colors and intricate details or do you prefer simplicity and minimalism? Taking your personal style into account will help you select a pattern that you’ll love not only while knitting but also when wearing or using the finished item.
Consider the Type of Project: Different knitting patterns are designed for various types of projects. Are you looking to knit a sweater, a hat, a pair of socks, or maybe a blanket? Each type of project requires different skills, materials, and time commitments. Sweaters often involve shaping, seaming, and multiple measurements, while hats can be quick and easy projects that are perfect for beginners. Socks usually involve more intricate techniques, such as heel and toe shaping, and blankets require long hours of knitting but can be rewarding in the end. Consider the type of project you want to undertake and choose a pattern that suits your preferences and time constraints.
Utilize Online Resources: In today’s digital age, there is an abundance of online resources available to help you find the perfect knitting pattern. Websites like Ravelry, LoveKnitting, and Knitty offer a vast selection of patterns for all skill levels and project types. These platforms allow you to filter patterns by difficulty, type, yarn weight, and more, making it easier to find exactly what you’re looking for. Additionally, many patterns on these sites come with user reviews and photos, giving you valuable insights into other knitters’ experiences. Take advantage of these resources to expand your pattern options and discover new and exciting designs.
When choosing the right knitting pattern, it’s essential to consider your skill level, personal style, the type of project you want to create, and utilize online resources. By taking these factors into account, you can select a pattern that will not only challenge and inspire you but also result in a beautiful finished piece that you will be proud to wear or share with others.
Getting Started: Casting On
Before you can start knitting, you need to learn how to cast on. Casting on is the first step in creating a new knitting project and involves creating a foundation row of stitches on your knitting needles. This foundation row will be the starting point for your knitting project.
To cast on, you will need a pair of knitting needles and your chosen yarn. There are several different methods of casting on, but one of the most common methods is the long-tail cast on. This method creates a neat and flexible edge that is perfect for many knitting projects.
Step 1: To begin the long-tail cast on, start by making a slipknot at the end of your yarn. Insert the knitting needle into the slipknot and tighten it slightly.
Step 2: Hold the knitting needle with the slipknot in your right hand. Use your left hand to hold the yarn, with the tail end on your palm and the working end draped over your fingers.
Step 3: Insert the knitting needle under the yarn that is draped over your thumb, then over the yarn that is draped over your index finger. This creates a loop on the knitting needle.
Step 4: Slip the loop off your thumb, while keeping the loop on your index finger. Tighten the loop slightly to create the first stitch on your knitting needle.
Step 5: Repeat steps 3 and 4, inserting the needle under the yarn on your thumb and over the yarn on your index finger to create additional loops and stitches on your knitting needle. Continue casting on until you have reached the desired number of stitches for your project.
The long-tail cast on is just one of many methods you can use to cast on your knitting project. Practice this technique and explore other casting on methods to find the one that works best for you.
Basic Knit Stitch
The basic knit stitch is one of the fundamental techniques in knitting. It is also known as the garter stitch, as it creates a textured fabric with rows of raised “v” shapes. This stitch is commonly used for scarves, blankets, and other beginner-friendly projects.
To work the basic knit stitch, you will need knitting needles and yarn. Start by making a slipknot and placing it on one of the needles. Hold the needle with the slipknot in your right hand, and insert the empty needle into the slipknot from left to right.
Hold both needles with your right hand, and use your left hand to wrap the working yarn counter-clockwise around the right-hand needle. Slide the right-hand needle behind the left-hand needle, catching the yarn with the tip.
Now, bring the right-hand needle back to the front, pulling the yarn through the stitch. Slip the old stitch off the left-hand needle, and you have completed a knit stitch. Repeat these steps for each stitch on the left-hand needle until you reach the end of the row.
Practice the basic knit stitch to get comfortable with the motion and tension. Once you have mastered this stitch, you can explore different knitting patterns and create beautiful projects. Happy knitting!
Mastering the Purl Stitch
The purl stitch is one of the basic knitting stitches that every knitter should master. It is the opposite of the knit stitch, creating a bump on the fabric instead of a smooth V-shaped stitch. Once you understand how to do the knit stitch, learning the purl stitch will open up a whole new world of knitting possibilities.
To purl, you will need a pair of knitting needles and a ball of yarn. Hold the knitting needle with the cast-on stitches in your left hand, and insert the right needle into the first stitch from right to left, just as you would with the knit stitch. However, instead of bringing the yarn over the needle, bring it under the needle. This creates a loop that you can then slip off the left needle, completing the purl stitch.
The purl stitch is commonly used to create ribbing, seed stitch, and other textured patterns in knitting. It is often used in combination with the knit stitch to create interesting patterns and designs. By mastering the purl stitch, you will have more flexibility and creativity in your knitting projects.
Combining Knit and Purl Stitches
Knit and purl stitches are the building blocks of knitting. Combining these two basic stitches creates a wide variety of patterns and textures in your knitting projects. Understanding how to combine knit and purl stitches opens up a world of possibilities for creating unique and beautiful designs.
Stockinette Stitch: One of the most common ways to combine knit and purl stitches is to create the stockinette stitch. This stitch pattern is created by alternating rows of knit stitches and purl stitches. The right side of the work will appear smooth and uniform with a “V” pattern, while the wrong side will have a bumpy texture.
Garter Stitch: Another simple pattern that combines knit and purl stitches is the garter stitch. This stitch pattern is created by knitting every row. The result is a fabric with horizontal ridges on both sides. Garter stitch is reversible and has a lot of stretch, making it great for scarves, blankets, and other projects where both sides of the fabric will be visible.
By combining knit and purl stitches in different ways, you can create a wide variety of patterns and textures in your knitting. Experiment with different combinations and see what unique designs you can come up with!
Creating Simple Textured Patterns
When it comes to knitting, creating simple textured patterns can be a great way to add visual interest and depth to your projects. Textured patterns can range from basic stitches like knit and purl combinations to more intricate designs featuring cables, bobbles, and lace. Regardless of the level of complexity, textured patterns can elevate your knitting projects and make them stand out.
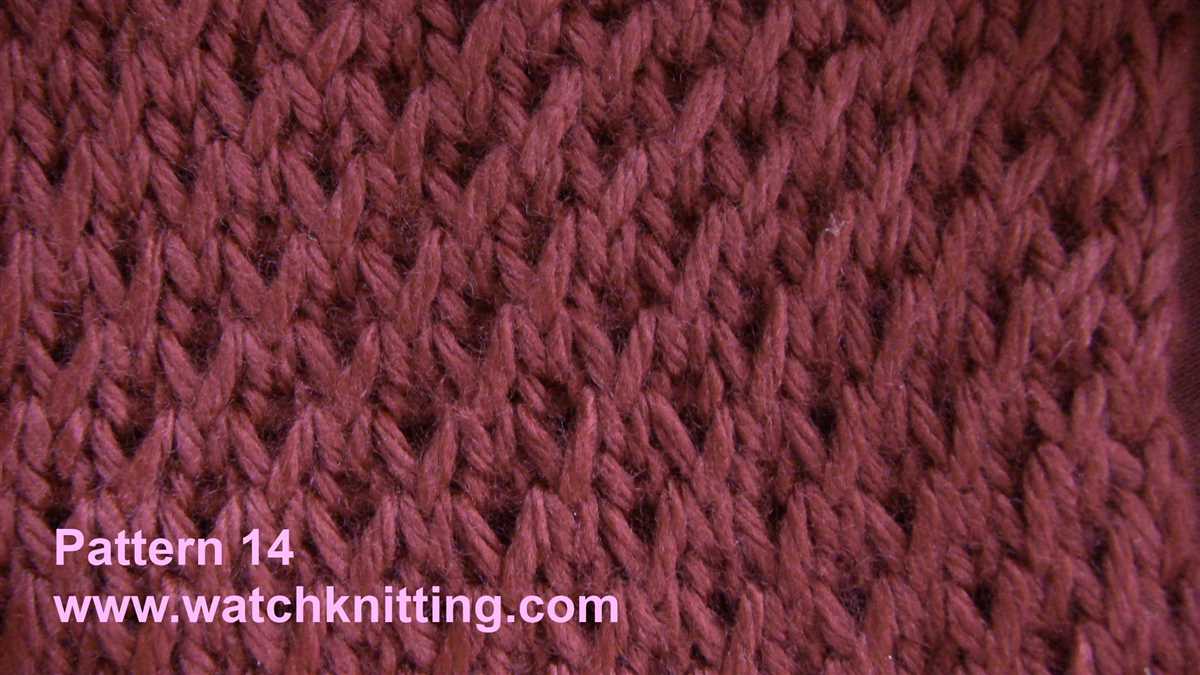
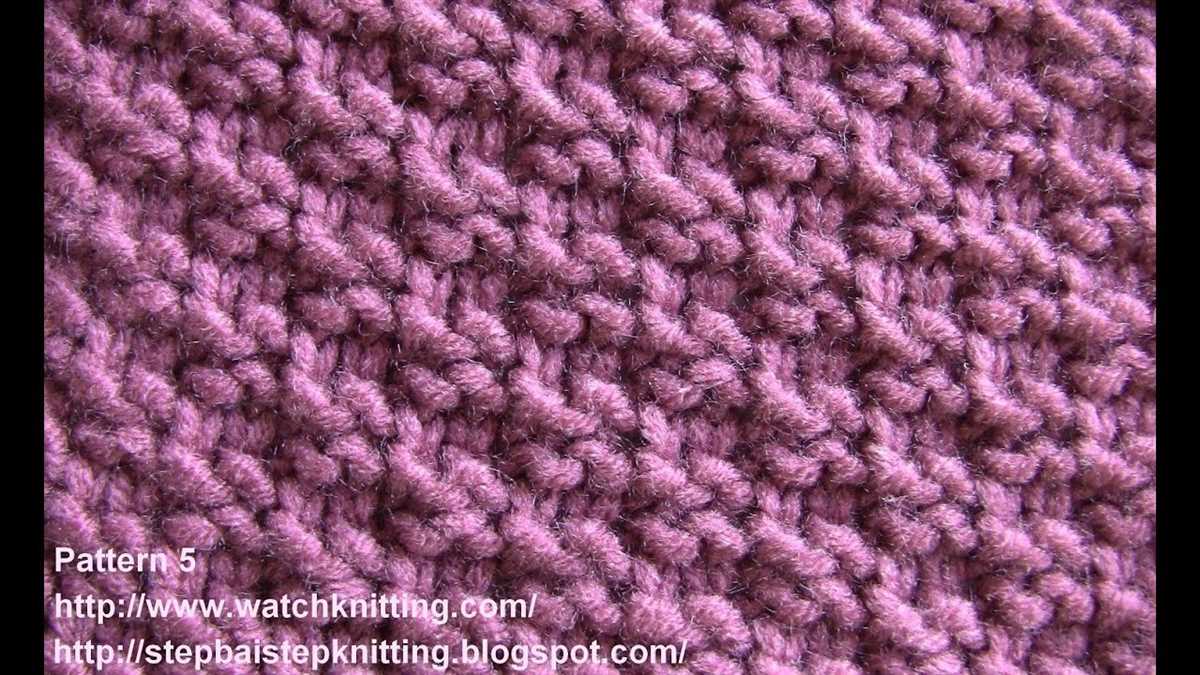
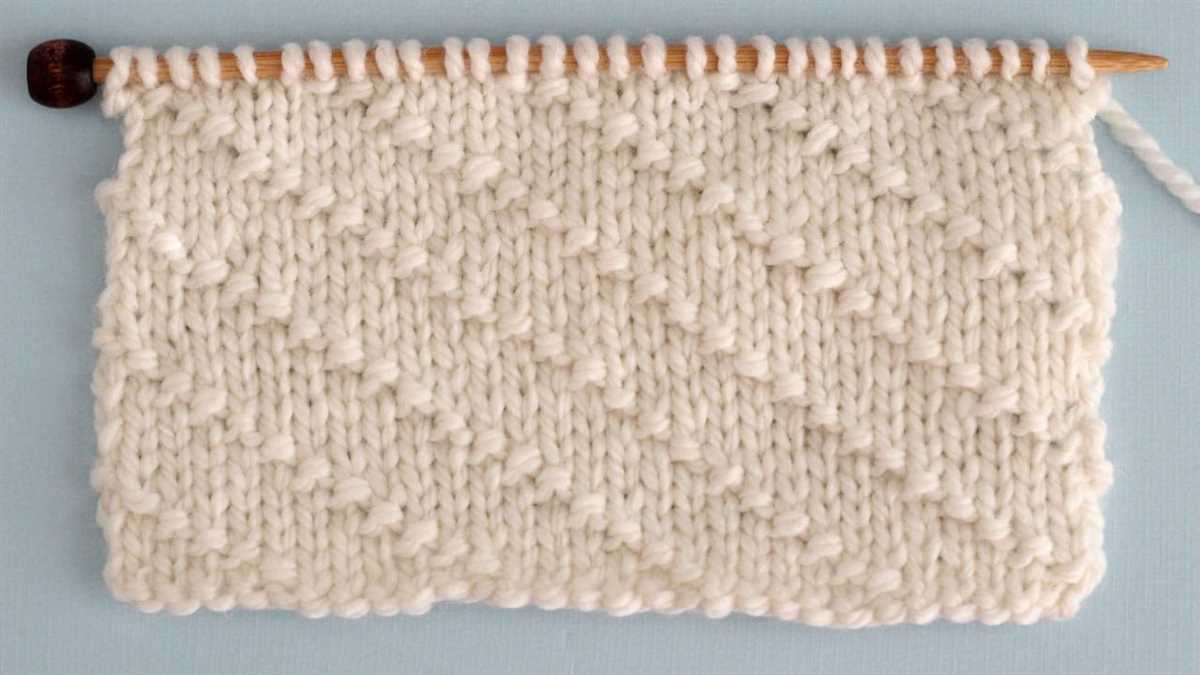
Knit and purl combinations: One of the easiest ways to create texture in your knitting is by combining knit and purl stitches. By alternating between knit and purl stitches in different patterns and sequences, you can achieve a variety of textures. For example, a simple seed stitch pattern, which alternates between knit and purl stitches in a checkerboard-like pattern, creates a rich, textured fabric.
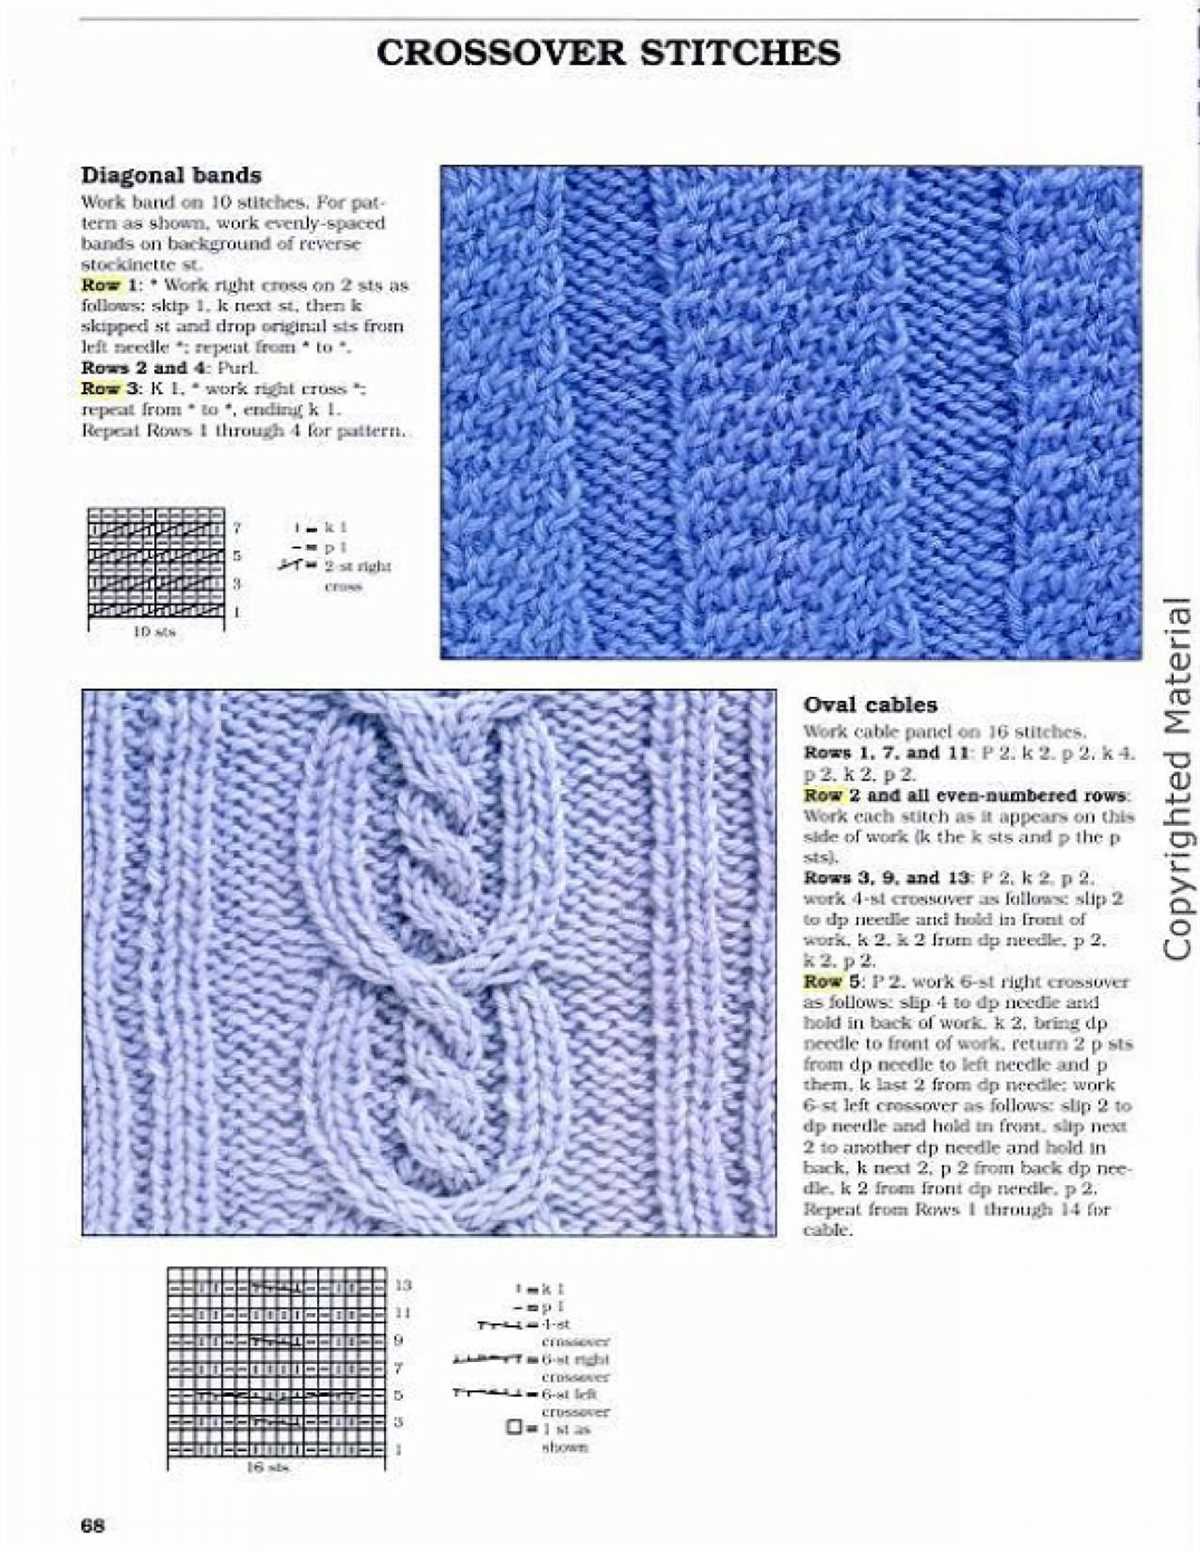
Cables: Cables are another popular way to add texture to your knitting. By crossing stitches over each other, you can create intricate and visually appealing designs that have a three-dimensional quality. Cables can range from simple twists to more complex braided patterns. They add depth and dimension to your knitting, making it look more intricate than it actually is.
Bobbles: Bobbles are small, raised bumps that add texture and visual interest to your knitting. They are created by working multiple stitches into the same stitch, often followed by decreasing those stitches to create the bobble shape. Bobbles can be placed strategically in your knitting to create patterns or used sparingly to add accents and details to your projects.
Lace: Lace knitting is another way to create beautiful textured patterns. By incorporating yarn overs and decreases, lace patterns create delicate and airy fabrics that are perfect for lightweight garments and accessories. Lace patterns can range from simple eyelet designs to more intricate and complex motifs. Regardless of the level of complexity, lace adds an elegant touch to your knitting projects.
When choosing a textured pattern, consider the level of difficulty and the desired outcome. Simple textured patterns can be great for beginners or for creating quick and satisfying projects. More complex patterns may require additional time and practice, but can yield stunning results. Experiment with different techniques and patterns to find what works best for you and your knitting style.
Adding Colors: Stripes and Color Blocking
Adding colors to your knitting projects can create stunning and vibrant results. One way to incorporate colors is through stripes, where you simply alternate between different colored yarns at regular intervals. This technique is fairly straightforward and can be used to create a variety of patterns and designs.
To knit stripes, start by choosing two or more colors of yarn that complement each other. You can opt for high-contrast colors for a bold look or choose a more subtle palette for a softer effect. Begin knitting with one color, and when you want to switch to the next, simply drop the working yarn and pick up the new color, leaving a short tail of yarn to weave in later. Continue knitting with the new color until you’re ready to switch again.
- To create evenly sized stripes, you can keep track of the number of rows you knit with each color.
- For a more random and organic look, you can vary the width and placement of the stripes.
- Experiment with different stitch patterns, such as garter stitch, stockinette stitch, or ribbing, to enhance the texture and visual interest of your stripes.
Another technique for adding color to your knitting is color blocking. Color blocking involves using blocks of different colors to create a bold and graphic design. Unlike stripes, color blocking typically involves larger sections of color, making it ideal for statement pieces or accessories.
To achieve color blocking, you can either knit with multiple yarns held together to create a thicker fabric or use different colors for different sections of the project. For example, you could knit the body of a sweater in one color and add contrasting colored cuffs, collar, and hem. You can also experiment with geometric designs by combining different colors in specific patterns or shapes.
When working with color blocking, it’s important to consider the color placement and how the different shades interact with each other. You can create a harmonious color scheme by selecting colors that are adjacent on the color wheel or opt for a high-contrast look with complementary colors. The choice is yours, and the possibilities are endless!
Creating Ribbing and Edges
In knitting, ribbing and edges are techniques used to add structure and finishing touches to a project. Ribbing creates a stretchy and elastic fabric, allowing the knitted piece to conform to the body. Edges, on the other hand, provide a neat and polished finish to the edges of a garment or accessory. Both ribbing and edges can be accomplished using various knitting techniques and stitches.
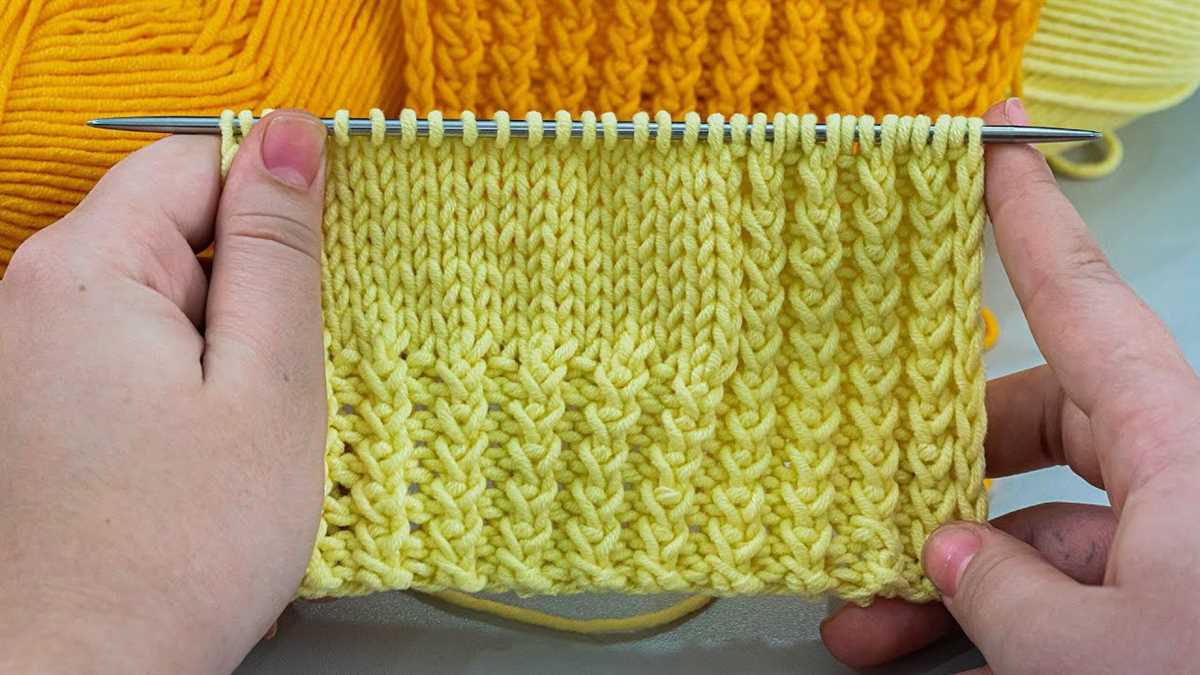
To create ribbing, commonly used stitches include the knit stitch and the purl stitch. These stitches are alternated to create a pattern of raised ridges and recessed valleys. For example, a common ribbing pattern is the 1×1 rib, where one knit stitch is followed by one purl stitch. This pattern creates a fabric that is stretchy and flexible, making it ideal for cuffs, collars, and hems. Other popular ribbing patterns include the 2×2 rib and the fisherman’s rib, each with their own unique texture.
To add edges to a knitted piece, several techniques can be used. One common method is to add a garter stitch edge, which is created by knitting every row. This creates a sturdy and flat edge that does not curl. Another method is to use a slip stitch edging, where stitches are slipped or worked in a specific manner to create a neat and finished edge. Slip stitch edging can be particularly useful when working with delicate or lacy patterns, as it helps prevent the fabric from unraveling.
It is important to consider the desired outcome of your knitted project when choosing ribbing and edge techniques. The type of yarn, needle size, and pattern design will all play a role in determining the best approach. Experimenting with different techniques and stitches can help you achieve the desired look and functionality for your project, whether it be a cozy sweater, a warm hat, or a delicate lace shawl.
Making Increases and Decreases
When knitting simple patterns, it’s important to understand how to make increases and decreases to shape your project. These techniques allow you to add or remove stitches in your knitting to create interesting patterns, shaping, or to achieve a desired fit.
Increases: To make an increase in your knitting, you can use different methods depending on the desired effect. One common method is the knit front and back (KFB) increase. To do this, simply knit into the front of a stitch, leaving the stitch on the left-hand needle, then knit into the back of the same stitch. This creates an extra stitch. Another option is the yarn over (YO) increase, where you simply bring the yarn over the needle, creating a new stitch.
Decreases: Decreasing stitches allows you to shape your knitting, making it narrower or creating angled lines. One common decrease method is the knit two stitches together (K2tog) decrease. To do this, simply insert the right-hand needle into the next two stitches as if to knit, then knit them together as one stitch. Another option is the slip one, knit one, pass slipped stitch over (SKP) decrease. This involves slipping one stitch as if to knit, knitting the next stitch, and then passing the slipped stitch over the knit stitch.
Common Increase and Decrease Abbreviations:
- KFB – Knit front and back
- YO – Yarn over
- K2tog – Knit two stitches together
- SKP – Slip one, knit one, pass slipped stitch over
By mastering these basic increase and decrease techniques, you’ll be able to create a wide variety of simple knitting patterns, from shaping a hat or sweater to adding texture and interest to your projects. Experiment with different methods and incorporate increases and decreases into your knitting repertoire to take your projects to the next level.
Finishing Off: Binding Off
After completing your knitting project, it’s time to finish off by binding off. Binding off is the process of creating a neat edge and securing your stitches so that they won’t unravel. It’s an essential skill every knitter should know.
To bind off, follow these simple steps:
- Knit the first 2 stitches. Start by knitting the first two stitches as you would normally.
- Pass the first stitch over the second stitch. Insert the left needle into the first stitch on the right needle and lift it up and over the second stitch. The first stitch is now bound off.
- Knit one more stitch. Knit the next stitch on the left needle as usual.
- Pass the previous stitch over the newly knitted stitch. Repeat step 2 by passing the previous stitch over the newly knitted stitch. Continue this process until you have one stitch left on the right needle.
- Cut the yarn and pull it through the last stitch. Cut the yarn, leaving a tail of 6-8 inches. Insert the tail through the last stitch and pull it tight to secure.
Once you have bound off all the stitches, you can weave in the loose ends using a tapestry needle. This will give your knitted project a clean and finished look.
Binding off is a simple technique that adds a professional touch to your knitting projects. With a little practice, you’ll be binding off like a pro in no time!