
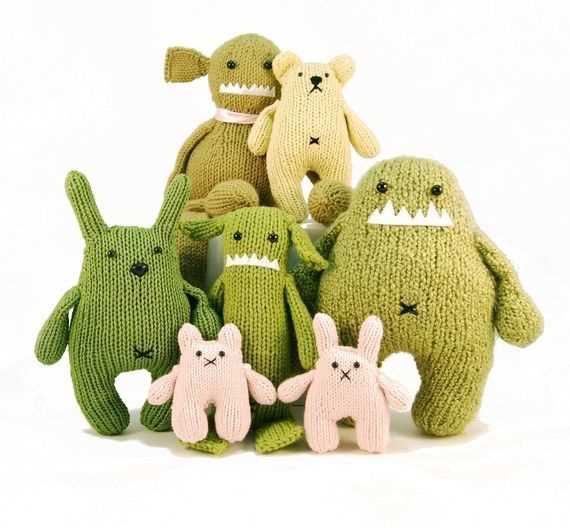
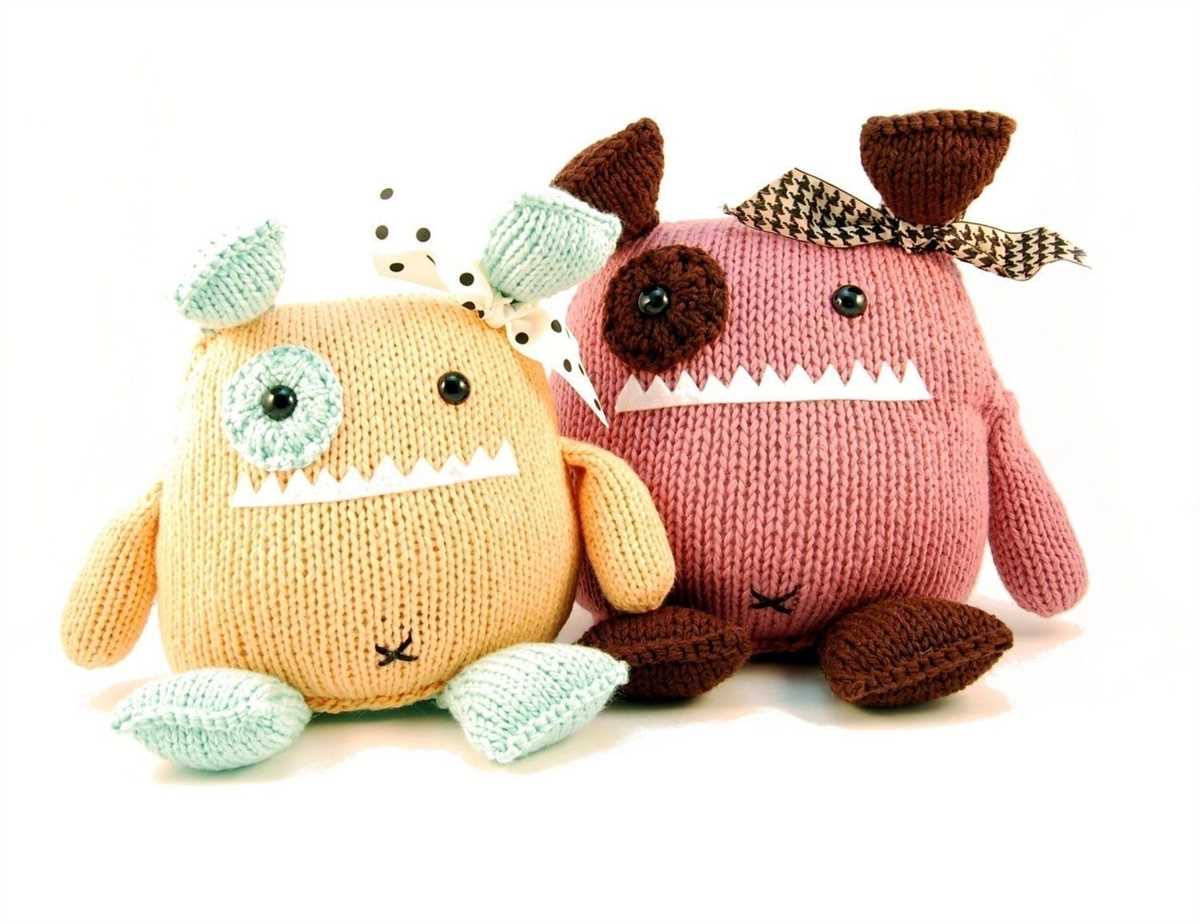
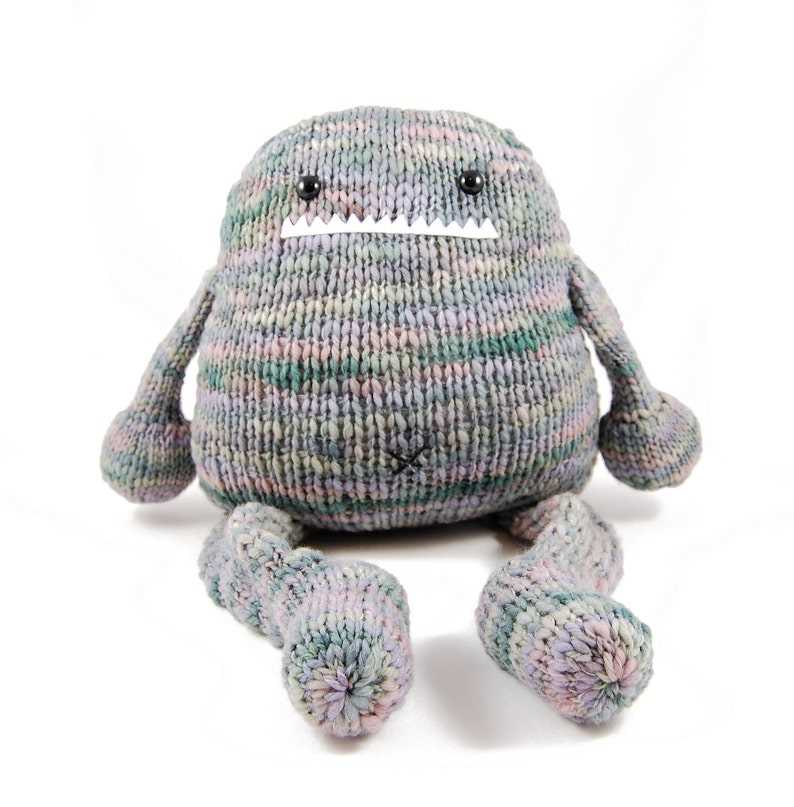
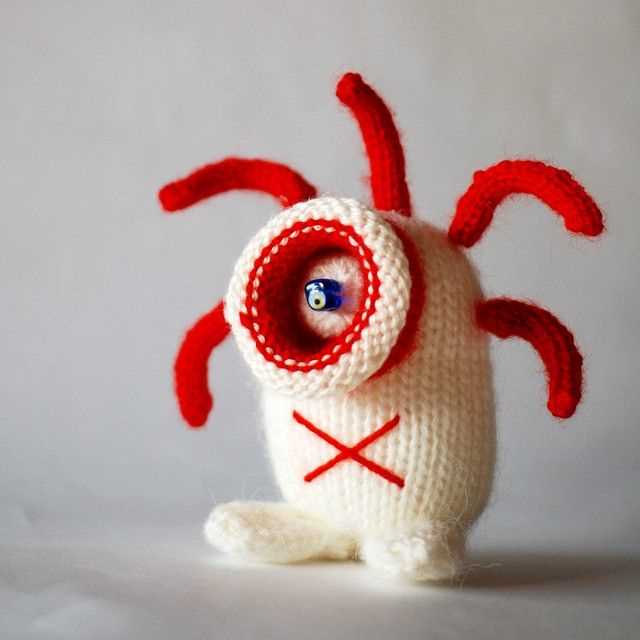
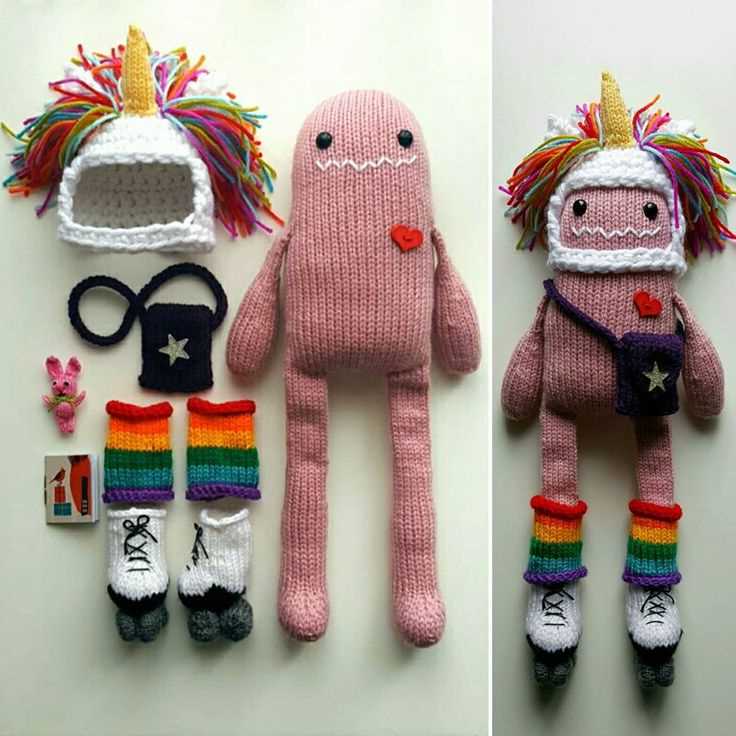
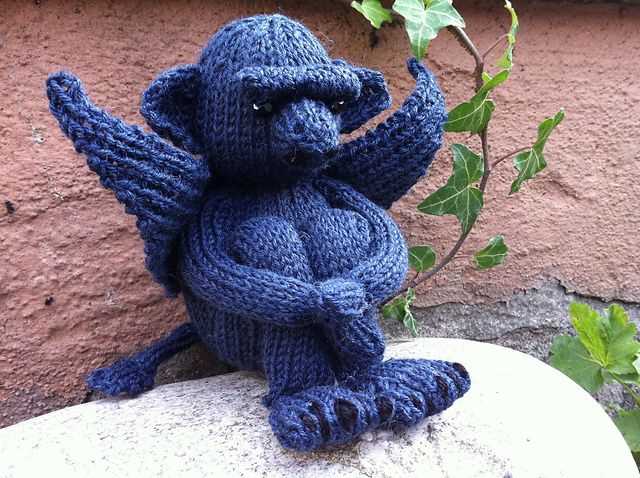
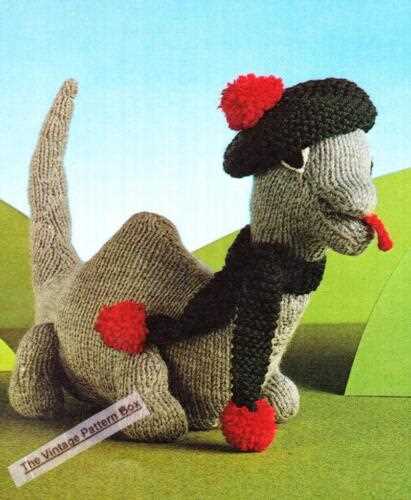
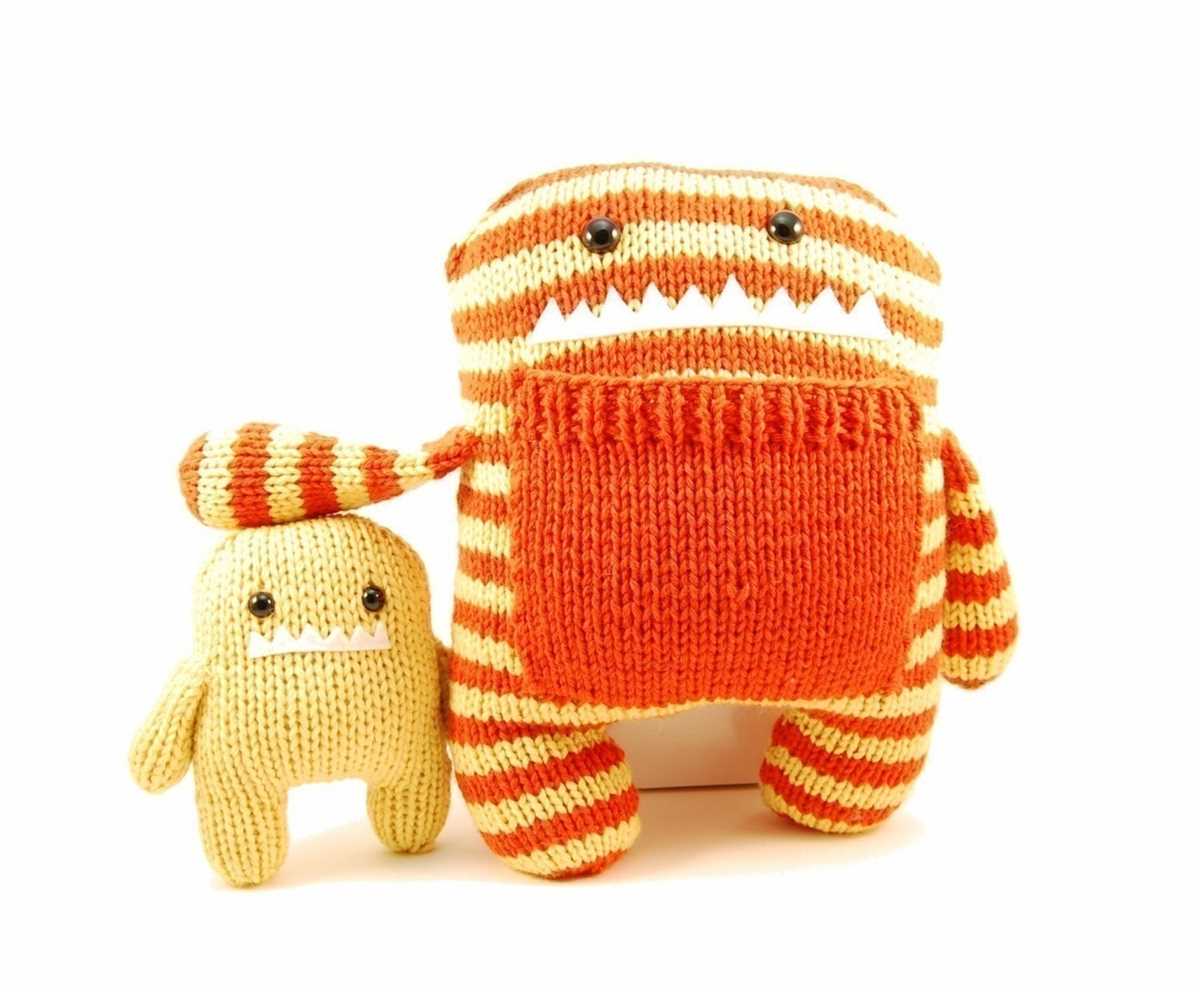
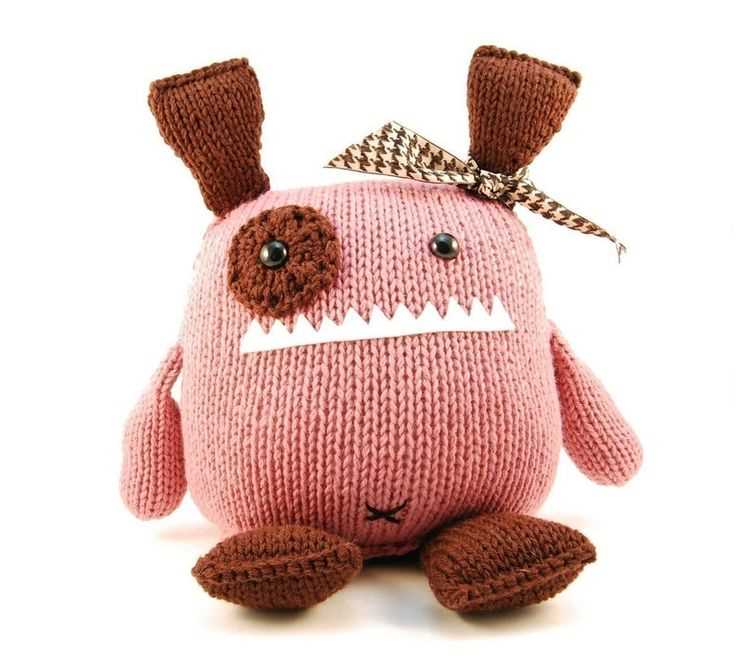
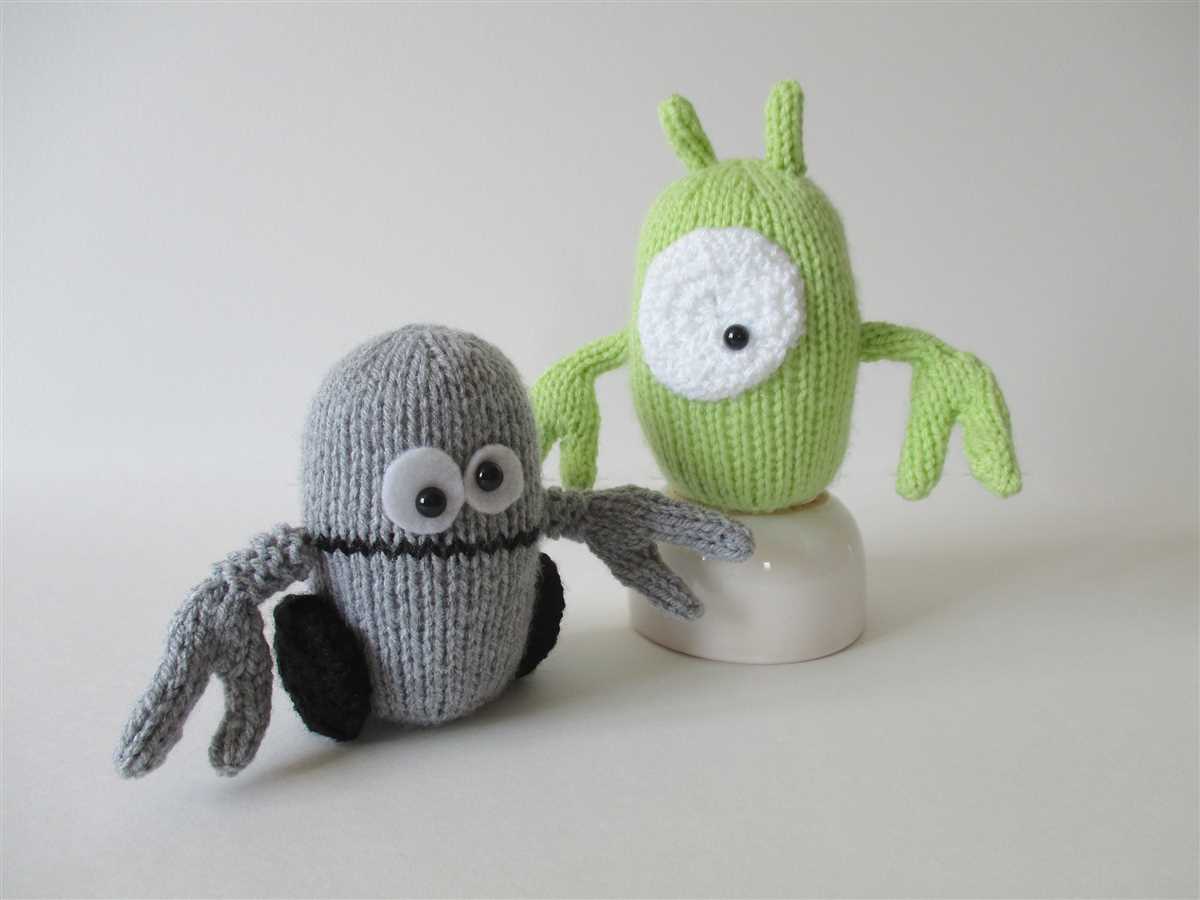
Knitting is a versatile and creative craft that allows people to create unique and personalized items. One popular knitting project is the gargoyle knitting pattern. This pattern brings a touch of whimsy and charm to any home or garden.
Traditionally, gargoyles are stone statues that serve as decorative water spouts on medieval buildings. However, with the gargoyle knitting pattern, knitters can bring these stone creatures to life in a cozy and adorable form. The pattern typically involves using various knitting techniques to create the intricate details and textures of the gargoyle’s features.
With the gargoyle knitting pattern, knitters have the freedom to choose their own colors and yarn types, allowing for endless customization possibilities. Whether you prefer a traditional gray gargoyle or a vibrant and colorful one, this pattern can be adapted to suit your personal style and preferences.
Not only is knitting a gargoyle a fun and creative project, but it also provides an opportunity to practice and improve your knitting skills. From working on intricate cables to crafting small and detailed accessories, this pattern offers a range of techniques to challenge and inspire knitters of all skill levels.
Gargoyle Knitting Pattern
In the world of knitting, there are many unique and interesting patterns to choose from. One such pattern is the Gargoyle Knitting Pattern. This pattern allows knitters to create adorable gargoyle figures using their knitting skills. Whether you’re a beginner or an experienced knitter, this pattern is a fun and exciting project to try.
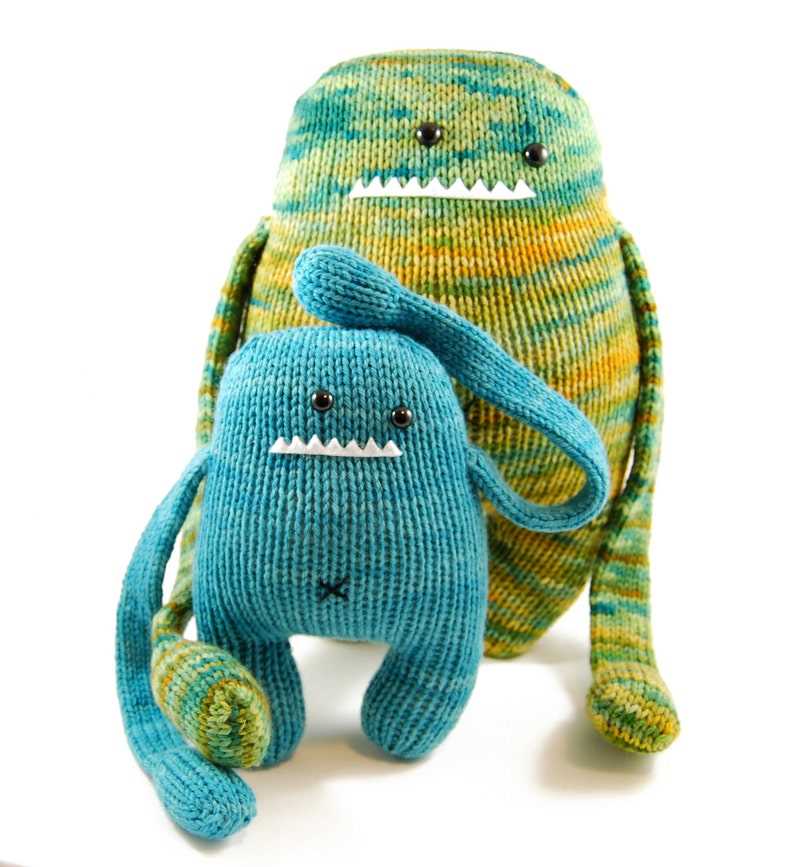
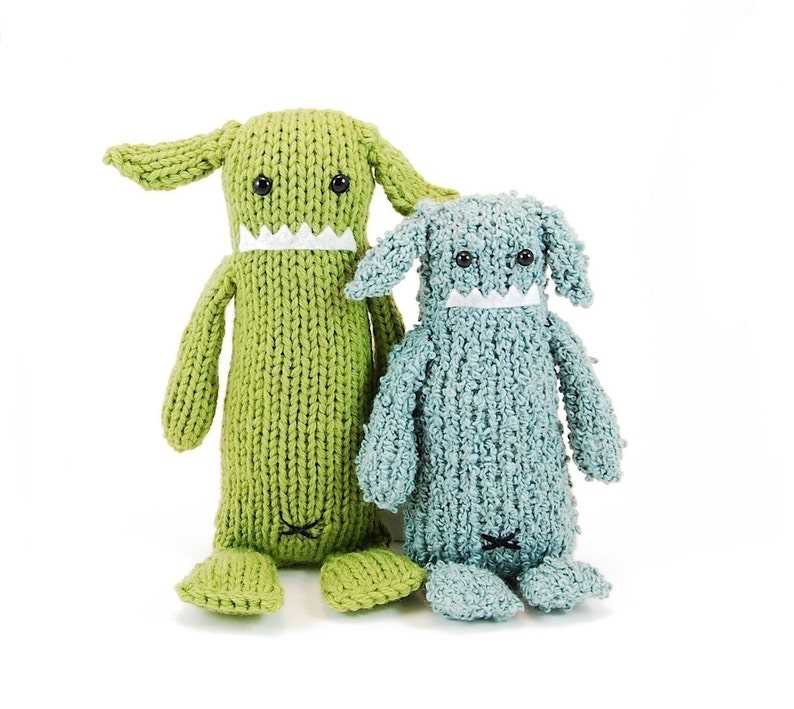
The Gargoyle Knitting Pattern typically includes instructions on how to knit the body, wings, horns, and facial features of the gargoyle. The pattern may also include variations for different sizes and styles of gargoyles. Knitters can choose their own colors and textures of yarn to bring their gargoyle to life.
To start knitting the gargoyle, knitters will usually need to gather the necessary materials, including knitting needles, yarn, stuffing, and any additional accessories like safety eyes or beads. The pattern will provide a list of recommended materials and gauge to ensure the best results.
Instructions:
- Begin by casting on the required number of stitches for the gargoyle’s body.
- Work in the round, following the pattern’s instructions for shaping the body and adding details like wings and horns.
- Once the body is complete, stuff it firmly with stuffing to give it a three-dimensional shape.
- Follow the pattern’s instructions to knit the facial features, such as the eyes, nose, and mouth.
- Attach the facial features to the body using a yarn needle, making sure they are securely fastened.
- Finally, add any additional accessories or embellishments to personalize your gargoyle.
Once the knitting is complete, you’ll be left with a charming gargoyle that can be used as a decorative item or a special gift. The Gargoyle Knitting Pattern allows knitters to unleash their creativity and create a unique and whimsical piece of art. So grab your knitting needles and get ready to bring a gargoyle to life!
Why Gargoyles?
Gargoyles have long captured the imagination of people around the world with their mysterious and intriguing presence. These stone creatures perched on the edges of buildings seem to possess an otherworldly quality that both fascinates and frightens. But why are gargoyles so popular?
One reason is their rich history and symbolism. Gargoyles first appeared in the Middle Ages, primarily in Gothic architecture. They were not mere decorations, but functional elements, designed to divert rainwater away from the building’s walls. This practical purpose gave birth to their unique and often grotesque appearance, with their open mouths serving as waterspouts.
The intriguing aspect of gargoyles lies in their dual nature. On the one hand, they serve a practical purpose, protecting the building from water damage. On the other hand, their monstrous and eerie forms seem to guard the building from supernatural threats. This duality has made gargoyles a symbol of protection and warding off evil spirits.
Furthermore, gargoyles have etched themselves into popular culture. They have appeared in various forms of media, including literature, films, and television shows. Their presence in these works often represents a sense of mystery, darkness, and the supernatural. This, in turn, has contributed to their enduring appeal.
In recent years, the interest in gargoyles has extended beyond their architectural significance. People have started to appreciate gargoyles as unique and artistic pieces, even turning them into collectible items. Gargoyle enthusiasts find joy and satisfaction in creating their own gargoyle sculptures or knitting patterns, showcasing their creativity and appreciation for this ancient art form.
In conclusion, the allure of gargoyles lies in their history, symbolism, and their ability to evoke a sense of mystery and intrigue. Whether it’s their role in architectural design or their representation in popular culture, gargoyles continue to captivate and inspire the imaginations of people worldwide.
The History of Gargoyles
Gargoyles have a rich and fascinating history that dates back to ancient times. These decorative statues, often found adorning the exterior of buildings, have served both practical and symbolic purposes throughout the centuries.
The use of gargoyles can be traced back to ancient civilizations such as the Egyptians and Greeks, who believed that these grotesque figures had the power to ward off evil spirits. In fact, the word “gargoyle” itself is derived from the Latin word “gargouille,” meaning throat or gullet, referencing the water spouts often found on these statues.
During the Middle Ages, gargoyles became a prominent feature of Gothic architecture, notably adorning the facades of cathedrals and churches. These stone creatures were not only decorative but also served a practical purpose. The grotesque faces and forms were designed to channel rainwater away from the building, preventing damage to the masonry. At the same time, the intimidating appearance was believed to scare away evil and protect the sacred space from harm.
Over time, the symbolism associated with gargoyles expanded beyond their protective function. They came to represent an array of mythical creatures and figures, such as dragons, demons, and chimeras. These fantastical beings were often depicted in intricate detail, showcasing the craftsmanship and artistic skills of the craftsmen who created them.
Today, gargoyles continue to captivate and intrigue people around the world. While their practical use in architectural design has diminished, they remain an enduring symbol of both medieval history and the fantastical world of myth and legend.
Materials Needed for Gargoyle Knitting
Before you can start knitting your gargoyle, make sure you have all the necessary materials. Here is a list of items that you will need to complete this project:
- Yarn: Choose a bulky or super bulky weight yarn in the color of your choice. Ideally, go for a yarn that has a bit of texture to enhance the gargoyle’s appearance.
- Knitting Needles: Use a pair of circular or double-pointed needles that are appropriate for the yarn you’ve chosen. The needle size will depend on your gauge and personal preference.
- Tapestry Needle: This needle will come in handy for weaving in ends and seaming your gargoyle together. Make sure it has a large enough eye to accommodate your yarn.
- Stuffing: To give your gargoyle a three-dimensional shape, you’ll need some stuffing material. You can use polyester fiberfill, wool roving, or even fabric scraps.
- Scissors: A good pair of scissors is essential for cutting the yarn and trimming any excess. Make sure they are sharp enough to deliver clean cuts.
- Stitch Markers: These small, removable markers will help you keep track of your stitches and pattern repeats. They can be especially useful when working on different sections of the gargoyle.
With these materials on hand, you’ll be ready to cast on and start knitting your adorable gargoyle. Remember to check your pattern for any additional materials or tools that may be required.
Choosing the Right Yarn
When it comes to knitting a gargoyle, choosing the right yarn is essential. The type of yarn you select will greatly impact the final appearance and texture of your creation. Here are some factors to consider when deciding on the perfect yarn for your gargoyle knitting project.
Fiber Content
The fiber content of the yarn is an important consideration. You want a yarn that not only looks good but also feels good. Natural fibers such as wool or alpaca can provide warmth and softness to your gargoyle. On the other hand, synthetic fibers like acrylic or nylon can offer durability and easy care. Consider your preferences and the intended use of your gargoyle when choosing the fiber content.
Gauge
Another factor to consider is the gauge of the yarn. The gauge refers to the number of stitches and rows per inch when knitting. Different patterns and projects require specific gauges to achieve the desired size and appearance. Make sure to check the gauge recommended in your gargoyle knitting pattern and choose a yarn that matches it. Using the wrong gauge may result in a misshapen or ill-fitting gargoyle.
Texture and Color

The texture and color of the yarn can greatly enhance the look of your gargoyle. If you want a gargoyle with intricate details and textures, opt for a yarn with a fuzzy or textured finish. This will give your gargoyle a more realistic and interesting appearance. Additionally, consider the color options available. Choose a yarn color that complements the overall theme or design of your gargoyle. Bold colors can make your gargoyle stand out, while muted tones can create a more subtle and natural look.
Price and Availability
Lastly, consider the price and availability of the yarn. Some specialty yarns may be harder to find or more expensive, which can impact your budget and the overall feasibility of your project. It’s important to choose a yarn that fits within your budget and is readily available for purchase. Take time to research and compare different yarn options to find the best balance between quality, price, and availability.
By considering these factors – fiber content, gauge, texture and color, and price and availability – you can ensure that you choose the right yarn for your gargoyle knitting project. Remember, the right yarn will not only make your gargoyle look great but also make the knitting process enjoyable and rewarding.
Basic Knitting Techniques
Knitting is a versatile and enjoyable craft that allows you to create beautiful garments, accessories, and home décor items using just two needles and yarn. Whether you’re a beginner or an experienced knitter, it’s important to have a solid understanding of the basic knitting techniques. These techniques serve as the foundation for all knitting projects and can help you create clean and professional-looking stitches.
Casting On
The first step in any knitting project is casting on. This is the process of creating a row of stitches on one of your knitting needles. There are several methods for casting on, including the long tail cast on, the knit cast on, and the cable cast on. Each method has its own advantages and creates a slightly different edge. It’s important to choose the cast on method that best suits your project and personal preference.
Knit Stitch
The knit stitch is the most basic stitch in knitting. It forms the foundation for many other stitch patterns and techniques. To knit, insert one needle into the stitch on the other needle, from left to right, and wrap the yarn around the needle. Then, pull the new loop of yarn through the old loop, sliding it onto the working needle. Repeat this process for each stitch on the needle until you have completed a row.
Purl Stitch
The purl stitch is another fundamental knitting stitch. It creates a textured fabric that looks like bumps or “purls” on the right side of the work. To purl, insert the needle into the stitch from right to left, bring the yarn to the front of the work, and wrap it around the needle. Then, pull the new loop of yarn through the old loop, sliding it onto the working needle. Repeat this process for each stitch on the needle until you have completed a row.
Increasing and Decreasing

Increasing and decreasing are techniques used to shape knitted fabric. To increase, you can make a new stitch by knitting into the front and back of the same stitch or by using other methods like yarn overs. This creates additional stitches and adds width to your work. To decrease, you can knit two stitches together or work other specialized techniques, which helps shape your fabric by reducing the number of stitches.
Binding Off
Once you have completed your knitting project, binding off is the final step. This technique is used to create a finished edge and secure the stitches so they don’t unravel. To bind off, work the first two stitches as normal, then use the left needle to lift the first stitch over the second stitch and off the needle. Repeat this process until you have only one stitch remaining, then cut the yarn and pull it through the last stitch to secure.
These are just a few of the basic knitting techniques that every knitter should master. By understanding and practicing these techniques, you’ll be able to tackle a wide range of knitting patterns and create beautiful, handmade items to treasure for years to come.
Essential Knitting Stitches for Gargoyles
Knitting patterns for gargoyles require a unique set of stitches to bring these creatures to life. Whether you’re a beginner or an experienced knitter, it’s essential to master these stitches to create stunning gargoyle sculptures.
Garter Stitch: One of the simplest stitches, garter stitch is perfect for creating the body of your gargoyle. Knit every row to produce a textured fabric that adds depth and dimension to your piece.
Stockinette Stitch: This stitch creates smooth, polished fabric that is ideal for gargoyle wings and limbs. Knit one row and purl the next to achieve the stockinette stitch, giving your gargoyle a sleek and refined look.
Rib Stitch: For a more textured effect, try using rib stitch for your gargoyle’s features. This stitch alternates knitting and purling, creating raised vertical ribs that add an interesting touch to your gargoyle’s face or body.
Moss Stitch: To add intricate detailing to your gargoyle, the moss stitch is a great choice. This stitch involves knitting and purling in a pattern of alternating pairs, creating a bumpy texture that mimics the appearance of stone.
Cable Stitch: For a more intricate and decorative effect, consider using cable stitch for your gargoyle’s features or accessories. This stitch involves crossing stitches over each other, creating twists and braids that add a unique and captivating touch.
Lace Stitch: If you want to create delicate and ethereal gargoyle wings, lace stitch is the way to go. This stitch involves creating intricate patterns that resemble lace, adding a touch of elegance and sophistication to your gargoyle’s attire.
By mastering these essential knitting stitches, you’ll be able to bring your gargoyle knitting patterns to life. Experiment with different stitches and combinations to create unique textures and details that will make your gargoyle truly stand out.
Step-by-Step Guide to Knitting a Gargoyle
If you’re interested in knitting, why not take on the challenge of creating your very own gargoyle? These unique and often eerie creatures can add a touch of charm and mystery to any home or garden. With this step-by-step guide, you’ll learn how to create a knitted gargoyle that will impress anyone who sees it.
Materials: Before you begin, gather all the materials you’ll need for this project. You’ll need yarn in various colors, knitting needles, stuffing, and embroidery thread for details. Make sure you have all the necessary tools and materials before you get started.
Step 1: Choose your pattern
Start by selecting a gargoyle knitting pattern that you like. There are many options available online, ranging from simple to complex designs. Consider the size and level of detail you’re comfortable with, and choose a pattern that suits your skill level and preferences.
Step 2: Gather your yarn and needles
Once you have your pattern, gather the yarn colors specified in the pattern and the appropriate needle size. The pattern will usually indicate the type of yarn and needle size required. Make sure you have the correct materials to achieve the desired outcome.
Step 3: Cast on and knit the body
Begin by casting on the required number of stitches and follow the pattern instructions to knit the body of the gargoyle. This may involve shaping the body with decreases and increases, as well as knitting in different colors for added detail. Take your time and follow the pattern carefully to ensure an accurate and well-shaped body.
Step 4: Add details and facial features
Once the body is complete, it’s time to add the details and facial features to bring your gargoyle to life. Use different colors of yarn and embroidery thread to create eyes, a mouth, and any other desired features. You can also add horns, wings, or other elements to make your gargoyle more unique.
Step 5: Stuff and finish
After all the details are in place, stuff your gargoyle with polyester filling or other suitable stuffing material. Make sure to evenly distribute the stuffing to give your gargoyle a sturdy and well-shaped appearance. Finally, finish off any remaining loose ends and secure the stuffing inside the body.
With these step-by-step instructions, you can create your very own knitted gargoyle that will add character and charm to your space. Enjoy the process of knitting and let your creativity shine as you bring your gargoyle to life!
Adding Details to Your Gargoyle
Once you have completed the basic knitting pattern for your gargoyle, you can add various details to bring your creation to life. Adding details is an important step that will make your gargoyle unique and personalized. Here are some ideas to help you add those finishing touches:
1. Facial Features

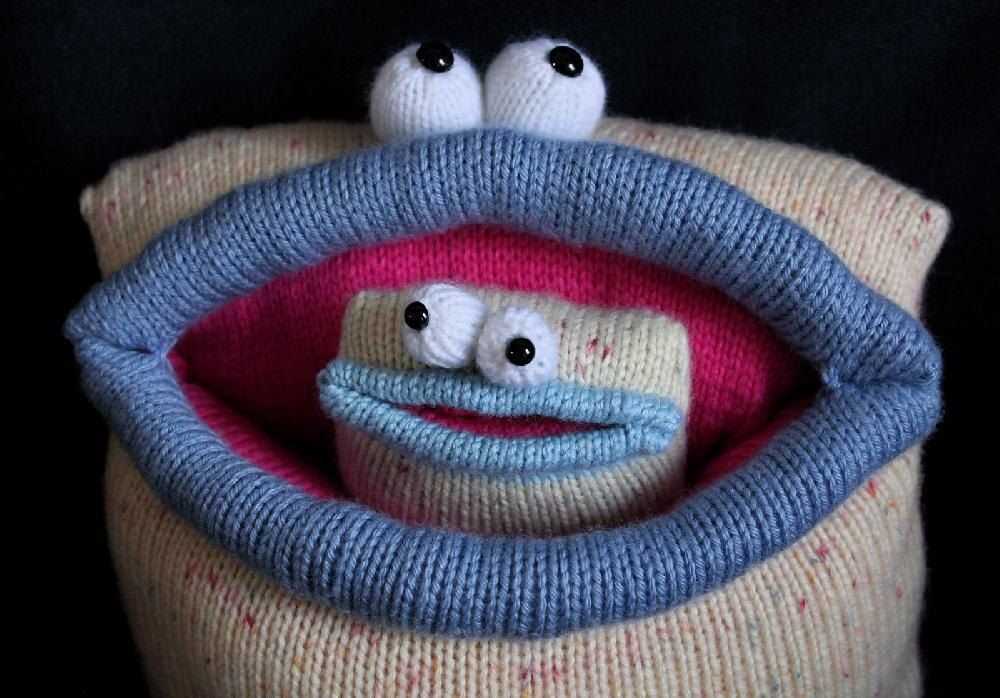
One of the most important details to focus on is the face of your gargoyle. You can use embroidery techniques to create eyes, nose, and mouth. Consider using different colors of yarn to make these features stand out. You can also add eyebrows or horns to give your gargoyle a more menacing or playful look. Be creative and experiment with different shapes and sizes to find the perfect expression for your gargoyle.
2. Wings and Tail
If your gargoyle is designed to have wings, you can use a crochet hook to create the desired shape. You can also add texture to the wings by using different stitch patterns. Adding a tail to your gargoyle can also give it more character and balance. You can create a tail using the same knitting pattern as the body and then attach it securely.
3. Accessories
To add even more personality to your gargoyle, consider adding accessories. This could include a tiny knitted scarf, a miniature hat, or even a little knitted pouch for your gargoyle to carry small objects. You can also use beads or buttons to embellish the accessories and add some sparkle. Let your imagination run wild and have fun creating unique accessories for your gargoyle.
4. Texture and Surface Details
To make your gargoyle more visually interesting, consider adding texture and surface details. This could be achieved by using different stitch patterns or adding knitted or crocheted appliques. You can also use embroidery or surface crochet techniques to add texture and depth to specific areas, such as the body or wings. Experiment with different techniques to find the right balance of texture and detail for your gargoyle.
5. Finishing Touches
Finally, don’t forget about the finishing touches. This includes weaving in any loose ends and securely attaching all the added details. Take your time to make sure everything is neat and secure. You can also lightly stuff your gargoyle to give it a more three-dimensional look. Once you are satisfied with the overall appearance, you can proudly display your unique and personalized gargoyle for everyone to admire.
Finishing and Assembling Your Gargoyle
Once you have completed knitting all the pieces for your gargoyle, it’s time to start the finishing and assembly process. This is an important step to bring your gargoyle to life and give it its unique character. Follow these steps to ensure a successful completion of your knitting project:
1. Blocking and Shaping:
Before you start assembling your gargoyle, it’s recommended to block and shape the knitted pieces. Blocking helps to even out the stitches and ensure that the finished gargoyle has a smooth and professional look. You can use blocking mats and pins to stretch and shape the pieces according to the pattern instructions. This step is especially important if you want your gargoyle to have a specific pose or position.
2. Seaming:
To assemble the different parts of your gargoyle, you will need to seam them together using a tapestry needle and the same yarn you used for knitting. Start by aligning the edges of the pieces and secure them with pins or stitch markers. Use a whip stitch or mattress stitch to sew the pieces together, making sure to hide the yarn strands within the seams. Pay attention to the pattern instructions to ensure that you seam the pieces in the correct order and position.
3. Stuffing:
Once the main body of your gargoyle is assembled, it’s time to stuff it to give it a three-dimensional shape. Use fiberfill or polyester stuffing to fill the body and other parts, such as the wings and tail. Be careful not to overstuff, as it can distort the shape of your gargoyle. Ensure that the stuffing is distributed evenly and gives your gargoyle a firm yet squishy feel.
4. Facial Features and Embellishments:
To add character to your gargoyle, you can embroider or sew on its facial features, such as eyes, nose, and mouth. You can also attach any additional embellishments, such as beads, buttons, or charms, to give your gargoyle a personalized touch. Be creative and experiment with different options to make your gargoyle truly unique.
5. Finishing Touches:

After assembling and adding the final touches to your gargoyle, take a step back and assess its overall appearance. Check for any loose threads or uneven stitches and make necessary adjustments. You can also lightly steam or iron the finished gargoyle to give it a polished look. Finally, admire your completed gargoyle and display it proudly!
Displaying and Caring for Your Knitted Gargoyle
After spending time and effort creating your knitted gargoyle, you’ll want to display it proudly in your home or give it as a gift to someone special. Follow these tips to ensure your knitted gargoyle stays in excellent condition and remains a cherished keepsake for years to come.
Displaying Your Knitted Gargoyle
When it comes to displaying your knitted gargoyle, there are several options to consider:
- Shelf or Mantelpiece: Place your knitted gargoyle on a shelf or mantelpiece, allowing it to stand upright. This will show off its unique features and quirky charm.
- Bookshelf: Position your knitted gargoyle among your favorite books to create an eye-catching display. You can even knit a small book for your gargoyle to hold, adding to its whimsical appeal.
- Window Sill: Set your knitted gargoyle on a windowsill, letting natural light accentuate its textures and colors. This is an excellent option if your gargoyle has translucent wings.
- Wall Mount: If your knitted gargoyle has a loop or hook, consider mounting it on the wall for a unique and unexpected twist. This will draw attention to its craftsmanship and make a statement.
Caring for Your Knitted Gargoyle
To ensure your knitted gargoyle lasts for years to come, follow these care instructions:
- Dust Regularly: Dust your knitted gargoyle regularly with a soft, dry cloth to keep it free from dirt and debris.
- Avoid Direct Sunlight: Prolonged exposure to direct sunlight can fade the colors of your knitted gargoyle. Keep it away from windows or use UV-protective film if displaying it near natural light.
- Handle with Care: When handling your knitted gargoyle, be gentle and avoid pulling or tugging on any delicate parts. This will prevent any damage to the knitting or attached embellishments.
- Keep Away from Pets and Children: While your knitted gargoyle may be adorable, it is best kept out of reach of pets and young children who may unintentionally damage it.
- Store Properly: If you need to store your knitted gargoyle, place it in a clean, dry container or wrap it in acid-free tissue paper. Avoid storing it in damp or humid environments to prevent mold or mildew growth.
By displaying your knitted gargoyle in a creative and safe manner, as well as caring for it properly, you can enjoy its unique charm and intricate details for many years to come.