
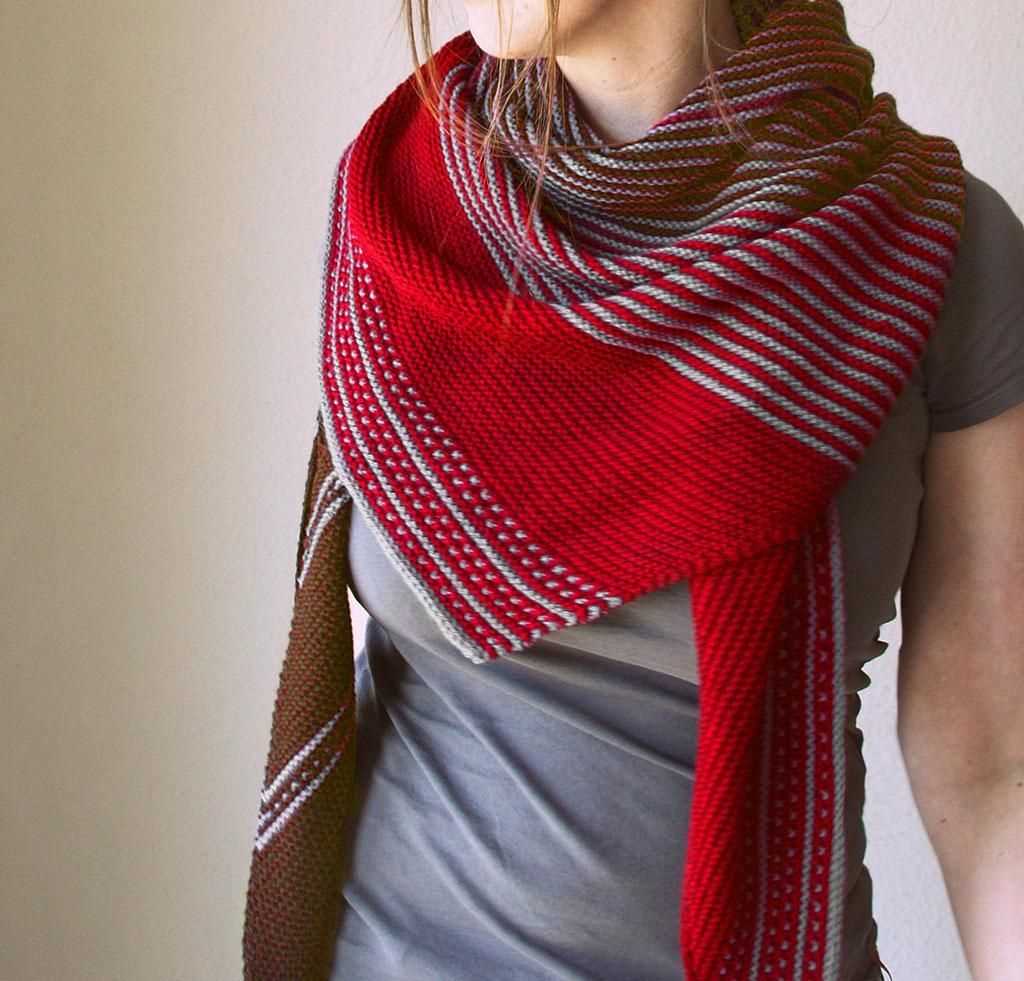
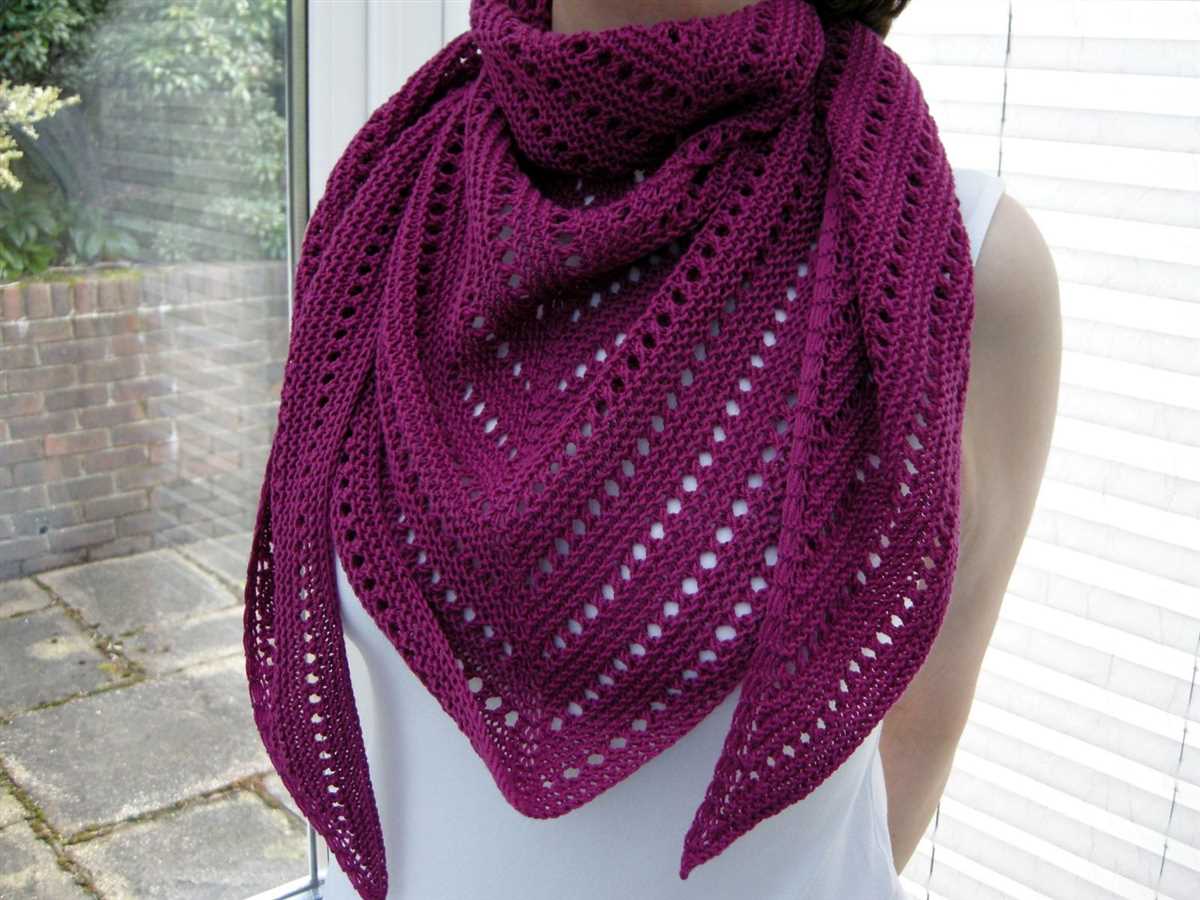
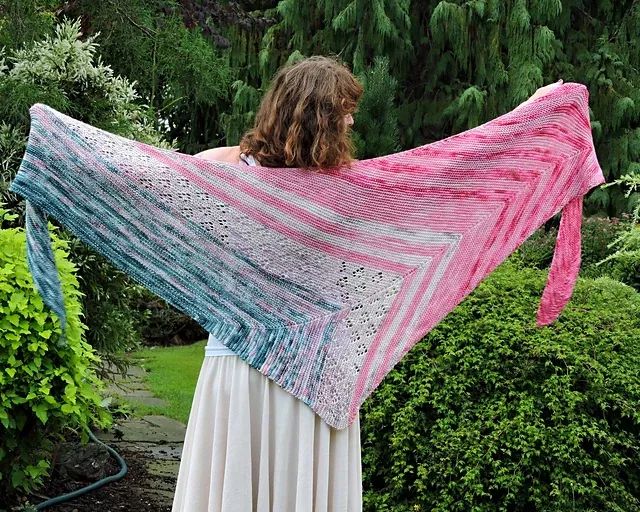
Are you looking for a versatile and stylish accessory to knit? Look no further than the shawl scarf wrap knitting pattern! This pattern allows you to create a beautiful and functional accessory that can be worn in multiple ways.
Whether you want to wrap it around your neck like a scarf, drape it over your shoulders like a shawl, or wear it as a cozy wrap, this knitting pattern has you covered. With its intricate stitch pattern and luxurious yarn, this shawl scarf wrap is sure to become your favorite accessory for any occasion.
Not only is this pattern a great way to showcase your knitting skills, but it also makes for a wonderful gift for your loved ones. The shawl scarf wrap is a timeless accessory that can be worn year-round, making it a versatile addition to any wardrobe.
So, grab your knitting needles and get ready to create a stunning shawl scarf wrap. With this knitting pattern, you’ll have a beautiful accessory that is both trendy and practical.
Shawl Scarf Wrap Knitting Pattern
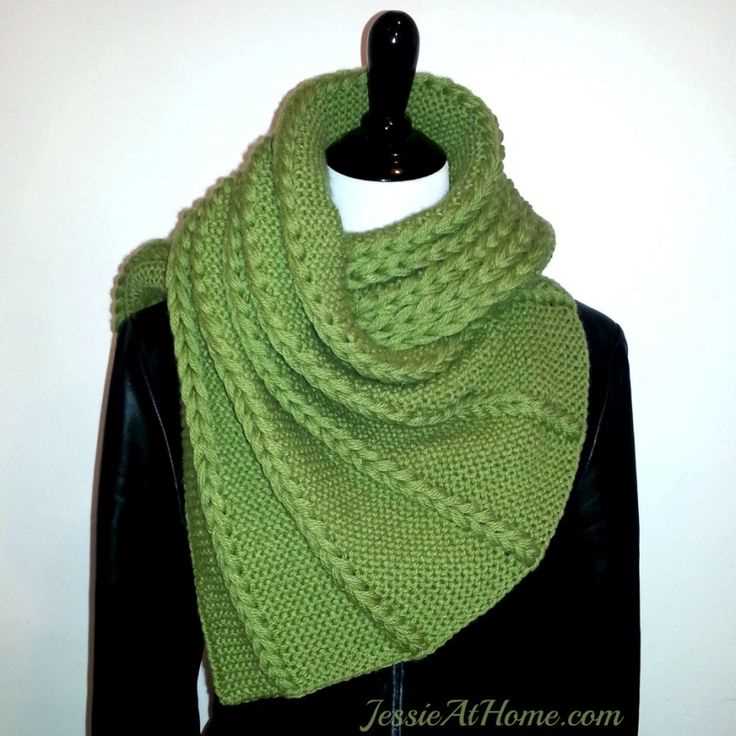
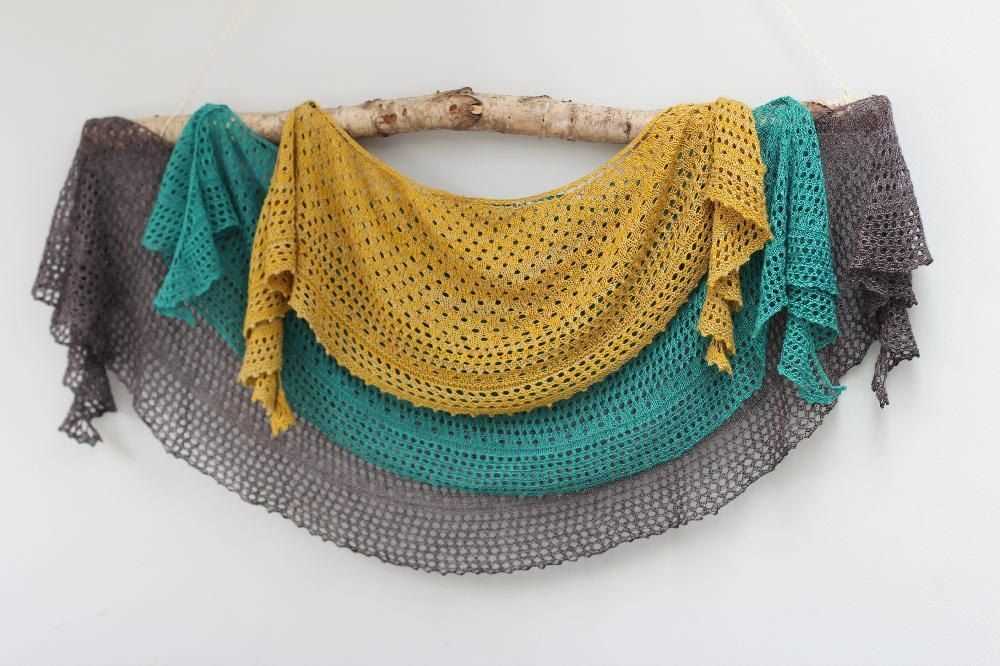
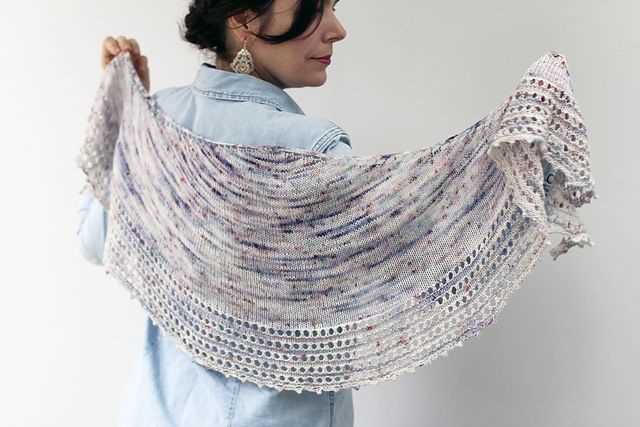
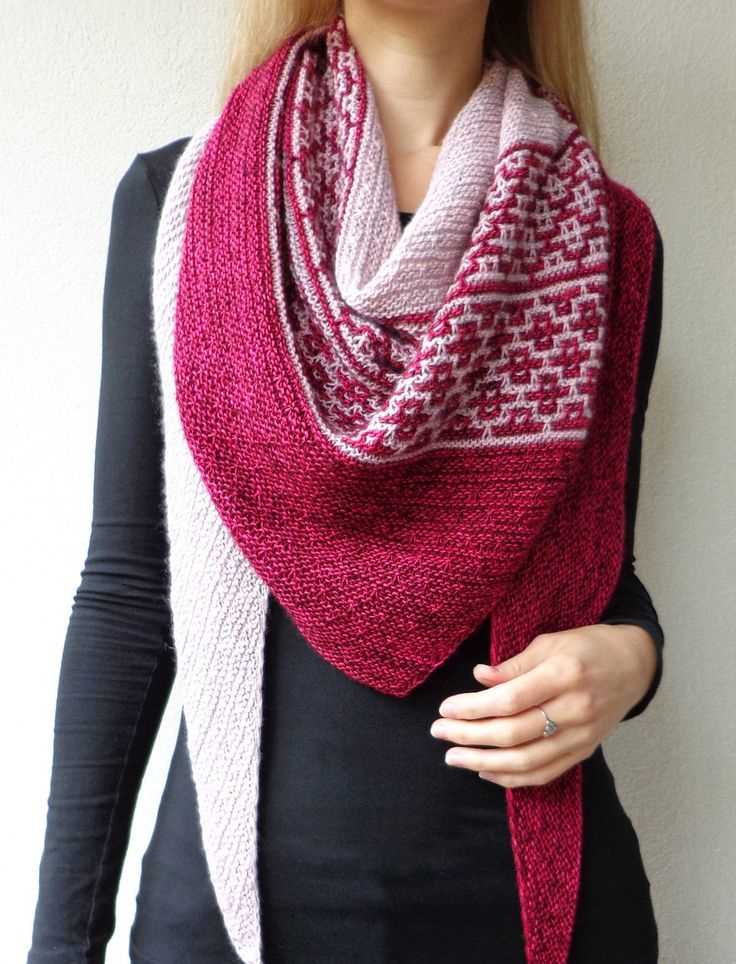
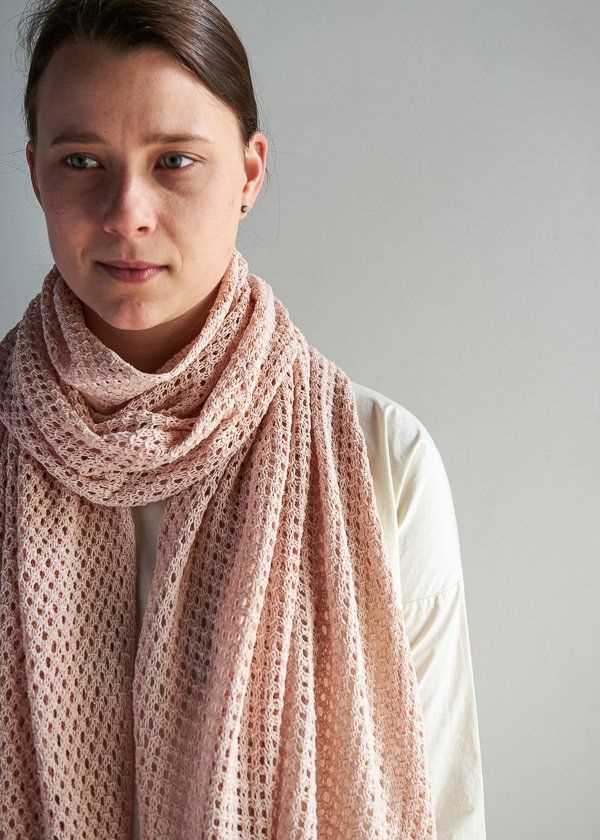
If you’re looking for a versatile and stylish accessory to add to your winter wardrobe, a shawl scarf wrap is the perfect choice. With its cozy warmth and fashionable look, it can be worn in various ways to suit your personal style. Whether you prefer a classic wrap around the shoulders, a cozy scarf draped around the neck, or a stylish shawl worn over the arms, this knitting pattern will help you create the perfect accessory.
This knitting pattern is designed for intermediate level knitters who have some experience with lace knitting patterns. It features a beautiful lace stitch pattern that adds a delicate and feminine touch to the shawl scarf wrap. The pattern includes detailed instructions and charts to guide you through the knitting process, ensuring that you can create a stunning accessory with ease.
To knit the shawl scarf wrap, you will need a set of circular knitting needles and a skein of yarn with the appropriate weight and fiber content. The pattern provides recommendations for yarn and needle size, but you can also experiment with different yarns to achieve the desired drape and texture.
Once you have gathered all the necessary materials, you can begin knitting the shawl scarf wrap. The pattern starts with casting on and continues with the lace stitch pattern, increasing and decreasing stitches to create the desired shape and size. The pattern also includes instructions for finishing the edges and blocking the finished piece to ensure that it acquires its final shape and drapes beautifully when worn.
With its timeless style and versatility, the shawl scarf wrap is a must-have accessory for any knitter. Whether you choose to make it for yourself or as a gift for a loved one, this knitting pattern will help you create an elegant and sophisticated accessory that will keep you warm and stylish throughout the colder months.
Choosing the Right Yarn
When it comes to knitting a shawl scarf wrap, choosing the right yarn is essential to achieving the desired outcome. The yarn you choose will greatly impact the drape, warmth, and overall look of your finished project. There are several factors to consider when selecting the right yarn for your shawl scarf wrap.
Fiber Content: The fiber content of the yarn will determine its characteristics and performance. Some popular yarn options for shawl scarf wraps include wool, alpaca, silk, cashmere, and acrylic. Wool yarns provide warmth and bounce, while alpaca yarns offer softness and drape. Silk yarns give a luxurious sheen, and cashmere yarns provide ultimate softness. Acrylic yarns are often chosen for their affordability and easy care.
Weight: The weight of the yarn refers to its thickness or gauge. Shawl scarf wraps can be knit with a variety of yarn weights, from lace to bulky. The weight of the yarn will determine the drape and texture of your finished project. Lighter weight yarns will create a delicate and airy shawl, while heavier weight yarns will result in a more substantial and cozy wrap.
- Color: The color of the yarn is another important consideration. The color you choose for your shawl scarf wrap can greatly affect its overall appearance and how well it matches your personal style and wardrobe. Consider whether you want to make a statement with a bold and vibrant color or opt for a neutral shade that will easily coordinate with your outfits.
- Texture: The texture of the yarn can also play a role in the look and feel of your shawl scarf wrap. Yarns with a smooth texture will create a more polished and refined look, while textured yarns, such as bouclé or mohair, can add depth and visual interest to your project.
Ultimately, the choice of yarn for your shawl scarf wrap will depend on your personal preferences and the desired characteristics of your finished project. Take the time to explore different yarn options, swatch and experiment with different colors and textures, and enjoy the process of creating a unique and beautiful shawl scarf wrap.
Selecting Needles
When it comes to knitting your shawl scarf wrap, selecting the right needles is crucial to achieving the desired look and feel of your project. There are several factors to consider when choosing your needles, including the material, size, and type.
Material: Needles can be made from different materials, such as metal, wood, or plastic. Each material has its own unique properties that can affect your knitting experience. Metal needles, like stainless steel or aluminum, are known for their smoothness, which allows the yarn to glide easily. Wood needles, such as bamboo or birch, have a natural warmth and grip that can be beneficial when working with slippery yarns. Plastic needles are lightweight and affordable, making them a popular choice for beginners.
Size: The size of your needles will determine the gauge or tension of your knitting. The recommended needle size for your pattern will usually be indicated in the instructions. You can find needles in a range of sizes, from very thin and delicate (such as US 0 or 2 mm) to larger and thicker (such as US 15 or 10 mm). It’s important to use the correct size needles to ensure that your finished shawl scarf wrap matches the intended dimensions.
Type: There are different types of needles to choose from, depending on your personal preference and knitting technique. Straight needles have a pointed end on one side and a stopper on the other, and they are used for flat knitting. Circular needles have two needle tips connected by a flexible cable, which allows you to knit in the round or work larger projects. Double-pointed needles (DPNs) are shorter and have points on both ends, making them suitable for knitting small diameter projects, like sleeves or socks.
In conclusion, when selecting needles for your shawl scarf wrap knitting pattern, consider the material, size, and type that best suit your project and knitting style. Take into account the recommendations in the pattern instructions and your personal preferences to ensure a successful knitting experience and a beautifully finished shawl scarf wrap.
Casting On
When starting a knitting project, the first step is to cast on. This is the process of creating the first row of stitches on the knitting needle. The way you cast on will depend on the type of project you are working on and the desired edge finish.
There are several different methods for casting on, each with its own advantages and uses. The most common method is the long tail cast on, which creates a neat and flexible edge. To do this, you will need to estimate the amount of yarn you will need for the desired number of stitches and leave a long tail. The tail is then used to create the new stitches by looping it around the needle.
Another method is the knitted cast on, which is a great choice for projects that require a stretchy edge. This method involves knitting a stitch onto the needle and then using that new stitch to create the next one. It creates a smooth and flexible edge.
Other casting on methods include the cable cast on, the provisional cast on, and the backward loop cast on. Each method has its own uses and benefits, so it’s worth experimenting with different techniques to find the one that works best for your project.
Once you have cast on your stitches, you are ready to begin knitting your shawl, scarf, or wrap pattern. Remember to keep your tension consistent and enjoy the process of creating a beautiful and functional garment.
Knit Stitch
The knit stitch is one of the basic stitches in knitting. It is used to create a smooth, flat fabric with a distinctive “V” pattern. When knitting, the knit stitch is created by inserting the right-hand needle into the front of the loop on the left-hand needle and pulling the yarn through to create a new loop. This process is repeated for each stitch across the row.
The knit stitch can be used in many different patterns and projects, including shawls, scarves, and wraps. It can be worked in various combinations with other stitches to create different textures and patterns. For example, combining the knit stitch with the purl stitch creates the stockinette stitch, which is commonly used for garments.
The knit stitch is also known for its versatility and ease of learning. It is an essential stitch for beginners, as it forms the foundation for many knitting techniques. With practice, knitters can increase their speed and accuracy in working the knit stitch, allowing them to create beautiful and intricate designs.
When following a knitting pattern, the knit stitch is often represented by the abbreviation “k” or “K” for knit. This makes it easy to identify when reading a pattern and helps to keep track of the stitches. By mastering the knit stitch, knitters can explore a wide range of patterns and create unique and personalized projects.
Purl Stitch
The purl stitch is one of the essential stitches in knitting. It creates a bumpy, textured pattern on the fabric, and is often used in combination with the knit stitch to create various designs. The purl stitch is the reverse of the knit stitch, with the yarn brought in front of the needle instead of behind it. To purl, insert the tip of the right needle into the first stitch on the left needle from right to left, wrap the yarn counterclockwise around the right needle, and pull the right needle through the stitch, slipping it off the left needle. Repeat this process for each stitch until the row is complete.
The purl stitch is commonly used to create ribbing, which is a popular design element in scarves, sweaters, and other knitted garments. Ribbing is created by alternating knit and purl stitches in a specific pattern, such as knitting two stitches and then purling two stitches. This creates a stretchy, elastic fabric that is often used for cuffs, hems, and collars. The purl stitch is also used in lace knitting to create intricate patterns and motifs.
The purl stitch can be a bit tricky for beginners, as it requires a different hand and finger movement compared to the knit stitch. It is important to keep the tension of the yarn consistent and not pull too tightly or too loosely. Practice and patience are key to mastering this stitch. Once you have learned the purl stitch, you can explore various knitting patterns and create beautiful shawls, scarves, and wraps with unique textures and designs.
Increasing stitches is an essential technique in knitting that allows you to create larger or more complex patterns. By adding stitches to your work, you can increase the width or length of your project, or create decorative elements such as lace or cables.
There are several methods for increasing stitches, depending on the desired effect and the stitch pattern you are working with. One common method is the yarn over (YO) increase, where you simply bring the yarn to the front of the work between the needles and then continue knitting the next stitch. This creates a new stitch and a small hole or eyelet in the fabric.
Another method is the make one (M1) increase, which involves picking up the horizontal loop of yarn between stitches and knitting into it. This creates a new stitch without leaving a hole in the fabric.
In addition to these basic increases, there are also more advanced techniques such as the lifted increase or the knit front and back (KFB) increase. These methods create more pronounced increases and can be used to add shaping or decorative elements to your knitting.
When increasing stitches, it’s important to maintain an even tension and spacing to ensure your fabric doesn’t become distorted. Take care to space your increases evenly along the row or round, and always check your work to make sure you haven’t missed any increases or made any mistakes.
By mastering the technique of increasing stitches, you can explore a wide range of knitting patterns and create beautiful, intricate designs. Whether you’re knitting a shawl, scarf, or wrap, understanding how to increase stitches will open up countless possibilities for your knitting projects.
Decreasing Stitches
When knitting a shawl scarf wrap, it is important to know how to decrease stitches in order to shape the garment. There are several different methods for decreasing stitches, each of which creates a slightly different effect.
To decrease stitches, you can use techniques such as knit two together (K2tog), slip slip knit (SSK), and slip slip slip knit (SSSK). K2tog involves knitting two stitches together as if they were one, while SSK and SSSK involve slipping stitches individually and then knitting them together.
- Knit Two Together (K2tog): Insert your right-hand needle into the front of the next two stitches on your left-hand needle, and knit them together as if they were one stitch. This decreases one stitch.
- Slip Slip Knit (SSK): Slip the next two stitches, one at a time, from your left-hand needle to your right-hand needle as if to knit. Insert the left-hand needle into the front of the slipped stitches, and knit them together through the back loop. This decreases one stitch.
- Slip Slip Slip Knit (SSSK): Slip the next three stitches, one at a time, from your left-hand needle to your right-hand needle as if to knit. Insert the left-hand needle into the front of the slipped stitches, and knit them together through the back loop. This decreases two stitches.
When decreasing stitches, it is important to follow the pattern instructions carefully to ensure the correct shaping. Pay attention to where the decreases are placed and how many stitches are decreased at a time. By using these decreasing techniques, you can create a shawl scarf wrap with the desired shape and fit.
Binding Off
Once you have completed all the rows of your shawl scarf wrap, it’s time to bind off. Binding off is the final step in the knitting process, where you secure the stitches and create a finished edge. There are several methods you can use to bind off, and the one you choose will depend on the look and stretchiness you want for your shawl scarf wrap.
One common method for binding off is the basic bind off. To do this, knit the first two stitches, then insert your left needle into the first stitch on your right needle. Lift it over the second stitch and off the right needle, leaving one stitch on your right needle. Knit the next stitch and repeat the process until you have only one stitch left on your right needle. Finally, cut the yarn, leaving a tail, and pull it through the last stitch to secure it.
If you want to create a stretchier bind off, you can use a stretchy bind off method. One example is the Jeny’s Surprisingly Stretchy Bind Off. This method involves working knit and yarn over stitches in a specific sequence to create extra stretch in the finished edge. It is a great choice if you want your shawl scarf wrap to have a more relaxed and stretchy edging.
Remember to always experiment with different bind off methods and tension to see which one works best for your project. You can also add a decorative bind off by using a picot or lace bind off pattern, which adds a delicate edge to your shawl scarf wrap. Whatever method you choose, binding off is an important step in completing your knitting project and ensuring a polished finish.
Blocking and Finishing

After you have finished knitting your shawl scarf wrap, it is important to block and finish it to achieve the desired shape and size. Blocking is the process of shaping and setting your knitted piece by wetting it and allowing it to dry in the desired shape.
Here are some steps to block and finish your shawl scarf wrap:
- Wash: Fill a basin with lukewarm water and add a small amount of mild soap or wool wash. Gently immerse your knitted piece and soak it for about 15 minutes. Do not agitate or wring the fabric.
- Rinse: Drain the soapy water and refill the basin with clean lukewarm water. Gently squeeze the excess water from your knitted piece and place it in the clean water. Repeat this process until the water runs clear.
- Blocking: Lay a clean towel on a flat surface and place your knitted piece on top. Gently stretch and shape the fabric to your desired dimensions. Use pins or blocking wires to hold the fabric in place. Allow the shawl scarf wrap to dry completely.
- Finishing: Once your shawl scarf wrap is dry, remove the pins or blocking wires. Trim any loose threads or yarn ends. You can also add fringe or other embellishments if desired.
Blocking and finishing your shawl scarf wrap will not only give it a professional and polished look, but it will also help to relax the stitches and bring out the beauty of the yarn. It is an essential step in the knitting process and should not be skipped.
With these tips and techniques, you can confidently create a stunning shawl scarf wrap that will showcase your knitting skills and provide warmth and style for years to come.