
If you have a passion for knitting and love marine animals, this free whale knitting pattern is perfect for you. With just a few skeins of yarn and some basic knitting skills, you can create your very own adorable whale toy. Whether you want to knit it for yourself or gift it to a friend, this pattern is sure to bring joy to anyone who sees it.
This pattern features beginner-friendly instructions, making it suitable for knitters of all skill levels. Even if you’re new to knitting, you’ll be able to follow along and create a beautiful whale toy. The finished product is approximately 10 inches long and 6 inches tall, making it the perfect size to cuddle or display on a shelf.
To get started, you’ll need some yarn in the colors of your choice. This pattern works well with both solid colors and variegated yarns, so feel free to get creative with your color choices. You’ll also need a pair of knitting needles in a size that matches the weight of your yarn, a tapestry needle for sewing up the seams, and some stuffing to give your whale its shape.
Why Knit a Whale?
Knitting is not just a fun and creative hobby, but also a great way to bring joy and comfort to yourself and others. When it comes to choosing a project, there are endless possibilities, and one of them is knitting a whale. But why would you want to knit a whale? Let’s explore some reasons.
1. Adorable Decor: A knitted whale can serve as a charming and whimsical piece of decoration for your home or office. Whether you place it on a shelf, on your desk, or in a child’s room, it adds a touch of playful personality to any space.
2. Unique Gift: A hand-knitted whale can make a special and heartfelt gift for your loved ones. Whether it’s a baby shower, birthday, or just a token of appreciation, a knitted whale showcases the time, effort, and thoughtfulness you put into creating something unique for them.
3. Educational Tool: Knitted toys, like whales, can be used as educational tools for children. They can help in teaching about marine life, habitats, and conservation. Additionally, through imaginative play, children can develop their fine motor skills and creativity while interacting with their knitted whale.
4. Stress Reliever: Knitting, in general, is known for its therapeutic benefits, helping to reduce stress and anxiety. The repetitive motions and focus required in knitting can have a calming effect on the mind, and the satisfaction of creating something beautiful can boost your mood. Knitting a whale can add an extra level of relaxation as you work on a pattern inspired by nature.
5. Challenging Project: If you’re an experienced knitter, knitting a whale pattern can be an exciting challenge. With different techniques like colorwork, shaping, and adding details, it can expand your skills and provide a sense of accomplishment. It’s a project that will keep you engaged and eager to see the final result.
In conclusion, knitting a whale can bring joy, serve as a unique gift or decoration, provide educational opportunities, help relieve stress, and offer a challenging project for experienced knitters. So grab your knitting needles, choose a whale pattern that speaks to you, and embark on a knitting adventure!
Choosing the right yarn
When it comes to knitting a whale, choosing the right yarn is crucial. The yarn you choose will determine the overall look and feel of your knitted whale, so it’s important to select a yarn that is suitable for the project.
Weight: The weight of the yarn refers to its thickness. For a whale knitting pattern, it is recommended to use a medium weight or worsted weight yarn. This yarn weight will provide a good balance between being easy to work with and creating a whale that has enough structure and durability.
Material: The material of the yarn will also affect the finished product. Acrylic yarn is a popular choice for knitting whales as it is soft, durable, and comes in a wide range of colors. Cotton yarn is also a good option, as it provides a more natural and environmentally-friendly choice. Consider the specific qualities you want in your knitted whale and choose a yarn material accordingly.
Color:
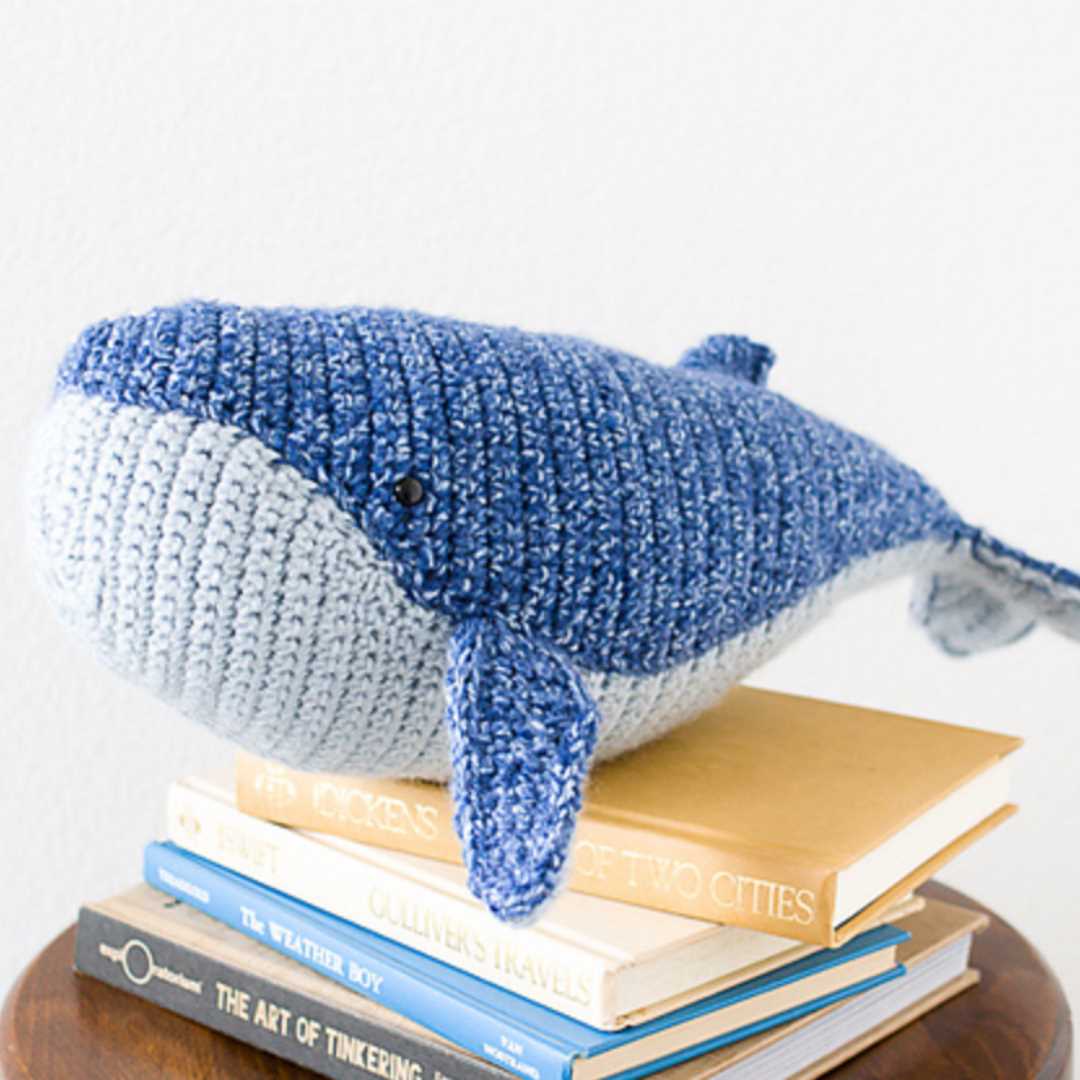
When selecting a yarn color for your knitted whale, consider the look you want to achieve. Traditional whales are often shades of blue or gray, but you can also get creative and use different colors to make your whale unique. Consider the purpose of your knitted whale – is it for a child’s toy, a decoration, or a gift for someone special? The color of the yarn can help convey the intended message or theme.
Texture:
The texture of the yarn can also add visual interest to your knitted whale. Smooth, even yarn will create a sleek and polished look, while yarn with a textured or fuzzy finish can add depth and dimension to the whale’s surface. Consider the overall aesthetic you want to achieve and choose a yarn with an appropriate texture.
- Medium or worsted weight yarn is recommended for a knitted whale.
- Acrylic or cotton yarn are popular choices for their softness and durability.
- Consider the color of the yarn to convey the intended message or theme.
- Texture can add visual interest to the knitted whale.
Required Knitting Skills
When it comes to knitting a free whale pattern, there are a few skills that you will need to have in order to successfully complete the project. Whether you are a beginner or an experienced knitter, these skills will come in handy when creating your knitted whale.
Casting On
The first skill you will need is casting on. This is the process of creating the first row of stitches on your knitting needle. It’s important to cast on the correct number of stitches for your pattern, as this sets the foundation for your project. There are various methods of casting on, including the long-tail cast-on, the knitted cast-on, and the cable cast-on. Each method has its own benefits and uses, so it’s a good idea to familiarize yourself with them.
Knitting and Purling
The next skill you will need is knitting and purling. These are the two basic stitches used in knitting. Knitting creates a smooth, V-shaped stitch, while purling creates a bumpy, horizontal stitch. You will need to know how to knit and purl in order to create the different textures and patterns required for your whale. Practice these stitches on a small swatch before starting your project to ensure that you are comfortable with them.
Increasing and Decreasing
Another skill you will need is increasing and decreasing. These techniques are used to shape your knitting and create the curves and angles required for your whale. Increasing involves adding stitches to your work, while decreasing involves removing stitches. Common methods of increasing include knitting or purling into the front and back of a stitch or making yarn overs, while common methods of decreasing include knitting two stitches together or slipping a stitch. Understanding and practicing these techniques will help you create the desired shape for your whale.
In addition to these skills, it’s also important to have a good understanding of reading and following knitting patterns, as well as basic finishing techniques such as binding off and weaving in ends. With these skills in your knitting repertoire, you will be well-equipped to tackle the free whale knitting pattern and create your very own knitted whale masterpiece.
Step-by-step instructions
To knit a whale using the free pattern, follow these step-by-step instructions:
Materials:
- 4mm knitting needles
- Worsted weight yarn in two colors (blue and white)
- Yarn needle
- Polyester fiberfill
Instructions:
- Cast on: Begin by casting on 40 stitches using the blue yarn.
- Garter stitch: Knit every row for the next 6 rows to create the garter stitch pattern.
- Main body: Switch to the white yarn and knit every row for the next 20 rows to form the main body of the whale.
- Fin: Switch back to the blue yarn and knit 8 rows. On the 9th row, decrease 2 stitches at the beginning and end of the row.
- Eye: Switch to the white yarn and knit 4 rows. On the 5th row, decrease 1 stitch at the beginning and end of the row.
- Stuffing: Cut the yarn, leaving a long tail. Thread the tail through a yarn needle and stitch the sides of the whale together, leaving a small opening for stuffing. Stuff the whale with polyester fiberfill and sew the opening closed.
- Tail: Attach the blue yarn to the bottom of the whale and knit 8 rows. On the 9th row, decrease 2 stitches at the beginning and end of the row.
- Finishing touches: Weave in any loose ends and trim excess yarn. Use the yarn needle to embroider a small eye on the whale’s face.
And there you have it – a cute knitted whale using the free pattern. Enjoy your new knitted friend or gift it to someone special!
Adding details to your whale
Once you have completed the basic knit shape of your whale, it’s time to add some details to make it come to life. These details will give your whale character and make it more realistic.
Eyes: Start by sewing on the eyes. You can use black buttons, safety eyes, or sew them on with black yarn. Place them on the head, about 1/3 of the way down from the top, and evenly spaced apart.
Mouth: To create the mouth of the whale, embroider a smile using black yarn or embroidery thread. Start by making a small stitch in the center of the face, then create a curved line to form the smile. Try different shapes and sizes to give your whale a unique expression.
Fin: For the fin, you can either knit a separate piece and sew it onto the main body, or you can knit it directly onto the body by picking up stitches along the back. It’s up to you to decide the shape and size of the fin, whether it’s a traditional dorsal fin or a more whimsical design.
Tail: The tail of the whale can be knitted separately and sewn onto the body, or you can continue knitting the body in a tapered shape to create the tail. Experiment with different shaping techniques to achieve the desired effect.
Belly: If you want to add a contrasting color to your whale, consider knitting a different color for the belly. This can be achieved by switching yarn colors or creating a separate belly piece and sewing it onto the body. It will give your whale a pop of color and make it more visually interesting.
Surface texture: To add more texture and dimension to your whale, you can experiment with different knitting techniques. For example, you can use purl stitches to create a ribbed or textured effect on certain parts of the body, such as the belly or the fins. This will make your whale more tactile and visually appealing.
Tips and Tricks for Knitting a Free Whale Pattern
Knitting a whale pattern can be a fun and rewarding project for knitters of all skill levels. Whether you’re a beginner or an experienced knitter, here are some tips and tricks to help you create a beautiful whale using a free knitting pattern:
1. Choose the Right Yarn
When selecting yarn for your whale, consider the texture and weight of the yarn. A smooth and soft yarn with a bit of stretch works best for creating a neat and even stitch. Look for a yarn that is suitable for your needle size and desired finished product.
2. Read and Understand the Pattern
Before starting your whale, take the time to thoroughly read and understand the pattern. Pay attention to any special stitches or techniques that may be required. Familiarize yourself with the abbreviations used in the pattern, so you don’t get confused while knitting.
3. Gauge Matters
Gauge is important in knitting projects, as it affects the size and fit of the finished product. To ensure your whale turns out the right size, take the time to create a gauge swatch before starting. Adjust your needle size if needed to match the gauge specified in the pattern.
4. Use Stitch Markers
Using stitch markers can be a helpful tool to keep track of your stitches and pattern repeats. Place markers in key points of the pattern, such as the beginning of a round or a specific stitch repeat. They will help you avoid mistakes and keep your knitting organized.
5. Practice Proper Tension
Consistent tension is essential for achieving an even and professional-looking finish. Avoid knitting too tightly or too loosely, as it can affect the overall appearance and shape of your whale. Take breaks if you feel your hands getting tired to maintain a steady tension.
6. Pay Attention to Details
Whales have distinct features like eyes, fins, and a tail. Pay special attention to these details while working on your whale. Take the time to embroider or sew on the facial features neatly, and position the fins and tail correctly to bring your whale to life.
- Choose the Right Yarn
- Read and Understand the Pattern
- Gauge Matters
- Use Stitch Markers
- Practice Proper Tension
- Pay Attention to Details
By following these tips and tricks, you’ll be on your way to knitting a beautiful and adorable whale using a free knitting pattern. Enjoy the process and have fun creating your very own knitted whale!
Whale Knitting Variations
Knitting enthusiasts love the versatility and creative possibilities that come with different knitting patterns. When it comes to knitting whales, there are several variations to choose from. Whether you’re a beginner or an experienced knitter, these patterns offer something for everyone.
1. Classic Whale Pattern
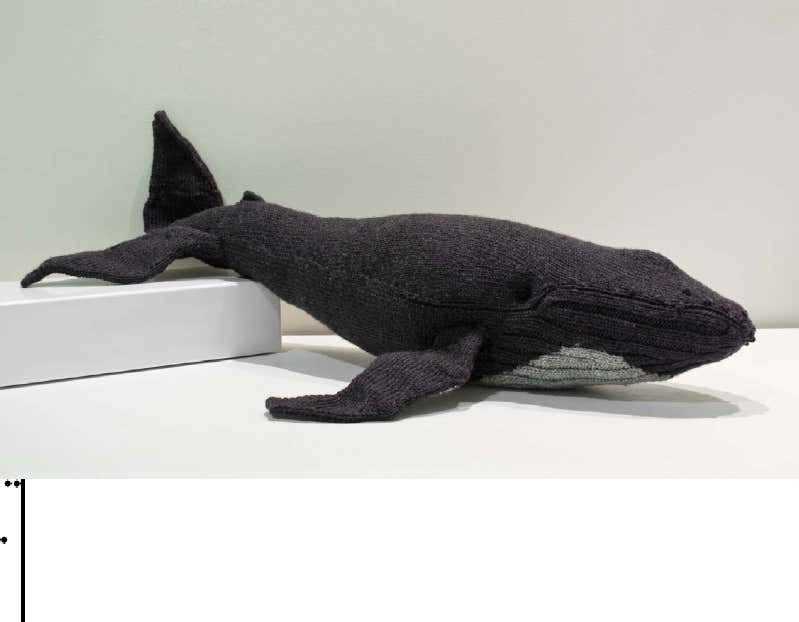
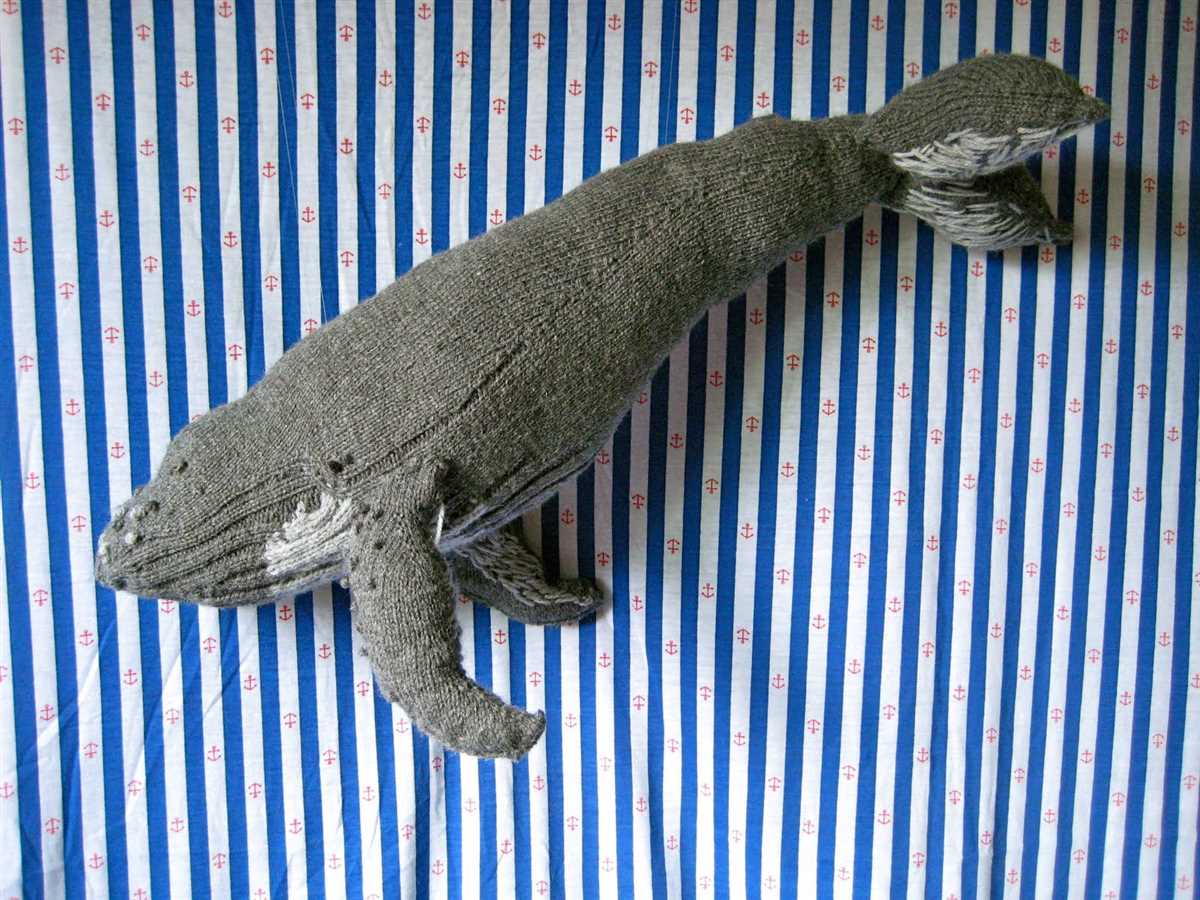
The classic whale pattern is a popular choice for knitters who want to create a traditional-looking whale. This pattern typically includes a textured body, fins, and a tail, allowing you to add realistic details to your knitted whale. With this pattern, you can recreate the majestic beauty of a whale in your own hands.
2. Cute and Cuddly Whale Pattern
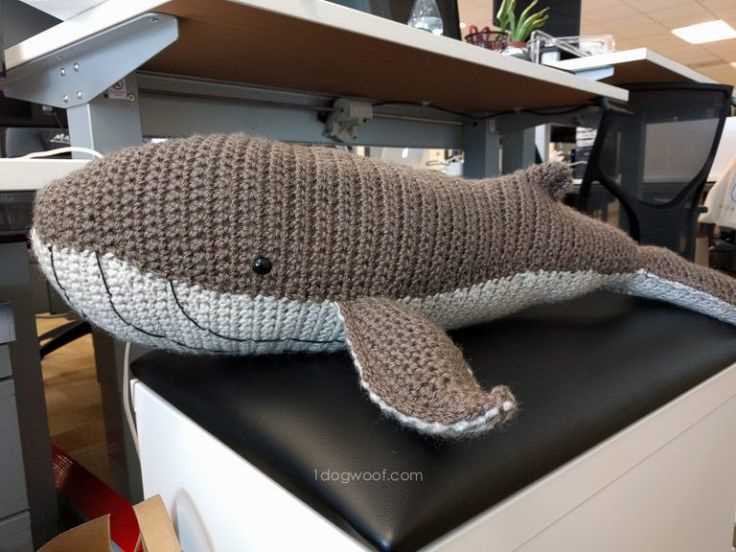
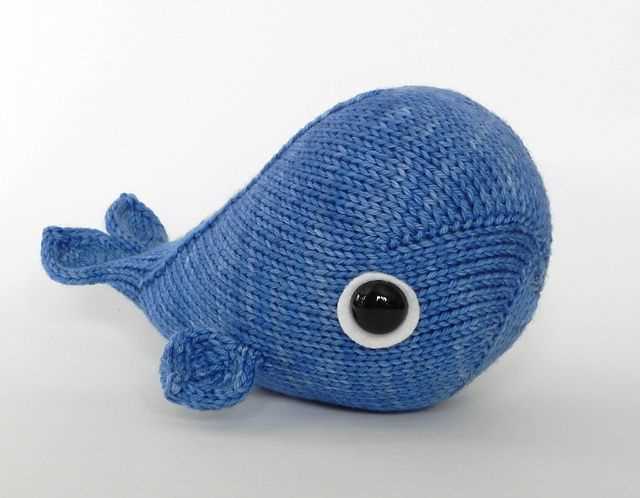
If you’re looking to create a whimsical and adorable knitted whale, the cute and cuddly whale pattern is perfect for you. This pattern often features a softer texture and rounder shape, making it ideal for creating a plush toy or a charming decorative piece. Kids and adults alike will love the cute and cuddly appeal of this knitted whale variation.
3. Miniature Whale Pattern
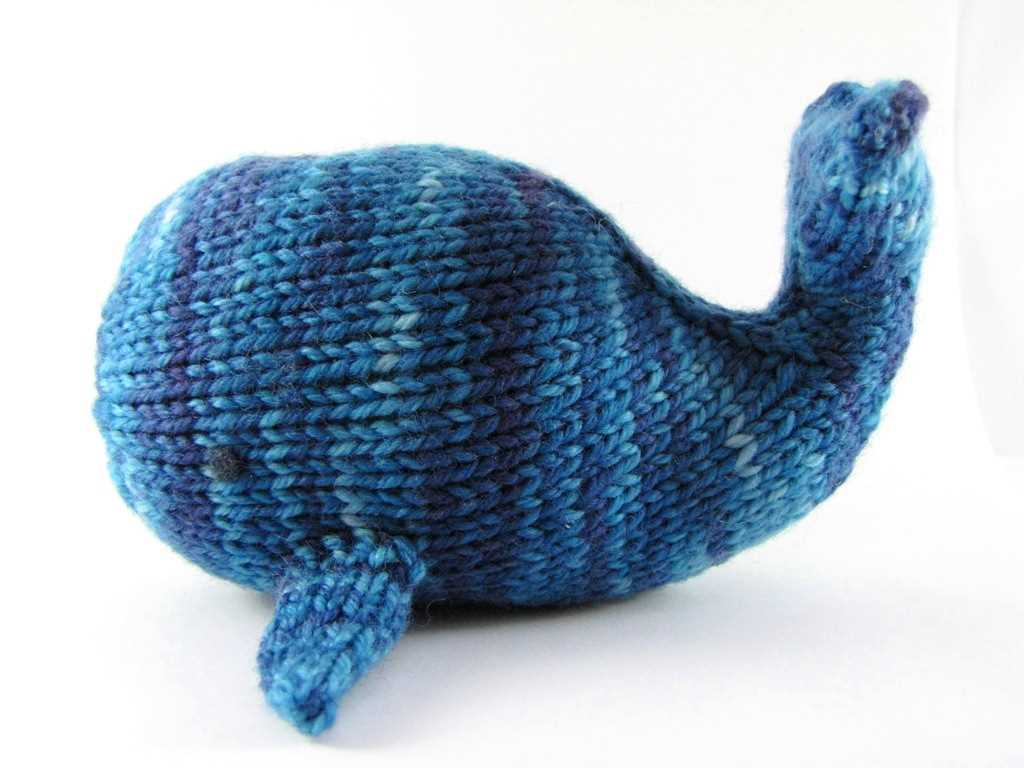
If you’re short on time or prefer smaller knitting projects, the miniature whale pattern is an excellent choice. This pattern allows you to create tiny whales that can be used as keychains, ornaments, or even as part of a larger sea-themed project. The miniature whale pattern is a fun and quick knitting project that can be easily completed in an afternoon.
These are just a few examples of the whale knitting variations available. Whether you prefer a classic design or want to explore more whimsical options, there is a pattern out there that will suit your style and skill level. So grab your knitting needles and start creating your own adorable whale masterpiece!
Finishing touches
Once you have completed knitting your adorable whale, it’s time to add the finishing touches. These final details will really bring your creation to life and make it even more special.
One important step is to attach the eyes. You can use small black buttons or sew on some black beads to give your whale a cute and expressive look. Make sure to secure them tightly so they don’t come off easily. Alternatively, you can embroider the eyes using black thread.
To give your whale a charming smile, use a contrasting color of yarn to carefully stitch a curved line across its face. You can make it as subtle or as pronounced as you like, depending on the expression you want to give your whale.
Next, you can add some personality to your whale by knitting or crocheting accessories for it. You can make a tiny hat, a scarf, or even a little bow tie. This will not only add a touch of style but also make your whale more customizable and unique. Use different colors and textures to make the accessories stand out.
If you want to make your whale more huggable, you can stuff it with extra filling. This will make it softer and give it a squishy texture that is perfect for cuddling. Make sure to stuff it evenly and firmly to maintain its shape.
Finally, you can give your whale a name and attach a little tag or label to identify it. This will add a personal touch and make it feel like a cherished companion. You can also write down the date and any special notes on the tag to remember the occasion.
By adding these finishing touches, you will create a truly unique and lovable whale that will bring joy to whoever receives it. Enjoy the process and have fun making your handcrafted masterpiece!
Final Thoughts
In conclusion, the free whale knitting pattern offers a fun and creative way to engage in the art of knitting. Whether you are a beginner or an experienced knitter, this pattern is easy to follow and allows you to create a cute and adorable whale toy.
By using various knitting techniques such as knitting, purling, increasing, and decreasing, you can bring your whale to life. The pattern provides step-by-step instructions, making it accessible to knitters of all levels.
Knitting is not only a productive hobby but also a therapeutic activity that can help reduce stress and improve focus. Creating a knitted whale allows you to unwind and relax while producing a beautiful and unique toy.
Whether you are knitting for yourself or for a loved one, the finished whale will undoubtedly bring joy and happiness. It can be a lovely addition to a nursery or even a thoughtful gift for someone special.
So, grab your knitting needles, download the free whale knitting pattern, and get started on your whale-knitting journey. Happy knitting!