
Are you looking for a cozy and stylish hat to knit for yourself or a loved one? Look no further! We’ve got a free knitting pattern that is perfect for beginners and experienced knitters alike.
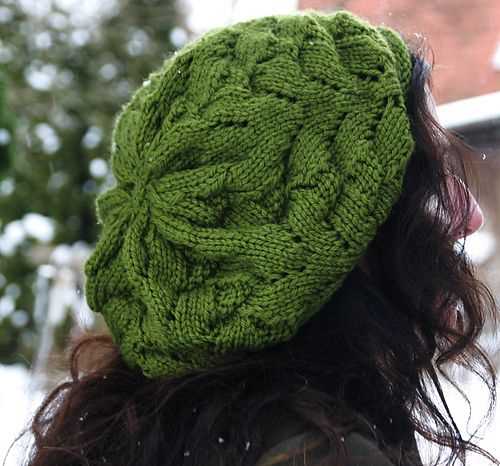
This knitted hat pattern features a simple rib stitch design, which creates a stretchy and snug fit. It is suitable for both men and women and can be customized with your favorite colors and yarns. Whether you’re knitting for yourself or as a gift, this hat is sure to keep you warm and fashionable during the colder months.
With just a few basic knitting stitches, you’ll be able to create a beautiful hat in no time. The pattern includes instructions for sizes ranging from small to large, making it easy to find the perfect fit. And the best part? It’s completely free!
The importance of a good hat pattern
When it comes to knitting a hat, having a good pattern is crucial for a successful knitting project. A well-written and detailed hat pattern provides clear instructions and guidance, allowing knitters to create a hat that fits well and looks beautiful.
A good hat pattern ensures accuracy and precision in knitting. Knitting is a precise craft that requires attention to detail, especially when it comes to sizing and shaping. A well-designed hat pattern provides accurate measurements and stitch counts, ensuring that the finished hat will fit the intended recipient perfectly. It also includes detailed instructions for shaping the crown and creating any desired patterns or designs.
A good hat pattern inspires creativity and customization. While a basic hat pattern is essential for beginners, experienced knitters often look for patterns that offer room for customization and creativity. A good hat pattern provides a solid foundation while also allowing knitters to experiment with different stitches, colors, and yarns to create a unique and personalized hat.
A good hat pattern saves time and simplifies the knitting process. Knitting can be a time-consuming craft, and a poorly written pattern can lead to frustration and wasted effort. A good hat pattern is clear and easy to follow, with concise instructions that minimize confusion. It provides a roadmap for knitters, helping them to stay organized and focused during the knitting process.
A good hat pattern fosters learning and skill development. Knitting is a continuous learning process, and each project presents an opportunity to expand skills and techniques. A well-written hat pattern introduces new stitches or techniques, allowing knitters to enhance their knitting abilities and develop their creativity. It provides clear explanations and illustrations, helping knitters understand the mechanics of knitting and apply new skills to future projects.
In conclusion, a good hat pattern is essential for a successful knitting project. It ensures accuracy, inspires creativity, saves time, and fosters learning. Whether you’re a beginner or an experienced knitter, investing in a well-designed hat pattern is key to knitting a beautiful and functional hat.
Materials and tools needed
In order to knit a hat using the free pattern, you will need the following materials and tools:
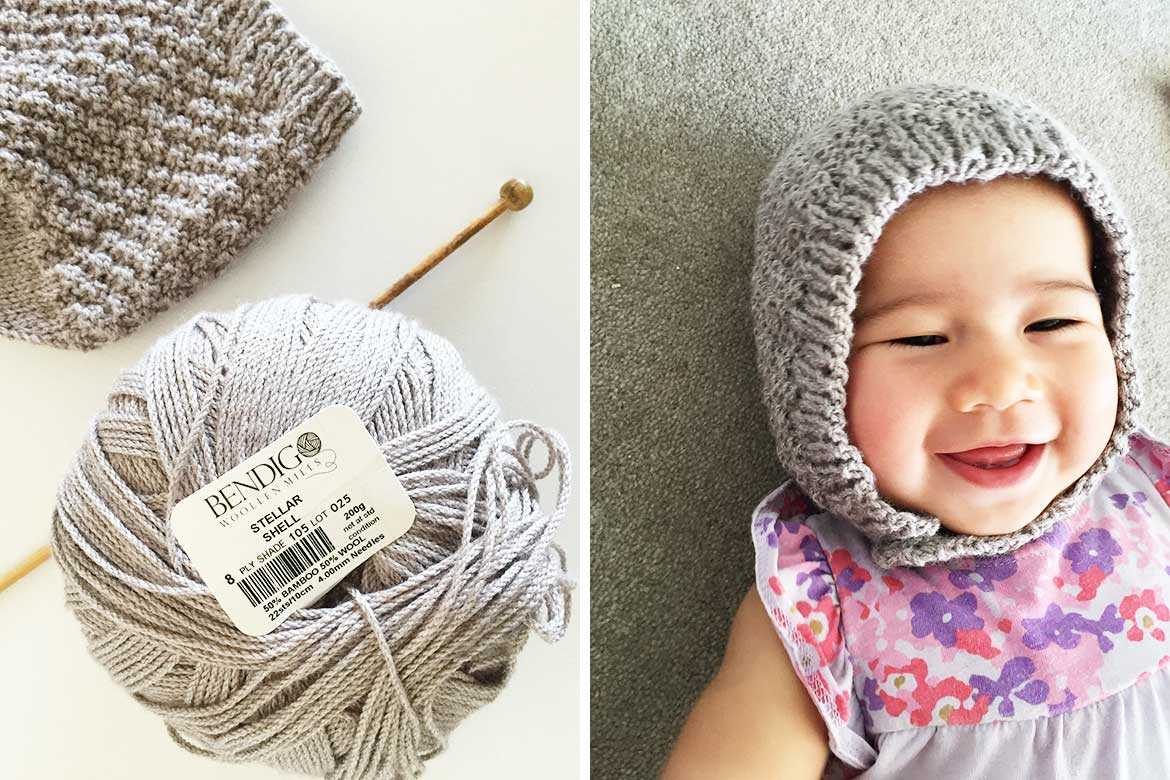
- Yarn: Choose a yarn that is suitable for knitting hats. The pattern may specify a particular type or weight of yarn, so be sure to check the instructions.
- Knitting needles: Depending on the pattern, you may need circular needles, double-pointed needles, or straight needles. Check the pattern for the recommended needle size.
- Tapestry needle: This needle is used for weaving in loose ends of yarn and sewing up any seams in the hat.
- Stitch markers: These are used to mark certain stitches or sections of the hat, making it easier to keep track of your progress.
- Scissors: You will need a pair of scissors to cut the yarn when necessary.
- Measuring tape: This is useful for measuring your gauge and ensuring that your hat will fit properly.
Make sure you have all of these materials and tools before starting the project. It’s also a good idea to read through the entire pattern to familiarize yourself with any additional requirements or techniques that may be needed. With the right materials and tools, you’ll be able to create a beautiful knitted hat using the free pattern.
Choosing the right yarn

When knitting a hat, one of the most important factors to consider is choosing the right yarn. The yarn you choose will determine the warmth, softness, and overall look of your finished hat. With so many options available, it can be overwhelming to make a decision. Here are some factors to consider when choosing yarn for your project.
1. Fiber content
The fiber content of the yarn will greatly impact the characteristics of your hat. Wool yarn is a popular choice for hats as it is warm, soft, and has good elasticity. Acrylic yarn is a more affordable option and is also lightweight and easy to care for. Other common fiber options include alpaca, cotton, and cashmere, each with their own unique qualities. Consider the properties you desire in your hat and choose a yarn that aligns with your preferences.
2. Weight
The weight of the yarn refers to its thickness and will affect the gauge and drape of your hat. Common yarn weights for hats include fingering, sport, worsted, and bulky. Fingering weight yarn will result in a more delicate and lightweight hat, while bulky weight yarn will create a chunkier and warmer hat. Consider the season and climate in which you will be wearing the hat and choose a yarn weight that suits your needs.
3. Color and pattern
The color and pattern you choose for your yarn can greatly enhance the overall look and style of your hat. Solid-colored yarn creates a classic and timeless hat, while variegated yarn adds visual interest and depth. Consider the pattern you will be using and how the colors and pattern of the yarn will interact with it. Experimenting with different color combinations and patterns can result in a truly unique and personalized hat.
By considering factors such as fiber content, weight, and color, you can choose the perfect yarn for your knitted hat project. Keep in mind your desired characteristics and style, and don’t be afraid to experiment and have fun with the process!
Getting Started: Casting On
When starting a knitted hat project, the first step is to cast on. Casting on refers to the process of creating the first row of stitches on your knitting needle. This sets the foundation for your hat and determines the size of the brim. It is important to cast on with a method that creates a stretchy and flexible edge, as this will ensure a comfortable fit.
There are several casting on methods to choose from, but one of the most common techniques for a knitted hat is the long-tail cast on. To begin, you will need to estimate the amount of yarn that you will need for the cast on. A general rule of thumb is to measure a tail that is about three times the width of the hat brim you want to knit.
To perform the long-tail cast on, hold the yarn in your right hand and create a slipknot about six inches from the end. Place the slipknot on the left needle and tighten it. Hold the yarn with your thumb and index finger of your right hand and hold the needle with your left hand.
Next, insert the right needle into the slipknot from left to right, going under the left-hand needle. With your right hand, wrap the yarn around the right needle counterclockwise. Use the right needle to pull the loop of yarn through the slipknot.
Repeat this process of inserting the needle, wrapping the yarn, and pulling it through the loop until you have cast on the desired number of stitches for your hat. Make sure to keep the tension even, but not too tight, to ensure that the edge remains stretchy.
Once you have cast on all the stitches, you are ready to start knitting the brim of your hat. Follow the pattern instructions to continue knitting in the desired stitch pattern and create a cozy and stylish hat.
Basic knitting stitches
Knitting is a craft that involves creating fabric by interlocking loops of yarn using knitting needles. There are several basic stitches that every knitter should learn in order to create different patterns and textures.
The knit stitch is the most fundamental stitch in knitting. It is created by inserting the needle into the front of the loop from left to right, wrapping the yarn around the needle, and pulling the loop through. This creates a smooth and flat right side of the fabric.
The purl stitch is another basic stitch that is commonly used in knitting. It is the opposite of the knit stitch and creates a raised bump on the right side of the fabric. To purl, the needle is inserted from right to left, the yarn is wrapped around the needle, and the loop is pulled through.
Combining the knit and purl stitches in different patterns creates various textures and designs. For example, the stockinette stitch is created by knitting one row and purling the next row. This results in a smooth and flat right side and a bumpy wrong side.
Other basic knitting stitches include the garter stitch, which involves knitting every row, and the rib stitch, which alternates knit and purl stitches in a specific pattern. These stitches can be combined and modified to create intricate patterns and designs in knitted garments.
Overall, learning the basic knitting stitches is essential for any beginner knitter. Once these stitches are mastered, knitters can explore more advanced techniques and create beautiful and unique knitted projects.
The hat body: knit and purl
The body of the hat is created by using a combination of knit and purl stitches. These two basic stitches are the foundation of many knitting patterns and can be easily mastered by beginners.
When knitting, the knit stitch is formed by inserting the right-hand needle through the front of the stitch on the left-hand needle, wrapping the yarn around the right-hand needle, and pulling it through to create a new stitch. The purl stitch, on the other hand, is formed by inserting the right-hand needle through the back of the stitch on the left-hand needle, wrapping the yarn around the right-hand needle, and pulling it through to create a new stitch.
To create the pattern for the hat body, you will need to alternate between rows of knit stitches and rows of purl stitches. This will create a textured fabric with a combination of raised stitches (knit) and recessed stitches (purl).
One common pattern for the hat body is the rib stitch, which is created by alternating between knit and purl stitches in the same row. This creates a stretchy and flexible fabric that is perfect for hats and other accessories. Another popular pattern is the stockinette stitch, which is created by knitting one row and purling the next. This creates a smooth and flat fabric that is great for showing off variegated or textured yarns.
By incorporating knit and purl stitches into the body of your hat, you can create a wide variety of patterns and textures. Whether you prefer a simple and classic rib stitch or a more intricate cable or lace pattern, the possibilities are endless. Experiment with different stitch combinations and yarns to create a hat that is unique and personalized.
Shaping the crown
When knitting a hat, shaping the crown is an important step to create the desired fit and style. There are several methods to shape the crown, depending on the design and the desired outcome.
One common method is to decrease stitches evenly around the circumference of the hat. This can be achieved by dividing the stitches into sections and decreasing a certain number of stitches in each section. For example, you can decrease two stitches in each section every other round until the desired number of stitches remain. This creates a tapered effect, giving the hat a more fitted look at the top.
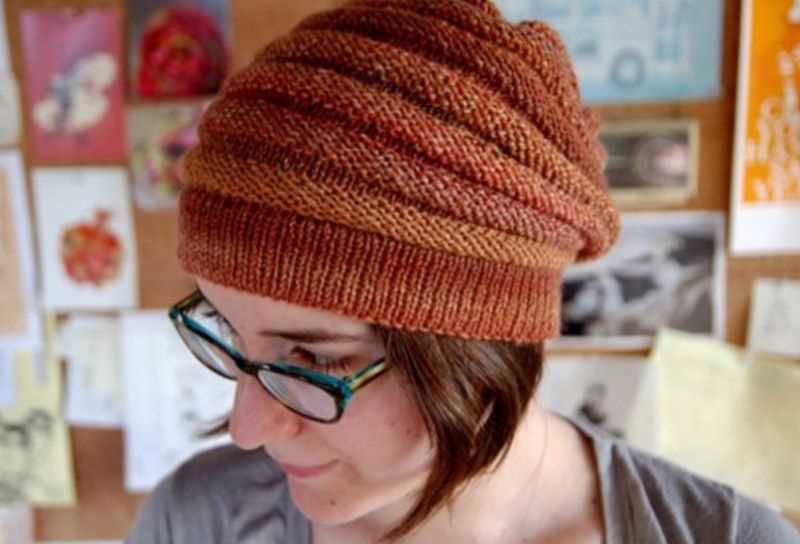
Another method is to create a gathered or slouchy effect by decreasing stitches more rapidly towards the top of the hat. For this, you can decrease a larger number of stitches in each section every round until only a few stitches remain. This creates a gathered or slouchy look, adding volume and texture to the crown.
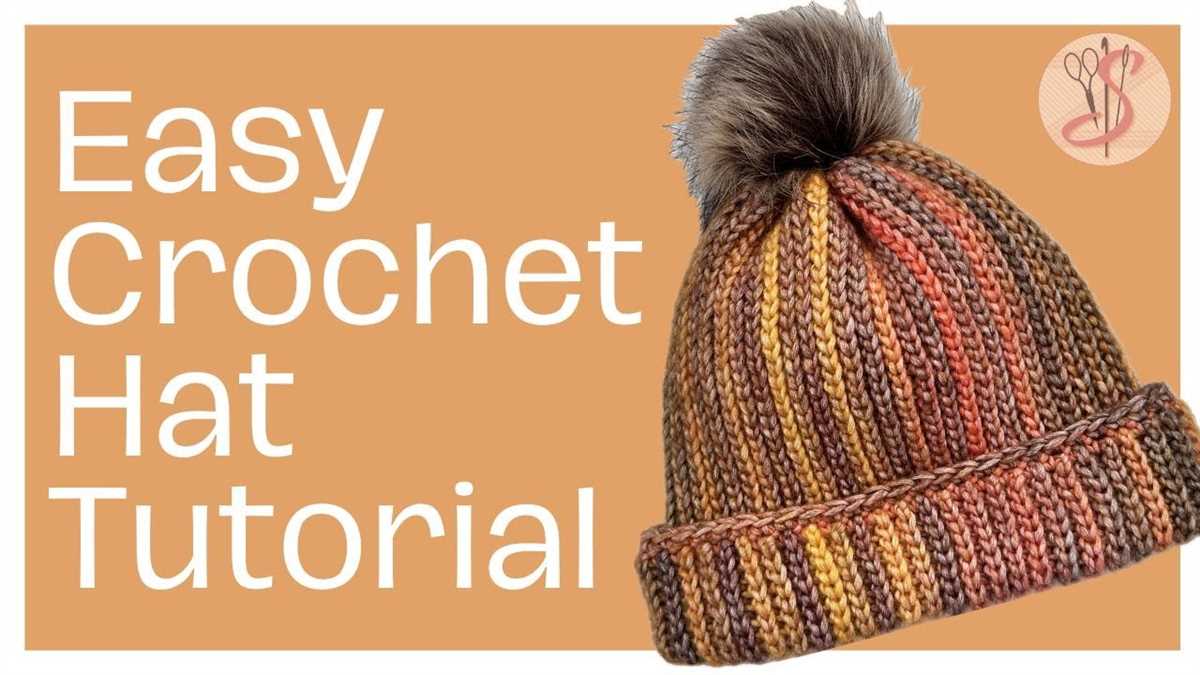
Making a hat with a unique crown shape can also involve using different stitch patterns or adding decorative elements. For example, you can incorporate lace or cable stitches into the crown, creating an intricate and eye-catching design. Additionally, you can add a pom-pom or a stylish button as a finishing touch to the crown, adding an extra touch of personality to the hat.
Adding Embellishments
Adding embellishments to your knitted hat can be a fun and creative way to personalize your design and add a unique touch. There are many different types of embellishments you can use, ranging from simple additions like buttons and bows, to more intricate techniques such as embroidery and beading.
Buttons: One of the easiest ways to add embellishments to your knitted hat is by sewing on buttons. You can choose buttons of different shapes, sizes, and colors to complement your hat design. Simply sew them onto the hat using a needle and thread, making sure they are securely attached.
Embroidery: If you have some basic embroidery skills, you can add intricate designs to your knitted hat using different colored yarns. You can embroider patterns, flowers, or even personalize the hat with initials or a name. Use a tapestry needle and embroidery hoop to ensure neat and even stitches.
Beading: For a more glamorous look, you can add beads to your knitted hat. This can be done by threading beads onto your yarn before knitting, or by sewing them onto the hat afterwards. Be careful when adding beads, as they may add weight to the hat and alter its fit. Consider using lightweight beads and securing them tightly to prevent them from falling off.
When adding embellishments to your knitted hat, consider the overall look and feel you want to achieve. Experiment with different materials and techniques to find what suits your style best. Remember to secure any additional elements properly to ensure they stay in place and do not cause discomfort when wearing the hat. Get creative and have fun with your embellishments to make your knitted hat truly one-of-a-kind!
Finishing touches: binding off
After you have completed knitting the hat, it is time to bind off to finish the project. Binding off, also known as casting off, involves closing the stitches at the last row and securing them so that they do not unravel.
To bind off:
- Knit the first 2 stitches on the row as usual.
- Insert the left needle into the first stitch on the right needle.
- Lift the first stitch over the second stitch and off the right needle, leaving one stitch on the right needle.
- Knit the next stitch on the left needle.
- Repeat steps 2-4 until only one stitch remains on the right needle.
- Cut the yarn, leaving a long tail.
- Pull the tail through the last stitch and tighten to secure.
Once you have bound off, you can weave in the loose ends using a tapestry needle to hide them and prevent them from loosening over time. Trim any excess yarn to tidy up the hat.
Remember to check the pattern instructions for any specific binding off techniques or variations that may be required for the particular hat pattern you are working on.
Blocking and Care Instructions
Blocking is an important step in finishing your knitted hat. It helps to even out the stitches and give the hat its final shape. To block your hat, you will need a blocking mat or towel, rust-proof pins, and a spray bottle filled with water and a small amount of wool wash or mild detergent.
Blocking Process:
- Gently hand wash your hat using a wool wash or mild detergent. Rinse it thoroughly and gently squeeze out the excess water.
- Place the hat on a clean towel and roll it up to remove even more moisture.
- Unroll the towel and spread the hat out onto the blocking mat or towel.
- Gently stretch and shape the hat to your desired size and shape, making sure to smooth out any wrinkles or creases.
- Secure the hat in place by pinning it to the blocking mat or towel, making sure the pins are rust-proof to avoid any damage to the yarn.
- Mist the hat with the water and wool wash or mild detergent mixture using the spray bottle. This will help to set the hat’s shape and remove any remaining wrinkles.
- Leave the hat to dry completely before removing the pins. This may take anywhere from a few hours to overnight.
Once your hat is dry, it’s important to follow the care instructions to keep it looking its best. Here are some general guidelines:
- Hand wash your hat using a wool wash or mild detergent. Avoid using harsh chemicals or bleach.
- Do not wring or twist the hat when washing. Instead, gently squeeze out the excess water.
- Lay the hat flat to dry, reshaping it if necessary.
- Avoid hanging or storing your hat in direct sunlight, as this can cause fading or damage the yarn.
- If necessary, you can use a fabric shaver to remove any pills or fuzz that may appear over time.
By following these blocking and care instructions, you can ensure that your knitted hat will maintain its shape and look great for years to come.
Share your creations!

Now that you have completed your knitted hat using our free pattern, we would love to see what you have created! Whether you put your own spin on the design or followed it exactly, we believe that each knitter brings their own unique touch to their projects.
Take a moment to share a photo of your finished hat on social media using the hashtag #knittedhatpattern. You can also join our online knitting community to connect with other knitters, share your creations, and get inspired by others.
Don’t forget to showcase your knitting skills by sharing your progress photos as well. It’s always fascinating to see the journey from a ball of yarn to a beautiful knitted hat!
By sharing your creations, you not only inspire others to pick up their needles and start knitting, but you also become part of a supportive and creative community of knitters.
Thank you for choosing our free pattern and being a part of our knitting community. We can’t wait to see all the incredible hats you have made!
Q&A:
Where can I find a free pattern for a knitted hat?
You can find free patterns for knitted hats on various websites and blogs dedicated to knitting. Some popular sources include Ravelry, Knitting Patterns Central, and AllFreeKnitting.
What materials do I need to make a knitted hat?
To make a knitted hat, you will need yarn suitable for hats, knitting needles in the appropriate size, a yarn needle, and scissors. Optional materials include stitch markers and a pom-pom maker.
What are some easy patterns for knitted hats?
Some easy patterns for knitted hats include basic ribbed hats, seed stitch hats, and simple garter stitch hats. These patterns are great for beginners or for those who want a quick and simple project.
Can I modify a knitted hat pattern to fit different sizes?
Yes, most knitted hat patterns can be easily modified to fit different sizes. To make the hat larger or smaller, you can adjust the number of stitches cast on or use different needle sizes. There are also many patterns available that provide instructions for multiple sizes.
Can I sell the hats I make from a free pattern?
It depends on the specific pattern and the copyright restrictions. Some free patterns allow for the sale of finished items, while others may have limitations on selling the hats made from the pattern. It’s important to always check the individual pattern’s terms and conditions.
Where can I find free knitting patterns for hats?
You can find free knitting patterns for hats on various websites such as Ravelry, Knitting Pattern Central, and LoveCrafts. These websites offer a wide range of patterns for different skill levels and styles, so you can easily find a pattern that suits your preferences.
What materials do I need to knit a hat?
To knit a hat, you will need a set of knitting needles suitable for the yarn you are using, a tapestry needle for sewing in ends, and of course, yarn. The type and weight of yarn will depend on the pattern you choose. Make sure to check the pattern for specific recommendations on yarn and needle size.