
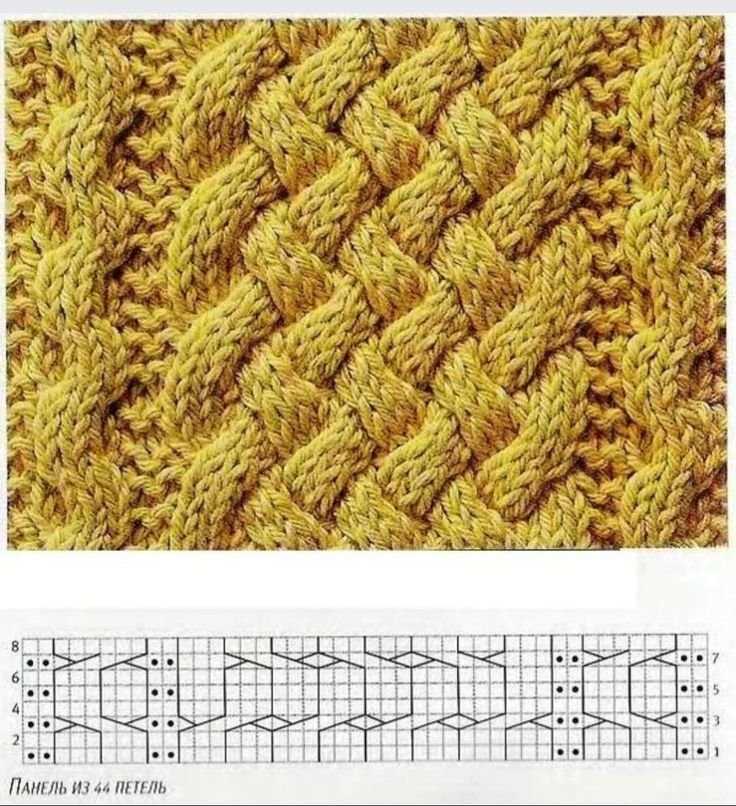
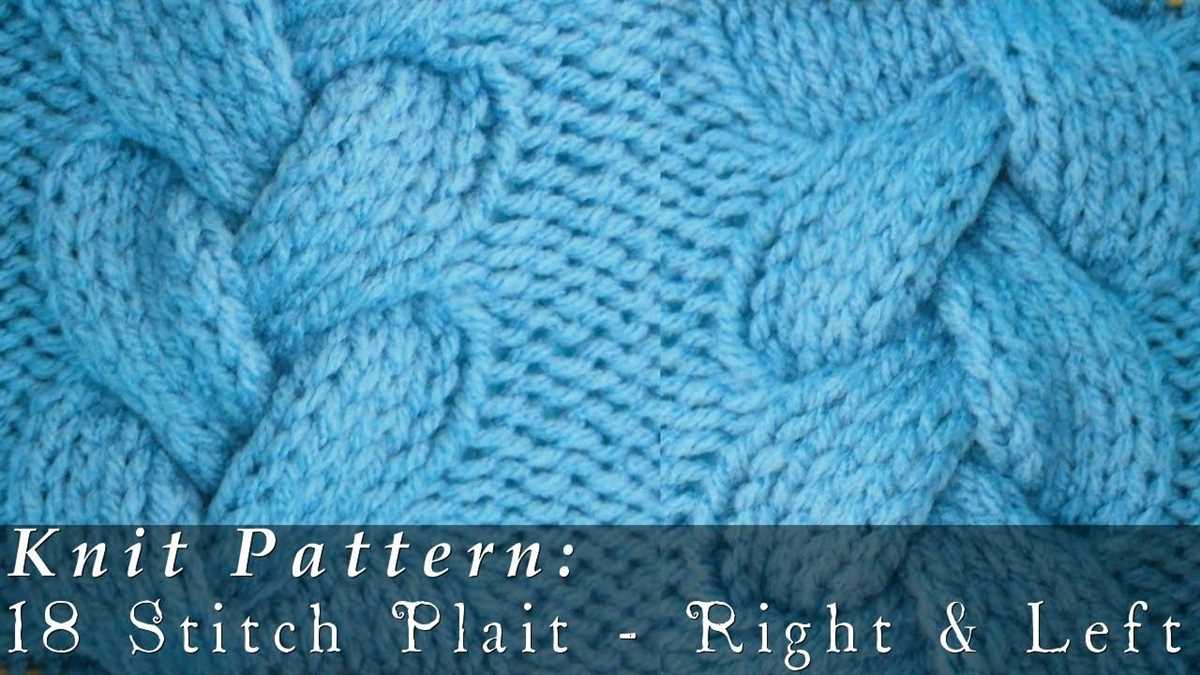
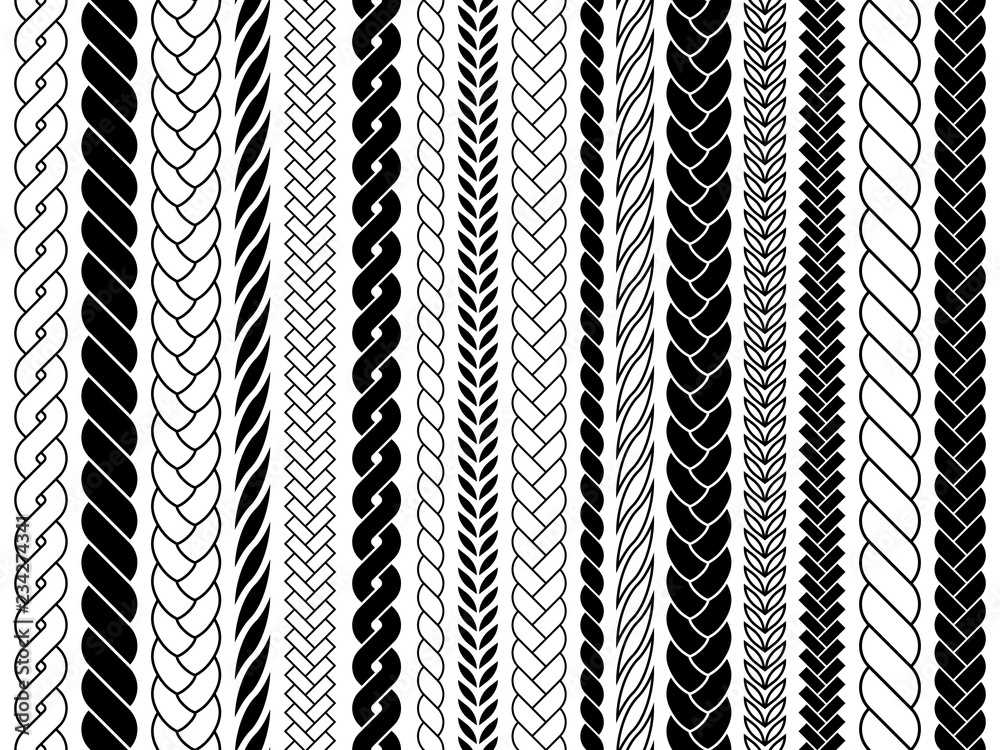
A plait cable knit pattern is a classic and timeless design that adds texture and depth to any knitted garment or accessory. It is characterized by interlocking cables that resemble braided plaits or ropes.
The plait cable pattern is achieved by crossing stitches over each other in a specific order, creating the appearance of woven cables. This intricate pattern requires intermediate to advanced knitting skills, but the effort is well worth it when you see the stunning results.
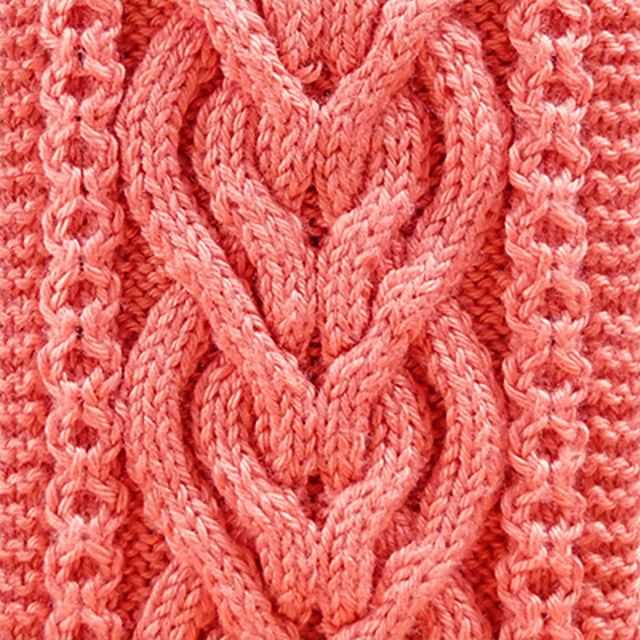
Plait cables are often used in traditional Aran sweaters, adding a touch of sophistication and elegance. They can also be incorporated into scarves, hats, and mittens, elevating the overall design and making a simple piece of knitwear stand out.
Whether you’re a seasoned knitter looking for a new challenge or a beginner eager to expand your skills, the plait cable knit pattern is a beautiful technique to learn. In this article, we will explore various ways to incorporate this pattern into your knitting projects and provide step-by-step instructions to help you master the art of plait cable knitting.
How to create a beautiful plait cable knit pattern
Creating a beautiful plait cable knit pattern can add a touch of elegance and sophistication to your knitting projects. Whether you’re knitting a cozy sweater or a warm scarf, incorporating a plait cable design can take your knitting skills to the next level. Follow these steps to create a stunning plait cable knit pattern.
Step 1: Choose your yarn and needles
Start by selecting the yarn and needles that are appropriate for your project. Consider the weight of the yarn and the desired finished look. Thicker yarns may be better suited for larger projects, while finer yarns can create delicate patterns. Choose a pair of knitting needles that are compatible with your chosen yarn.
Step 2: Understand the plait cable pattern
Before you begin knitting, make sure you understand the plait cable pattern you’ll be working with. The plait cable pattern typically consists of a series of twists and crosses, creating a braided effect. Familiarize yourself with the symbols or written instructions for the cable pattern, as this will guide your knitting.
Step 3: Start knitting the plait cable
Begin knitting the plait cable pattern by casting on the desired number of stitches. Follow the cable pattern instructions to create the twists and crosses. Generally, cable patterns involve knitting a certain number of stitches out of order, then crossing them over one another to create the desired plait effect. Repeat the pattern rows until you’ve achieved the desired length.
Step 4: Finishing touches
Once you’ve completed the plait cable pattern, finish off your project by binding off the stitches. Carefully weave in any loose ends to ensure a polished look. Block your knitting if necessary, following the instructions for your chosen yarn. This can help to even out the stitches and enhance the overall appearance of the plait cable pattern.
With these steps, you can create a beautiful plait cable knit pattern that will impress anyone who sees your finished project. Experiment with different yarns, needles, and designs to create unique variations of the plait cable pattern that showcase your knitting skills and creativity.
Choosing the right yarn for your plait cable knit pattern
When it comes to knitting a plait cable pattern, choosing the right yarn is crucial in order to achieve the desired texture and appearance. The plait cable knit pattern is known for its intricate and interwoven design, so selecting the appropriate yarn can make a difference in the final result.
One of the key factors to consider when choosing yarn for a plait cable knit pattern is the fiber content. Natural fibers like wool, alpaca, and cashmere are popular choices as they have good stitch definition and elasticity, which will enhance the cable pattern. These fibers also have a nice drape and create a warm and cozy finished product. Alternatively, blends that combine natural and synthetic fibers can also work well, providing strength and durability while maintaining the desired texture.
Another important consideration is the weight of the yarn. The plait cable knit pattern typically requires a medium to bulky weight yarn in order to showcase the cables effectively. A thicker yarn will give the cables more depth and definition, creating a more visually appealing finished piece. It is recommended to use a yarn with a slightly tighter twist, as this will help the cables stand out and hold their shape.
Lastly, the color and texture of the yarn can also impact the final look of the plait cable knit pattern. Solid and neutral colors can highlight the intricate cable design, while variegated or speckled yarns can add depth and visual interest. Additionally, yarns with a slight sheen or texture can enhance the overall appearance of the cables.
Overall, selecting the right yarn for your plait cable knit pattern involves considering the fiber content, weight, color, and texture. Taking these factors into account will help you achieve the desired look and texture in your finished project. Whether you choose a natural fiber or a blend, a thicker weight yarn or a finer one, the key is to find a yarn that works well with the plait cable pattern and enhances its intricacies.
Selecting the appropriate needle size for your plait cable knit pattern
Choosing the right needle size is crucial when working on a plait cable knit pattern. The needle size not only affects the final gauge and drape of your knitted piece but also determines the overall look and feel of the cables. Here are some factors to consider when selecting the appropriate needle size for your plait cable knit pattern.
Gauge and tension:
One of the first considerations when choosing a needle size is the desired gauge or tension for your plait cable knit pattern. The gauge refers to the number of stitches and rows per inch in your knitting. If you are following a specific pattern, make sure to check the recommended gauge and adjust your needle size accordingly. Using a larger needle size will result in a looser, more open fabric, while a smaller needle size will create a tighter, denser fabric.
Cable definition:
The needle size also affects the definition and visibility of the cables in your plait cable knit pattern. If you want the cables to be prominent and well-defined, opt for a smaller needle size. This will help the stitches bunch up closer together, creating more pronounced twists and turns in the cables. On the other hand, if you prefer a more subtle and delicate look, using a larger needle size will result in looser cables with a softer appearance.
Casting on for your plait cable knit pattern
When starting a plait cable knit pattern, it is important to cast on the correct number of stitches to ensure that the plait design is properly formed. The number of stitches will vary depending on the size of the project and the desired width of the plait.
To cast on for your plait cable knit pattern, you will need to use the cable cast on method. This method creates a firm and flexible edge that is perfect for cable patterns. Start by making a slipknot and placing it on your knitting needle. Insert your right-hand needle into the slipknot from front to back, and place the yarn over the right-hand needle as if you were going to knit a stitch.
Step 1: Insert the right-hand needle into the first stitch on the left-hand needle, as if to knit.
Step 2: Take the yarn in your right hand and wrap it around the right-hand needle counterclockwise.
Step 3: Use the right-hand needle to pull the wrapped yarn through the stitch on the left-hand needle, creating a new stitch.
Step 4: Slip the new stitch onto the left-hand needle, and tighten the stitch by pulling gently on the working yarn.
Step 5: Repeat steps 1-4 until you have cast on the desired number of stitches for your plait cable knit pattern.
Once you have cast on all of the necessary stitches, you can begin working the plait cable pattern according to the instructions. Keep in mind that the plait cable pattern may require crossing stitches over each other, creating a woven appearance. Follow the pattern carefully to create a beautiful plait design in your finished project.
How to create the basic cable stitch for your plait cable knit pattern
The plait cable knit pattern is a beautiful and intricate design that adds texture and depth to your knitted projects. One of the key elements of this pattern is the cable stitch, which creates the twisted, braided effect that gives the plait its distinctive look. Learning how to create the basic cable stitch is the first step in mastering the plait cable knit pattern.
Step 1: Set up your knitting needles
To begin, you will need a pair of knitting needles and your choice of yarn. Choose a needle size that is appropriate for the yarn you are working with. For the cable stitch, it is best to use a cable needle, which is a shorter, double-pointed needle that will hold your stitches in place as you create the cable.
Step 2: Follow the pattern instructions
Once you have your materials ready, you can start following the pattern instructions for the plait cable stitch. The pattern will usually indicate how many stitches to cast on and the specific order in which to work the cable stitches. It may also include a chart or written instructions for you to follow.
When you come to the section of the pattern that calls for the cable stitch, you will need to carefully read the instructions to determine how many stitches to place on your cable needle and in which direction to cross them. The cable needle will hold the stitches while you work the following stitches, creating the twisted effect.
Step 3: Cross the stitches
To create the cable stitch, you will typically need to cross stitches over each other. This is done by slipping a certain number of stitches onto your cable needle and holding it at the front or back of your work, depending on the pattern instructions. Then, you will knit or purl the following stitches from your left-hand needle, and finally, you will knit or purl the stitches from your cable needle. This will create the twisted effect of the cable.
Continue following the pattern instructions, repeating the cable stitch as required. As you work through the pattern, you will start to see the plait cable knit design emerge. Remember to keep an eye on your tension and to knit or purl your stitches evenly, as this will help to create a neat and uniform result.
With practice and patience, you will soon become proficient in creating the basic cable stitch for your plait cable knit pattern. Once you have mastered this technique, you can explore different variations and designs to create unique and stunning knitted projects.
Knitting the plait cable pattern
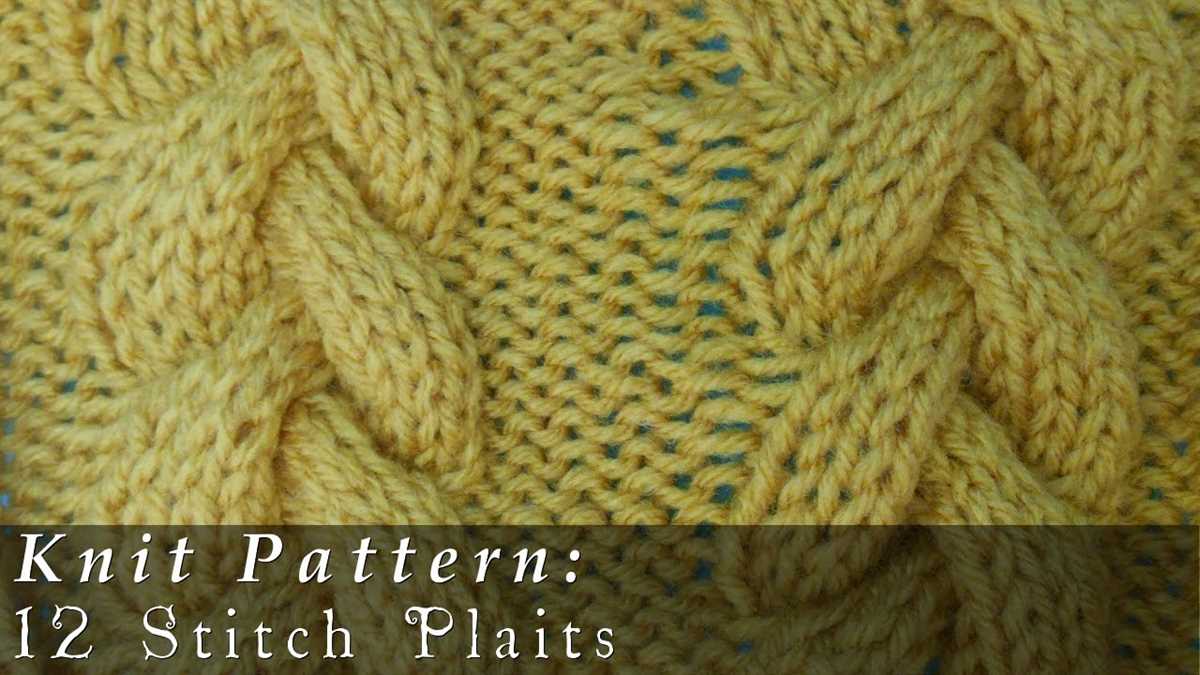
The plait cable knitting pattern is a classic and timeless design that adds beautiful texture and interest to any knitting project. It consists of interweaving cables that create a braided or plaited effect, giving your knitting a sophisticated and intricate look.
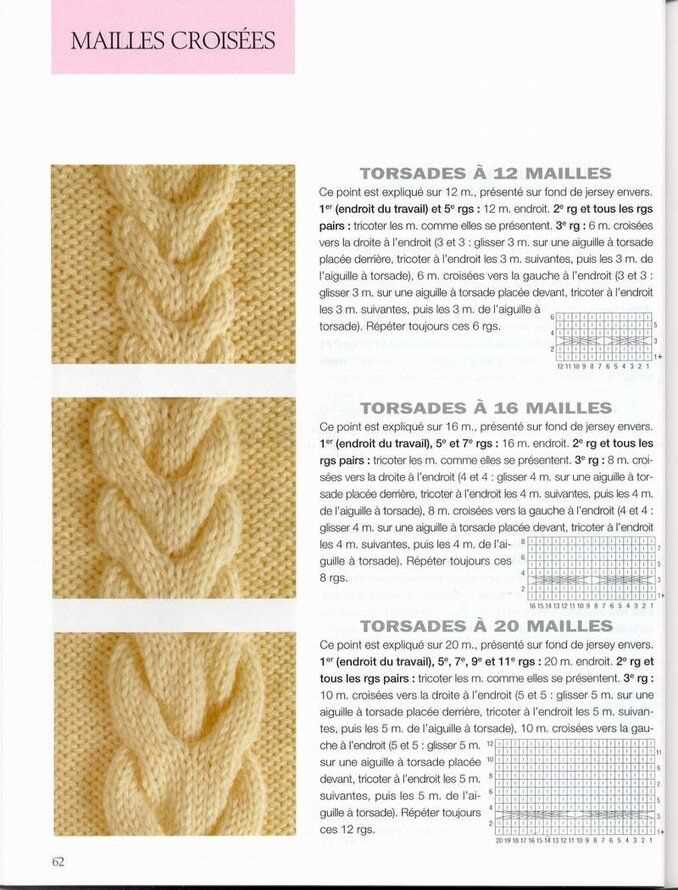
To knit the plait cable pattern, you will need a cable needle and a basic understanding of knitting cables. The pattern typically consists of a multiple of stitches, usually 4 or 6, to create the desired width. You will also need to know how to knit and purl stitches.
The plait cable pattern is created by crossing the stitches over each other in a specific sequence. This is done by sliding a designated number of stitches onto the cable needle and holding it either in front or in the back while you continue knitting the remaining stitches. Then, you will knit the stitches from the cable needle in the desired order, creating the cable twist.
To create a plait cable pattern, follow these steps:
- Knit the first few rows in a ribbing pattern, such as knit 2, purl 2, to create a nice border and ensure the cable pattern stands out.
- Start the cable pattern by knitting a few rows in the desired stitch, such as stockinette stitch.
- Begin the cable crosses by sliding the designated number of stitches onto the cable needle and holding it either in front or in the back of the work.
- Knit the remaining stitches in the row.
- Knit the stitches from the cable needle in the desired order (either knit or purl).
- Continue knitting the pattern, repeating the cable crosses at regular intervals to create the plaited effect.
- Finish the pattern by knitting a few more rows in the original stitch or in a ribbing pattern to match the beginning of the pattern.
The plait cable pattern can be used to add interest to a variety of knitting projects, such as sweaters, scarves, hats, and blankets. It creates a classic and elegant look that never goes out of style. So grab your cable needle and give the plait cable pattern a try in your next knitting project!
Incorporating the plait cable stitch into your overall design
When it comes to knitting, the plait cable stitch can add a beautiful and intricate detail to your overall design. Whether you are knitting a sweater, scarf, or even a hat, incorporating this stitch can take your project to the next level.
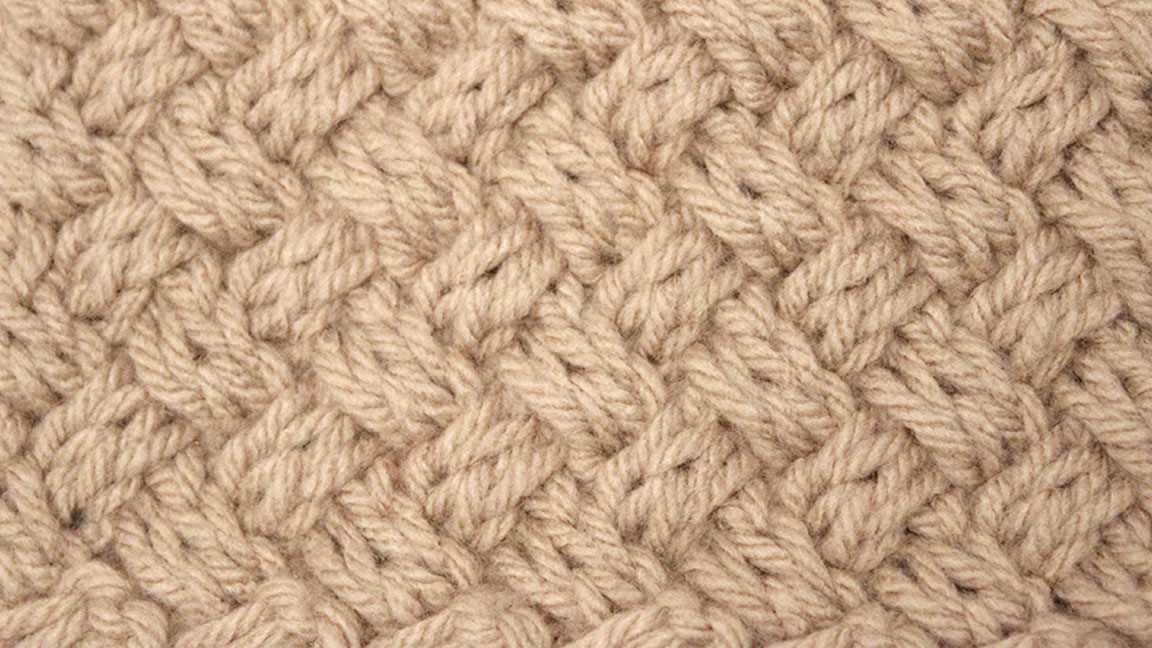
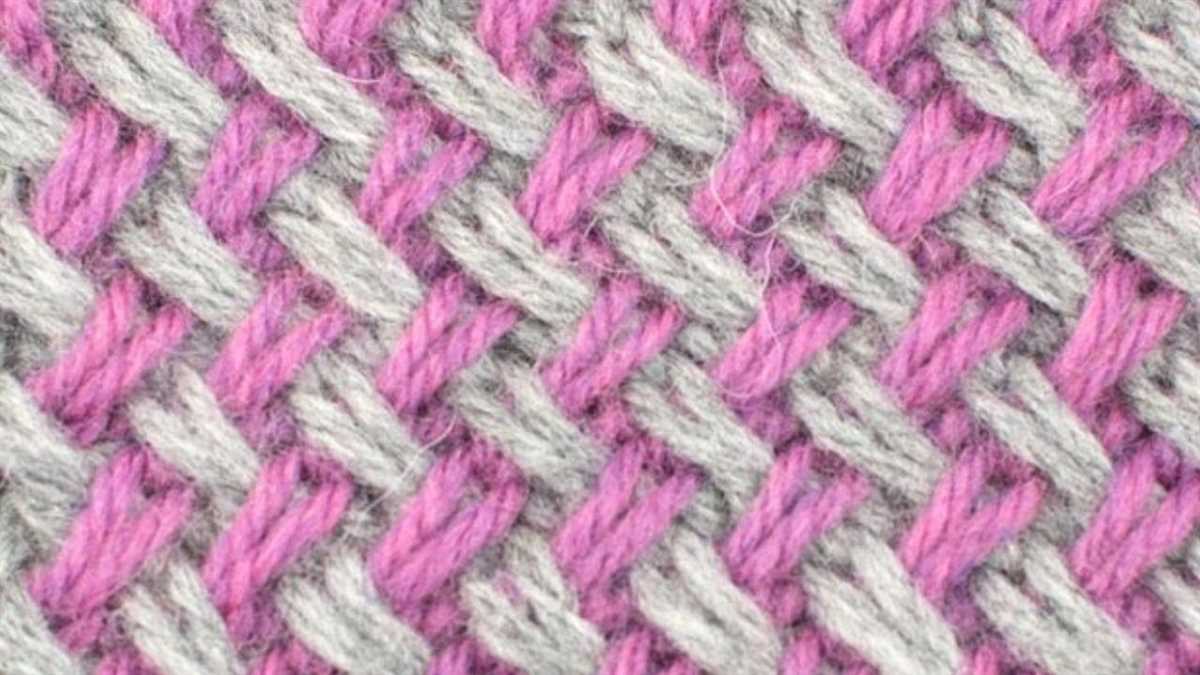
The plait cable stitch creates a braided or woven texture that adds depth and visual interest to your knitting. It is typically made up of a series of crossed stitches, creating the appearance of intertwined cables. This stitch can be used as a central design element, running vertically or horizontally, or as an accent detail on cuffs, collars, or hems.
To incorporate the plait cable stitch into your overall design, start by selecting a yarn that complements the stitch pattern. Thicker yarns with good stitch definition work best for showcasing the intricacies of the plait cable stitch. Consider choosing a yarn in a solid or semi-solid color to let the stitch pattern shine.
Next, decide where you want to incorporate the plait cable stitch in your design. You can use it as the main pattern for the entire project or as an accent detail. Consider the size and shape of the project when determining how many cables to include and their placement. For larger projects, such as a sweater, you may want to include multiple cables to create a more complex pattern.
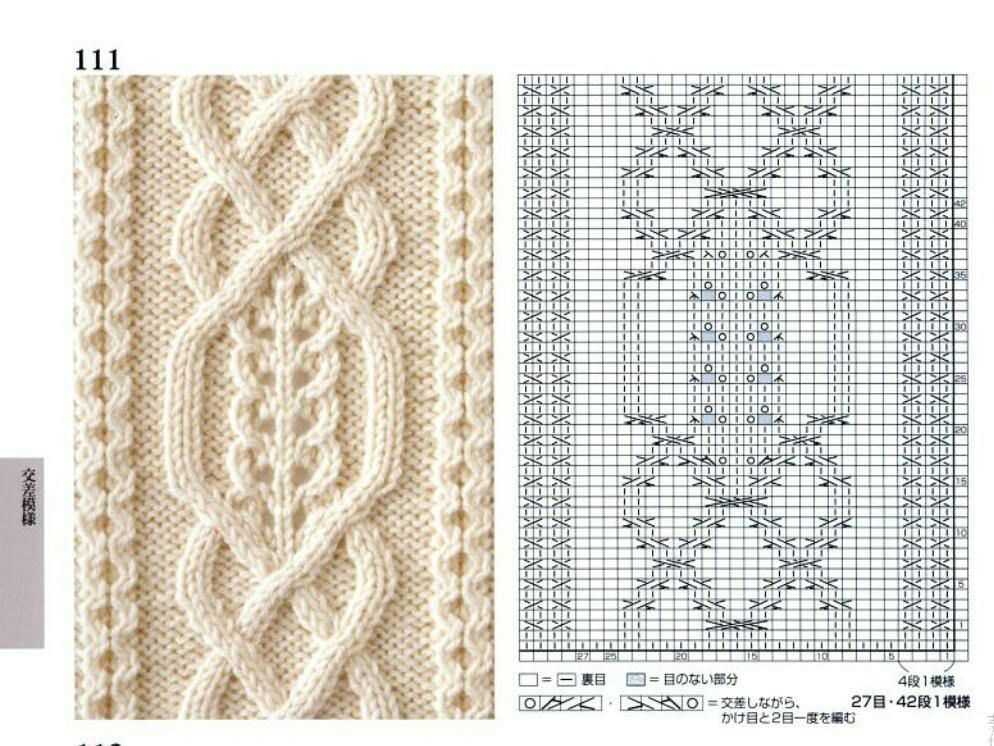
When knitting the plait cable stitch, it is important to follow a cable chart or pattern that outlines the specific stitch sequence. This will ensure that your cables cross in the correct direction and create the desired plaited effect. Take your time when following the chart and make sure to read the instructions carefully before beginning.
To make the plait cable stitch stand out even more, consider pairing it with complementary stitch patterns. For example, you can alternate the plait cable stitch with a simple knit or purl stitch to create a contrast in texture. This can add even more visual interest to your design.
Overall, incorporating the plait cable stitch into your overall design can elevate your knitting project and create a beautiful, intricate look. Experiment with different yarns, placement options, and complementary stitch patterns to create a unique and personalized design.
Adding Variations to Your Plait Cable Knit Pattern
Plait cable knitting is a classic and timeless technique that adds intricate texture and depth to your knitted projects. While the traditional plait cable pattern is beautiful on its own, adding variations to the pattern can take your knitting to the next level. Here are some ideas to inspire you:
1. Adjusting the Cable Width
One way to add variation to your plait cable knit pattern is by adjusting the width of the cables. You can experiment with different numbers of stitches for each cable twist, creating cables that are wider or narrower than the original pattern. This can create a more delicate or bold look, depending on your preference.
2. Mixing Cable Patterns
Another way to add interest to your plait cable knit is by mixing different cable patterns together. Instead of using the same plait cable throughout your project, you can introduce other cable patterns such as twists, braids, or honeycombs. This can create a unique and dynamic design that will stand out.
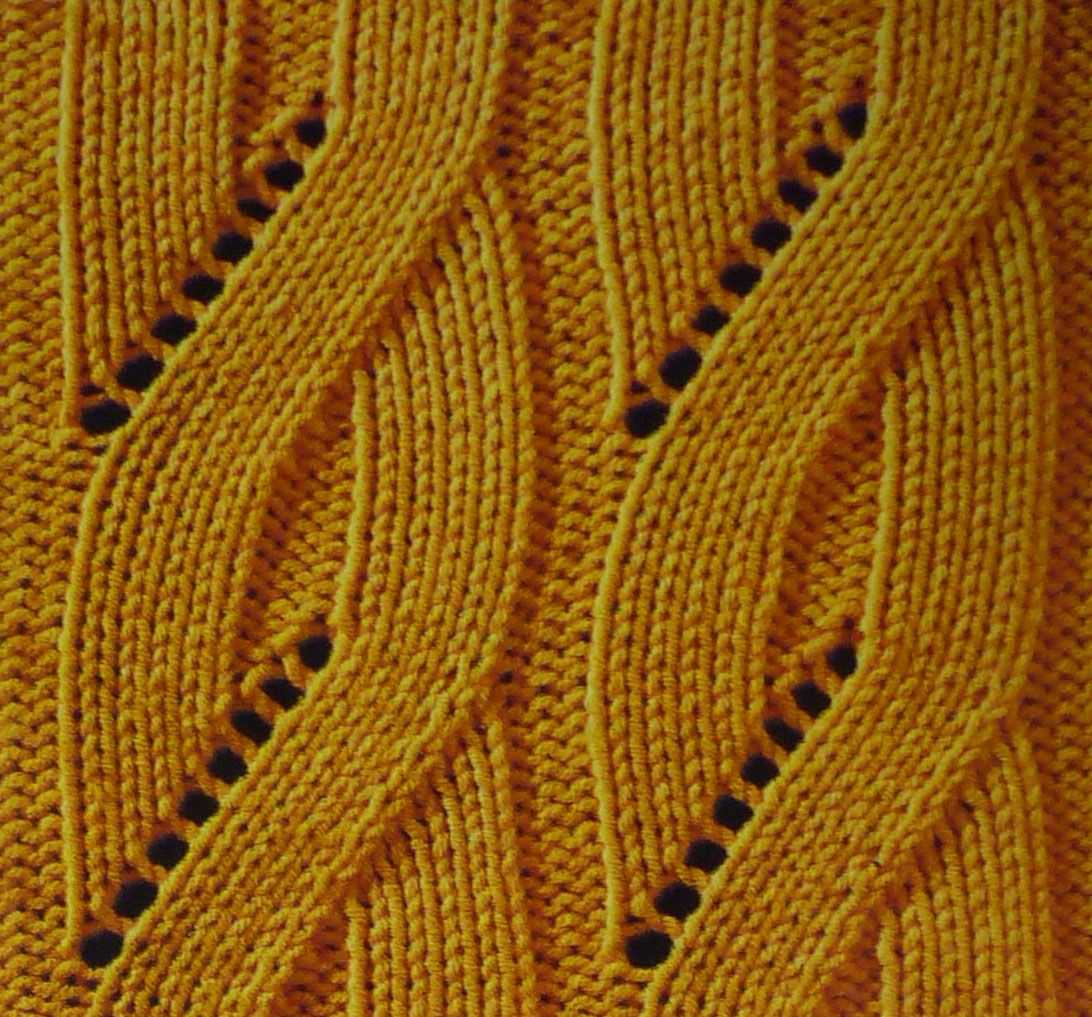
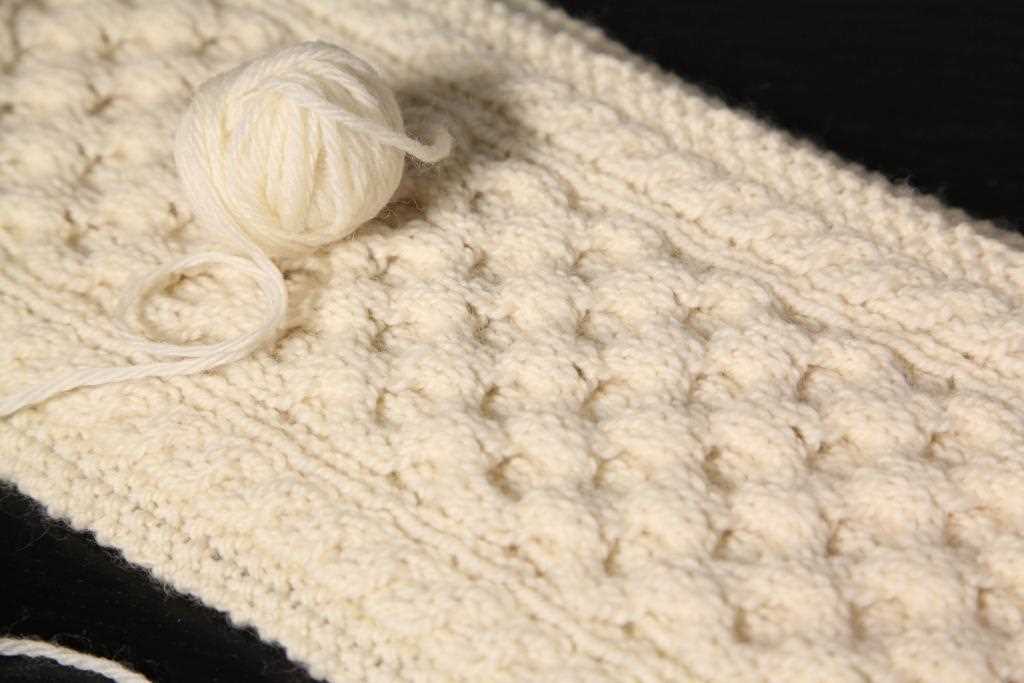
3. Adding Lace or Bobble Accents

If you want to take your plait cable knit pattern to a whole new level, consider adding lace or bobble accents. Lace can soften the look of the cables and create a more feminine and delicate design. Bobbles, on the other hand, can add texture and playfulness to the pattern. You can incorporate these accents in specific sections of your project or scatter them throughout for an eclectic look.
4. Experimenting with Color

Adding color to your plait cable knit pattern can also create interesting variations. You can switch colors for different cables or incorporate colorwork techniques such as Fair Isle or Intarsia to create intricate designs. This can result in a visually striking and unique knitted piece that will surely turn heads.
By adding variations to your plait cable knit pattern, you can create truly one-of-a-kind pieces that showcase your knitting skills and creativity. So don’t be afraid to experiment, mix patterns, and play with colors to take your knitting to new heights!
Fixing mistakes in your plait cable knit pattern
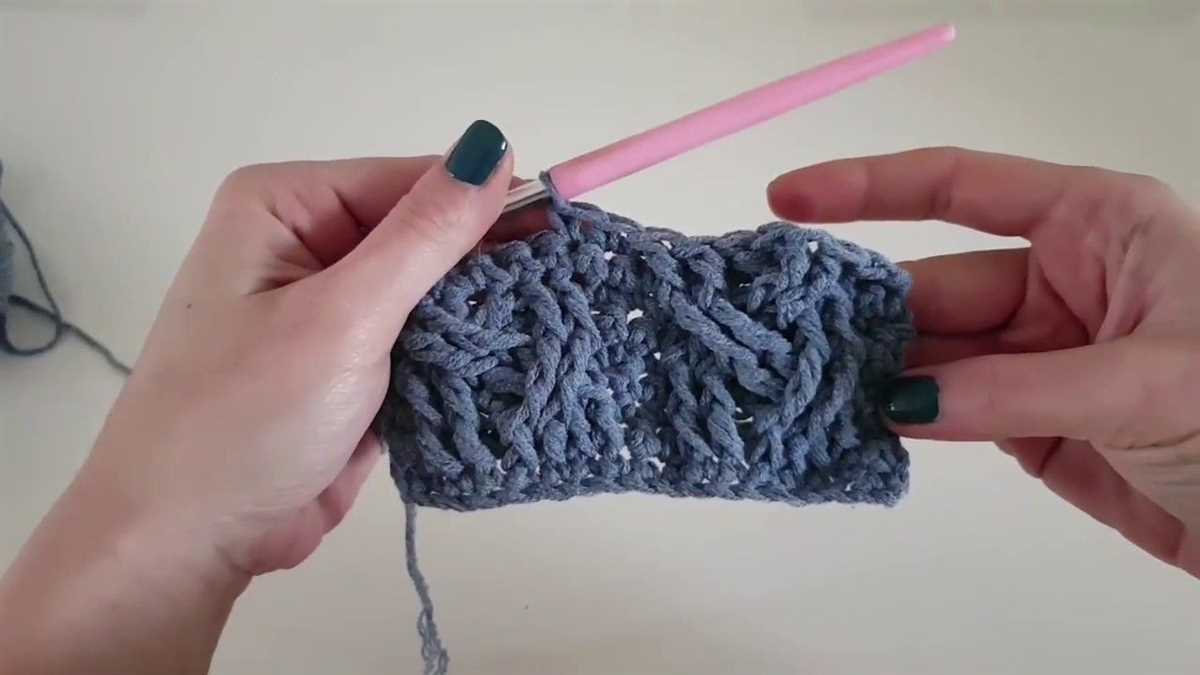
Knitting a plait cable pattern can be a fun and rewarding experience, but it’s not uncommon to make mistakes along the way. Whether you dropped a stitch or forgot to cross a cable, these errors can be easily fixed with a little patience and some basic knitting techniques.
If you notice a dropped stitch in your plait cable pattern, don’t panic. The first step is to secure the stitch above and below the dropped stitch with stitch markers or safety pins to prevent further unraveling. Then, using a crochet hook or a spare knitting needle, gently pick up the dropped stitch and bring it back up to the correct row. Once the stitch is back in place, carefully adjust the tension to match the surrounding stitches.
If you realize that you forgot to cross a cable in your plait cable pattern, don’t worry – it’s an easy fix. First, identify the row where the cable should have been crossed. Using a knitting needle or a cable needle, carefully unravel the stitches in the incorrect direction, being careful not to drop any stitches. Then, reknit the cable by crossing the stitches in the correct order, ensuring that the cable is facing the right way. Finally, adjust the tension to match the rest of the pattern.
It’s important to note that fixing mistakes in a plait cable knit pattern may require some patience and practice. Don’t be discouraged if it takes a few tries to get it right. Remember to take your time, double-check your work, and don’t hesitate to seek help from experienced knitters or online tutorials if needed. With practice, you’ll become more confident in fixing mistakes and completing your plait cable knit pattern with ease.
Blocking and Finishing Your Plait Cable Knit Pattern

After you have completed knitting your plait cable pattern, the next step is to block and finish the project. Blocking is an essential process that helps to flatten and shape the knit fabric, giving it a professional and polished look. It can also help to even out any minor inconsistencies in tension and make the cables stand out more prominently.
To block your plait cable knit pattern, start by soaking it in lukewarm water with a small amount of wool wash or gentle detergent. Gently squeeze out any excess water and then lay the knit flat on a clean towel. Carefully shape and stretch the knit to your desired dimensions, making sure the cables are well-defined and evenly spaced.
Next, you can use blocking pins to secure the knit in place. Start by pinning the corners and edges of the project, and then add additional pins along the cables to maintain their shape. Leave the knit to dry completely, which could take up to 24 hours depending on the yarn and climate.
Once the knit is dry, it’s time to finish any remaining details. This may include weaving in loose ends, sewing on buttons or other embellishments, or adding a decorative border. Take the time to carefully sew in any loose ends, ensuring they are not visible from the right side of the knit.
Finally, give your plait cable knit pattern a final inspection. Check for any additional adjustments that may be needed, such as blocking out any remaining wrinkles or reshaping the cables. Once you are satisfied with the overall appearance, your plait cable knit pattern is ready to be enjoyed or gifted!
Styling and Showcasing Your Plait Cable Knit Pattern

Plait cable knit patterns are a popular choice for creating beautiful and intricate designs in knitted pieces. Whether you’re working on a sweater, scarf, or blanket, styling and showcasing your plait cable knit pattern can help elevate your project and make it stand out.
One way to style your plait cable knit pattern is by choosing the right yarn and color. A chunky yarn with a rich and vibrant hue can accentuate the texture and detail of the plait cables. Consider selecting a yarn with a slight sheen or variegated colors to add visual interest to your project.
When it comes to showcasing your plait cable knit pattern, highlighting it as a focal point can make a statement. For example, you could incorporate the plait cables in the front panel of a sweater or the center of a scarf. By framing the plait cable knit pattern in this way, you draw attention to its intricacy and craftsmanship.
Another way to showcase your plait cable knit pattern is by contrasting it with simpler stitch patterns or textures. For instance, you can create sections of stockinette stitch or garter stitch between the plait cables to create visual contrast and make the cables stand out even more.
Finally, don’t forget about finishing touches that can enhance the overall look of your project. Adding decorative elements such as buttons, ribbons, or a coordinating edge can bring the plait cable knit pattern to life and give it a polished and professional finish.
In conclusion, styling and showcasing your plait cable knit pattern involves careful consideration of yarn choice, placement within your project, and the addition of complementary elements. By paying attention to these details, you can create a stunning piece that highlights the beauty and complexity of the plait cable knit pattern.
Tips and Tricks for Mastering the Plait Cable Knit Pattern
Mastering the plait cable knit pattern can take some time and practice, but with the right tips and tricks, you can become proficient in no time. Here are some valuable insights to help you along the way:
1. Use Cable Needles: When working with the plait cable knit pattern, using cable needles is essential. These small tools help you hold stitches in place while you cross them over each other, creating the signature plaited look. Make sure to invest in a set of cable needles that are suitable for your yarn weight and project.
2. Follow Detailed Instructions: Cable patterns can be complex, so it’s crucial to carefully follow the detailed instructions provided in your knitting pattern. Take your time to understand the abbreviations and symbols used to represent different cable crosses. Paying attention to the pattern’s repeat instructions is also essential for maintaining consistency in your plaited cables.
3. Use Stitch Markers: Stitch markers can be your best friend when working on a plait cable knit pattern. Place markers at strategic points in your work, such as before and after each cable section or every repeat. This will help you keep track of your progress and ensure that your cable crossings are in the right place.
4. Practice Tension Control: Maintaining consistent tension is vital when knitting cables. Be mindful of not pulling your stitches too tightly or leaving them too loose. Experiment with different techniques, such as wrapping yarn over or under your cable needle, to achieve the desired tension. Take your time to find a comfortable grip and rhythm that works best for you.
5. Fixing Mistakes: Mistakes happen, even to the most experienced knitters. If you make a mistake in your plait cable pattern, it’s not the end of the world. Use a crochet hook or small knitting needle to carefully unknit or drop down stitches, fixing any errors. This may take some patience, but it’s worth it to achieve a flawless plait cable design.
6. Practice, Practice, Practice: The more you practice knitting plait cable patterns, the better you’ll become. Start with simpler cable designs and gradually work your way up to more intricate patterns. Don’t be discouraged if your first attempts aren’t perfect. With dedication and practice, you’ll soon be creating stunning plaited cable designs with confidence.
In conclusion, the plait cable knit pattern is a beautiful and intricate design that can add depth and texture to your knitting projects. By following these tips and tricks, using cable needles, following detailed instructions, using stitch markers, practicing tension control, fixing mistakes, and dedicating time to practice, you’ll soon master this pattern and create stunning cable knits.