
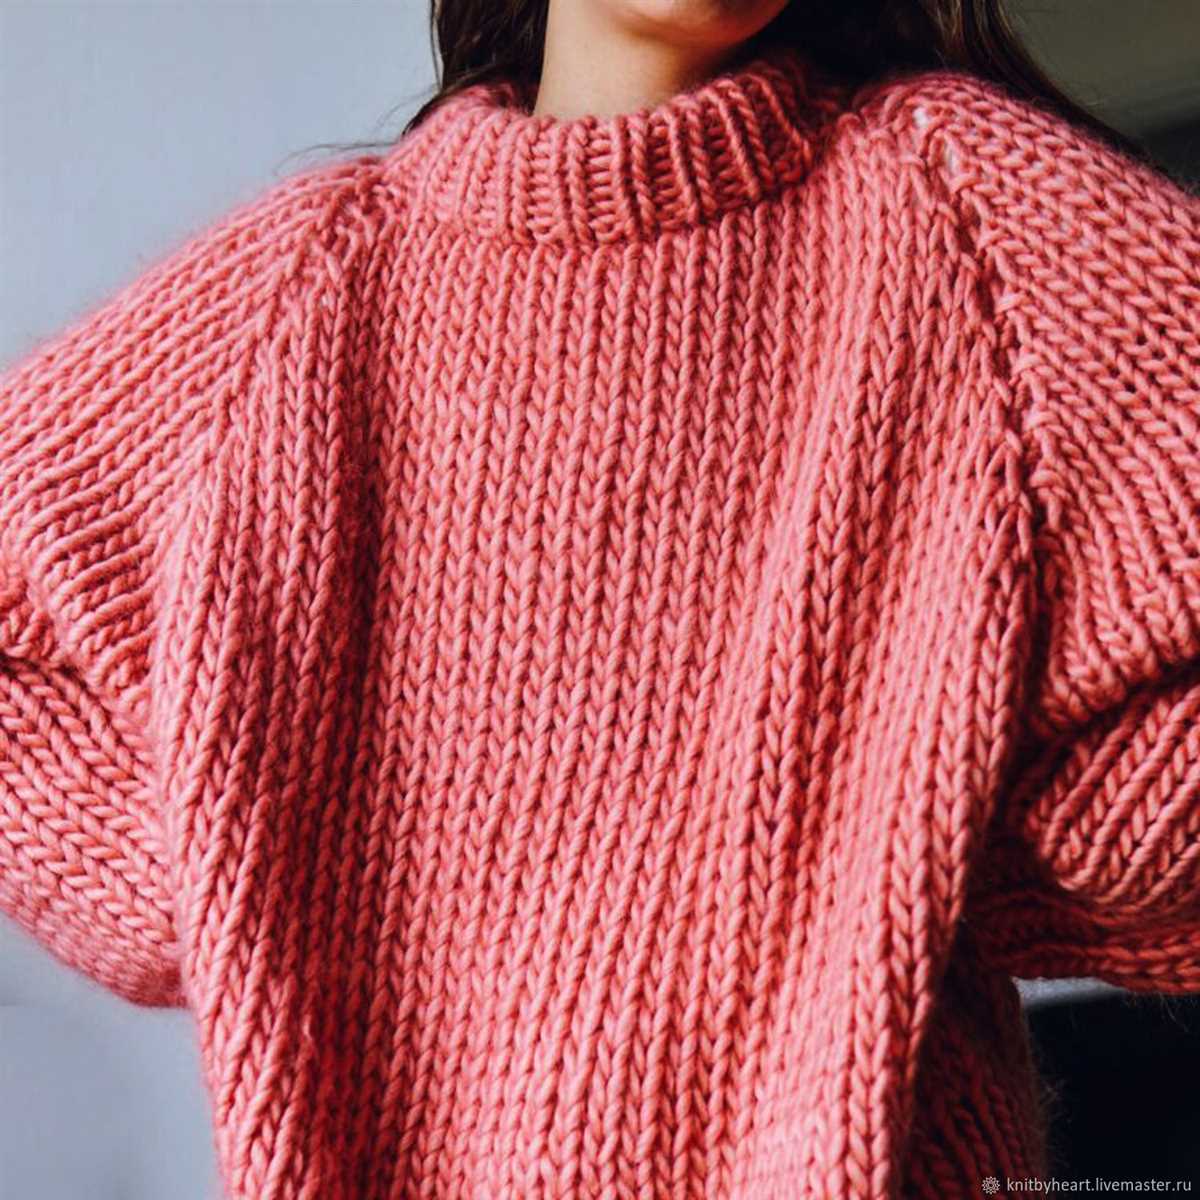
Stay stylish and warm with a trendy cold shoulder jumper! This versatile garment is perfect for colder months when you want to show a little skin while still staying cozy. Whether you’re new to knitting or an experienced pro, this knitting pattern will guide you through creating your own fashionable cold shoulder jumper.
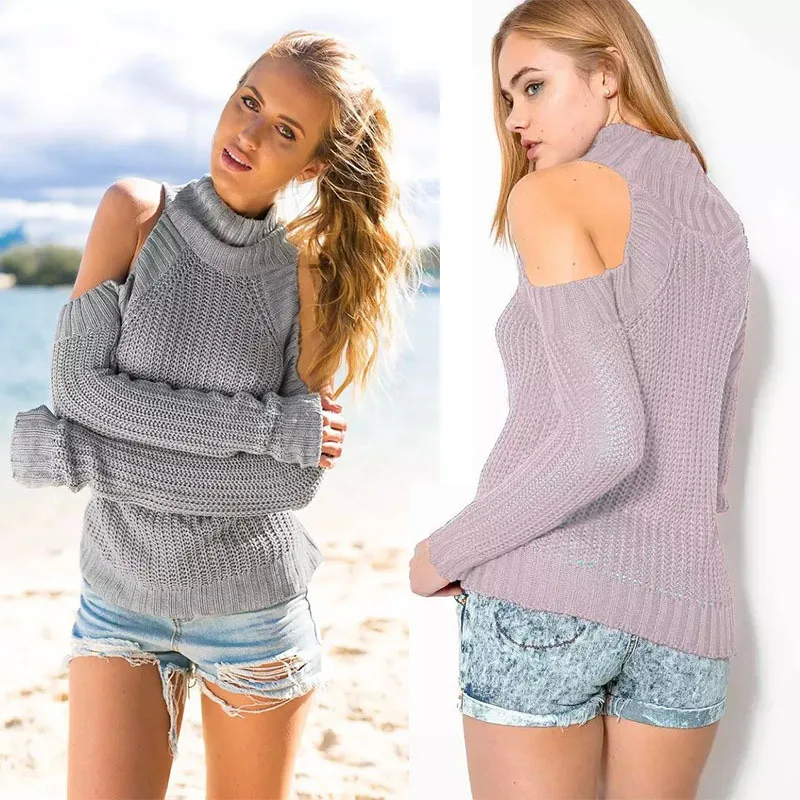
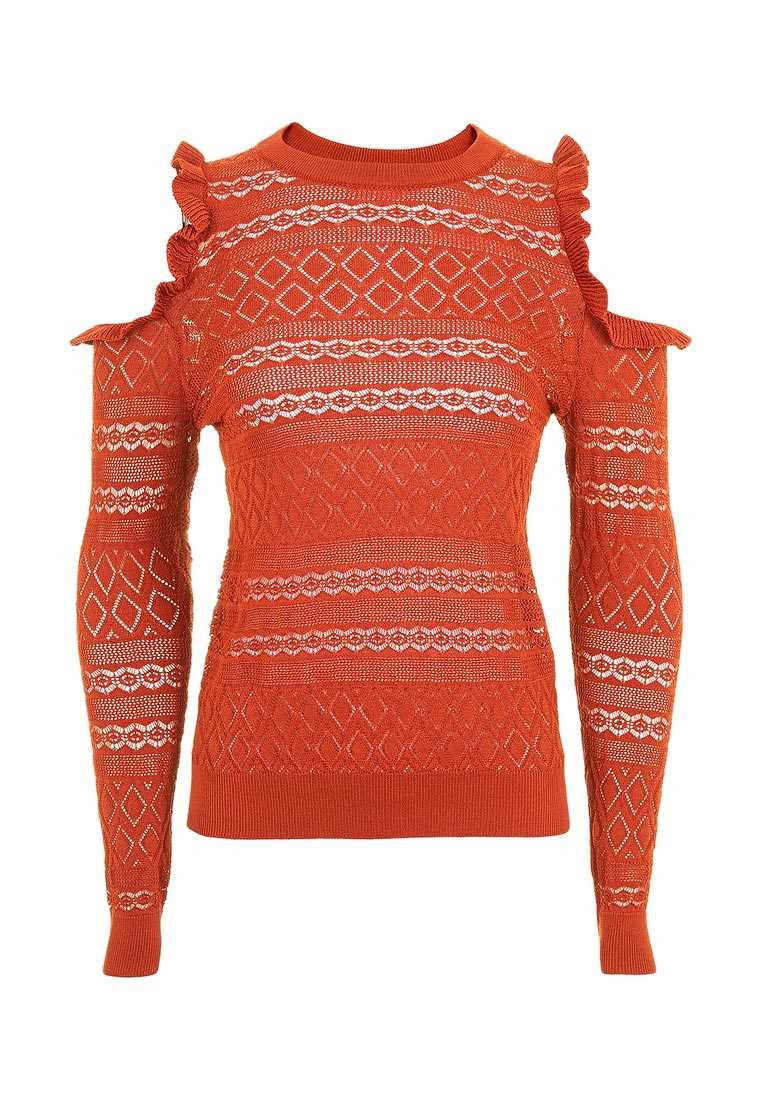
The cold shoulder jumper is a modern twist on the classic sweater, featuring open shoulder cutouts that add a touch of flair to any outfit. It’s a great way to showcase your creativity and personal style, as you can choose from a variety of patterns, colors, and yarns to create a unique look. Plus, knitting your own jumper allows you to customize the fit and length to suit your body type and preferences.
This knitting pattern is suitable for intermediate knitters and requires knowledge of basic knitting stitches such as knit, purl, and ribbing. The pattern includes detailed instructions, as well as a list of materials and tools you’ll need to complete the project. With a little patience and practice, you’ll have a beautiful cold shoulder jumper to wear with pride!
Cold Shoulder Jumper Knitting Pattern
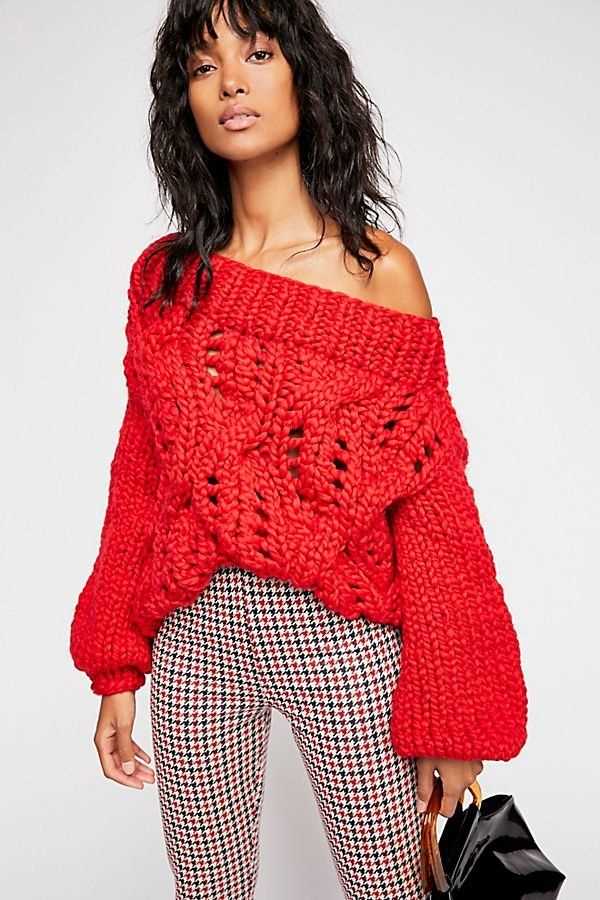
A cold shoulder jumper is a trendy and fashionable piece of clothing that adds a unique touch to any outfit. Whether you want to show off a bit of skin or simply stay warm in style, a cold shoulder jumper is a perfect choice. Knitting your own cold shoulder jumper allows you to customize it to your liking, whether it’s the color, pattern, or fit. With a bit of time and patience, you can create a beautiful and cozy cold shoulder jumper that you’ll love to wear.
To knit a cold shoulder jumper, you’ll need to gather the necessary materials, including knitting needles, yarn, and a pattern. There are many patterns available online that provide step-by-step instructions and can accommodate different skill levels, from beginner to advanced. It’s essential to choose a pattern that matches your skill level and desired style. Once you have all the materials and pattern, you can begin the knitting process.
To start, cast on the required number of stitches according to your chosen pattern. Pay attention to the gauge mentioned in the pattern to ensure that your finished cold shoulder jumper will fit properly. Then, follow the pattern’s instructions, which will typically include different stitches, such as knit, purl, and ribbing, as well as shaping techniques like increasing and decreasing stitches. Take your time and carefully follow each step to ensure a professional-looking end result.
As you progress with the knitting, you’ll reach the point where you’ll need to create the cold shoulder openings. This involves binding off a certain number of stitches on each side, which will create the desired cold shoulder effect. The pattern will guide you on how to do this correctly, so make sure to follow it closely.
Once you’ve completed the main body of the cold shoulder jumper, it’s time to finish off the edges. This usually involves knitting ribbing or a crochet trim around the neckline, cuffs, and hem to give the jumper a polished look. Again, the pattern will provide guidance on how to achieve the desired finish.
After completing all the necessary steps, you’ll have your very own cold shoulder jumper ready to wear. It’s a great feeling to know that you’ve created a unique and stylish garment with your own hands. So, gather your knitting supplies and dive into the world of cold shoulder jumper knitting. With practice, you’ll become more skilled and confident, allowing you to experiment with different patterns and designs to create the perfect cold shoulder jumper for any occasion.
Choosing the Right Yarn
When it comes to knitting the perfect cold shoulder jumper, selecting the right yarn is essential. The type of yarn you choose will greatly impact the final look and feel of your garment. It’s important to consider factors such as fiber content, weight, texture, and color.
Fiber Content: One of the first things to consider when choosing yarn is the fiber content. Different fibers have different properties and will create different effects in your finished project. For a cold shoulder jumper, you’ll want to opt for a yarn that is soft and comfortable against the skin. Natural fibers like wool, alpaca, and cashmere are great choices as they provide warmth and softness.
Weight: The weight of the yarn refers to its thickness or thinness. It’s important to choose a weight that suits the design of the cold shoulder jumper. A lighter weight yarn, such as a fingering or sport weight, will create a more delicate and drapey garment, while a heavier yarn, like a worsted or bulky weight, will produce a warmer and chunkier jumper.
Texture: The texture of the yarn can also play a role in the overall look of your cold shoulder jumper. Smooth yarns will create a clean and polished appearance, while textured yarns, such as boucle or tweed, can add interest and depth to the garment. Consider the style you want to achieve and select a yarn with a texture that complements it.
Color: Finally, the color of the yarn is an important consideration. It’s important to choose a color that flatters your complexion and complements your personal style. A neutral color, such as gray, black, or cream, can be versatile and easy to match with other pieces in your wardrobe. Alternatively, you can opt for a bold and vibrant color to make a statement with your cold shoulder jumper.
In conclusion, choosing the right yarn for your cold shoulder jumper is crucial in creating a beautiful and comfortable garment. Consider the fiber content, weight, texture, and color to find the perfect yarn that will allow you to knit a jumper that you’ll love to wear.
Selecting the Perfect Needles
When knitting a cold shoulder jumper, selecting the right needles is crucial for achieving the desired result. The type and size of needles can greatly affect the tension, drape, and overall appearance of the finished garment. It’s important to consider a few key factors when choosing needles for your project.
Material: Knitting needles come in a variety of materials, including metal, bamboo, and plastic. Each material has its own unique qualities. Metal needles are durable and slide easily through the stitches, making them ideal for faster knitting. Bamboo needles, on the other hand, have a natural grip that can help prevent stitches from slipping off. Plastic needles are lightweight and flexible, making them comfortable to use for long periods of time. Consider your personal preference and the specific requirements of the cold shoulder jumper pattern when deciding on the needle material.
Size:
Size: The size of the needles is another important consideration. Needles are usually labeled with a size number, such as 4mm or US 6. The size of the needles will affect the size and tension of your stitches. Smaller needles will create smaller, tighter stitches, while larger needles will create looser and larger stitches. Check the pattern gauge to determine the recommended needle size for your cold shoulder jumper. Using a needle size that matches the pattern gauge will help ensure that your finished garment has the proper fit and appearance.
Cable Length: In addition to the material and size, the length of the cable on circular needles is also important to consider. When knitting a cold shoulder jumper, you may find that a longer cable length is more comfortable for holding a larger number of stitches. A longer cable length can also be helpful for trying on the sweater as you knit to ensure proper fit. However, if you prefer to knit with shorter cables or are working on a smaller size garment, a shorter cable length may be more suitable.
By carefully considering the material, size, and cable length of your knitting needles, you can ensure that you have the perfect tools for creating your cold shoulder jumper. Take the time to experiment with different needle options to find the ones that feel most comfortable and produce the desired results for your knitting project.
Gauge Check
Before starting any knitting project, it is crucial to do a gauge check to ensure that your stitches and rows match the recommended measurements provided in the pattern. This step is especially important for garments like a cold shoulder jumper, as an incorrect gauge can result in a poorly fitting finished product.
To perform a gauge check, start by knitting a swatch using the specified yarn and needle size. The pattern will typically indicate the number of stitches and rows that should be present in a given measurement. For example, it may state that there should be 20 stitches and 28 rows in a 4×4 inch square.
Once your swatch is complete, measure the dimensions of the knitted fabric using a ruler or measuring tape. Count the number of stitches and rows in the specified measurement area and compare them to the pattern’s recommended gauge. If your stitches and rows match the pattern’s gauge, congratulations! You can confidently start working on your cold shoulder jumper, knowing that it will turn out as intended.
If your gauge does not match the recommended measurements, it is essential to make adjustments. If you have more stitches and rows than the pattern suggests, your tension is too tight, and you will need to use larger needles to achieve a looser gauge. Conversely, if you have fewer stitches and rows, your tension is too loose, and you will need to use smaller needles to achieve a tighter gauge.
Keep in mind that changing the needle size will affect not only the gauge but also the overall drape and appearance of the fabric. It is recommended to knit another swatch with the adjusted needle size to ensure that the new gauge is now in line with the pattern’s requirements. Repeat this process until you achieve the correct gauge, as specified in the pattern.
Remember, taking the time to properly check and adjust your gauge will result in a well-fitting and beautifully finished cold shoulder jumper. The effort put into ensuring the correct gauge at the beginning of the project will save you from disappointment and frustration later on.
Casting On
When beginning a knitting project, the first step is to cast on. This is the process of adding the initial stitches onto the knitting needle. There are many different methods for casting on, but the most common is the long tail cast on.
The long tail cast on is a versatile method that creates a neat and elastic edge. To begin, you will need to estimate the length of yarn needed for your cast on. This can be done by measuring your desired number of stitches against a ruler and multiplying it by a thumb’s width of yarn per stitch. Once you have the correct length, make a slipknot in the yarn and place it on one of the knitting needles.
To cast on the first stitch, hold the needle with the slipknot in your right hand. Insert the tip of the left needle into the slipknot from left to right, passing it under the right needle. With your right thumb and forefinger, grab the working yarn and bring it over the left needle. Pull the working yarn through the slipknot, creating a new loop on the left needle.
Continue casting on stitches in this manner until you have reached the desired number. Each new stitch will be cast on using the loop from the previous stitch. Once all the stitches have been cast on, you are ready to begin knitting the first row of your cold shoulder jumper.
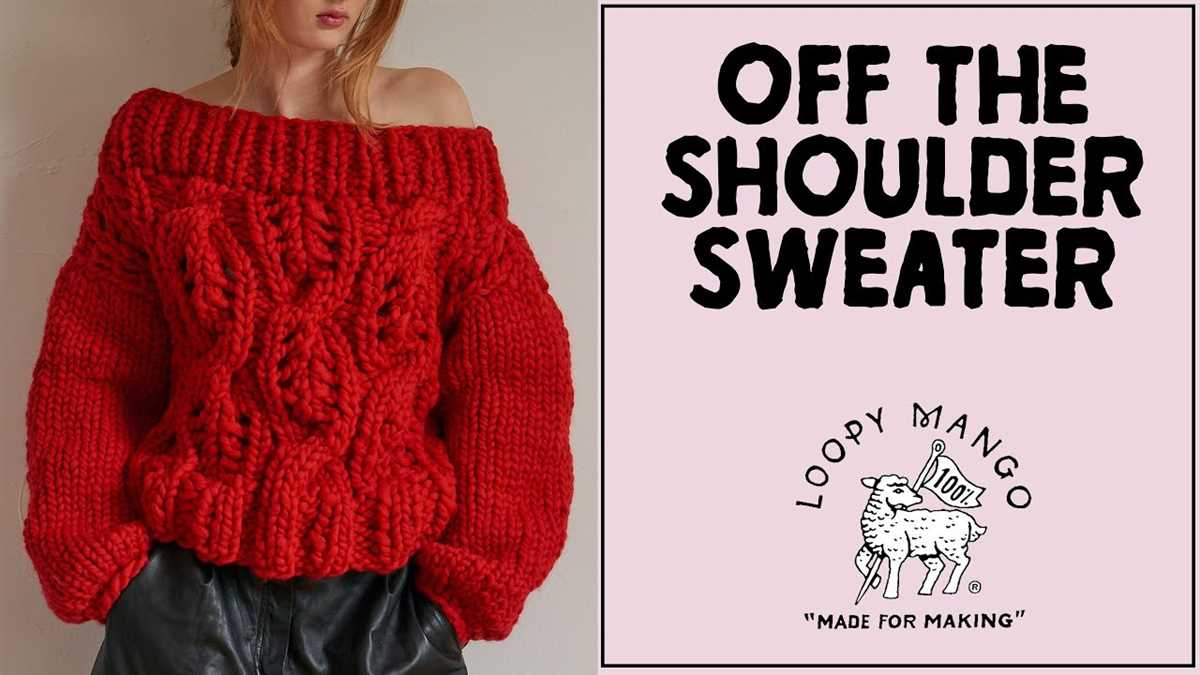
Creating the Cold Shoulder Opening
Adding a cold shoulder opening to your jumper can give it an edgy and fashionable look. This stylish feature exposes a small section of the shoulder, creating a chic and sexy vibe. Here are the steps to create this trendy detail in your knitting pattern.
To start, measure the desired length and width of the cold shoulder opening on your jumper. This will depend on your personal preference and the style you want to achieve. Once you have these measurements, you can calculate the number of stitches you need to cast off for the opening.
1. Marking the opening: Begin by placing markers on both sides of the jumper where you want the cold shoulder opening to be. This will serve as a guide as you work on the section.
2. Casting off stitches: When you reach the markers, start casting off the calculated number of stitches for the opening. You can use a basic cast-off method or a more decorative one, depending on your skill level and desired aesthetic. Make sure to cast off evenly to maintain a neat and symmetrical look.
3. Rejoining the yarn: Once you have cast off the stitches, rejoin the yarn to continue knitting the rest of the jumper. You can do this by simply picking up the yarn and knitting as usual.
4. Keeping track of the pattern: It’s important to keep track of your knitting pattern while creating the cold shoulder opening. Pay attention to stitch patterns, decreases, and increases to ensure that the overall design of the jumper remains consistent.
5. Finishing touches: After completing the cold shoulder opening, continue knitting the rest of the jumper according to the pattern. Once you finish the piece, you can add any desired embellishments, such as ribbing or lace trim, to enhance the look of the opening.
By following these steps, you can easily create a cold shoulder opening in your jumper and elevate its style to a whole new level. Remember to take your time and pay attention to detail to achieve an impeccable finished product.
Knitting the Body
When knitting the body of the cold shoulder jumper, it is important to carefully follow the knitting pattern to achieve the desired fit and style. The body of the jumper is typically worked in the round, starting from the bottom and working upwards.
Step 1: Begin by casting on the required number of stitches specified in the pattern. This will determine the width of the jumper’s body. Use a circular needle to accommodate the large number of stitches, ensuring that the stitches are not too tight or too loose.
Step 2: Once the stitches are cast on, join them in the round, being careful not to twist the stitches. Use a stitch marker to mark the beginning of the round, as this will help keep track of your progress.
Step 3: The body of the jumper is typically worked in a specific stitch pattern or combination of stitches. Follow the pattern instructions to create the desired texture or design. This may involve knitting in stockinette stitch, ribbing, or incorporating cables or lace patterns.
Step 4: As you work your way up the body of the jumper, make sure to measure your progress against the pattern’s specified length or number of rounds. This will ensure that the jumper is the correct length and will fit properly.
Step 5: Depending on the pattern, you may need to shape the body by decreasing or increasing stitches at certain points. Follow the pattern instructions carefully to achieve the desired shaping and fit.
Step 6: Once the body of the jumper is complete, you can then move on to knitting the sleeves and neckline, following the pattern instructions. These instructions may include picking up stitches along the armholes and neck edge to create a finished edge or adding ribbing or other decorative elements.
Step 7: After completing the knitting portion, it is important to block the jumper to help even out the stitches and give the finished garment a polished look. Follow the blocking instructions included in the pattern to properly shape and care for your cold shoulder jumper.
Shaping the Sleeves
When knitting the cold shoulder jumper, shaping the sleeves is an important step to achieve the desired fit and style. The sleeves are usually worked separately from the body, and the shaping is done by increasing or decreasing the number of stitches in each row. This helps create the desired shape and fit around the arms.
To begin shaping the sleeves, you can start by decreasing a certain number of stitches at the beginning and end of each row. This can be done by knitting two stitches together (K2tog) or by slipping a stitch and then knitting the next stitch and passing the slipped stitch over (SSK). These decrease stitches are typically done on the right side rows only, while the wrong side rows are worked without any changes.
As you continue to work on the sleeves, you may need to increase the number of stitches to create a wider shape towards the cuff. This can be achieved by making one stitch (M1) by picking up the yarn strand between two stitches and knitting into it. These increase stitches can be evenly spaced across the row or strategically placed for a more tailored fit.
It is important to follow the instructions provided in the cold shoulder jumper knitting pattern for the specific shaping techniques and stitch counts. This will ensure that the sleeves are shaped correctly and match the overall design of the garment. Taking the time to properly shape the sleeves will result in a well-fitting and stylish cold shoulder jumper.
Finishing Touches
Once you have finished knitting your cold shoulder jumper, it’s time to add the finishing touches to make it truly unique. These small details can make a big difference in the overall appearance and fit of your garment.
Seaming: Before you can add any finishing touches, you’ll need to seam the different parts of your jumper together. This can be done using either a mattress stitch or a whip stitch, depending on your preference. The seaming should be done carefully and neatly to ensure the final product looks polished.
Neckline: The neckline of your cold shoulder jumper is an important element that can greatly affect the overall style of the garment. You can choose to leave the neckline as is, or you can add ribbing or a contrasting color to create a more defined look. Experiment with different options to find the one that suits your taste.
Cuffs and Hem: The cuffs and hem of your jumper are areas that can be embellished to add a personal touch. You can choose to add ribbing, a contrasting color, or even a decorative stitch pattern. Pay attention to the length and fit of the cuffs and hem to ensure they are comfortable and flattering.
Buttons or Zippers: Depending on your design, you may want to add buttons or zippers to your cold shoulder jumper. This can be both functional and decorative. Choose buttons or zippers that complement the color and style of your jumper, and ensure they are securely attached.
Blocking: After all the finishing touches have been added, it’s important to block your jumper to give it a professional finish. This involves wetting and shaping the garment to the desired dimensions and allowing it to dry flat. Blocking helps to even out stitches, improve drape, and make the garment look more polished.
By paying attention to these finishing touches, you can elevate your cold shoulder jumper from a basic knitted piece to a stylish and well-finished garment that you’ll be proud to wear.
Final Thoughts
In conclusion, the cold shoulder jumper knitting pattern is a great project for knitters of all skill levels. Whether you’re a beginner looking for a new challenge or an experienced knitter looking for a quick and satisfying project, this pattern has something to offer.
The cold shoulder design adds a stylish and modern twist to a classic jumper, making it a trendy and fashionable garment. It’s a versatile piece that can be dressed up or down depending on the occasion, making it a wardrobe staple.
Knitting your own cold shoulder jumper allows you to customize the fit and color to suit your personal style. You can choose from a wide range of yarns, colors, and patterns to create a unique and individualized piece.
This knitting pattern provides clear and concise instructions, making it easy to follow along and complete the project successfully. It’s a great way to improve your knitting skills and learn new techniques, such as shaping and creating a stylish neckline.
So why not give the cold shoulder jumper knitting pattern a try? It’s a fun and satisfying project that will result in a stylish and wearable garment. Whether you’re knitting for yourself or as a gift for a loved one, this pattern is sure to impress.