
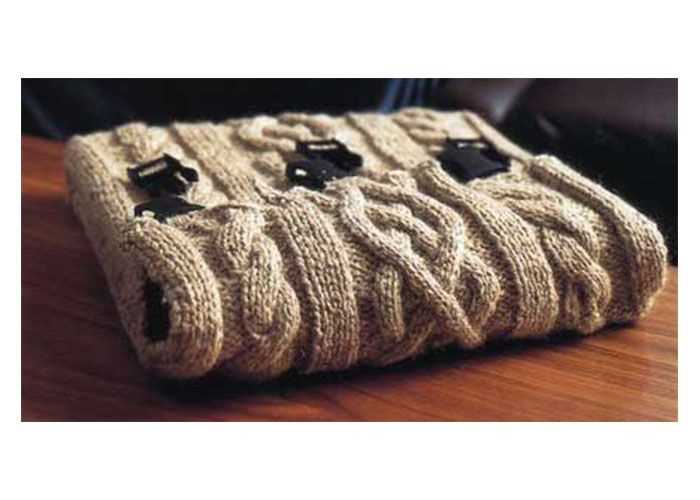
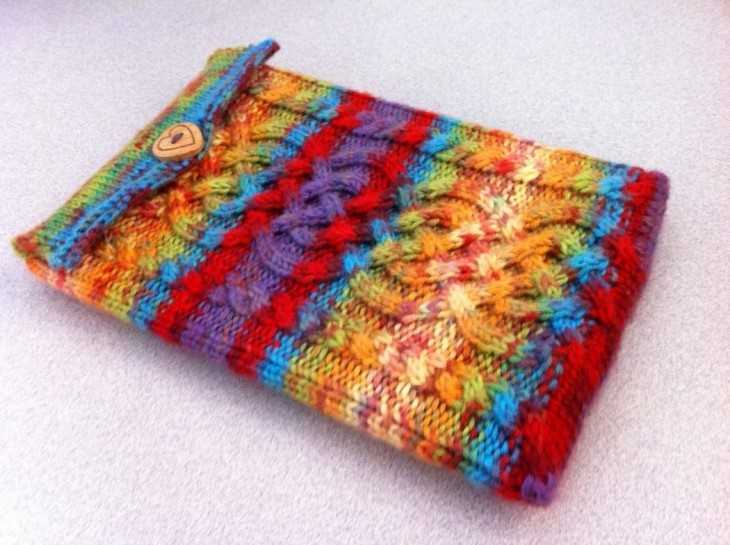
If you love your Kindle and want to protect it while also showing off your knitting skills, then a knitted Kindle case is the perfect project for you. This article will provide you with a step-by-step pattern to make your own knitted Kindle case that is both stylish and functional.
Knitted Kindle cases not only protect your device from scratches and damage, but they also add a personal touch and reflect your unique style. The cozy texture of the knitted fabric provides a comfortable grip, making it easier to hold your Kindle for extended reading sessions.
Whether you’re an experienced knitter or a beginner looking for a fun and rewarding project, this knitted Kindle case pattern is suitable for all skill levels. With just a few basic knitting techniques and some simple materials, you can create a custom case that fits your Kindle perfectly.
This pattern uses a combination of knit and purl stitches to create a ribbed texture that adds both elasticity and visual interest to the case. The instructions are easy to follow, and the pattern can be easily adjusted to fit different Kindle models and sizes. So grab your knitting needles and get ready to create a stylish and protective case for your beloved Kindle!
Knitted Kindle Case Pattern
Materials:
- Yarn – choose a soft and durable yarn in your favorite color
- Knitting needles – size appropriate for your yarn
- Stitch marker
- Tapestry needle
Instructions:
1. Cast on stitches: Start by casting on the required number of stitches to fit your Kindle. Make sure to leave enough extra stitches for the seam allowance.
2. Knit the body: Once you have cast on the stitches, start knitting in the desired stitch pattern. You can choose from a variety of patterns, such as garter stitch, stockinette stitch, or even a cable pattern. Continue knitting until the body of the case reaches the desired length.
3. Shaping the case: To create a snug fit for your Kindle, it’s important to shape the case. You can do this by decreasing stitches at regular intervals. Start by decreasing a few stitches on each side of the case, then continue decreasing every few rows until the desired width is reached.
4. Finishing: Once the case is the right size for your Kindle, it’s time to finish it off. Cut the yarn, leaving a long tail. Thread the tail through the tapestry needle and use it to sew up the sides of the case. Make sure to leave an opening for the Kindle to slide into. Secure the yarn and weave in any loose ends.
With this knitted Kindle case pattern, you can protect your Kindle and add a personal touch to it at the same time. It also makes a great gift for any book lover in your life. Happy knitting!
Materials Needed
Before you start knitting your kindle case, make sure you have all the necessary materials. Here is a list of items you will need:
- Knitting needles: Choose the appropriate size for your yarn. Most patterns recommend using US size 8 or 9 needles.
- Yarn: Pick a yarn that is suitable for the size of your kindle and the desired thickness of the case. Worsted weight yarn is a popular choice.
- Tapestry needle: This needle will come in handy for weaving in loose ends and sewing up the seams.
- Scissors: You will need a sharp pair of scissors for cutting the yarn.
- Measuring tape: It’s important to have a measuring tape on hand to ensure your case is the right size.
- Stitch markers: These little markers can be used to indicate specific stitches or sections in your knitting.
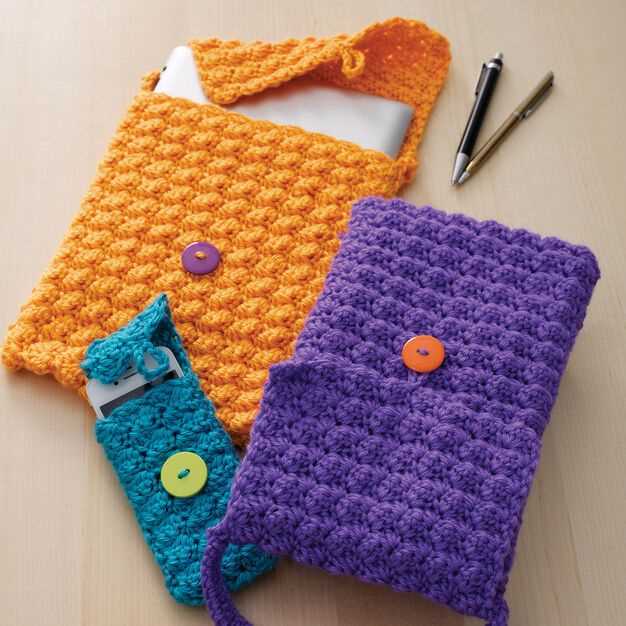
- Buttons or closures: If you want to add a button or closure to your kindle case, make sure to have them ready.
Once you have gathered all these materials, you will be ready to start knitting your kindle case.
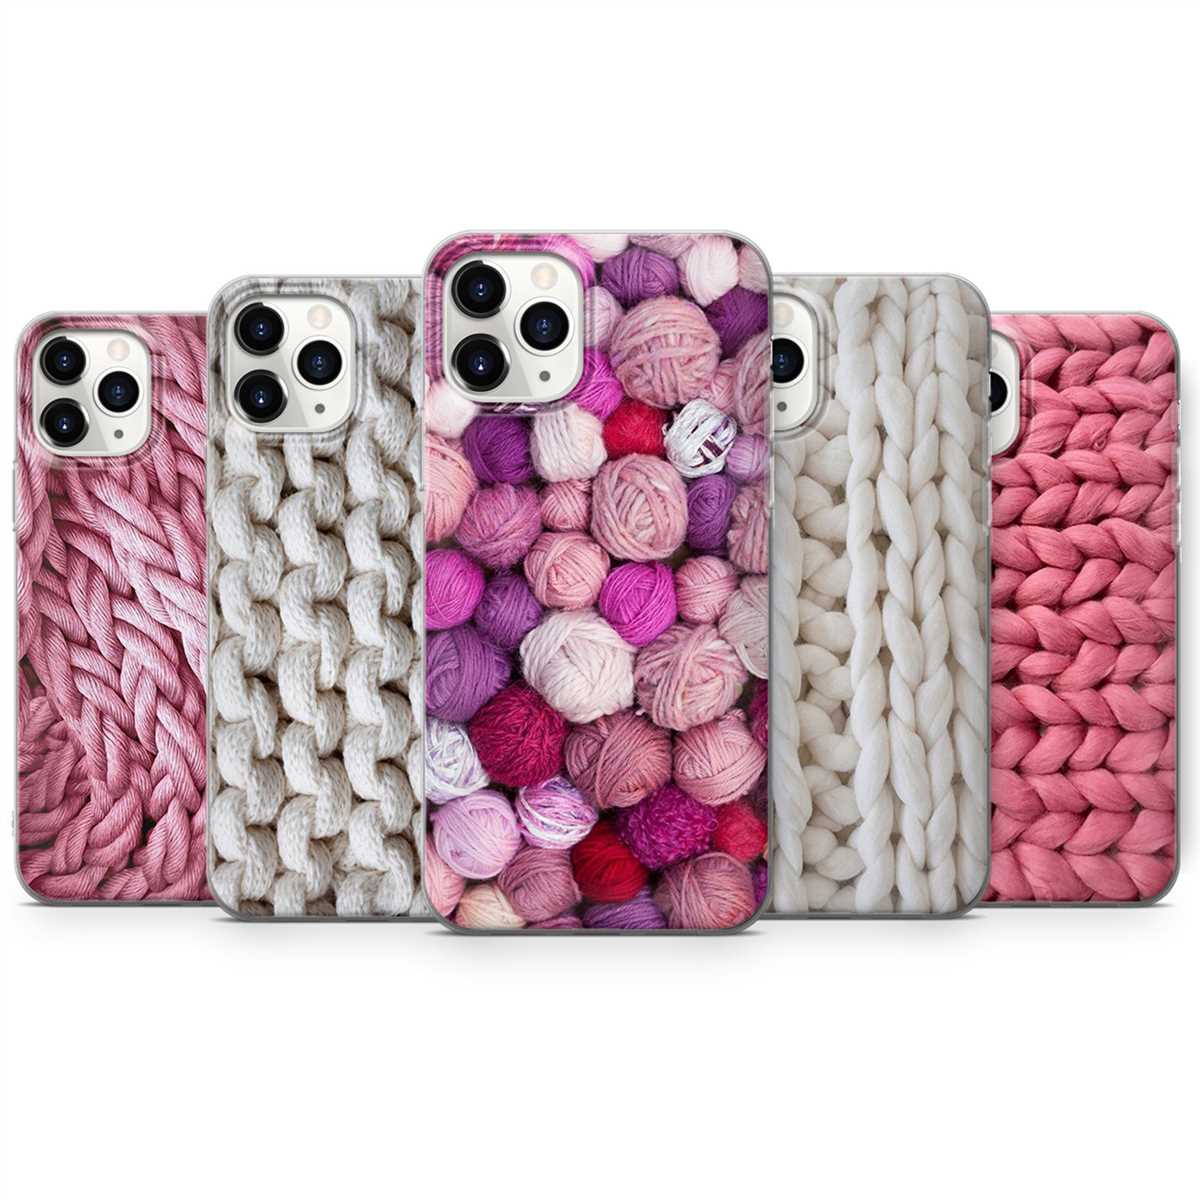
Choosing the Right Yarn
Selecting the right yarn for your knitted kindle case pattern is essential to achieve the desired outcome. The choice of yarn can greatly affect the look, feel, and durability of your finished project. There are several factors to consider when choosing the right yarn, including fiber content, weight, and texture.
Fiber Content: The type of fiber used in the yarn will determine its properties, such as softness, warmth, and breathability. Common fiber options for knitting include wool, cotton, acrylic, and blends. Wool is known for its warmth and elasticity, while cotton is breathable and lightweight. Acrylic is a synthetic fiber that is often used as an affordable alternative to natural fibers. Blends of different fibers can combine the properties of each to create a yarn with desired characteristics.
Weight: The weight of the yarn refers to its thickness or thinness. Yarns are typically classified into different weight categories, ranging from lace weight (very thin) to super bulky (very thick). The weight of the yarn you choose will depend on the pattern requirements and the desired final product. For a knitted kindle case, a medium-weight yarn, such as DK or worsted weight, is usually a good choice as it provides enough structure and protection without being too bulky.
Texture: The texture of the yarn can add visual interest and complexity to your knitted kindle case. Yarns come in various textures, including smooth, fluffy, and textured. Smooth yarns are often used for more intricate stitch patterns, while fluffy yarns can add warmth and softness. Textured yarns, such as boucle or tweed, can create interesting surface patterns. Consider the desired look and feel of your knitted kindle case when selecting the yarn’s texture.
By considering the fiber content, weight, and texture of the yarn, you can choose the perfect yarn for your knitted kindle case pattern. Take into account the desired properties of the finished product and the pattern requirements to ensure a successful and satisfying knitting experience.
Getting Started
Welcome to the world of knitting! If you’re new to knitting or looking for a fun and practical project, knitting a case for your Kindle is a great place to start. This project is perfect for beginners as it only requires basic knitting skills and can be completed in just a few hours. Plus, you’ll have a stylish and protective case for your Kindle once you’re done!
Before you begin, you’ll need to gather a few materials. You’ll need a pair of knitting needles, preferably in size 8 or 9, and some medium weight yarn in the color of your choice. You’ll also need a tape measure or ruler to check your gauge, a yarn needle for weaving in ends, and a pair of scissors to snip your yarn. Once you have all your supplies together, you’re ready to get started on your knitted Kindle case!
Casting On
When starting a knitting project, one of the first steps is casting on. This is the process of creating the foundation row of stitches on the knitting needle. There are several methods for casting on, and the choice of method depends on the desired appearance and stretchiness of the edge.
Long-tail cast on: The long-tail cast on is a popular method that creates a neat, elastic edge. To perform this cast on, you need to estimate the amount of yarn needed for casting on all the stitches. The tail of the yarn is used to create the stitches, while the working yarn is used to knit subsequent rows.
Knitted cast on: The knitted cast on is a simple method that is great for beginners. It creates a tight edge that is less stretchy compared to the long-tail cast on. To perform this cast on, you start with a slip knot on the needle, then knit into the slip knot and place the new stitch onto the left needle.
Cable cast on: The cable cast on is a method that creates a neat, stable edge. This cast on is often used for projects where a firm edge is desired, such as socks or cuffs. It involves creating stitches that are twisted, resulting in a tight edge that doesn’t easily stretch.
It’s important to choose the right casting on method for your project, keeping in mind the desired appearance and stretchiness of the edge. Beginners may find the knitted cast on method to be the easiest to learn, while more experienced knitters may prefer the long-tail cast on for its versatility.
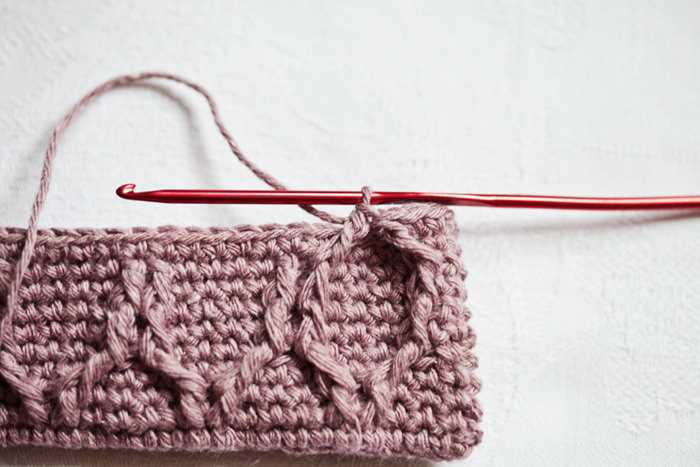
Knitting the Body
Once you have finished knitting the flap of your kindle case, it is time to move on to the body of the case. The body is where you will knit the main portion of the case that will hold your kindle.
To begin knitting the body, you will first need to pick up stitches along the edges of the flap. This will create a smooth transition between the flap and the body of the case. You can use a crochet hook to easily pick up the stitches, ensuring that they are evenly spaced along the edge.
Once you have picked up the stitches, you can start knitting the body in your chosen stitch pattern. You can use a simple stockinette stitch for a classic look, or try a more intricate pattern to add some texture to your case. Make sure to refer to the knitting pattern you are using for the correct stitch count and instructions.
As you knit the body, be sure to periodically measure your work to ensure that it is the correct size for your kindle. You can place your kindle on the work to see if it fits properly, making any adjustments as necessary.
Continue knitting the body until it is the desired length, keeping in mind that you will also need to knit a flap for the other side of the case. Once the body is complete, you can bind off the stitches and weave in any loose ends. Your knitted kindle case is now one step closer to being finished!
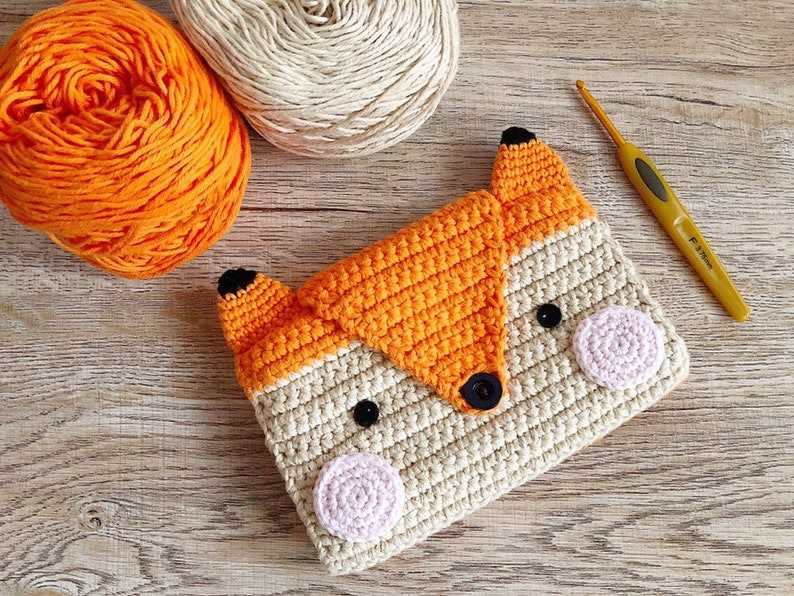
Creating the Flap
The flap of the knitted Kindle case is an important part that protects the device and adds a touch of style. To create the flap, you will need to follow a specific pattern that will ensure a perfect fit for your Kindle.
Start by casting on the required number of stitches, as indicated in the pattern. This will determine the width of the flap. Once you have cast on, you can begin working the flap in the desired stitch pattern.
1. Knitting the Rows: Continue knitting in the stitch pattern until the flap reaches the desired length. You can use stockinette stitch, garter stitch, or any other pattern that you prefer. Remember to keep track of your rows to ensure the flap is symmetrical.
2. Shaping the Corners: To shape the corners of the flap, you will need to decrease stitches. This can be done by knitting two stitches together at each end of the row or following the specific decrease instructions in the pattern you are using. Decreasing gradually will give the flap a neat and professional finish.
3. Binding Off: Once the flap has reached the desired length and the corners are shaped, it is time to bind off the stitches. This can be done by knitting two stitches together and passing the previous stitch over, or using any other bind-off method you prefer. Make sure to bind off loosely to allow for easy closure of the flap.
Creating the flap for your knitted Kindle case requires attention to detail and following the pattern’s instructions. With the right stitch pattern and proper shaping, you can create a functional and stylish flap that will protect your Kindle and showcase your knitting skills.
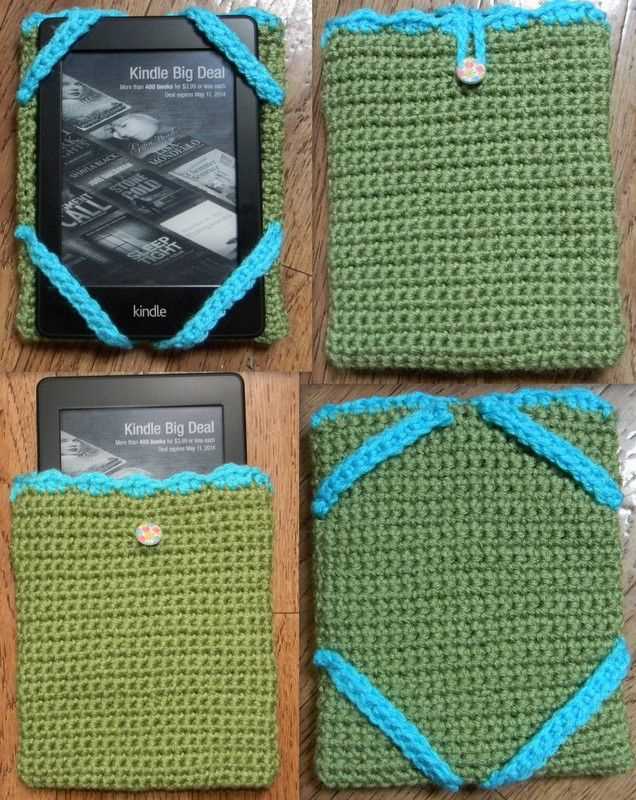
The process of adding a buttonhole to a knitted Kindle case is a straightforward and practical step, as it allows for easy access to the device without having to remove it from the case. This tutorial will guide you through the process of adding a buttonhole to your knitted Kindle case, ensuring a snug fit and convenient use.
Materials needed:
- Knitted Kindle case
- Yarn
- Blunt tapestry needle
- Scissors
- Button
- Sewing needle and thread
Step 1: Prepare your materials
Before you begin, gather all the necessary materials listed above. Make sure your knitted Kindle case is finished and ready for the buttonhole addition.
Step 2: Determine the placement of the buttonhole
Decide where you would like the buttonhole to be located on your knitted Kindle case. This will depend on the size and shape of your device, as well as personal preference. Choose a spot that allows the case to close securely while still providing easy access to the screen and buttons.
Step 3: Create the buttonhole
Using the blunt tapestry needle and yarn, carefully stitch a horizontal row of loops at the chosen location for the buttonhole. The number of loops will depend on the size of your button, but it’s generally recommended to make 2-3 loops to ensure a secure fit. Make sure the loops are evenly spaced and tightly stitched to prevent any stretching or loosening over time.
Step 4: Secure the button
Now it’s time to attach the button to the opposite side of the knitted Kindle case. Choose a button that matches the size of the buttonhole and sew it securely in place using a sewing needle and thread. Make several stitches to ensure the button is firmly attached and will not come loose with use.
Step 5: Test the buttonhole

Once the button is securely attached, carefully insert your Kindle into the case and test the buttonhole. It should fit snugly around the button, providing a secure closure for your device. If the buttonhole is too loose or tight, make any necessary adjustments by adding or removing loops.
With the buttonhole added, your knitted Kindle case is now complete and ready to provide both protection and easy access to your device. Enjoy using your handmade case and keep your Kindle safe in style!
Finishing the Case
Once you have completed the knitting of the kindle case, it is time to finish it off and make it ready for use. There are a few steps involved in finishing the case, but they are relatively simple and straightforward.
1. Sew the seams: Using a tapestry needle and the same yarn that you used for knitting, sew the bottom and side seams of the case. This will give the case its final shape and ensure that it fits your kindle perfectly. Make sure to sew the seams neatly and securely so that they don’t come undone with use.
2. Block the case: If you want your kindle case to have a more polished and professional look, you may choose to block it. Blocking involves wetting the knitted fabric and then stretching it into shape. You can use blocking pins or a blocking board to help you achieve the desired shape and size. Allow the case to dry completely before removing the pins or board.
3. Attach the button: If you want to add a button closure to your kindle case, now is the time to do it. Choose a button that complements the color and style of your case. Sew the button securely in place on the front of the case, making sure that it aligns with the buttonhole when the case is closed.
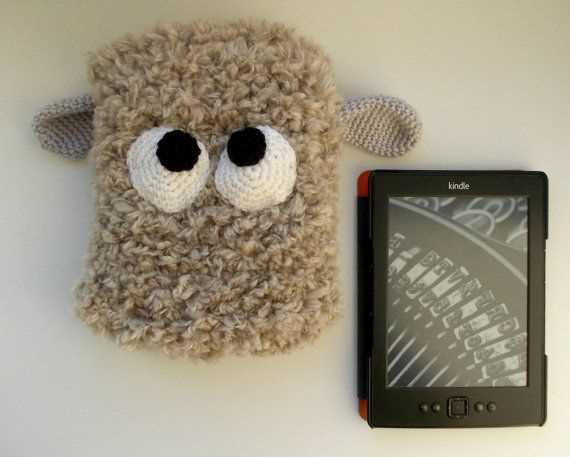
4. Embellishments (optional): If you want to personalize your kindle case, you can add embellishments such as embroidery, appliques, or beads. Get creative and make your case unique and one-of-a-kind. Just make sure that the embellishments are securely attached and won’t get in the way of using the case.
Once you have completed these steps, your knitted kindle case will be ready to protect your device in style. Enjoy your new handmade accessory!
Blocking the Case
After completing the knitting process for your kindle case, the next step is to block it. Blocking is an important technique in knitting that helps to shape and finish the final product, ensuring that it looks neat and professional.
The first step in blocking the case is to prepare the blocking materials. You will need a blocking board or mat, rustproof T-pins, and a spray bottle with water. The blocking board provides a flat surface, while the T-pins are used to secure the knitted piece in place. The spray bottle is used to dampen the fabric, making it easier to shape and set the stitches.
Once you have gathered your materials, it’s time to begin the blocking process. Start by laying out your knitted case on the blocking board, making sure it is flat and smooth. If there are any curls or wrinkles, gently stretch and smooth the fabric until it lies flat.
Next, moisten the fabric with water using the spray bottle. Be careful not to soak it completely, as excessive moisture can damage the yarn. Lightly mist the fabric, focusing on the areas that need shaping or stretching.
After dampening the fabric, use the rustproof T-pins to secure the edges and corners of the case to the blocking board. This helps to hold the shape in place while the fabric dries. Start pinning from one corner and work your way around, making sure the fabric is stretched evenly. Smooth out any wrinkles or puckers as you go.
Allow the case to dry completely before removing the T-pins. This may take several hours or even overnight, depending on the humidity and thickness of the yarn used. Once the case is dry, carefully remove the T-pins and admire your finished, beautifully blocked kindle case!
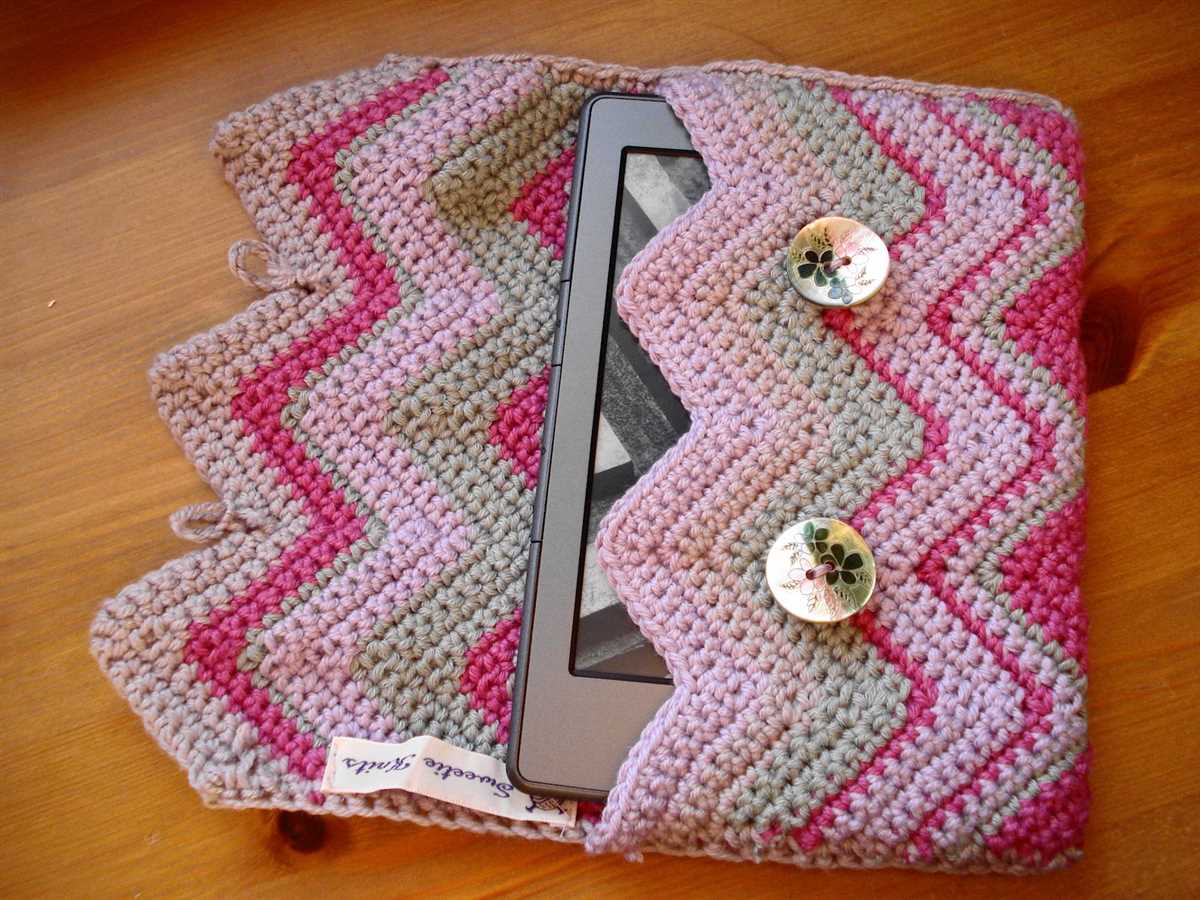
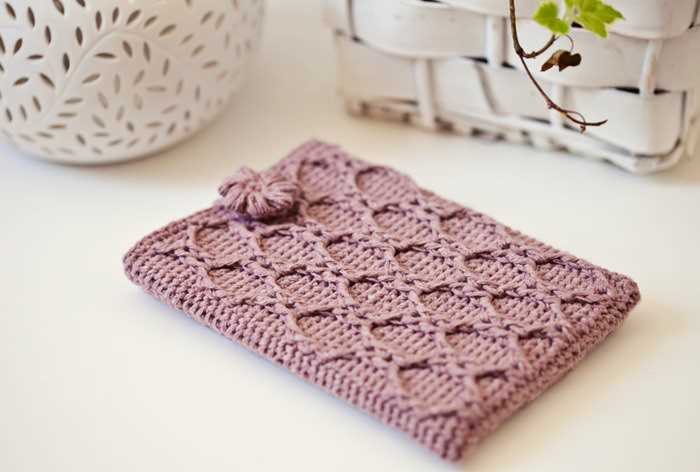
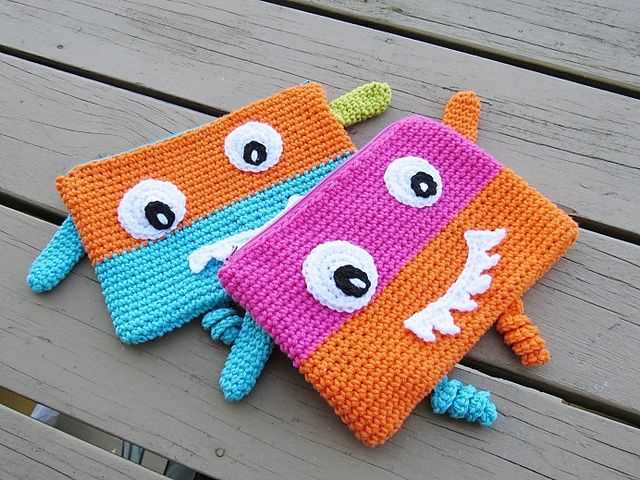
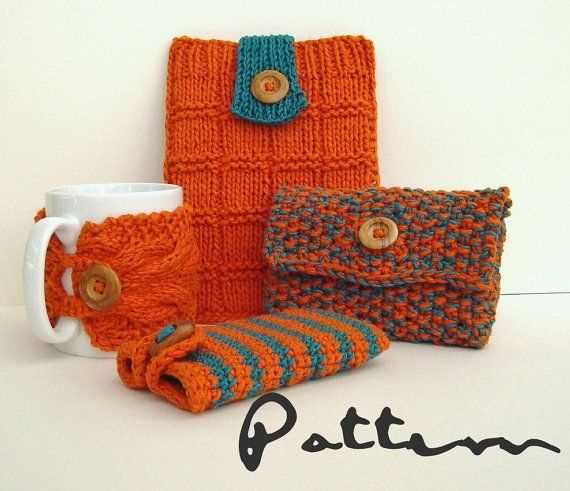
Customizing the Design
While the knitted kindle case pattern provides a basic design to follow, there are many ways to customize and personalize it to suit your style and preferences. Here are a few ideas to inspire you:
Color Choice
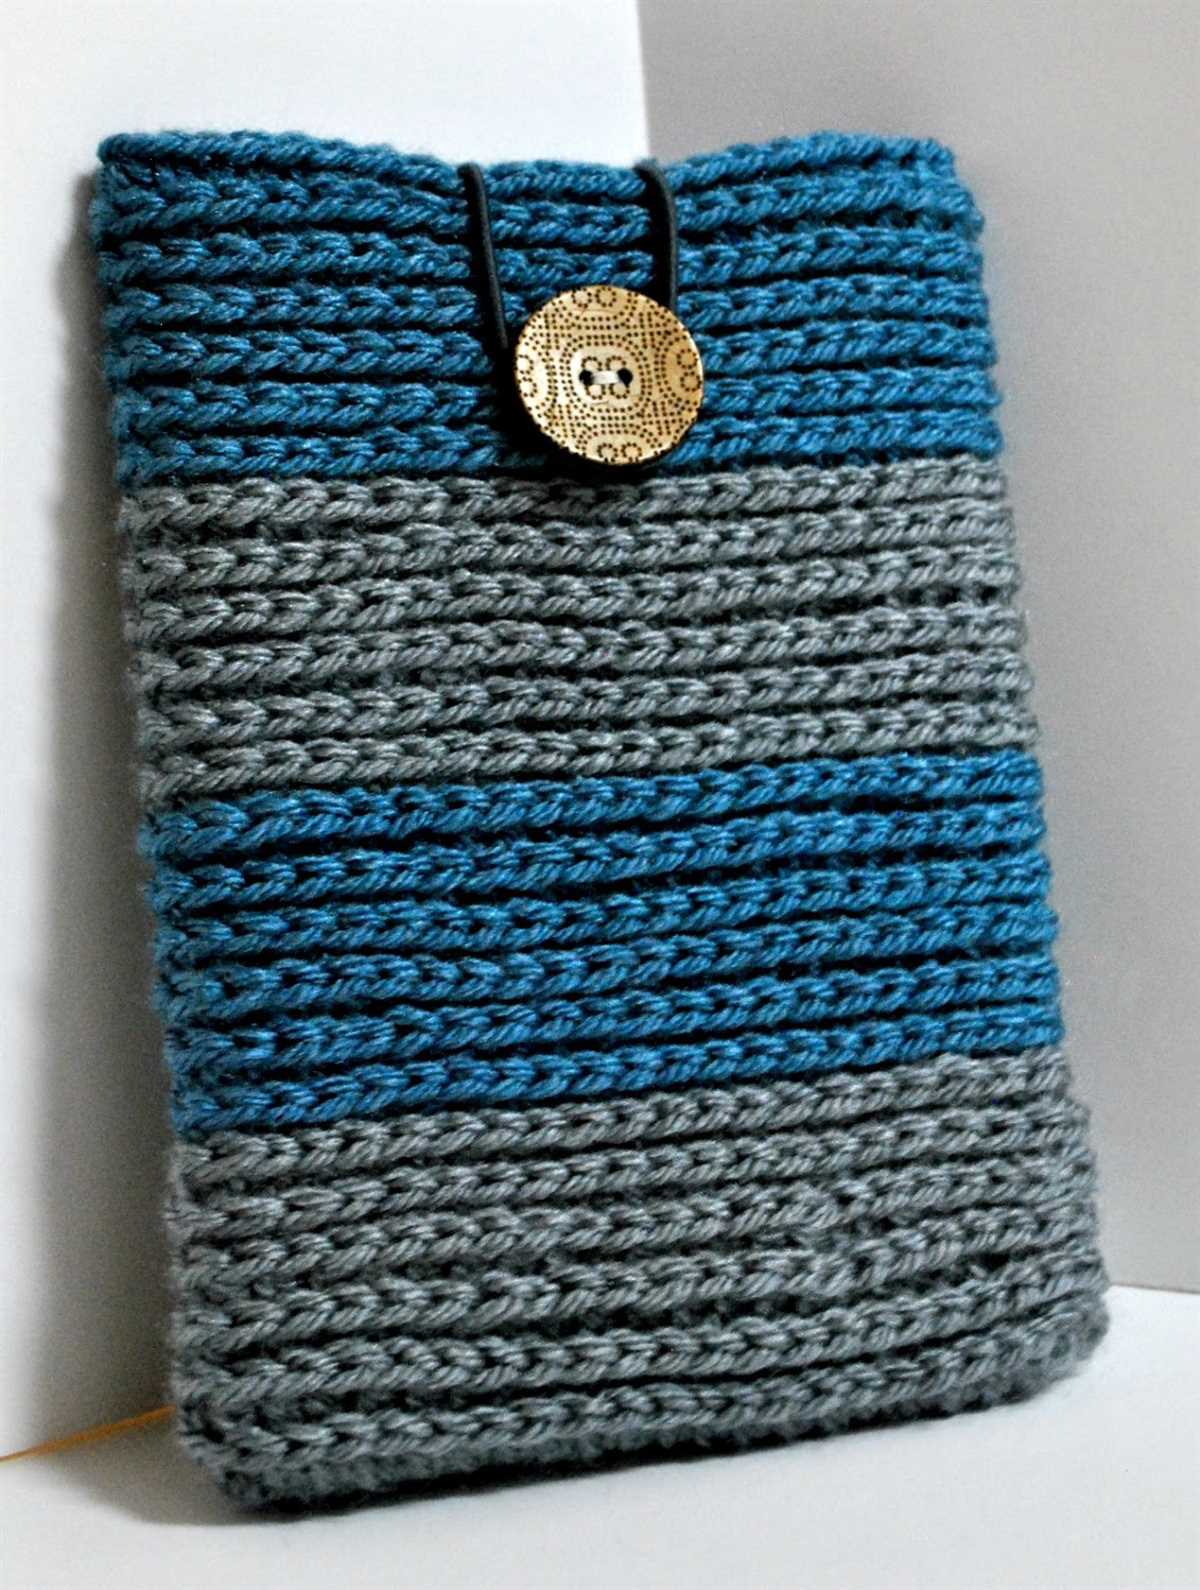
Choose yarn in your favorite colors to create a unique and vibrant kindle case. Consider using variegated or self-striping yarn for added visual interest. You can also create a color block effect by using multiple colors in different sections of the case.
Embroidery or Appliqué
Add a personal touch to your kindle case by embroidering or appliquéing designs onto the fabric. You can stitch on initials, patterns, or even small images that have special meaning to you. This customization will make your kindle case truly one-of-a-kind.
Button or Clasp
Enhance the functionality and style of your kindle case by adding a button or clasp closure. This can not only keep your kindle secure but also add an extra element of design. Choose a button or clasp that complements the overall aesthetics of your case to create a polished finish.
Texture and Stitch Variations
Experiment with different stitch patterns and textures to create a unique look for your kindle case. You can incorporate cables, lace, or ribbing to add visual interest and dimension. Don’t be afraid to mix and match different stitch patterns to create a design that truly stands out.
Remember, the beauty of knitting is that you have the freedom to customize and make each project your own. Be creative and have fun with your kindle case design, and enjoy the process of making something that reflects your personal style and creativity.
Tips and Tricks
Here are some helpful tips and tricks for knitting a kindle case:
- Choose the right yarn: Select a yarn that is durable and soft, preferably with a bit of stretch. Cotton or acrylic blends work well for kindle cases.
- Use the right needle size: Use needles that match the recommended gauge for your chosen yarn. This will ensure a properly fitting and comfortable case.
- Measure your kindle: Take accurate measurements of your kindle, including the height, width, and thickness. This will help you create a custom fit for your case.
- Consider adding padding: If you want extra protection for your kindle, consider adding a layer of foam or quilt batting to the inside of the case. This will help cushion your device.
- Knit a swatch: Before starting your project, knit a small swatch to check your gauge. This will help you determine if you need to adjust your needle size or tension to achieve the desired size and fit.
- Try different stitch patterns: Experiment with different stitch patterns to add visual interest to your kindle case. Cables, lace, or ribbing can give your project a unique and personal touch.
- Consider adding a button or closure: For added security, consider adding a button or closure to your kindle case. This will help keep your device securely in place.
- Take your time: Knitting a kindle case requires precision and attention to detail. Take your time and enjoy the process, and you’ll be rewarded with a beautiful and functional finished project.
With these tips and tricks, you’ll be well-equipped to knit your own stylish and practical kindle case. Happy knitting!
Q&A:
Where can I find a knitted kindle case pattern?
You can find knitted kindle case patterns on various knitting websites, such as Ravelry, Etsy, and LoveKnitting.
What materials do I need to knit a kindle case?
To knit a kindle case, you will need knitting needles, yarn (preferably a soft and durable type), a tapestry needle for sewing up seams, and any additional decorations or buttons you may want to add.
Is it difficult to knit a kindle case?
Knitting a kindle case is considered an intermediate-level project, so it may be a bit challenging for beginners. However, with patience and practice, anyone can learn how to make it.
How long does it take to knit a kindle case?
The time it takes to knit a kindle case depends on your knitting speed and the complexity of the pattern. It can range from a few hours to a few days.
Can I customize the knitted kindle case pattern?
Yes, you can customize the knitted kindle case pattern by choosing different yarn colors, adding embellishments, or adjusting the size to fit your specific kindle model.
Where can I find a knitted kindle case pattern?
You can find knitted kindle case patterns on various crafting websites, such as Ravelry or Etsy. There are also many free patterns available on knitting blogs and forums.
What materials do I need to knit a kindle case?
To knit a kindle case, you will need yarn of your choice (preferably a lightweight yarn), knitting needles in the appropriate size for your chosen yarn, a tapestry needle for weaving in ends, and any buttons or other embellishments you would like to add.